All Activity
- Past hour
-
I think the soft came issue was rectified in 1988 (when GM reworked the small block Chevys… also improving the rear seal and one piece oil pan gasket… My 305 engine was purchased around 1994… but sat under a workbench for years after being pulled out of the street rod.
- Today
-
 I had the piston (York?) compressor replaced with the Sanden compressor while the car was getting a paint and interior makeover. The guy welded an adapter plate (currently available through Vintage Air, I believe) to the original mount bracket allowing mounting of the rotary compressor. Looked like crap, crankshaft and compressor axes did not quite line up, I hated it. Vintage Air has mount brackets for various makes and models. My compressor is mounted on the passenger's side with the power steering pump on the left. My A/C hoses come out of the dash on the passenger side, hence the compressor on that side. I don't know about your 350, basically the same block as the 327, but the 327 had either a long or a short water pump and, hence, different pulley arrangements and accessory mount brackets; I don't know if this applies to your setup. (I consulted my friend, Mr. Youtube, to figure mine out.) Vintage Air has brackets for both. For my 327 with the short pump, Vintage Air's p/n is 15126-SCA. If nothing else, this p/n can get you to the listing of the GM brackets. As I recall, their website was a bit tricky to navigate. Regarding Vintage Air, their jigs for patterns are right on the money and they use very good metal and the brackets have very good welds. They provide the bolts and spacers for whichever application you have, (e.g., Ram Horn Manifold, Drop Type Manifold, ...) and the tolerances are very tight. You get to paint them as you choose, no paint from the factory. They illustrate which bolts and spacers go where; however, their other written instructions are vague. They provide written instructions with the kits but you can also view these with the kit itself and print these out. If you go this route, I'd recommend print them out and perusing them before purchase as you can familiarize yourself ahead of time. It is a bit of a puzzle and you can figure it out; just don't imagine that you'll figure it out in 5 minutes. They could easily include more detailed pictures; this is my only complaint. Overall, very good value for the money and I'm very happy with the results. Good luck! Keep us posted.
 -
The hoses you describe are ducting to cool the shifter/console area. As you describe they terminate at the shifter but they start high behind the dash underneath the grill in front of the windscreen. If you look under the dash in that area you should see two round fittings (one either side of the trans hump) that you attach the other end of the ducting too. If you look through the air vent grills in front of the windscreen (from the outside of the car) you can see where they terminate. The ducting was a later idea from Studebaker to try and lower cabin temperatures. The idea is that fresh air is drawn from that outside vent area and blown onto the shifter area to lower Temps. I only replaced my ducting about a month ago as it had rotted out as well. From memory the ducting was around 2 inches in diameter. Pb
-
I have a '67 Avanti. Trying to figure out the routing of the ductwork hoses. Most puzzling are the two hoses that run along the inside of the consul (one on each side) and terminate into the space where the automatic shifter is located (probably so mice can have an easy access). I'm not sure where the other ends end up. The hoses have deteriorated and the one I touched broke into segments when I tried to move it. I was assuming these were ac hoses until just now as I was typing this, but maybe there weren't any hoses for the ac. The ac may just blow out the two front vents on the consul. But why all the hoses? Any ideas? Is there any diagram or drawings of how this is laid out? I have a R1 and a R2 but neither have a/c so no help there!
-

How many Avantis are still in existence?
Mark63Avanti replied to Ronny Daytona's topic in Avanti Trivia
I looked back through my browser history and I was trying to update "TheAvanti.com" -
Only issues I ever had was soft came on a 305. But if You've gone that far.. not a concern.
-
I’ve heard Avanti Motors, during that period, converted some of their ‘electric fan’ cars back to a standard Chevy 5 blade clutch fan & shroud… due to insufficient cooling with the factory electric fans. My ‘85 Avanti has the electric fans… and frankly I’m not a ‘FAN’ !!!!
-
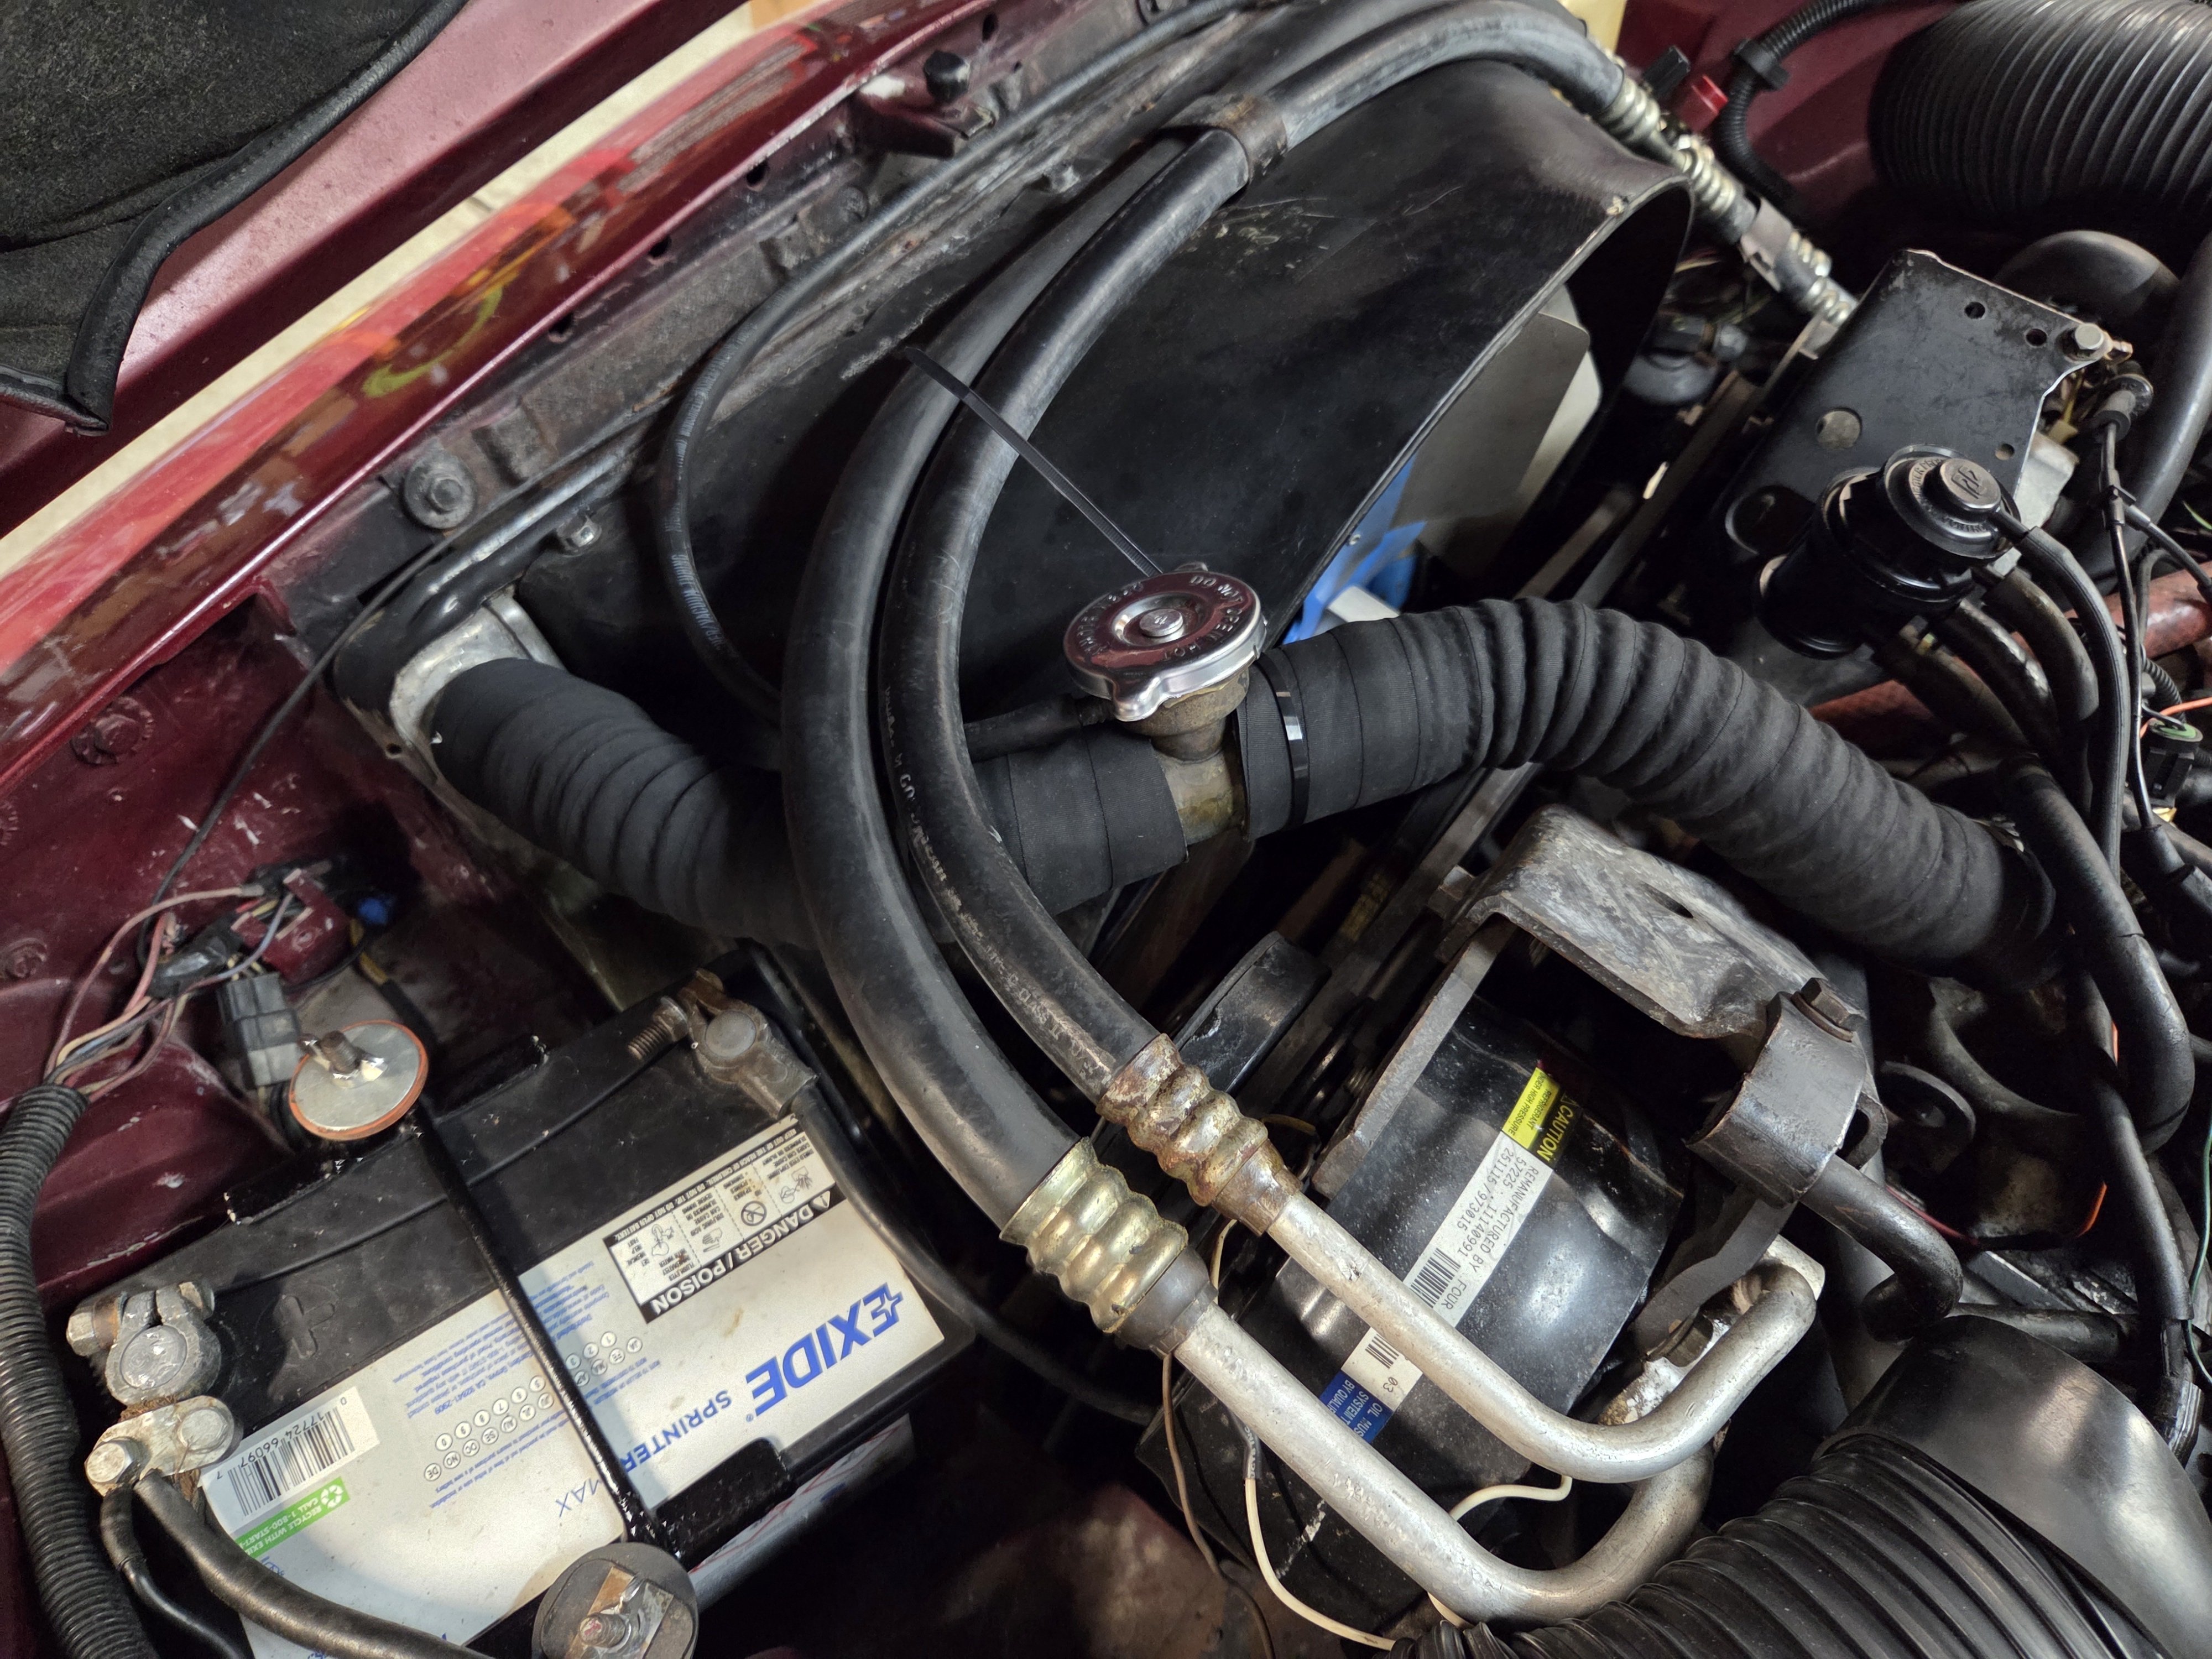
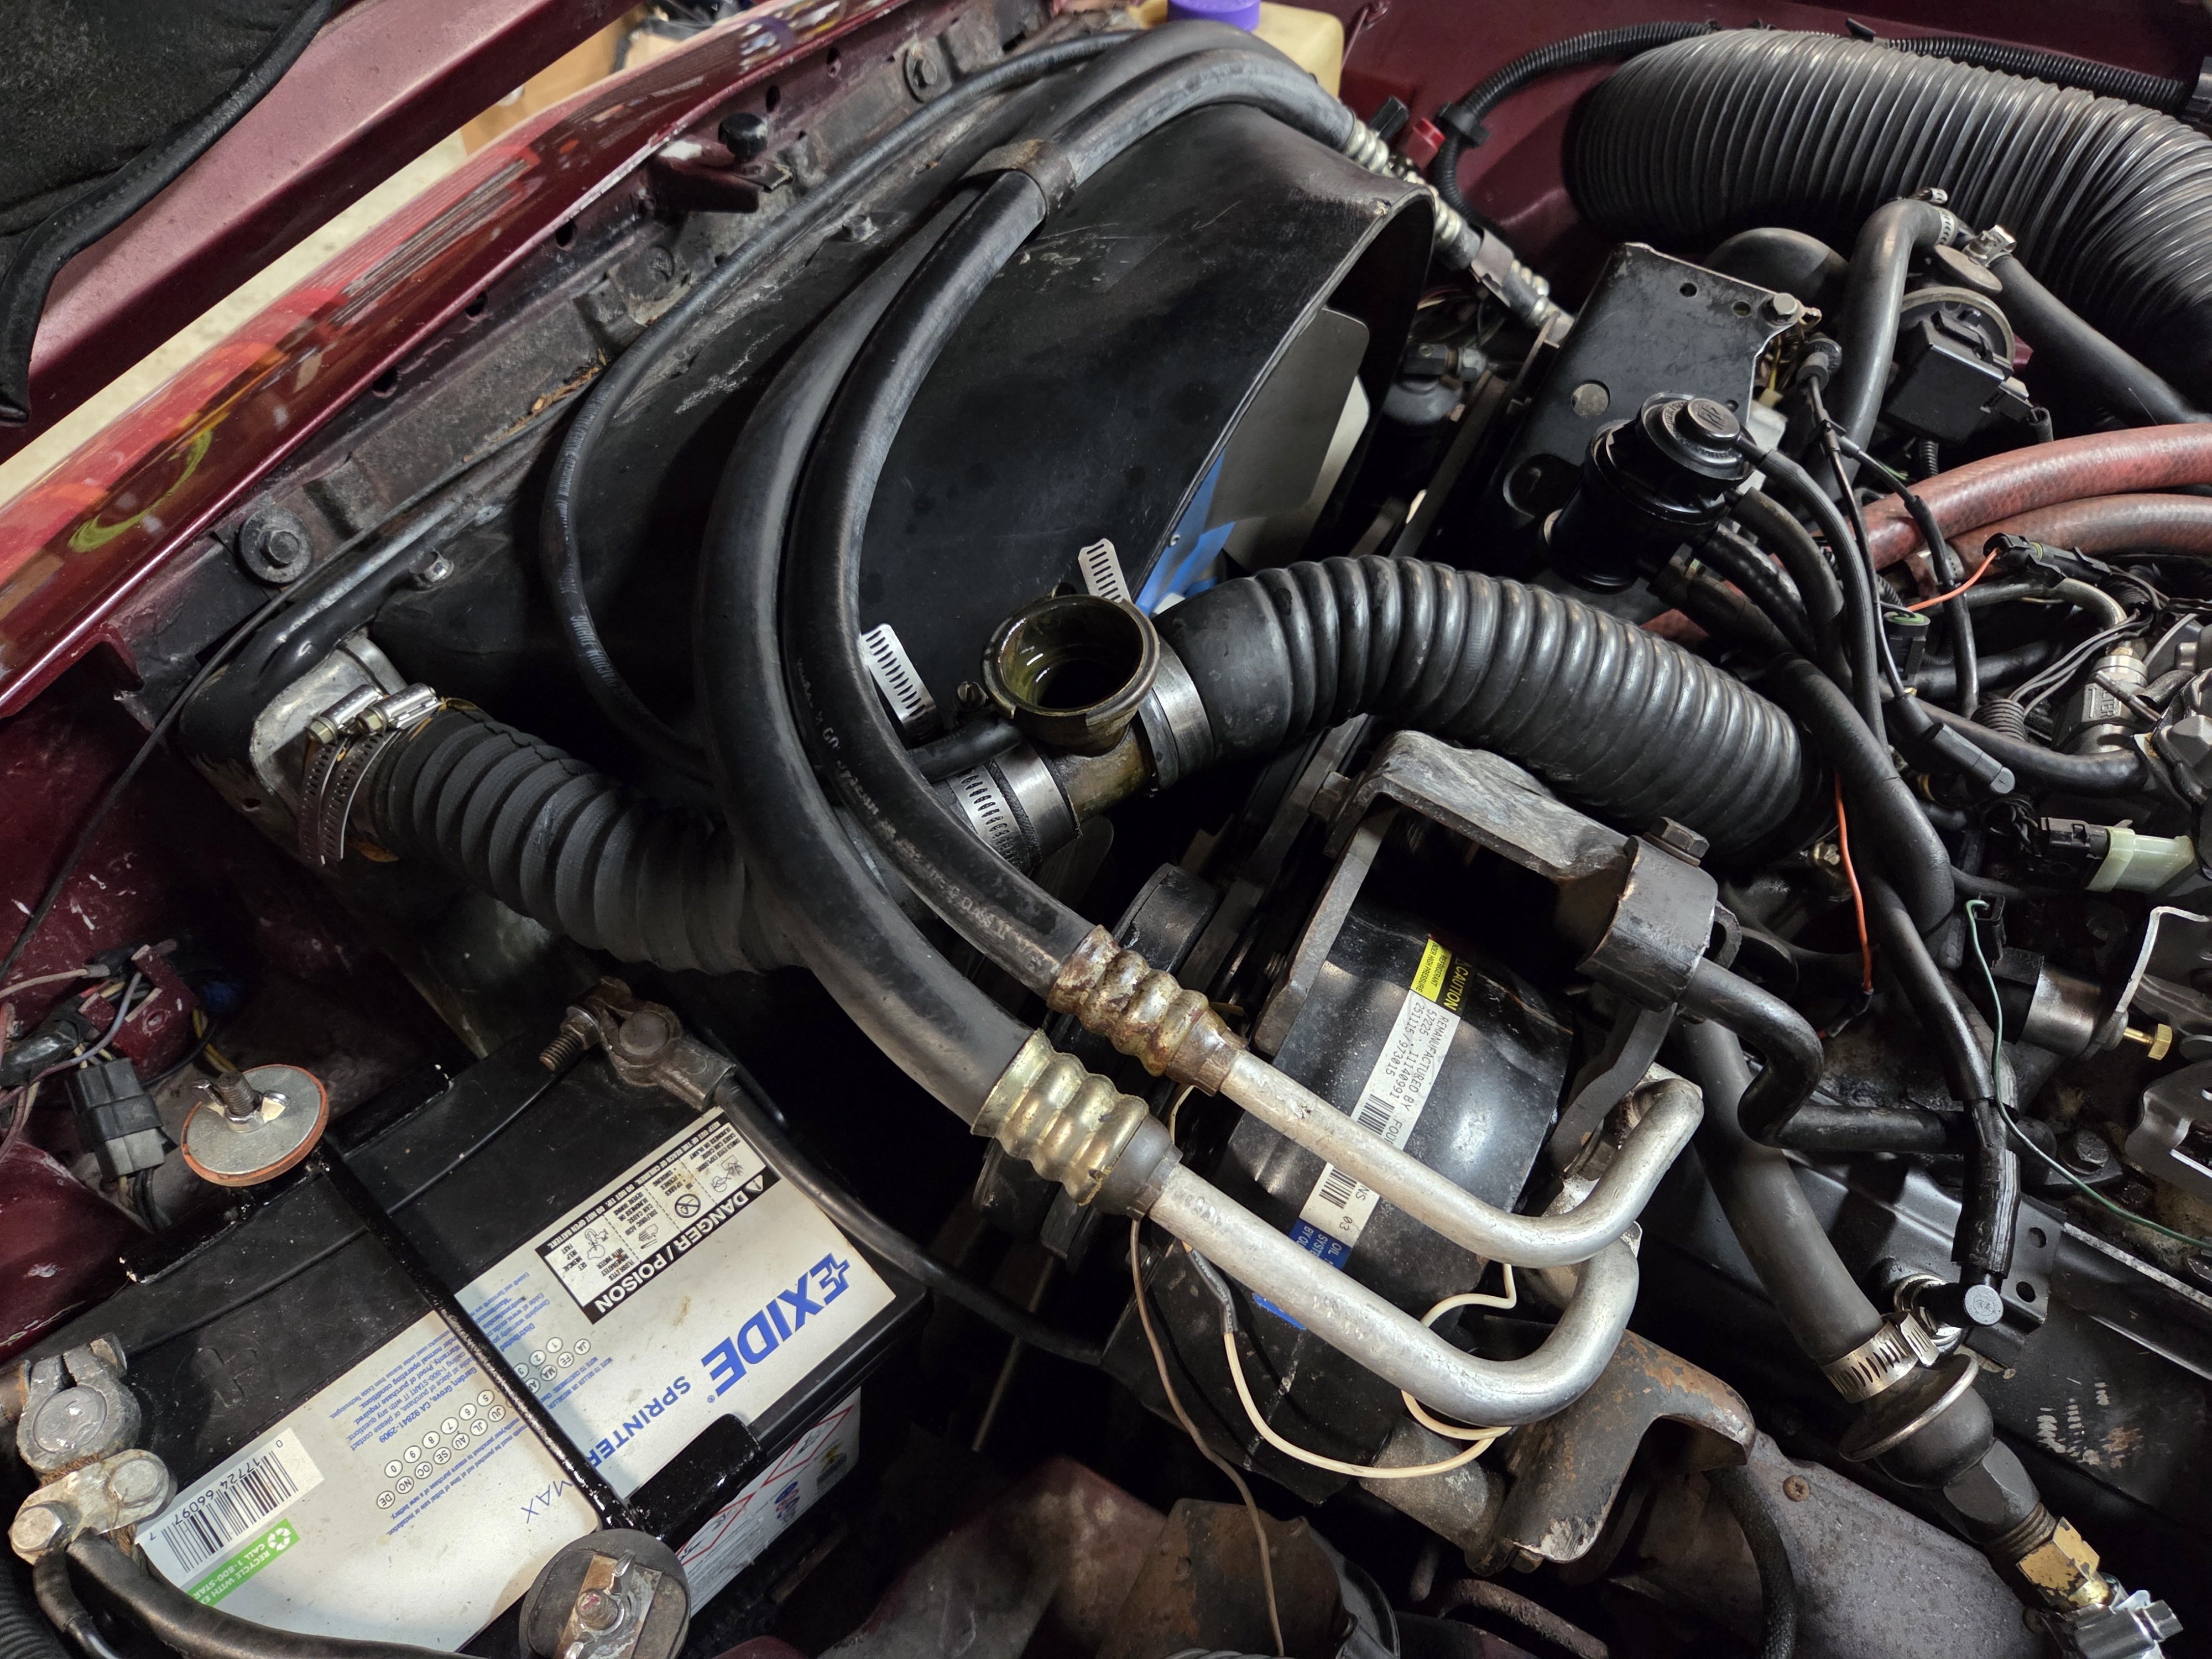
Here is the mockup with the existing inline filler, replacement is on order. The radiator to filler hose is a Dayco 81311 - 11.25" long, the filler to thermostat housing is a Dayco 81321 - 13.25" with an All Star Performance (Amazon) ALL30240 1.75 to 1.5 reducer. The Dayco reducer is 76950. Gates also sells a reducer 26391. The hoses are pretty stiff, but can be persuaded into shape. The inline filler connection was zip tied to the fan shroud to keep the hoses "shaped." This was how it was configured when I get the car. This adequately clears the A/C hoses, Compressor belt and aligns with the thermo housing. Note that the car originally came with an electric fan and the original owner converted to a shroud/flex fan assembly. I would like to go back to an electric fan - flex fans scare me.

-
Hi Ronmanfredi.... Yes, a kit is made by B+M but here "In the land down under" it's might pricey at $620AUD minimum. If and when the Computer fails, I will either bite the bullet for the above or fabricate a manually operated system that I can cancel by a tap on the Brake pedal. I need some help designing this but I'm looking at a simple instantaneous pushbutton through a relay for initiation and another Relay to disengage the latter through a switch at the Brake pedal.
- Yesterday
-
The 200r4 transmission has a computer operated lock up converter as well. When removing the computer, you can retain the lock up converter by installing a kit in the valve body, which engages the lock up converter once the transmission shifts into 4th gear. I'm not sure whether or not there is a kit for your 350C but you should check just in case. Beats the manual switch in my book.
-
You would have static on your AM radio.
-
Thank you. So it's okay that the capacitor is not actually hooked up to anything? How would I know if I need to attach it?
-
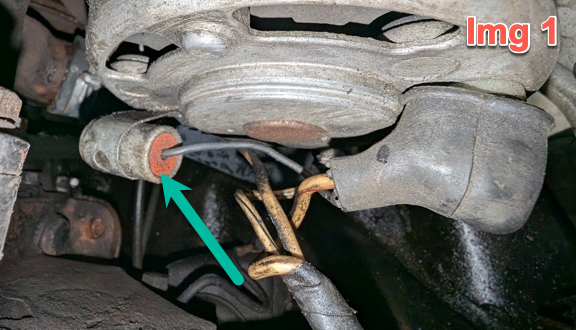
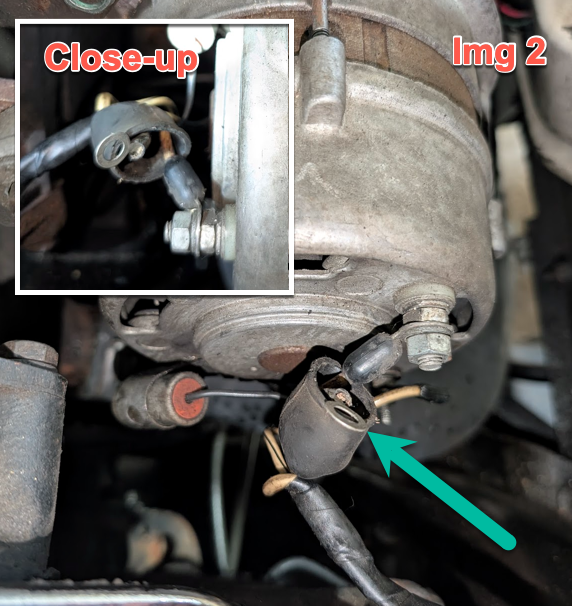
The round "can" is a radio noise suppresser condenser, or more commonly called a capacitor. Not any sort of voltage regulator. The other wiring seems correct. The white with red stripe is to the main terminal, the one with the black stripe goes to the smaller terminal, often a spade push on connector if original. Then the plain white wire is ground to the case. The voltage regulator is in front of the master cylinder on the drivers side inner fender.
- Last week
-
I got a good deal on the 305… When brand new it was installed in a street rod… but yanked out with about 1600 miles on it because (like you mentioned) the rod owner went with a 350 for better performance.
-
Atlas 710 38-42A

-
Trusty multimeter in hand, I'm left to determine that I have a bad diode in my alternator. I've been perusing the forums and https://studebaker-info.org/Tech/Bhend/avantalternatorarticle1.pdf by Bill Henderson. (Awaiting the shop manual to arrive.) I have a call into a local auto electrical rebuild shop and I'm poking around the alternator. I'd love to have a backup, like one of the Honda or Toyota alternators like others have done so I can still drive my daily while the original is being rebuilt. I'm not a good electrical diagram reader. I have three wires coming from the harness to the alternator, white (or so faded they look yellow to me), white with black stripe and white with red stripe. The resister looking thing attached to the back of the alternator -- is this the Prestolite regulator? (see img 1). Whatever it is, it is not actually attached to the alternator, as I found it loose, not broken, in the boot. (Img 2). The red stripped wire goes to the terminal with the boot, the black-stripped goes to the other terminal, and the solid looks like it is being grounded to the post that holds the "regulator". Thoughts/Comments/Suggestions welcomed. -Dobb
-
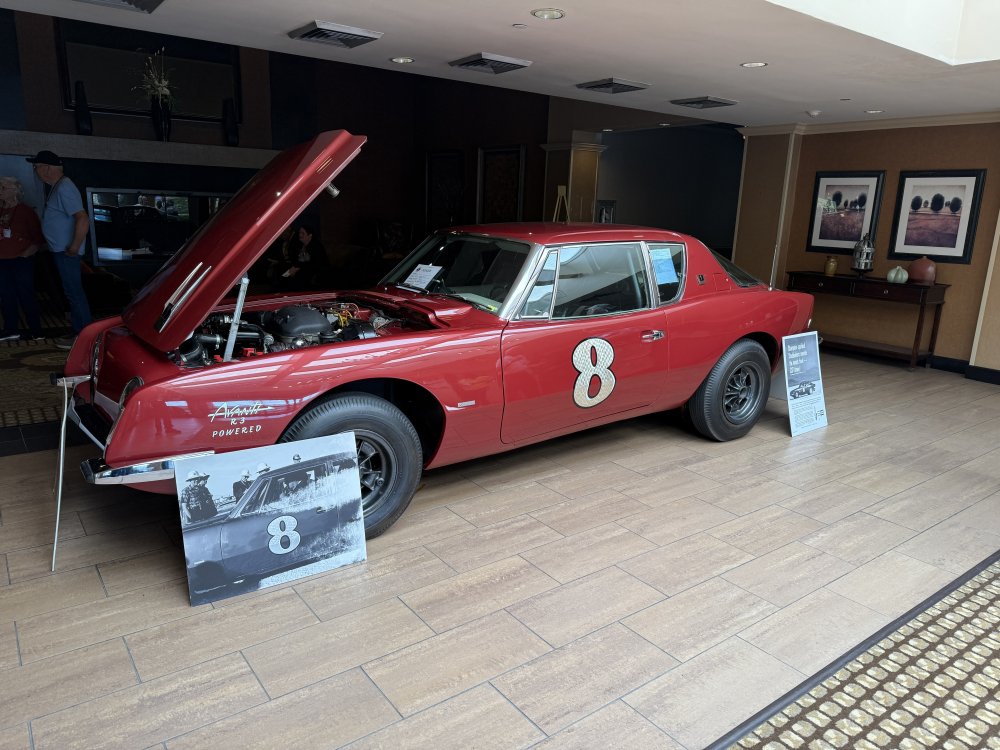
This was in the meet hotel lobby. Nelson had his #1 Daytona convertible inside the swap meet building.
-
.....as stated above
-
How many Avantis are still in existence?
Mark63Avanti replied to Ronny Daytona's topic in Avanti Trivia
Then I am in it! I was trying to update the AOAI listing. My Avanti wasn't included in their listing. It has a fill-in form that, when I hit send, says there was some sort of error. -
Getting back to this thread. Unfortunately 1700928 and 1700929 aren't even close (bought both- I believe these are for 63-64 with a surge tank eliminator kit.) It must be a combination of the location/orientation of the R4 A/C compressor and the angle and diameter of the thermostat housing on the Chevy L69 "HO" 305. I've tried other molded hoses from Camaros to Caprices and Monte Carlos with no likely fit, even with cutting sections out. What is needed is hose #1 with a 1-3/4" ID at the radiator with the same diameter at the inline filler neck, and hose #2 with a 1-3/4" ID ending with a 1-1/2" ID at the thermostat housing. I've ordered some Dayco Flex hoses, a reducer and a inline filler neck. I'll posts part numbers if it ends up good. Here is current leaky setup.

-
From Egbert's Avanti.
-
Thank you for providing the information to make a custom badge.
-

Restoring a toasted Avanti dash pad the cheap way
Nelson replied to Nelson's topic in Avanti Information
I did email Larry Crapo several weeks ago but as of yet haven’t gotten a response. -
Is it a kilometer speedometer ? Maybe an original europe import car....😀
-

Brake pedal goes almost to the floor before brakes engage
Zedman replied to Jim S's topic in 1965-83 Avanti
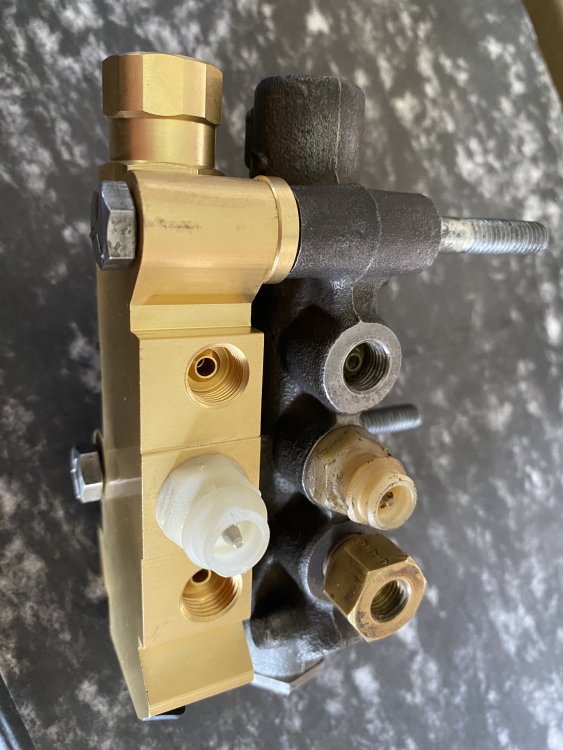
Thanks Jim- BTW what valve do you have and is it mounted on the left hand inner Frame Rail or is it up top with your Master cyl? If its a Kelsey-Hayes unit (like my old one) it will be OLD. I wasted a huge amount of time researching this obscure little bugger only to find it was likely to be pretty well stonkered. There are some parts for it but it not all, so it's not really worth it. I opted for the GM PV-2 valve and it was plentiful, cheap, Brass not Ferrous and a 100% bolt-up fit so long as you use some of the old fittings. Picture attached so you can see the similarities...