All Activity
- Past hour
-
1963-1964 Virtual Car Show
chdonley2 replied to ronmanfredi's topic in VIRTUAL CAR SHOW for 1963-1964 AVANTI
My 1963 road race Avanti.thumb.jpg.316f1658d899698f8f9a958e3c2ce03c.jpg)
- Today
-
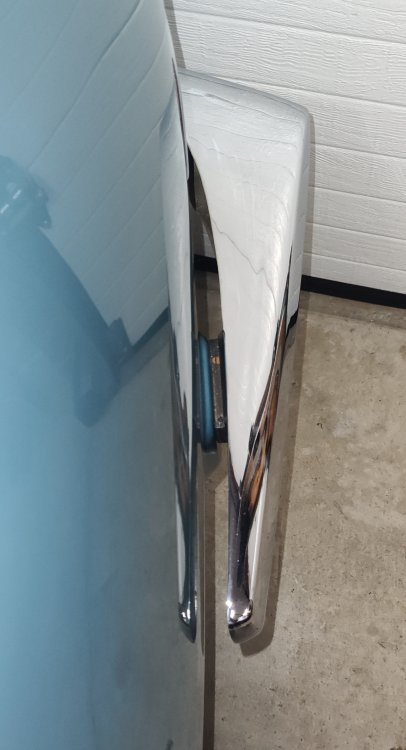
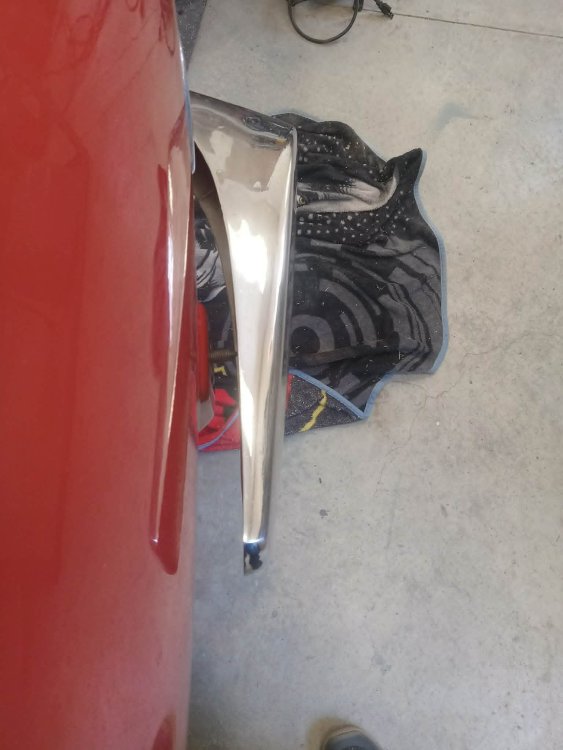
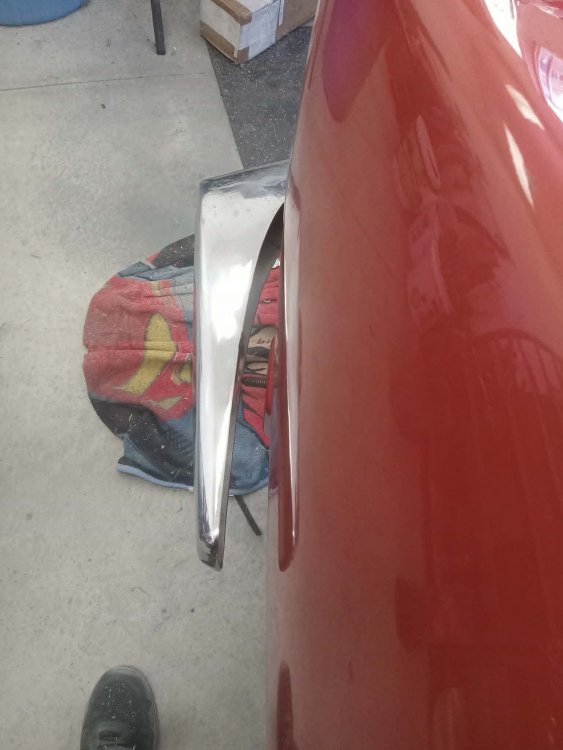
The bumper is exactly the way it was installed at the factory with a 1/4 inch shim on each side. The gap is the same on both sides.
-
 Yes, PM me if interested.
 -
I’d go easy when doing this .. but it’s the bracket itself taking the strain... You don’t want the bumper too close to body, as shown in photo, as a possible side impact will mean certain fiberglass damage….. Also, those bumper sides come in fairly easy when tightening the side bolts… just go slowly… Trying to straighten the bumper off the car can be done, however that’s unfortunately a good way to crack the chrome plate.
-
dont think I like the idea of cranking on bolts to put that kind of constant strain on the body. I will try to bend the bumper tomorrow. Thanks regnalbob for the pictures and the measurements.
- Yesterday
-
You thought CORRECT!
-
Thought it was 1/4
-
The width of the bumper between inside edges is approximately 63 inches. The gap at the front edge is 1/2 inch. The gap at the shim is 5/8 inch.
-
There’s a 1/4” rubber shim that fits in between the bumper and the fiberglass body which will fill some of that gap. The gap on your Avanti does look excessive. I’d add a second rubber shim, then tighten the bolt to crank it in.
-
Installed the rear bumper and have excessive side clearance. Over an inch from the fiberglass to the mounting pad on the bumper. I think I need to bend the bumper. What is the standard gap? As it is the bolts do reach.
-
Studebaker recommended replacing the disc brake pads on their 1963 and 1964 passenger cars equipped with Bendix disc brakes when the pad thickness wore down to……?……. 1) 3/16”…..2) 1/4”…..3) 5/16”…..or…..4) 3/8”
-
 Rlowey2 joined the community
 -
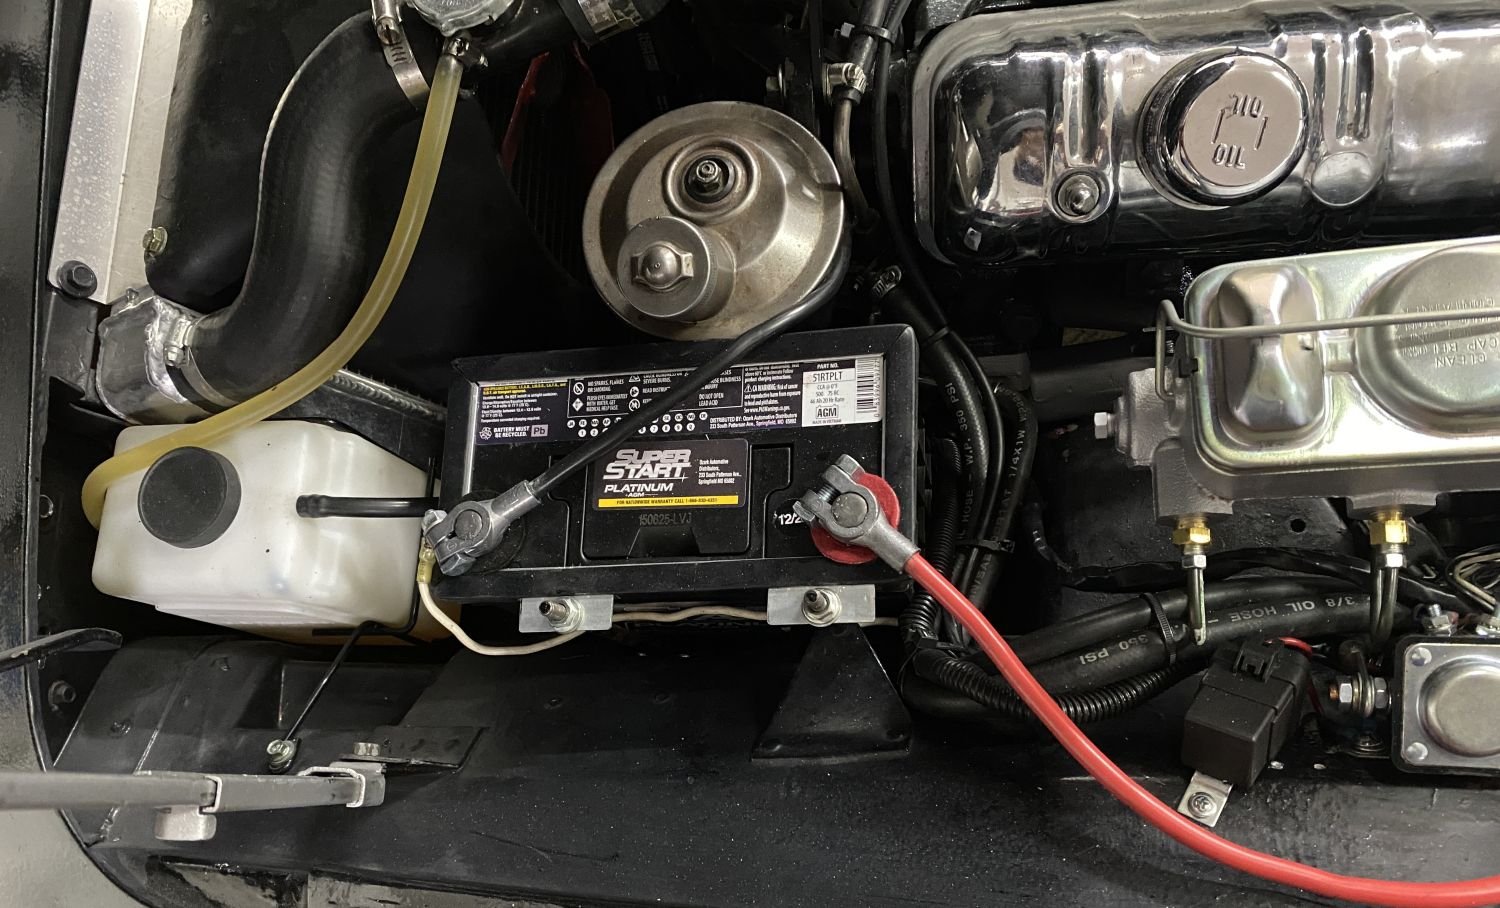
 In my 63, I installed the 51 by moving the oem front mounting bracket and making an aluminum battery frame. The frame is notched out around the terminals and then covered with some automotive rubber trim. This also gave me room to move the radiator overflow tank to the left side so I can make a CAI and place it on the right side.
-
Ben, I may have one. Please check your messages. Thanks
-
 I initially thought the same thing but then remembered it’s a fiberglass body and the bracket could lean against the positive post and never go to earth/ground.
 -
Note that the early Avanti boosters have 4 studs, and later models have two studs.
-
I'm not very knowledgeable on the subject of Avanti brake boosters, but "Booster Dewey" in Portland Oregon rebuilt several Avanti II brake boosters for me many years ago, and I think an original 1963 Avanti booster as well (the boosters may have been the same). I've owned a half-dozen or so Avanti's over the years but have not driven my one remaining Avanti for the past 10 years. https://www.powerbrakebooster.com/
- Last week
-
Thanks for all the responses and info. Good luck all.
-
Don't know if helpful, but the parts book shows that the hood ornament, including insert, changed at serial number 4879.
-
I have no documentation to support this, but I recall seeing early round light Studebaker Avanti‘s with a gold ‘S’ on the hood, and silver ‘S’s’ on the cars earmuffs!
-
The mounting holes were on all of them. My early serial # 63 has the holes but never had a grille.
-
Somewhere during the '63 model run the grille was made standard. --Dwight
-
It depends on your car's serial number. Earlier '63 Avantis came with a gold "S" and later '63s came with a silver one. I don't know the serial number at which Studebaker changed from gold to silver, but someone does. --Dwight
-
https://midwestbooster.com/ here is where i've bought my rebuild kit , item code 2502303 k
-
So , i'm gone take a look to my rebuild kit invoice
-
Does anyone know where I can get this? Do you have one you can sell me? I can't find it anywhere. "Things the Shop Manual Never Told You" by Stan Gundry
.jpg.58fbf85377e17ec5e685ae3ea86badea.jpg)