All Activity
- Past hour
-
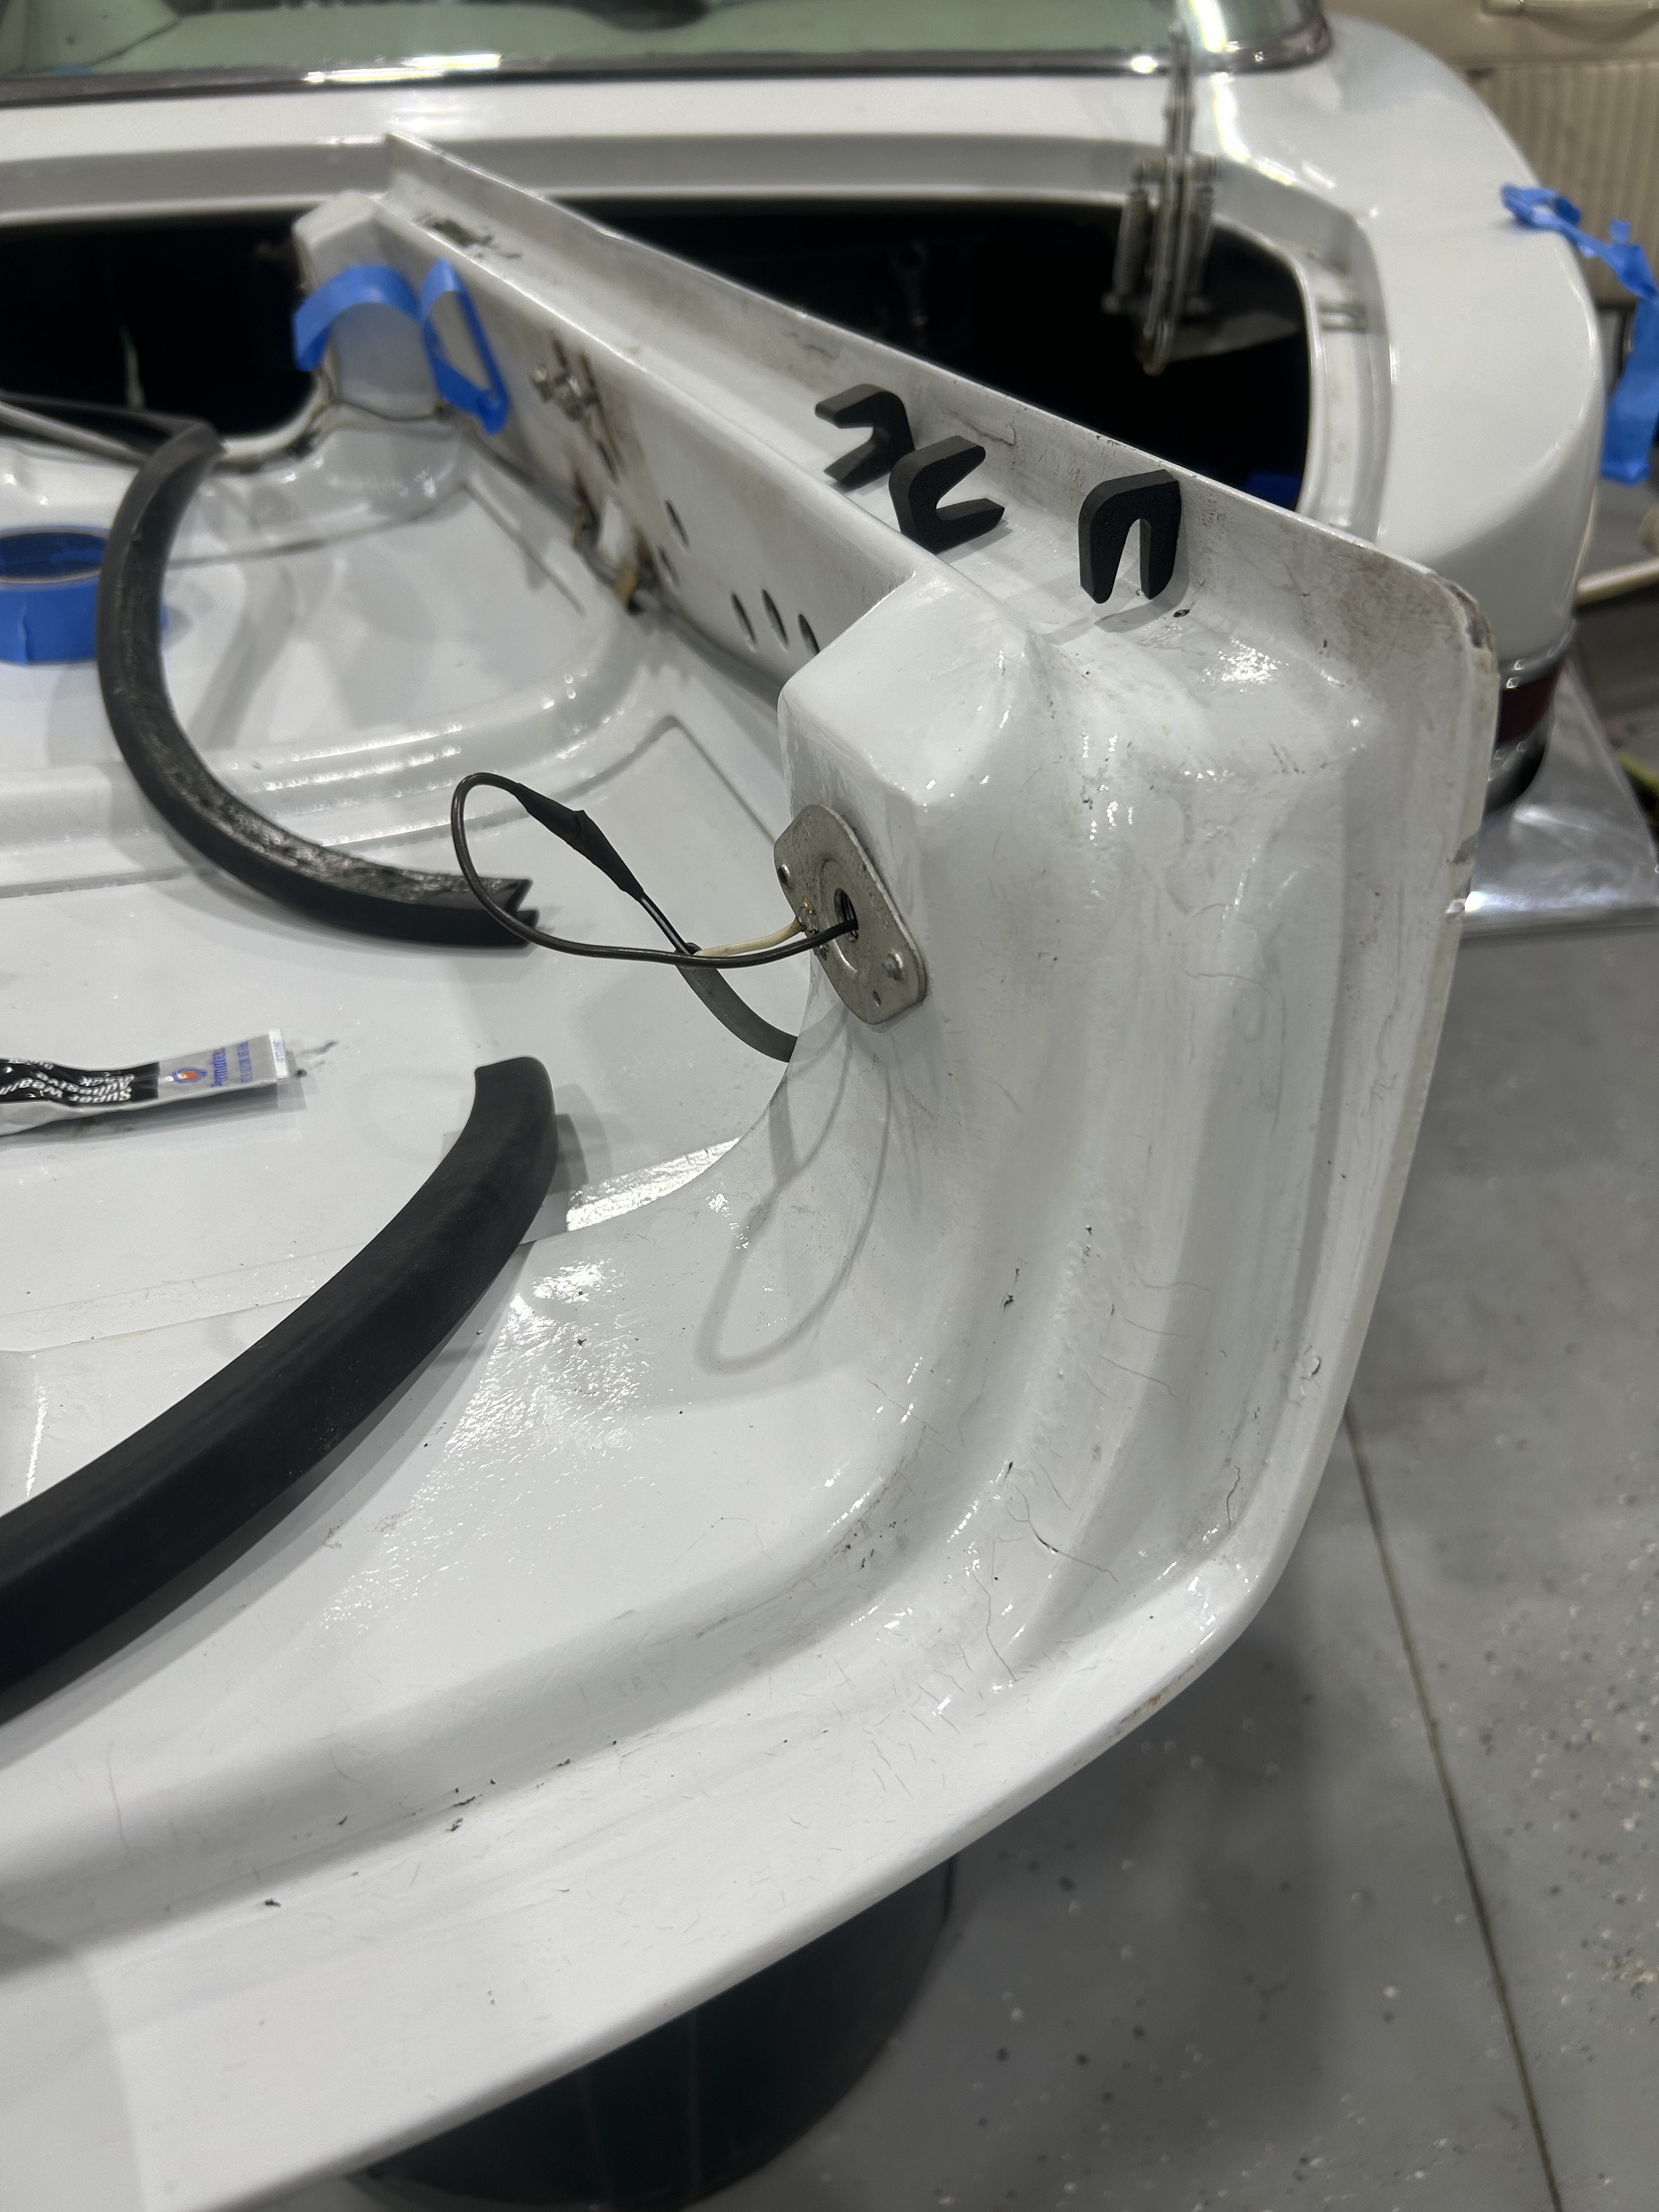
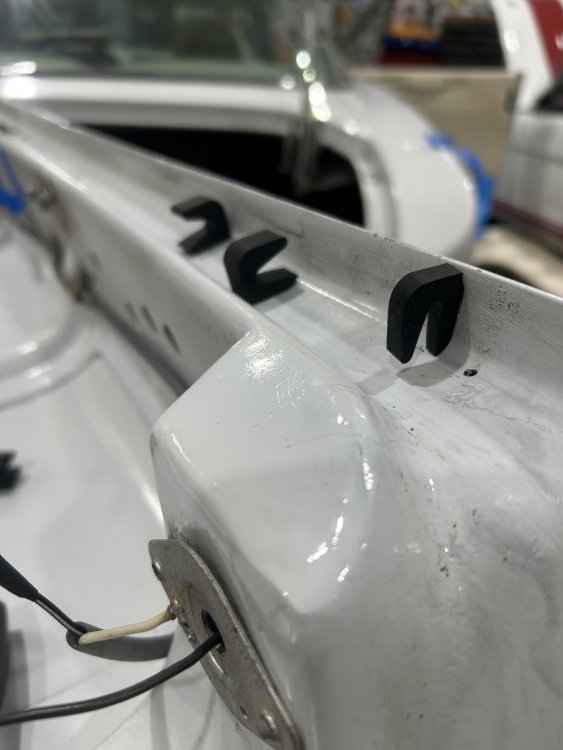
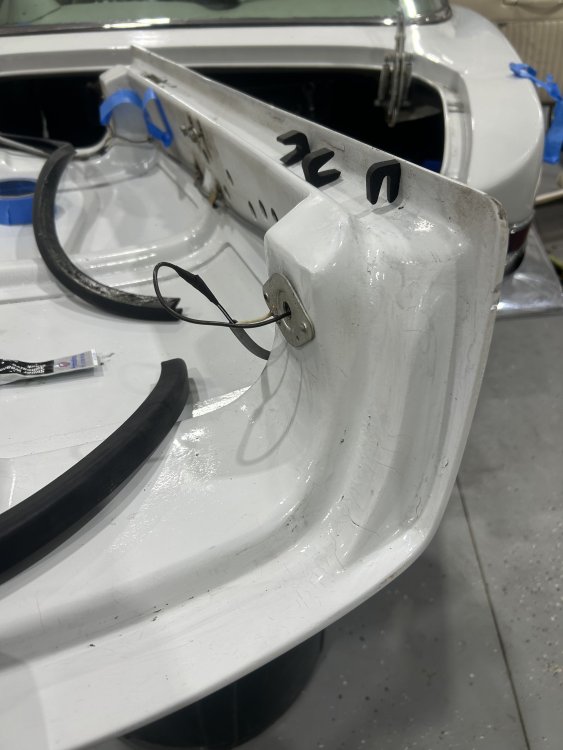
When I read those instructions, I concluded that the seal furthest away in the photo is facing the right direction. That is how I did it on my car, anyway, and it looks neat.
- Today
-
Can the GM turbo400 transmission be removed without pulling the engine?
Jim S replied to Jim S's topic in 1965-83 Avanti
I thought so too. They are very close to the transmission. It looks like you can remove the rear mount support plate at the center of the "X" frame and drop it out. -
I’ve had several Avanti II models but never had to change plugs thank God. I did change a fuel pump on one and it wasn’t a fun task. I’d be putting in platinum plugs hoping to never have to change plugs again.
-
I just saw this in Hemmings! Good luck with the sale!
-
 The transmission can definitely be removed from below without removing the engine. The exhaust pipes might be in the way though and might need to be disconnected at the manifolds and moved for clearance.
 -
There are two hidden screws under the black paper that is under the plastic name plate.
- Yesterday
-
Your description on removing & replacing spark plugs #5 & #7 is very concise…. That’s exactly how I handled that same job on my ‘83!
-
Welcome to the club. :-(
-
Can the GM turbo400 transmission be removed without pulling the engine?
Jim S replied to Jim S's topic in 1965-83 Avanti
The seal was installed properly, however a local trans mechanic just told me if the torque convertor neck is badly worn, they will certainly leak. That may be my problem. It’s going in the shop next week. And hopefully we’ll find the culprit. -

Can the GM turbo400 transmission be removed without pulling the engine?
Kevin G. replied to Jim S's topic in 1965-83 Avanti
That seal had to have been put in wrong before, as they rarely leak, the TH400 Trans is one of the most bullet-proof transmissions ever made; they put them on GM motor homes back in the day; be sure they put in a new solenoid on the shifting module, as that is inside the transmission and 'messy to change later and the new style works a lot better than the old copper-colil one. -
Type F ATF
-
The 70 RQA had a 350/300 and the only way to get to plugs 5/7 were, to raise the car using the main crossmember,...brace with jack stands under the frame.... remove the Dside whee and use a hole saw to cut through the fiberglass inner fender, to enable a straight shot with a socket for #5. To get to #7, you had to lay on your back and approach from the Pside on a creeper until you could see the plug straight up from underneath. Then then reach up past the steering box with a socket in your fingers and place it over the plug, then attach the socket wrench and remove/reinstall the plug. You could not get a socket on a wrench in there in one move ... Now, since I had an engine change and the heads are now the "dart style", its even worse...
-
Two or three of the L&R rearmost plugs can be reached under the fenders, either working over or removing the front tires.
-
Thanks. After looking the engine over, it seems like a near impossible task to get to all 8 plugs. Not saying it can't be done by somebody, but it's likely not going not happen.
-
I understood that if the car has been sitting for a long time and then all the oil is at the bottom. That is, the engine no longer drains oil to the bottom. Then the cause can only be a crack in the pan or a drain plug. That was the case with me. My plug broke even though I had a copper gasket in it. It was too hard and I changed to a softer synthetic gasket and sealed the threads with Loctite pipe sealant.
-
Hi Aardvark- I got a bit of a shock trying to remove Sparkplugs when I got my '1981. The Smog pump and AIR Tubes do get in the way- job took a full day. My strong suggestion would be to persevere and oil the bores. spin the motor with no compression to get some oil to fill the the galleries before starting. Just my humble opinion 😊.
- Last week
-
Do you still have the seats and where are they located? Thanks
-
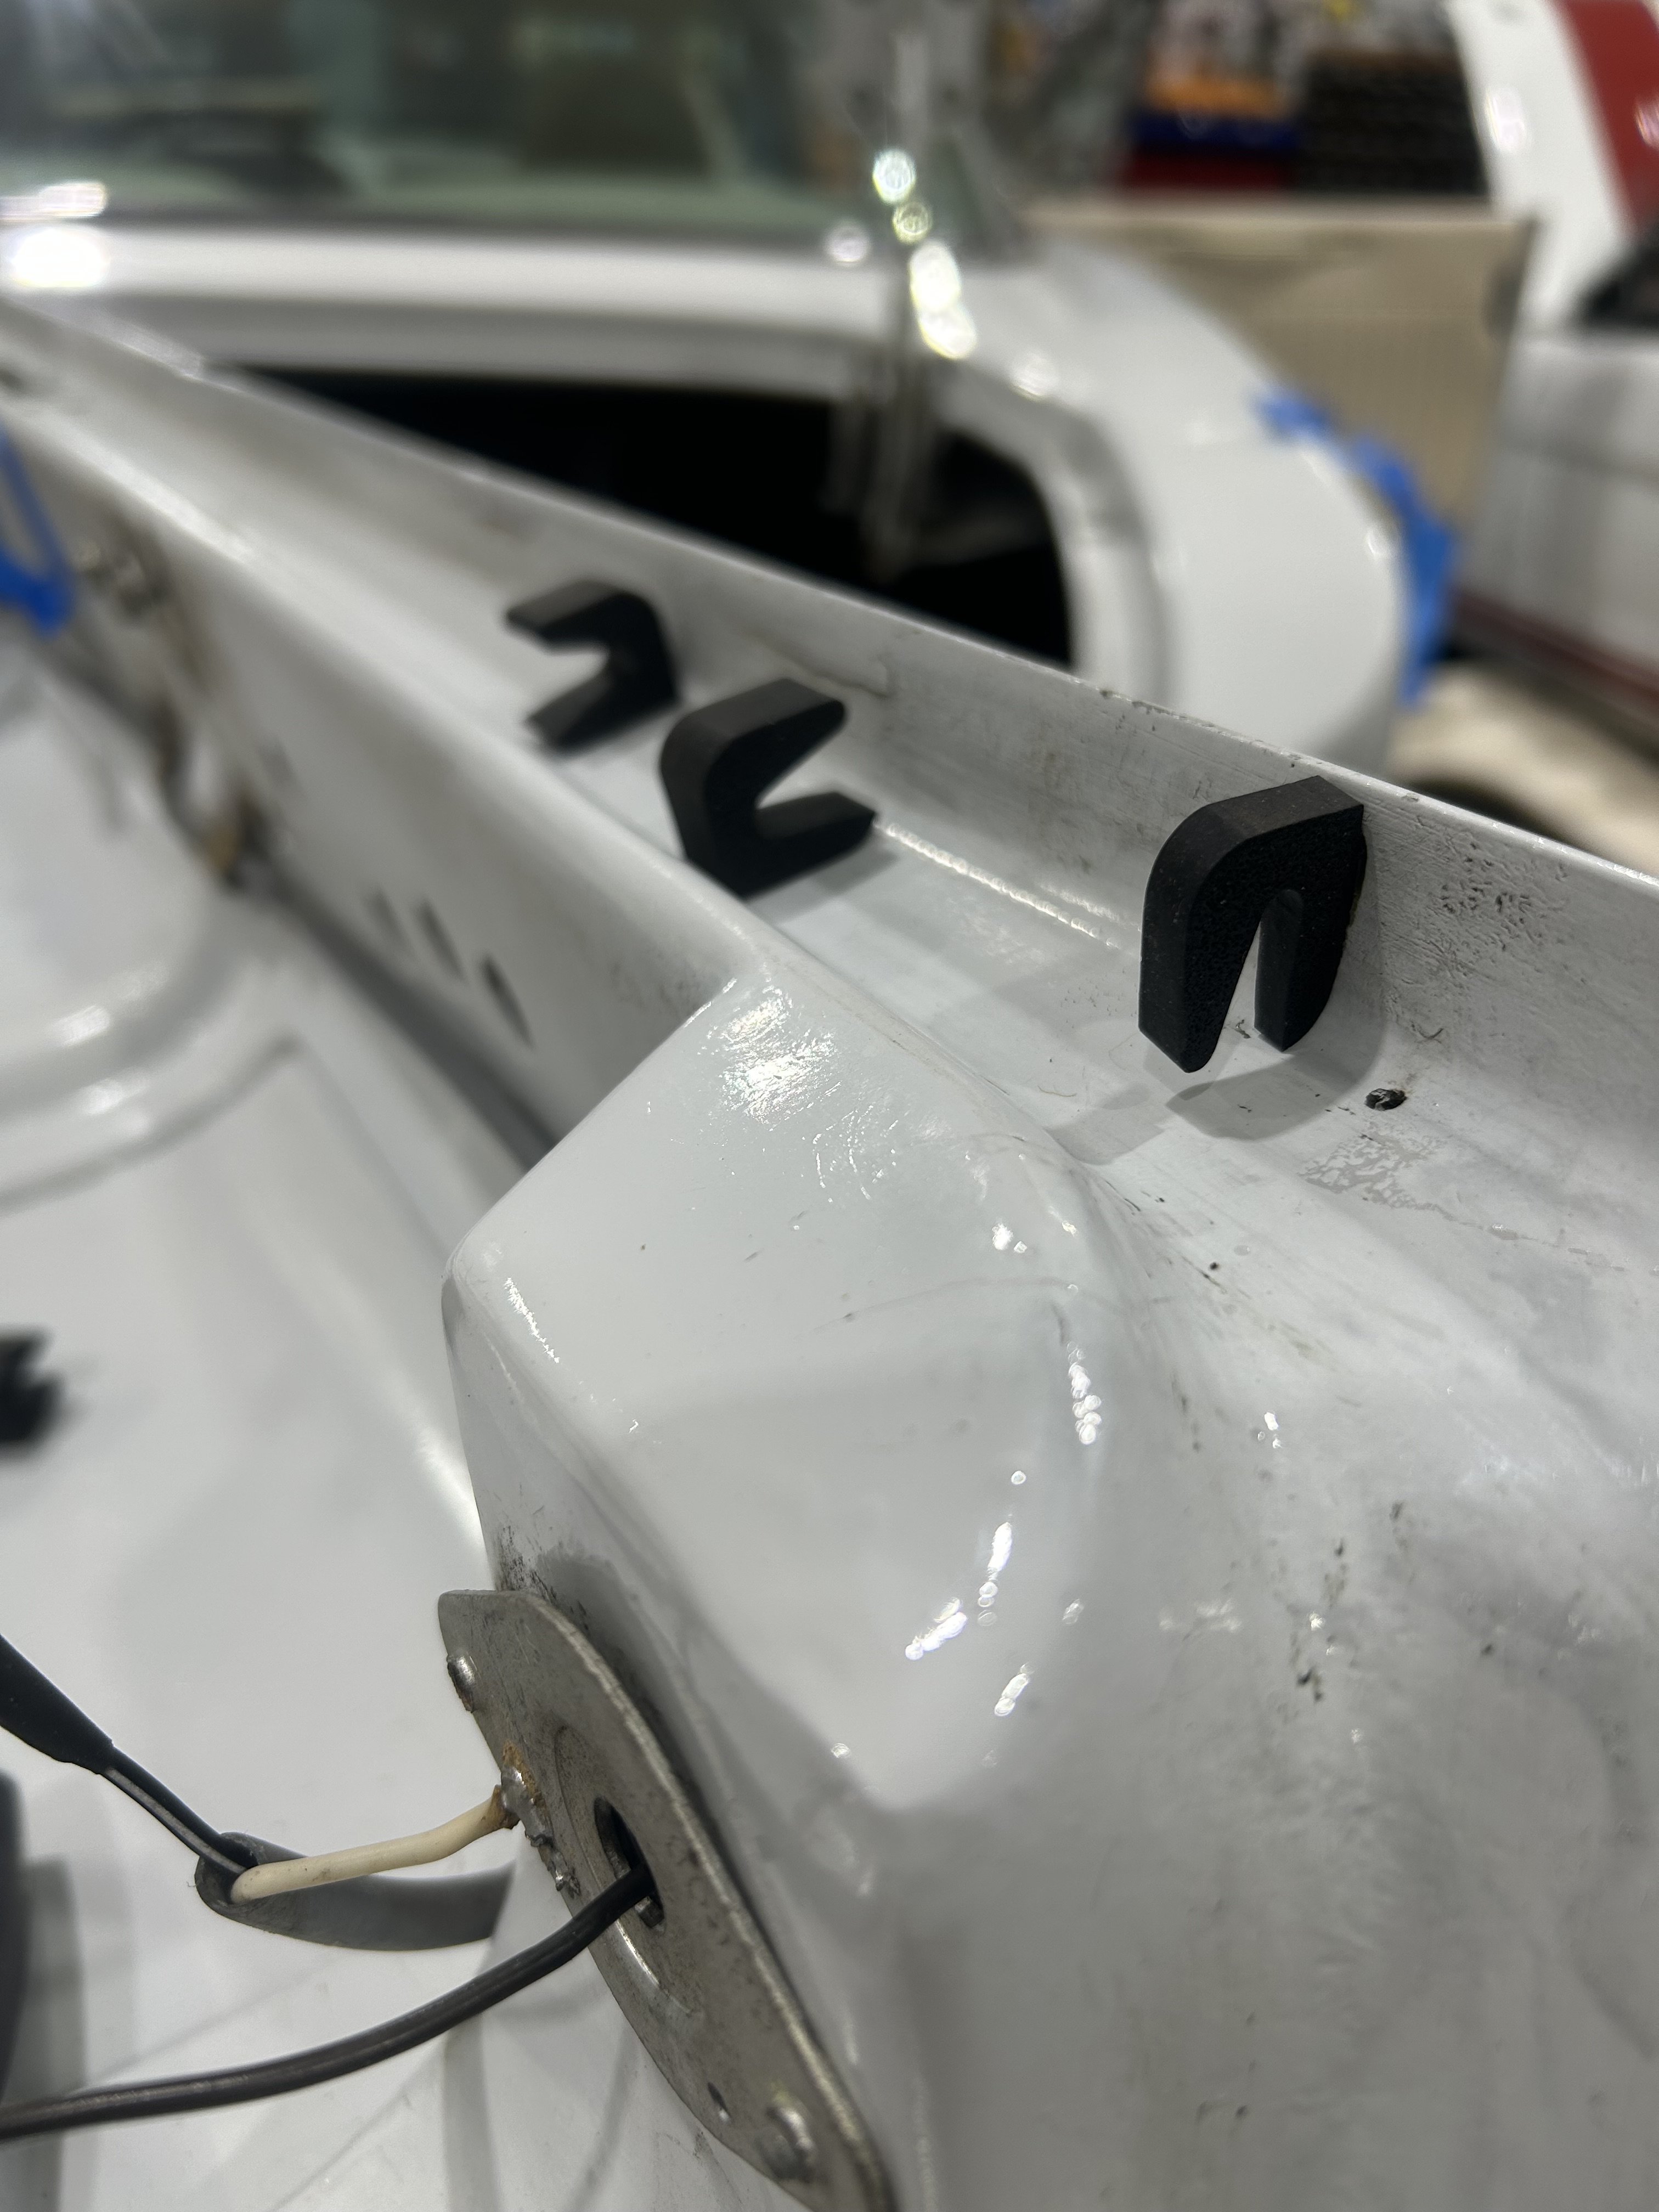
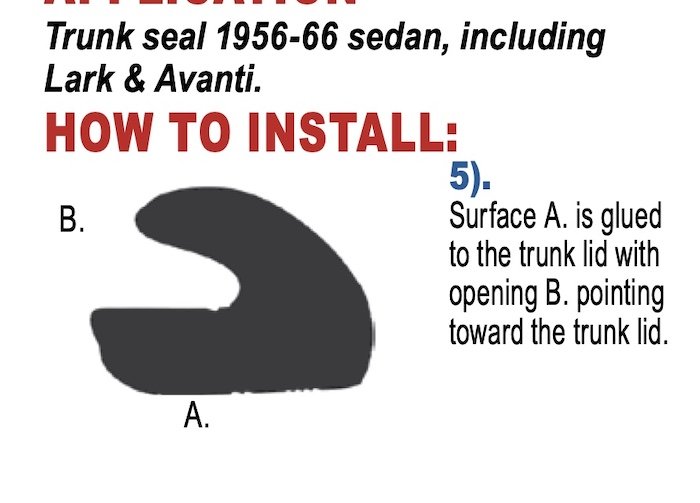
The explanation by SilverStude above is the instruction from Studebaker International. So in your latest pic, the alignment of the middle example would seemingly be correct, however in the interest of having the best anchor to the lid, the example farthest from the lens would be optimal. Ironically, I just checked my car, where the seals are about 10 years old and what I have is totally different, in that the seal is a rectangular tube with rounded edges and not having an opening and it adheres to the main body of the lid and not to the extended, thin section that hides the seal itself
-
So, reviving this topic, the pictures that were uploaded before aren’t coming through now in April 2026. when I got my 1976 Avanti there was no weatherstrip on the trunk lid. so I purchased and installed (Fail), I pulled it all off and researched. I came up with no pictures of what is correct. i took a picture of 3 orientations along the bottom (latch side) of the lid. Can anyone confirm which orientation of the rubber? the trunk lid is upside down in the photo(s).
-
 WDA joined the community
 -
I had a 400 ci with 400 turbo in a Chev Vega.. That was a thrill ride.. Imagine this one will run similar but a bit more body weight.
-
An Avanti ll equipped with the 400 engine can easily outrun a stock R2 equipped Stude Avanti up to about 70 mph.
-
The Avanti factory had to reinforce the front crossmember due to extreme low end torque of the 400 engine. Retrofit kits were also made available.
-
All the 400’s were backed up with Turbo 400 trannys… One of the very best period transmissions.
-
Thank You Sir... How about a turbo 400 Tranny? I think I bought a gem.. I'm a little concerned in starting a engine that hasn't run for a number of years.. Carb is original and all looks clean.. I thought of some Marvel Mysery Oil in the cyls. but the plugs are in a very tight position. Wondering if starting it dry will be ok. Gonna drain the fuel and run new thru a few inline clear filters to see what the tank send up. The car is from Calif.. no corrosion of significance.. Any other suggestions?
-
Yes.