


Avanti83
-
Posts
1,282 -
Joined
-
Last visited
Content Type
Profiles
Forums
Events
Posts posted by Avanti83
-
-
14 hours ago, Greg Howarth said:
I love that hood can I buy one?
You'll need to build one but you can purchase the starting fiberglass.
This is my post on the SDC forum on construction. You can see I decided to elongate the back edge, which in hindsight, would have easier to do initially.
http://forum.studebakerdriversclub.com/showthread.php?84666-Avanti-Cowl-Induction-Hood-!!
Bob
-
Pulse generator for the cruise control possibly. Bob
-
Monte, I'm not sure about seal kits but the unit was made by a commercial supplier of sun roofs. I suspect more knowledgeable folks will help here.
I have one in my 83, it works and doesn't leak but I don't find myself using it often. It also steals an inch or two of headroom. I would consider molding it into the top IIWM but that's a personal call. They do drain into the hog troughs and can create a problem with the windshield surround, which is steel. When you do the body I'm guessing you'll pull the windshield and that will uncover the windshield surround under the stainless trim on the sides of the windshield. I was lucky on the my 74 as only a small section was punky and easily fixed. Check yours out to be sure.
I'll be interested in your fabrication of the hog troughs. I built a set for my 54 Studebaker hardtop where they serve the same function as on the Avanti. I used a small vise mounted sheet metal brake and MIG'd them together.
I see you looked at the article in the AOAI mag. If they didn't use the three piece hog troughs how were they installed without lifting the body. I couldn't see a way to put the one piece units in without either cutting the rocker panels or lifting the body.
When I removed the paint from the body I used over 100 single edged razor blades and mucho time because I was afraid of the aircraft stripper getting into places I couldn't get it out of easily due to past experiences using it. Since then, I acquired a used fiberglass cap for my Ram pickup and wanted to change it to the truck color. It had two paint jobs on it, the original BC/CC OEM and an enamel black painted over that. I wasn't about to scrape that of after my last experience.
I tried a couple of strippers and found this product from West Marine softened all the coats so they were easily lifted with a putty knife. It took 24 hrs to get through the paint but it was effective and when it dried it was just a powder that was easily removed with water. I'll never scrape again.
https://www.westmarine.com/buy/back-to-nature--aqua-strip-paint-stripper--P004563136?recordNum=1
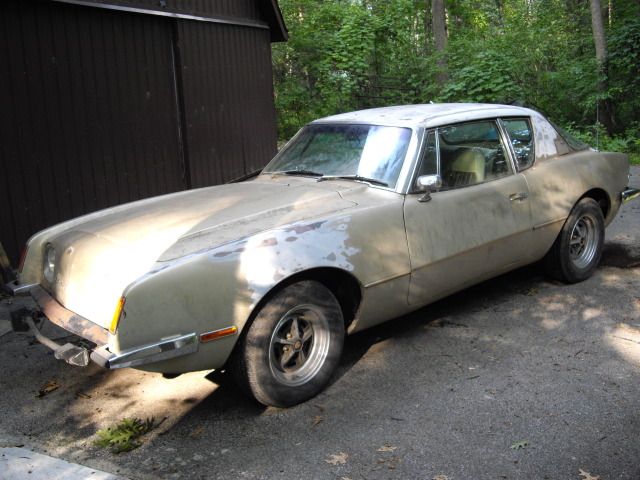
Here was mine it all it's radiant beauty
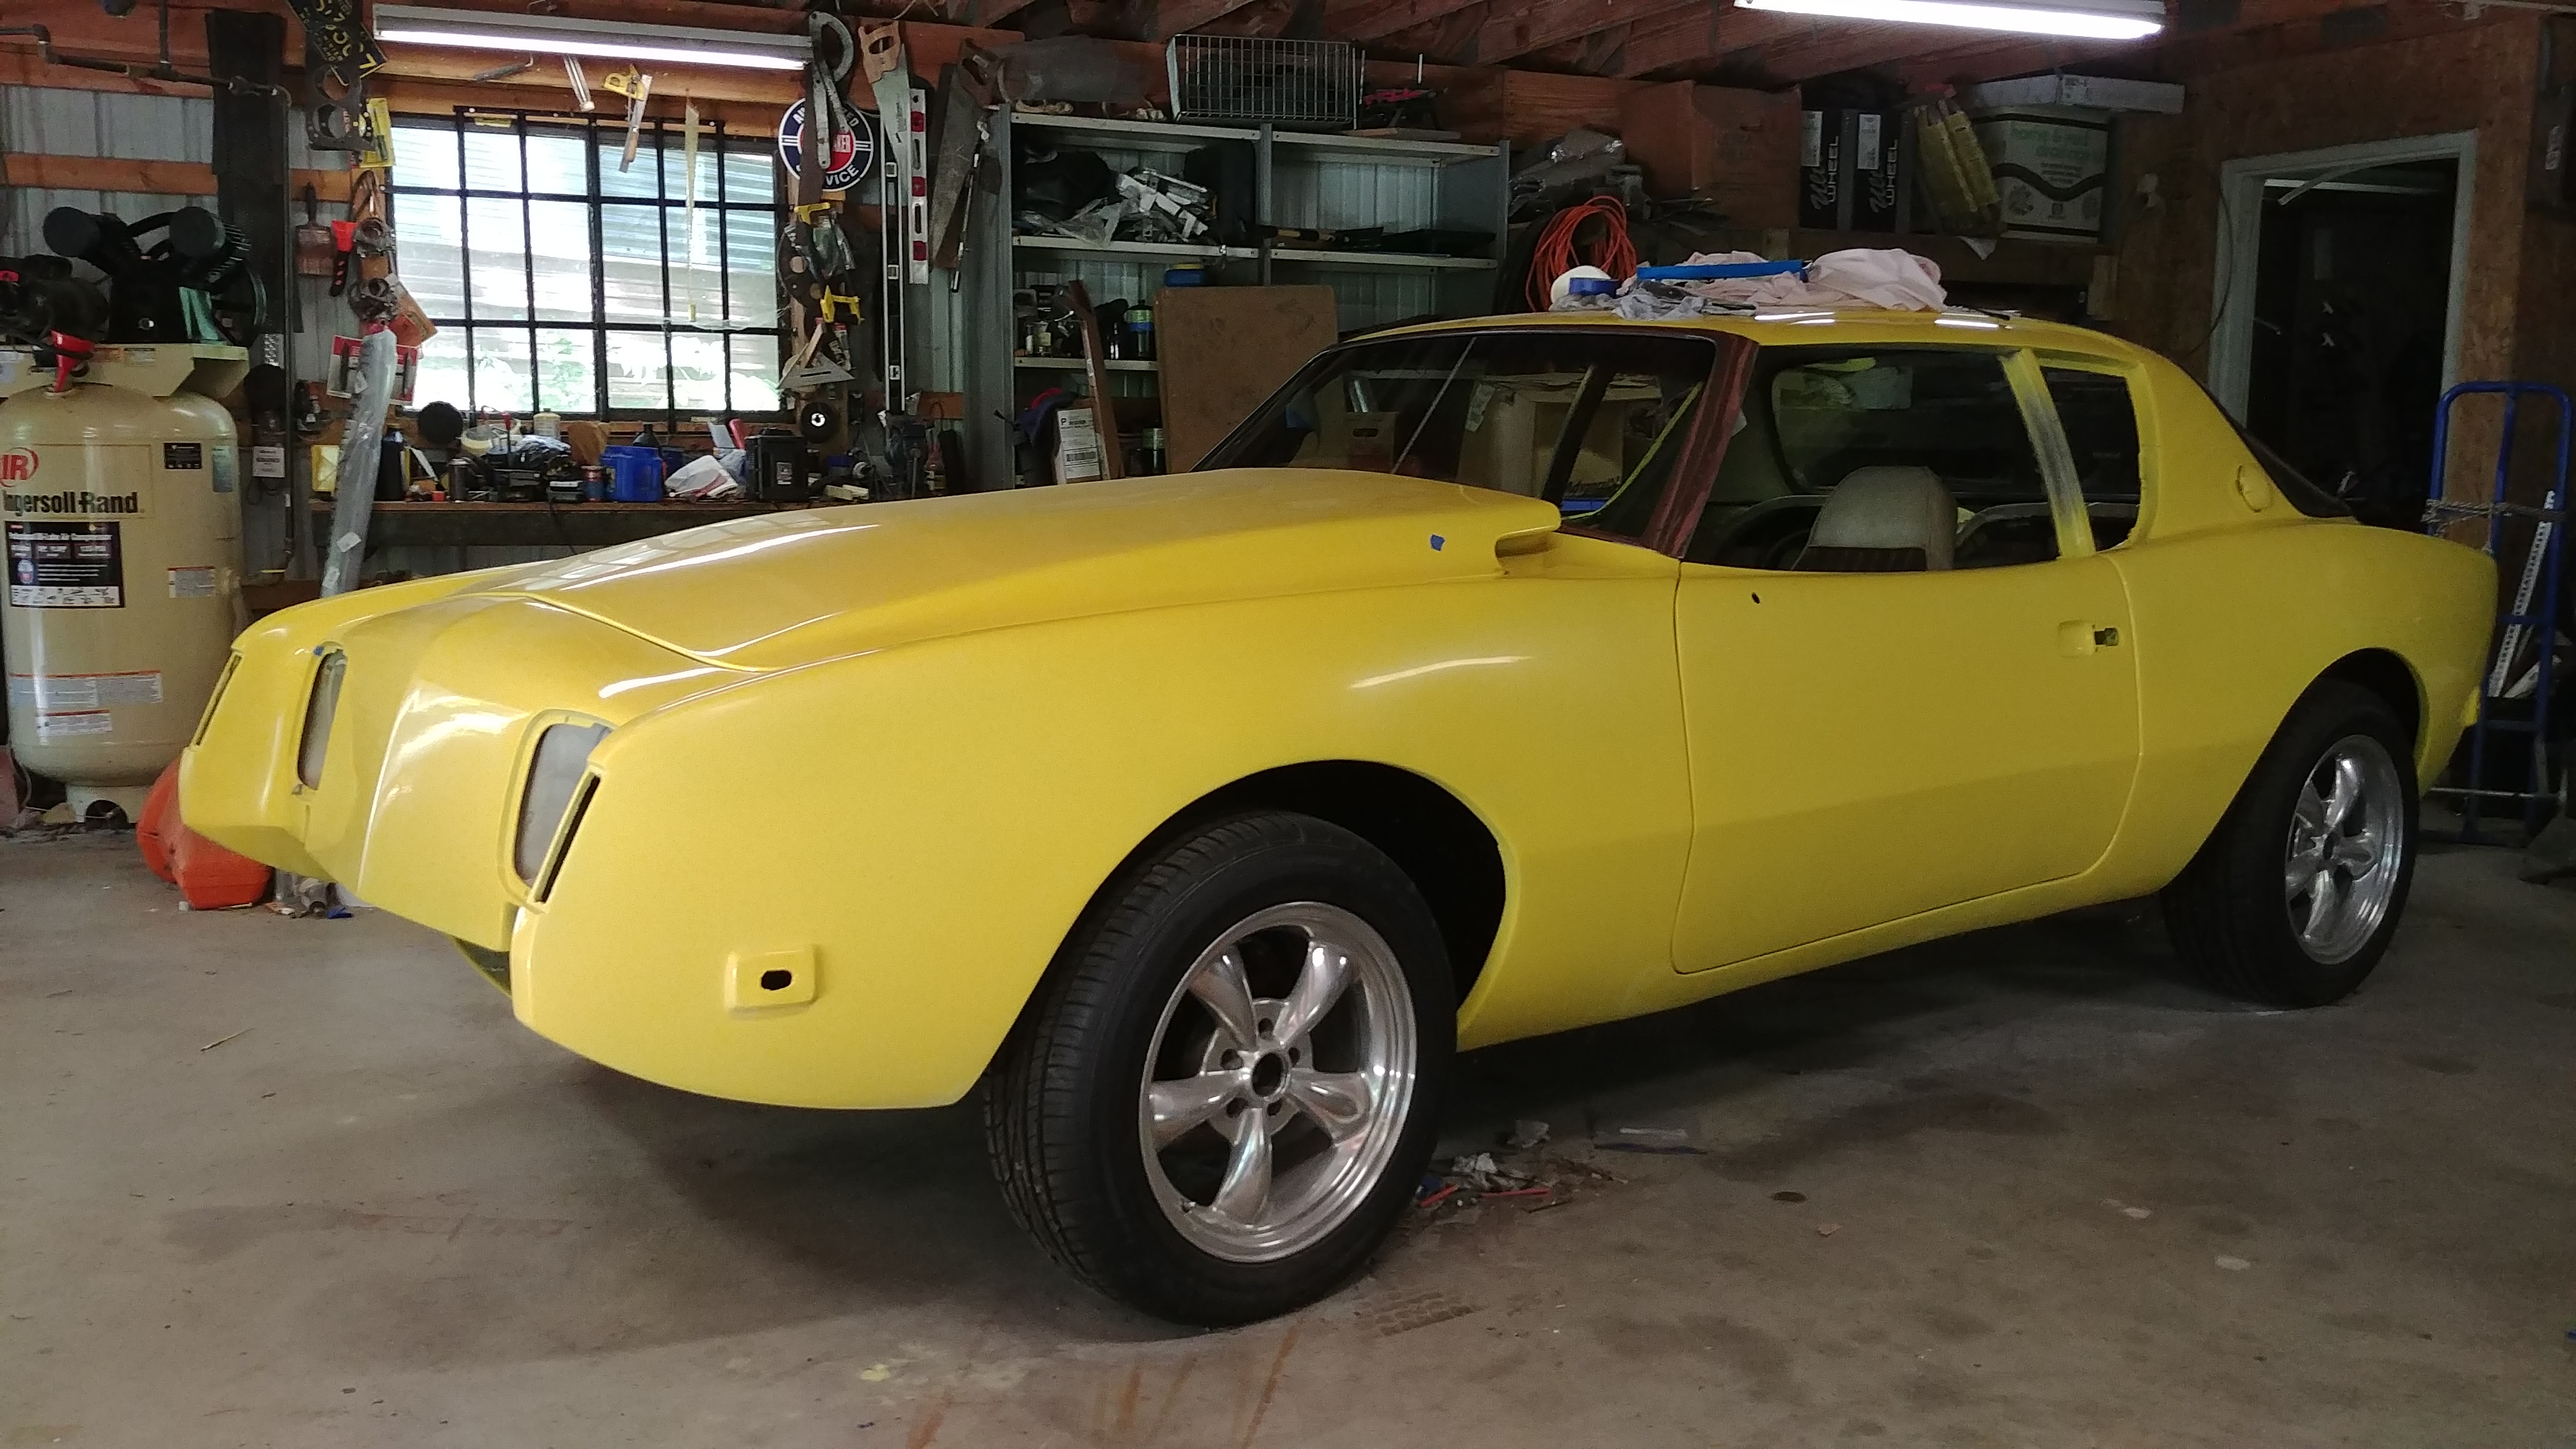
Here it is today. I just put the front and back windscreens in last friday. There's hope

-
I'm running 17 X 8 inch Mustang rims on my 74. I used 2000-04 Bullitt style and the back spacing is fine on the rear. Quite tight on the front so I'm adding a 1/8" spacer.
My 83 has 15 X 8 inch custom wheels with about 3.5" BS on the front and about 4.5" BS on the rear. I can get a closer BS on the 83 front but it will take some time.
-
The 74 Avanti is creeping closer to a finished product so I'm ready to install the front and rear windscreens. Called Dan and ordered the gaskets and installation kit he provides. He said they would be delivered the next day, I'm about 70 miles away. He said to call him back when I see what I have and he'd draw me a mental picture of how he does them.
They arrived as promised and I called back. Left a message and Dan called me back about 7:00 PM. We spent better than 1/2 hour on the phone as he described his methodology and a few tricks to ease the installation. We discussed a few points I needed clarity on and we ended the call with him saying to call him a day or so before I install them so he can be sure to answer his phone if he sees my number and need further guidance during the install.
So the bottom line is if the installation is less than great, it's all my doing.
What a seller. Thanks, Bob -
On 6/3/2017 at 11:15 AM, studegary said:
I suggest selling it as-is unless you can repair it yourself. Put it on eBay with a good description and pictures(including these). Have a very low starting price to develop auction interest and a reserve that you can live with. Some bidders may do their own repairs and/or have no idea what this type of repair costs.
Do you have a price on the repair? It might be worth getting a quote as listing it in this condition severely limits the market. Otherwise, I agree with Gary. List it as-is with a reserve on Ebay and see where it goes. If it doesn't make the reserve, then you can weigh repair vs other options. I assume the damage happened without insurance which is too bad.
Here's an 80 that sold on Ebay this year without the damage for a bit over $9K. If you are a seller, they don't bring a lot of money. If you are a buyer, they don't cost a lot.
Good luck, Bob
-
STP oil treatment does have zinc additives in the formulation, the only one I see that doesn't is smoke treatment. I'd guess the the oil treatment is the closest to the original based on level of viscosity improvers so based on this data. False
-
Monte
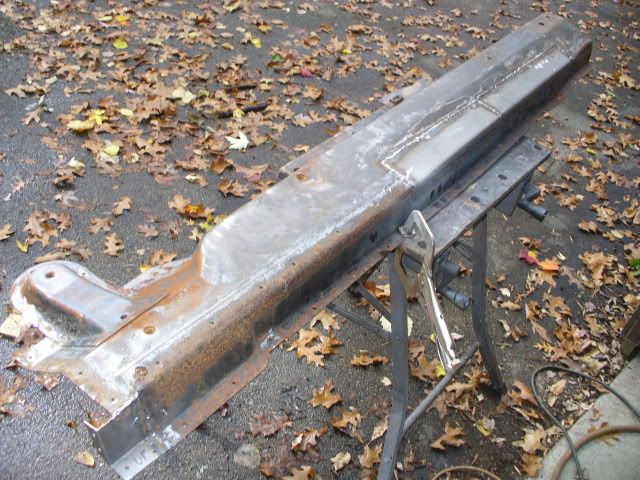
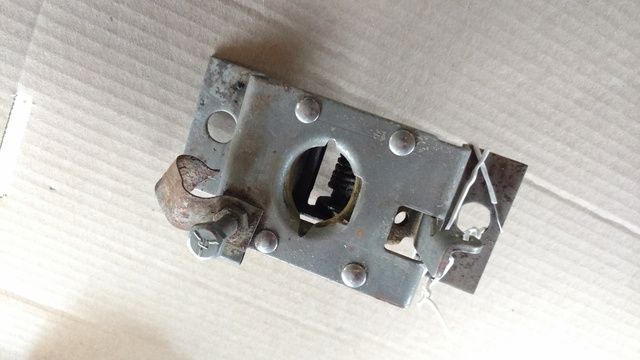
My guess would be 18 ga but I'll get more specific if you need. Here's a shot of one of the troughs that I found. It needed some work but the other one I bought was new. I had considered just what you are suggesting, fabbing my own, but I got a screaming deal on this pair so I repaired the bad one and installed them.
Looks like you bought my 74 from the picture.
As I said, I'll help where I can if you want. I would guess that less fancy would be fine as long as the support of the body and rocker panels was there.
Bob
-
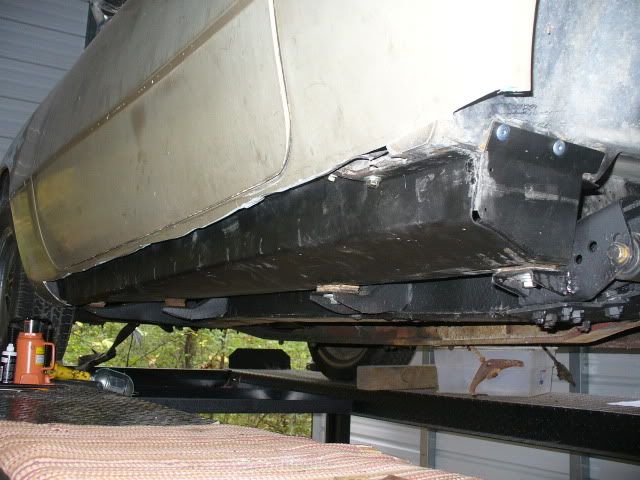
When I purchased my 74 it looked like this. The PO had replaced the rusted out hog troughs with 2X6 box. While it stabilized some of the floor there was a fair amount of flexing in other parts of the floor and body when it was stepped on.
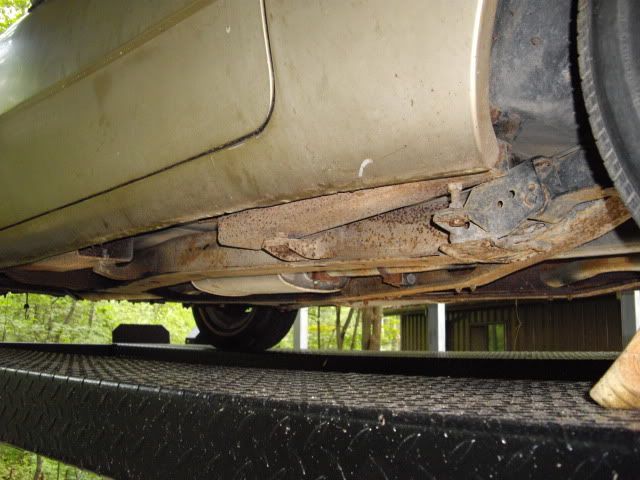
To replace the hog troughs, you can see I cut the rocker panels out and installed the one piece units. What you don't see is that the entire rocker panels are bonded to the hog troughs when they are in place to provide more structural integrity.
This is the start of adding the bonding strips to the hog troughs to adhere the rockers to them.

Rockers replaced.
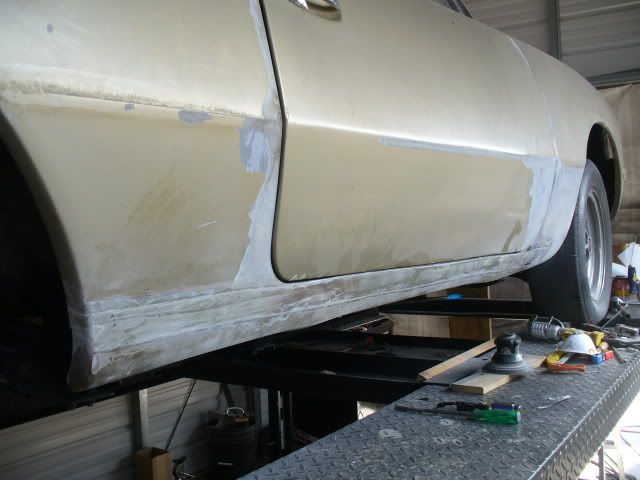
I added the pictures to give you some idea of the work involved in replacing them.
Gunslinger is correct in that there are ones that can be installed without cutting the rocker panels but the install still requires cleaning and bonding the rocker panel, etc. You can find that procedure on the SDC website or google (hog troughs, dick steinkamp). He published the install.
All that to say, if you're not prepared for this effort, buy one that has good hog troughs. I've been told that labor alone can run $2500-4000 for the install.
There have been several discussions about using alternative designs to replace these units but IAC, you still need to supply body mounting structure and bond the rocker panels to it to have a rigid structure.
OOPs! Just reread my post and see you already own the 77. I guess you can see what's involved now. If I can help with pictures, thoughts, etc, Just let me know.
Bob
-
I don't know how tall you are but if you are over about 5'10" headroom can be an issue as well as distance from the wheel. There is also the factor of installation of seats from other models.
If you are interested in better seats, measure the height of the bottom cushion from the floor to the top of the cushion and prowl the local wrecking yards and car dealerships. Find a seat you like and see if the height and width look reasonable for your car. You can find about any seat you want by going to car-parts.com which is a nationwide parts locating service that most wrecking yards use and you can also.
Luckily modern cars have become smaller and you will find most seats from this decade will fit, but measure to be sure. One hint, try to find them with the power switches on the seat not the dash or console. That way you only need to run 12v to the seats to make them function. Try to find 8-10 way adjustable seats to allow you the find the most comfortable driving position.
the good and bad news is you will need to fabricate mounts. The Avanti mounting is pretty straight forward but takes a bit of creativity. Custom mounts will also let you move the seat position back if necessary.
For my 74 I picked up a set of Pontiac G6/GTO leather seats and built the mounts.
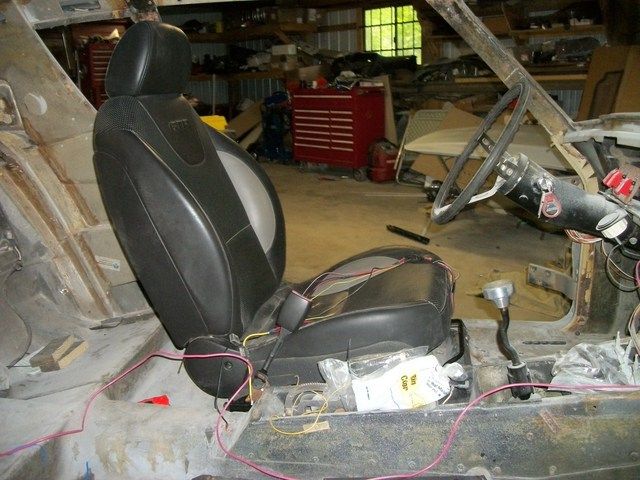
Initial mount mockup
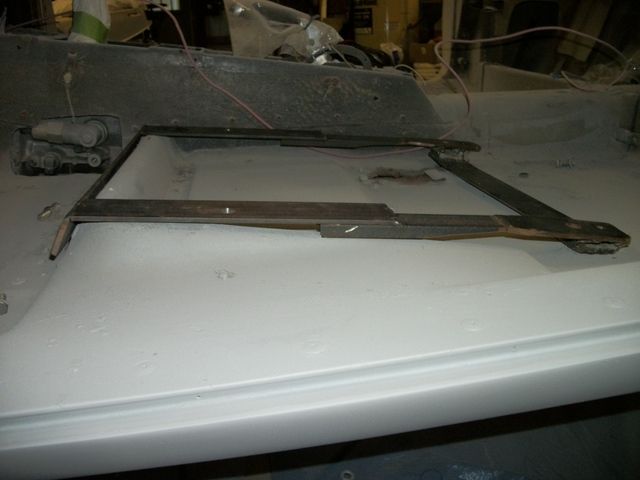
The mount has changed a fair bit from this pix but it will give you an idea.
There are after market seats that have mounts available for Avanti but I believe you will give up the power which I think is a major factor. Also choose a set with heat if your back bothers you. Again, pretty easy to hook up. I made sure I took the under seat harnesses with the seats, that way I had all of the correct connectors to power up. Wiring diagrams are usually available through Google.
Bob
-
Two options.
Start by measuring and profiling the hose you need and go to the Gates website and look over the hoses they show. See if one is close. Remember that a larger hose can be reduced by using the adapters Gates also offers.
Secondly, take a piece of heavy wire and bend it to the shape necessary. Take that to your FLAPS and see if they will let you into the backroom to match it up. Remember here you only need to use the appropriate portion of a longer hose.
A last method is to join a couple of hoses and use the plastic clamps Gates also manufactures. They are a plastic ring that shrinks to clamp the hose and look pretty decent installed.
Bob
-
The SB Stude club did this with former Studebaker employees a while back in 84 bldg. Many had worked in the locations we visited and had numerous stories about assembling the cars. One told about installing the windshields and the force necessary to set some in place. He said not all of them survived the process.
I can't remember time better spent at a Studebaker event than interacting with the previous employees. Don't miss this event.
It might be advisable to publish the location of the Gillespie Center.
Thanks a ton to whomever set this up.
Bob
-
If everything has been drained probably close to two gallons but why not just start with a 50/50 mix of antifreeze and pour it in until it won't hold anymore, start the engine and add more as needed. Then just fill the overflow reservoir to the full mark and let it heat up well, purge the air and drive the wheels off of it. Just watch the overflow so it's not empty when the engine cools for a few cycles. It will take what it needs and there's no need to guess.
If the heater was drained, you may want to pull off a hose before you fill the rest of the system and fill the heater with the valve open, then fill the system until it reaches the hose, reconnect the hose and then finish refilling the system.
Bob
-
I'll say false as the only change to the Hurst unit would be the shifter mod IIRC.
-
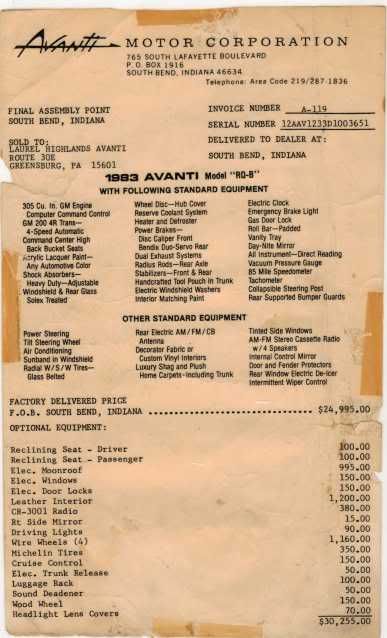
I Think Dan has the production order but not sure about the window sticker. If you can get the production but not the window sticker you might be able to make one. This is the one off my 83. I could send you a copy if it will help. Bob
-
I'll guess true as it was an option on earlier models. 50/50 shot.
-
Not sure what normal means. If listed in the brochure means normal which it isn't in my brochure, I'd say true.
If it means would they install one I'd say false because my 74 came with a hitch stamped Avanti from the factory so my guess is if there was one available they'd install it if requested.
-
I'm close to the same issue on my 74.
What I plan to do is hold the engagement lever back so it won't engage then loosen the bolts holding the mechanism so they only hold lightly. I'll lower the hood until the pins center in the mechanism, raise the hood and tighten the bolts. I'll then lower the hood again to be sure the pins are still correctly set and then release the engagement lever. I'll probably coat the pin head with chalk to be sure it looks about right.
I'll also have a couple padded blocks on the firewall to be sure the hood will only lower enough to let the pins enter the lower mechanism.
Raising/lowering the bolts will set the hood depth.
Will it work, Don't know but it's a variation of a procedure I've used for years on things like this.
Just a minor point, I know the wire goes through the mounting hole but it won't when I install it.
Bob
-
I would think any body shop could do it. It's just bent sheet metal. Personally, IIWM I'd take an icepick and wander around poking at them. Have them pay particular attention to the rear areas if you are uncomfortable under there. Also have them look at the frame rails particularly over the rear wheels and the rear cross member.
Good luck
-
The process is usually known as EDM, electron discharge machining IIRC. Not sure if it works in a plastic matrix, however. We used them in the 80's for die insert work but most of that has been replaced by wire travel EDM. IAC an interesting and quite precise technology generally found in toll and die shops.
-
Brad Bez, forum member does award winning work. http://bezautoalchemy.com/
Also a good thought on Corvette shops but the Avanti based folks will understand better the in's and out's of the car.
-
Here's a start http://forum.studebakerdriversclub.com/showthread.php?87316-63-Avanti-Radiator-Replacement
Just Google Avanti Aluminum Radiator or go to Bob Johnstone's site for more info. Pretty straight forward as they take a common size. Just be aware that there may be an outlet size difference. Pretty easy to use a radiator hose bushing if necessary.
Bob
-
Your best bet would be Dan Booth at Nostalgic Motors in Wixom Michigan. You'll need to call him, but he'll know availability of the parts. My guess is it's not going to be cheap if you need to find all the associated parts. Dan can also talk to you about the fabrication aspects.
Depending on your budget, it might be easier to find a parts car.
Lastly, ask the same question on the SDC forum, I know a couple have been parted out recently over there.
-
computer command control

What hog trough to ise
in 1965-83 Avanti
Posted · Edited by Avanti83
I'm not sure of all the variants but unless George Dimitas at Olympus is selling stainless yet, the only differences I know are the three piece and one piece. Because you are doing a body off, use the one piece.
My choice of vendor particularly if you are installing them yourself is Dan Booth at Nostalgic Motors in Wixom Michigan. He bought out the failed Avanti Motors and has parts that will fit. As a bonus, he'll spend whatever time it takes to explain how to do the install and answer any questions you have during and after.
He was invaluable during the install of my front and rear glass a while back.