


Avanti83
-
Posts
1,282 -
Joined
-
Last visited
Content Type
Profiles
Forums
Events
Posts posted by Avanti83
-
-
I'd suggest that you look for the best 1966-83 Avanti you can find and do the upgrades to the engine, trans etc.
If you are dead set on the 63/64 round eyed version your choices become more expensive.
A very nice later Avanti should go for under $30K and leave you a ton of room for mechanical upgrades like an LS engine/trans combo. The Dana 44 rear will be plenty strong for this power.
Paint, hog troughs, body and frame repair not counting interior will get you close to $25K and will still nickel and dime you from there. It best to start with one that doesn't need all that work unless you can do the work like painting, etc.
I've done one Avanti in really poor condition because I do about everything so cost is reasonable but if I paid myself for my labor I wouldn't want to know what I've spent.
Starting with a good one and upgrading should get you on the road with a driver you will be proud and happy to drive for approx $50K or less. Now a show car is another story.
-
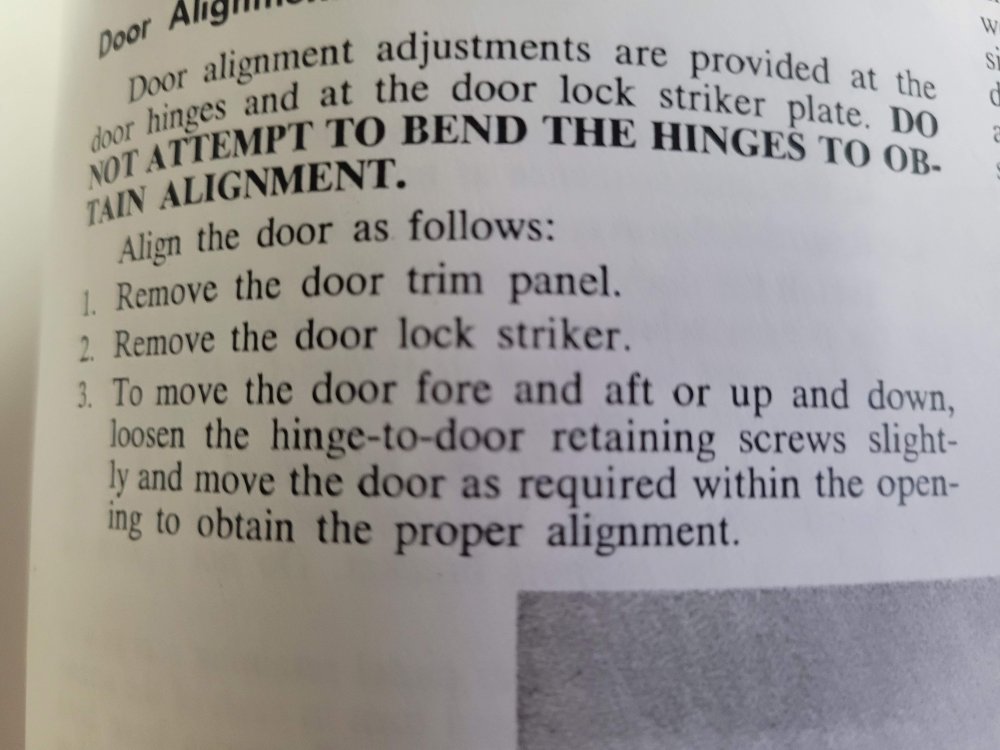
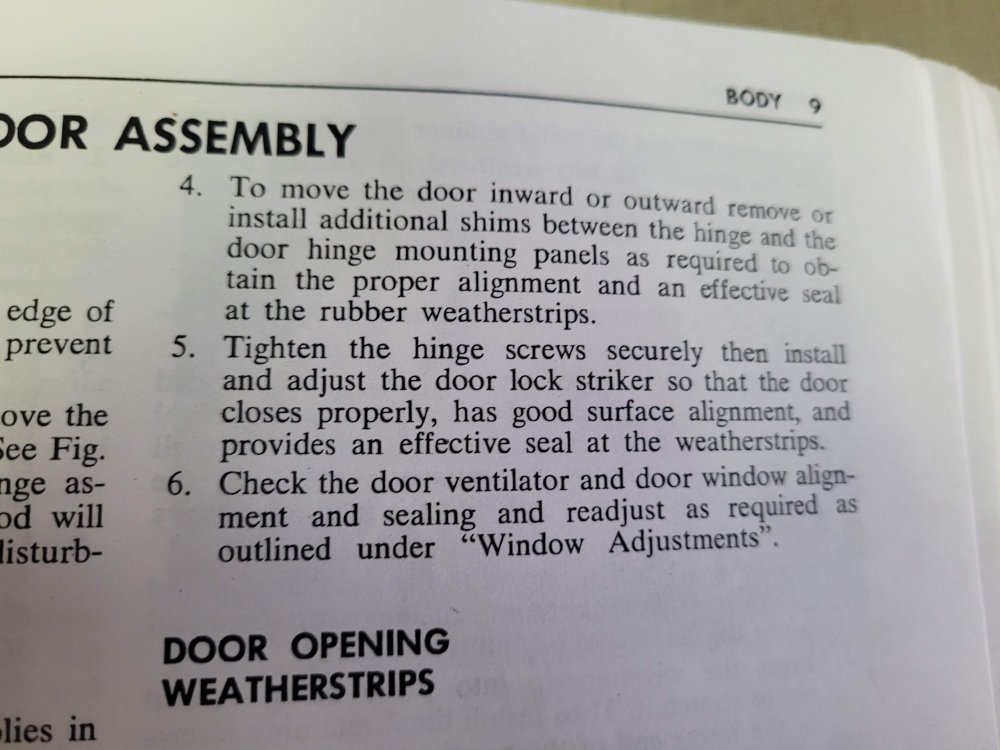
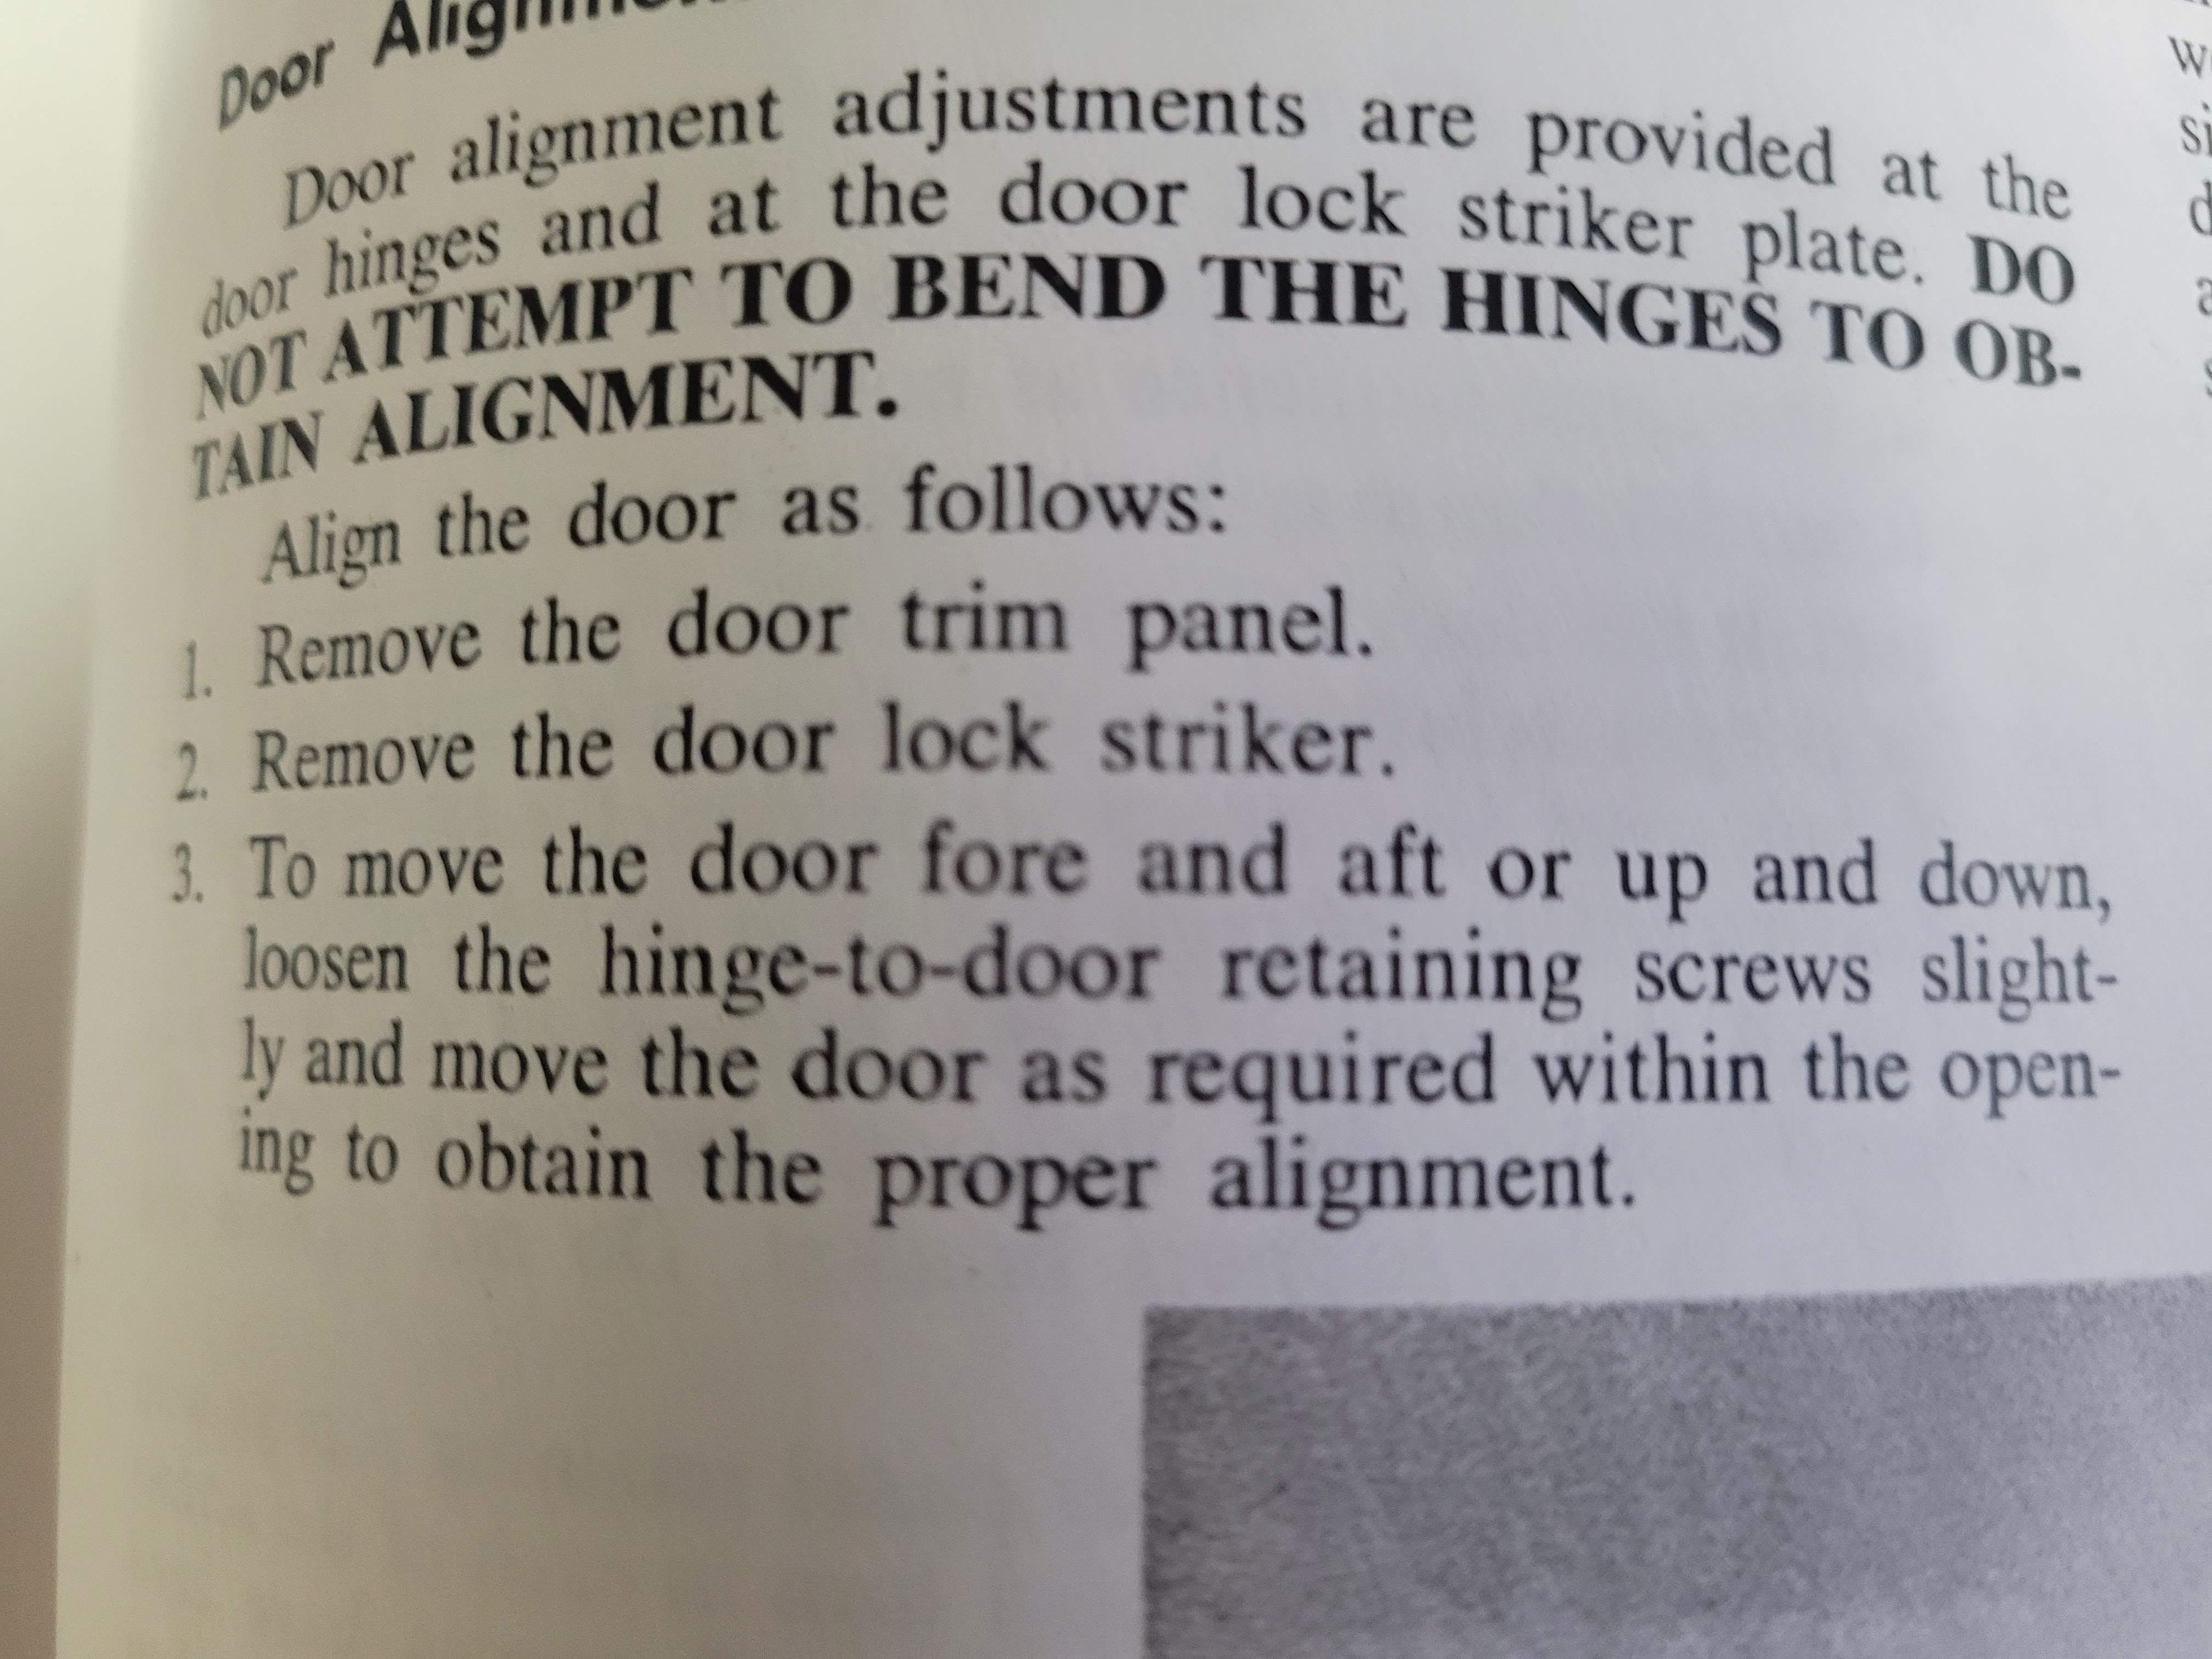
I'm a bit confused about the "vague" instructions. The manual says to adjust fore/aft (back to front) and up/down loosen the screws in the door hinges (#1) and move to adjust. For in/out you need to add shims. That's about what any manual would say.
Have you tried to adjust them yet. I can personally attest there is a fair amount of adjustment by loosening the screws in the doors.
-
As Wayne said, front to back is by loosening the bolts inside the doors and in and out are by shimming. Be sure to check the hinge pins for wear and corrosion.
I also pull out the striker so I'm not fighting it.
When I reinstall doors, I set them in the opening with the hinges in the pockets but no bolts. I then shim them around the opening to create the gap I want and tape long pieces of wood across the door and body to get the correct in/out match. Then add the shims behind the hinges and tighten everything.
You may find that you need to reglass or trim sections to get the gaps you want.
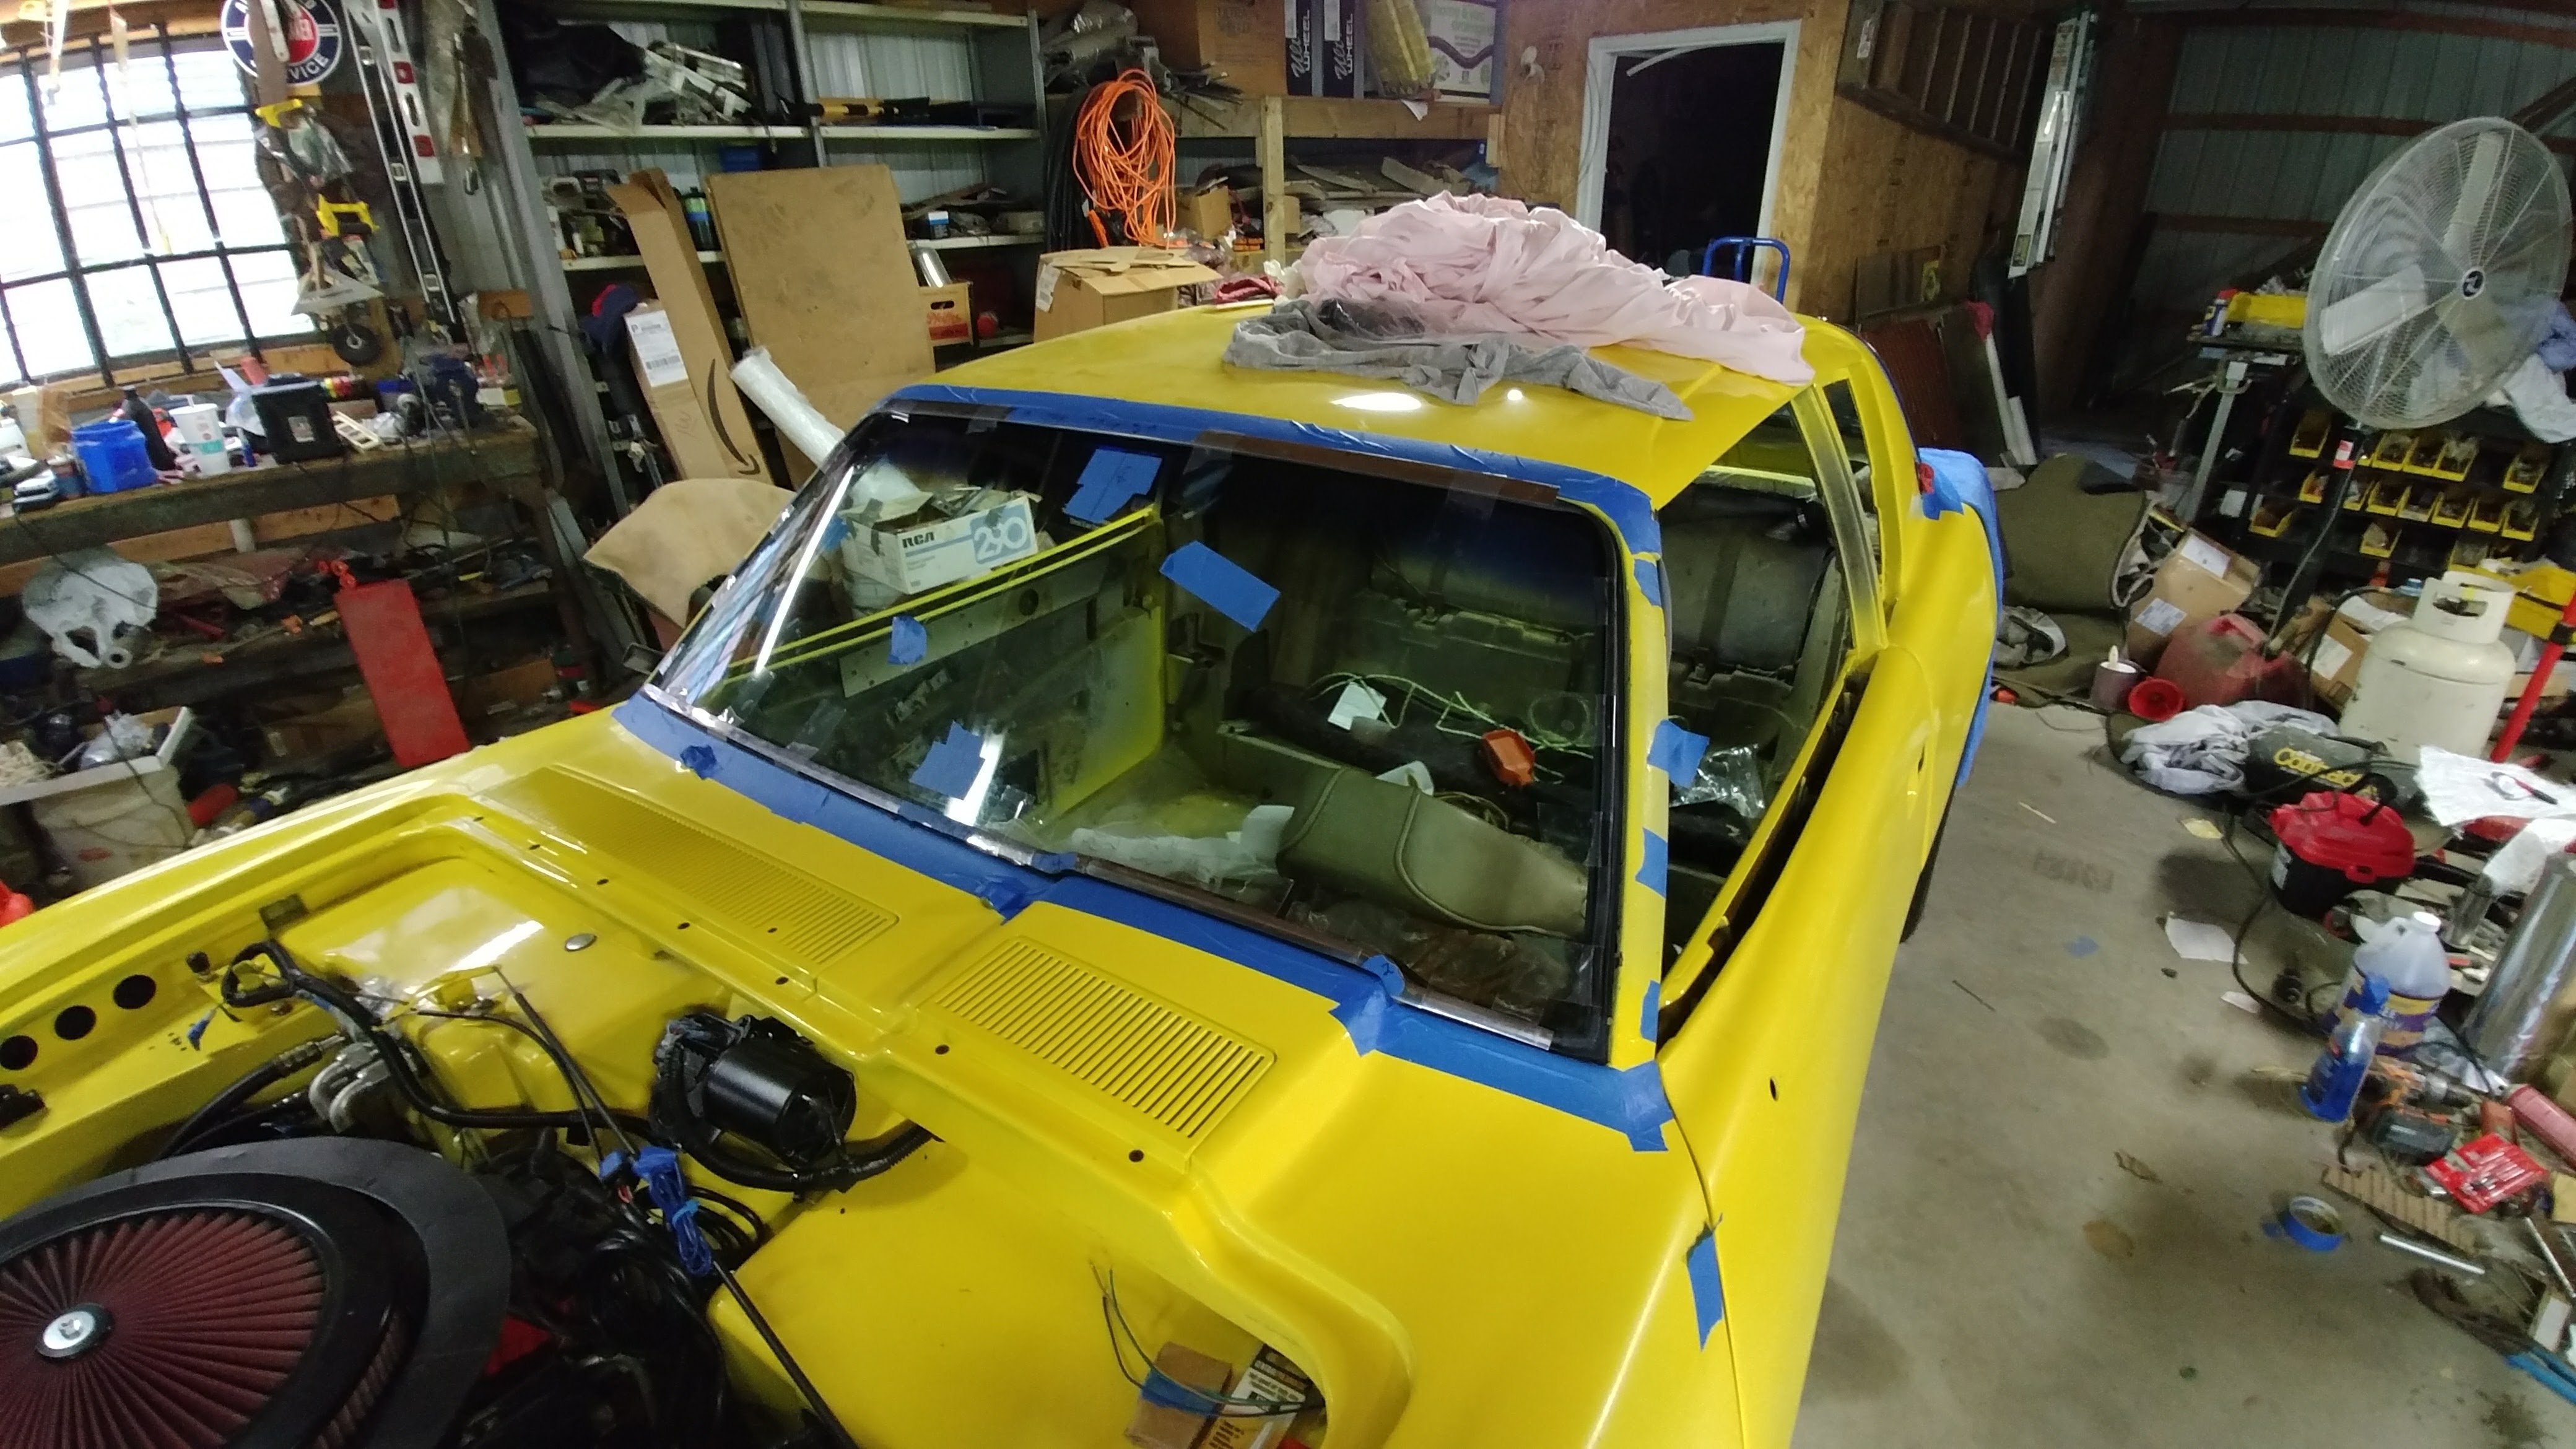
My 83 had really nice gaps from the factory. The 74 passenger door must have been a late Friday build as it needed a fair bit of body work when I redid the car a few years back.
Let me also strongly encourage to get the manuals. It's more than frustrating to put hands on a Avanti without one and worth every cent of the cost.
-
Wayne is correct that the build sheets for the II's are usually available from Nostalgic. Are you sure the "red" primer isn't faded red paint?
As far as the rocker panels, it's body work just like any other metal repair. Just be aware that the metal is bonded to the fiberglass at the rocker panels so heat needs to be carefully applied.
If you're happy with the repairs then that's what should matter.
-
Glad it worked out. My guess is that movement is not good for the teeth on the cam so the replacement was timely. Time to deep six the old one. Just curious, what does a replacement go for these days if you don't mind me asking.
-
1 hour ago, Goodin said:
Avanti 83
thank you very much for the numbers I need. I realize my view of the members here on the forum is most likely distorted by my membership in some other forums populated by much younger members than me. I hope as we "senior people" go to our rewards we pass our cars and our passion on. I hope to get the Avanti done before I'm gone so it can go down the line to one of my great grandsons
thanks again for the numbers, I can now establish a datum and get on with the suspension mods
Please keep us in the loop, I'm looking forward to an impressive build. Pictures are really welcomed.
BTW - A belated WELCOME!!
Avanti, Bob
-
I suspect by now you realize you are the youngest contributor to this post. I just went out and measured my 74 because you finally gave me the approximate sections you wanted measured and as I'm two years your senior I wasn't about to spend several sessions crawling under it.
My suggestion as I said above in my last post is to understand the knowledge, age and methodology of the forum and adjust your expectations to our capabilities. If you go back through the forum you will see that we will do about anything within reason to get/keep these cars on the road.
Frame height front across from radiator - 16 1/4"
Frame height front, bottom of curve in front of body mount - 7 1/2"
Frame height rear in front of forward spring mount - 7 1/4"
-
Ten hours, Whoo! He's some reading for you from the SDC site.
If you need more, my 74 sets on different tires and wheels but I can get you a picture of how it sets and the dimensions as it sets now including tire size.
My guess is that while you are asking about stock ride height, in the end you are going to see what you like and go from there so mine might work as a start.
Let me know.
As an aside, while there may seem to be some wandering in the discussions, it's quite normal for some members to add info and cautions unless they are aware of folks skill levels.
Bear with us as those same folks have a lifetime of knowledge that just isn't available anywhere else, Well probably the SDC forum but it the same folks any how. You'll get what you need as we all want more of them on the road no matter how they get there.
Bob
-
Considering the miles you put on your Avanti and the fact you have pin pointed the sound to the distributor, it might be time to just replace it. These are usually under $75.
We can speculate on other causes - exhaust leak, bad lifter, worn oil pump, internal sparking, worn distributor bearings, broken piston skirt, etc. but if it's the original it's probably worth replacing as if the problem is more serious you'll want a new one anyway.
I hate just throwing parts at a problem so you could just pull it and see if something shows up but then you're already 1/2 way to replacing it anyway.
Good luck, I hate to see it off the road.
-
Not to speak for Ed, but the trunk rack and fuel door lock are straight forward. I removed the luggage rack and just filled the holes. You could either just weld a patch into the fuel door or find one without the lock.
Using 1/8" sheet would allow you to just build a couple of wooden supports the curve you want in the roof, screw them underneath the existing roof and add the sheet. Glass and fill the patch, then remove the supports and fill the holes. If it seems a little weak, glass a second sheet underneath for strength.
Otherwise you could take the earlier suggestion of buying a partial roof panel and replace the section containing the sun roof.
-
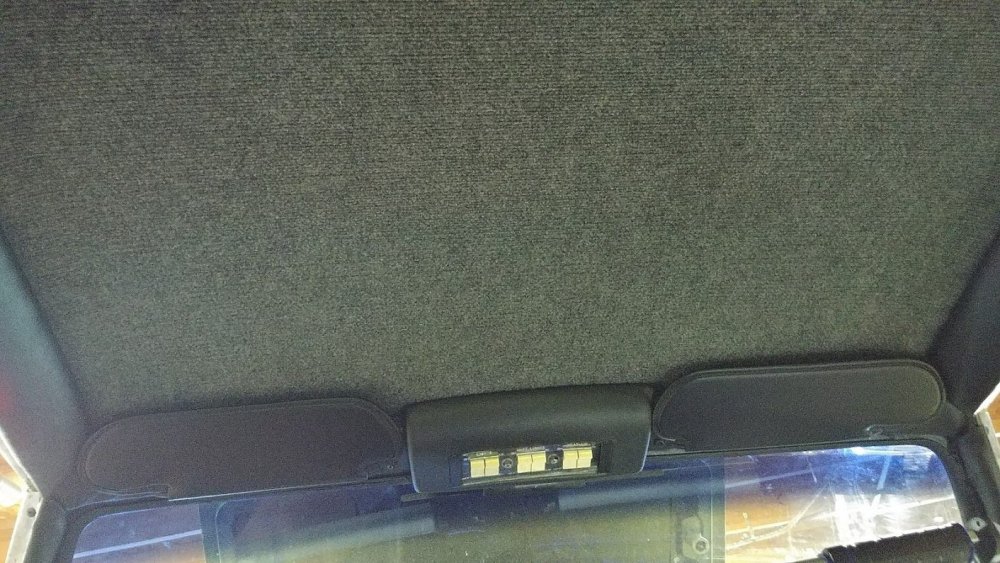
The moon roof panel can be removed/repaired without any issue of strength. There is a "roll bar" behind the door post for stiffness.
The roof interior is essentially cardboard with a cover glued to the top. I replaced it in my 74 with insulation and short pile carpet.
They are hot interiors so as you strip it apart plan on adding insulation to all the cabin surfaces.
Welcome and keep asking there's a fair bit of knowledge here. I can't help with the corvette suspension question but I suspect their are folks that know.
-
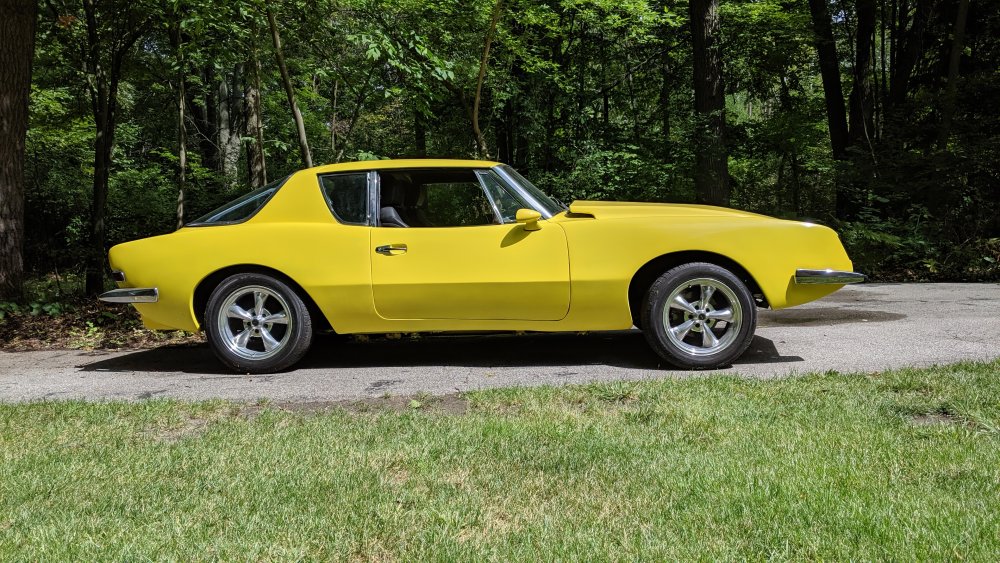
Mustang Bullitt Rims 17 X 8
Look like this on my 74
-
Just copy them from above into your browser to view or post the original on the site by clicking on other media in the lower right hand corner and into "insert image into URL"

-
Used the tape to hold everything in IIRC. Nothing goes across the gap from exterior to interior but I think I recall bending the tape under the lip slightly to get more purchase. It will pull out after installation if it is only under a short distance.
-
13 hours ago, Luma said:
Good Tip, I will try it out.
In your picture is the stainless already in place and then taped to the rubber and glass? Also do you have the rope in the picture all around the window and then crossed at the bottom?
Thanks, Dan
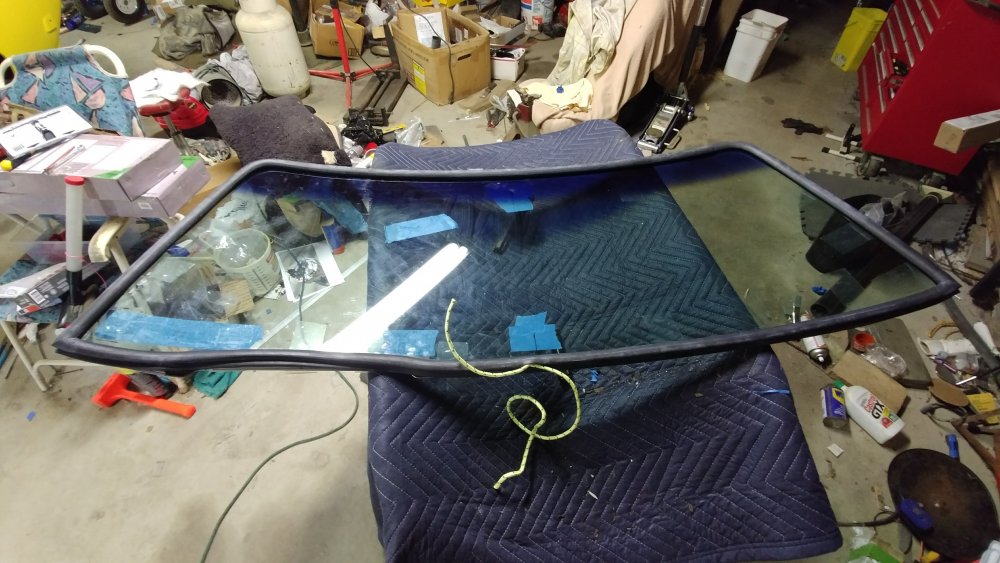
Looks like this right after installation. Yes on stainless and yes on rope. I believe I used 3/16" rope. Went in quickly with two helpers.

-
21 hours ago, brad said:
You have the rubber twisted, and the top stainless is not in the correct channel. You install the glass and the stainless as a unit. That is the rubber, and glass, and stainless are assembled on the bench before you install it in the car. Also, in the pictures, the rubber is not over the lip inside the car.
Agree here. Be sure you mark the center of the window and window opening to be sure you start centered to start with. I also used clear packing tape to be sure the gasket and window stayed in the proper position. This really helped to keep the hump in position during the install as you can see it in this Pix. Don't loop the tape under the gasket but just to the front surface after you clean it with Alcohol.
Thanks to Dan Booth for the tip as it just dropped right in like it was made to fit.
-
I agree with the set screw idea. While the spinner may block the nuts it would be a simple task to just carry an Allen wrench and remove the spinner first.
-
If you kept the belts just take them to your local FLAPS and they can measure them. Otherwise, take a chunk of rope and wind it around where the belt goes and mark length. Measuring the top of the pulley will get you the width.
If you want to figure it out yourself, do the same thing and go to Gates.com and look over their belt dimensions to find what you need.
Here's a link. https://www.gates.com/us/en/power-transmission/v-belts/automotive-v-belts.html
-
When I dove into the wiring on my 83 because the engine harness was in need of repair I found out there were really two harnesses. The normal engine harness and a computer harness that was almost completely separate, there were only a couple wires connecting between them IIRC. I mention this only because if you can find an earlier harness that doesn't have the computer portion, you may be able to use parts of the one that is missing if your 84 is much like my 83.
I ripped out the computer portion and replaced the carb and dissy with an aftermarket EFI setup, truth be told.
-
51 minutes ago, silverstude said:
Get or make a couple flat, tapered pointy tools from a hardwood. Carve down some wooden spoons, etc. You can work the gasket over the flange using these types of tools and it won't hurt the gasket. I put both the front and rear glass in, using this type of assist.
Very good suggestion. You might also try a set of these trim removal tools that are available at most auto related stores.
https://www.amazon.com/Tresalto-Auto-Trim-Removal-Tool/dp/B01L8GHB7O
-
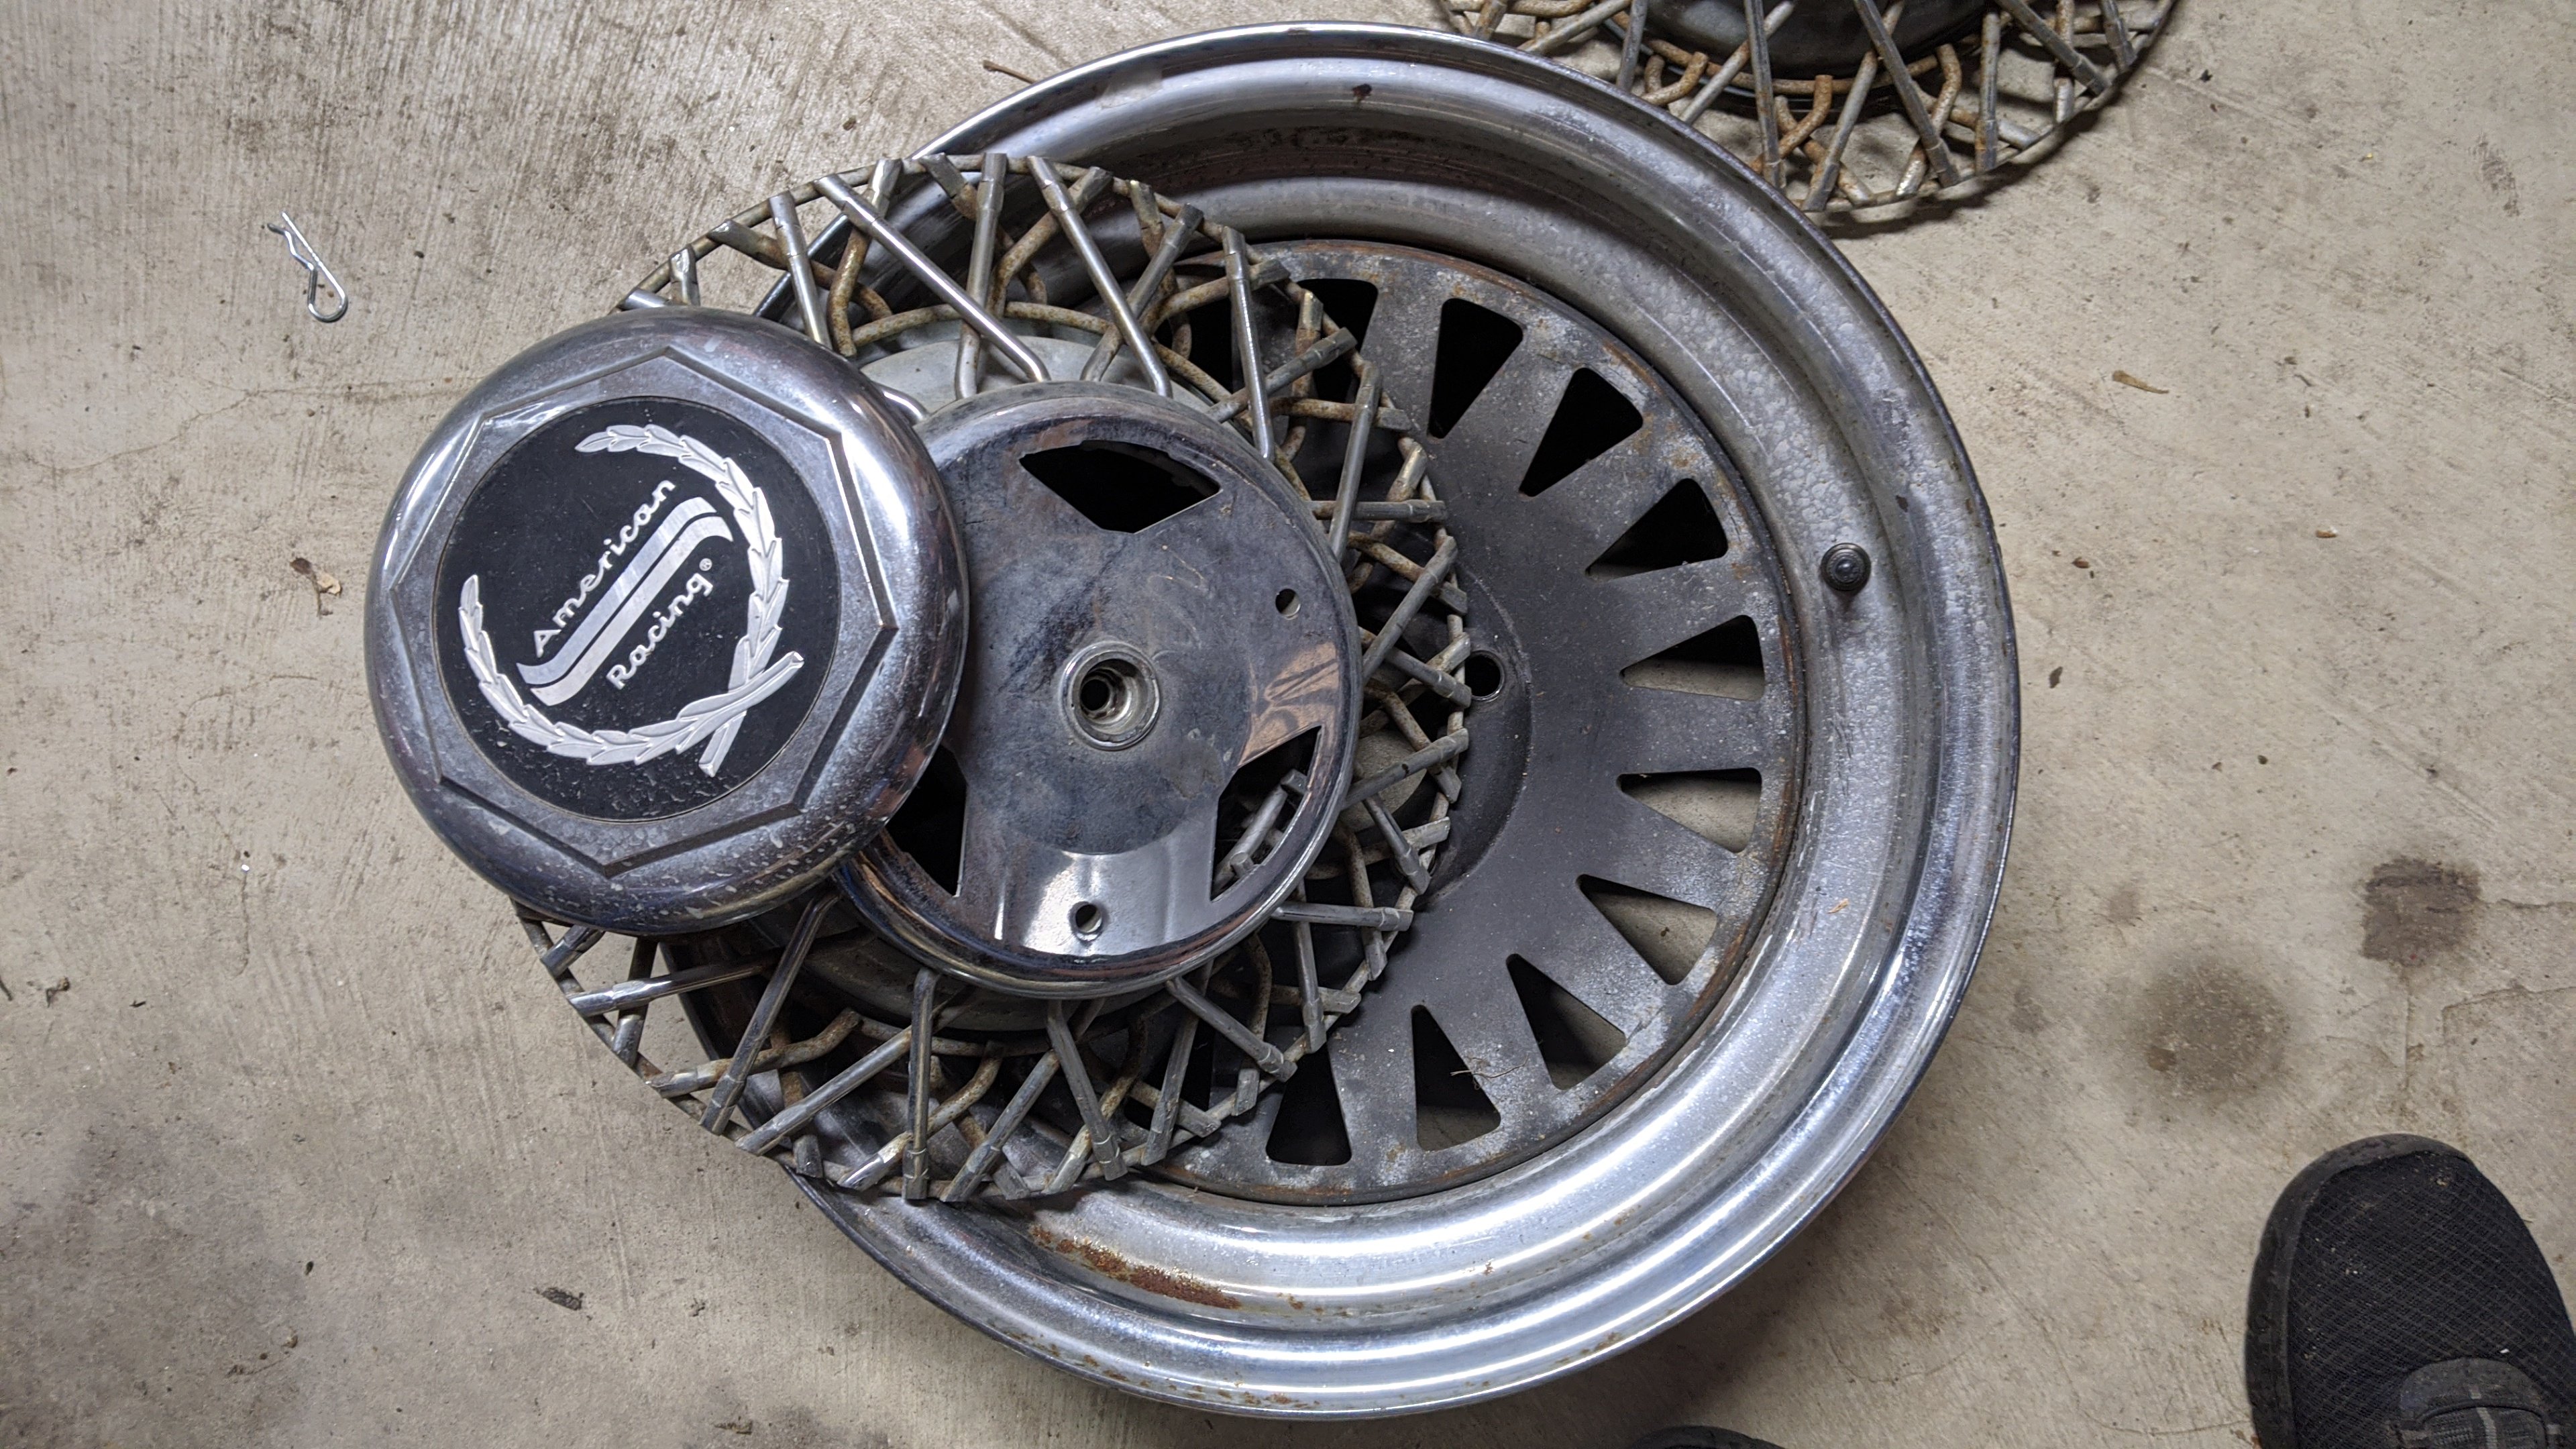
12 minutes ago, ACAGENT99 said:
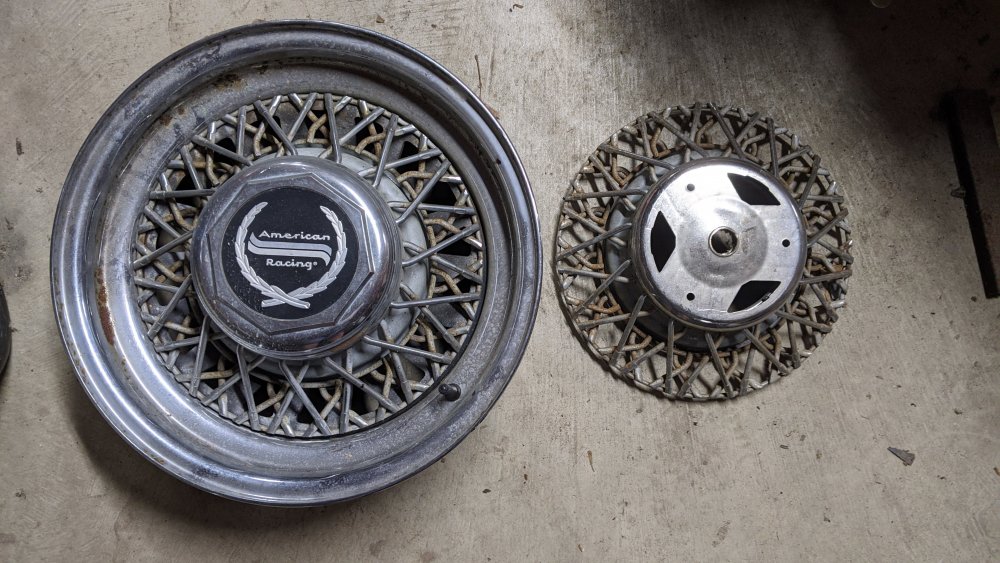
Mr. Vines, can I assume that the 5 Borrani wire wheels you have fit all early Avanti's ? I have been looking for a set for my 1978 Avanti II, R Q B 2802 . Mine came with the stock 500 mag set of 5. So do I understand that you have a set of Dayton wire wheels on your '63 and still have the set of 5 Borrani wire wheels ? Since they are older wires, are they bolt on or the knock off type ? What shape are they in and are they for sale ?
AL acagent99
Just for grins, my 83 Listed 4 wire wheels for $1160. These are the ones that came with the car when I bought it.
They are for sale.

-
On 9/2/2020 at 11:25 AM, AndyM said:
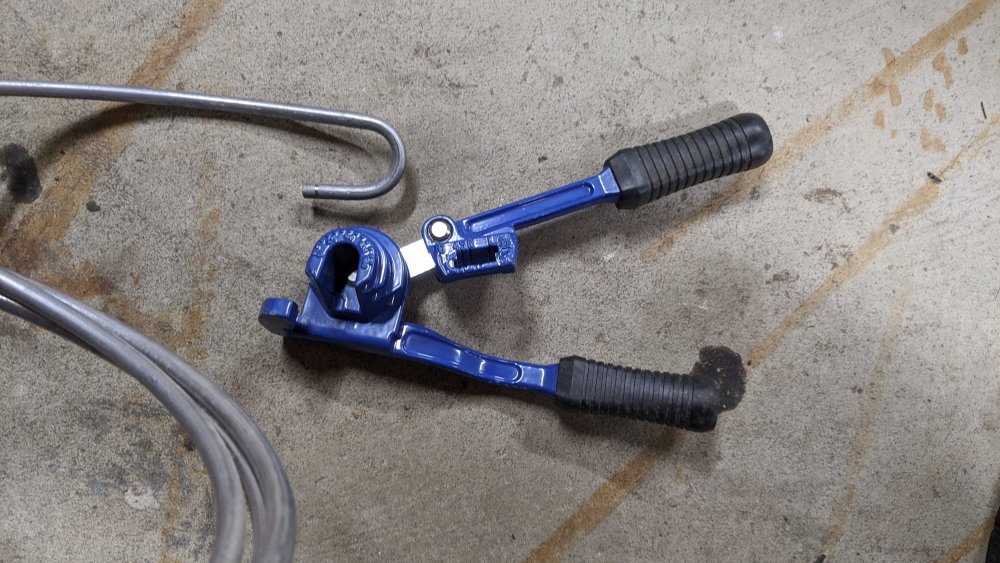
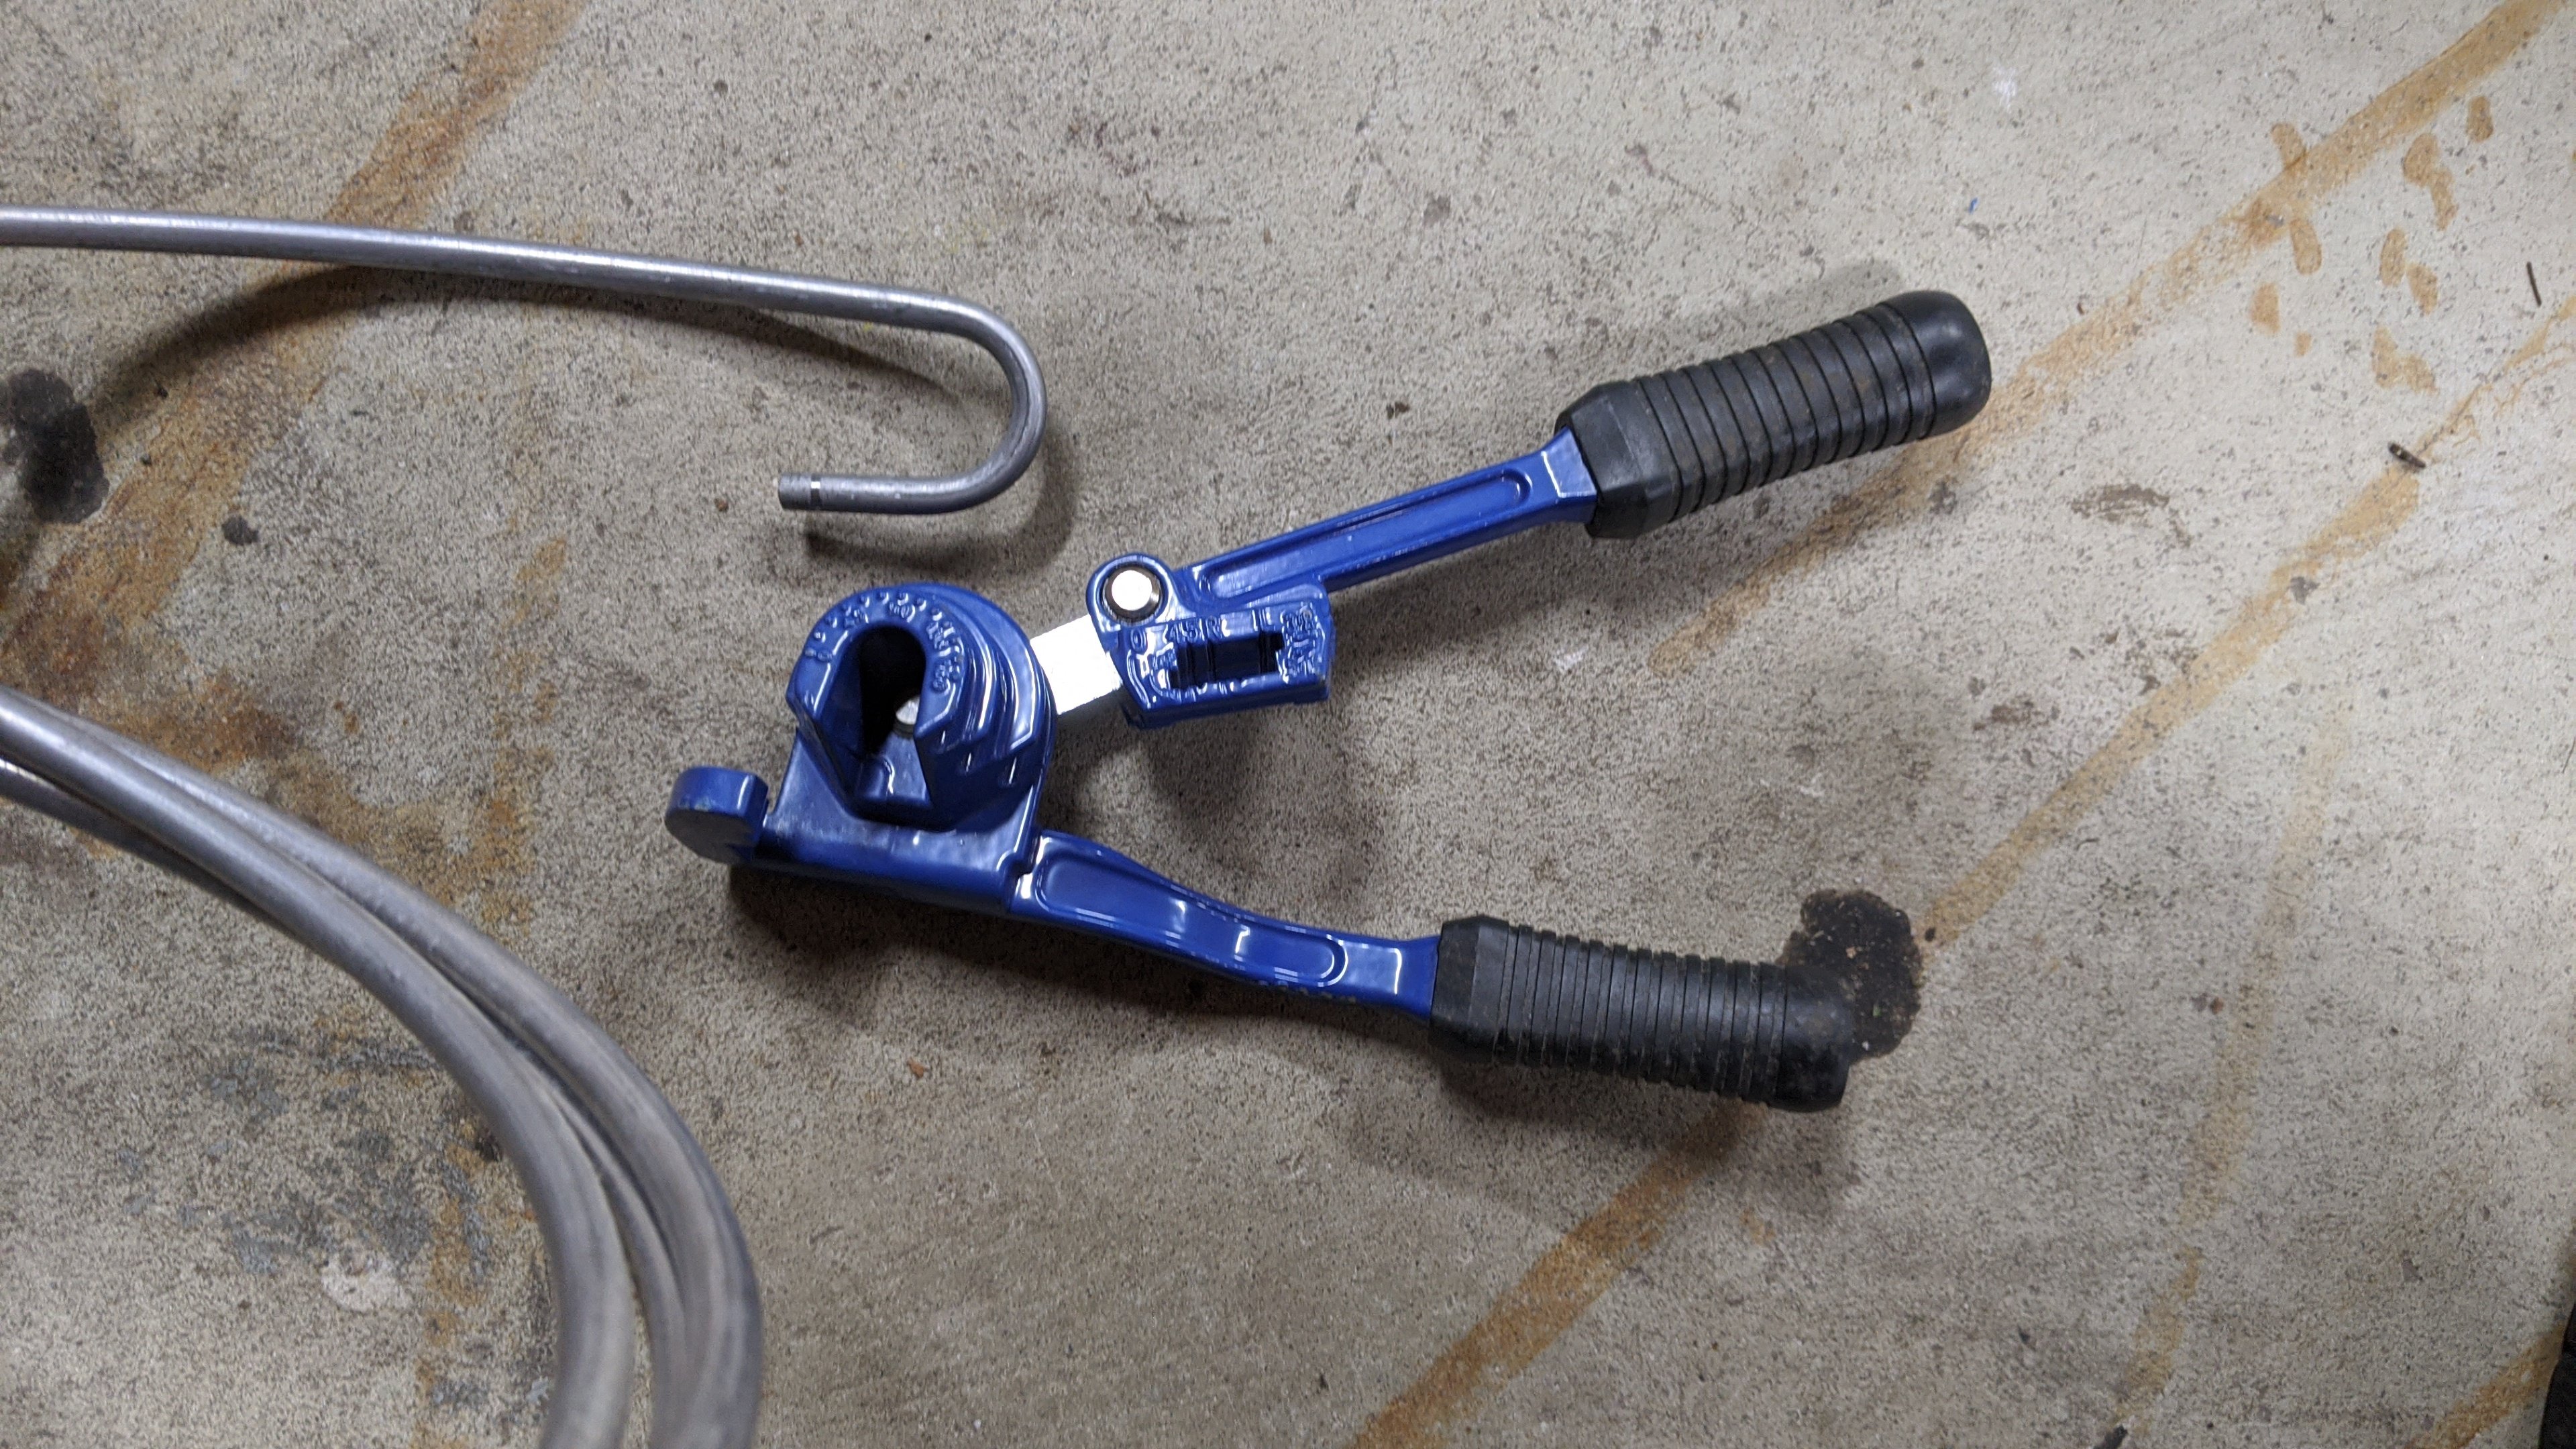
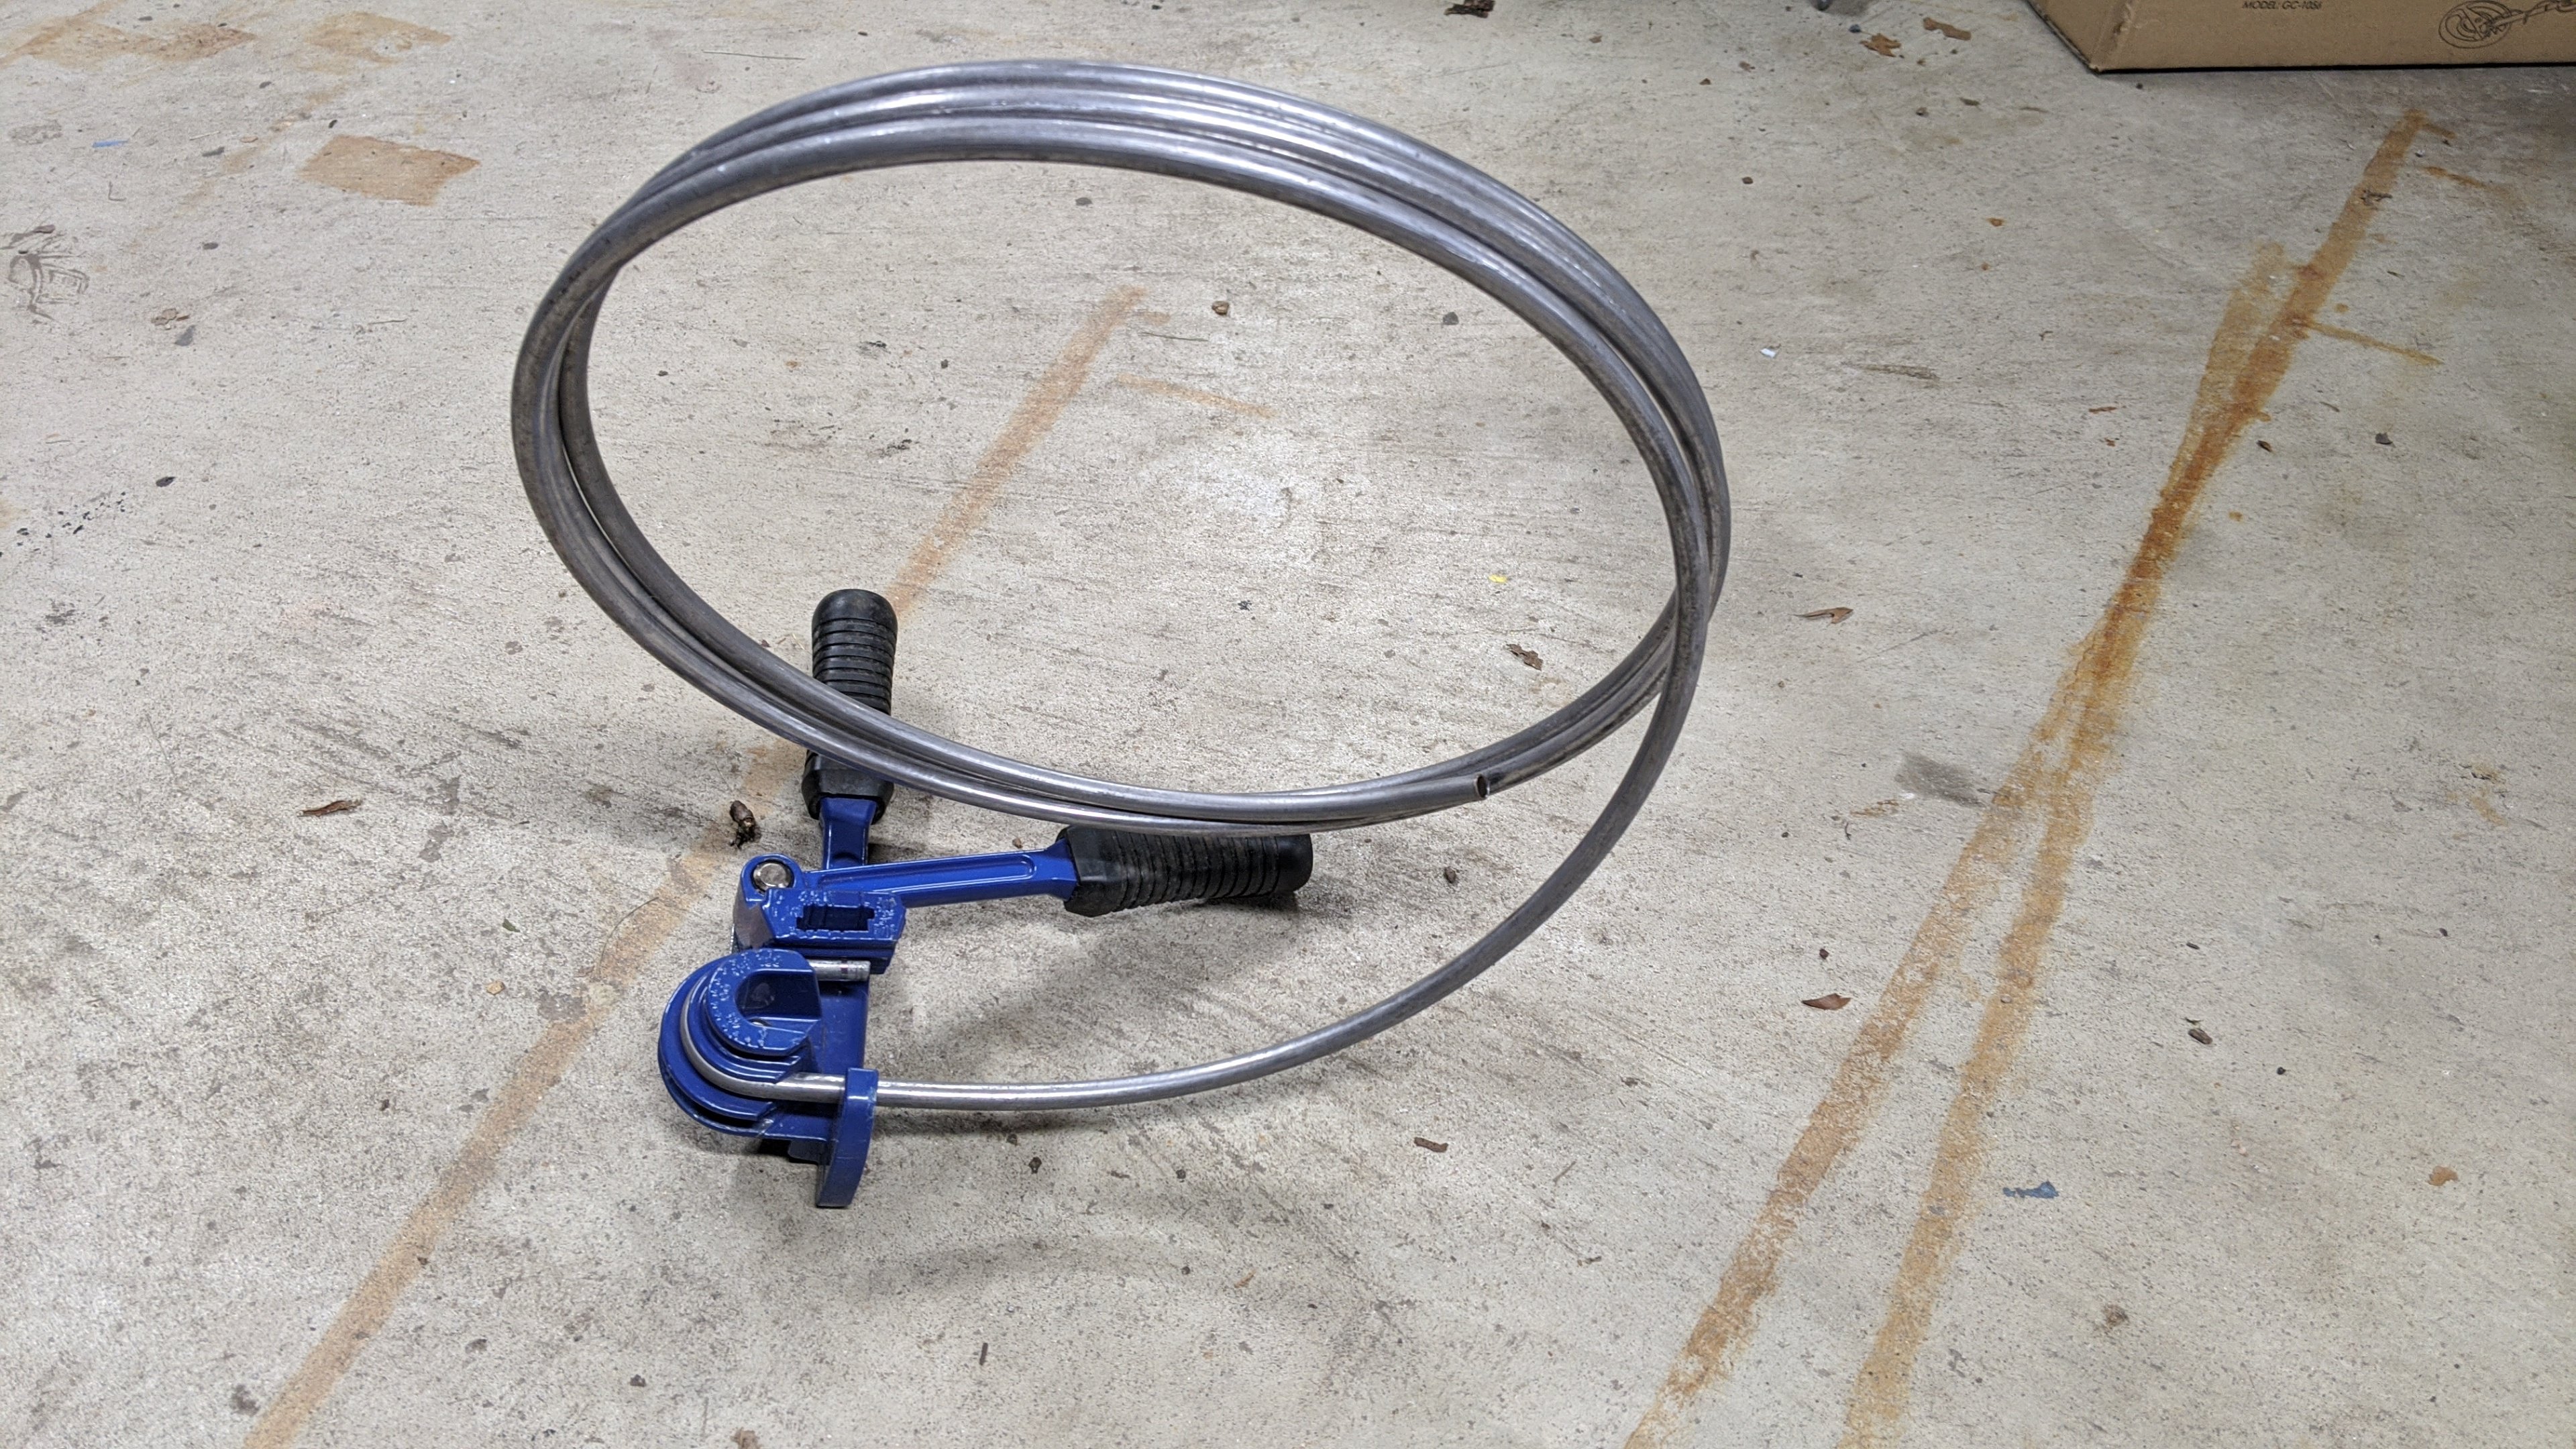
Ugh, we tried that, and the bends are a pain in my ass. Maybe I need a better bender, because the one I bought from the local parts store was a POS and caused all sorts of kinks, even with very careful pressure. Got any benders you recommend?
It's been long enough that I didn't remember but I've used this bender on up to 3/8" steel tubing. I couldn't find 3/8" but here is 5/16" bent just now. I know there is a big difference between 5/16 and 3/8 but this has worked for me in the past.
The problem is I don't recall where I got nor does it have a brand name on it. It's probably from Amazon but I've had it for years and it works. Just clamp the fixed arm in the vice and slowly bend the tubing. If you don't need as sharp a bend you can use it like you are now using the vise, bend a little and move some.
I believe the reason this one works is the curved area goes farther around the tube than the cheap ones.
I've used the sand idea and it's another method but it's very dependent on very fine dry sand and gentle bends. Certainly worth a try on your tubing though.

-
Just read in the recent AOAI Magazine a short article by Dan Booth Nostalgic Motors about the filter being available from him. Here from his site.
https://www.nostalgicmotorcars.net/store/p48/Power_Brake_Booster_filter_and_hose%2C_New_N.O.S.html#/
-
Try Ebay


Just bought a 1988 LSC Coupe and 1988 Convertible and cannot open hood on either car (added photos)
in 1984-91 Avanti
Posted
Looking straight up behind the passengers front tire on my 83. Yours may look somewhat different as you have a later chassis but there should be an opening there.