


WayneC
-
Posts
537 -
Joined
-
Last visited
Content Type
Profiles
Forums
Events
Posts posted by WayneC
-
-
Appreciate your thoughts, Gunslinger.
I've owned and worked on five different Avanti's since the mid-70's. I've owned this Avanti since about 1979. I converted all of them to silicone fluid, bleeding never was a problem, nor was it on this Avanti until now. Like I said, the car sat for quite a while, and when I started getting it roadworthy again the M/C was empty, so I put in a rebuilt one (and the shop I took it to later changed-out my "new" one for a second rebuilt M/C, thus my concern over their competency). But I had trouble bleeding the right front brake, which is why I ended up having it transported it to a brake shop. I spent several long bleeding sessions over the course of a week (using manual pedal-pump AND MityVac, wore my hand muscles out squeezing the MityVac) before I gave up on it. Considering that after I got it back from the shop and found it still braked very poorly, and that I couldn't bleed it at the line end upstream of the right flex hose, and that I'm not losing fluid or seeing bubbles in the M/C reservoir, I don't think I can blame the RF cylinders or the booster for the bubbles.
I'm aware of inferior brake pad issues, I've had them, so I generally buy pads from Nostalgic. But brake pads have nothing to do with my not getting a hard pedal or my inability to bleed the right front. If the booster were leaking air into the brake system somehow, I would expect the bleeding issue to show up in the left front first (not the right), and I'd also expect the reservoir fluid level to go down. I consider the inability to bleed to be a key symptom.
I will check the booster... that's a possibility I hadn't explored.... but I never did get a good high, hard pedal, which I blamed on my inability to properly bleed the front right brake. Just trying to figure out why I can't get it bled properly. Booster shouldn't enter into that... I don't seem to be losing fluid, nor am I seeing bubbles in the M/C reservoir. Last issue I had with a booster was on this car, and it manifested itself in a high pedal with the front brakes being partially applied all the time; a booster rebuild solved that. I could just get the booster rebuilt again, but I think that's just throwing parts at the problem rather than solving it.
-
Good point, Gunslinger... according to their price list, for about $650 + shipping you get calipers, rotors, pads and hoses; and if I'm interpreting the installation instructions properly, the only parts you need supply are some grease seals, and you must machine a tab off the supplied GM calipers (wonder why Turner doesn't do that step, and supply the seals with the kit?).
New XKS stainless brake cylinders alone would run $600.
Don't know the price for re-sleeving my originals.
It's not an immediate need, I recently installed a set of new wheel cylinders and flex hoses I had in my parts stash and I was thinking about having the old wheel cylinders re-sleeved.
***************
Actually, I'm having a weird issue with the brakes (the car has been sitting for several years)... probably too complicated to go into here, but after replacing the front pads and a leaking master cylinder, I had difficulty bleeding the brakes (both pedal-pump method and MityVac) so I had the car towed to a brake shop. I supplied them with all the parts I had in my stash, and they installed a (second) rebuilt master cylinder, new rear shoes, and new front cylinders... pretty much everything!
When I picked up the car they said that the rear brakes were squeaking and that the brakes didn't feel quite right but that I should drive the car for awhile to see if it would "wear in". It didn't, and in fact braking was so weak it felt to me like only the rears were working. I had to leave on an extended trip and didn't get the car back to the shop. On my return months later, I tried again to bleed the front brakes, but was unsuccessful bleeding the right front; I even tried bleeding the line before the flexible hose, using the MityVac, and that didn't work (never got solid fluid). So apparently I have a problem upstream, somewhere between the master cylinder and the flex hose.
Since I don't seem to have a fluid leak (the M/C stays full), and since the car doesn't pull to the left when braking, I am baffled.
I now don't trust the shop, their expertise seems to be just replacing parts, so I haven't had the car transported back to them.
I have very little knowledge about how a proportioning valve works.
Descriptions of proportioning valves seem to tell you what they do, but not how they do it.
Since I don't seem to have a fluid leak, is it possible the proportioning valve is simply not directing any pressure to the front brakes? Didn't see a warning light, but the light could be non-op.
That still may not explain why I can bleed the left front, but not the right front.
Possibly an air leak in the hard line to the right brake that doesn't affect the left brake?
...But then, why wouldn't I get a profuse fluid leak when pressing the brake pedal?
Hard to see much with the car parked on my sloped driveway, I assume there is a splitter in the front brake line between the proportioning valve and the brakes, I just don't know where it is.
-
Anyone had their stock front brake cylinders relined recently?
Where did you send them?
Stainless or brass?
Cost?
Thanks,
Wayne
-
Having never attempted it, I can't really comment, but I'm curious: what were the other methods you'd heard about?
I probably would have tried to use something with a hook, sort of an ice pick with it's pointed end bent back on itself, to pull/stretch the spring and finesse it onto the anchoring tab.
What you did seems to have worked out fine and didn't require any special tools (the extra set of hands might be an issue for me, though).
-
You can resize a photo with nearly any photo editing program, or...
To resize photos I use 2 programs:
PixResizer (can do 1 pic, or a folder full all at once, but doesn't handle drag & drop to it's logo)
http://pixresizer.en.softonic.com/
Fast Image Resizer (drag & drop your photo onto it)
-
I'm not all that knowledgeable, but here's my take:
Power steering is an add-on option, I don't think anything changes in the steering column or box. Basically a pump, a hydraulic control valve (with pitman arm attached), and a hydraulic power steering assist cylinder are added; on many cars a manual steering shock absorber is replaced by a power assist cylinder, but in looking at the parts manual, it does not appear that manual-steering Avanti's used a steering shock absorber.
The power assist cylinder (1551562) can push or pull to assist the wheels to turn (by pushing or pulling on the bellcrank), depending on whether you are turning right or left, but something must tell it which way you want to turn. That's the (1556068) valve attached to the pitman arm, with that valve being operated by the "pivot ball" you reference as moving... the ball has to move to cover/uncover the proper hydraulic ports to direct fluid pressure to either push or pull that power assist cylinder rod (with force in proportion to the resistance the wheels offer to being turned and the input the driver makes by turning the steering wheel).
Think of that pivot ball being like the lever of a kitchen sink faucet, which can give low or high flow (force) and either hot or cold water (analogous to direction), and the lever must move in order to control those parameters.
So, movement of that pivot ball would be normal, especially if it is pushing against hard resistance (like when the wheels aren't rolling and you turn the steering wheel).
Don't be concerned about movement, do be concerned about fluid leakage.
-
Here's a photo I took of Van Dyke's Avanti in the Petersen Museum back in 1997...

-
Maybe these links would be of some help:
http://www.gomiata.com/nastwhspadki.html
http://www.classicowheels.com/hubadapters.htm (I suspect the bolt pattern is the same as a GM column, since GM made the Chrysler columns)
http://www.amazon.com/Nardi-Personal-Adapter-Polished-Steering-4300-00-0003/dp/B004JKBCMW
-
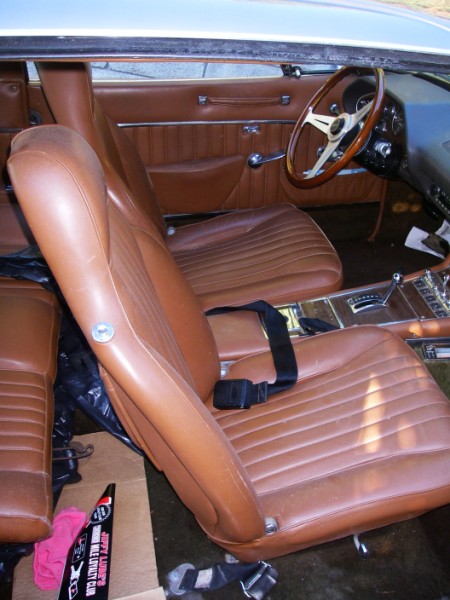
Avanti used Recaro seats (optional) or their own seats (standard).
I assume you mean the standard seats and that the "button" is the large round chrome button near shoulder height on the seat back?
Have you tried Nostalgic?
-
I would suspect the air cleaner... check to make sure there is a gasket between the air horn and the air cleaner, and that the air cleaner base is flat (no dings/distortions). And check the vacuum hose to the transmission.
-
You didn't say what problem/issue you are trying to resolve. Generally, the best approach is to verify that the carburetor has the factory stock parts, all clean and in good working order, set to Holley factory specs, with a fresh fuel filter. Once it's running smoothly, then go from there if you're not happy with those settings and are trying to tune for a specific condition/environment.
Can't help you directly, but here is a link to a Corvette forum search on the 3367, which should be interesting to read (includes recommendations for rebuilders if you don't feel up to that task):
http://forums.corvet...archid=35342645
Here's some hits I found on Google:
http://v8tvshow.com/...nt/view/110/28/
http://www.junkyardg...ley/tune01.html
http://www.nastyz28..../tech/htune.pdf
I assume your '66 would be running AC 45 spark plugs, which probably aren't easy to find these days; here is a link to some currently on eBay:
Don't settle for something that just has "45" as part of the number, except that R45 can be used if you aren't using resistor spark plug wires.
If the spark plug electrodes are clean when inspected after a run, gapped correctly, and the wires are in good shape and snug, there should be no need for fancy (expensive) spark plugs.
-
I must admit I own earlier Avanti II's and haven't looked closely at the trunk latch setup on my '80, which uses a solenoid to unlatch the trunklid. I usually lurk on the 66-83 Avanti II forum, but occasionally I peruse this forum, so please forgive my uninformed question:
Looks like a good idea, but where do you run the cable, ie, is this the same as original (for what year?), where does it attach at the ends and how do you get to the cable to pull it when needed?
Thanks,
Wayne
-
Regrettably, Delco no longer makes the maintenance-free battery.
-
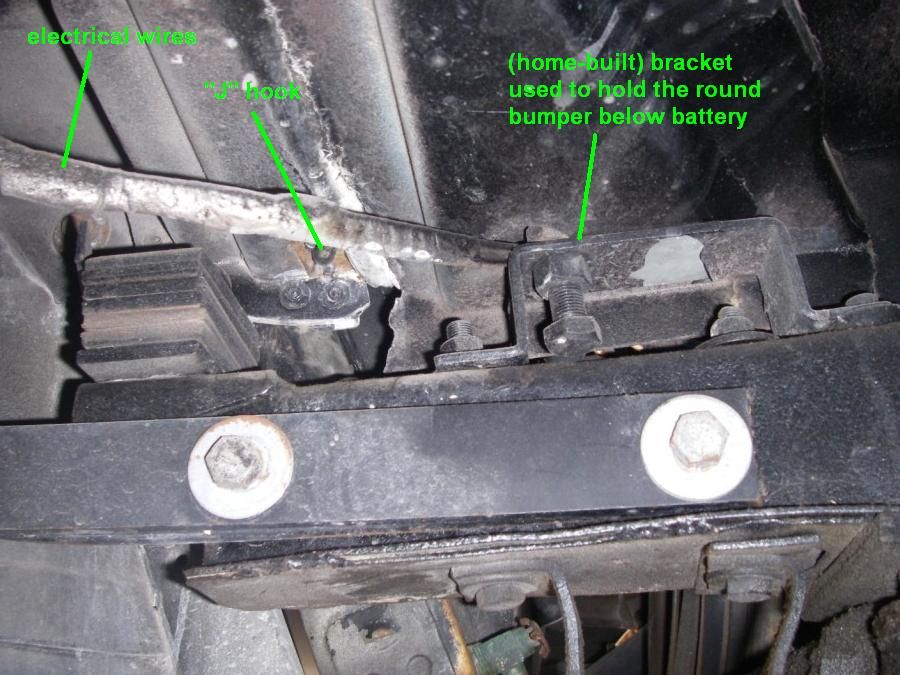
Here's a photo of the bottom of the battery box on my '71 Avanti (modified by me to add a round rubber support bumper)
http://i1032.photobucket.com/albums/a408/waynecpb/71%20Avanti/71Avantibatterybox_zpsb4cca794.jpg
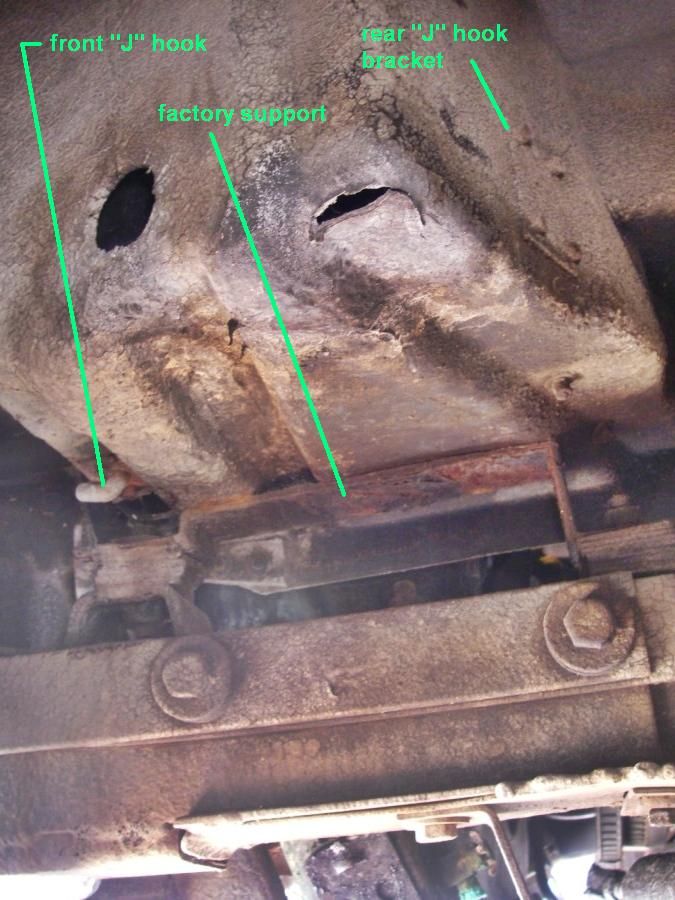
And a photo of the bottom of my '80 Avanti, which is different (has a better support, which I believe to be as-built by the factory)
http://i1032.photobucket.com/albums/a408/waynecpb/71%20Avanti/81Avantibatterybox_zps163628aa.jpg
-
Well, battery tray or no battery tray, you have the problem finessing the battery. Use a mechanics fender protector to try to avoid the scrapes. Removing the radiator reservoir and its connecting hoses gives you more room for a straight shot for the battery, but it's not easy removing those items, either.
-
That would be great. I'll take any help I can get!
I removed the battery on my '71 today and took a couple of pics for you...
http://s1032.beta.ph...brary/71 Avanti
1339477 is the same battery retainer I have on my '71, not sure where the plate you referenced would be,
(maybe below the forward post/rod)... I'll see if I can get below the car for a few pics.
-
I can't answer your question directly, but spring rate can be calculated based on the steel thickness, coil diameter, number of coils, free coils, and free height. You need someone with some expertise to input correct data...
http://www.gtthunder.../coilsprate.htm
http://www.pontiacra...spring_rate.htm
Since the Stude spring is of uniform coil and wire diameter, it should be easy to calculate.
Spring rate for a free spring and the spring rate as installed in the A-arms are different animals, when you want the rate that the car actually feels, you need to get into precise A-arm measurements.
There are companies that can make springs to whatever specification you want, and can probably plug the info about your present springs into their computer program to calculate the current spring rate and determine how to produce the rate you'd like, or suggest specs based on your desires. for example:
http://www.coilsprin...om/classic.aspx
http://www.eatonsprings.com/studebaker.htm
Changing the rate can lead to other issues, such as how the car sits at rest, whether it bottoms-out on bumps, what shocks are needed, how the car is driven, etc. Probably as much art as science.
-
I have a plug socket with a hex outer shape at the ratchet end... haven't done plugs for a long time, but I know I used a box wrench with that socket to get #7 plug from beneath the car. A ratcheting box wrench would probably come in handy with that same socket.
I also was able to get several plugs through the wheel wells (using a ratchet with a long extension inserted between the upper A-arm and the fender, wheel removed).
-
My opinion:
I believe the rear crossmember is there to support the spare tire, which otherwise might vibrate the fiberglass well it's sitting in (or the surrounding floor) enough to eventually break the fiberglass (through fatigue), or without that support the trunk floor may sag if it is loaded with luggage or whatever.
I'm not sure about the hog troughs, I don't know enough about how they are fastened (I've never replaced any), and I generally bow to Dan's expertise... but I suspect they may be there to add structural strength to the body.
In 63-67 Corvettes (coupes, especially), there is a stamped sheetmetal "birdcage" that acts as a dimensional stabilizer and strengthener to the fiberglass panels; the sheetmetal cage supports the dash and door hinges, runs around the windshield, doors, etc, and is welded together as a framework first, to which the fiberglass is bonded as the body is built-up in jigs. I've never seen an Avanti that's had all the fiberglass burned away, and any such metal "birdcage" (or "roll cage") structure pieces are not shown in the parts manual because they aren't considered field-replaceable parts. I know that on Corvettes, the birdcage is prone to serious rusting if the windshield seal has been leaking (usually at the base of the door hinge pillars where they meet the door sill frame mount area, and around the door hinge mounts, the base of the windshield frame, etc)... it is near impossible to find a used birdcage in serviceable condition, and even if one can be located, it is a prohibitive amount of work to replace large sections of birdcage, and then repair the fiberglass bonded to the birdcage; serious corrosion damage to the birdcage in multiple areas is considered fatal in most cases, requiring a salvaged donor body.
By the way, although I'm not positive, I don't think Dan Booth worked at Studebaker, which was based in South Bend IN. He's lived in SE Michigan at least since the early 70's when I first knew him (probably has all his life). He ran a small auto repair business back then (first with a partner, then on his own), personally owned Avantis, and was the go-to guy for Avanti repairs in the greater Detroit metro area. He later became a dealer, too, selling new and used Avanti's. In the mid-80s Kelly decided to stop supporting older ('84 and prior) Avanti's, and also decided to sell new Avanti's only through established US car major-brand dealerships (which meant Dan's Avanti dealership days were over). In financial trouble, Kelly also decided to sell off all his parts stock specific to Stude-chassis models (1984 and earlier)... Dan bought that parts inventory, and opened his current location of Nostalgic Motors in Wixom MI.
-
-
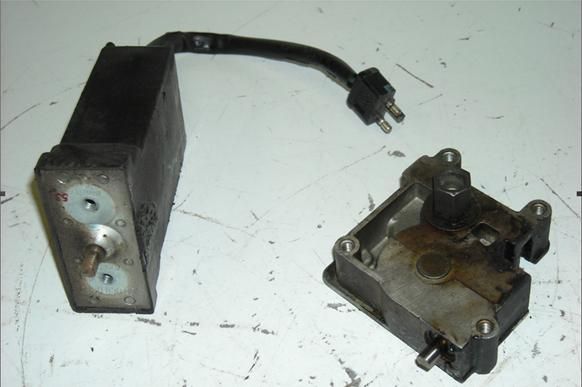
That was helpful, thanks!
Just out of curiosity, was the 12v electrical connector the same, too?
To post a picture, you may need an account at a host location, like Photobucket.
Then you upload photos to an album in your Photobucket account. When you view the photo you placed in the Photobucket account, they give you "image links" to the right of your photo and if you click one of those (like "direct link") it pastes the link in your notepad so you can then use a right-click "paste" to place that link in your posting here.... I'll try that now:
http://i1032.photobu...zpsf362c7c2.jpg ...the reader clicks the url to go see the post
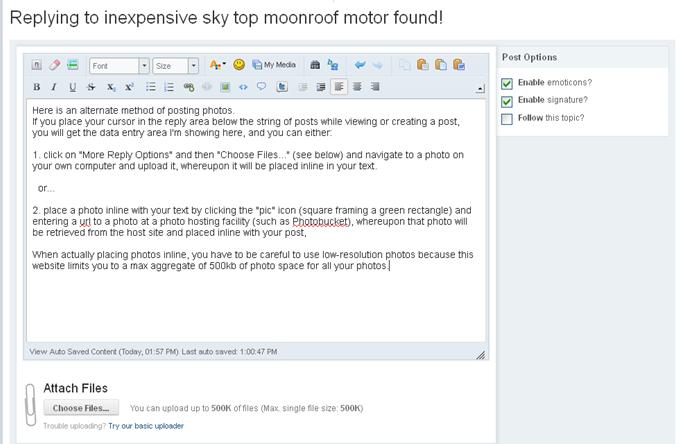
Alternately, you can attach a photo (or photos) to your post, in which case the reader clicks the attachment link to see the photo(s)... that's done by clicking on "More Reply Options" and then on "Choose Files" button below the posting area and navigating to each photo on your computer you wish to include in the attachment.
Or, you can place a photo inline in your text by clicking on the icon that is a frame with a green picture, and placing the url of the photo you stored at your photo-hosting site (photobucket) into the reply field, which puts the photo inline with your text.
So, 3 different approaches that I'm aware of:
1. put a link to your photo (at a photo-hosting service) into your text. Reader clicks the url link.
2. add an attachment containing photo(s) to your post (uploaded to AOAI directly from your computer
and you are limited to 500kb total size of photos). Reader clicks the attachment link.
3. place photos inline with your text (said photos must be resident on a photo-hosting service);
pictures appear in your text.
-
Well, that's a little more info, thanks, but I suspect some folks are like me, I sometimes squirrel away rare spare parts, if I find them at a bargain price, with the expectation that someday they'll be needed and may not be readily available. I don't know what Avanti sun or moon roof motors look like. I did peruse eBay listings for Mercedes motors, which differed wildly from each other. I certainly won't be tearing my roof liner apart to find out what the motor looks like unless/until I actually need to do so. I was hoping you might post a photo or a link to an eBay listing that has that particular motor pictured very clearly so as to be easily identifiable. Even when I don't intend buying parts in advance, I save articles about repairs in Word documents, with pictures, for my future reference in case I DO need the information.
-
If there were any markings on the motor you found (part numbers), please post those so others will know what to look for. What models of Mercedes did the eBay listing say it fit? Sunroof or moonroof?
What did you have to change on the coupler to make it fit?
Inquiring minds want to know :>)
(and pics would be nice, for example the pics used for the eBay listing).
-
I installed a vacuum cruise unit on two Avanti's ('66 and '71) many years ago, made by the common aftermarket supplier at that time (I'm having a senior moment, can't remember the name, probably "Dana"... they were vacuum units with a magnet sensor on the driveshaft). I agree with Bob that the choice today is probably a Rostra unit, coupled with a column switch that GM used back then (junkyard item or buy a similar switch):
http://www.ebay.com/...0618665&vxp=mtr
http://www.rostra.co...l-by-rostra.php (but expensive)
A new switch very similar to the old GM switch is available here:
http://www.thecruise...3/0018/250-3032
A real problem today seems to be the availability of the old vacuum bellows units, anything older than mid 1980's (the simple ones without all the electronic connections, just an air tube connector)... nobody seems to be reproducing them.

Re-sleeve front brake cylinders?
in 1965-83 Avanti
Posted · Edited by WayneC
Warren, I looked at the Hyedracyl website, and it appears the 2 1/8" SS wheel cylinders are priced at $240 each... that's $85 more than the XKS wheel cylinders!
http://xks.com/i-6916970-gr-64932067ss-wheel-cylinder-2-1-8-stainless-steel.html
http://www.hyedracyl.com/etype.html
On your rear brake shoes... is it possible they had been installed in reverse (front shoe where rear shoe should be)?
As for front cylinders seizing... I first used my originals, which showed no sign of leakage, but then the brake shop put in the brand new set from my parts stash.
I live in sunny CA, corrosion is not much of an an issue here (sun & heat are the great enemies; I lived in Michigan through the 1970's decade, so I'm familiar with corrosion)
Brad, good point for readers; I am aware of the pushrod adjustment, and I did that adjustment when I installed the first M/C, and I double-checked the adjustment for the M/C that the brake shop installed.
Again, my issue appears to be air bubbles in the right front front brake hard line that I haven't been able to eliminate despite extensive bleeding, but it's hard to understand why only the right, and why the air bubbles persist (even when bleeding from the steel brake line itself, ahead of the flex hose), yet apparently no fluid leakage/loss when everything is connected and the brake pedal is pushed. Pedal is soft, but not sinking.
When bleeding with the pedal-pump method, there was no sinking pedal with the wheel cylinder bleed valves closed, but the pedal was kinda spongy & middling height and never did reach the expected high & hard condition.
When I had the car on the road after the brake shop worked on it, the braking was so weak as to be downright scary to me; locking the wheels would have been impossible. The braking was fine before the car was left sitting a few years.
I did find a 5-year-old quote on stainless re-sleeving by "Karps Power Brake" in CA (east of L.A.)... it was $60 each + shipping both ways. Likely more now. I would also need to buy & install seal kits. http://www.karpspowerbrake.com/