


WayneC
-
Posts
541 -
Joined
-
Last visited
Content Type
Profiles
Forums
Events
Posts posted by WayneC
-
-
I generally place the jack under the frame beneath the firewall, or just in front of the frame kick-up for the rear wheels.
I prefer to use ramps if the car is mobile and I'm not removing a wheel.
-
What in the world is " leathers due "?
-
I assume you're sure the system is not charging, and that its not the dash gauge wiring that has an issue. Did you open the regulator box to see whether there is anything obviously wrong inside it?
Does your voltage regulator have 3 terminals, or 4, or ?
NAPA doesn't list a regulator for a 1966 Avanti, but they do list one (row of 3 terminals) for a 1964 Avanti:
https://www.napaonline.com/en/p/ECHVR126
....Or does your old regulator look like this instead:
https://www.napaonline.com/en/p/ECHVR32
I don't know for certain what Avanti Motors used in 1966, but if you have a row of 4 terminals on your regulator I'd guess one of these would work
https://www.napaonline.com/en/p/ECHVR142
-
Another add: IIRC, the lower coolant hose has a spring inside it to keep it from collapsing under suction, so when you change the hoses, check for that spring.
-
Great diagram, thanks for posting it.
-
I'm not an electrical guru, but I have chased a few shorts on my various cars over the years. Getting too old to do much of that anymore.
I assume everything was working before you took that panel apart? What was your first indication that you screwed something up? Did you see sparks or smoke? When you say you substituted the "a/c switch", did you really mean the heater switch? Actually, the headlight, instrument, and heater switches all have the same part number, so you probably eliminated the switch as the problem, assuming you (re)wired it correctly.
Does the horn work? Do the interior lights work? Do the instrument panel lights work? Does the heater work? Are the headlights dead on both low beam and high beam? Obviously some circuits (excepting headlights and parking lights) in the headlight/tailight circuits ARE working, and the issue is probably forward of the instrument panel. So, assuming the FRONT turn signals are working, you are looking for wiring components common to the headlights and parking lights, either positive or grounding circuits. I'm not sure, but I'm wondering if the headlight hi/low beam switch provides ground for both the headlights and the parking lights.
The Stude Avanti shop manual (hopefully you have one) has a fold-out electrical diagram and a list of the wires called out on that diagram. Some time ago I scanned the diagram (half at a time) in hi-res, then joined the scans. That way I can view the diagram on my 27" computer screen, enlarge parts of the diagram I need for a specific task and print those enlarged parts, then I use hi-liters to trace circuits related to the devices I'm troubleshooting. Using that method you can figure out what wires (and/or fuses and circuit breakers) are common to the headlights and parking lights (but not related to the turn signals and brake lights), see where they terminate, and try to test those paths for continuity.
I think the power for the headlights comes through the circuit breaker at the top of the fuse panel on the firewall, to the upper left of your left knee, but I can't recall if it automatically resets.
-
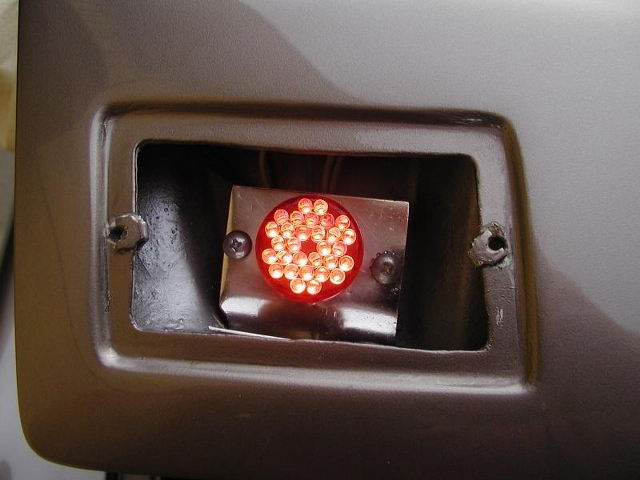
Appreciate the link, Bob.... I assume you also need to add a 150 ohm resistor to change brightness on a panel? Also, how did you address the blinker issue where LED's don't have enough resistance to activate the stock blinker unit?
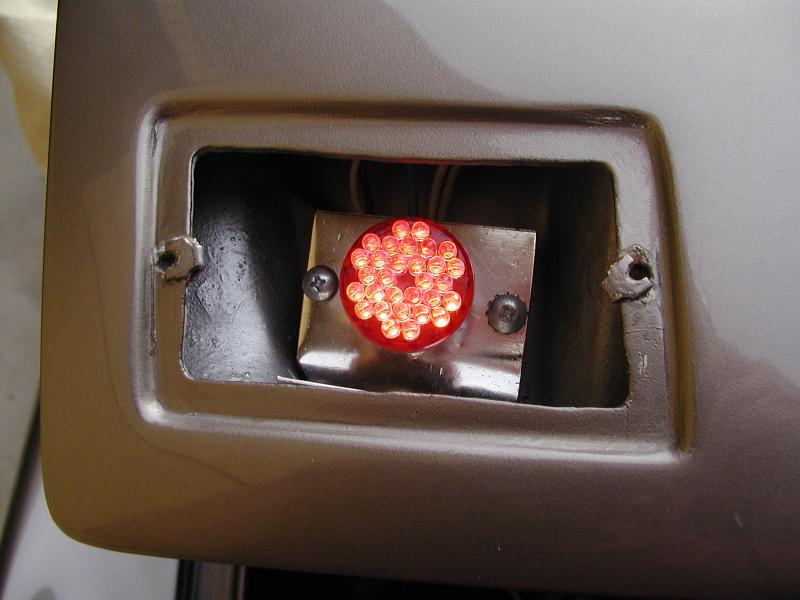
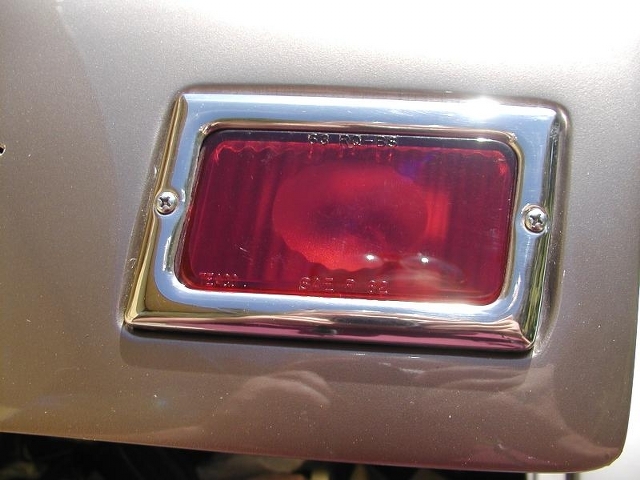
My interest is mostly academic, hopefully gleaning info for others who read your post... I converted my '71 backup lights to LED tail lights about 8 years back (using LED 1157 bulbs and sockets, and I may have added a resistor for the blinker... not certain because I think I retained the normal 1157 bulbs in the tail lights).
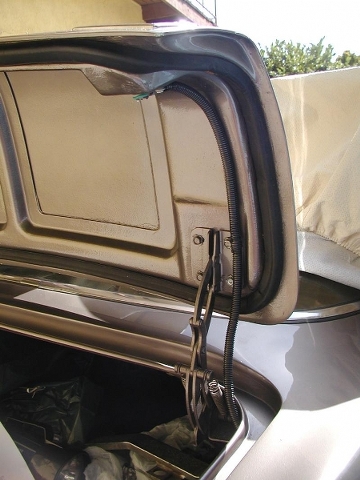
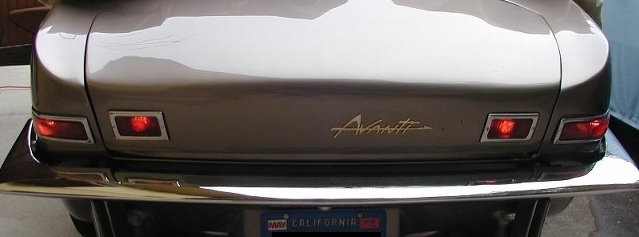
I wasn't satisfied with my conversion, particularly the klutzy wiring, and would like to have even brighter lighting. The backside of the decklid has an unfinished look that I never figured out how to cover. It may be possible to run the wiring through the raised ribbing of the decklid to make things neater.


-
Thanks. Too bad SuperBrightLEDs.com has discontinued the 1156/1157 panels.
I was looking in eBay listings and noticed a number of LED panels configured for internal car lighting, which may lend themselves to tail light applications, except that (1) they are white LED's and (2) they would need to have 1156/1157 bases added (but I'm not certain that would work with LED's that aren't meant to be tail lights, nor do I know what resistance value needs to be added to dim them)
-
Just out of curiosity, did you use white or red LED's?
And, how do the LED's go from normal tail light brightness to brake light brightness... a normal stoplight 1157 has 2 filaments, I think (so do only half the LEDs illuminate for tail light and then all for brake light? or is it solely the resistor that accomplishes that by somehow making the LED's glow brighter? Is the current switched to go through the resistor with the stop lights vs no resistor with normal tail light... or what?)
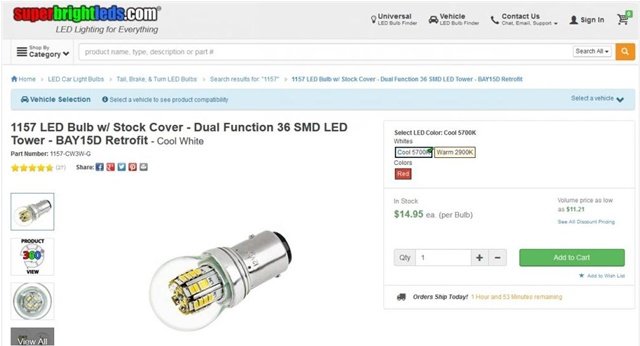
This might be a simple yet viable choice:
-
Very nice writeup, thanks!
But... which variety of 1157 panel did you choose? Those panels are in the process of being discontinued, so only red 15 degree panels are now available.
-
Very interesting question that I haven't pondered nor can I recall seeing any "how-to" articles. Perhaps its been covered in Avanti Magazine.
Don't forget to drain the fuel tank.
I think you can purchase heavy truckers load straps at Harbor Freight.
I faced that dilemma when I did a body lift in the mid 1980's on a Corvette, all alone without a lift; the recommended method on a Corvette is to invite 8 strong friends do the lifting, but I was new in town and didn't have 8 strong friends available to me, nor a tall garage. Here's my best recollection of how I did it...
1) removed the engine/transmission and bumpers/brackets and freed all frame mounts, steering column, brake lines, electrical wires, and other attachments.
2) lifted the body rear a few inches with floor jacks (using a 2x8 across/beneath the floor pan in front of the rear wheel frame kick-up to cushion the body from the jacks) to clear the frame enough to slide a long 4x4 across the frame rails beneath the raised body (sticking out about 2 feet on each side), then lowered the body onto the 4x4
3) moved the jack and repeated that procedure at the front firewall, using a second 4x4 (would've been smart to use long bolts to bolt the 4x4's to the body mounts, but I wasn't smart)
4) thereafter I lifted/jacked the body up incrementally by jacking up the 4x4's... I cannot recall whether I jacked at the center of the 4x4's or at the ends (probably the center)
5) using scrap pieces of 2x12's as shims between the jack and the floor, I repeated the procedure numerous times, each time adding a layer of scrap 2x12's or other suitable lumber scraps beneath the jack (and beneath the ends of the 4x4's), removed the jack and did the other end, alternating raising the front & then the rear of the body just a few inches each time.
I thought about bolting-on 4 trailer-leveling jacks (1 at each end of two 4x4's), but didn't go that route because the jacks didn't seem to have enough adjustment height
6) when the body was high enough, I bolted metal legs for a set of "horses" (kits purchased at a lumber store) near the outer ends of the 4x4's (one 4x4 at a time), removed all the scrap shims, and let the front and rear "horses" down to just rest on the floor, added cross-braces to the horse legs so they couldn't do a split
7) rolled the chassis out from under the rear of the raised body, and refurbished the chassis
You might be able to do something similar except perhaps just lift the body enough with jacks to be able to build a wooden "pallet" frame in place with beams at the firewall and in front of the rear wheelwells, then box those beams with beams outside the body and possibly another "box" frame above the roof to hold connecting straps away from the body, with the lift pulling up on the upper box frame and separate straps connecting the upper frame to the lower frame.
One thing to keep in mind... you can buy stuff on Craiglist or other places, use it, then re-sell it after the project
-
The superbrightleds.com 1157 board used by Jim shows only 1 in stock; dunno if they just ran out or if its discontinued
-
Interesting discussion, but not quite enough info... I converted my backup lights to tail lights 3 or 4 years ago using replacement LED bulbs, but can't remember details; I like your implementations better
Jim78, if I understand correctly, you ended up with a (pair of) double-wide panels you assembled for the backup light positions; but you then had 2 bulb bases, so:
1) could you give urls to the arrays you purchased? (same question to Wildfeir).... I've been searching Amazon and SuperBrightLeds, but unable to find the arrays you used.
update... I did find this one: https://www.superbrightleds.com/moreinfo/tail-brake-turn/1156-led-bulb-36-led-pcb-lamp-ba15s-retrofit-car/501/ ($2.88? can that be right?)
2) how did you wire the pair of bulb bases to the Avanti harness? (eg, how did you route the wiring from the Avanti harness to the backup/tail lights?)
**********************************************************************
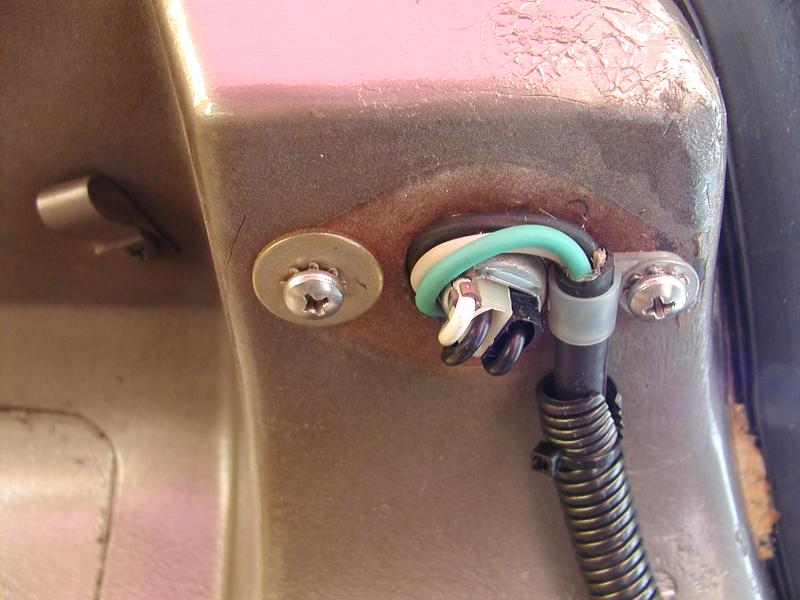
The wiring I came up with was cumbersome, far less than ideal (unfortunately I didn't take good pics of that aspect)
-
Congrats, very nice!
-
I doubt the issue has anything to do with the Nardi steering wheel itself, unless it was improperly mounted, but probably the only way to find the problem is to remove the steering wheel and start wiggling things to find loose or worn parts.
Your steering wheel likely has a Nardi or Momo adapter to mate the aftermarket steering wheel to the original steering column, and those screws could be loose. Or the issue could be in the steering shaft bearings & bushings at the top and/or bottom of the steering shaft. The shop manual shows those bearings and provides instructions for disassembly/reassembly; if you don't own one, you should get one, along with an Avanti parts catalog (eBay or Avanti parts vendors).
-
Lancer...
You might also consider the life left in your tires. If you also need to replace those soon, you'll find the pickings slim in 15" performance tires today. I've run across that issue on my Jaguar.
Might be prudent to consider 16" or better yet, 17" rims & tires. If it's just normal street driving, then there are still decent 15" tires available.
-
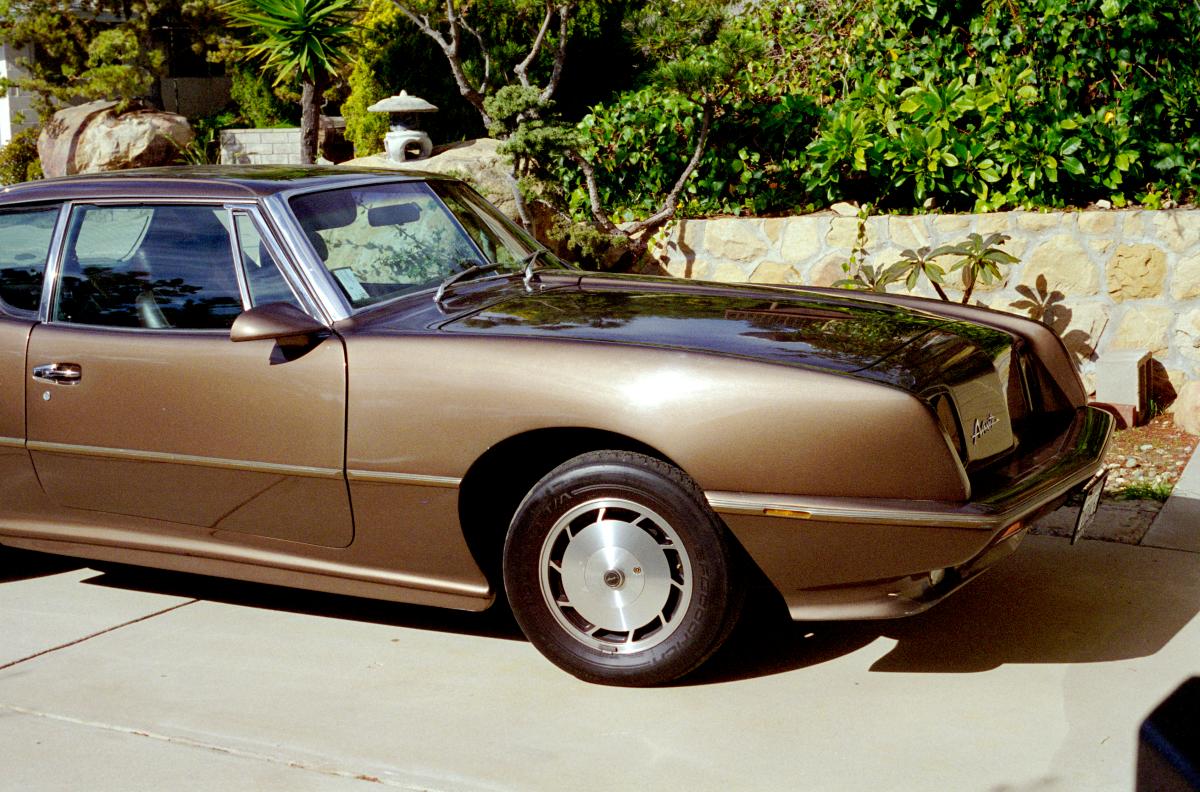
I kinda like the boy racer look (if by that you mean the rear wheels are a bit further out in the wheel well)
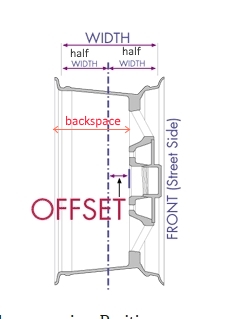
I agree with your advice about a good tire shop, hopefully with the equipment to measure the required offset(s) for fender and steering/frame clearance.
-
I can't answer your question directly, but I seem to remember that the old Blaupunkt Frankfurt radio used in Porsches and VW's during the 60's and early 70's can fit, but they are very expensive (if cosmetically nice and working). I just did a Google search and came across a company supplying less expensive new radios for old VW's, but they do not give the dimensions of their units... perhaps you could contact them for that information. http://www.classiccarstereos.com/1958-1967-vw-bug-radio-usa-230.html
And, of course, you would need to modify the face surround plate to fit the new radio.
Do you still have your original radio? Perhaps it could be repaired.
PS: update... came across these possibilities with another web search (specified vintage Porsche when searching the Crutchfield website):
https://www.crutchfield.com/g_300/All-Car-Stereos.html?tp=5684
https://www.crutchfield.com/g_300/All-Car-Stereos.html?tp=5684
these even have an extra-cost cable that allows the body of the radio to be located remotely from the faceplate/knobs/pushbuttons.
-
Try this vendor: http://boosterdeweyexchange.com/
-
This appears to be a source with a good selection: https://www.customautotrim.com/body-side-moldings/body-side-moldings/
They have the separate chrome channels with vinyl inserts, too:
https://www.customautotrim.com/body-side-moldings/body-side-moldings/chan75/83/
https://www.customautotrim.com/body-side-moldings/rivet-on-molding/insert/101/
-
Likely an aftermarket door ding strip, common in the 1970's, not so common now. Only 1 of the 6 Avanti's I've owned had them, a 1989.
Maybe something like this would work for you:
Here's a link from a 240Z forum...
http://www.classiczcars.com/topic/12447-door-ding-strips/

-
Perhaps a door-edge protector could be substituted, such as this one:
or quick link: http://tinyurl.com/m9xfz9m
-
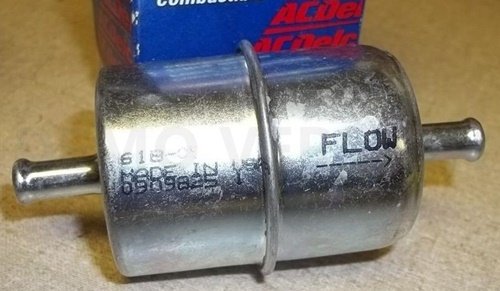
Can't tell you exactly what filter to buy, but if (as I suspect) it plugs to rubber fuel hoses at both ends, then a similar filter for Chevrolet cars of the era with V8's should work, such as this GM #854583 filter (which is 1 7/8" in diameter)...
-
The motor (same motor is used on both doors) is Ford part number C1AB-14553-A, which was used on the original 55-57 T-Birds and a few other Ford cars (60's station wagon rear window). The last NOS one I saw for sale was in the $300 range on eBay.
I have a very old reference to a motor rebuilder: Bob Clayton in Georgia 770-271-9627. Motor repair service is likely around $150+ (not including shipping both ways).
There was a comprehensive article in the Avanti Magazine Fall/Winter 2011 Issue 156 about power windows; if you contact me offline, I could email a copy to you,

Voltage Regulator question
in 1965-83 Avanti
Posted
I perused old photos of Avant II's that I've owned, but had no good closeups of the voltage regulator, nor do I know for certain whether those regulators were original; but for what its worth, here is photo I found of one in my '71... if it matches yours, then perhaps Avanti Motors didn't use a Delco unit.