ronmanfredi
-
Posts
341 -
Joined
-
Last visited
Content Type
Profiles
Forums
Events
Everything posted by ronmanfredi
-
Each of us has our own motives when buying and selling cars. And actually, it's no one else's business what they are and we shouldn't be attacking each other about this. If you stated your motives and the results, then you should be done posting about it and let others do the same. It's 2026 and time to start the New Year out right enjoying our cars and the fun and help that we get from other owners and their cars. Here are mine, let's see yours!


-
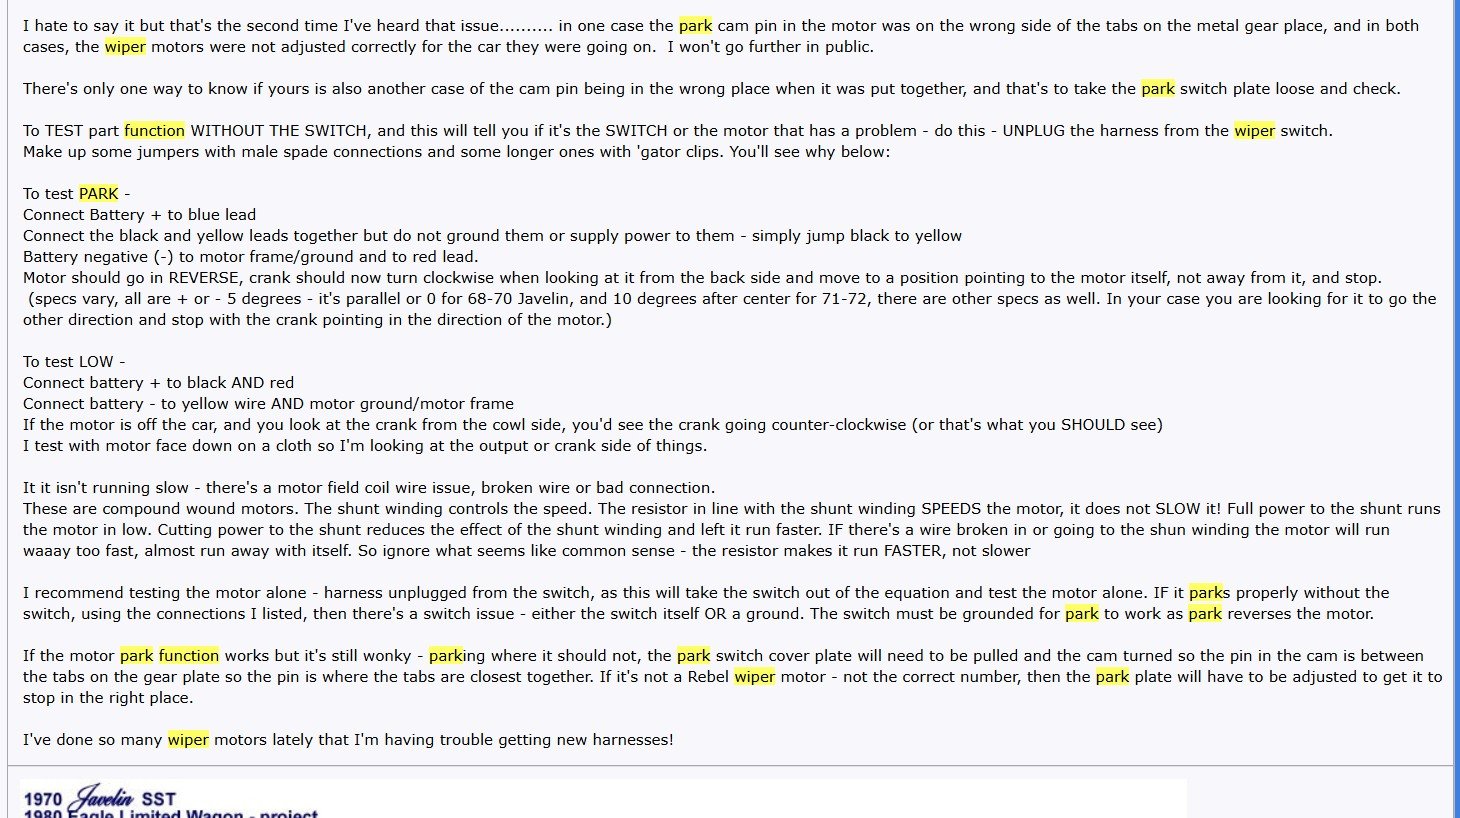
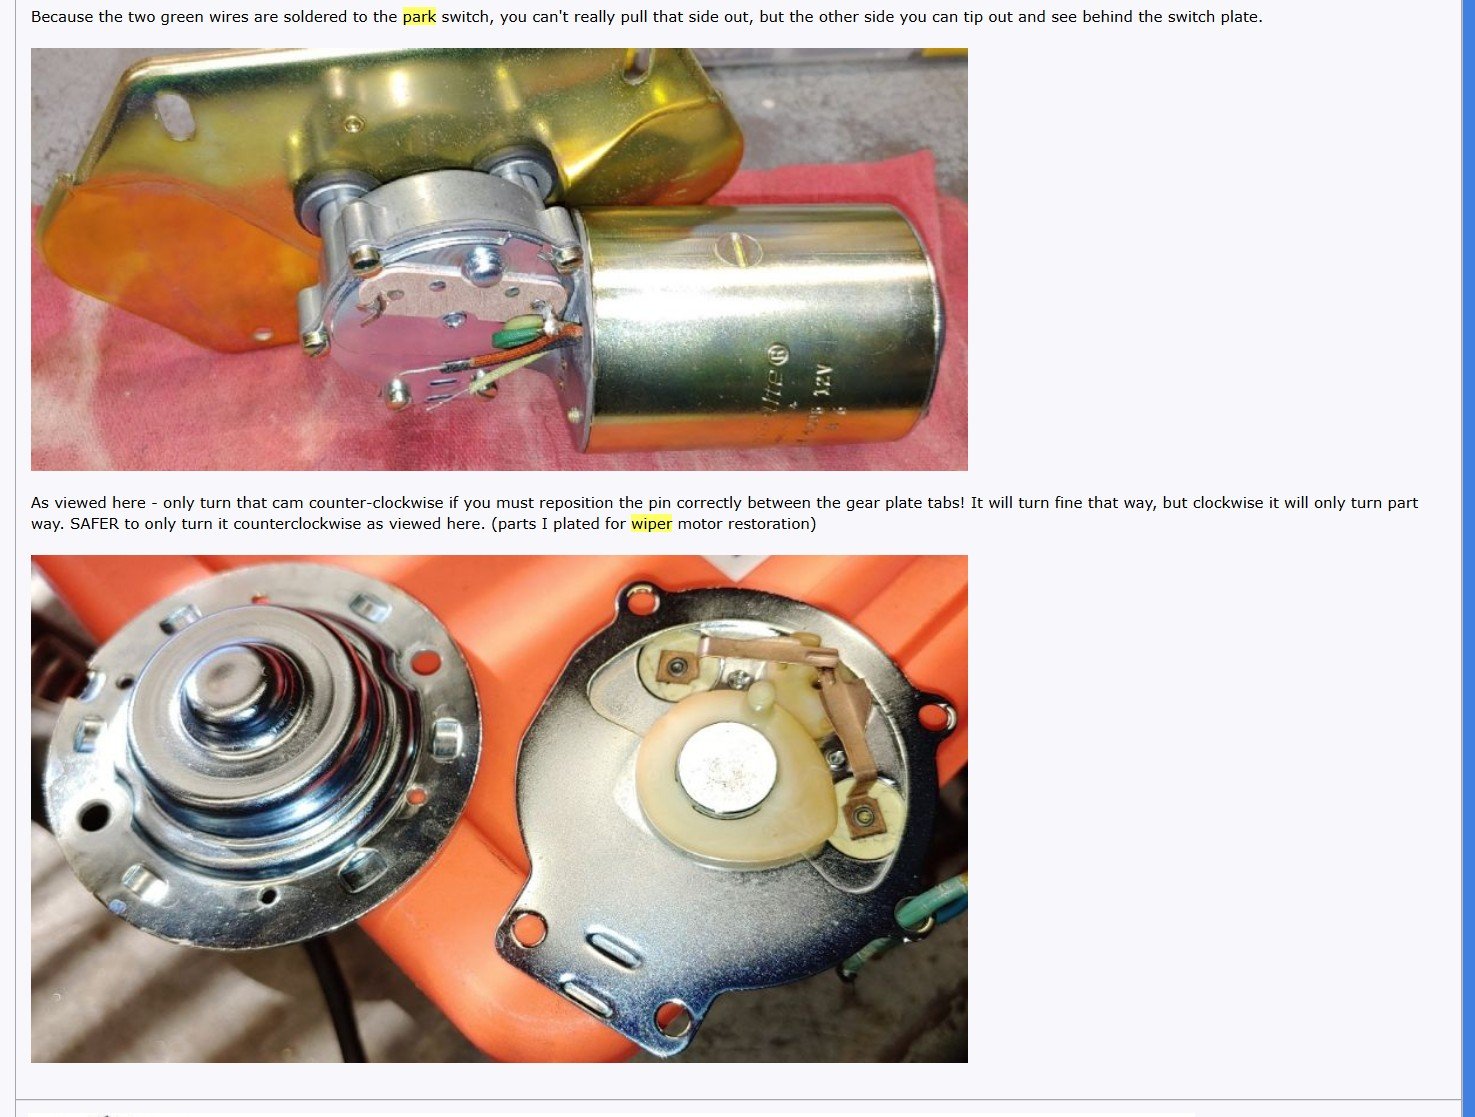
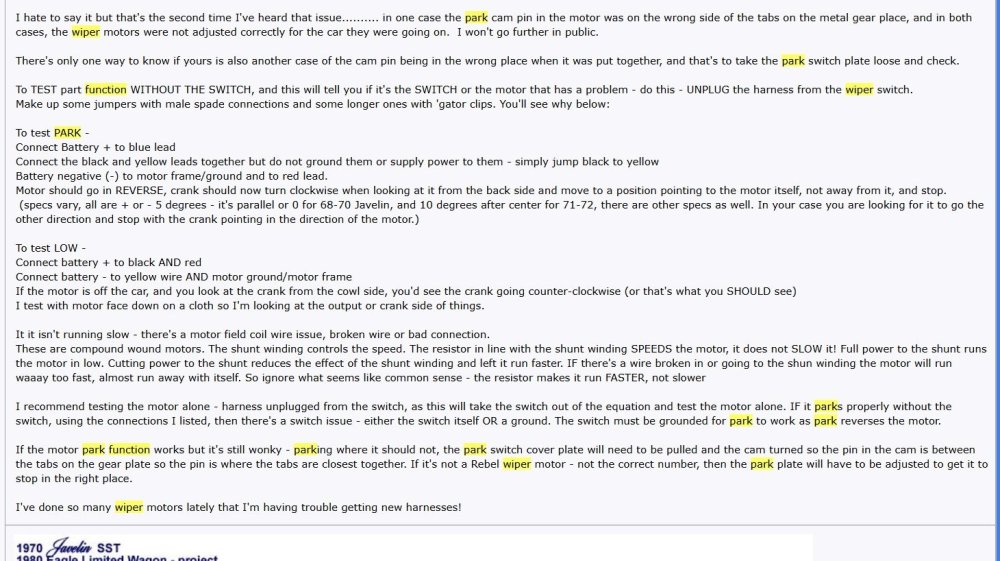
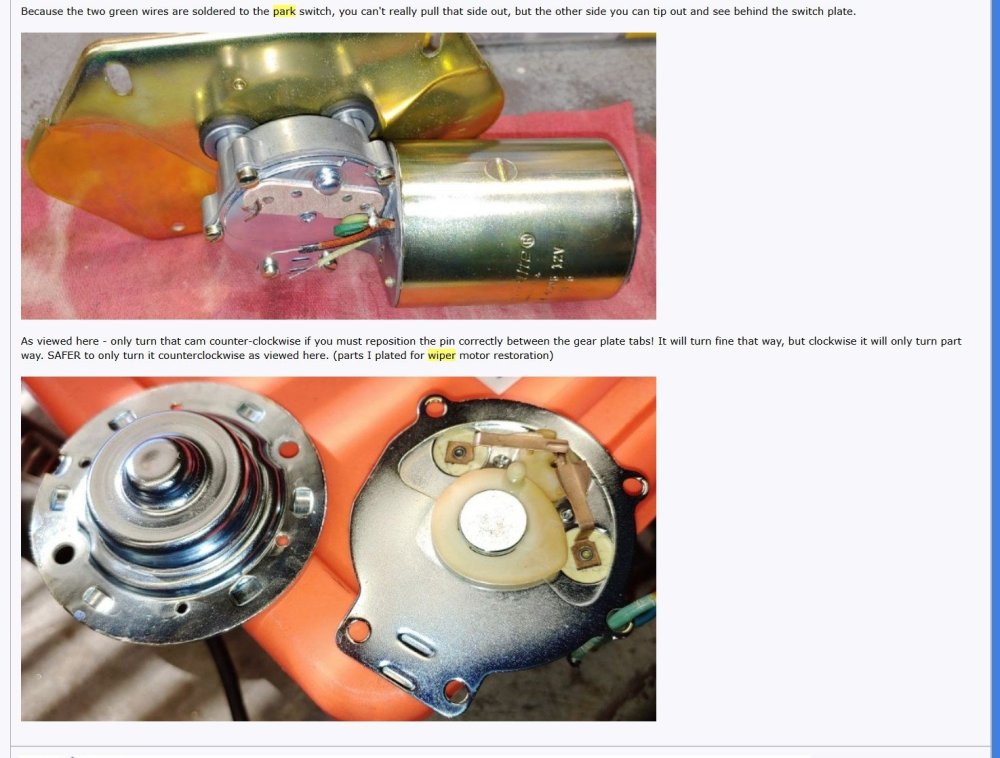
I have successfully repaired the wiper system on the new to me R2. First, the switch works as follows. All the way counter clockwise is off and the "park" happens at this time also. Clockwise then goes to slow. The next movement clockwise runs through a variable resistor and increases the speed to maximum as you turn the switch clockwise. I read a lot of articles from several online sources about this which helped me understand what was going on. The previous owner had installed a rebuilt motor and a new wiring harness. I had already taken the switch, which was in fair condition, and took it apart to clean and lubricate the moving parts. Didn't help at all. I did read where the switch had to be grounded for everything circuit to work properly yet when I grounded it, nothing changed. I removed the motor and did a bench test similar to the method shown in the first attached photo. The park function still wasn't working right, so I removed the cover, studied the mechanism, cleaned the 2 arm contacts and double checked the action when rotating the disc. Everything seemed OK, but still didn't work correctly. I finally took the switch out of the car and made up 4 6" leads with spade terminals on one end and female bullet connectors on the other end and connected the switch to the motor. Then I took a small 12 volt alarm system battery that I had and connected it to the switch, grounding the switch case and motor case. Next I cycled through the switch and again, not so good. Then I remembered reading that the switch case had to be grounded, which it was. But wait a minute, what is connected to the case? Then it occurred to me that there was a small brass leg coming out of the switch which was under one of the case legs that holds the switch together. An ohm meter showed that there wasn't any continuity between the brass leg and the case arm WHICH WAS TOUCHING IT. WTF? There must be some residue or film blocking the ground. Ok, I know how to fix that. I took a piece of "white" wire and soldered it to the brass leg and the case arm. Connected it to the ground on the battery and now EVERYTHING worked perfectly !!! So I reinstalled the switch, connected the extra white ground wire to the dash frame and everything works perfect !
-
You need a bushing driver set at a minimum. I also used a press with mine instead of beating it to death.
-
Is the switch action correct? Starting at far counter clockwise left: High>Off>Low?
-

Source For Replacement Rochester Quadrajet on 1969 350
ronmanfredi replied to TED DIMON's topic in 1965-83 Avanti
Quadrajet Power, Your One Stop Quadrajet Shop -
I did that to my 63 and there's still a problem. Rebuilt motor, new wiring harness, (by previous owners) all connections look good. Switch position>action as follows: turned all counter clockwise= high speed, next detent clockwise is off, next position range is low/variable. No parking of arms when turned off in 2nd position. Any ideas? Thank you!
-
Brad, I'm adding A/C to my R2 using Rogers brackets. The side mount refrigerant ports on the compressor look perfect in your photo. Do you remember the compressor part #? (v groove belt)
-
Standard part # ES110 is electric with a mounting bracket. I'm sure the bracket won't work on the carb, but you can modify it as needed to use. The solenoid by itself is Standard ES9.
-
Before I get with a vendor, I want to check and see if anyone has a new dash that they bought and then didn't use it. Thank you!
-
I have a heater core and fan blower out of my 1963 R2.
-
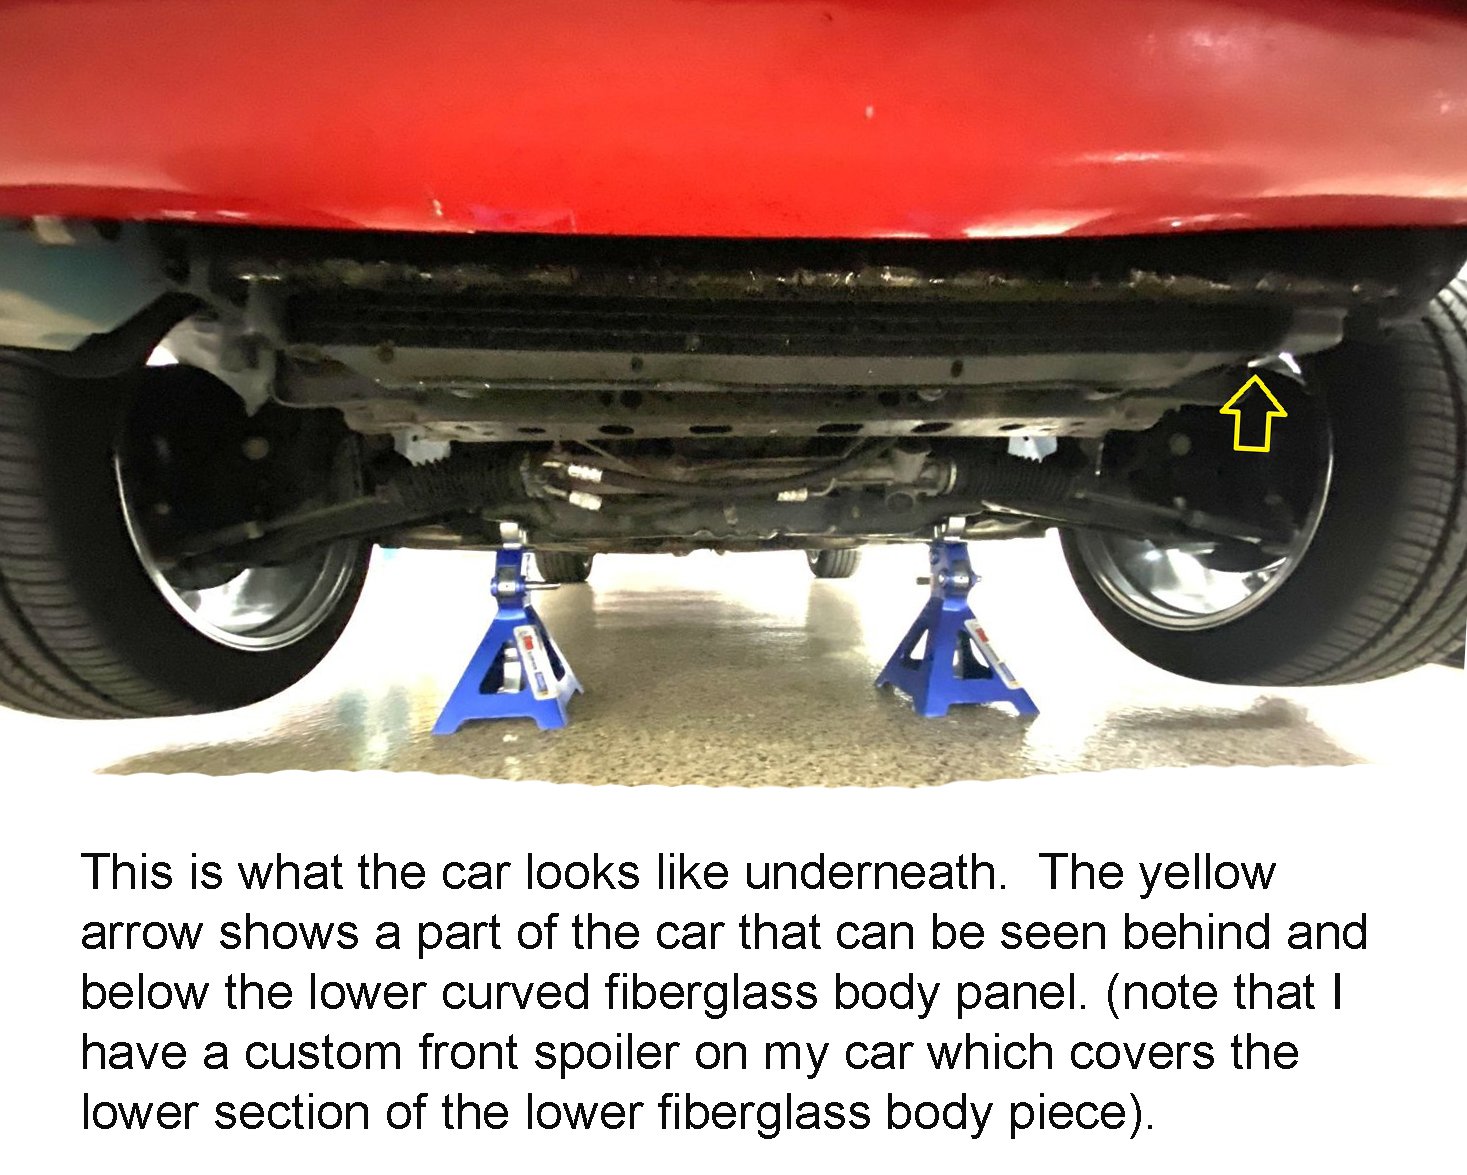
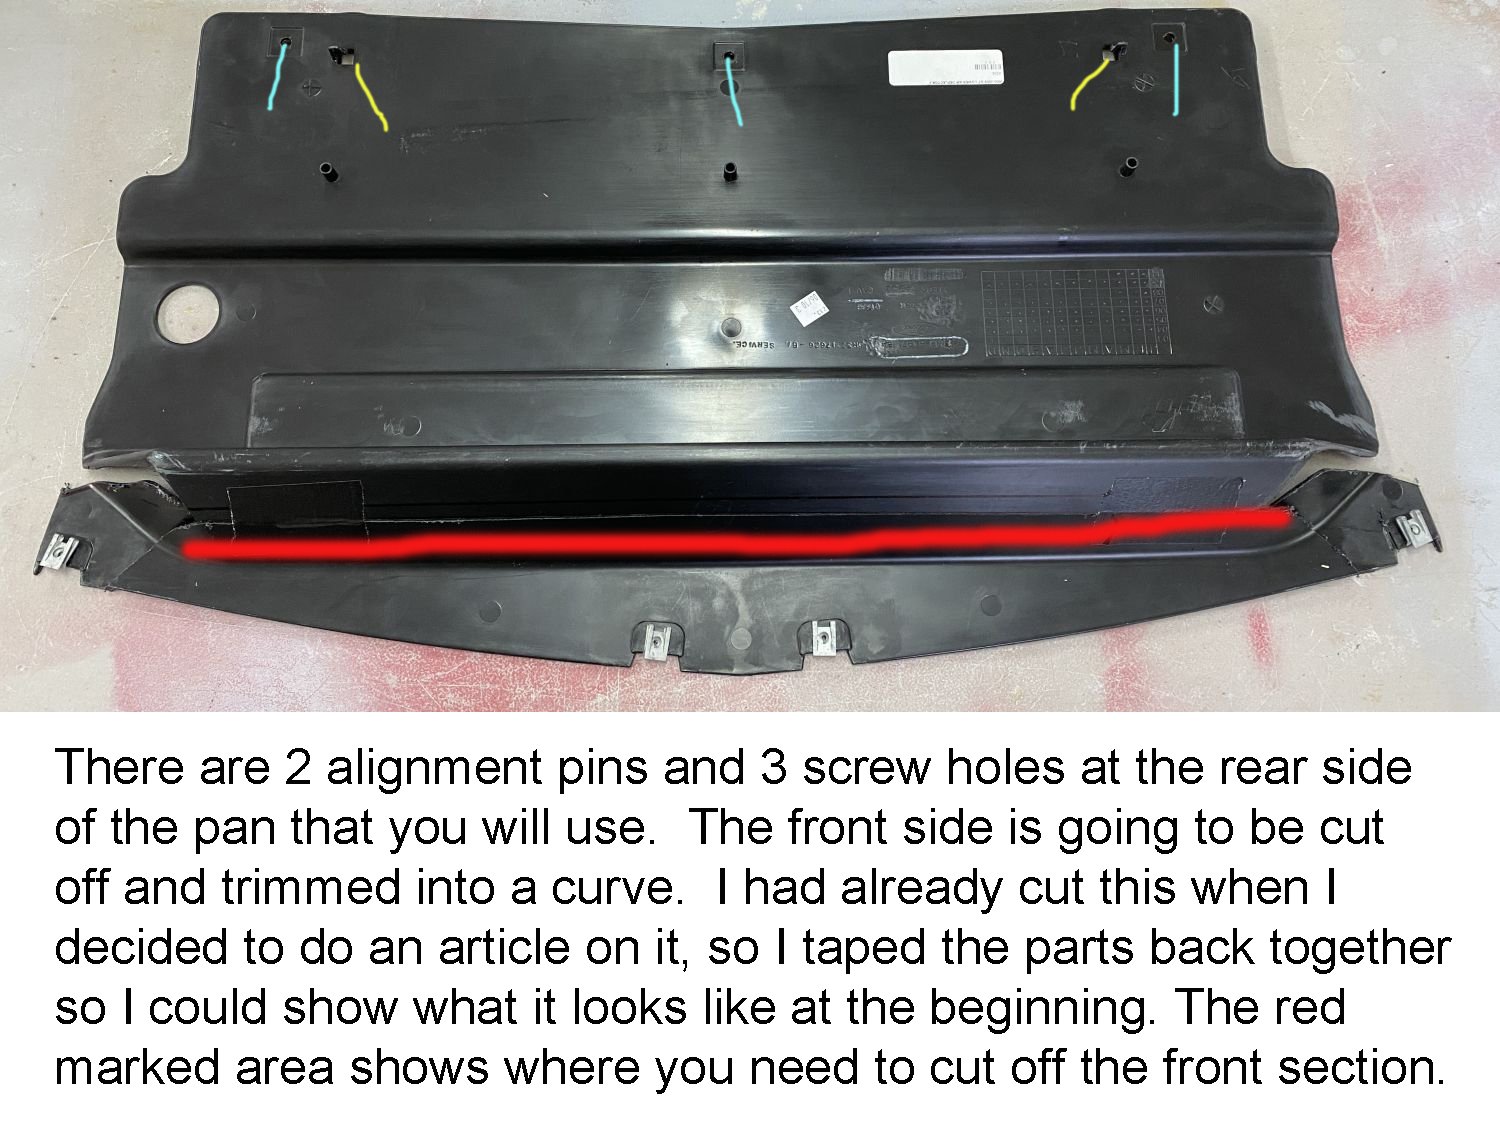
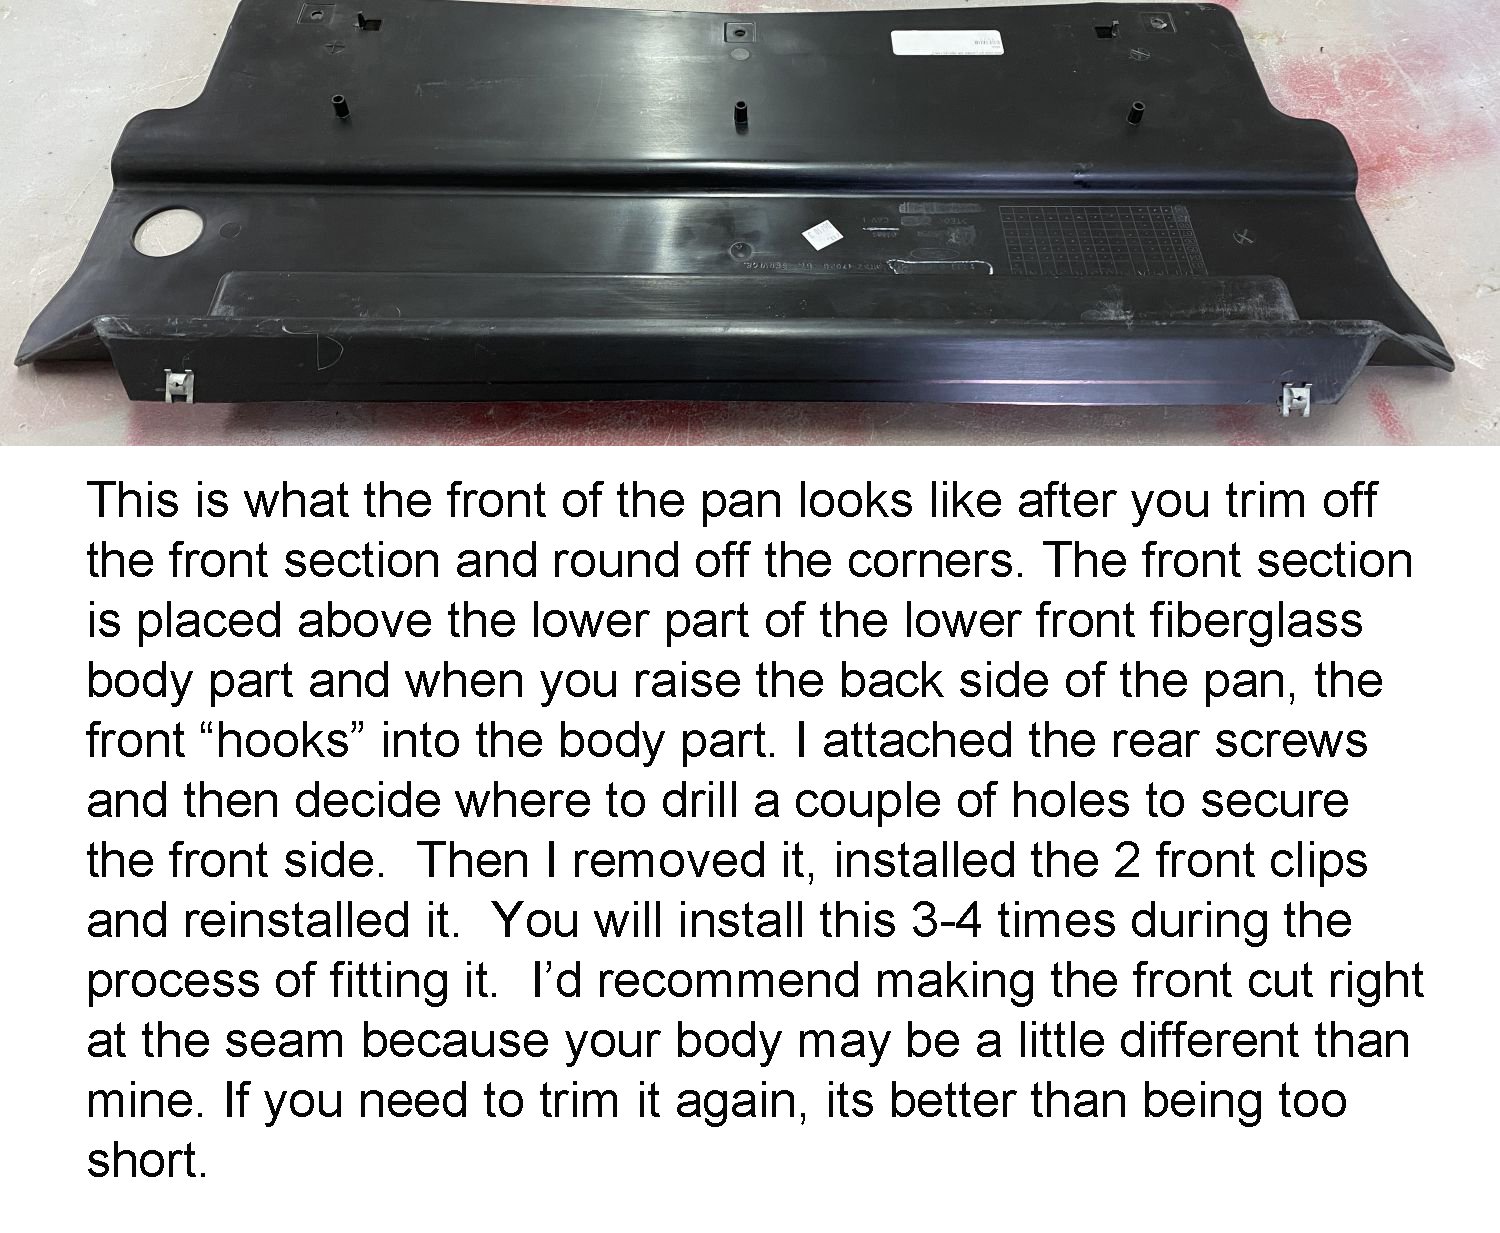
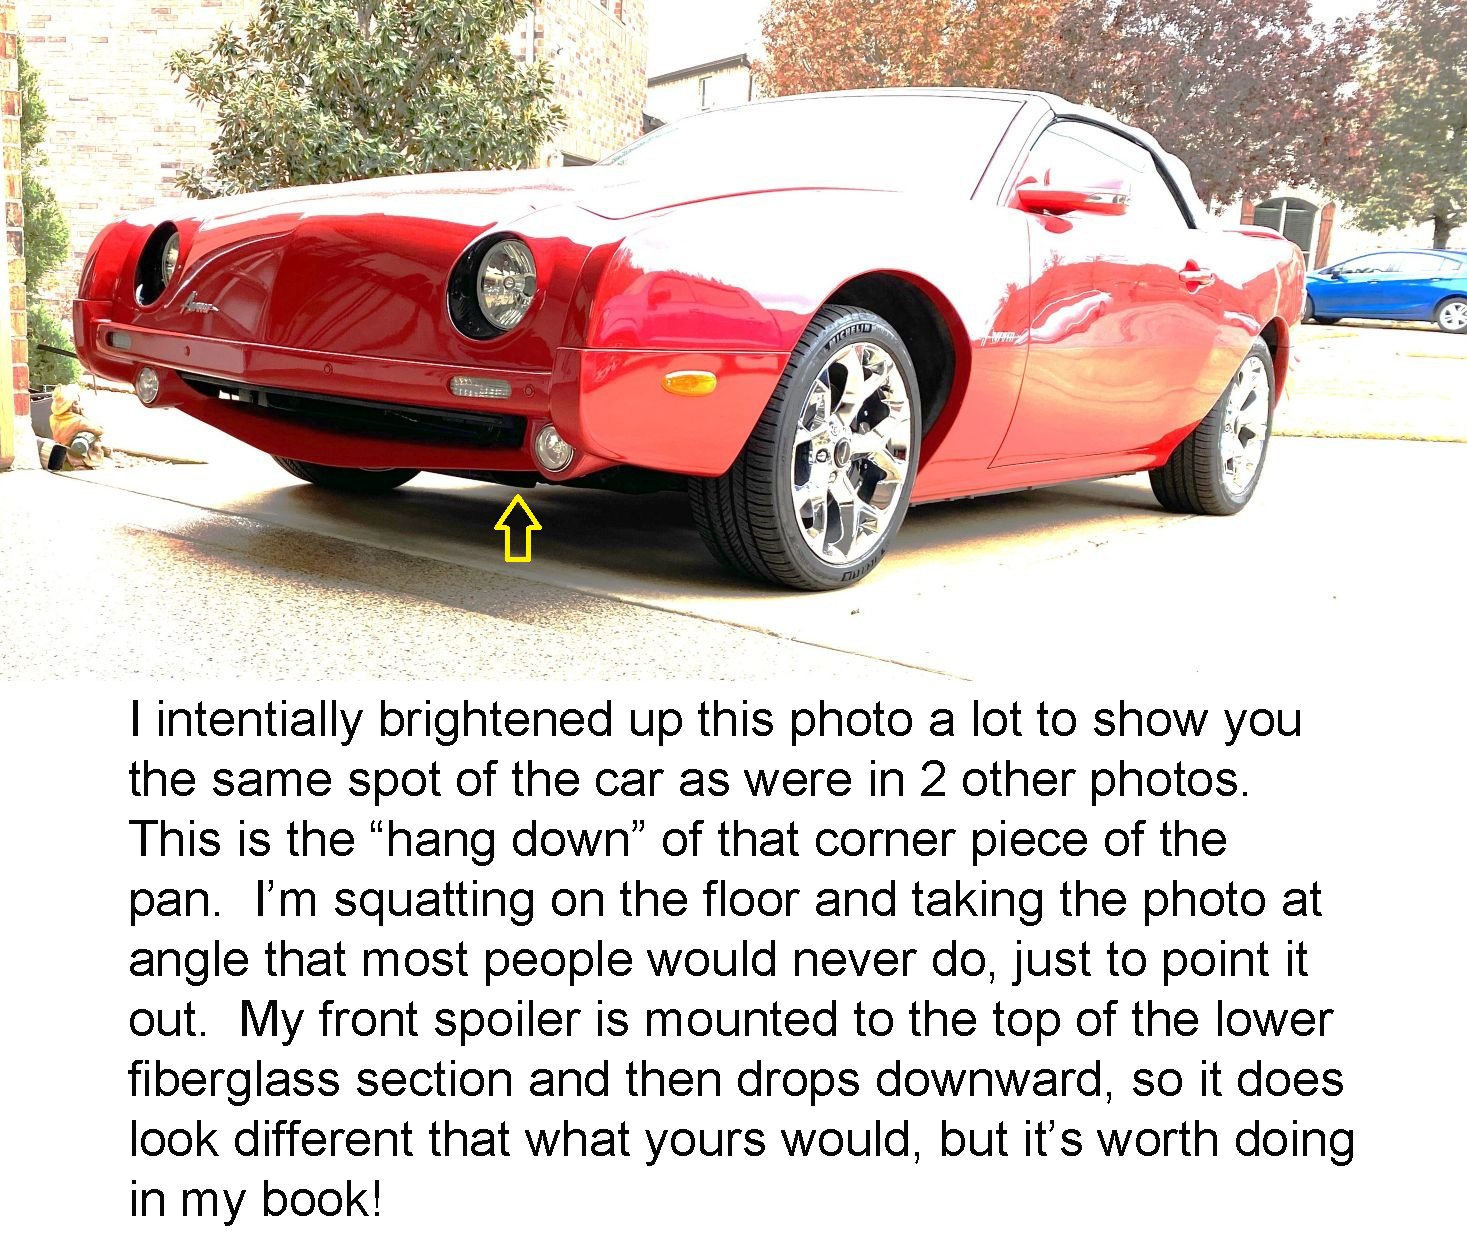
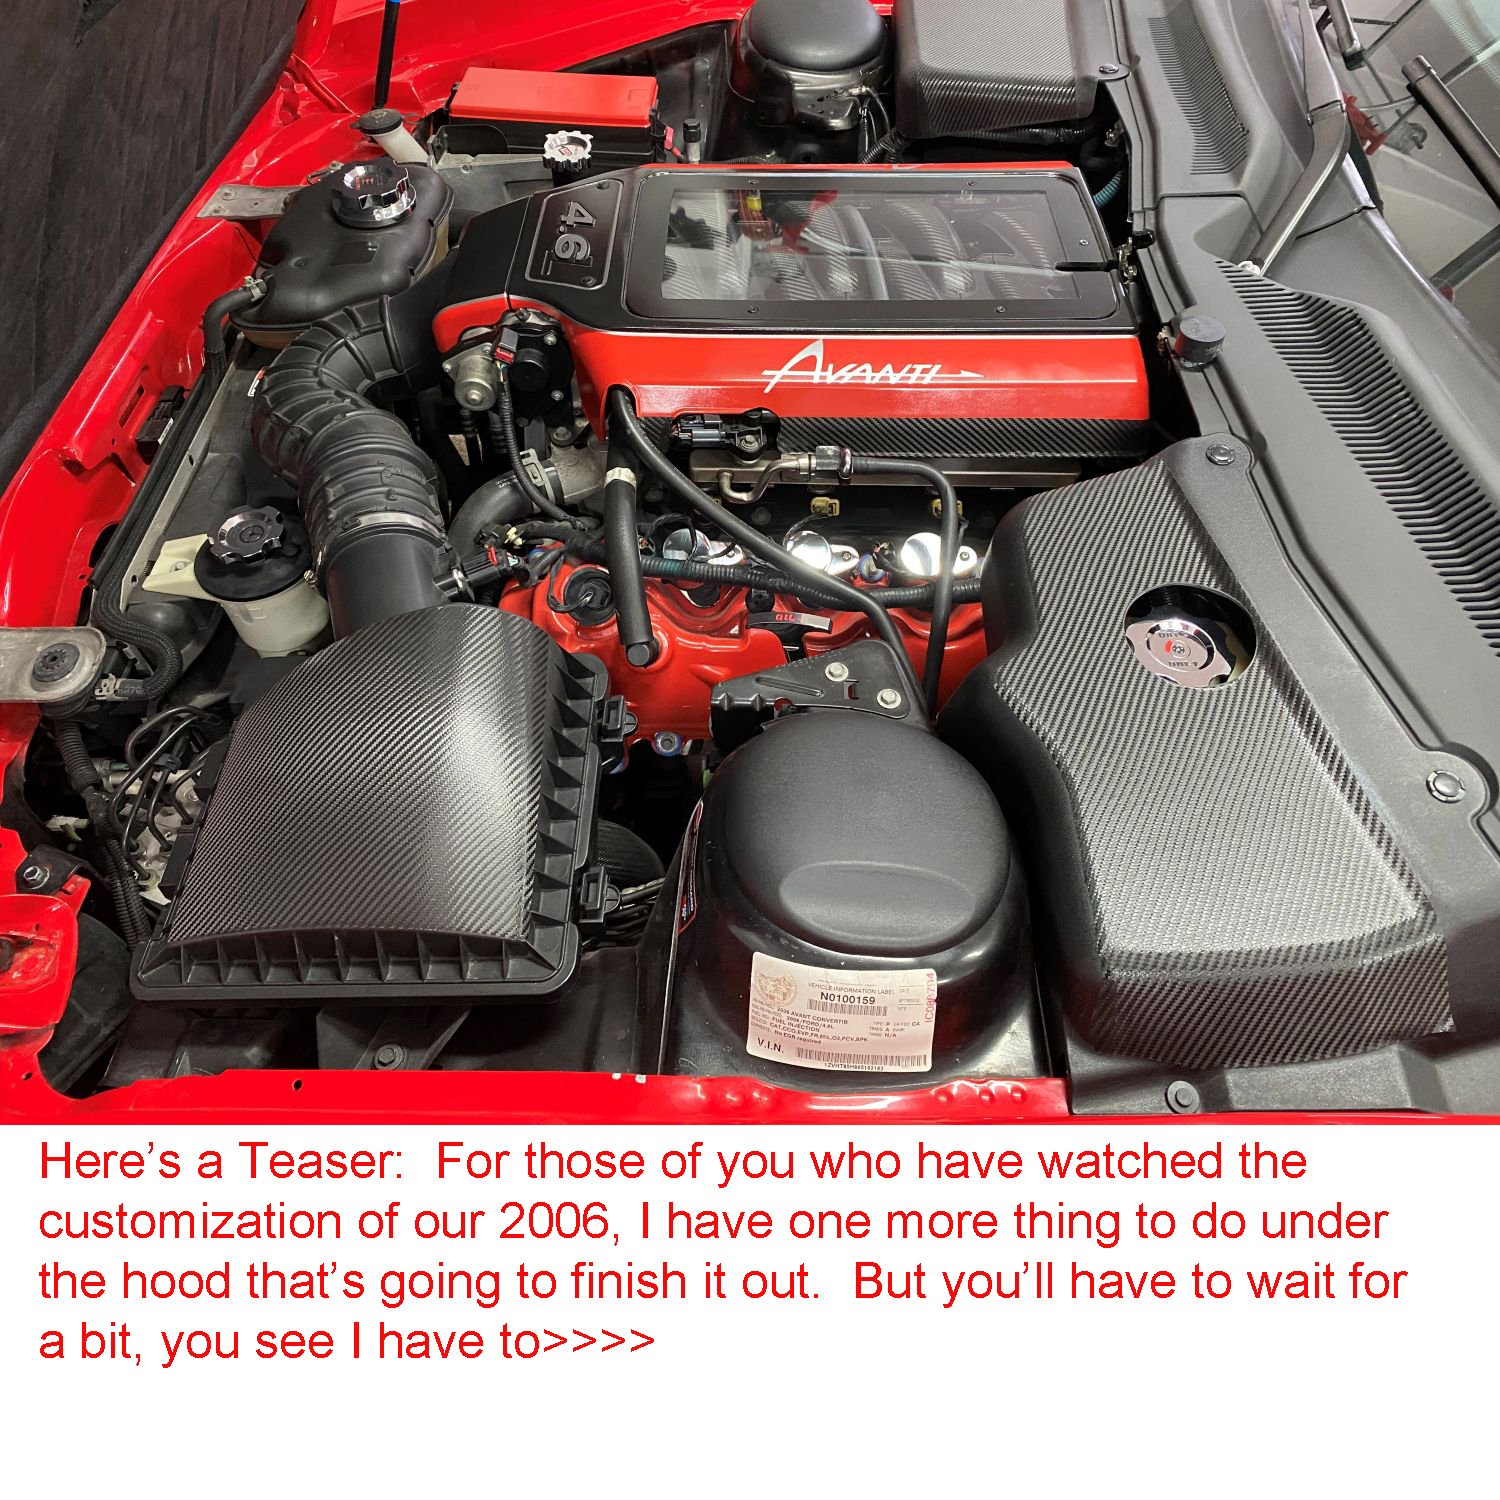
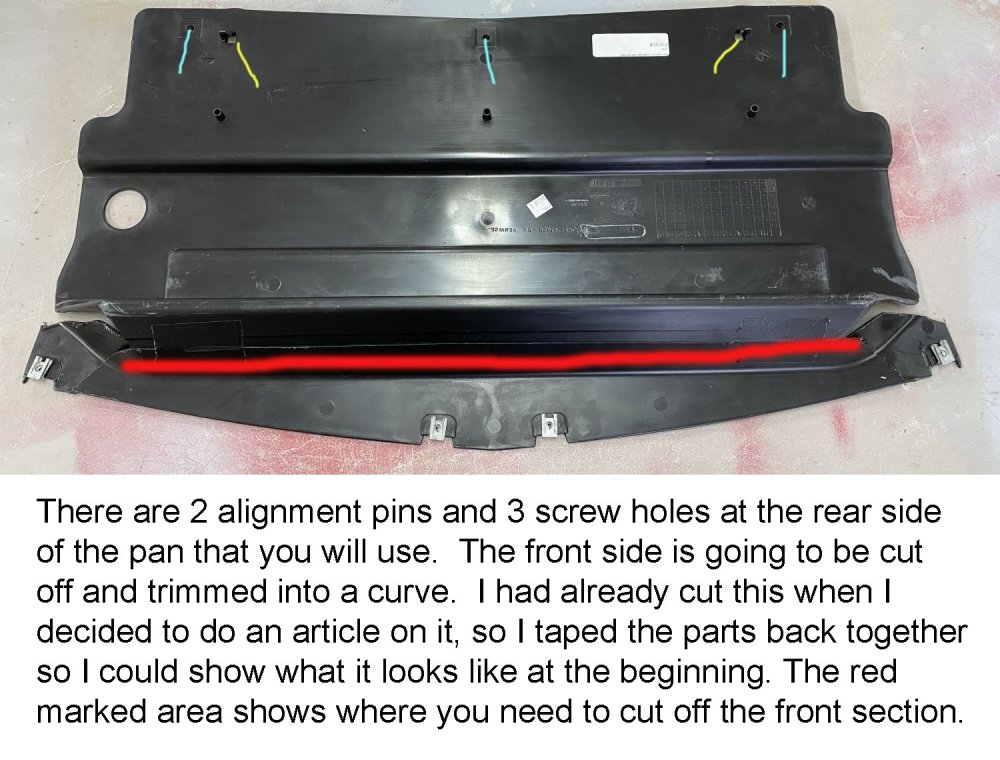
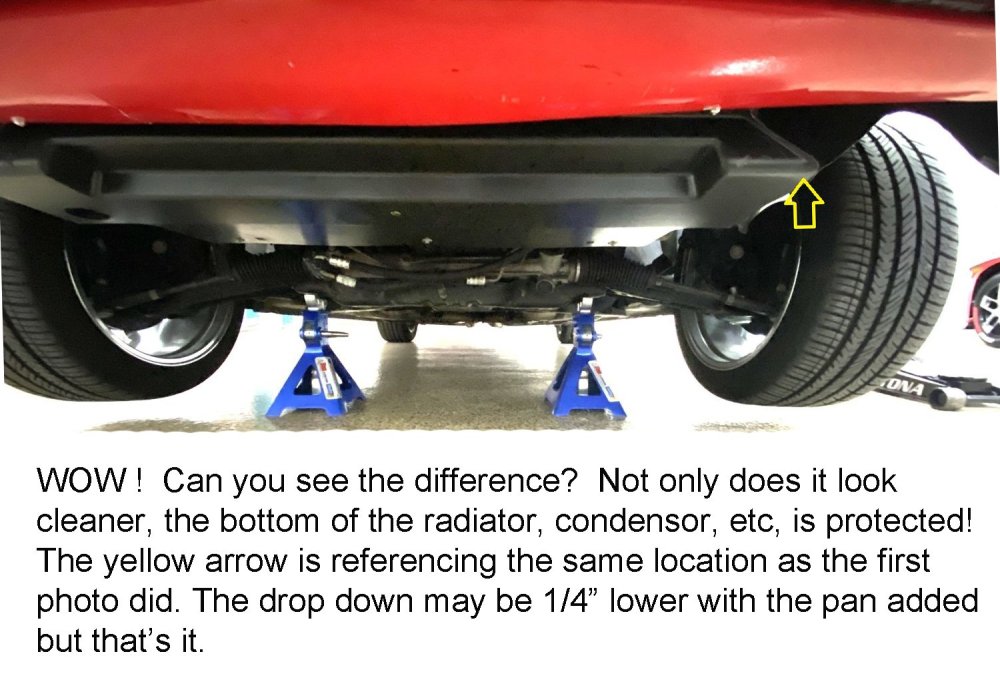
As we start getting closer to the AOAI national meet at Palm Springs, I have 4 upgrades to do before then. The first was to figure out how to install a belly pan under the front end of the car. To start with, I ordered a factory Mustang plastic pan from CJ Pony Parts of California. When I initially laid it on the floor and looked up at the car, I could see why Avanti Motors had just taken it off when building the car and disposing it. The pan is fairly flat in design and the front lower panel of the Avanti curves upwards at both ends. However, once I put the car on stands and took a hard look at it, I figured out how to mount it. The back side of it has a couple of locator push in pins and 3 holes to place screws into the support. My 06 still had the screws in the support. The front side has some recesses, angled and straight, it form-fits around the A/C condenser base, radiator drain, etc. As it turns out, the front angled section, which at first seemed to be a real problem, became the mounting solution for the front since the angle Matches the Avanti lower piece fairly closely. Follow along with the photos and it should make sense:


-
For those who know, what does the suffix "A" mean on a 1963 serial number, such as R-1234A?
-
Rebuilt original Auto. Twin Traction.
-
It could be either, assuming that you followed the system bleeding process? With the engine running, turn the steering wheel lock to lock a dozen times to get the air out of the system. The only way that I know to diagnose the cause is to install a pressure gauge in the ram hoses to see what's happening. Other than that, it's a guessing game.
-
Minor increased tire width doesn't affect alignment settings. If it has power steering, then you want as much positive caster as possible and zero-1/2 positive camber. 1/4" toe in is preferrable.
-
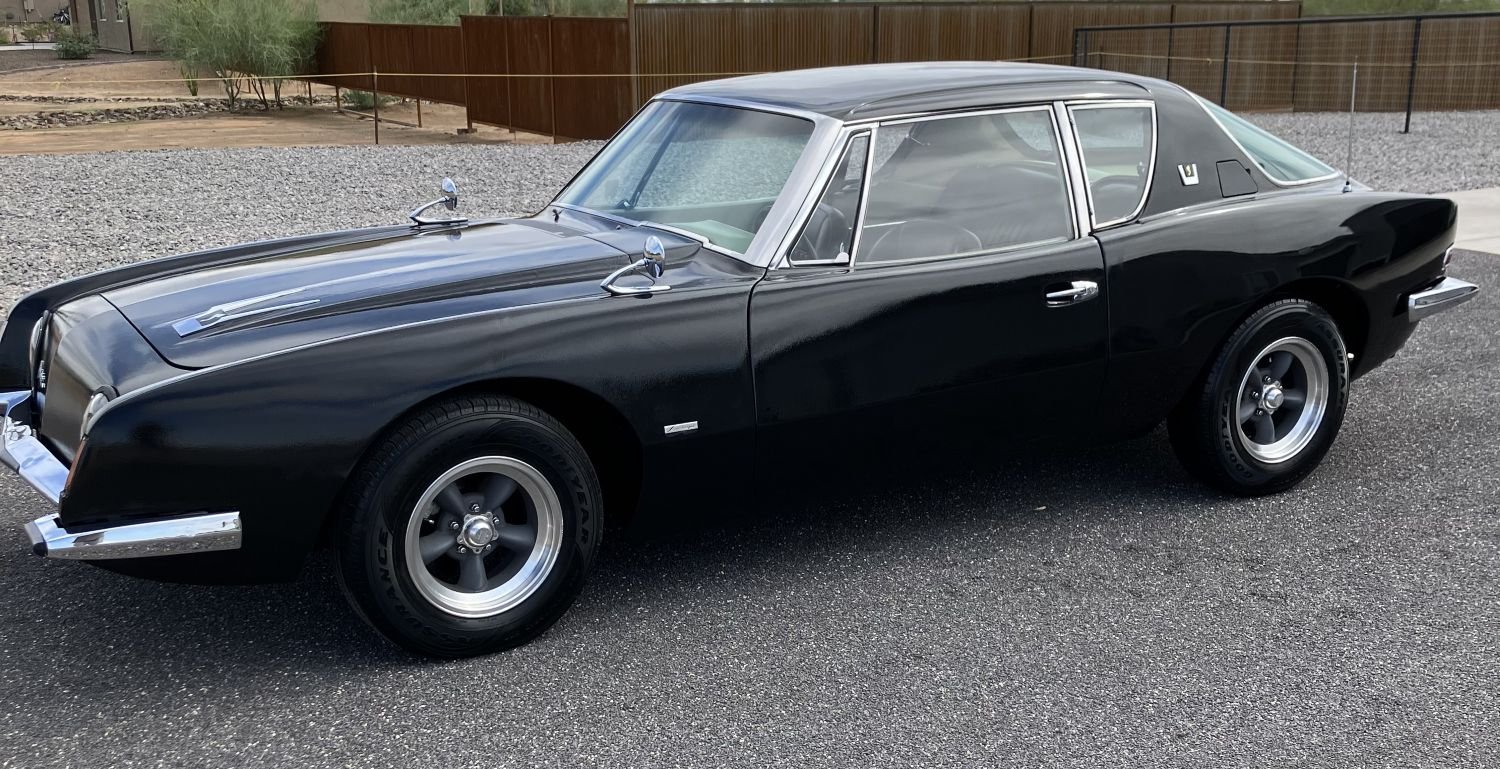
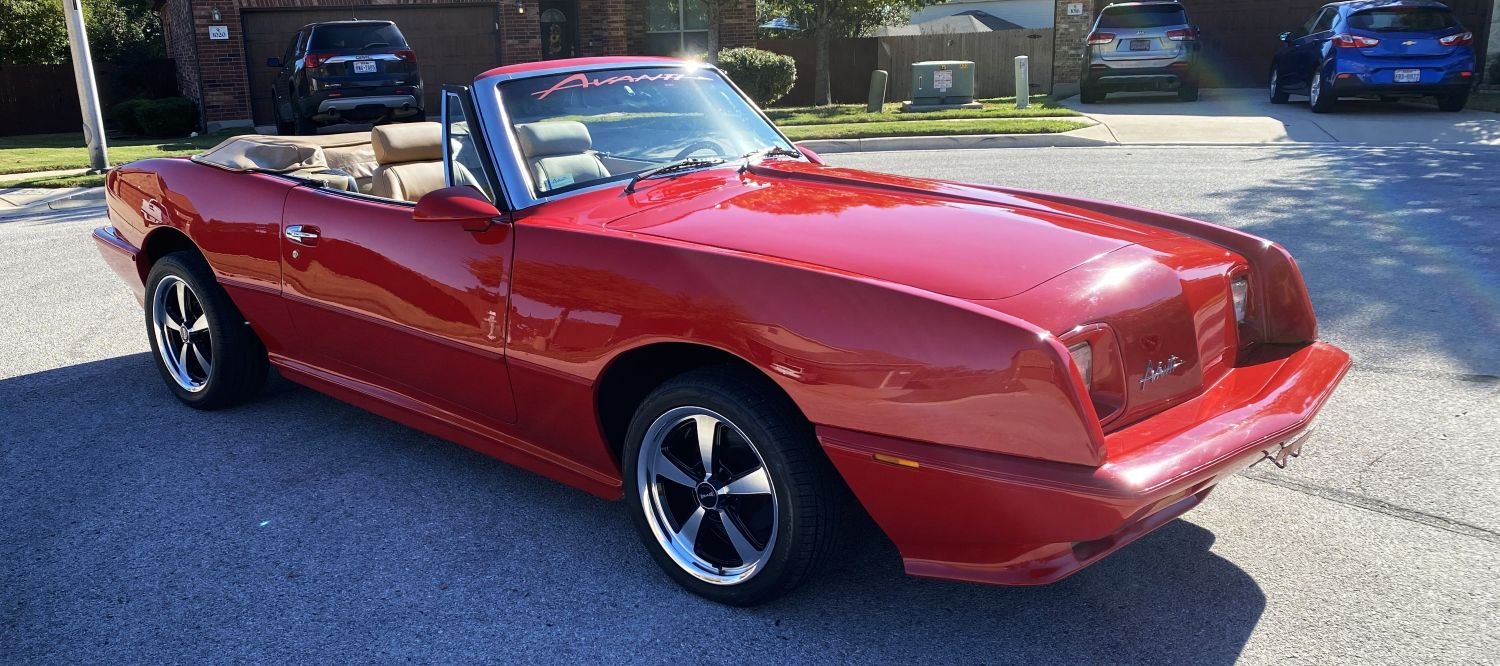
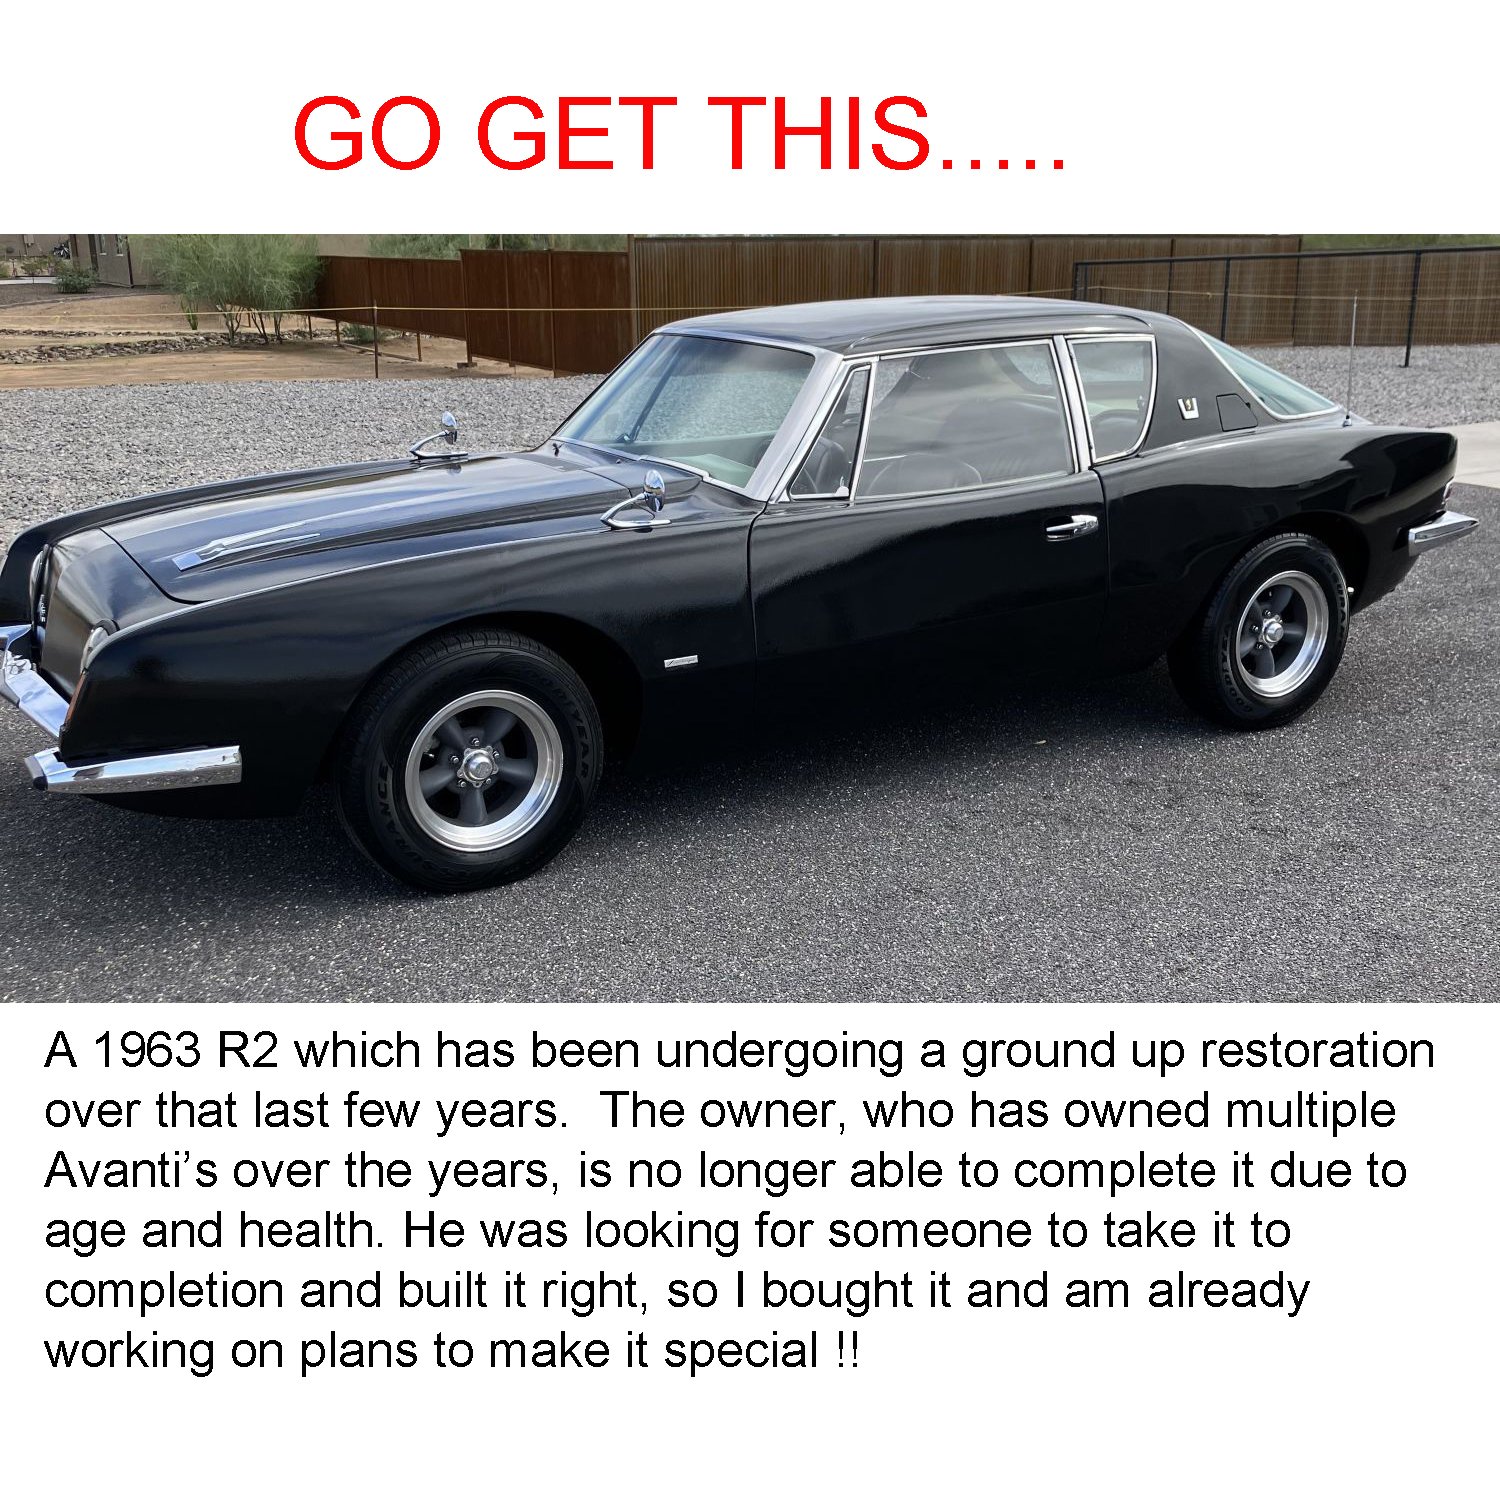
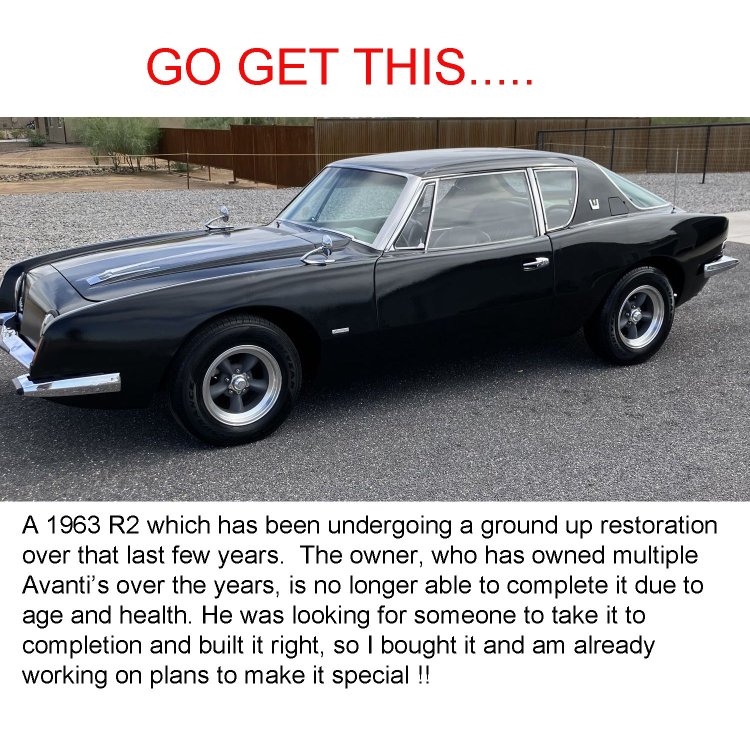
I'm about to complete a "save" restoration on a 1989 Conv with a musician history. It's going up for sale in January to someone who wants that year model car in great condition. Meanwhile, I just bought a 63 R2 in Black that has been going through a full restoration for several years for $15K. The owners age and health have made him decide to sell it to someone who can take it the rest of the way, and that's me.

-
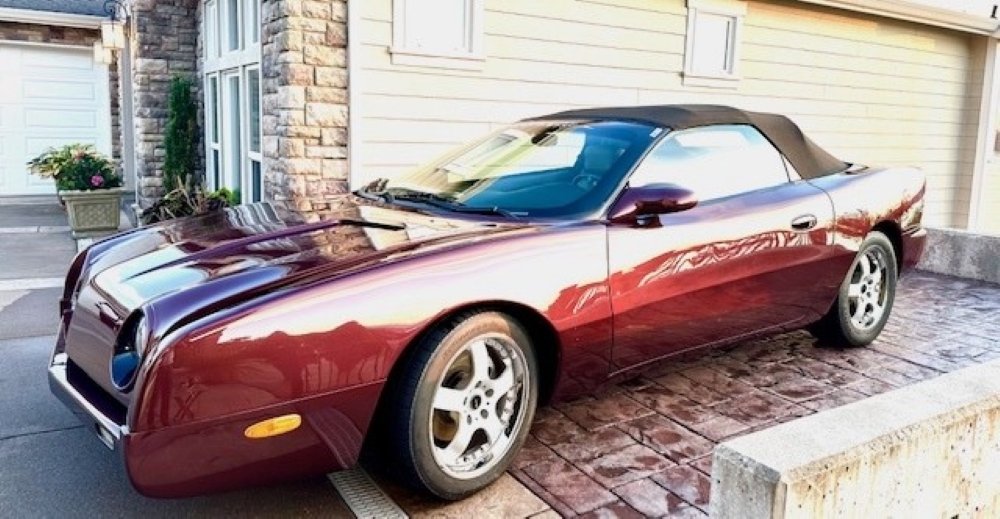
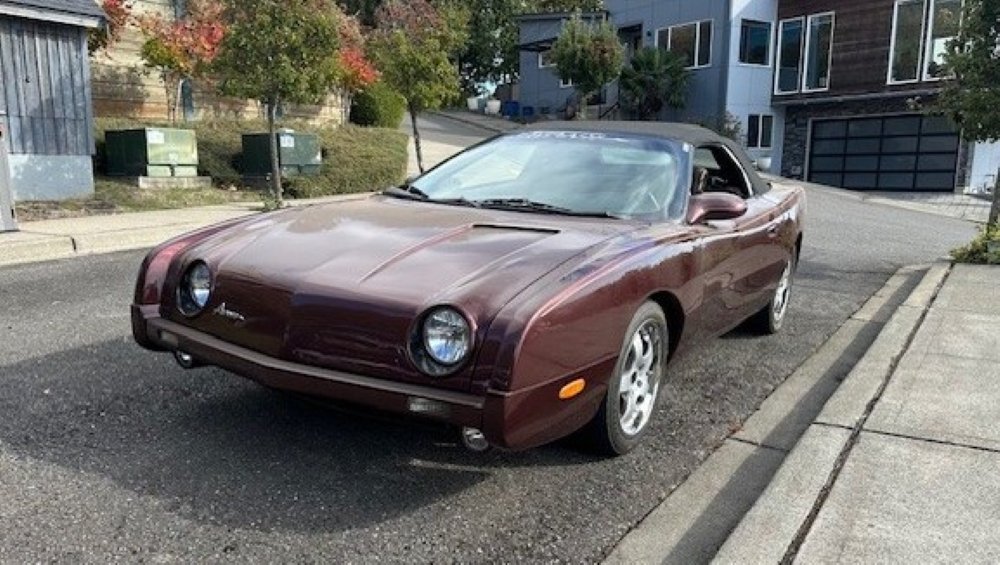
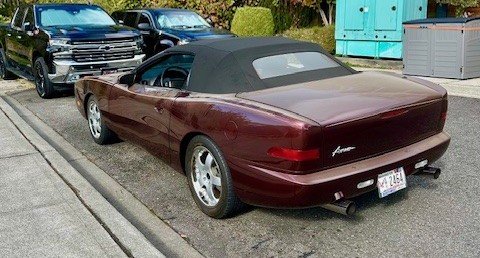
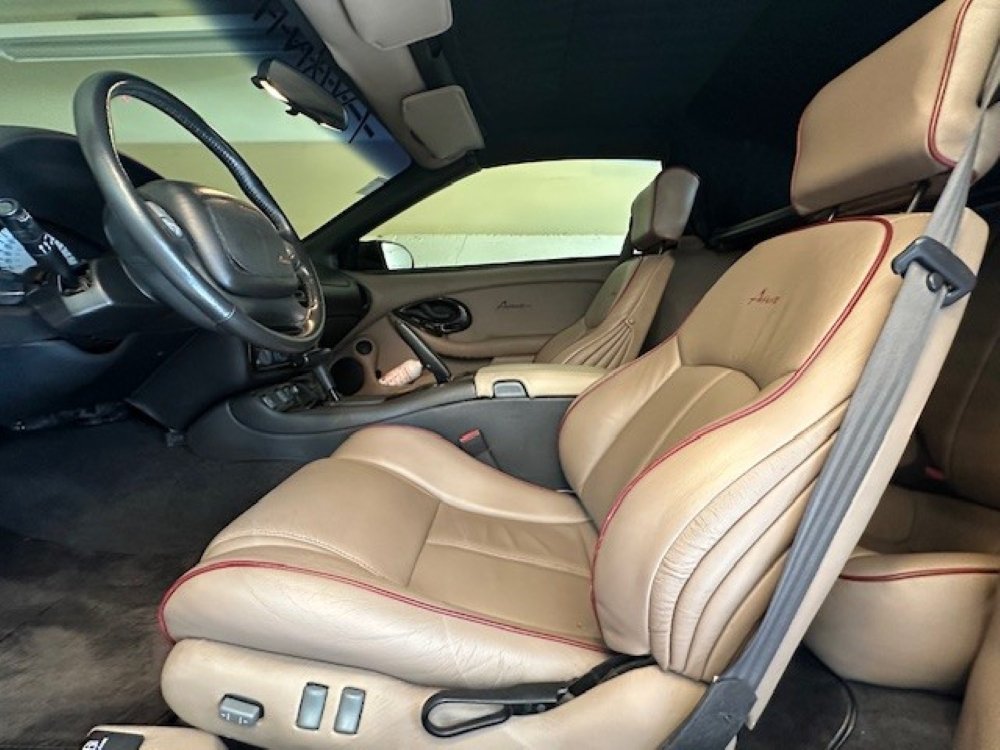
2003 Avanti Convertible for sale 22,000 original miles!
ronmanfredi replied to ronmanfredi's topic in Avanti's For Sale
Upper $30s. Asking $40 minus needed new tires and some needed paint work due to garage damage. -
I don't because the rear mounts on my sunroof were still attached, so I was able to rebond the sides and back without removing any upholstery. Dan Booth sells a fiberglass roof top if you wanted to delete the sunroof. It is the entire top.
-
Dan Booth helped me with mine. He also can provide instructions on how to bond the frame correctly and how to install the weatherstrip pieces correctly.
-
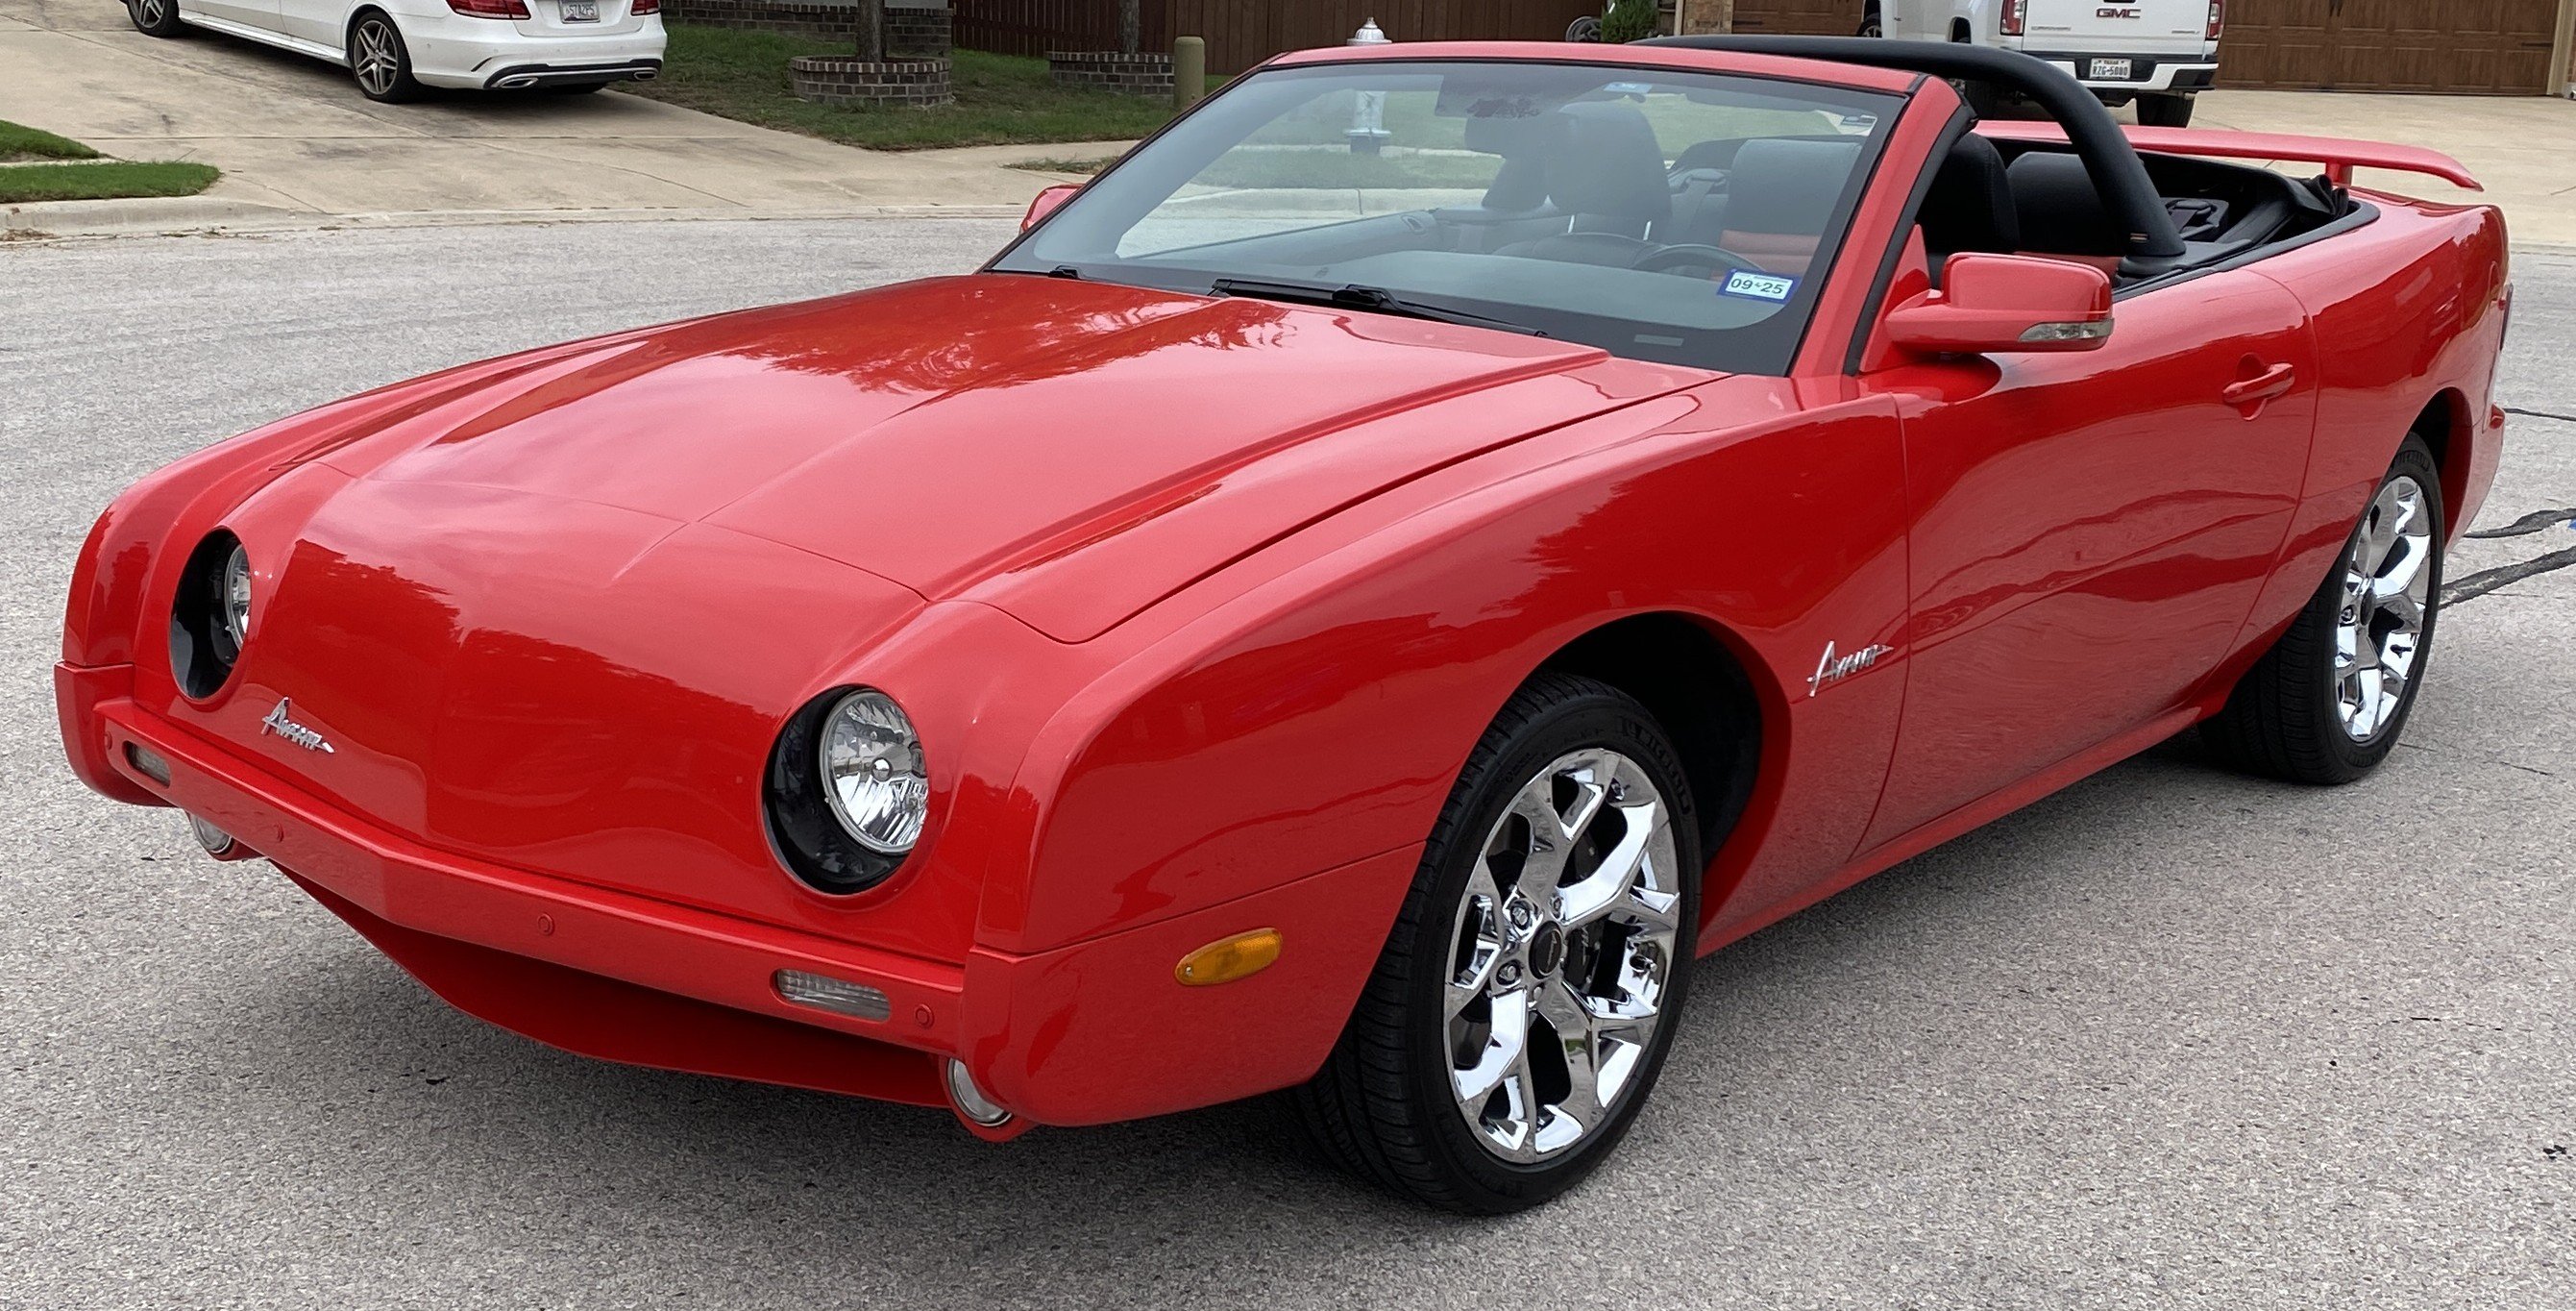
SOLD! Eric Johnson has put up his immaculate 2003 Convertible, which is 1 of 2 cars painted in Fox Fire Red Mica ever produced that we have records on. The car has Never been driven in the rain and garaged since new. To learn more about his car, you can reach him at 253-576-3040 or avanti400@aol.com. If you've ever wanted a Firebird based convertible, then this could be the one. Don't let this one get away!
-
They don't know where the original engine is.
-
If you guys had been at the AOAI convention last September like we were, you would have received the full accurate story, met Bennet, hands on the car and received the multi-page booklet on that car and the history of it.
-
2001 with 40K, two owners (father/son) sat outside for a couple of years with fiberglass repair needed, sun damage= top needed, seat covers, full paint. Sold for $15K 2 months ago California 2007 with 38K, one owner from Florida, excellent shape, sold for $38K 4 months ago 2007 with 99K, two owners (father/son) from Missouri, good shape for mileage, sold for 22K last month.
-
It's pretty irrelevant what any of the websites say about the value of the cars. They are only worth what someone is willing to pay for them at the time.
-
From what I was told, the schedule was determined by the availability of hotels/rooms. There are many events in that area and most hotels were already booked for 2026.