ronmanfredi
-
Posts
341 -
Joined
-
Last visited
Content Type
Profiles
Forums
Events
Everything posted by ronmanfredi
-
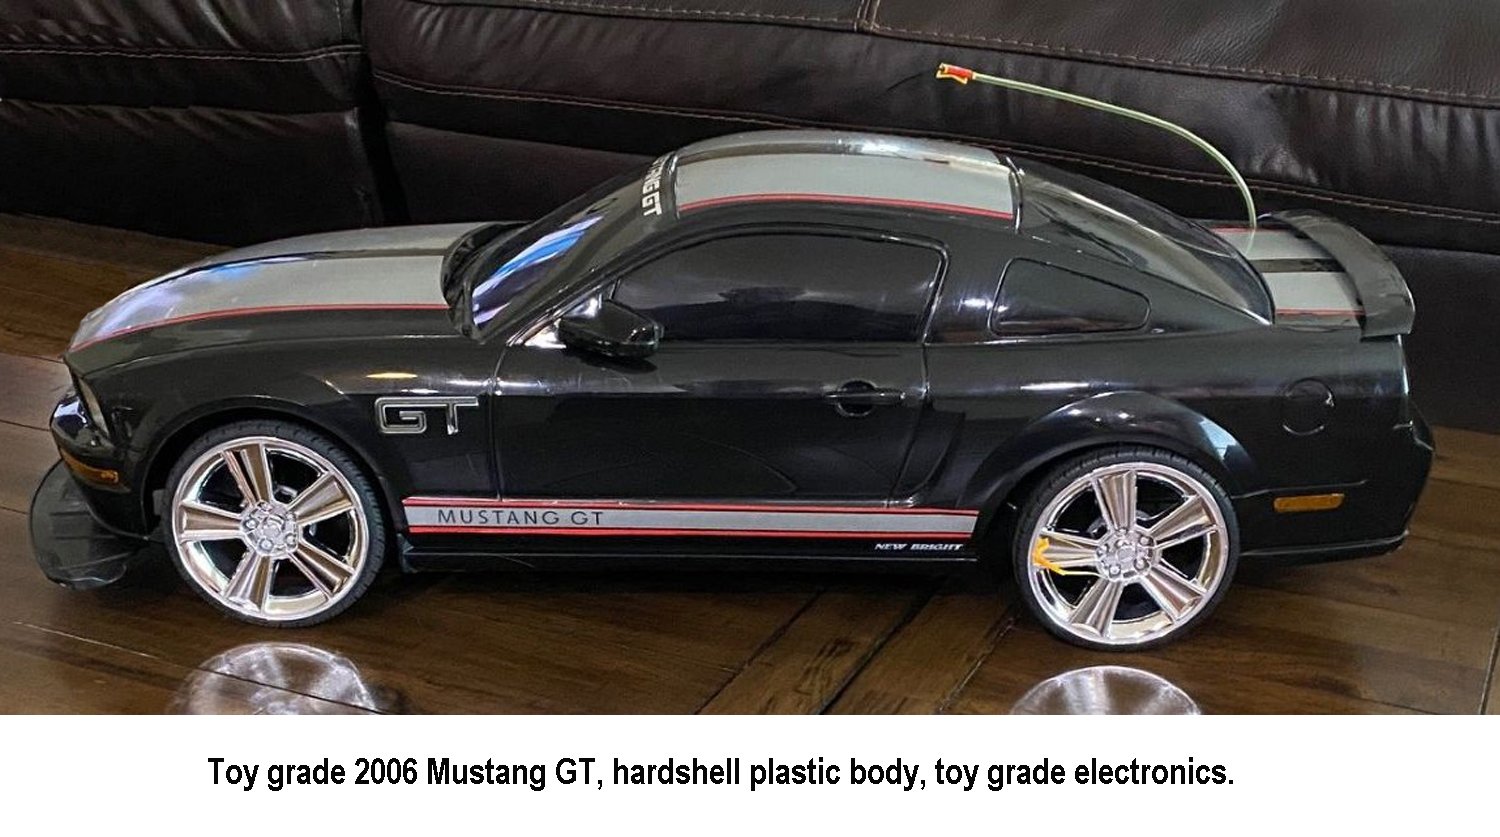
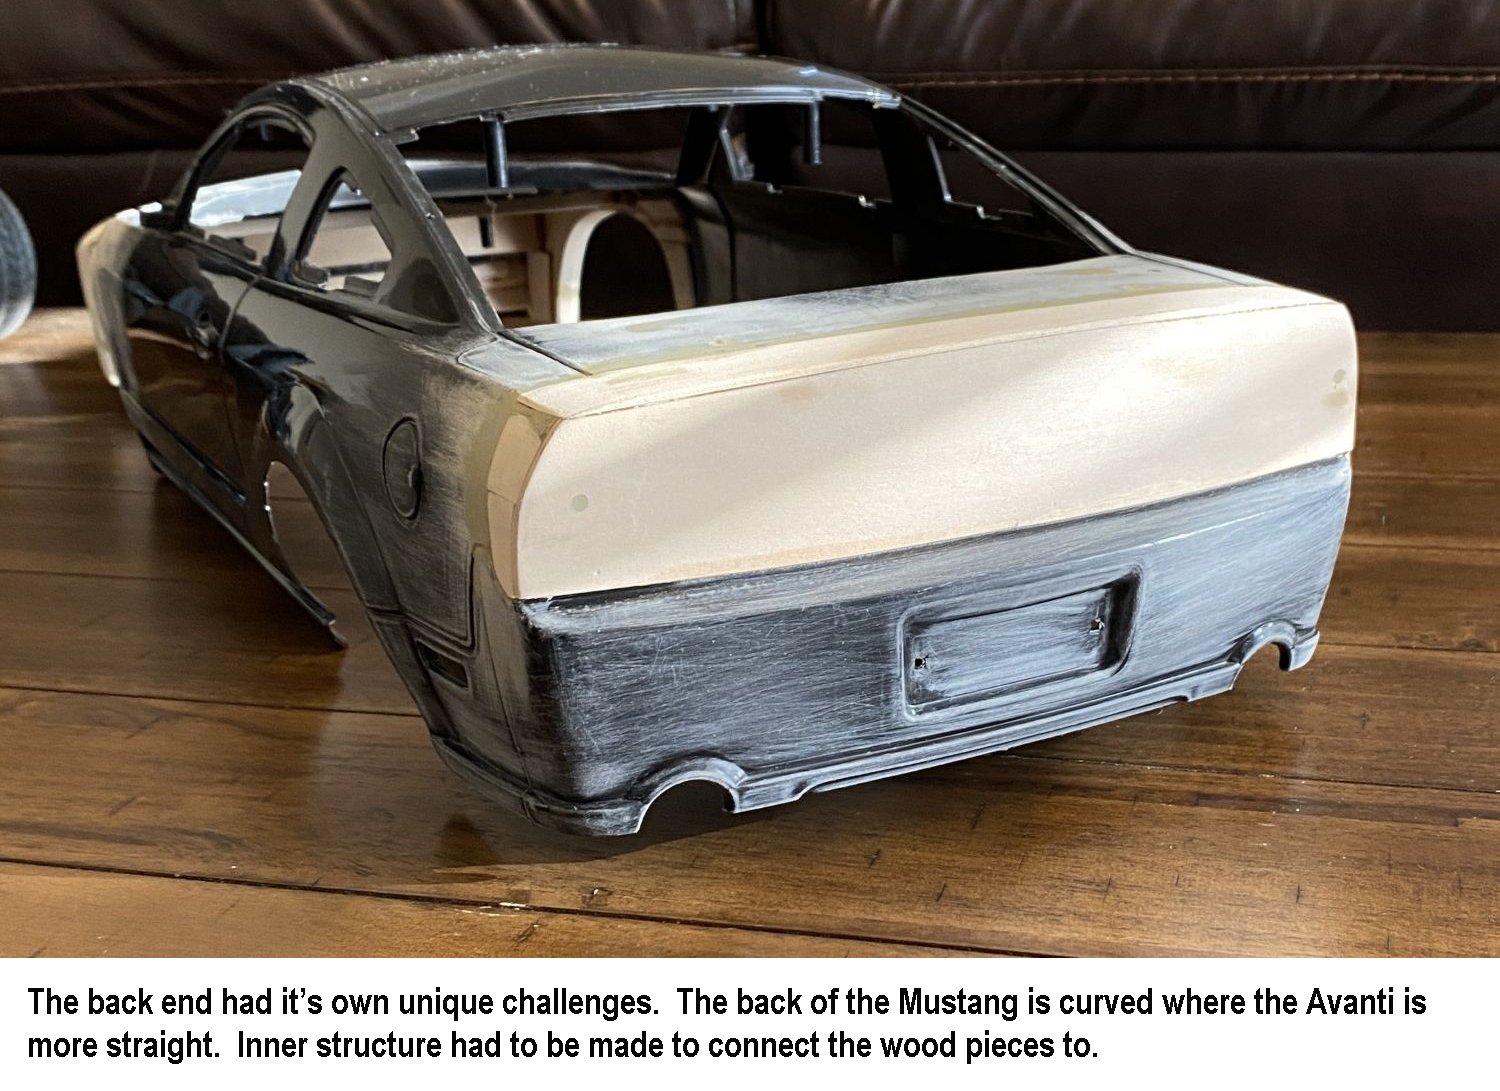
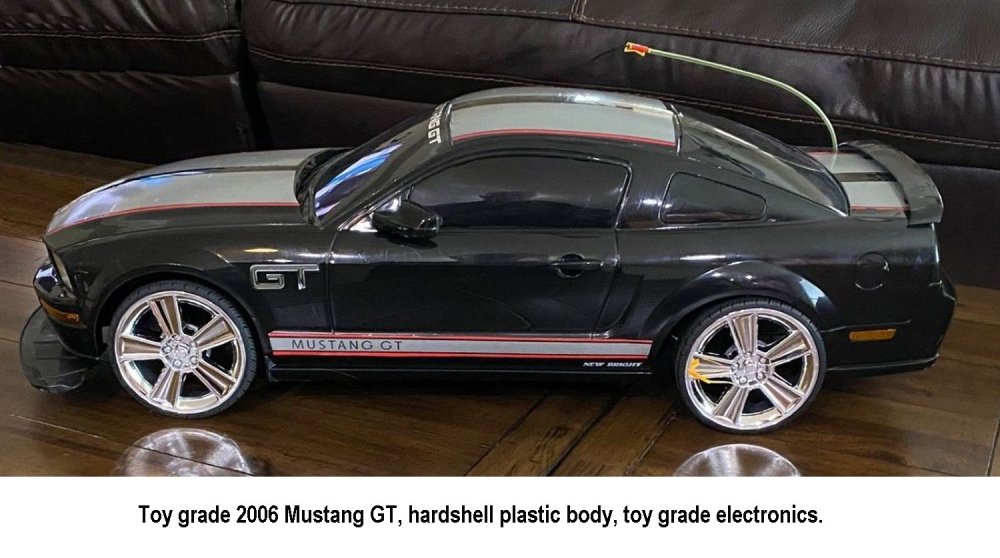
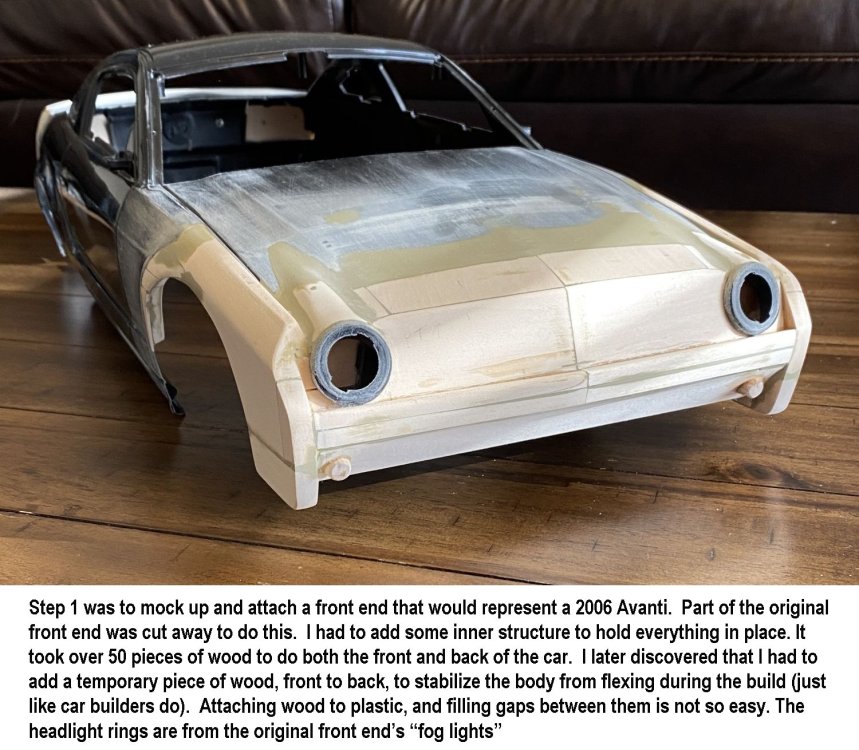
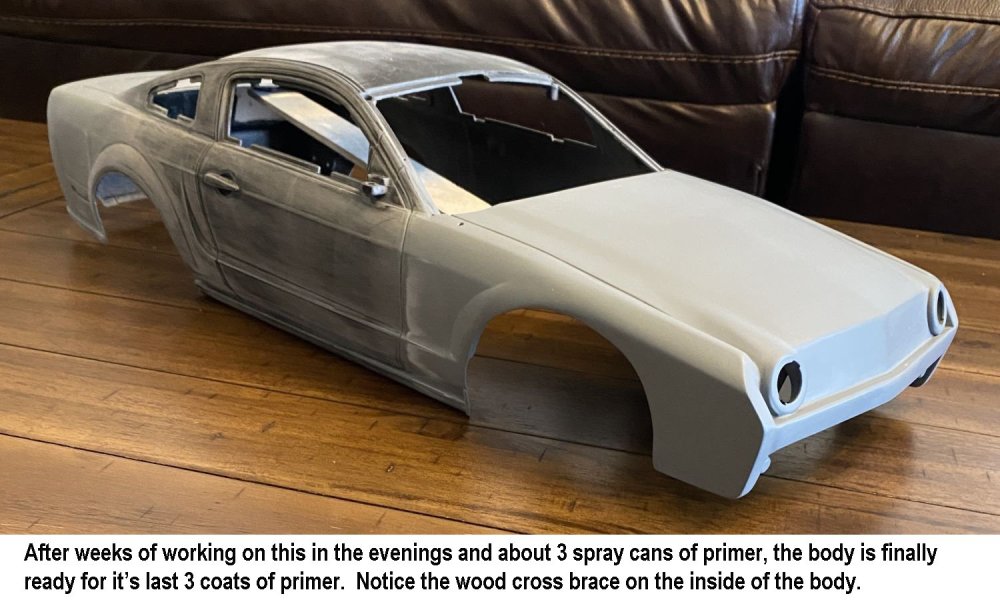
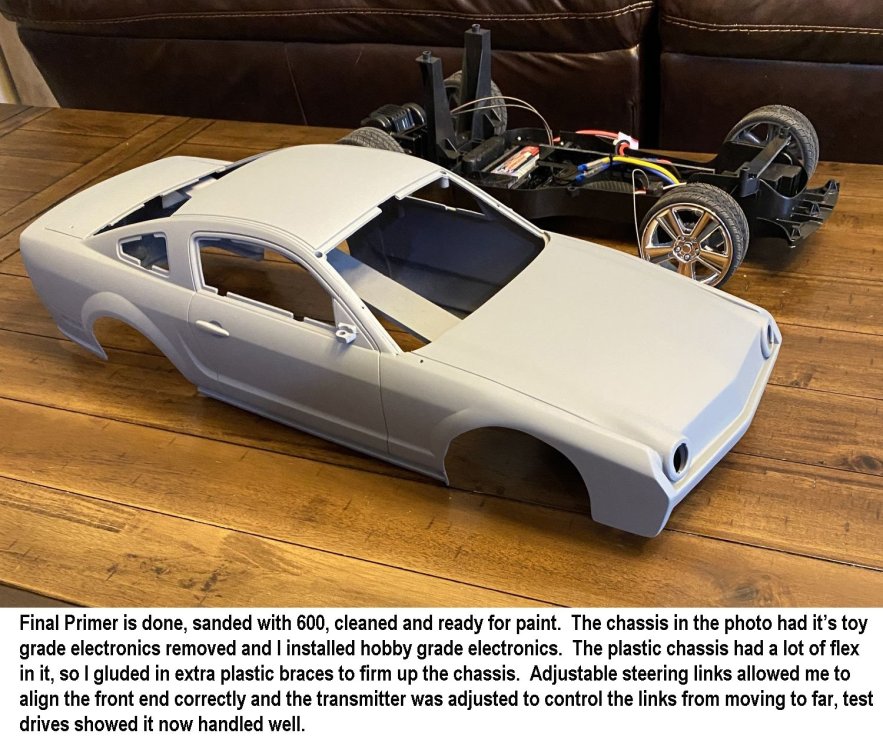
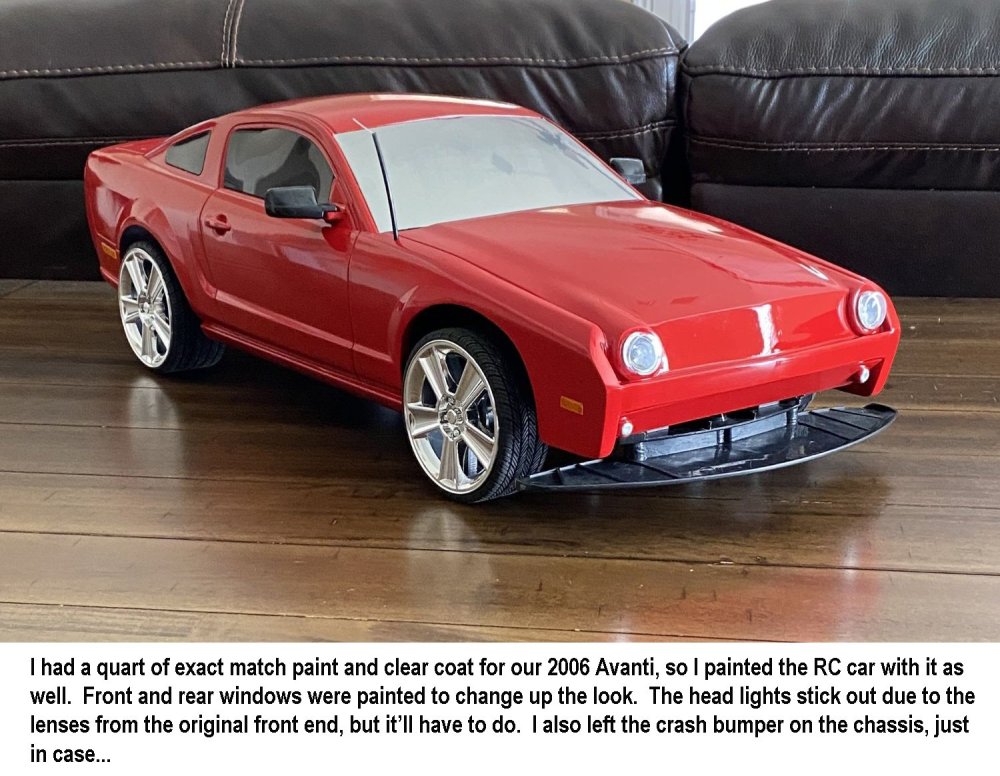
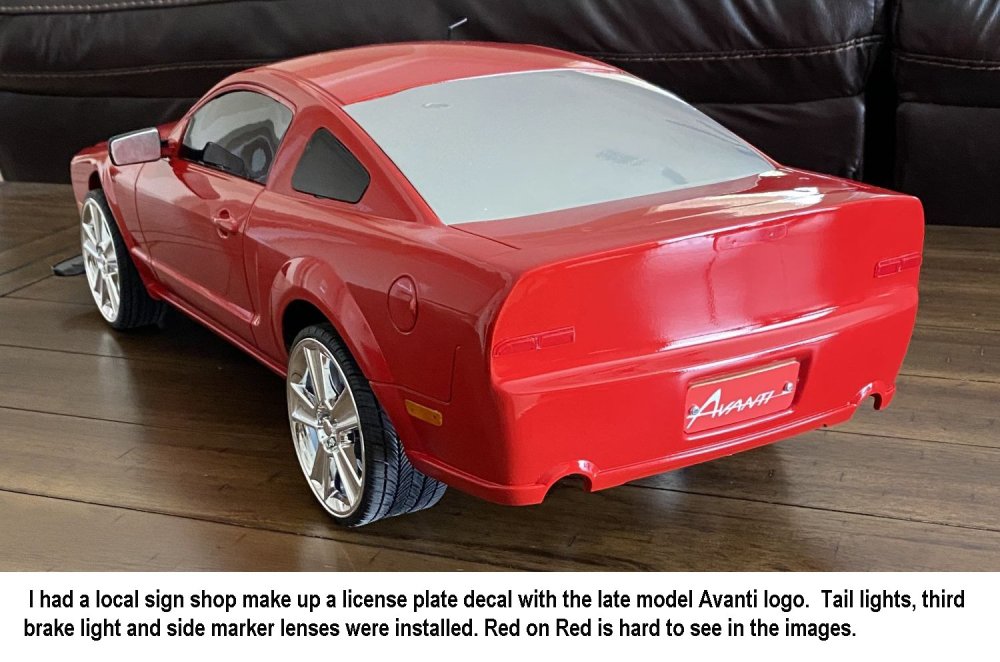
As I continue my customization of our 2006 Avanti, I thought to myself one day that if Avanti Motors could take a 2006 Mustang GT and convert it into an Avanti, then could I do it with a RC Car? And I didn’t want to do the standard 1/18-1/24 scale car, I wanted a larger one. So I started my search and eventually found an original, new in the box, 2006 Mustang GT toy grade 1/10 scale car. The plastic body on these were much thicker than today’s Lexan, so I figured it would be an easier car to work with. At 27” long, it’s pretty impressive too. The seller of the car was a collector who had it for years and was selling off his toy collections, so I was just lucky in my search. The only 2 negatives that come with an old toy grade car is the cheap electronics and thin brittle chassis plastic in parts of the chassis areas. So, I upgraded the electronics and added some pieces of 3/16” black plexiglass that I had laying around, to beef up the chassis while making a battery box, etc. It took about 3 months of off and on evening work to pull this off. Check out the build…

-
You should be able to find them on eBay. The seats were common with several German cars in the 80's and I found several parts that I needed for my 82 seats a year ago. There may be a part or ID # on your old part if you still have them that might help too.
-
 I read about a national event called Mustang Week in January and submitted our Mustang based 06 Avanti to see if they were interested. They were and we took our car there at the end of April. It was among 1500 Mustangs of all years, some from as far away as Canada and Puerto Rico. Our car won an award while there, but the most important thing were the ideas that we came up with while looking at all of cars/vendors. I now have 4 new ongoing projects with the car because of this and the first was wheels/tires. Ford originally intended that the car come with 18" wheels per the door sticker, but Avanti Motors put 2004 17" x 9" Mustang Cobra SVT wheels on the car instead. After we decided on a wheel, and we looked at dozens, we bought "Xcess 5 Flake" chrome rims, 18" x 8.5". I then purchased Michelin Pilot Sport A/S tires and put 255/45 on the back and 245/40 on the front. The front tires are 1.25" inches shorter than the back and gives the car that "dropped" front end look. The speedometer is accurate when checked with a GPS and the car drives and handles extremely well. I put the original wheels/tires for sale on Facebook and sold them in 1 day. 3 more mods are coming soon.
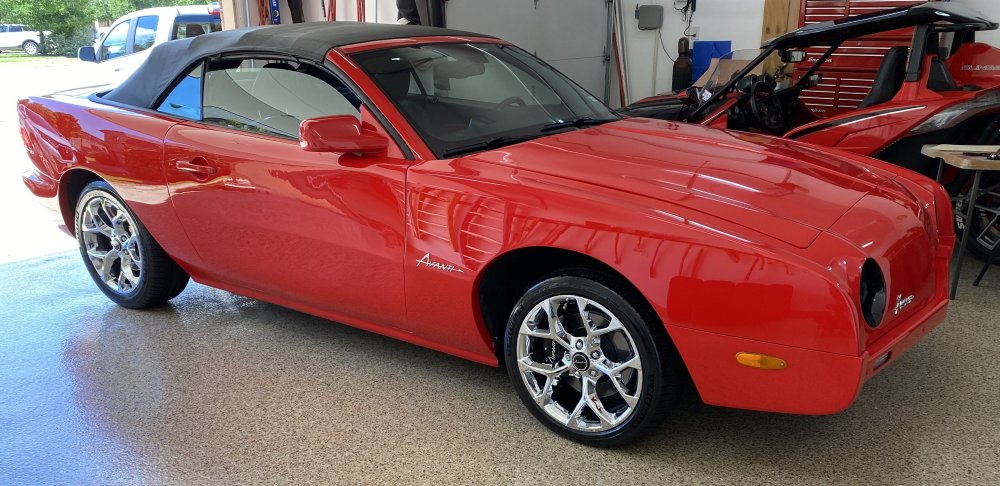
-
The switch is most likely bad. You can unplug it, connect an ohm meter to it and rotate it and see if the circuit works in every position (bad) or does work correctly. If it works correctly then someone has bypassed it or the wiring harness has a problem.
-
-
It's the resolution, jpg must be 300 DPI for conversion. Standard 72 DPI isn't clear enough.
-
Mine should work, used it for decals, clothing etc.
-
avanti06@att.net avanti(zero six)@att.net
-
You'll have to send me a personal email. Vector files can't be uploaded to the forum. avanti06@att.net
-
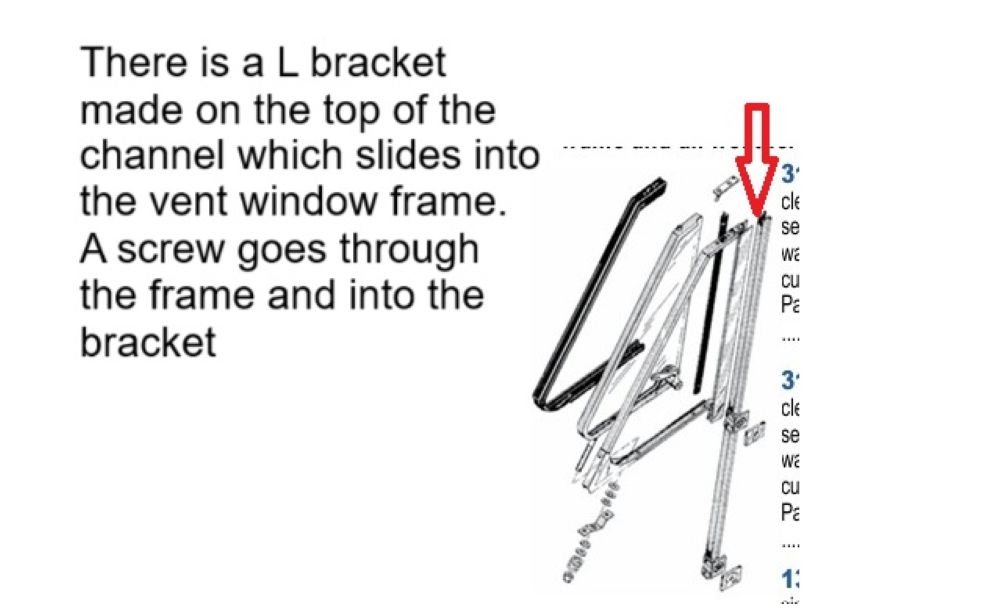
There is a small L bracket that is missing, it is part of the front window channel that you ordered from Dan.
-
You can swap out the 305 for a 350 without any problem. If you want to keep the 83 carb/distributor and computer system, then that will work also, with the exception of having to rejet the carb for the 350. The 350 also would need 350 exhaust manifolds since the ports and exit port are larger. You would need to have a muffler shop replace the flange that connects the exhaust pipe to each manifold with larger ones to match the 350 exhaust manifold. The good thing is you'll have a lot more power once you are done, and the value of the car will go up as well.
-
I was thinking that there was something similar to a L bracket that the screw went into and you could use that to attach the rivet to. Maybe we need to see a photo of the problem area?
-
I think there is enough room for you to drill a new hole and use a pop rivet to fix it, or maybe make a small L bracket to connect the 2 pieces.
-
Oreilly Auto Parts sells the 3 speed Murray switch which works like a champ.
-
I have the second generation logo in a vector file

-
I don't know, never had the pleasure of doing that.
-
Nostalgic Motors sells a complete sunroof delete roof skin in case you want to just reskin the entire roof.
-
The car was not in good shape. From looking at the photos, it needed everything. It sold for just under $14K and it wasn't worth that in my opinion
-
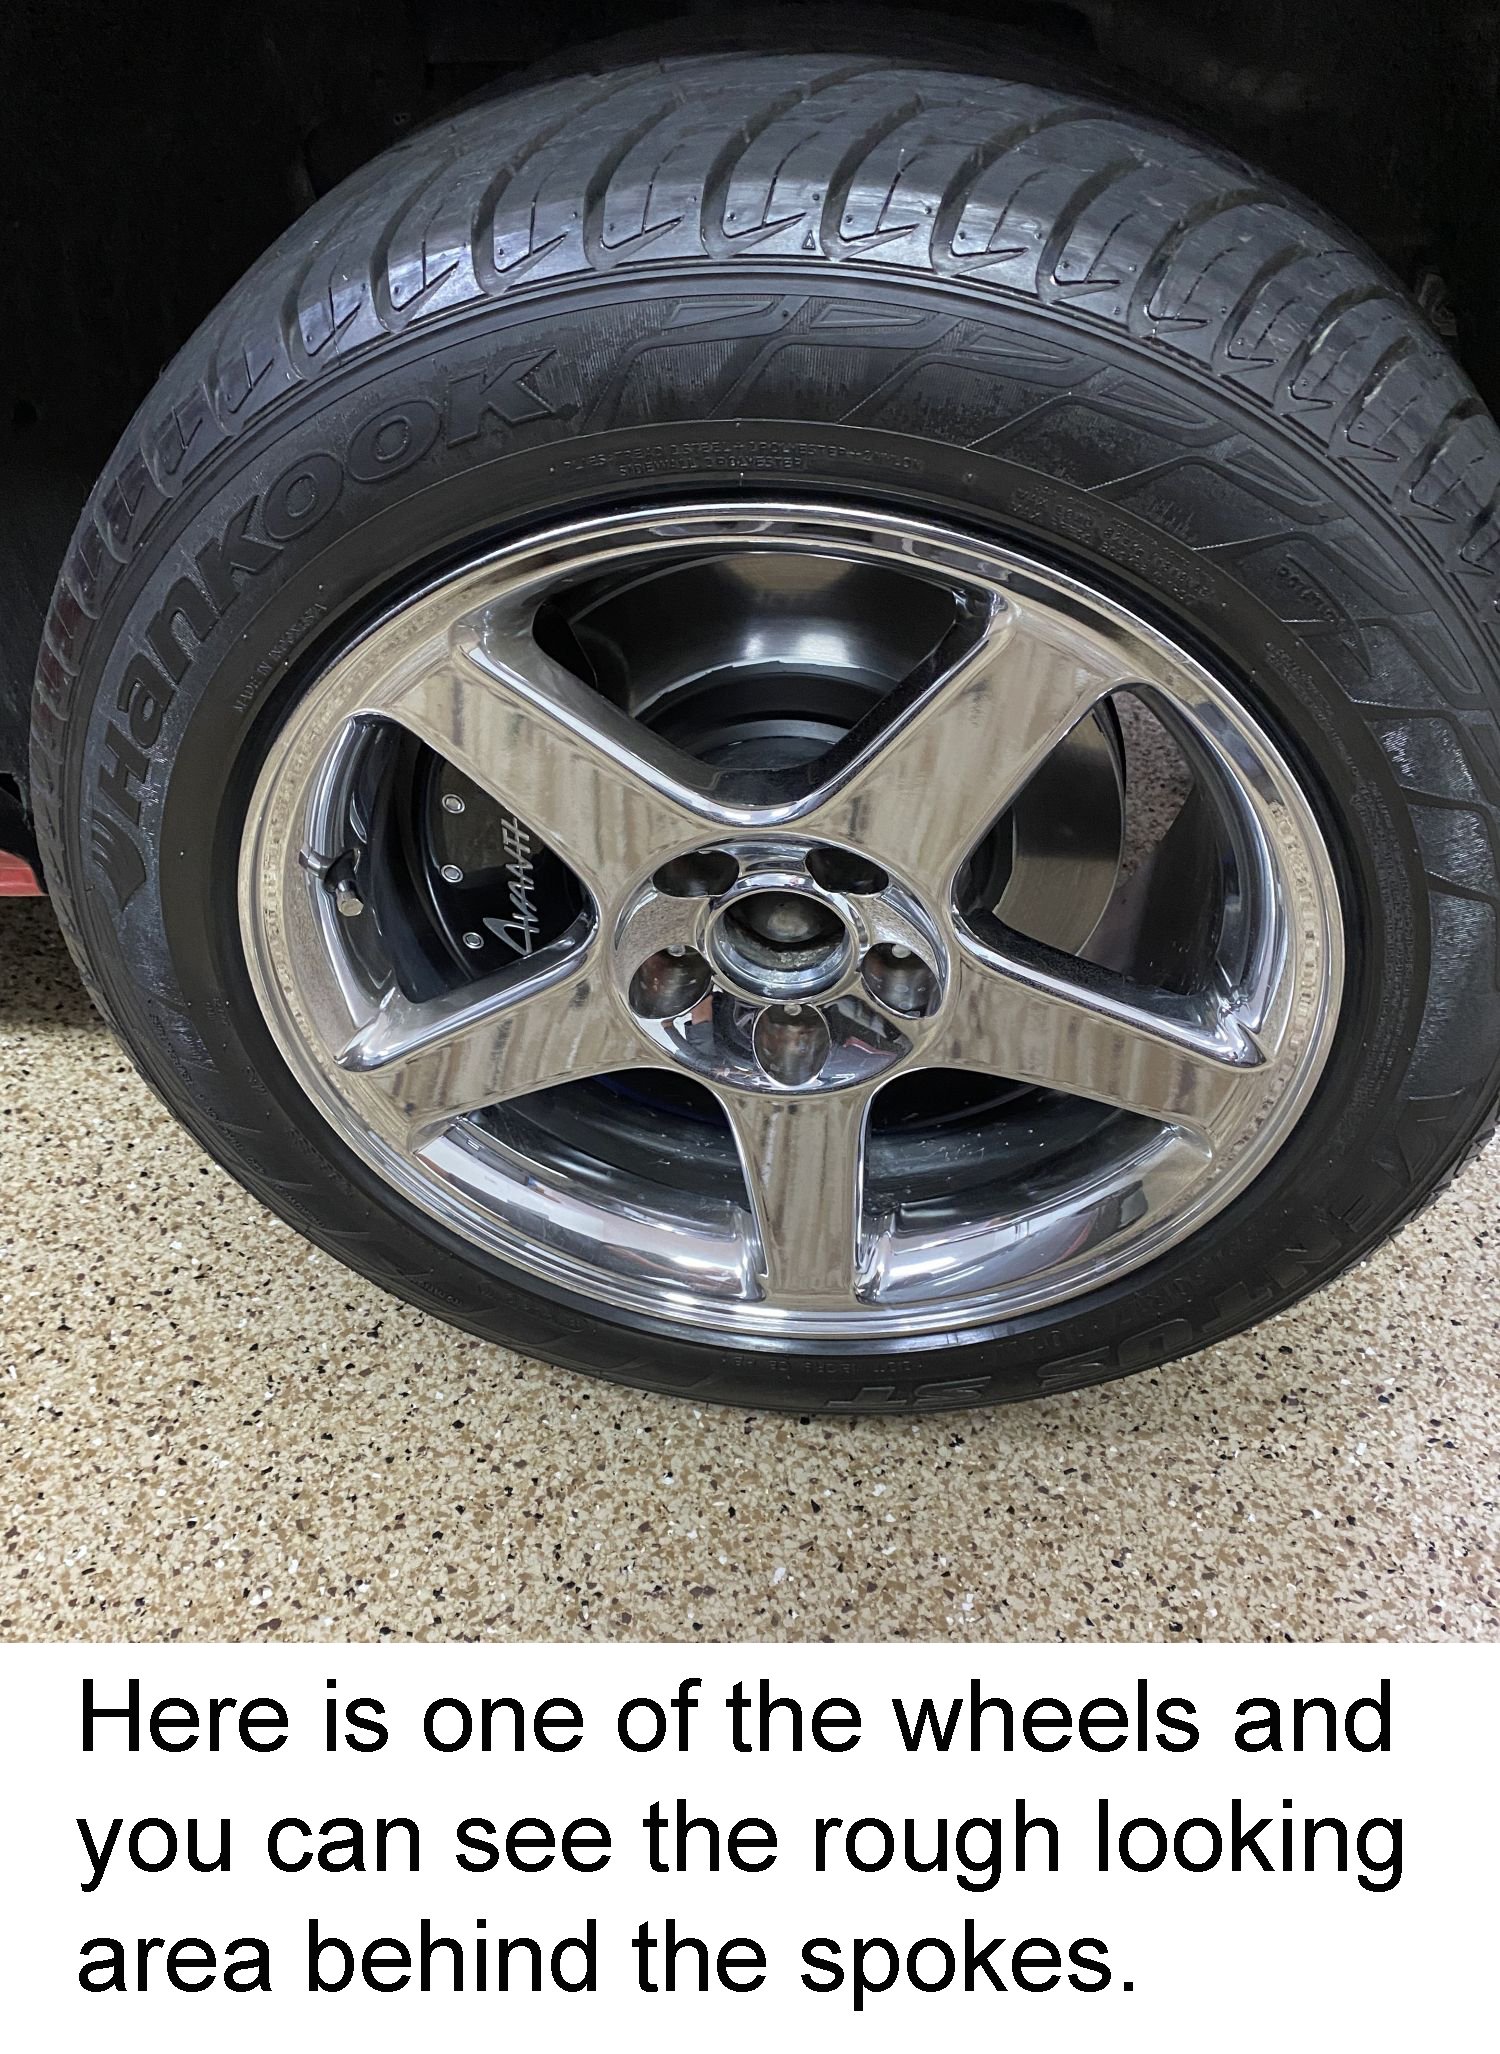
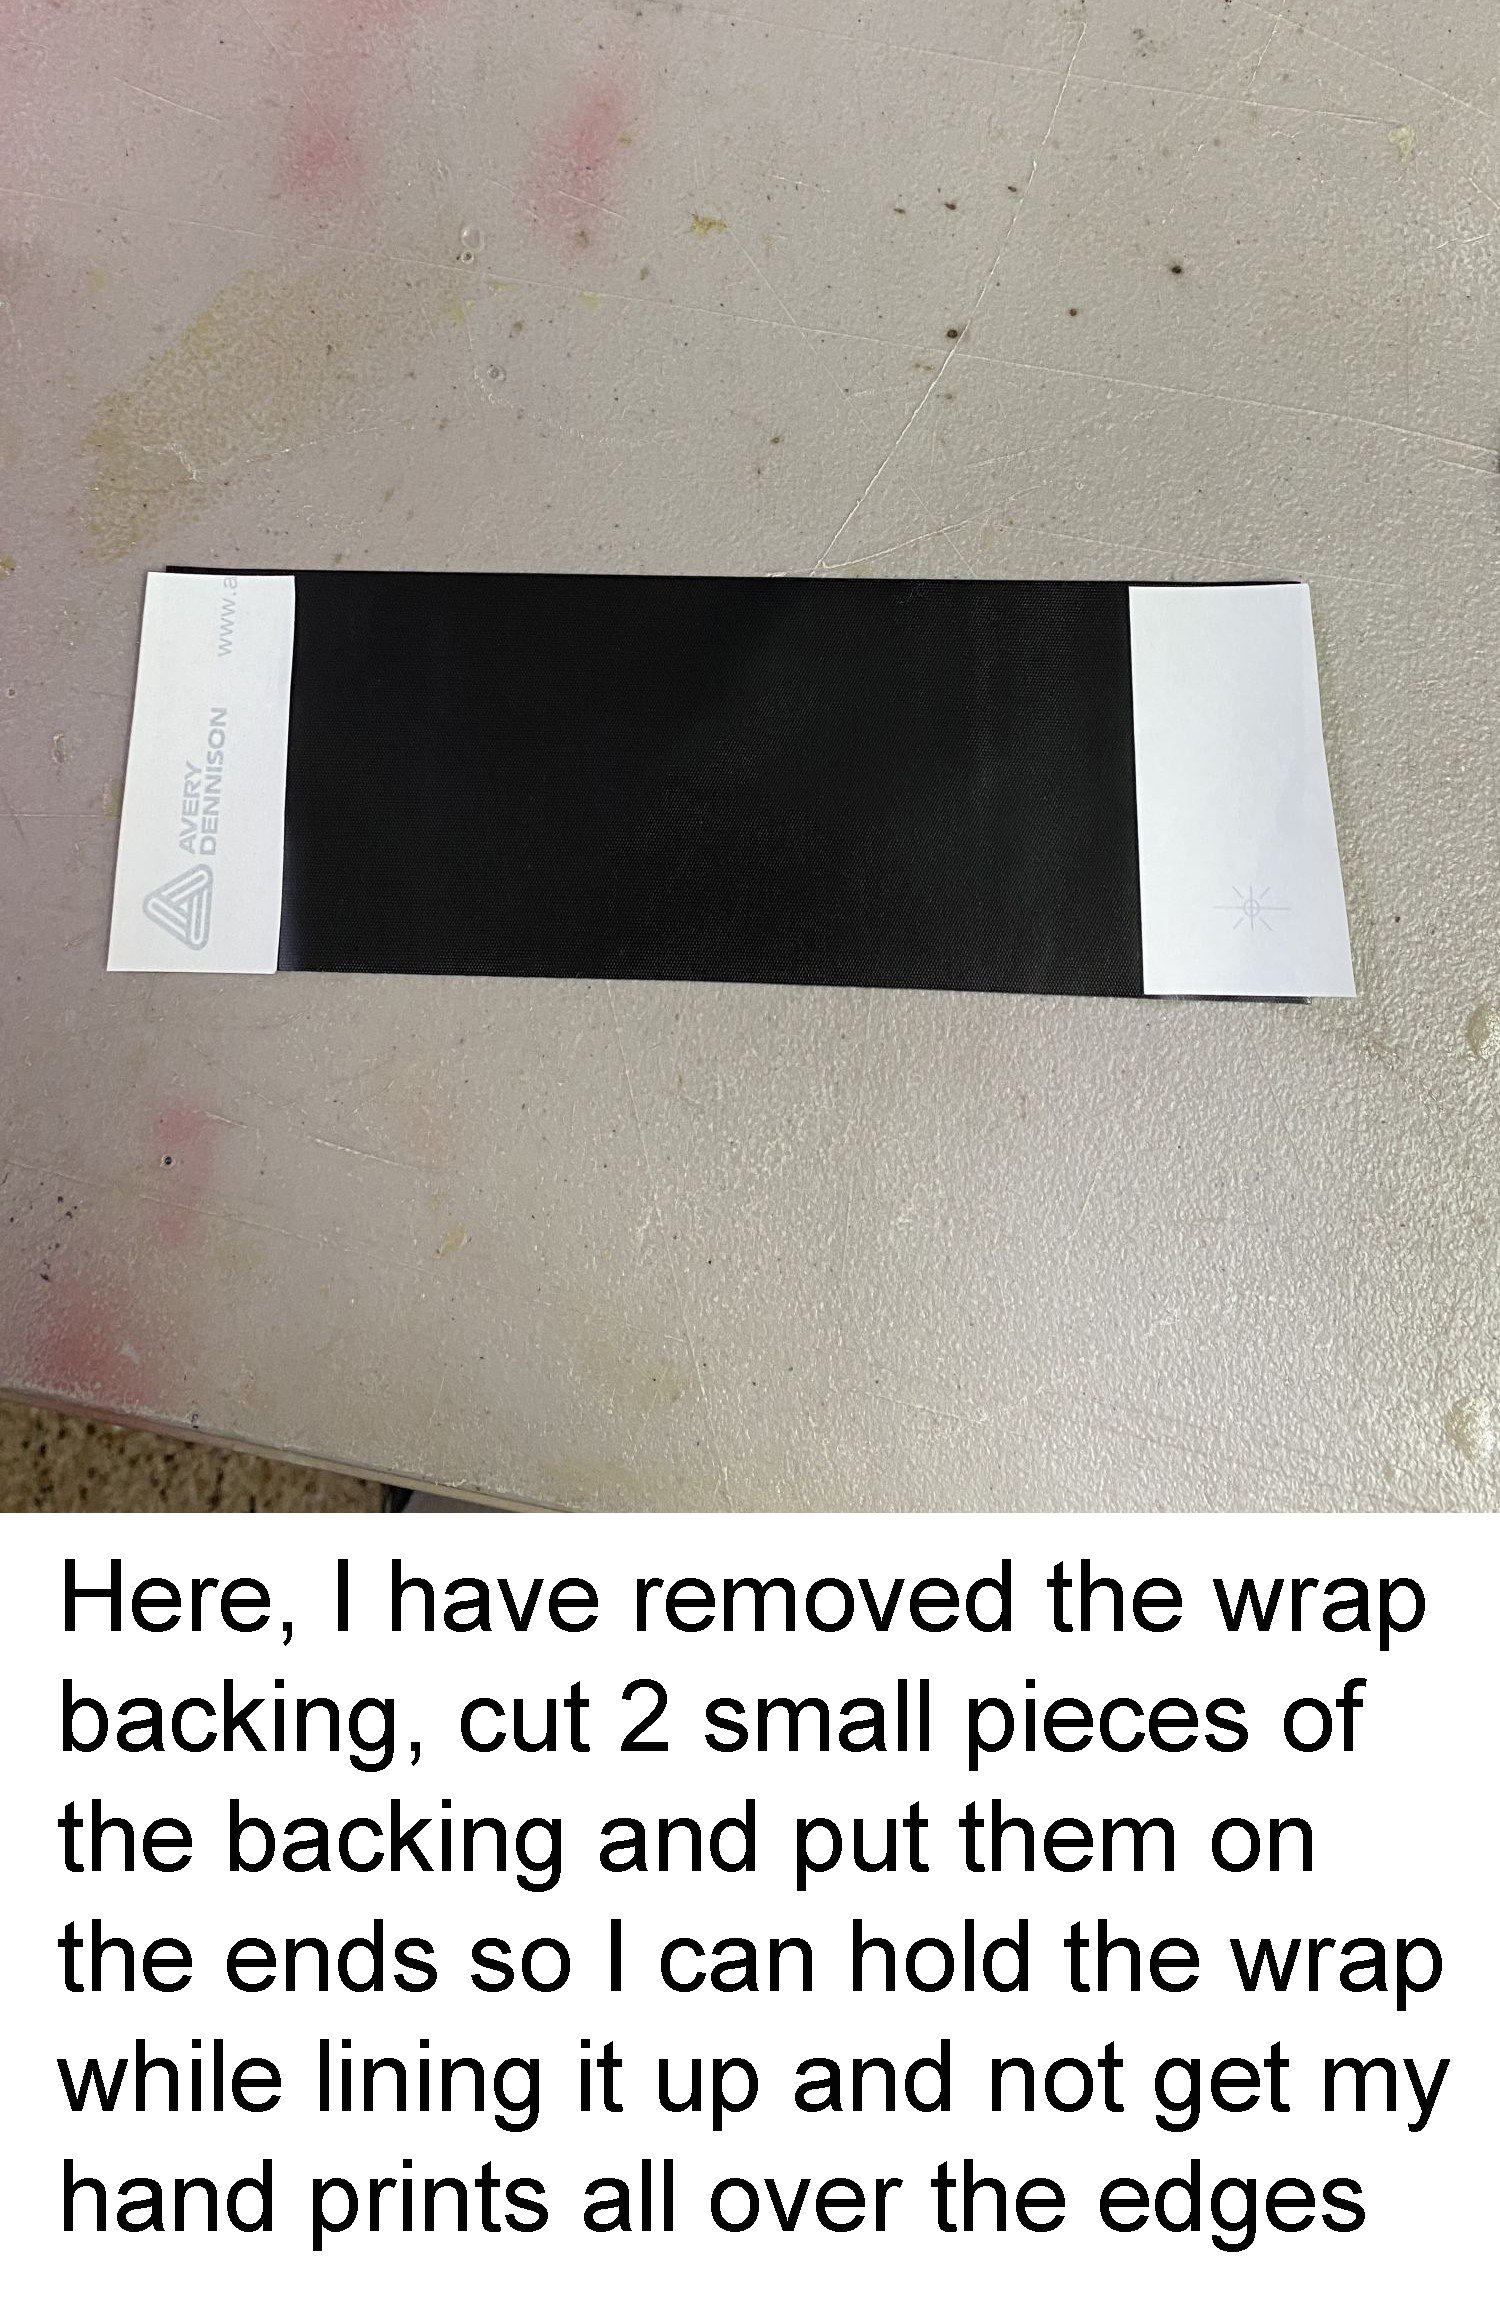
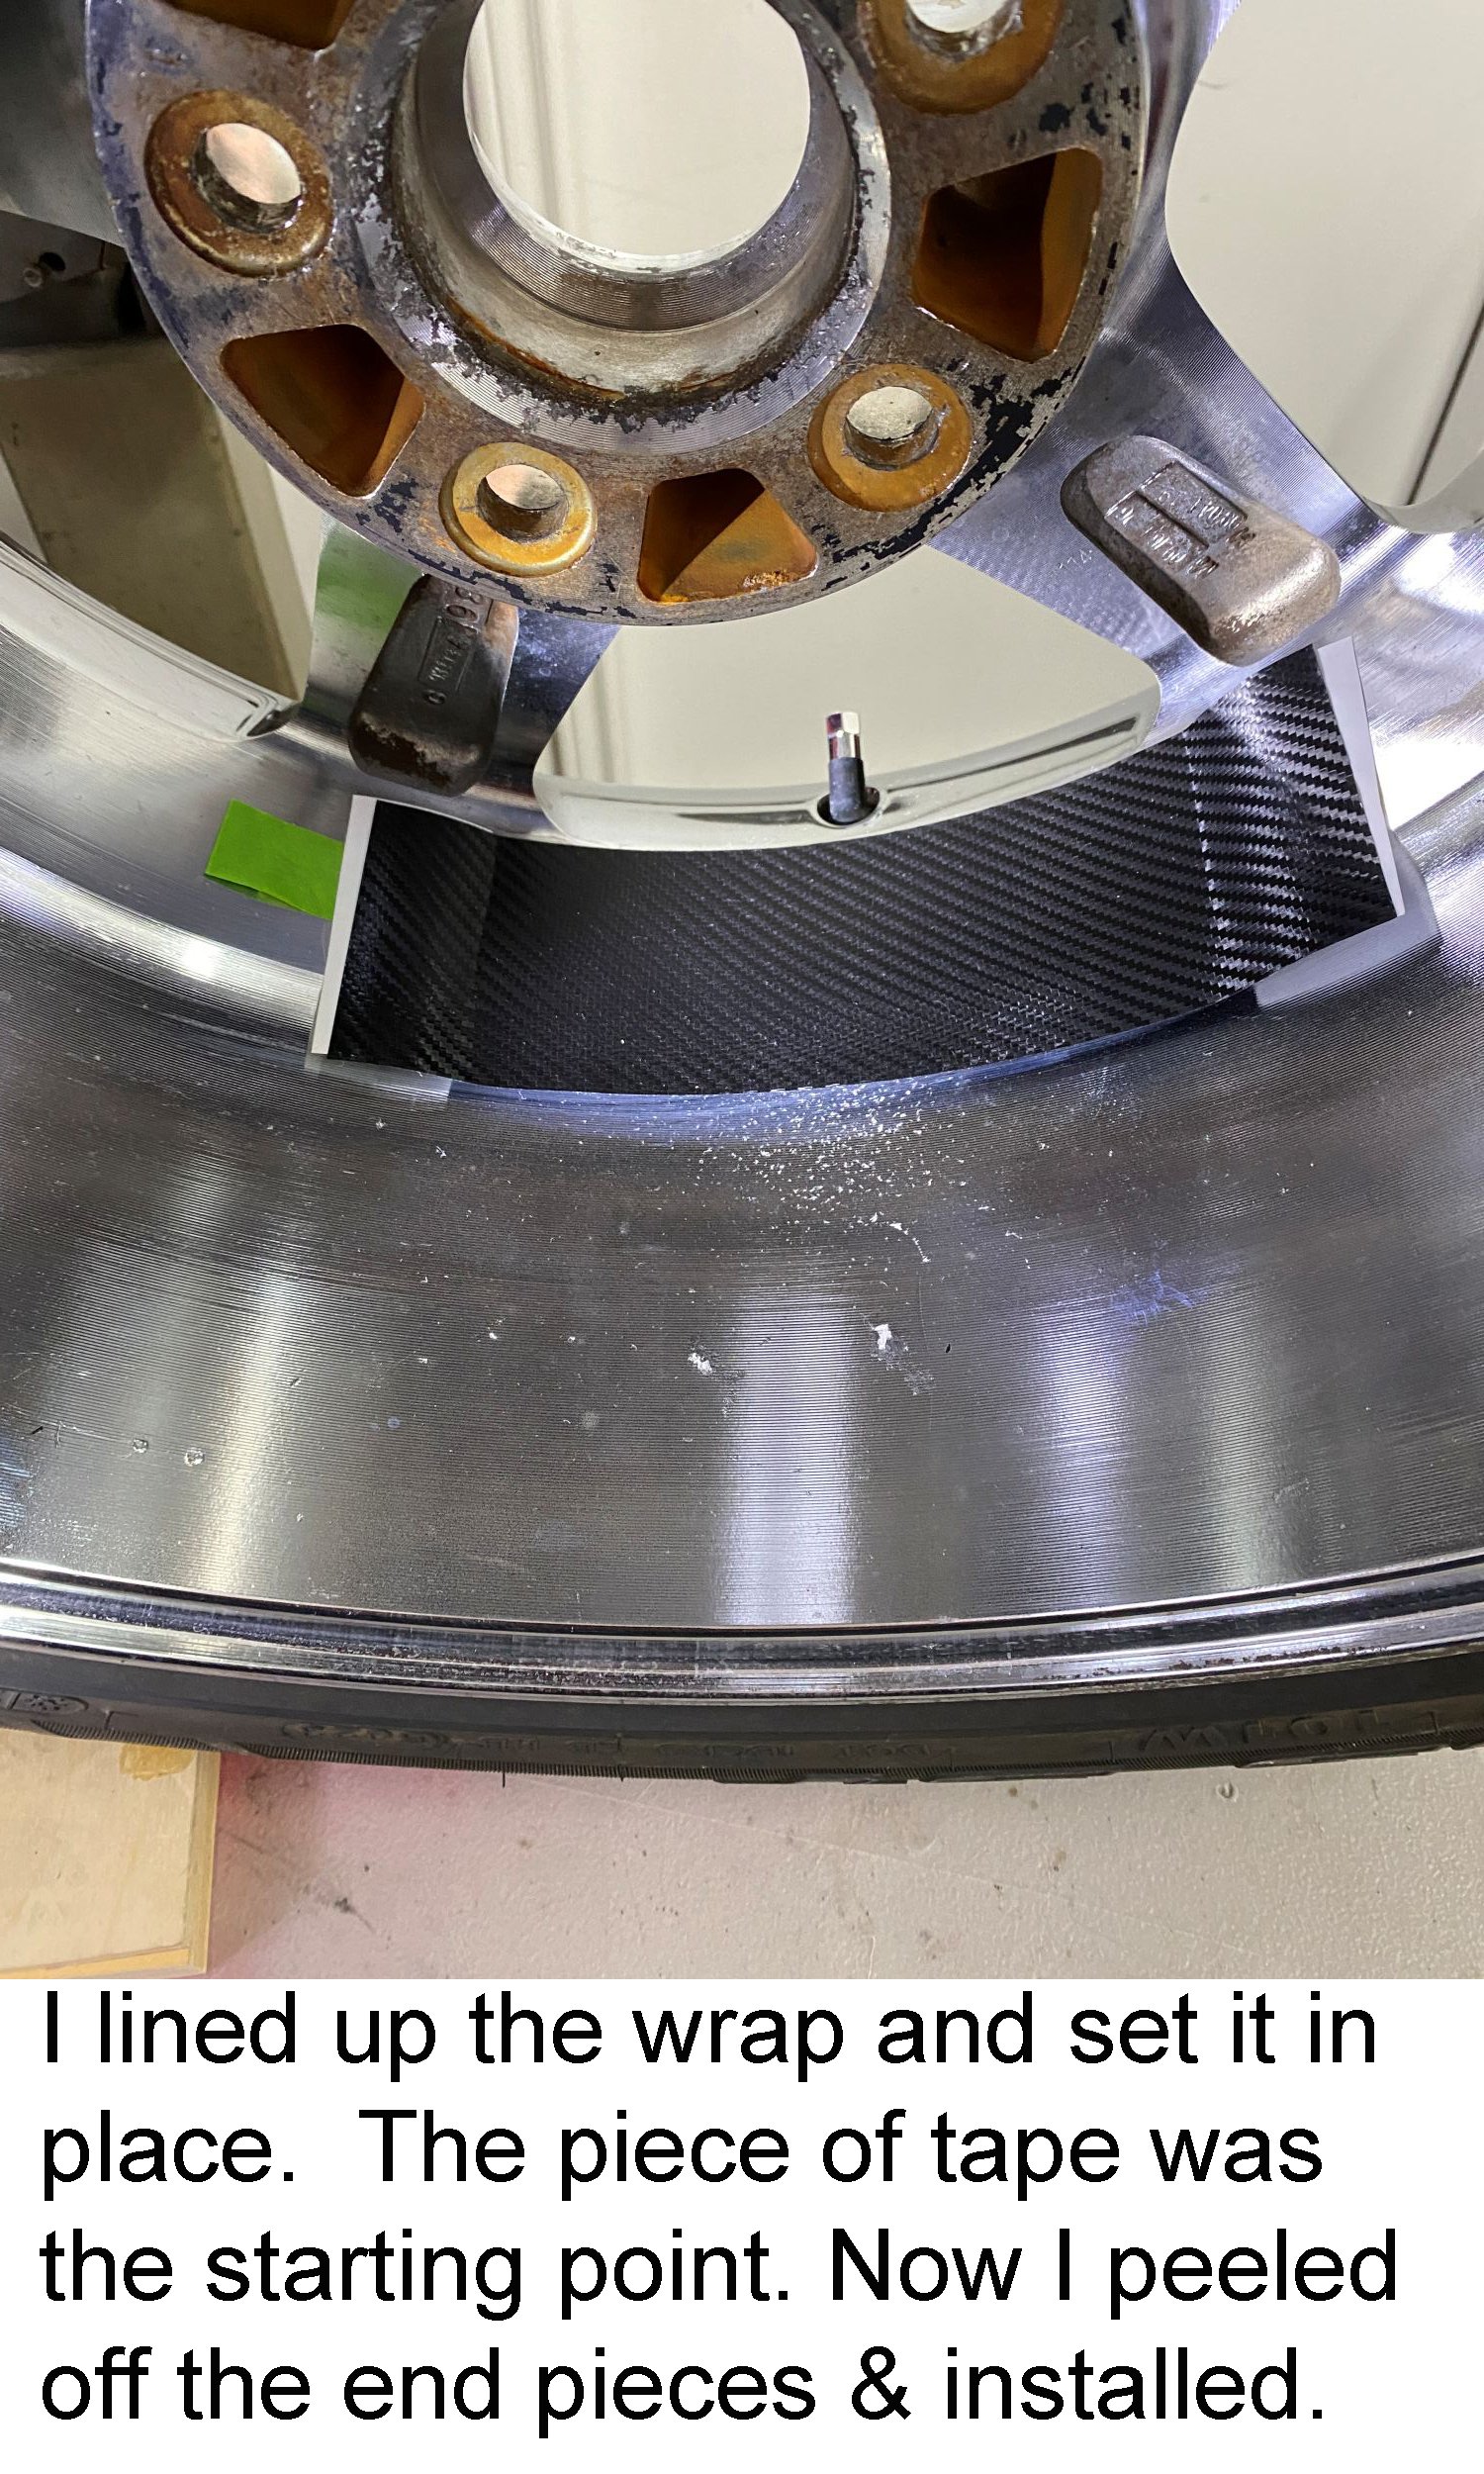
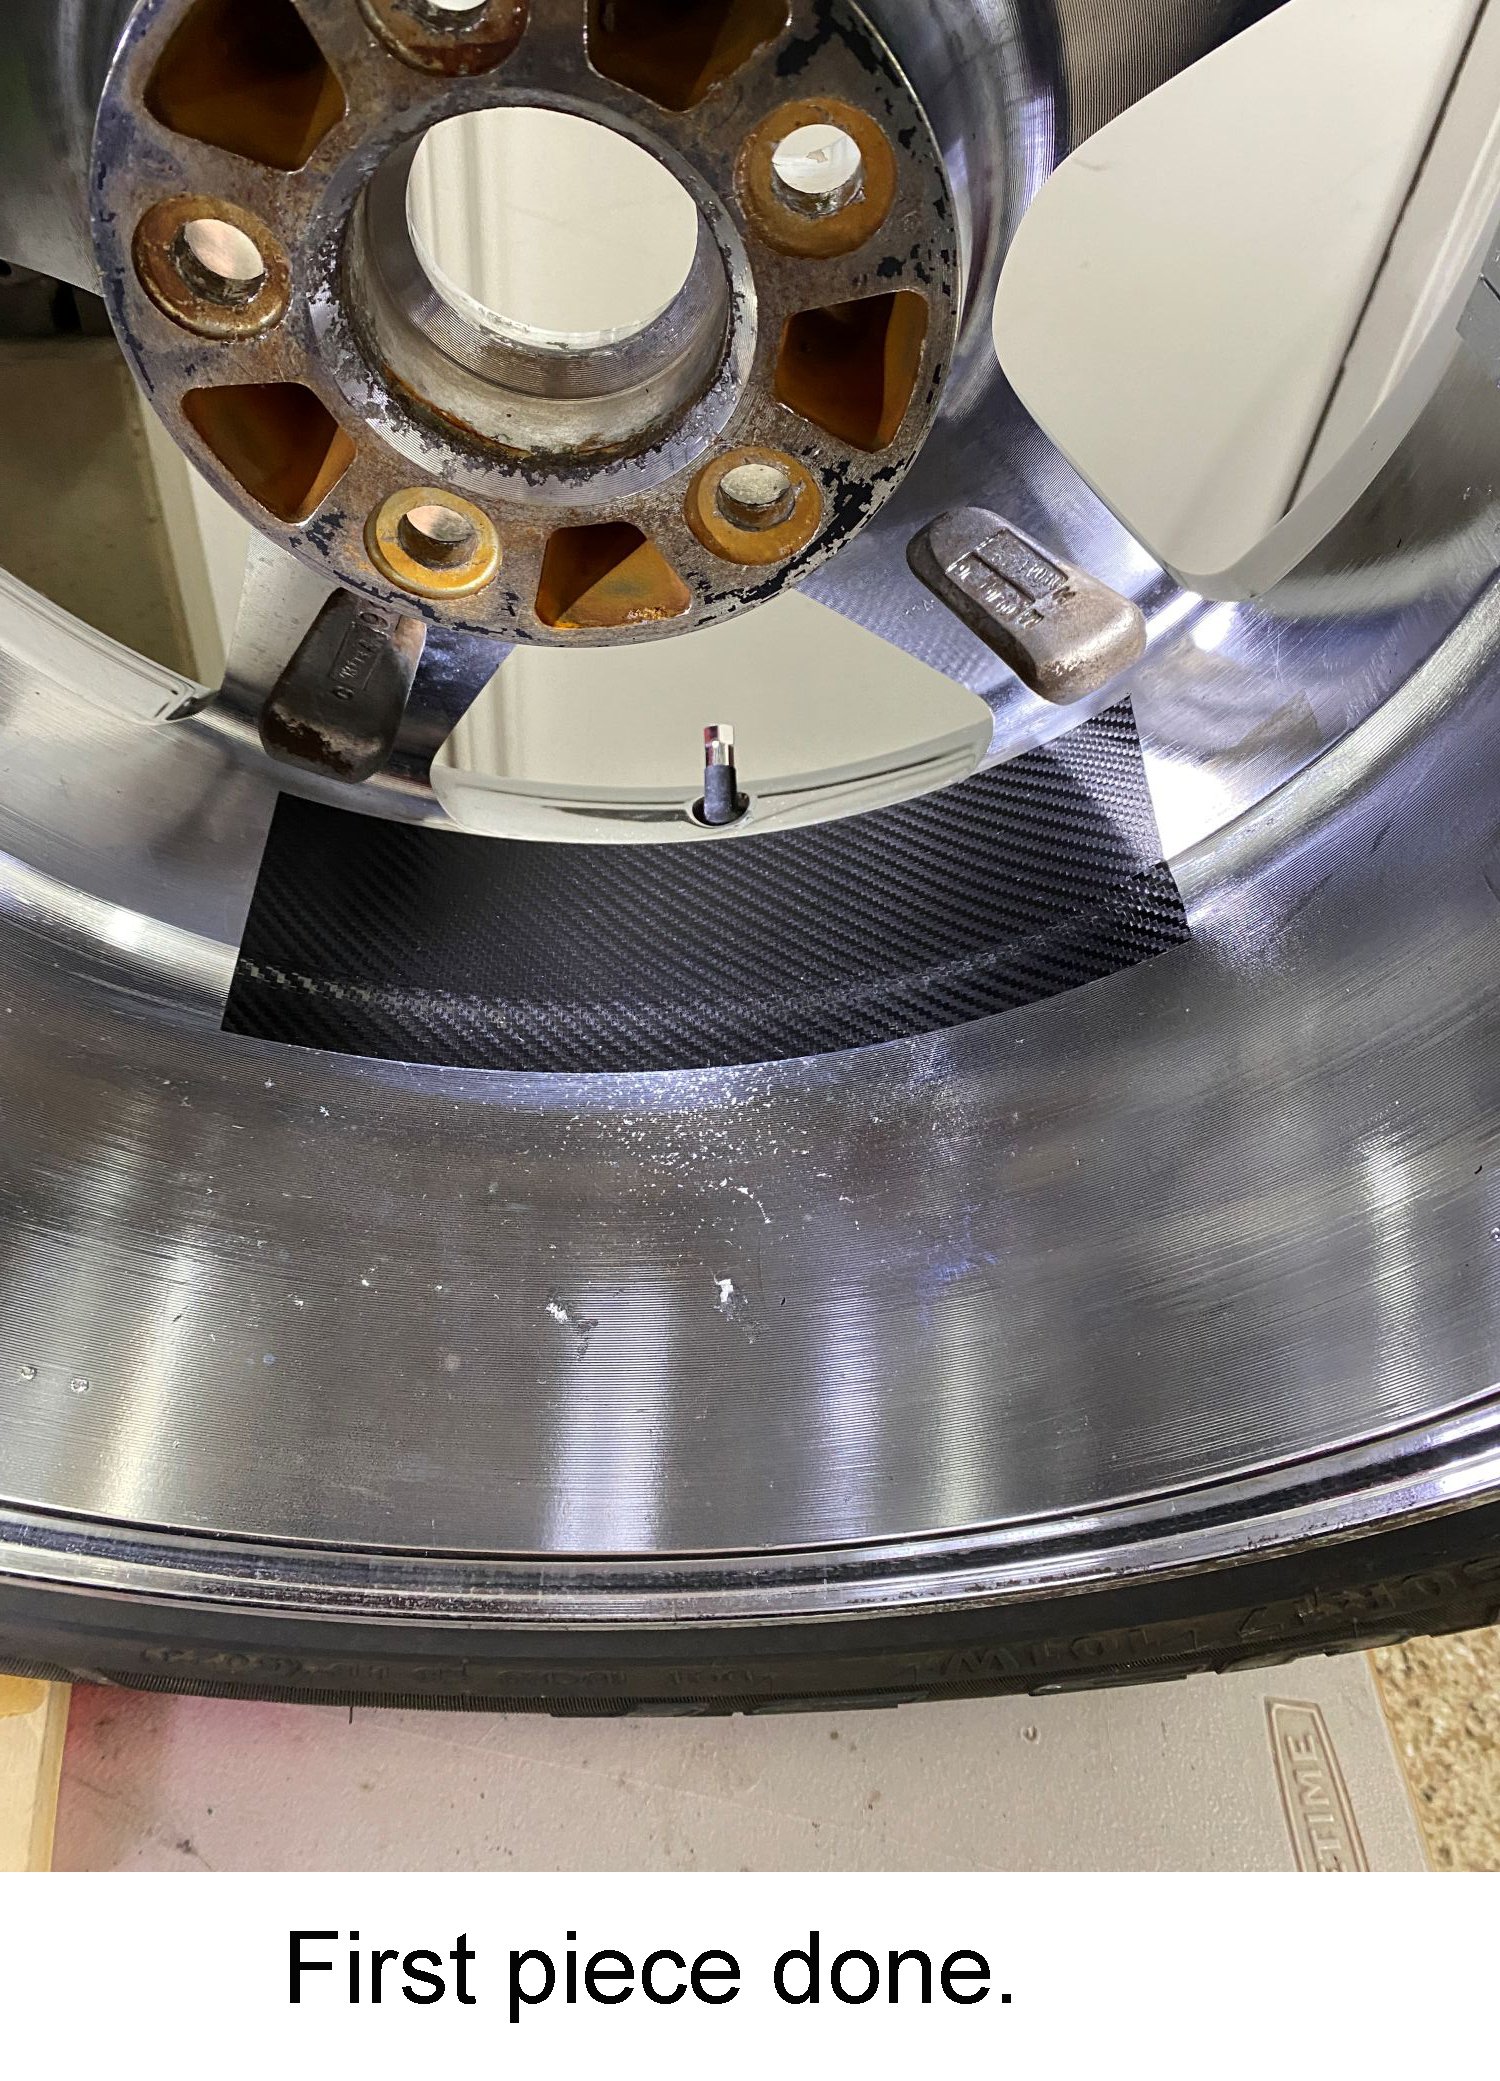
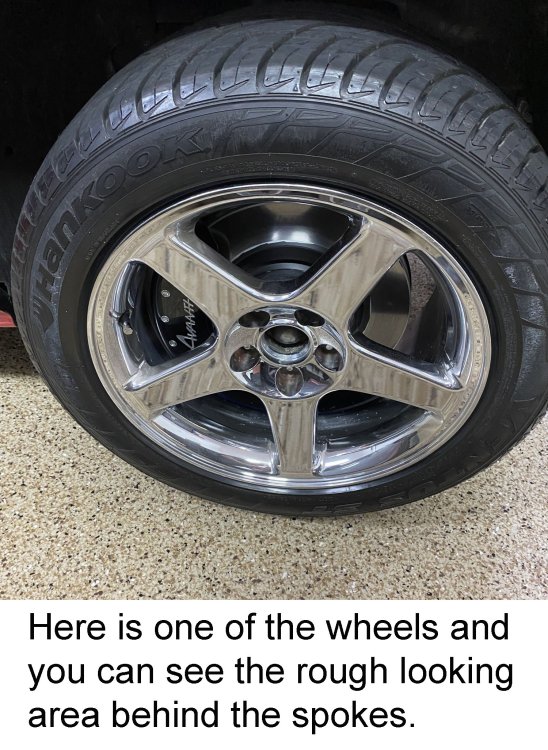
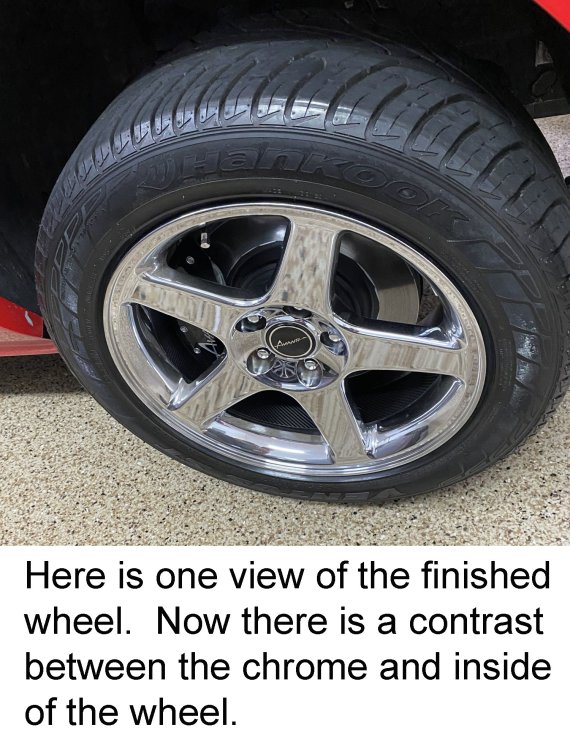
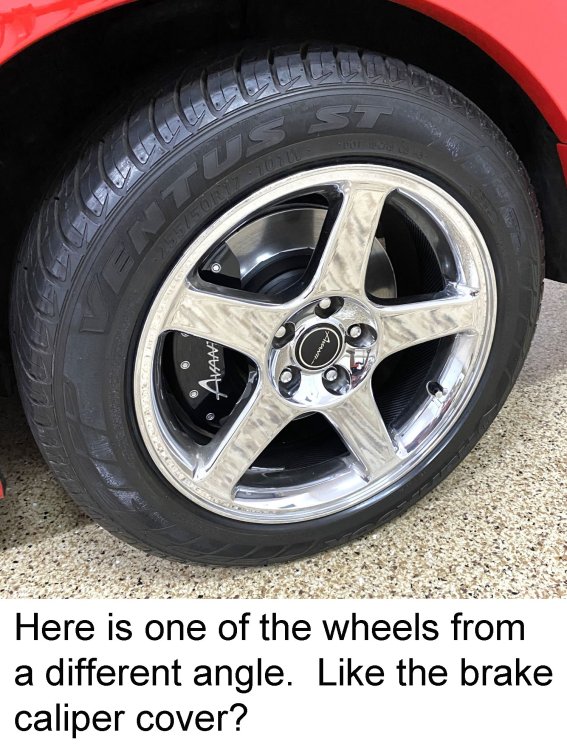
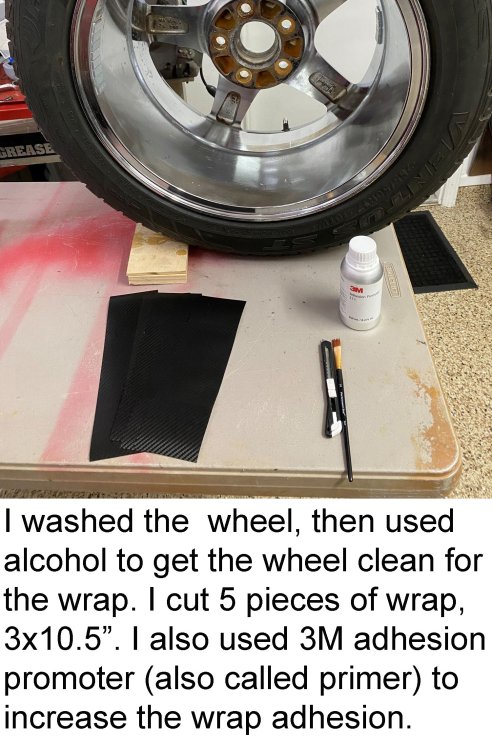
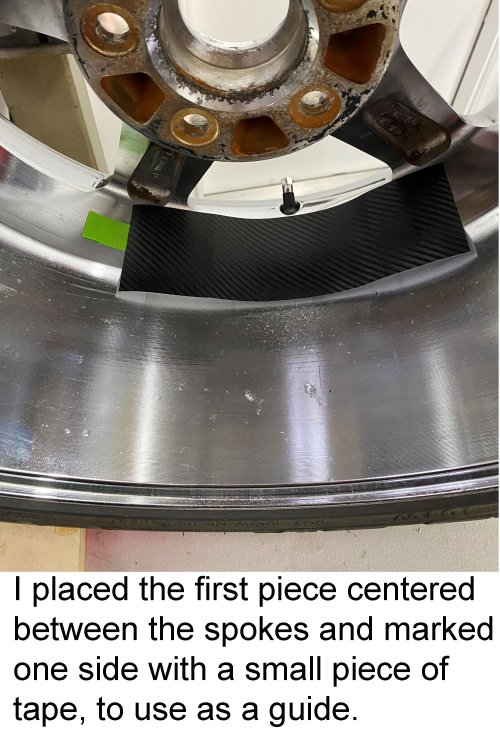
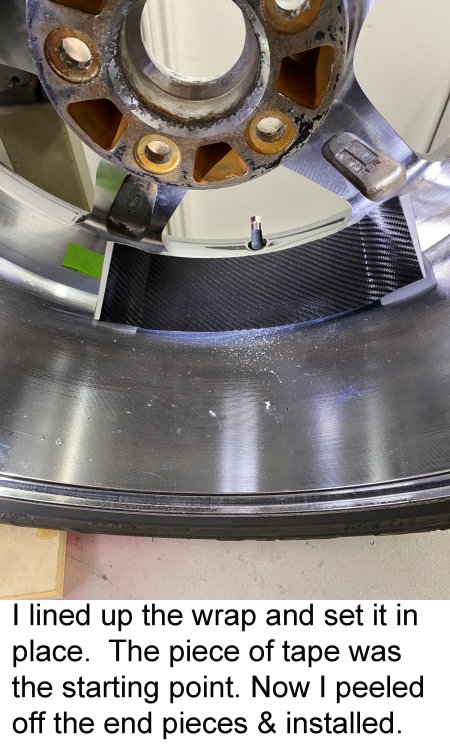
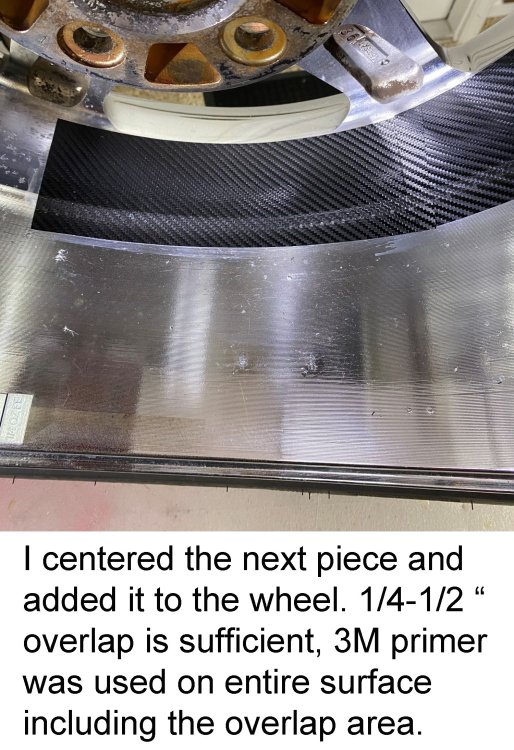
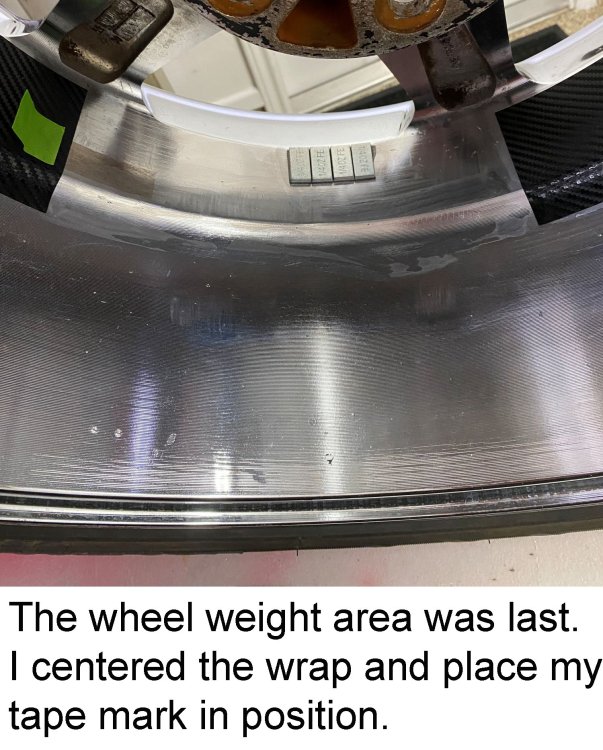
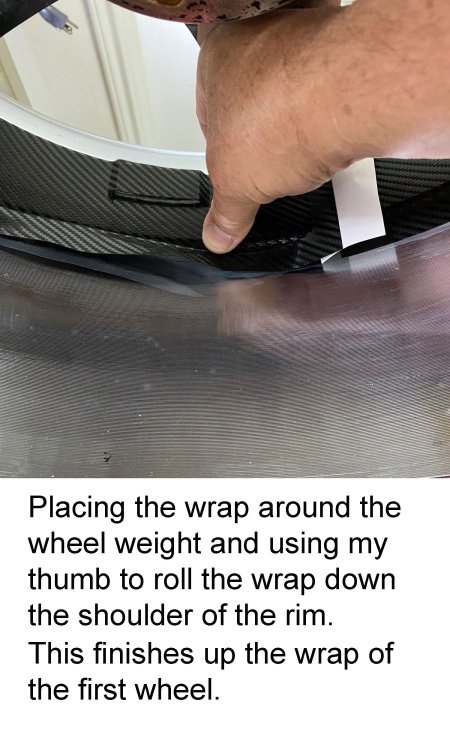
Our 2006 Avanti came with 17” wheels that were actually for the 2004 Mustang Mach 1 models. They have a lot of miles on them and since I recently put new tires on them, I decided to dress them up a little instead of replacing them. The chrome is getting tired and really looked bad on the inside of the wheel, so I decided to black out the part that you see the most when looking through the rim. The newest trend in wheels is to wrap them for unique patterns/colors, and since I had some extra black carbon fiber wrap, I decided to use that. The other thing was to figure out how much of the inside actually needed blacking out, and I determined that 3” from the back side of the spokes would be sufficient. Also, the diameter of the wheel spoke edge is different than 3” towards the back side of the rim, so wrapping it in 1 piece would end up being more difficult due to the extra curvature. I did a test wrap of about 1/4 of the wheel, 3” deep and it did exactly what I thought it was going to, no good. As I looked at it, I realized that installing or removing wheel weights would also become a problem, so the solution would be to wrap the inside in pieces, with each “joint” being behind the “spokes”. That would solve both problems and if wheel weights were added or removed, I could patch that area much easier. I also used 3M adhesive promoter (primer) to increase the wrap glue strength. A small brush was used to apply it to the area that the wrap pieces were would be placed. So, here we go:


-
My 82 model took 3 lbs, so you should be able to do that much.
-
Screw on service valves are for R12. Most anyone who does a 134 conversion replaces those and the dryer at a minimum when doing a conversion. In a lot of cases the rubber lines need to be replaced as well. Now, that's not to say that some person came up with an adapter to charge 134 through those fittings but I sure wouldn't. R12 and R134 don't mix, you use different A/C gauges to prevent mixing the refrigerant, use the correct fittings and gauge pressures. There use to be some R12 replacement refrigerants available but I don't think those are available anymore. You'd have to call a local parts store and see what they have.
-
1-2) It could have been installed back at the factory after purchase, a recommended repair shop that they used at the time or a repair shop that did it for the owner. 3 & 5) Your concept is correct. Replace the dryer, replace the service valve "stems" on the 2 hose fittings, vacuum it down for 30+ minutes and then recharge. The service valves will require snap-on connectors if the system has been converted to R134A 4) There isn't one from the factory. 5) Leak check the system once recharged
-
The "window stop" for its maximum height is adjustable. Remove the door panel; towards the rear of the door (latch side) and close to the top, there is a bolt that holds the adjustable stop in place. Lower the window and look down into the cavity from the top of the door and you will see the "stop". It's just a flat piece of metal attached to a bracket that you move up and down. Loosen the bolt, lower the stop a little. tighten, raise the window and check the new maximum window height. Once you have it where you want it then tighten the bolt and install the door panel.
-
In disassembled condition, the value of it will only be what someone is willing to pay for it. I've seen them go for $2500+ depending on the condition of the partial restoration and how much of the car needs to be reassembled. It might be best to list it on Bring a Trailer along with a LOT of photos and see what an auction will bring. The more photos, the more receipts for work done that you have, the better your chances are.
-
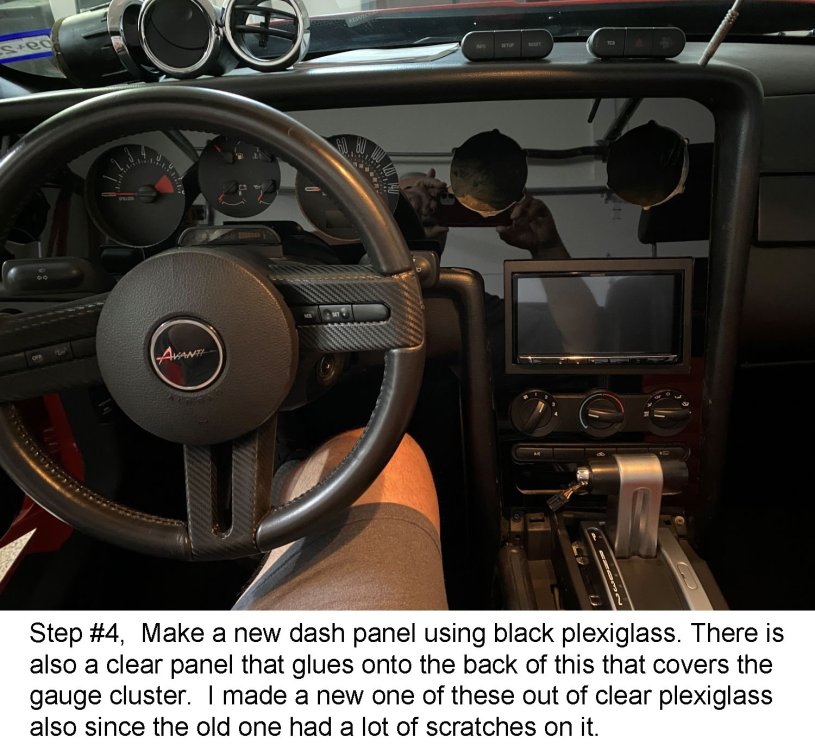
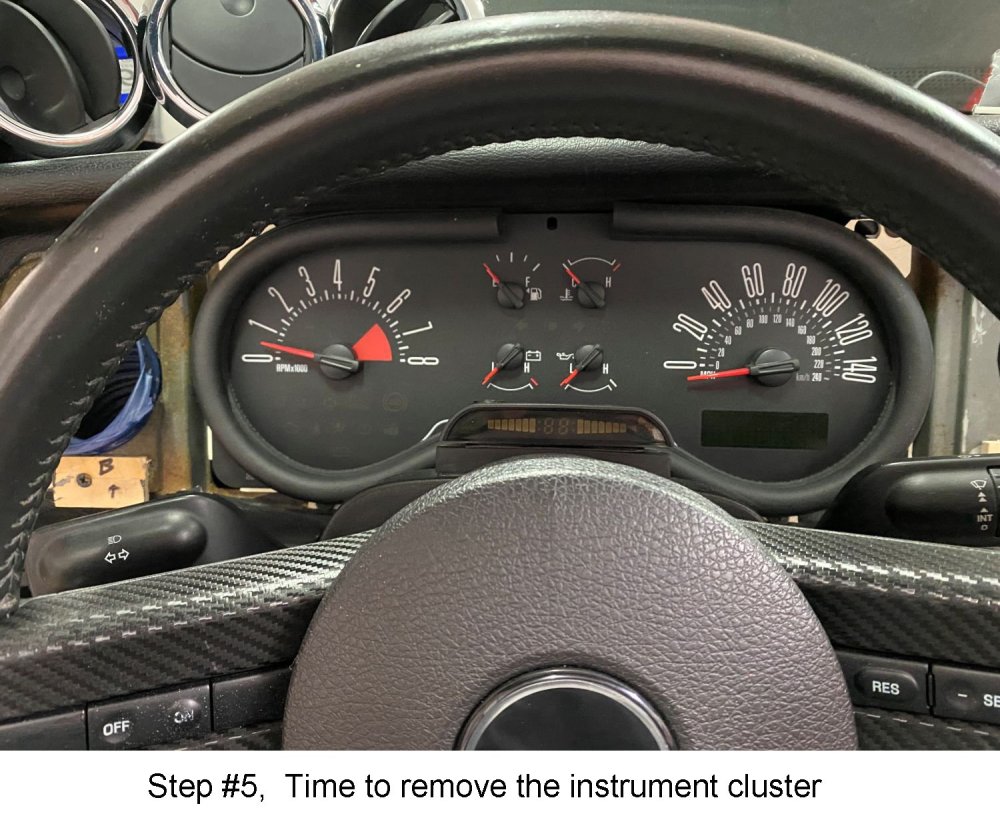
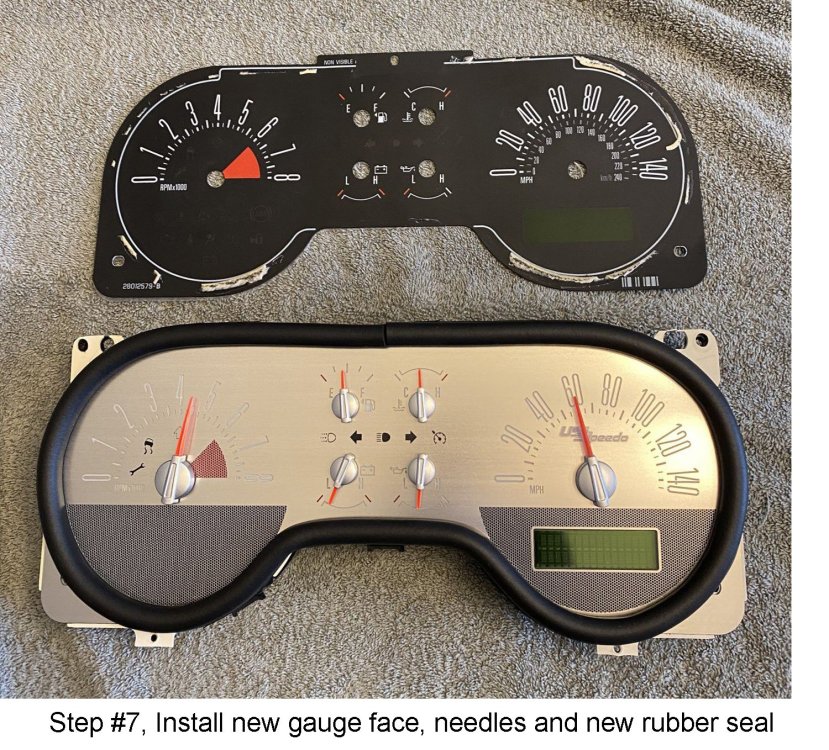
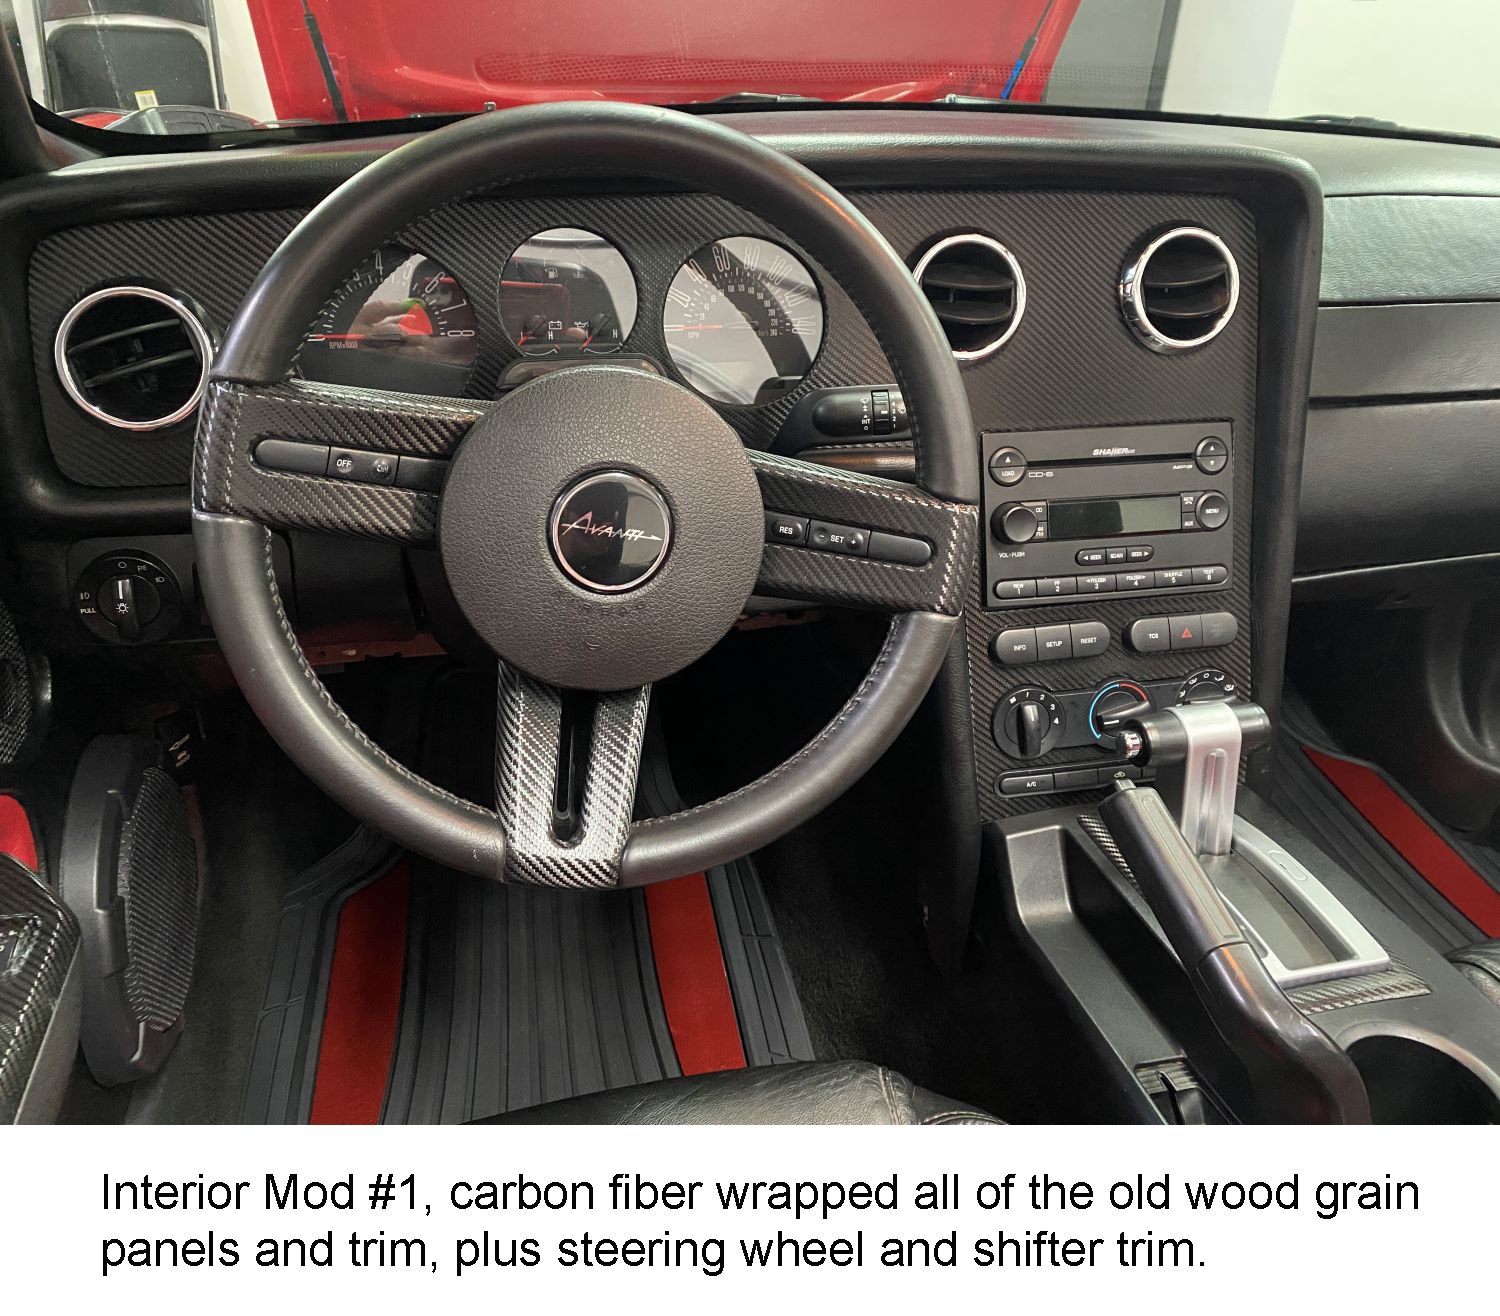
The 2001-2007 Firebird and Mustang based cars are so unique and appealing until you get inside the car and then you see either a GM or Ford car. In 2006-2007 Avanti did make a custom dash that was reminiscent of the late 80’s cars, but that was about it. I had recently sold our 1982 Avanti II which had a fantastic instrument cluster in the dash and as I look at the dash of our 2006 S197 Mustang based Convertible, it was easy to see that there could be some improvement of the gauge area. In addition, I wanted to replace the Ford Shaker 500 radio with a more powerful and modern flat screen radio, move the A/C-Heater controls “up” in the dash and clean up the sides of the console. The 2006 had 107,000 miles when purchased from the original owner and while he did a great job on maintenance, there was some normal wear and scuffing on the inside of the car which I am cleaning or covering up with carbon fiber wrap in addition to covering up all of the tired woodgrain. First, I looked hard at radio options and selected the Kenwood DMX908S Touch Screen radio. It has all the bells and whistles that I want, plus it has more power than the Shaker 500 radio. Crutchfield Audio sells the Kenwood radio and a wiring kit that connects it to the Mustang stock wiring which allows the 4 car speakers and 2 door mounted subwoofers to work correctly. I had previously replaced the 4 car speakers with JL Audio speakers which was a good upgrade and let me tell you that this radio upgrade is a HUGE improvement over the radio. Next, I had to decide what to do with the gauge appearance. In doing research for options on the Mustang itself, I found US SPEEDO, a company that make gauge cluster panels for all cars. After checking out all of the options, I selected the Stainless-Steel Panel. I also felt that the dash panel that covers the dash was missing 3 trim rings that could go around the gauges. Now I’ll tell you this was not an easy thing to find since there was almost nothing available. But I finally found a company called GAFFRIG which makes gauge trim rings for all sorts of companies. They did have the 4” ID gauge rings for the speedo/tach and the 3 3/8” ID rings for the center cluster. They were polished aluminum with some kind of clear coating added. The ring edges are pretty wide and once the speedo/tach rings were set in place, the center ring wouldn’t fit flush since it overlapped the other two so I decide to modify the edges in 2 places so it would fit correctly. Lastly, the plastic coating on the rings looked dull next to the chrome A/C vents in the dash so I decide to sand off the coating, repolish the rings and then put on a heavy coat of car wax to seal them off. They look like chrome now. Attached are photos of the project and I hope you like it!