All Activity
- Past hour
-
Brake pedal goes almost to the floor before brakes engage
Jim S replied to Jim S's topic in 1965-83 Avanti
FINALLY! I got the rear brakes to engage. I replaced the "new" master cylinder I purchased from NAPA with a rebuilt one from Autozone. The NAPA was the issue. Brakes are doing the job. Now onto starting the car. It seems I get no voltage to the HEI distributer during cranking. But as soon as I release the key from crank to run the engine with start. Seems like no voltage in crank but its there in run. Is that a bad ignitions switch? It's a 72 with the GM collum switch. And do I need to replace the pink resister wire with a normal one? A diagram of the 72 starting circuit and switch would help me a lot. -
Guslinger made some good points… Also, those hydraulic switches commonly fail… When in doubt… change it out!!! Or convert to a mechanical brake light switch.
- Yesterday
-
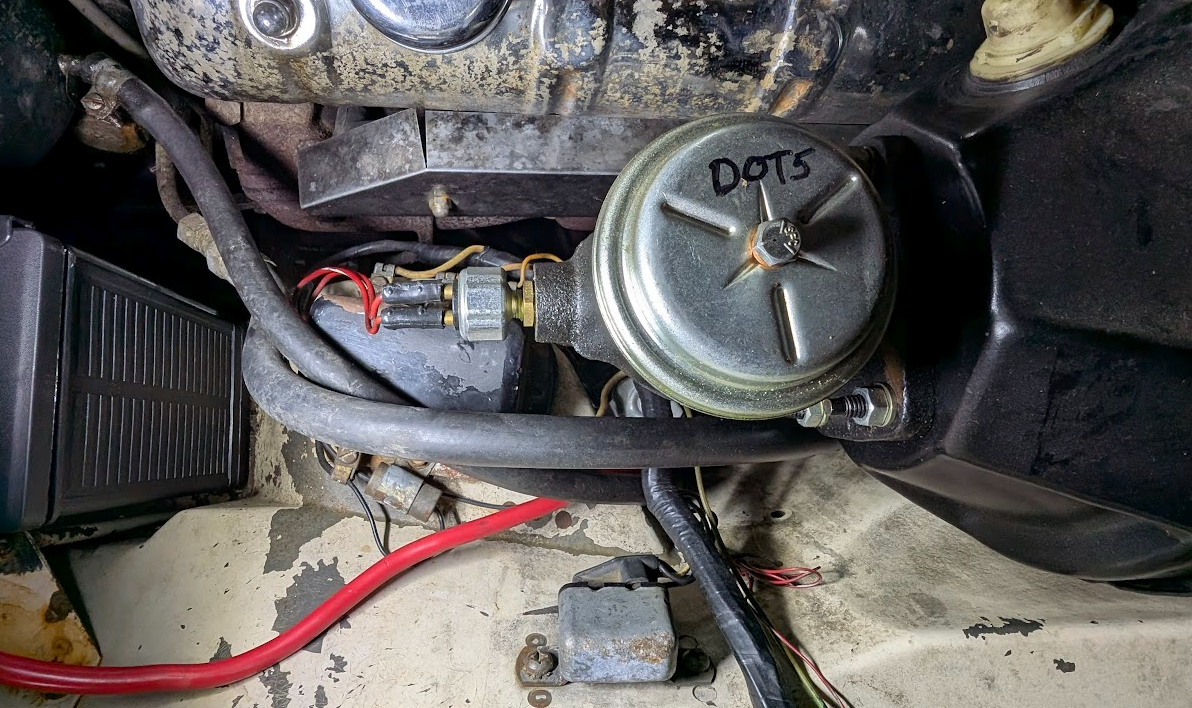
You have "DOT 5" on your master cylinder cap so I assume that's what's in it. Silicone brake fluid is notoriously difficult to bleed all the air out of...the little air bubble like to hide wherever they can and defy being bled out. If the car had standard DOT 3/4 fluid in it and wasn't completely flushed out and all the hoses replaced you will have spongy brakes or even fail in rare cases. The best performance cars don't use DOT 5 as strong concerning can cause bubbles in the system. DOT 5 also can kill the hydraulic brake switches...why I don't remember but it was explained to me once. The use of DOT 5 might be the cause of your problems.
-
Just beware of red, orange, or turquoise ‘salt’ !
-
OK… This changes the ‘picture’…… Eliminating computer controlled converter lockup on Avantis factory equipped with CCC is quite easy by removing the tan lockup control wire from the onboard computer and then completing the circuit by grounding that wire via a manual switch. (as I did on my ‘83) Your ‘A’ series Avanti never had a computer… so basically the internal lockup solenoid needs to be fed 12volts… and it’s negative (ground) wire (to frame) can be controlled with a switch. A wiring diagram pertaining to your transmission conversion would be helpful. Or, you can leave your Avanti, and your wallet, at a transmission shop… as others have suggested!
-
Brake pedal goes almost to the floor before brakes engage
Jim S replied to Jim S's topic in 1965-83 Avanti
I was told this car didn't orginally have the valve and I was advised to remove it. I installed a residual check valve. Still not getting rear brakes to engage. Also, I could not find proportioning valve tool that fit mine when I did have it installed. So I could not center the thing. -
I've been around Avantis forever and have heard many Avanti folks refer to "all" speckled colored carpeting as salt and pepper. Based on my history, it's odd to limit the term to just tan and black.
-
Yes, it has been
-
 stantheman changed their profile photo
 -
Let’s just say… More ‘natural’ than a 426 Chrysler Hemi !!!!!
-
I’m ask the administrator about this BTW …AG-R3.., your profile indicates you own an early ‘A’ series Avanti ll. That wouldn’t have a lockup converter… Or has it been retrofitted with a later ‘Turbo’ transmission?
-
That’s strange!…. I never requested to not receive messages
-
....... your PM capability has been rescinded.... You will get a response stating you "cannot receive messages"
-
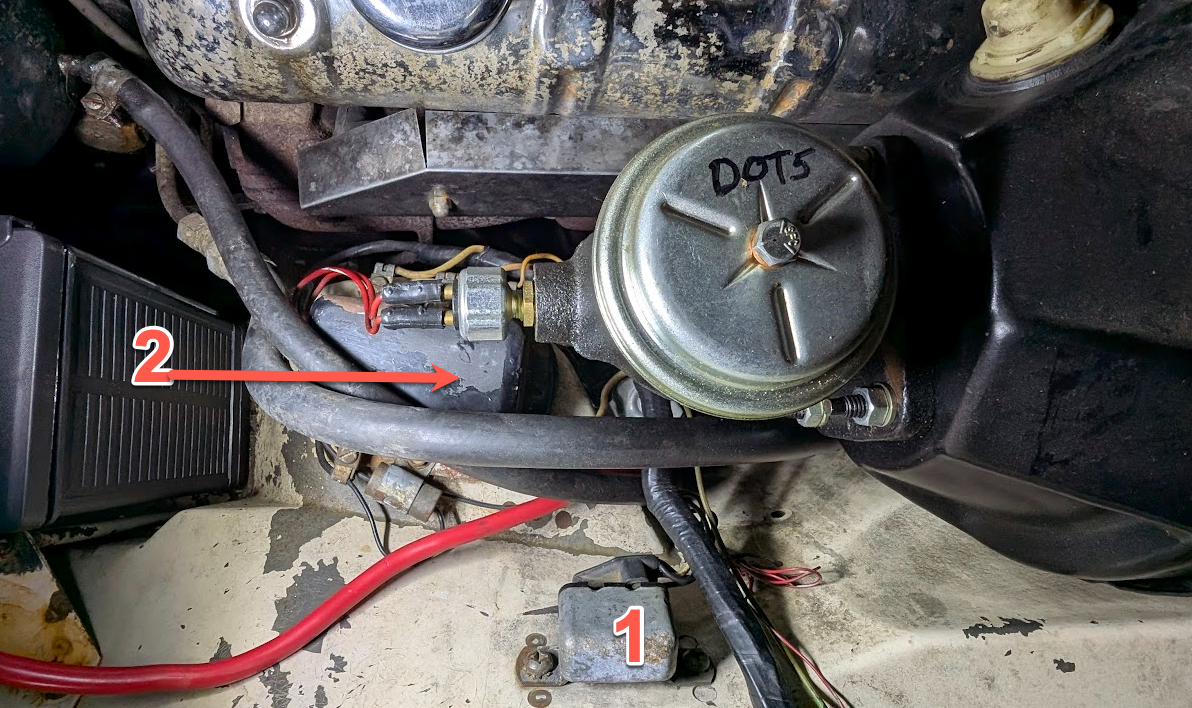
Yes … black ‘box’ marked 2
-
(still awaiting my shop manual) Would one of these be the external regulator?

-
Still waiting for my shop manual to arrive. Thank you for any advice. It takes the brake pedal to be pushed about 95% of full range to activate the brake lights. Aside from slamming on the brakes for an unexpected obstacle, I don't think I ever really have the pedal go that far. It appears to be a hydraulic switch on the master cylinder, so not adjustable. Correct? The fluid is full, and since a trusted mechanic replaced all the brake lines with stainless, I'm sure that they were bleed properly. Also, the brake booster was rebuilt, and a new master cylinder installed. The brakes themselves work fine, and no squishiness, etc. A). Should I try and bleed the lines first to help diagnose (or if I need to replace the switch, I'll have to bleed them again). B). Do the switches fail? Or should I be looking elsewhere for my perceived issue? C). If they do fail, where might I start hunting for a new one?

-
Yes, those kits can be pricey, not to mention the labor costs of a qualified transmission technician to install it. A manual switch is a practical, common sense way to handle this converter lockup issue… I’ve been using one for about 15 years in my ‘everyday driver’ ‘83 Avanti. However, what you describe is a bit over complicated I think… I can describe to you a much simpler way to handle this… If your interested, PM me on this forum.
-
Ok, makes sense.
-
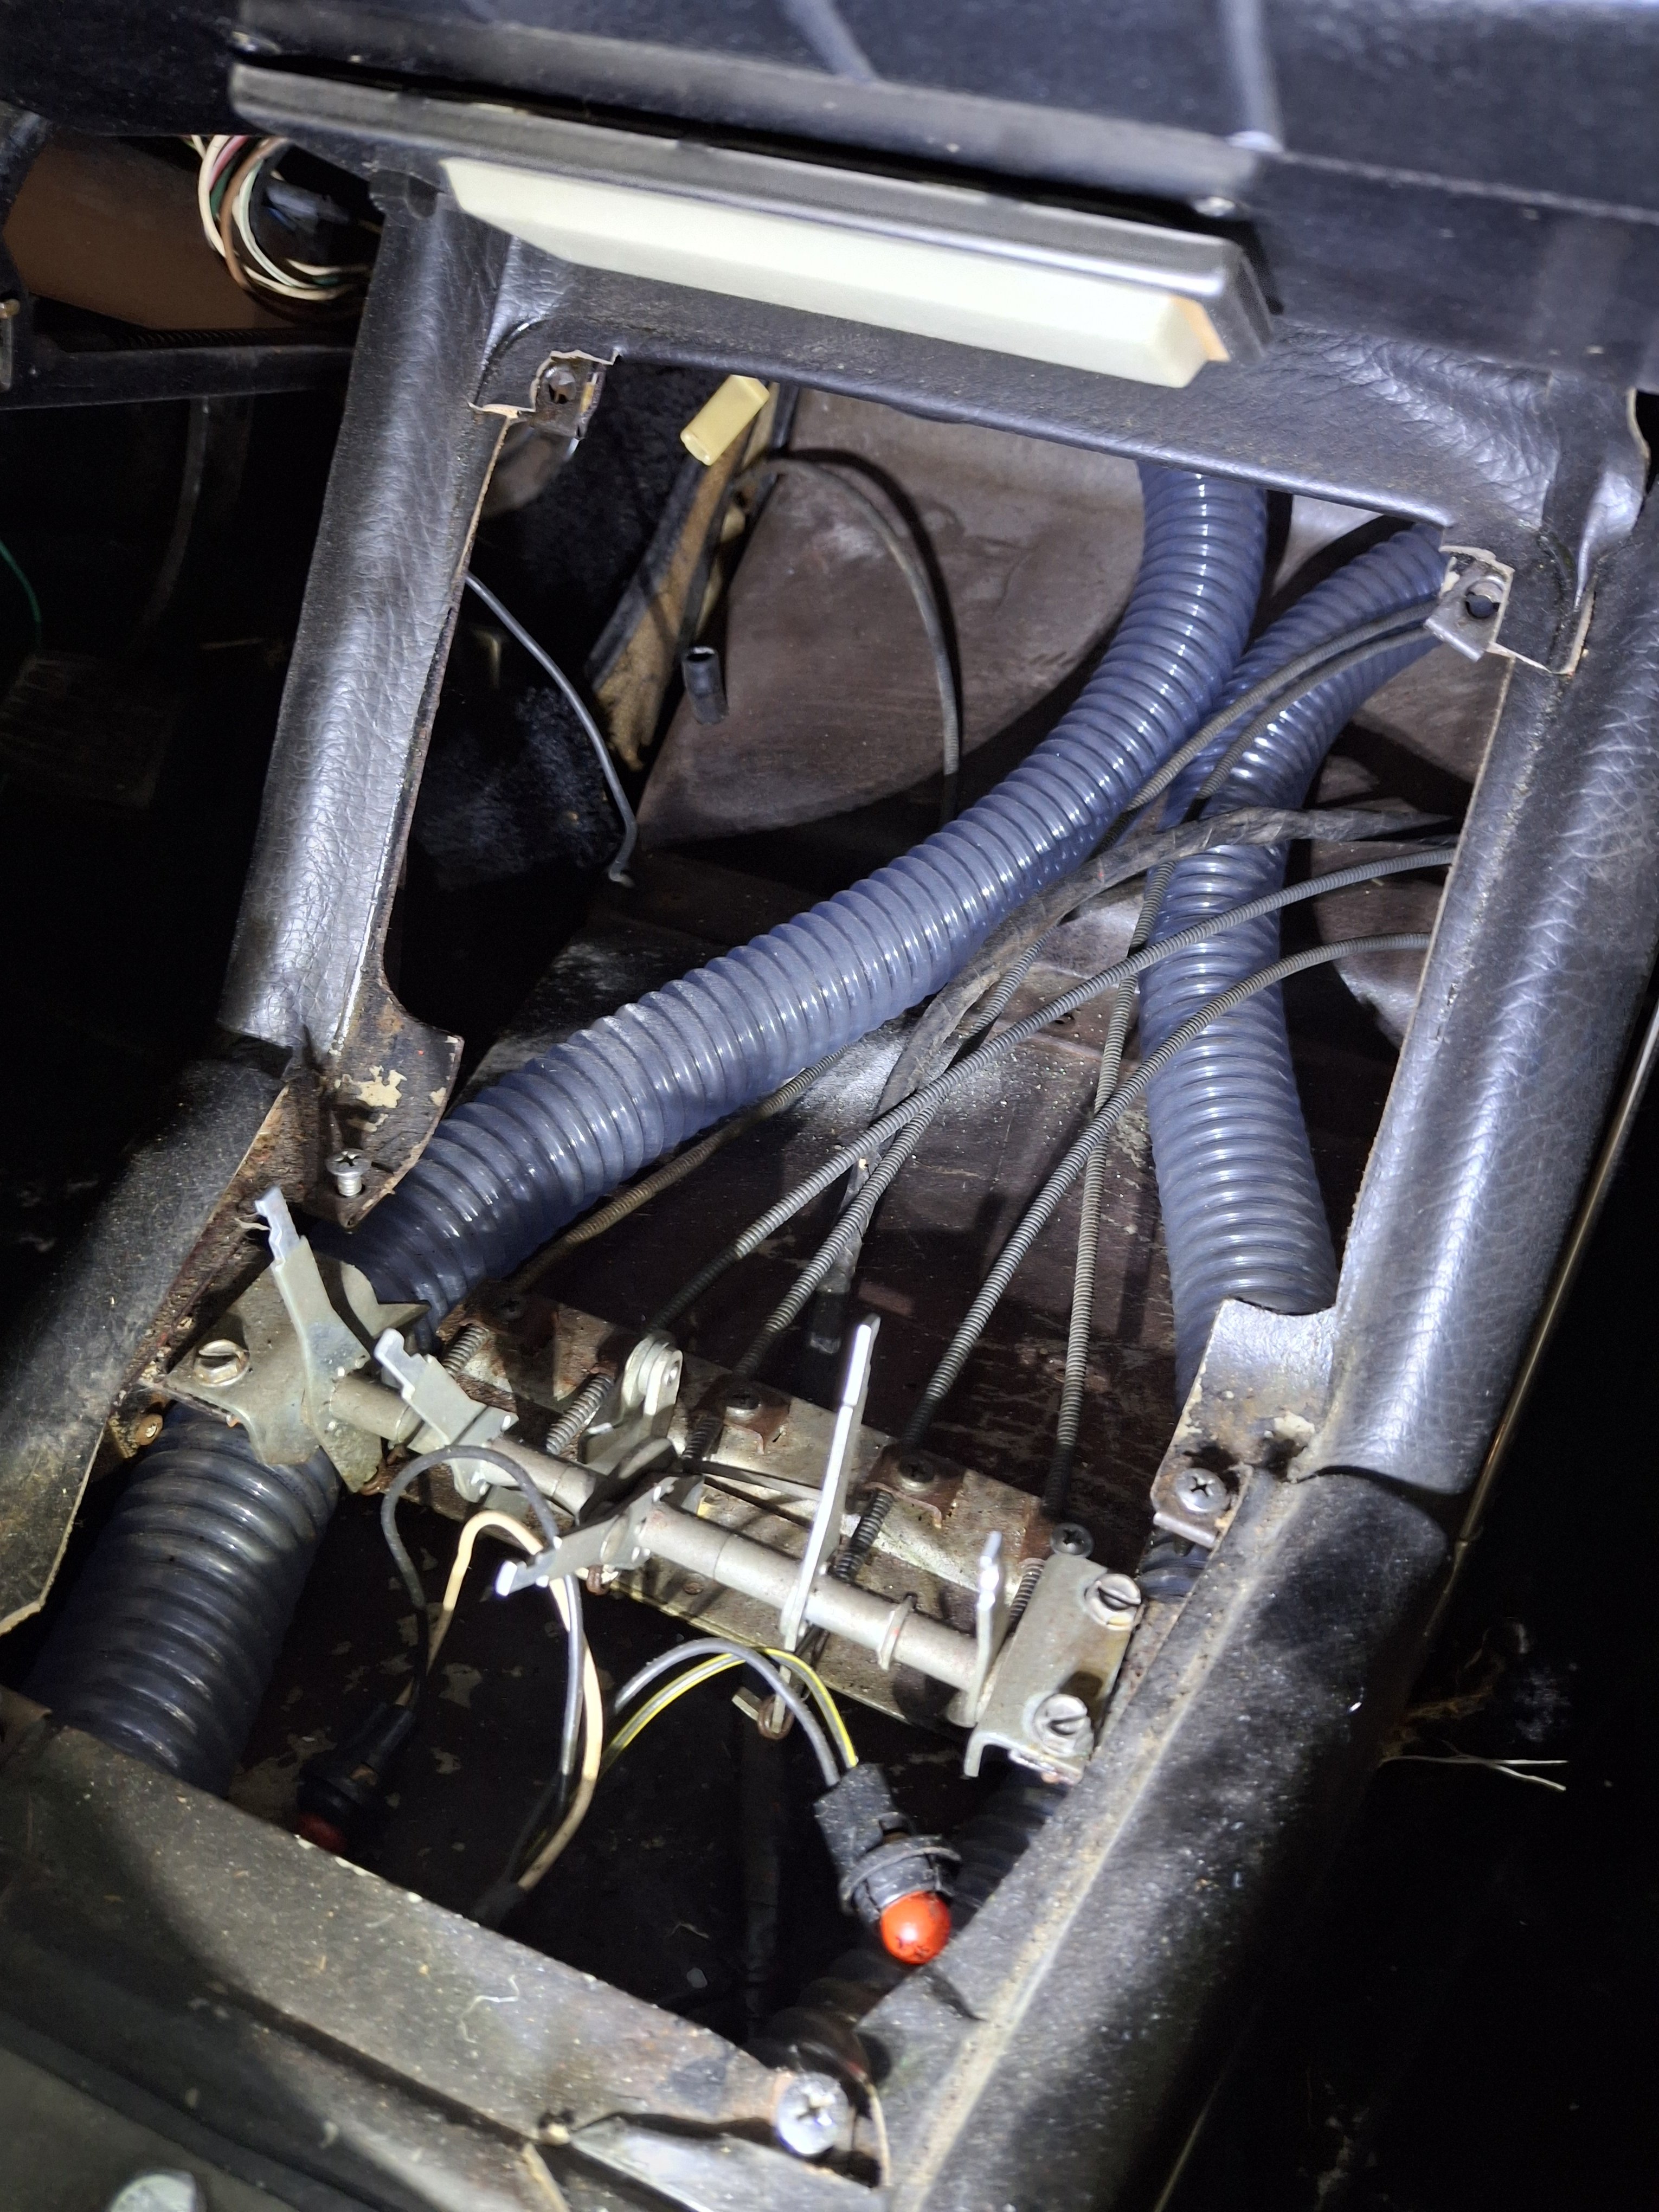
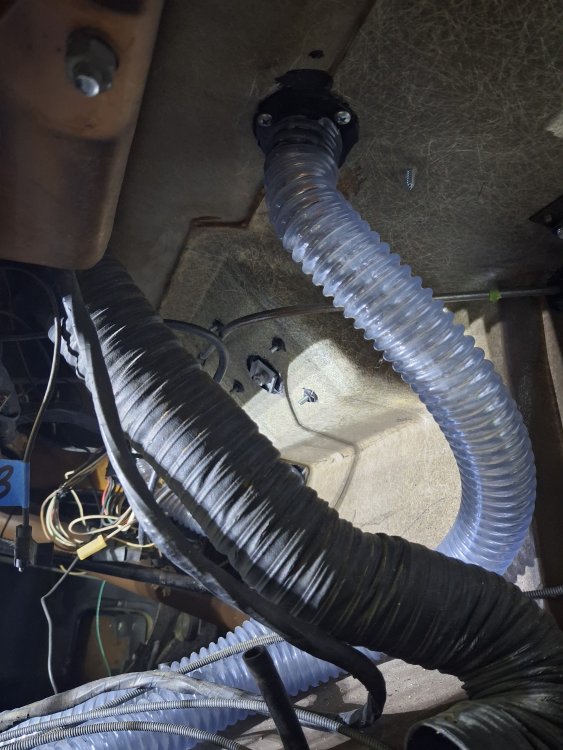
Thank you 63r2 for the information and the reminder. I should have remembered to look at my parts catalog to see the diagram. I still would not have known the background that you provided. I saw the inlets you described but never questioned what they were for. Now I know. What did you replace your hoses with? OEM (if available) or aftermarket? The first foot or so of the hoses from the top on each side seems OK, so I thought I might try to get a larger hose to slide over it and run it to the shifter area. I left about a 1/2" of the old hoses at the shifter so I can slip the new hoses on. The hoses are 1-1/2". Hopefully this will save some work and achieve what Studebaker tried to do.
-

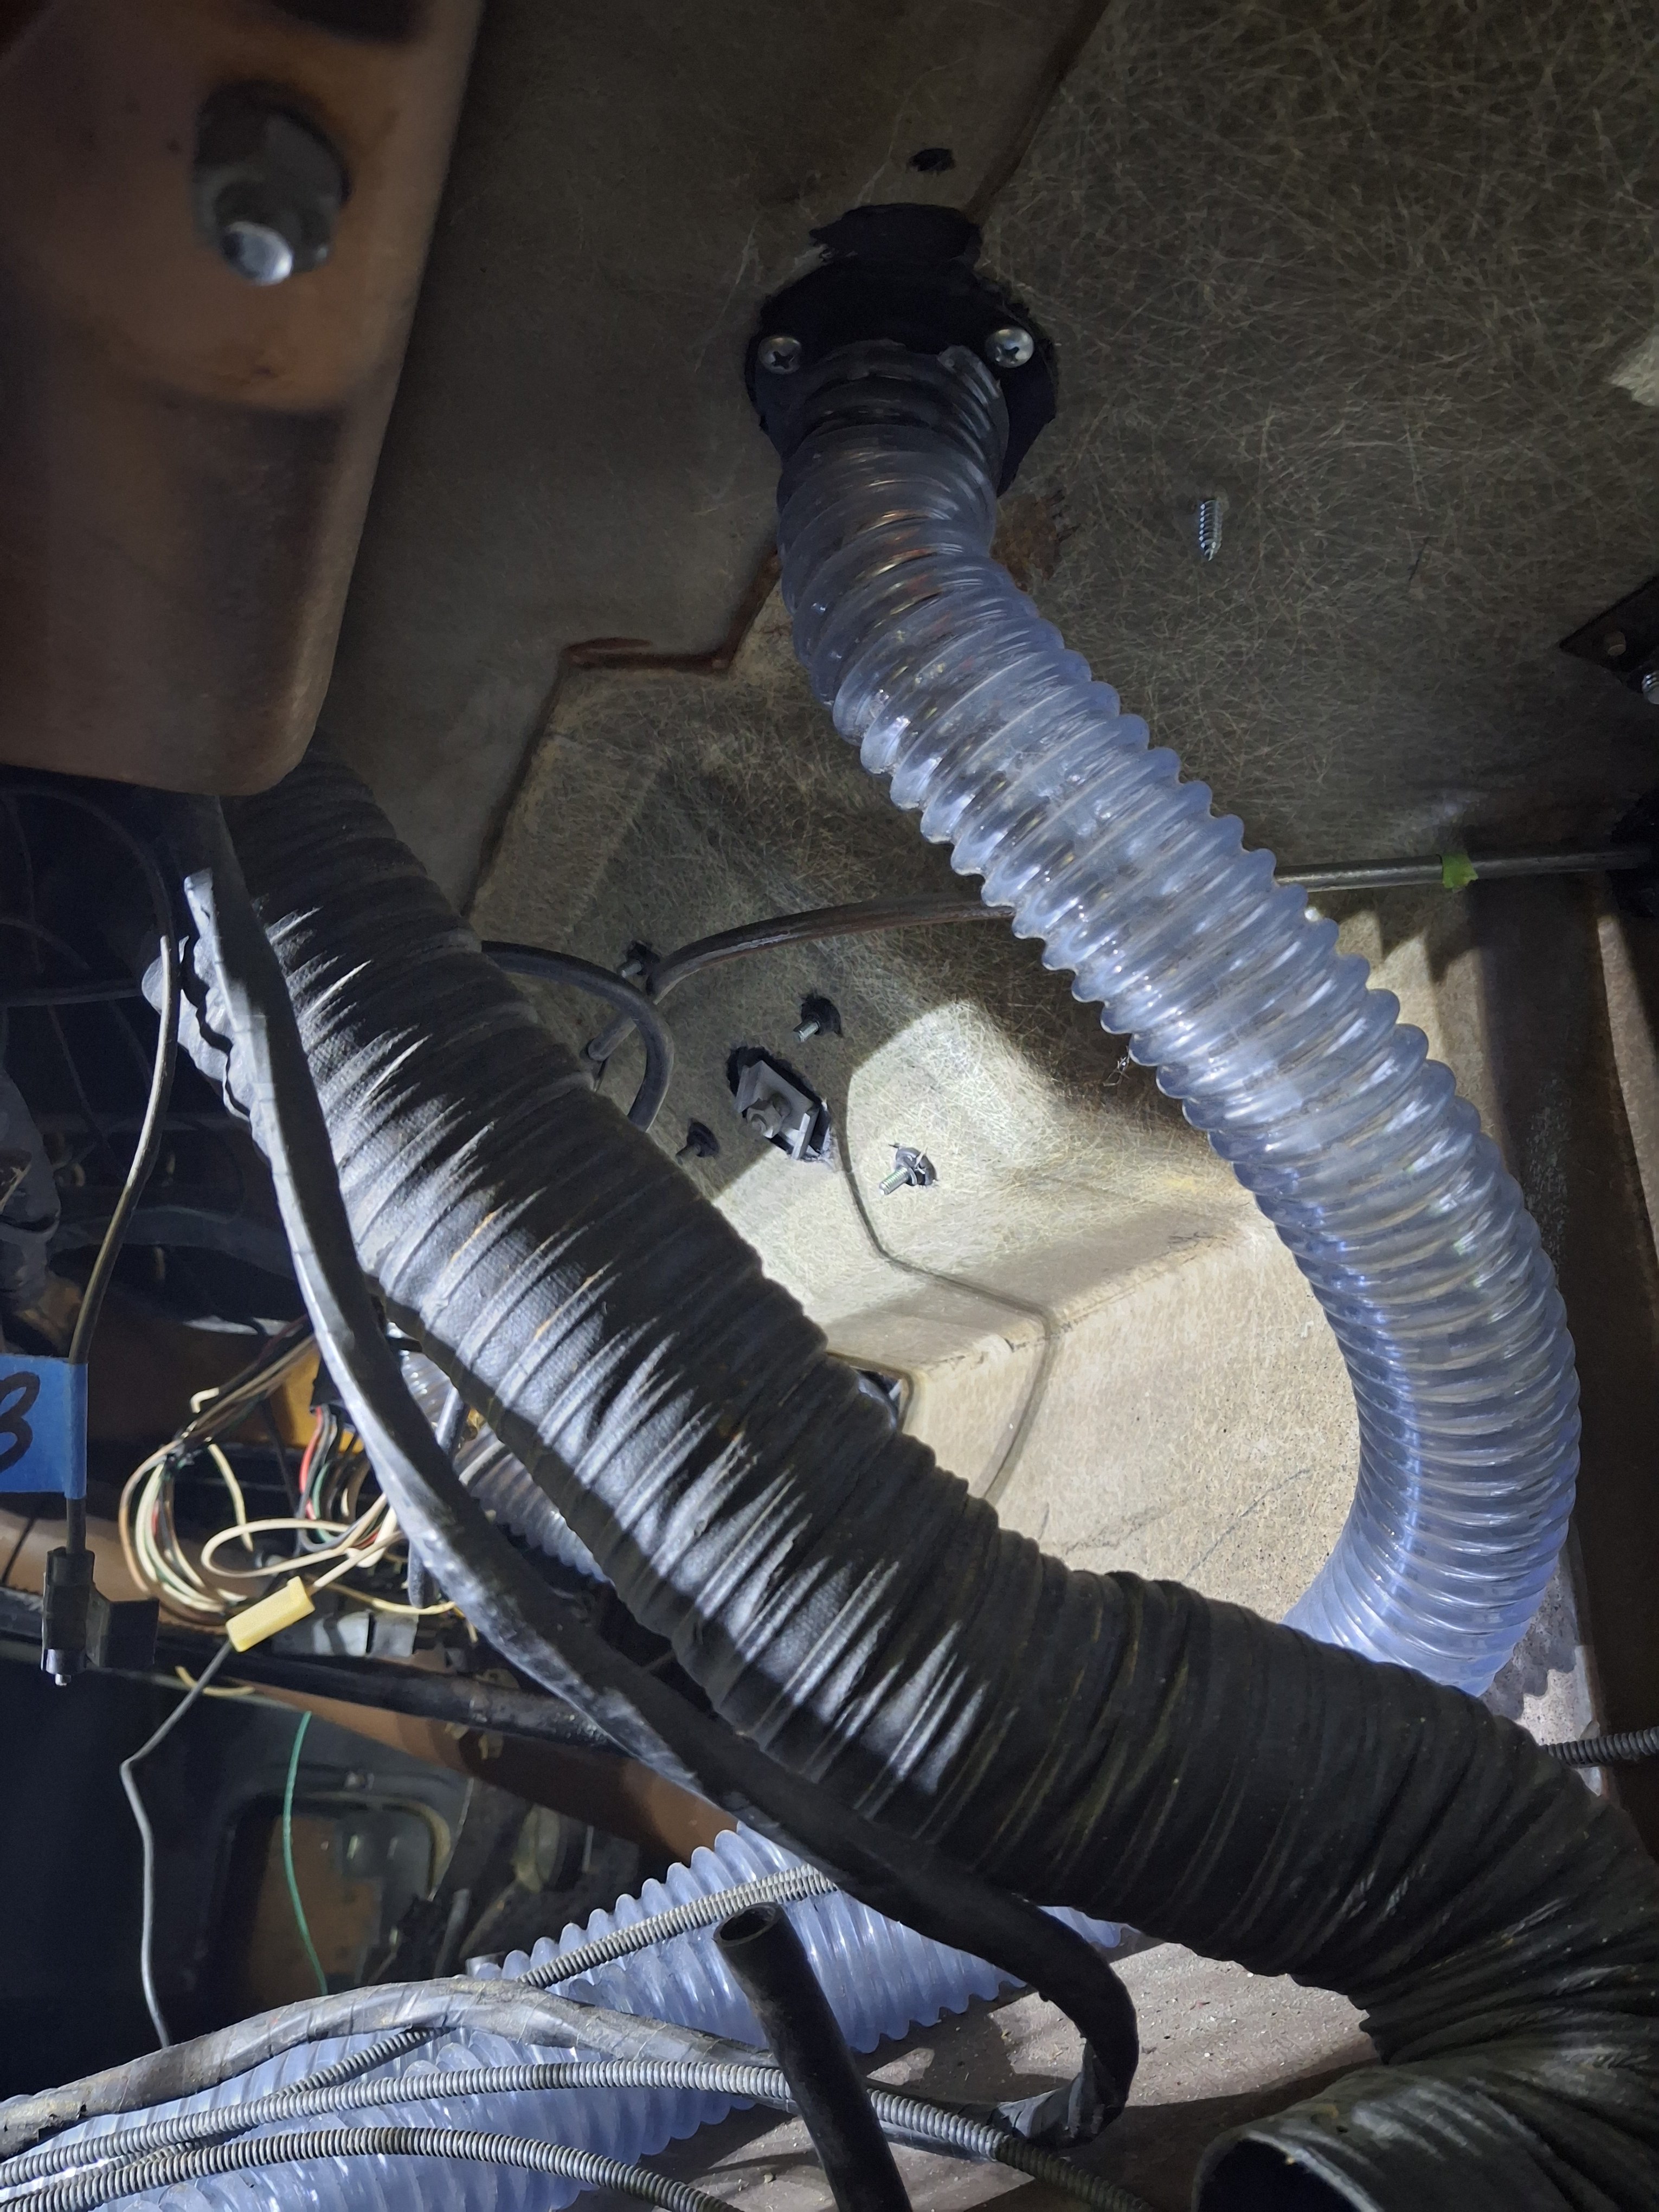
I replaced mine with plastic hose with a spiral rib. Similar to a hose on a vacuum cleaner but smaller diameter. If any water ever enters the hose, it will carry it out to the transmission tunnel .

-

Hello George
I used plastic hose/ducting similar to the photos. In fact mine looks identical to vacuum cleaner hose. If you are going to all that trouble I would replace the hose in its entirety.
Australia being a mainly metric country it was harder to find 1 1/2 hose so I think I sourced it from aliexpress. I'm assuming you are in the US so sourcing a replacement should be a lot easier.
Let me know how you go.
Peter
-

Hi Peter - Thanks for the response. The pictures from Michael were great. Thanks Michael - hopefully he can see this! In my case I have the additional tight squeeze because of the ac unit. I planned on running the hose the full length, just sliding it over or inside what I leave in place. In the end I may just replace the whole works. I'll let you know what I end up doing. - George (Callaway, Virginia, USA)
-
- Last week
-
Point I was making is it being ''Natural" is not a way to describe it..Natural is back to a Chev SB. And I have to think the installation would fit but a lot of small stuff would need addressed.
-
Well, can you think of any engine that would be easier to install into an Avanti ll chassis than a Studebaker V8? ( With the hypothetical assumption that an owner wanted to part company with the factory installed Chevrolet engine)
-
I thought that site was dead?
-
I question the ''Natural''. It's more like a confusion.
-
Nope… not me…. I just wondered if any Avanti owner had ever attempted it…. after all, it would be somewhat a ‘natural’!
-
Good, because that was a real problem that I actually got stuck with. So why the question? Are You considering a 3rd swap?
-

Brake pedal goes almost to the floor before brakes engage
Zedman replied to Jim S's topic in 1965-83 Avanti
Jim- I dropped the ball on the subject of Proportioning/Combo Valves, and forgot to mention what ALSO needs to be done.... If you have tried to bleed your brakes without the 'Special Tool' and the Shuttle Valve has indeed moved over- then you must RESET the valve manually (i.e. re-centre the shuttle). There should be a little 'pin' on one end of your valve, often covered by a rubber cover (just visible on the brass valve in the picture I posted). This pin may be sticking out somewhat, indicating the valve has moved over. You will need to push this back in otherwise the 'Tool' will not impinge on the groove in the middle of the shuttle. However, because your front brakes are operating, the shuttle valve will have moved inward. To help re center it, crack a bleeder on one of your Disc Calipers and give the Brake pedal a push. This ought to simulate a front brake "failure" and the shuttle valve ought to move the other way. One way or another, just ensure the Shuttle is centered before screwing the Bleeder Tool all the way in. Sorry for long explanations, but as an ex high school teacher, I know that you can't afford to throw doubt.