All Activity
- Today
-
Shifting group for sure.
-
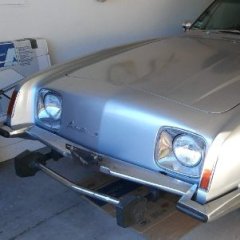
Does anybody know the current status of this parts car? Was last sold in the San Antonio, Tx area.
-
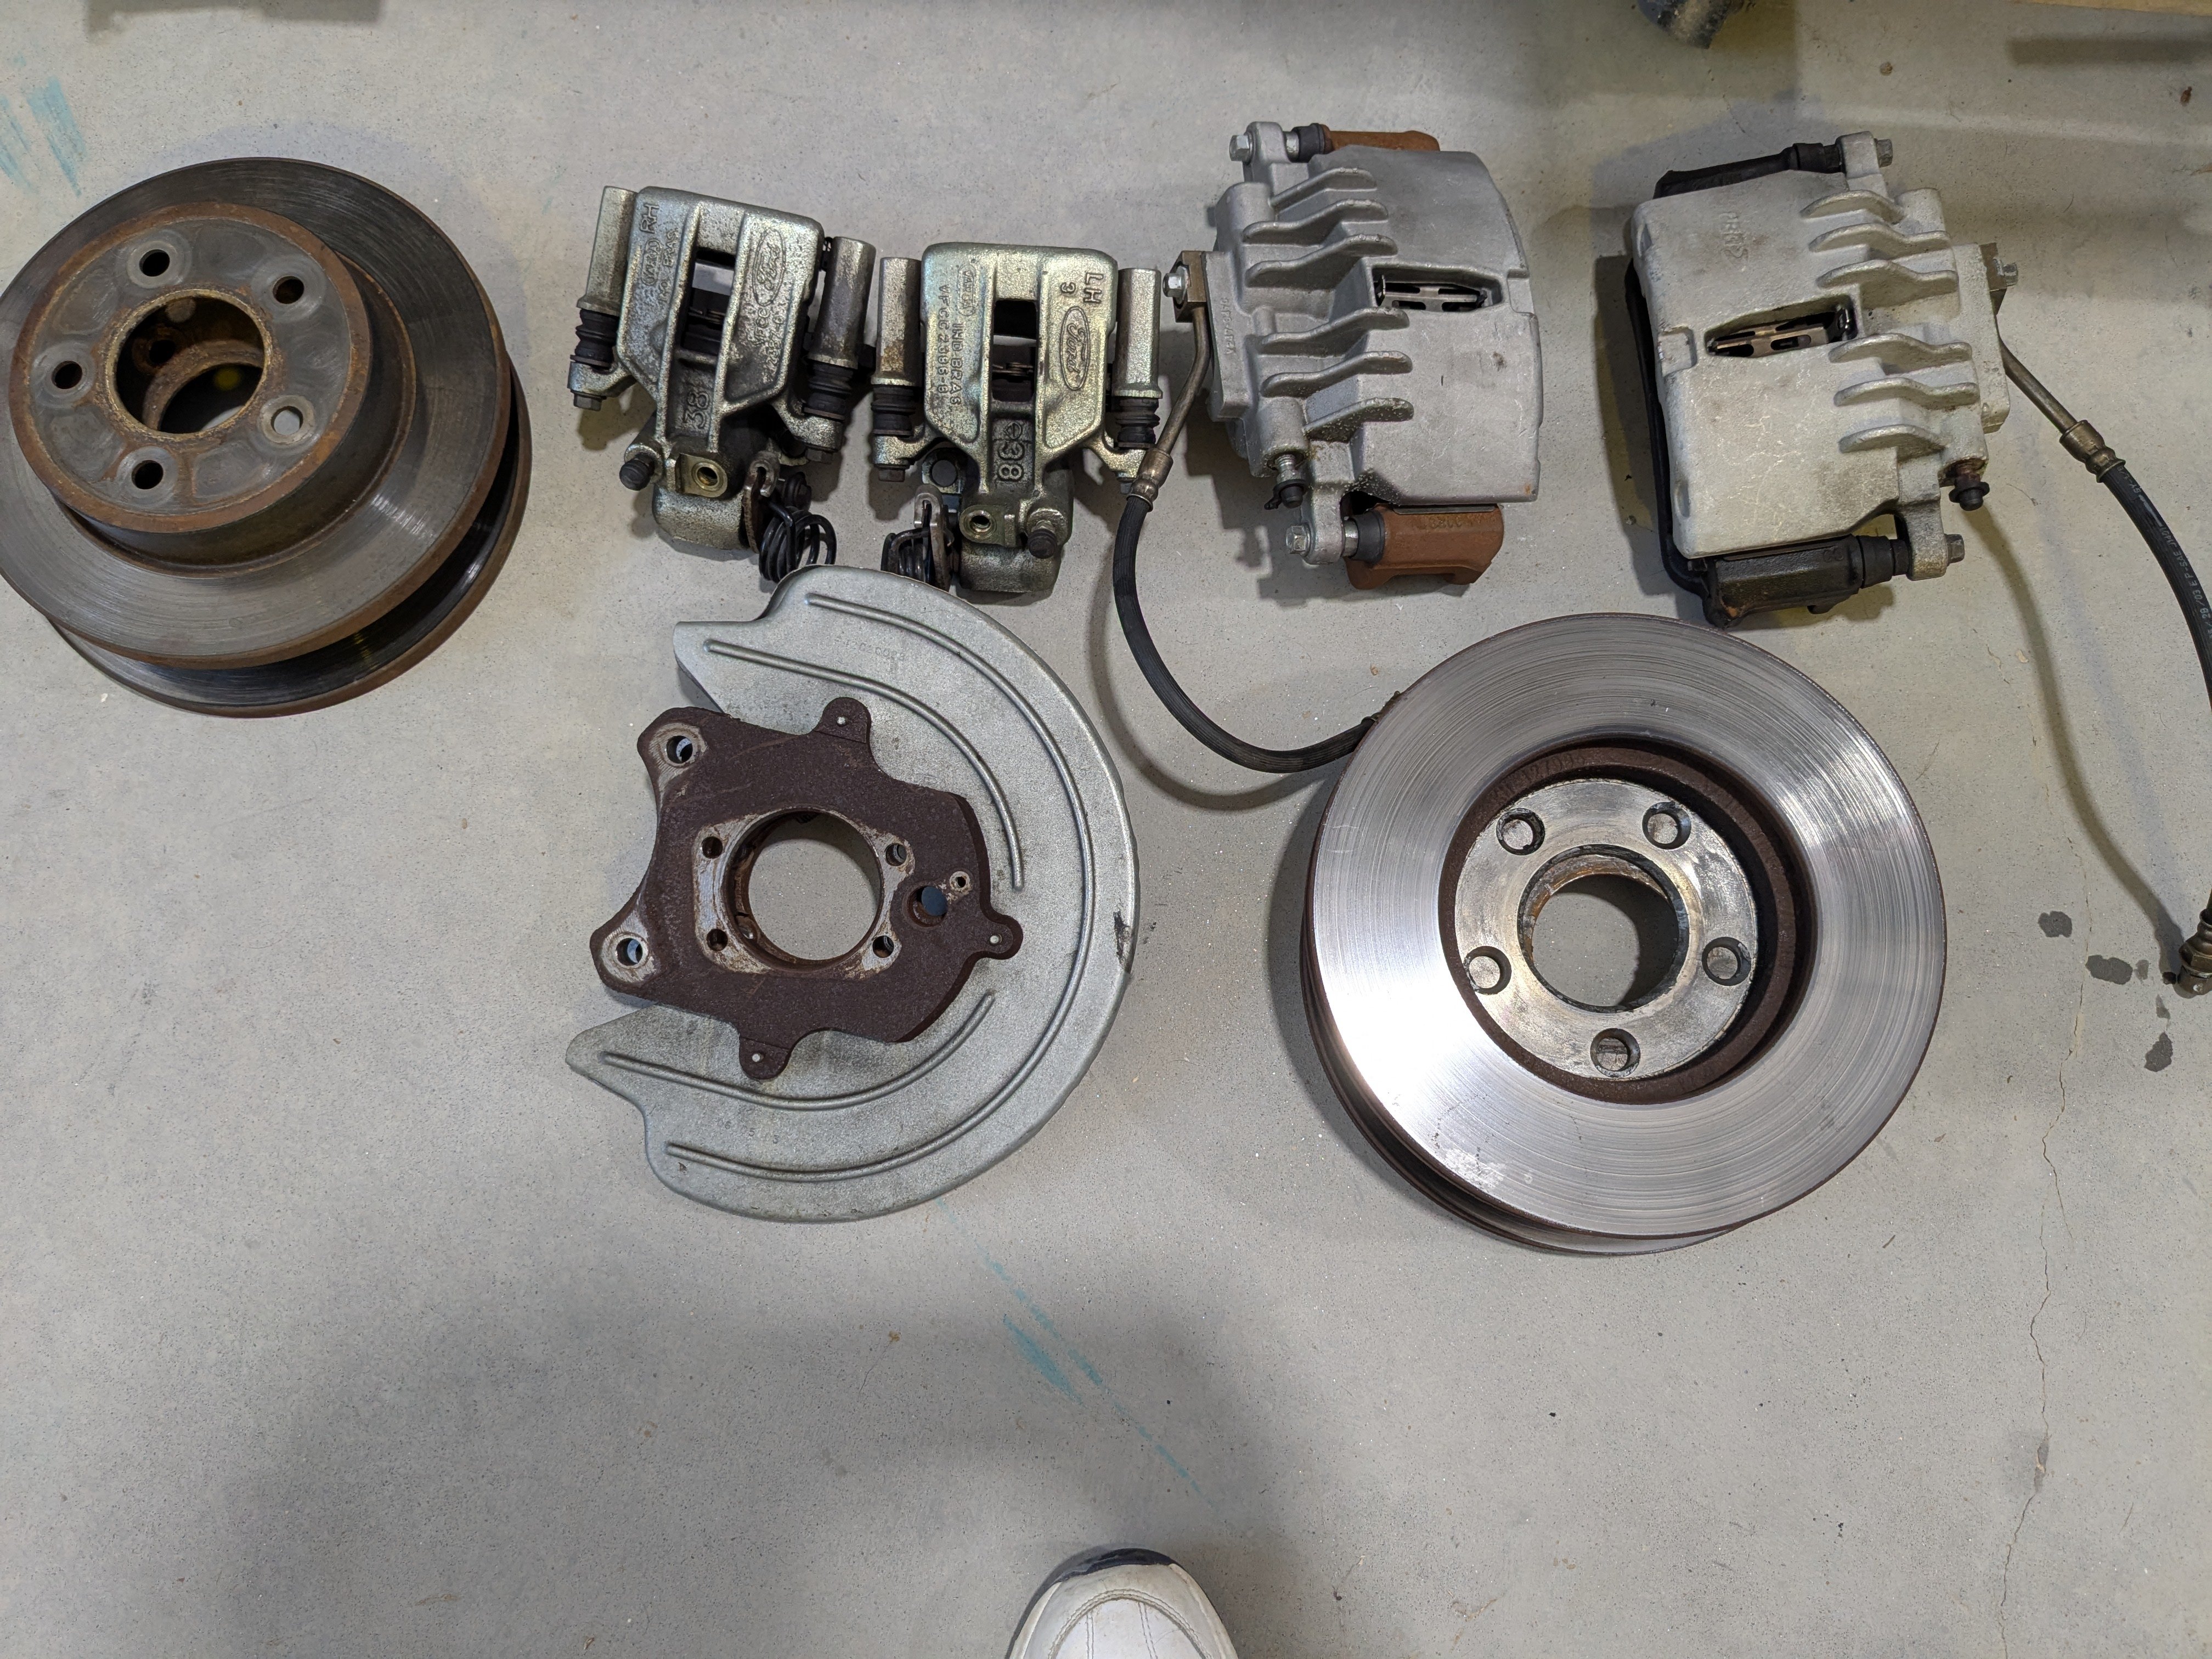
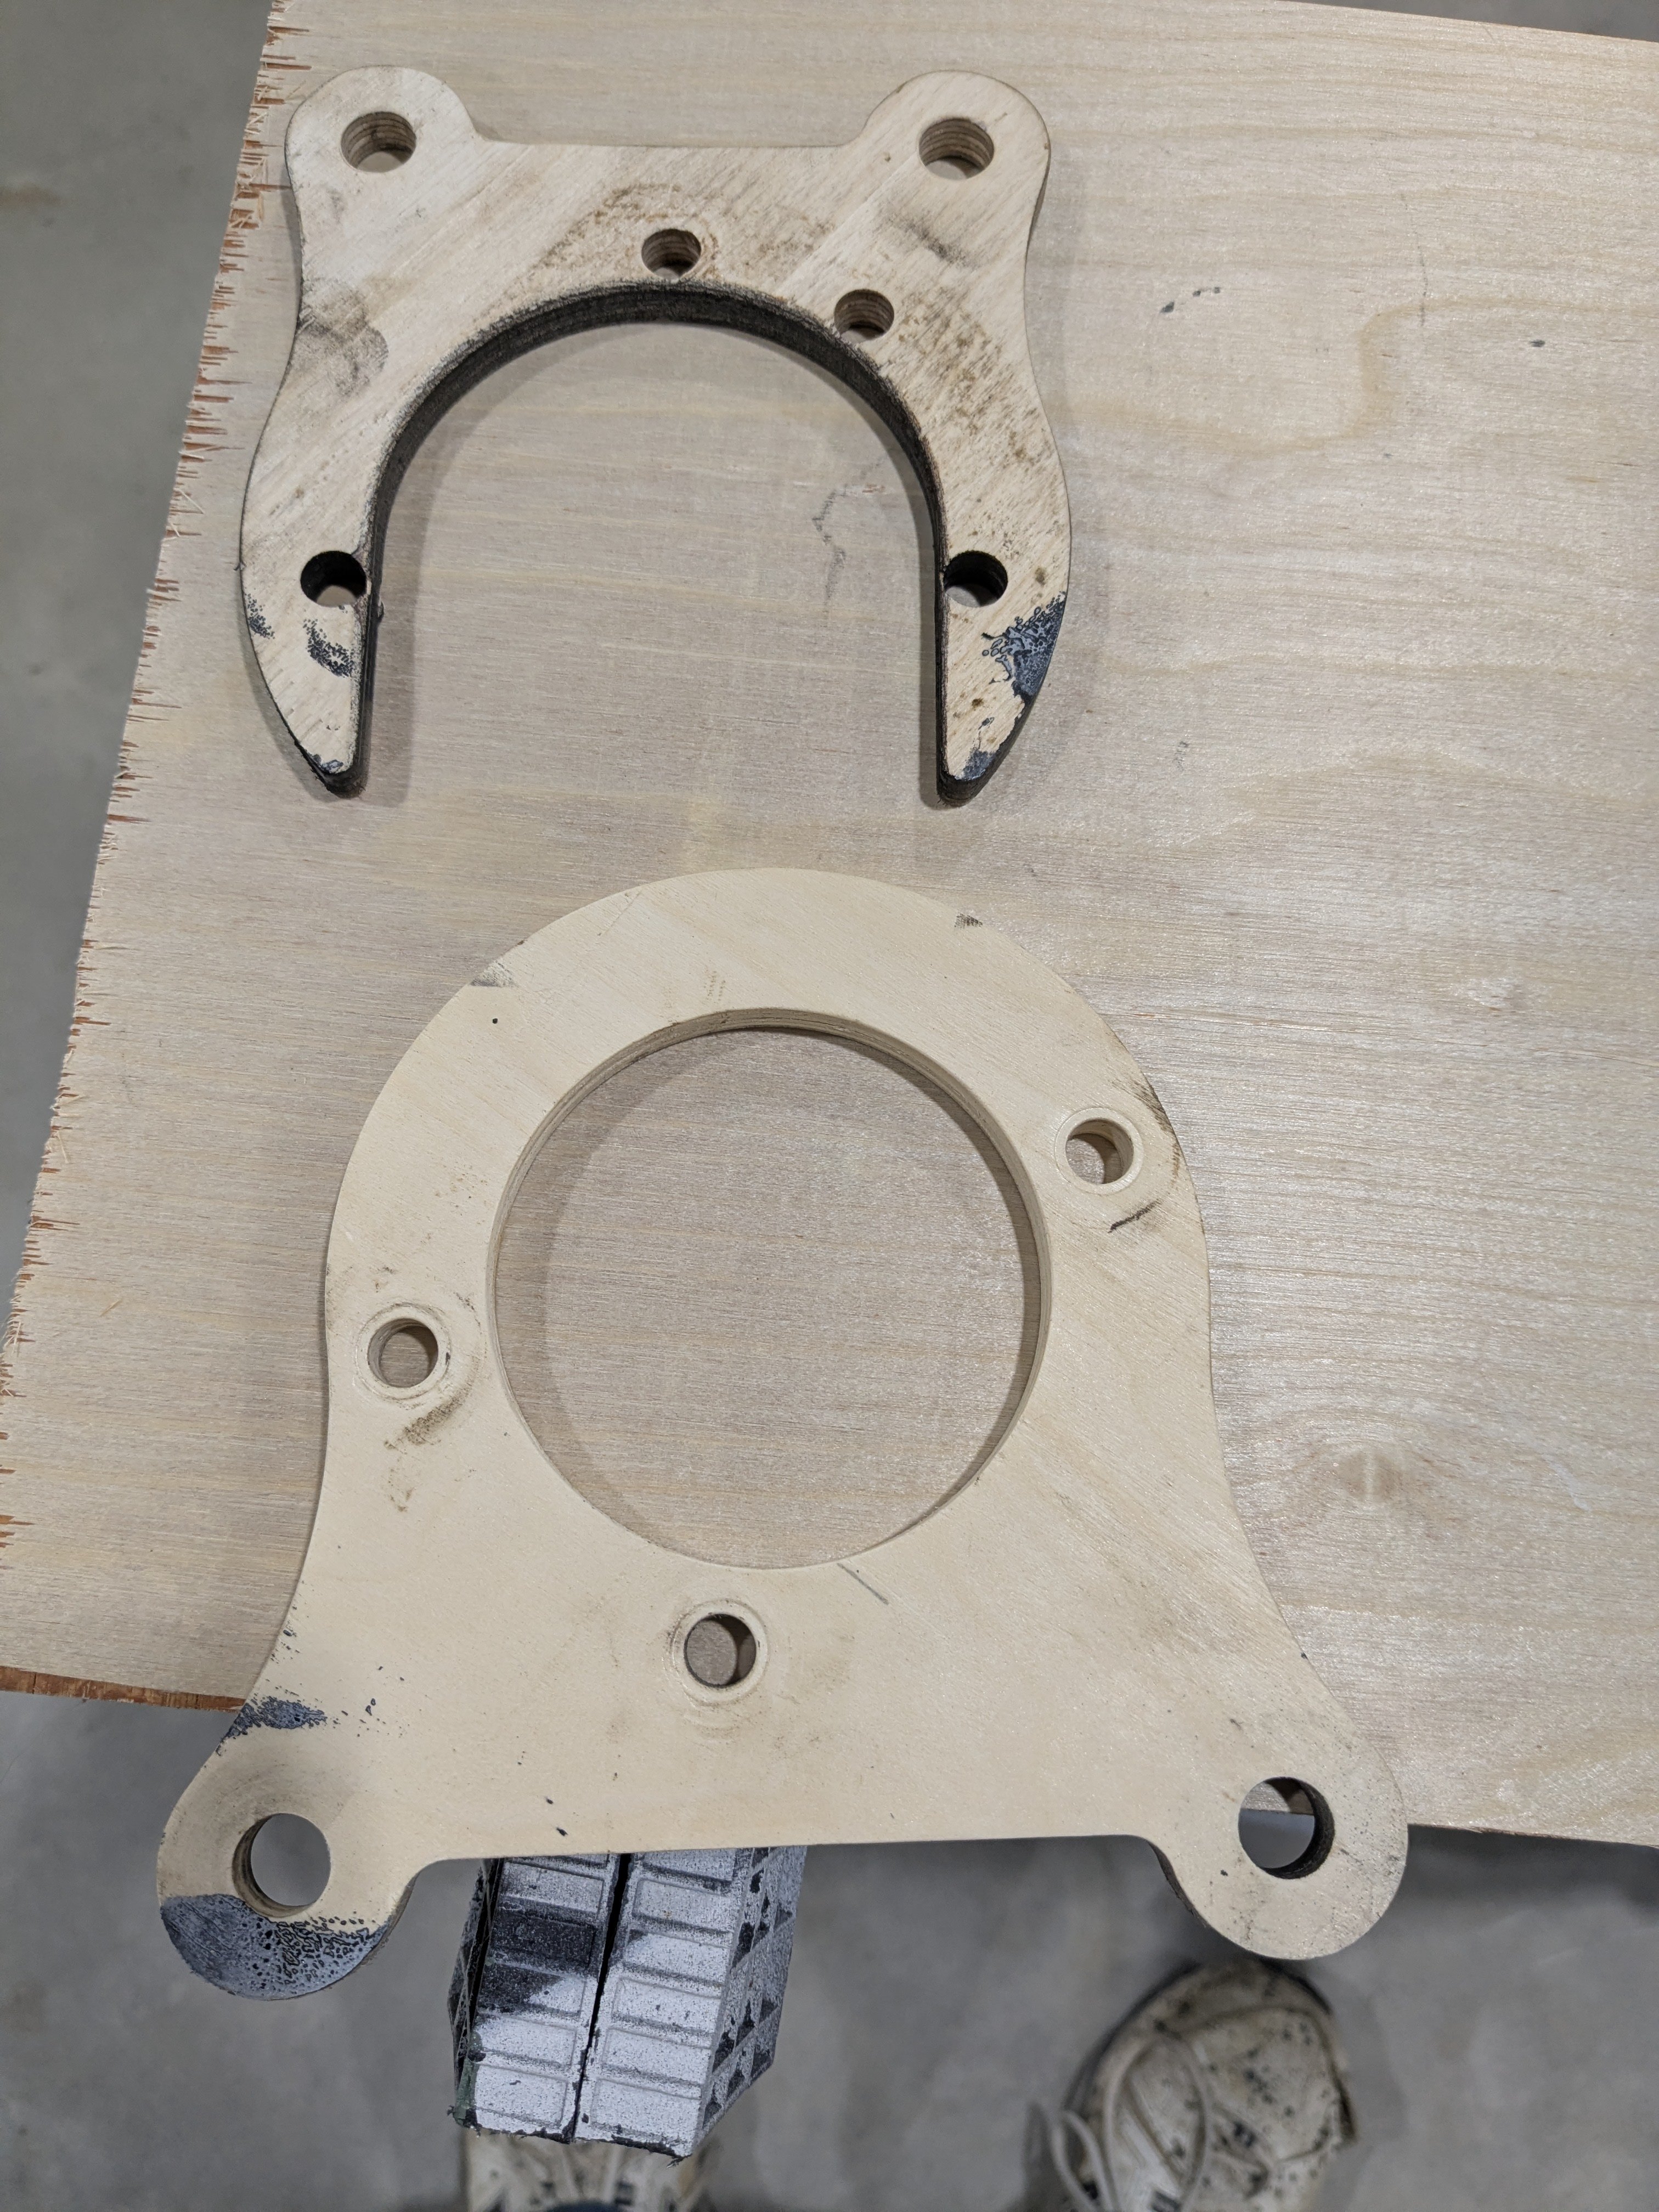
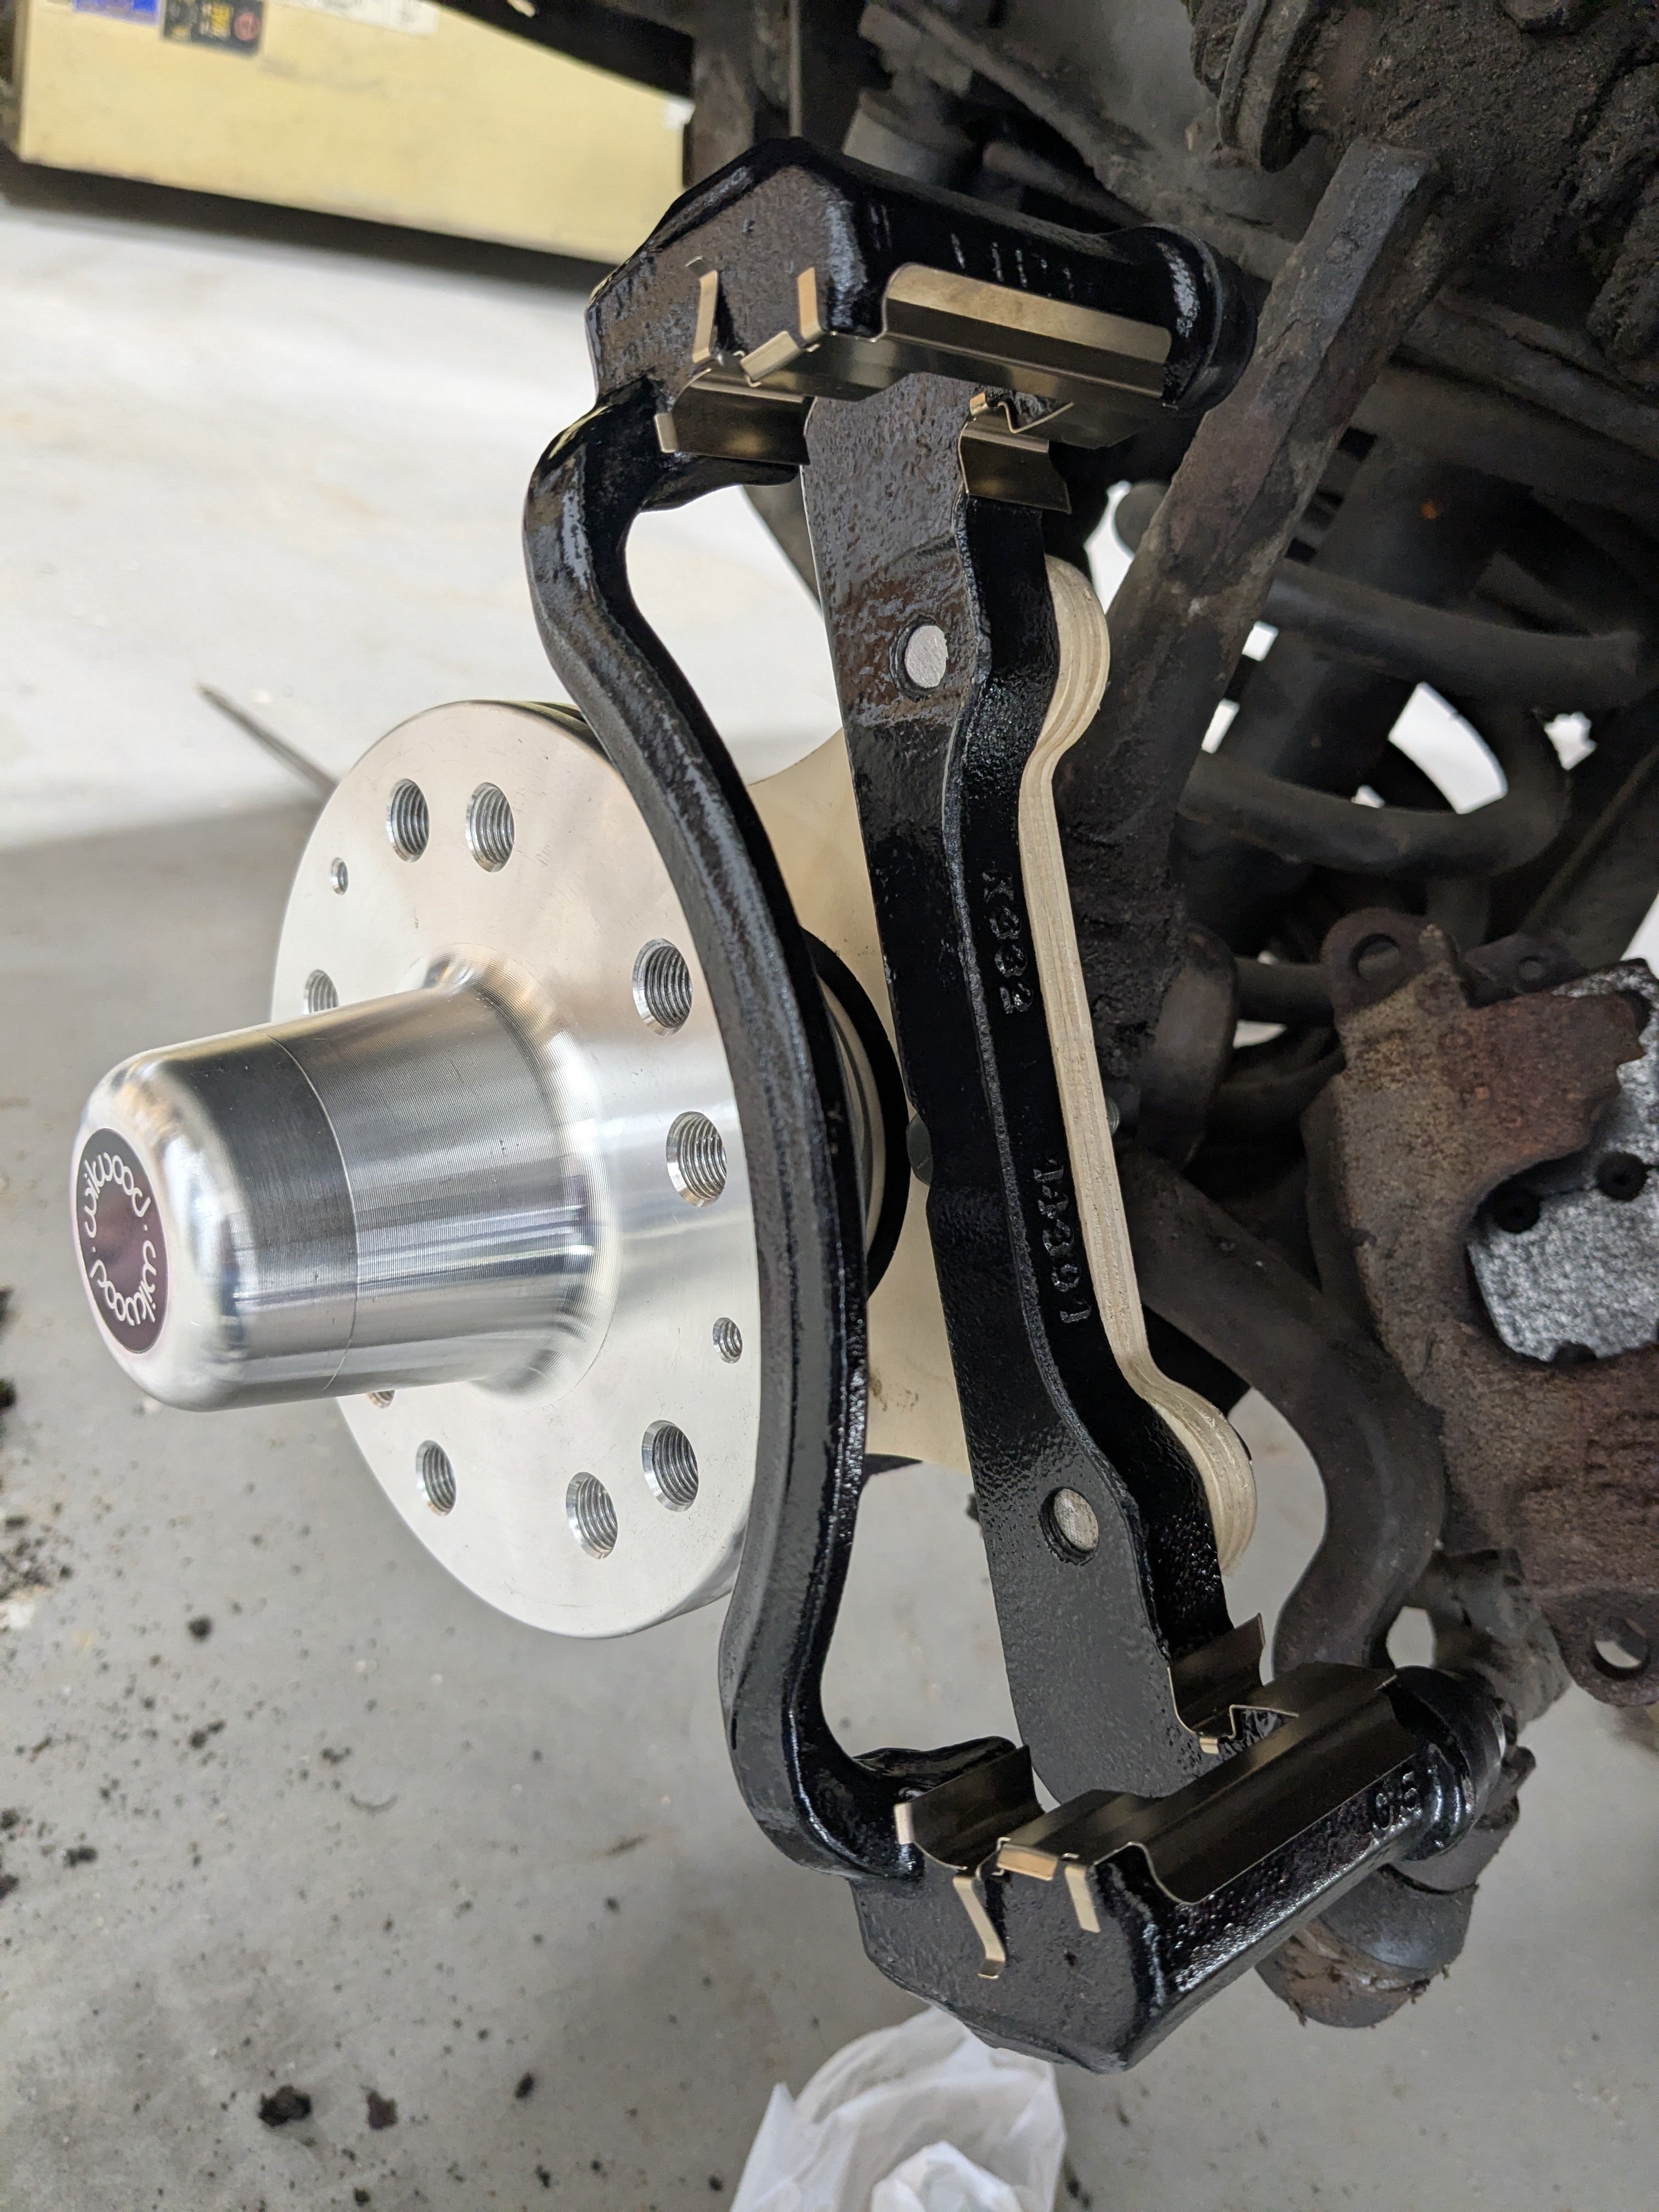
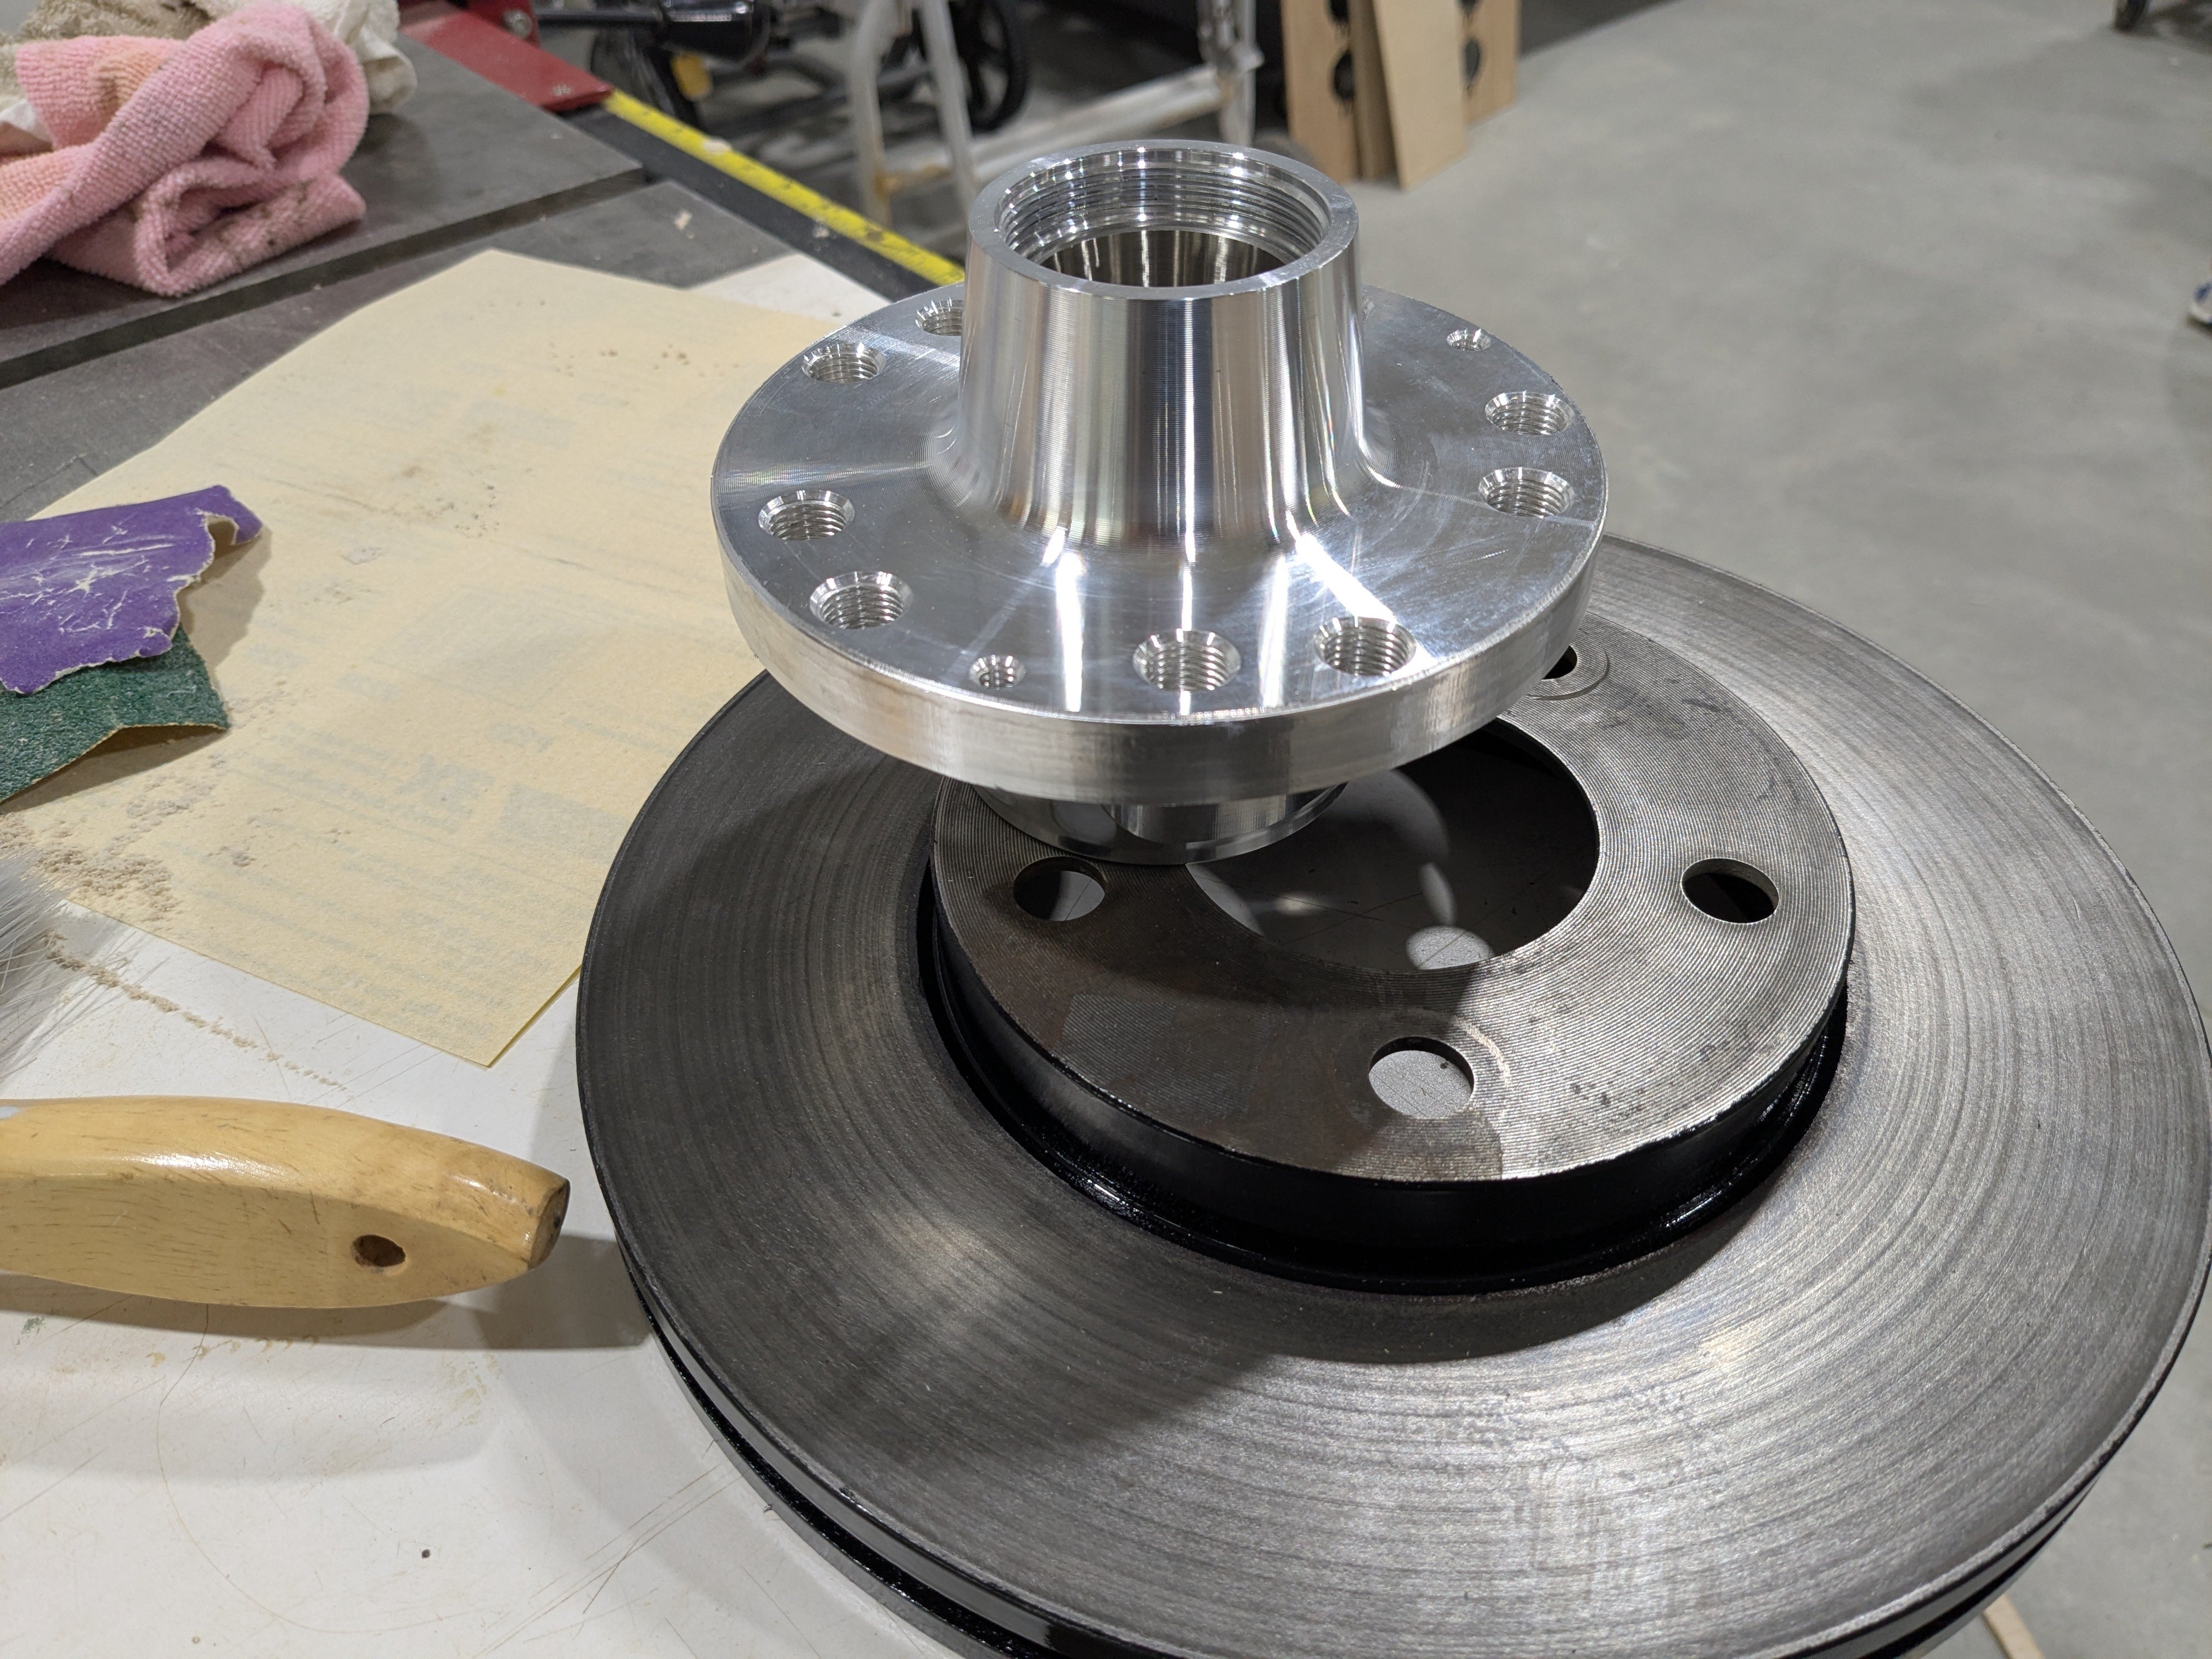
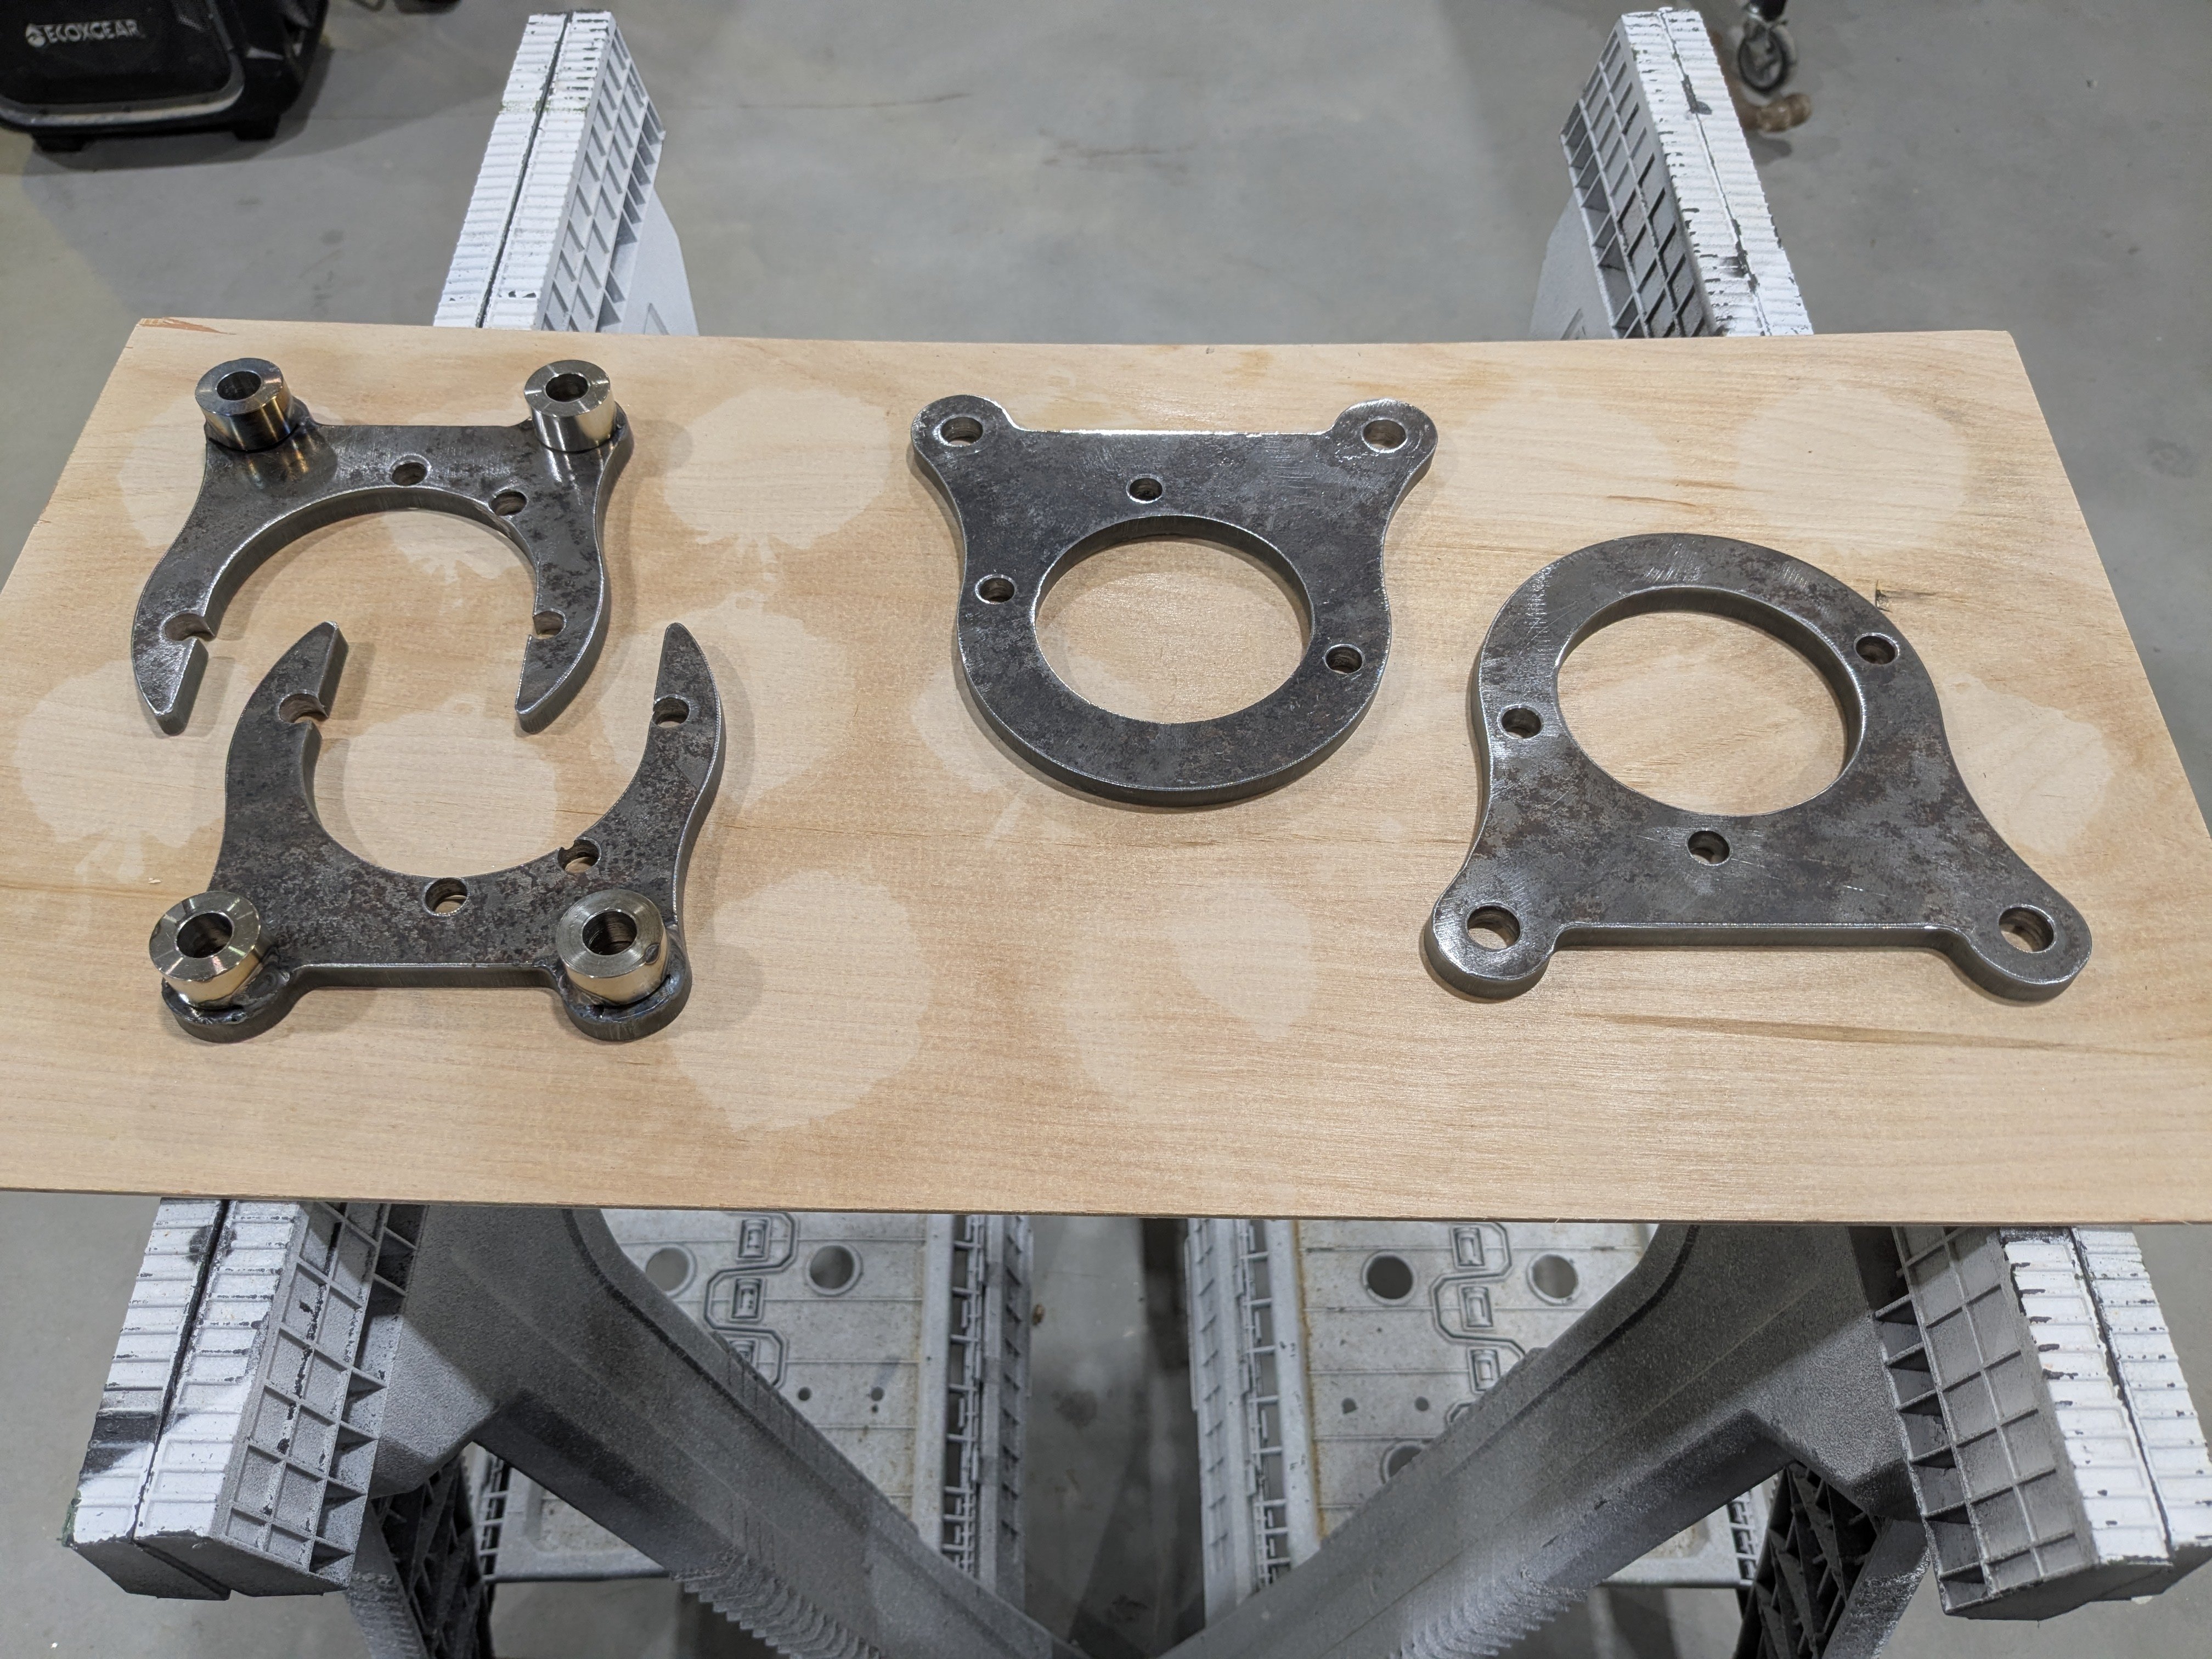
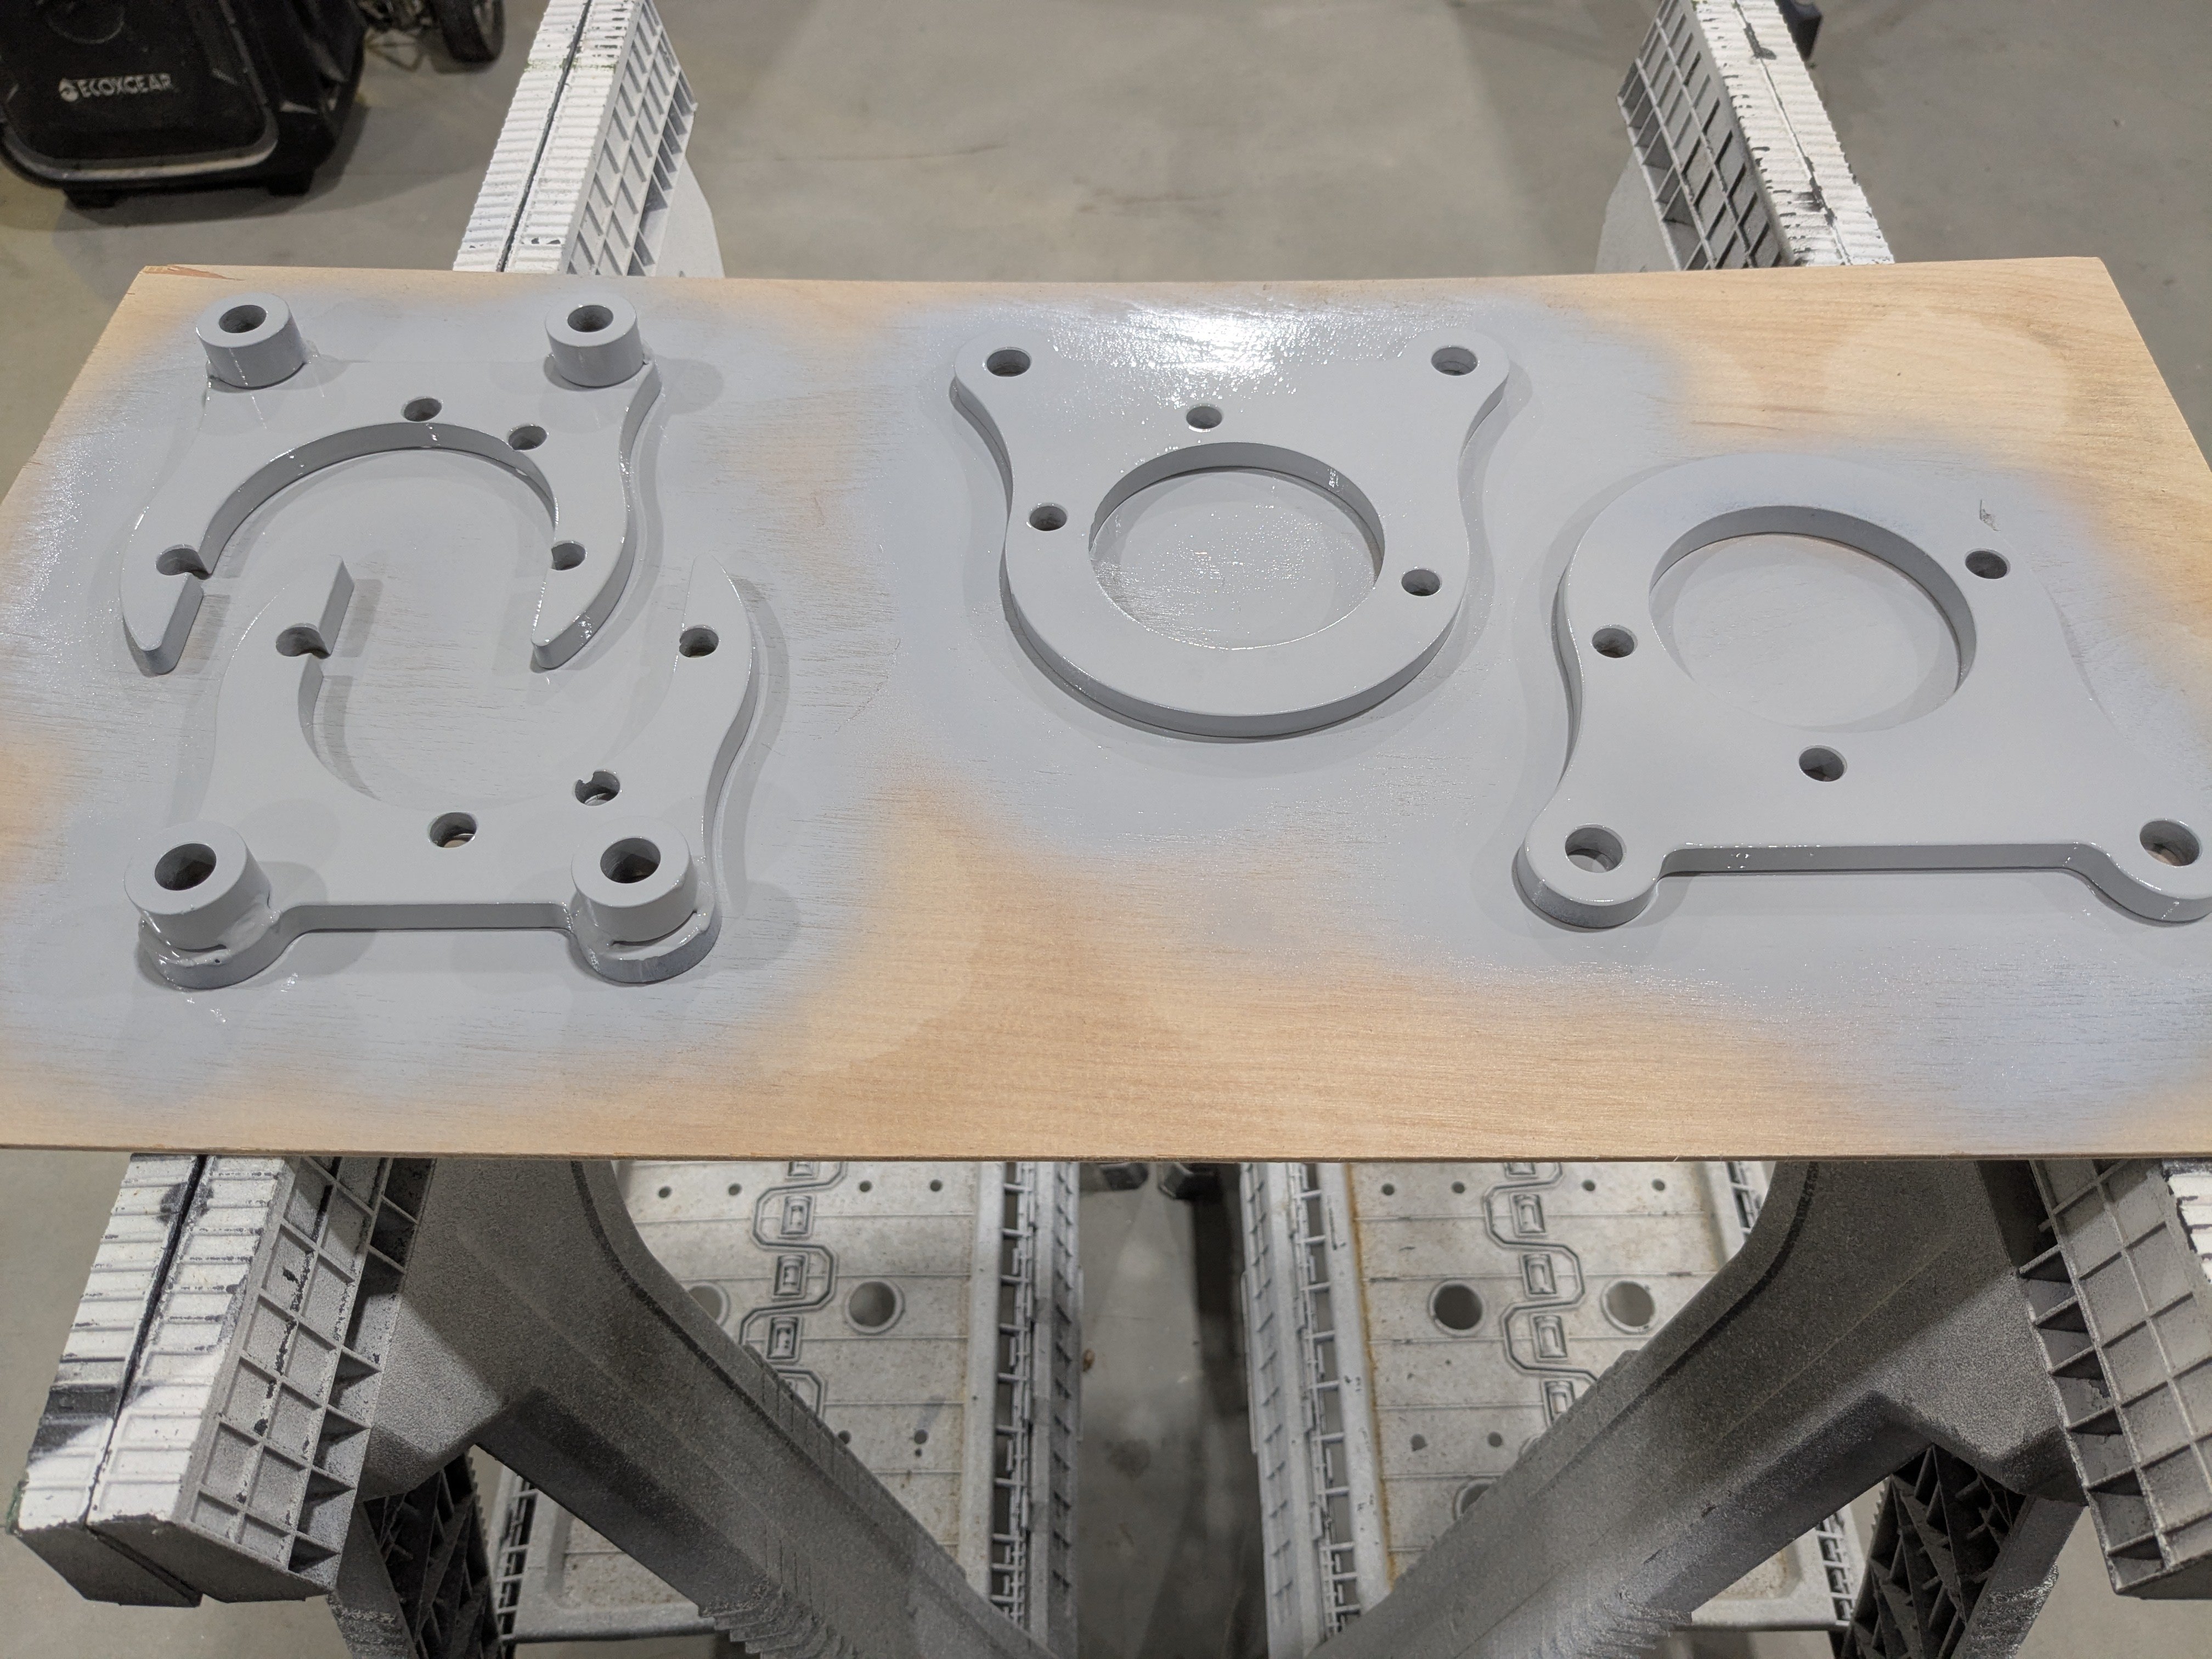
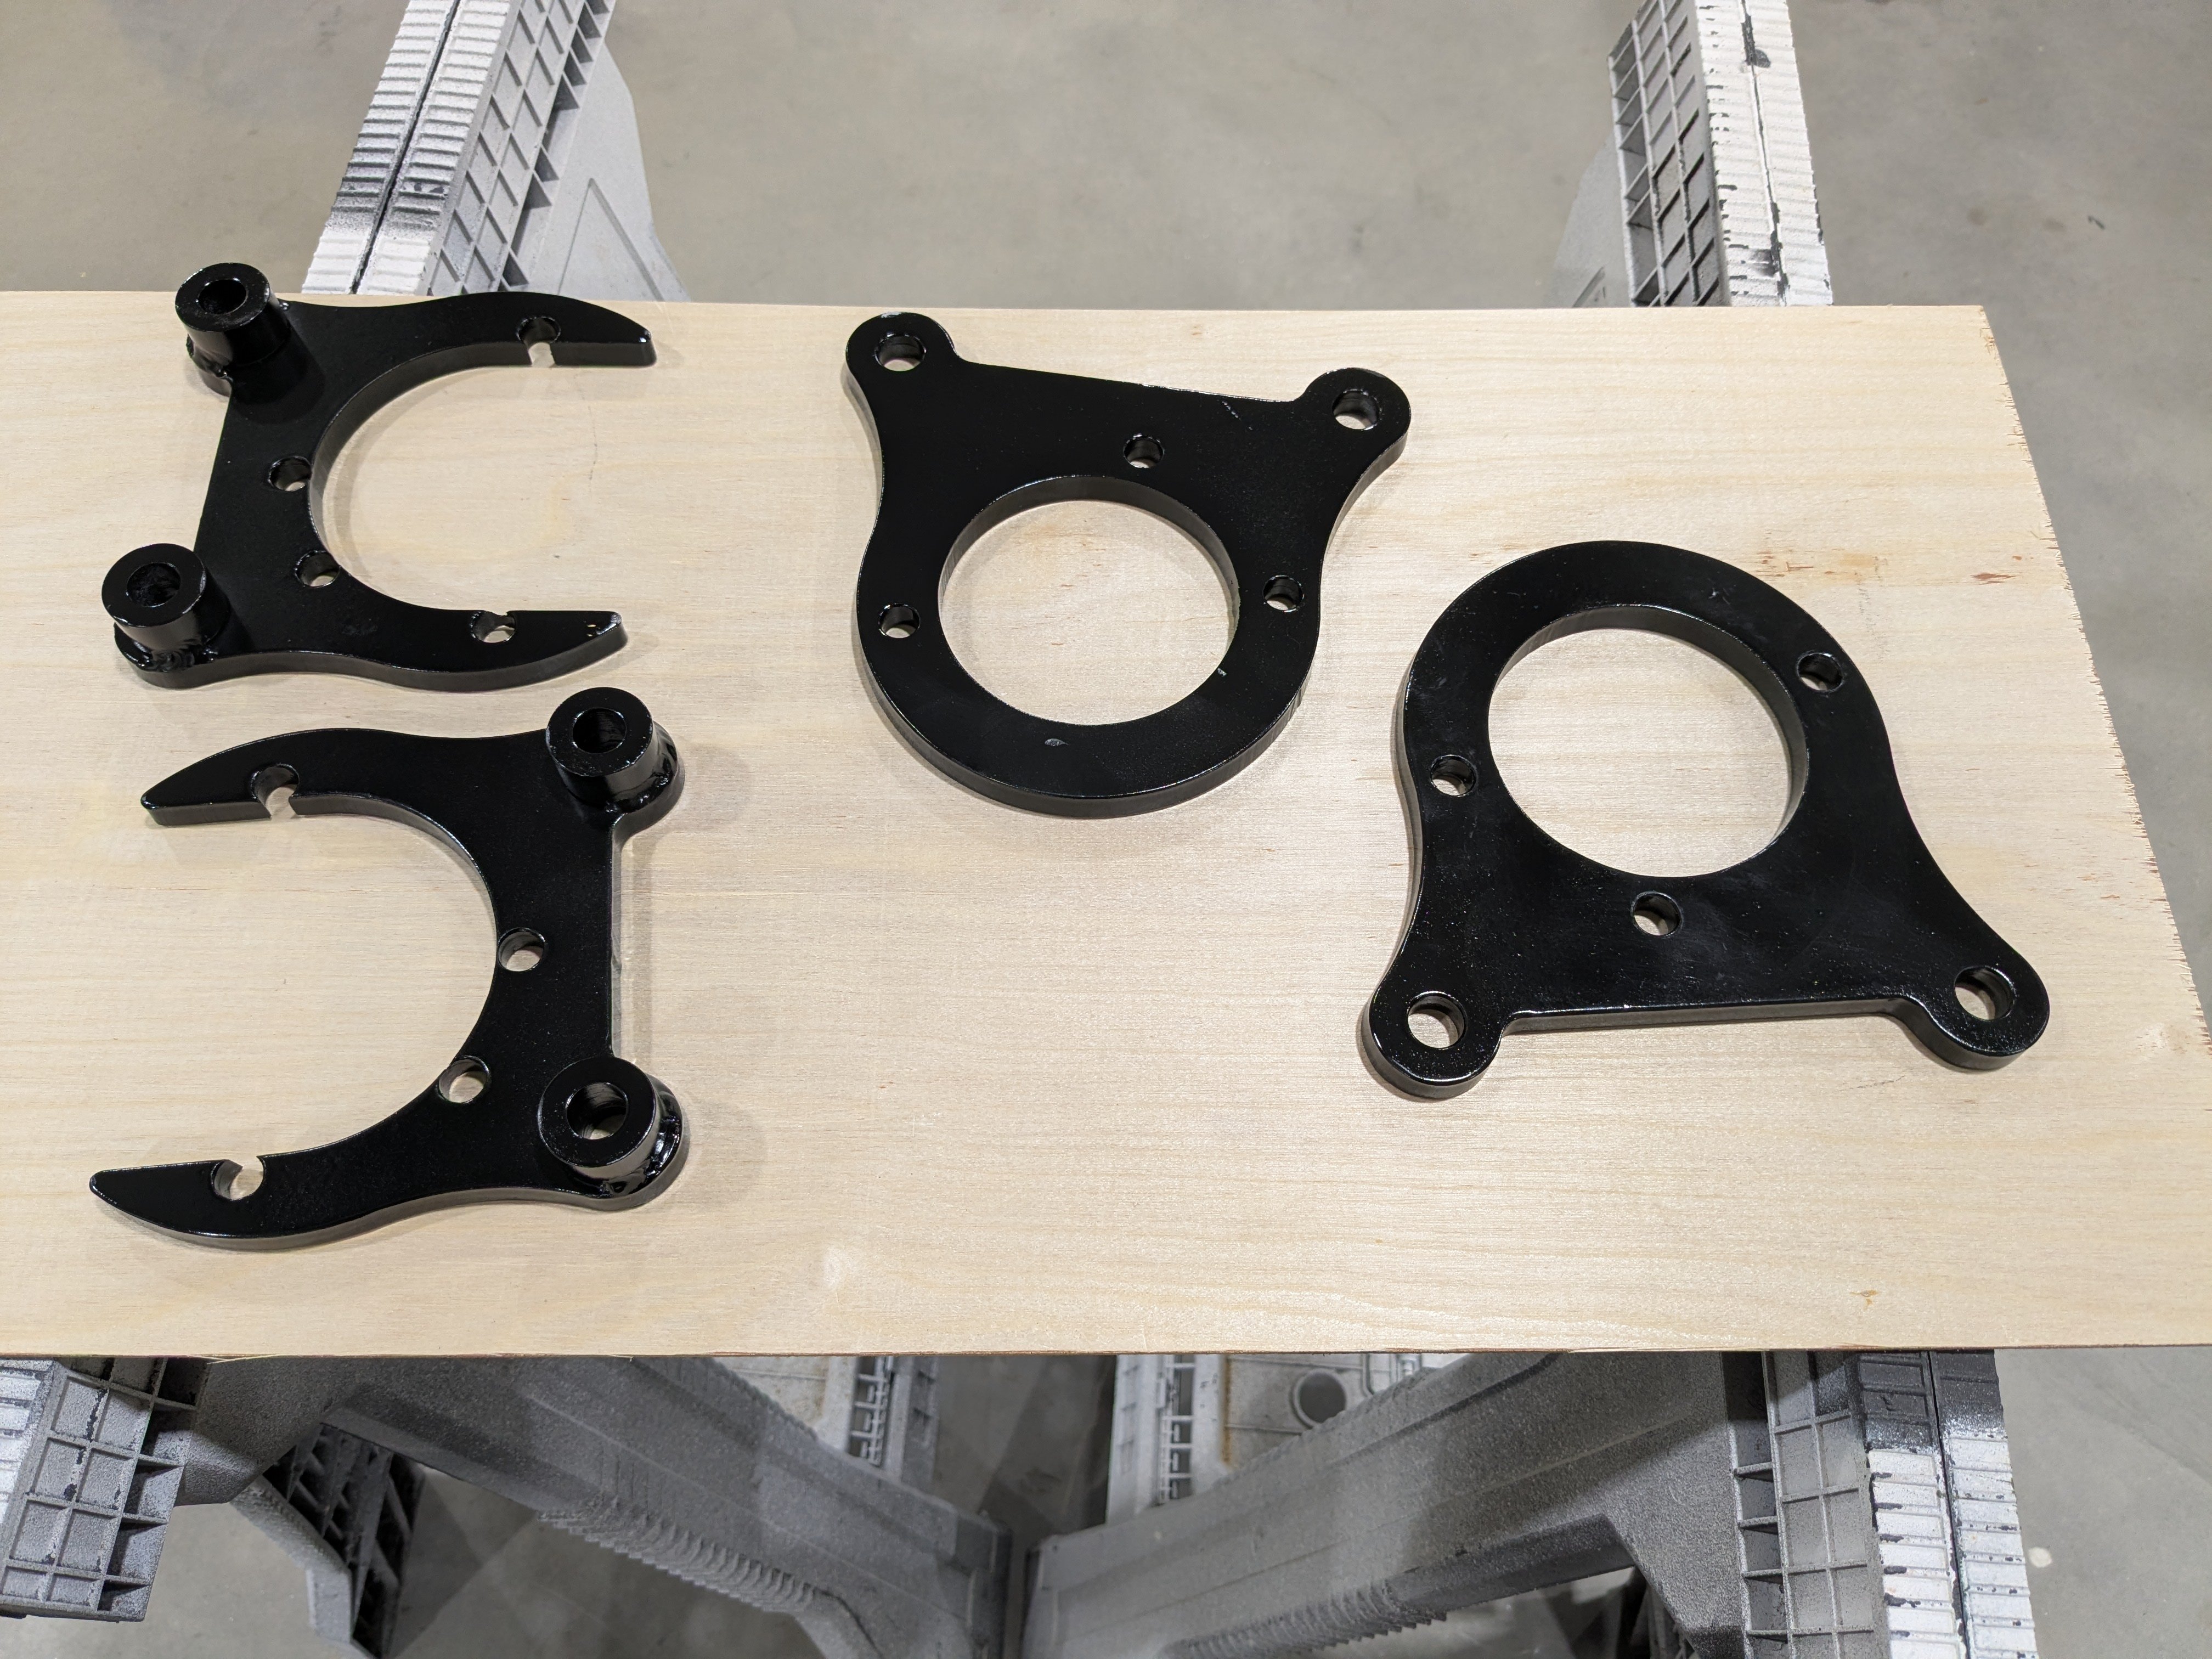
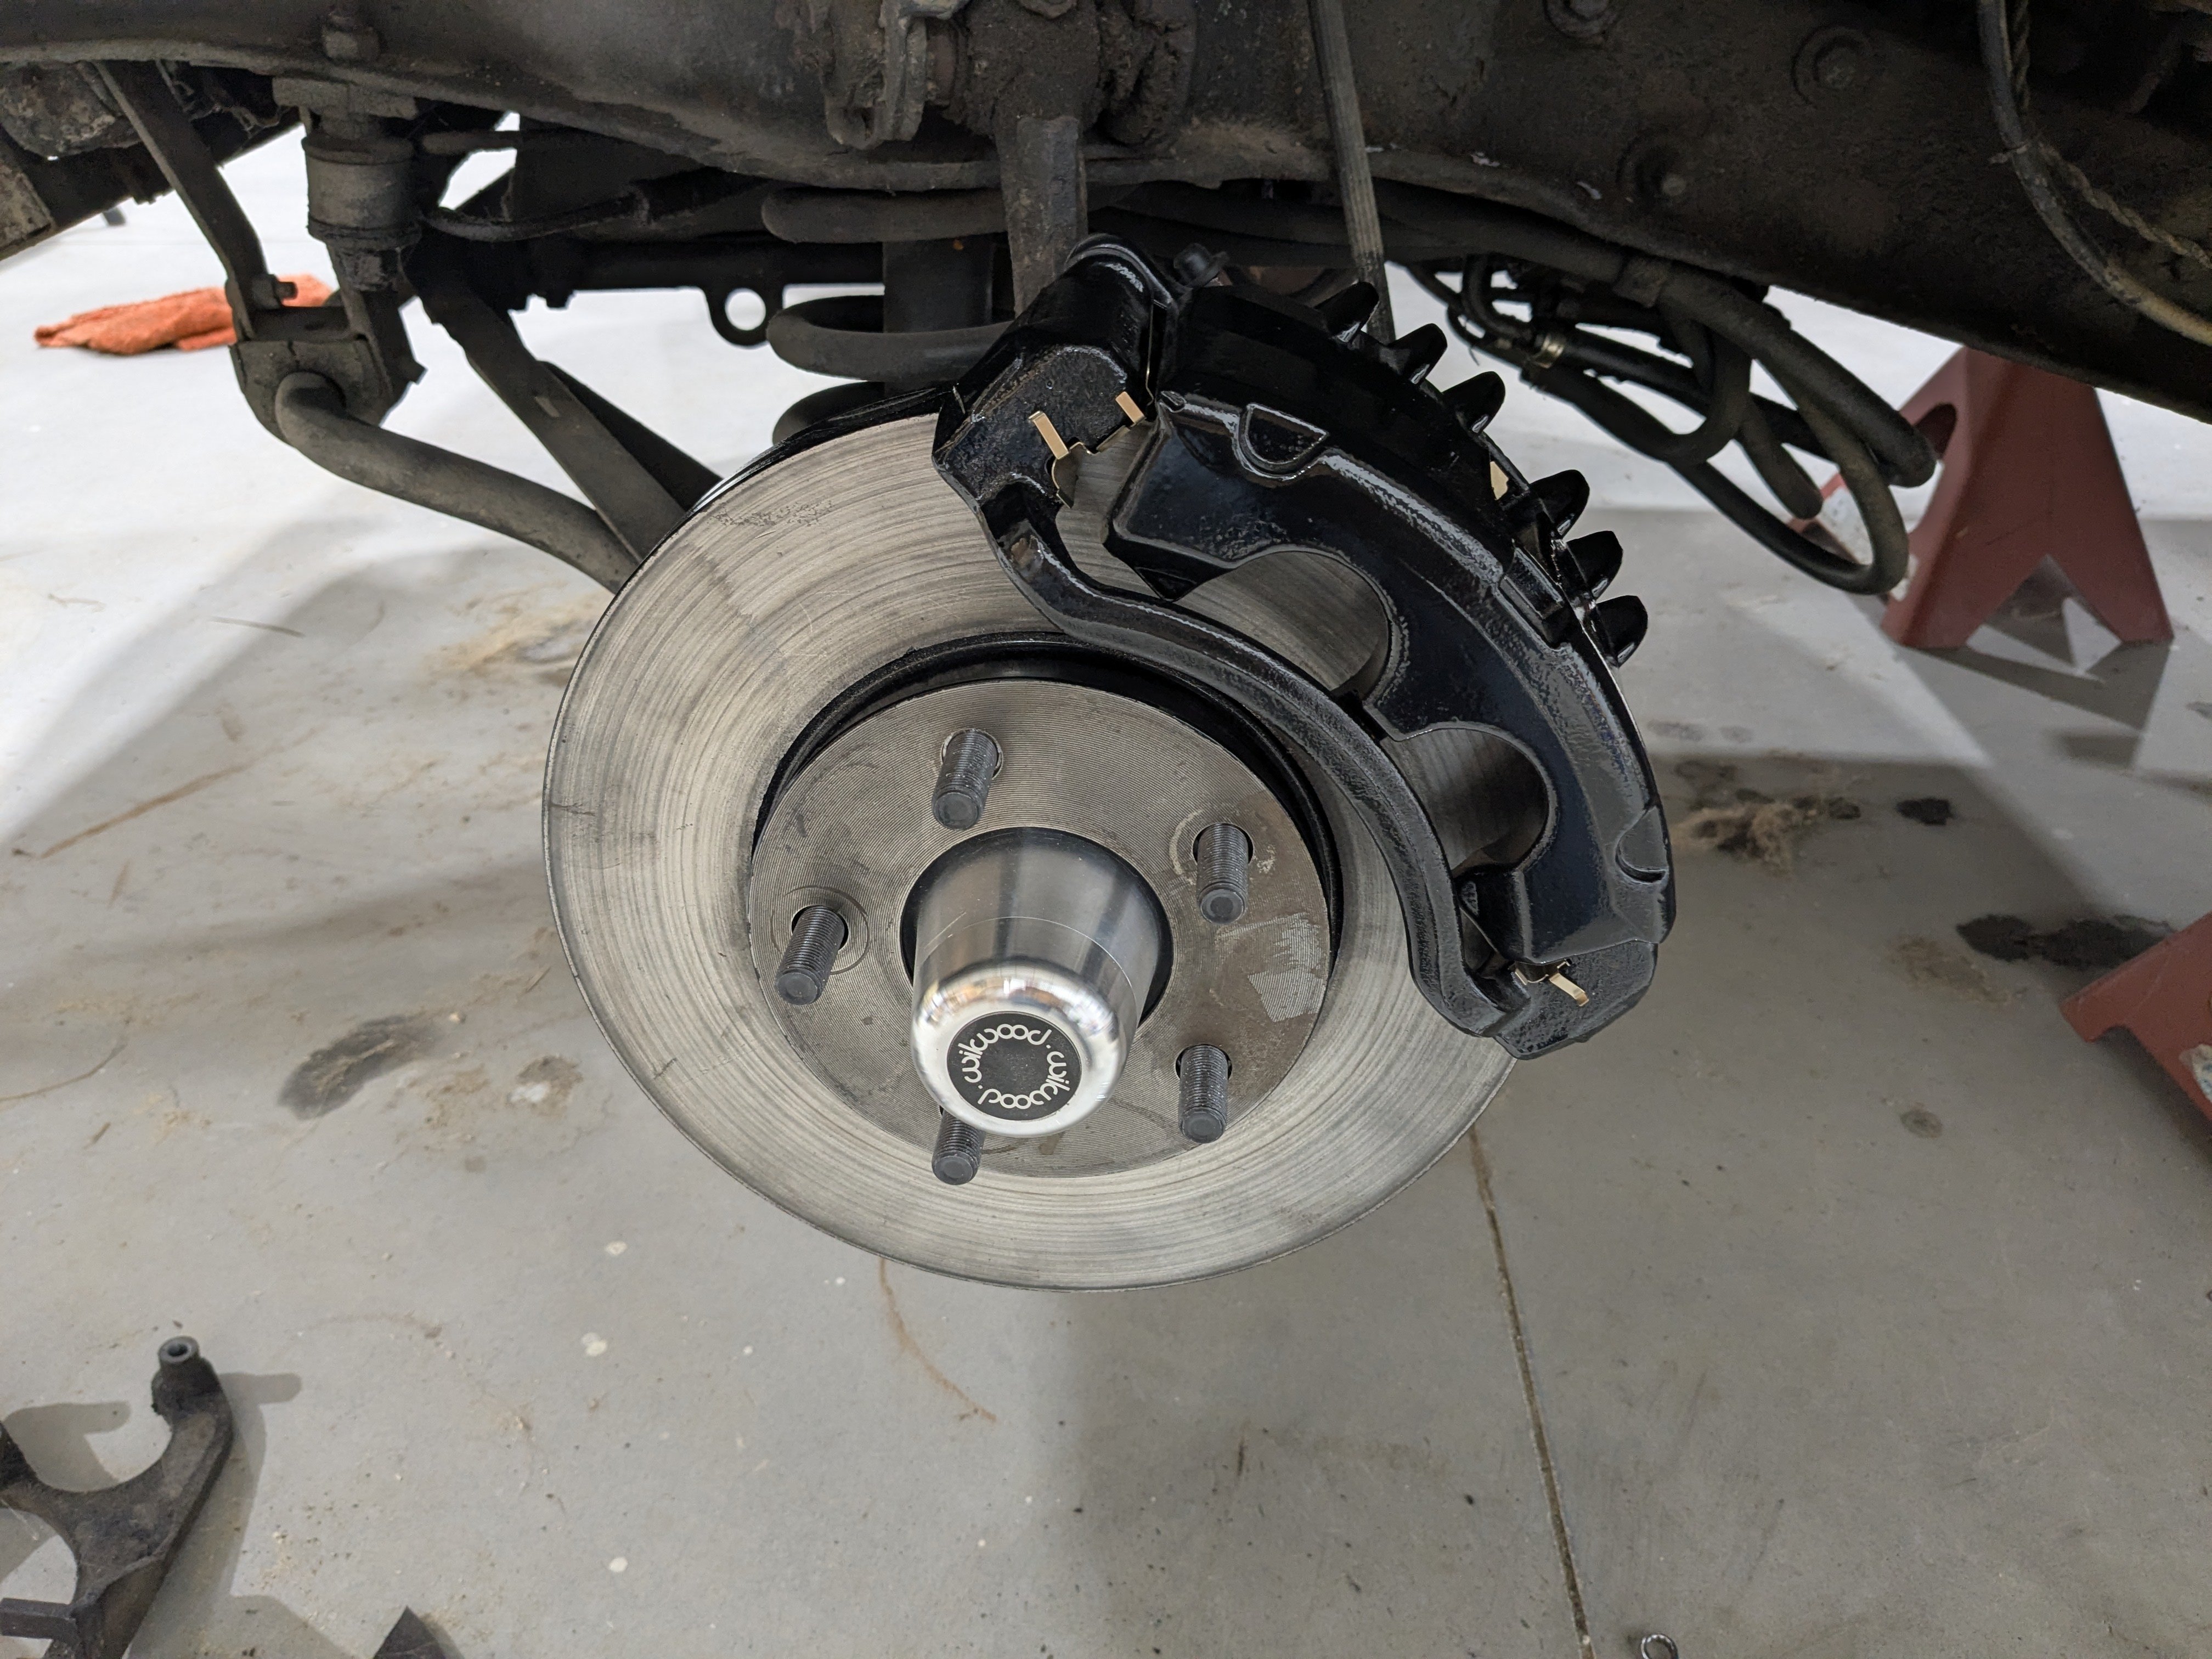
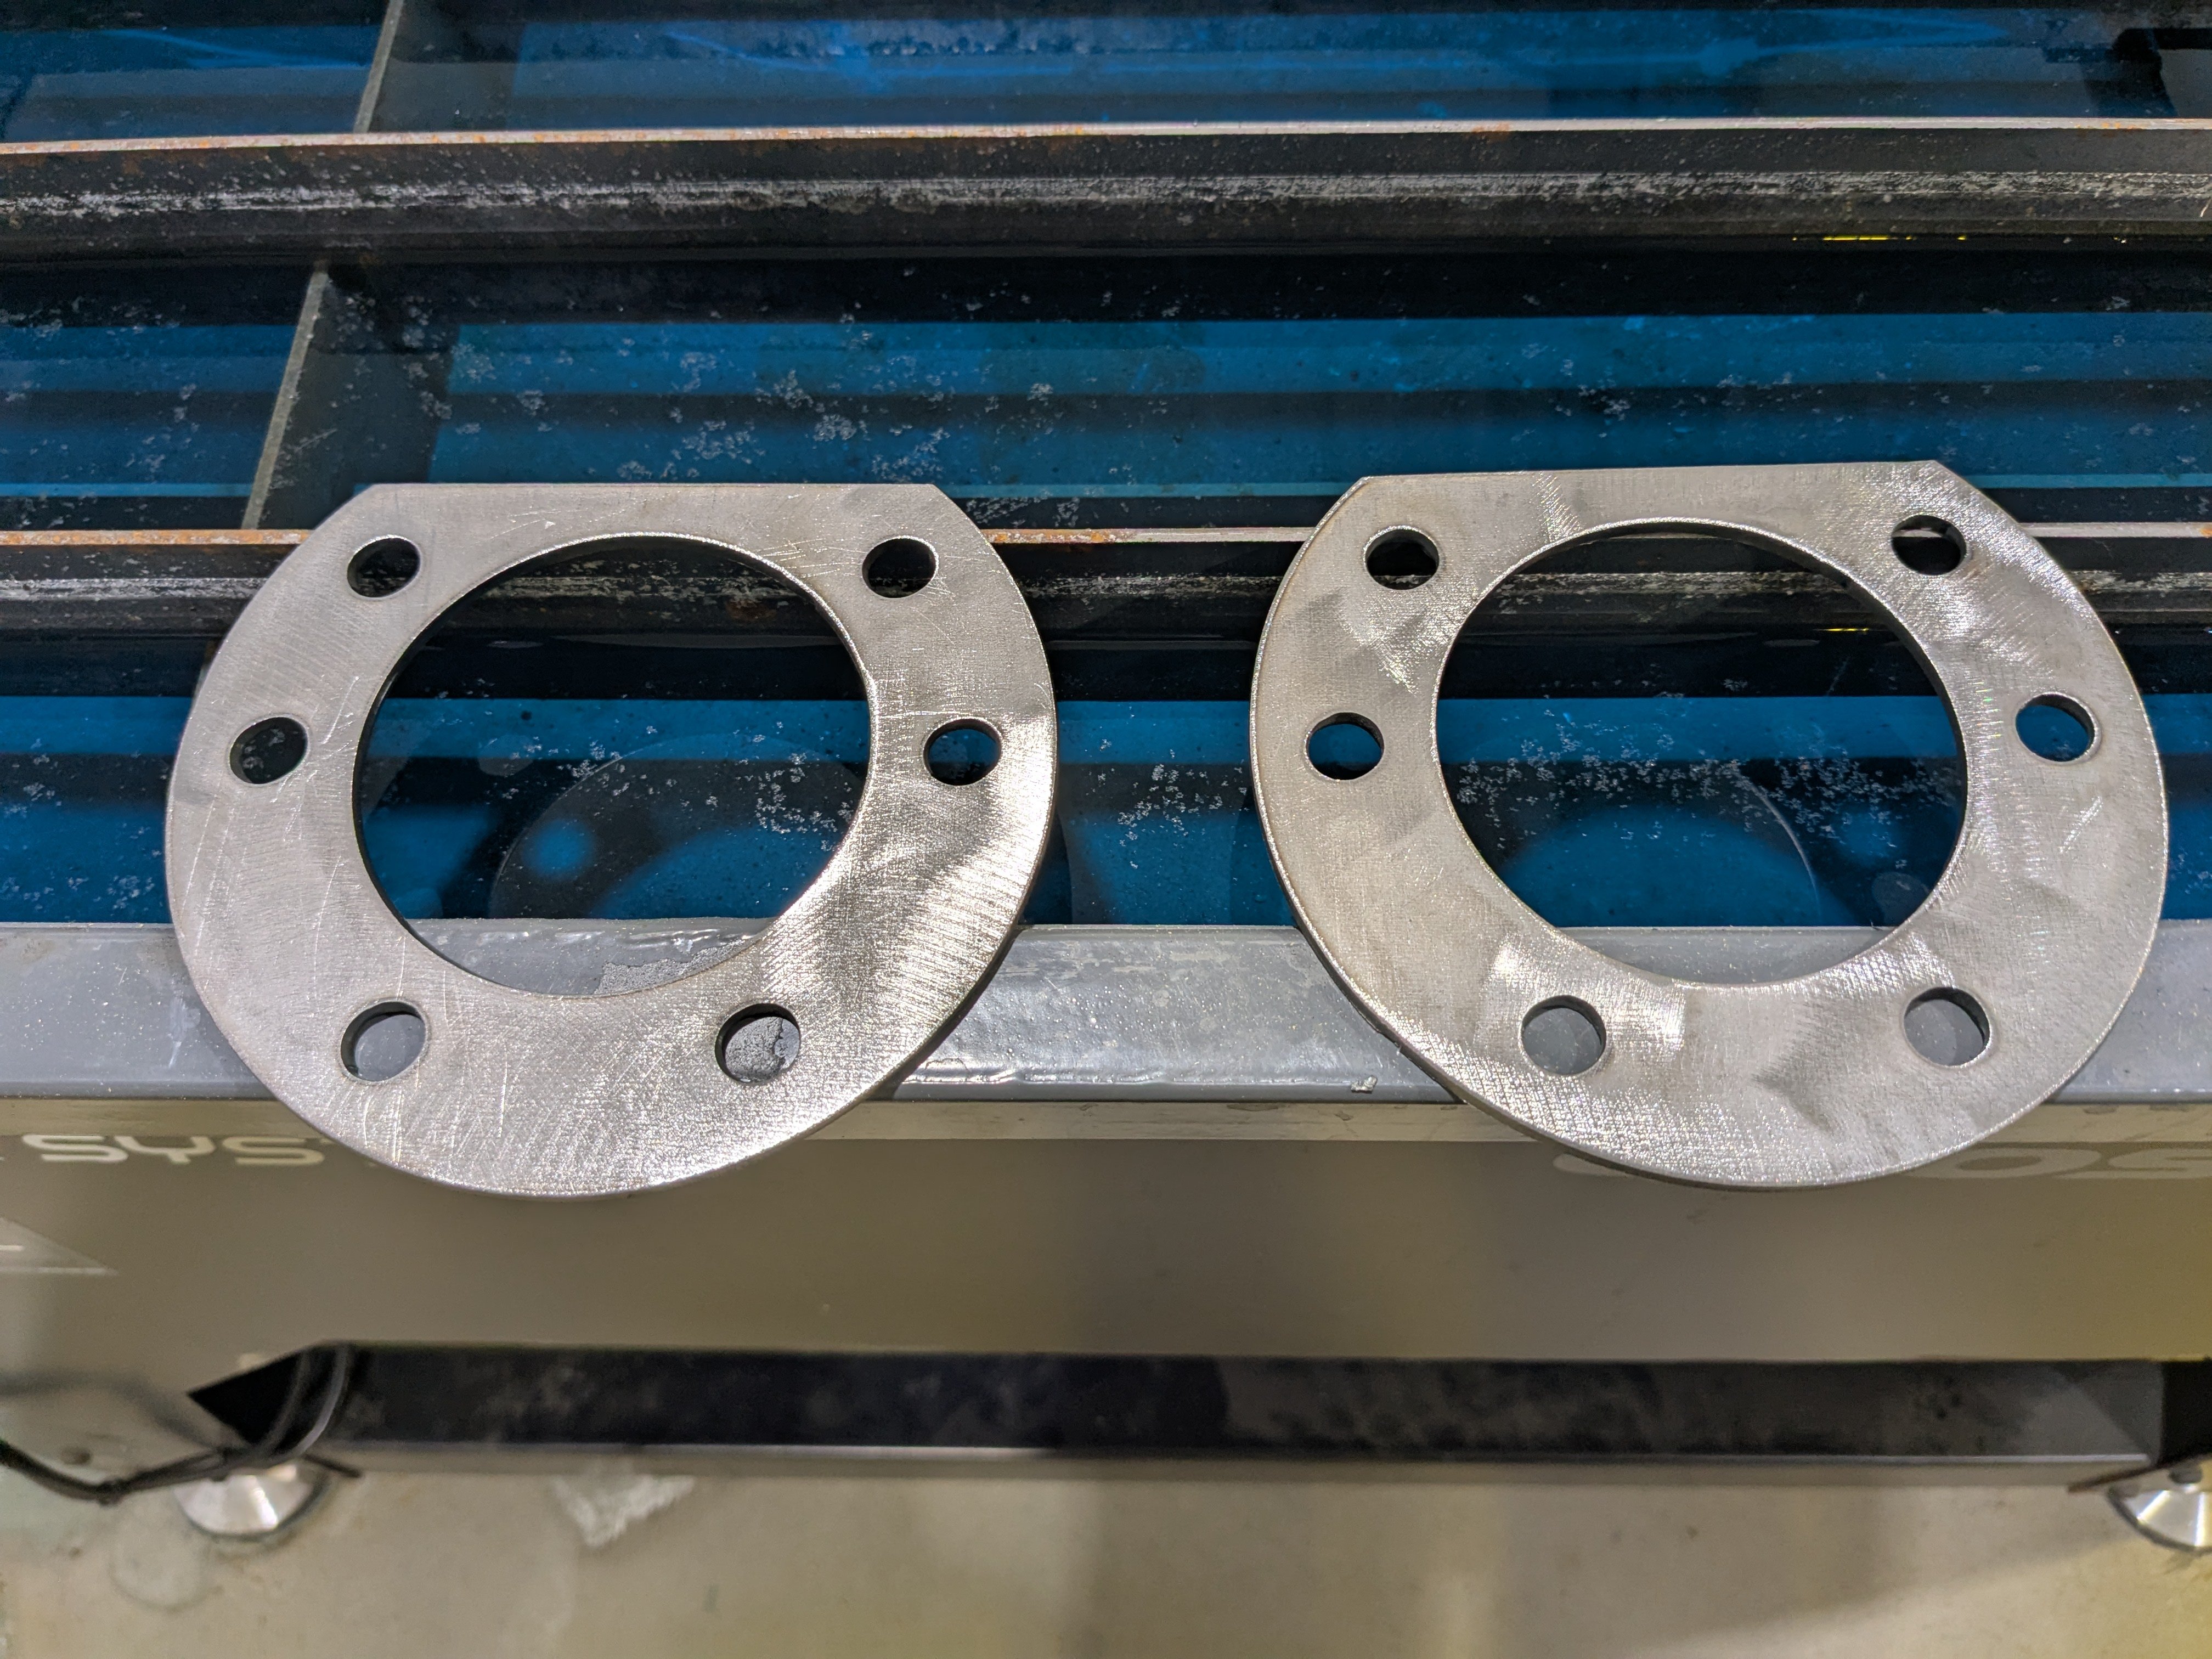
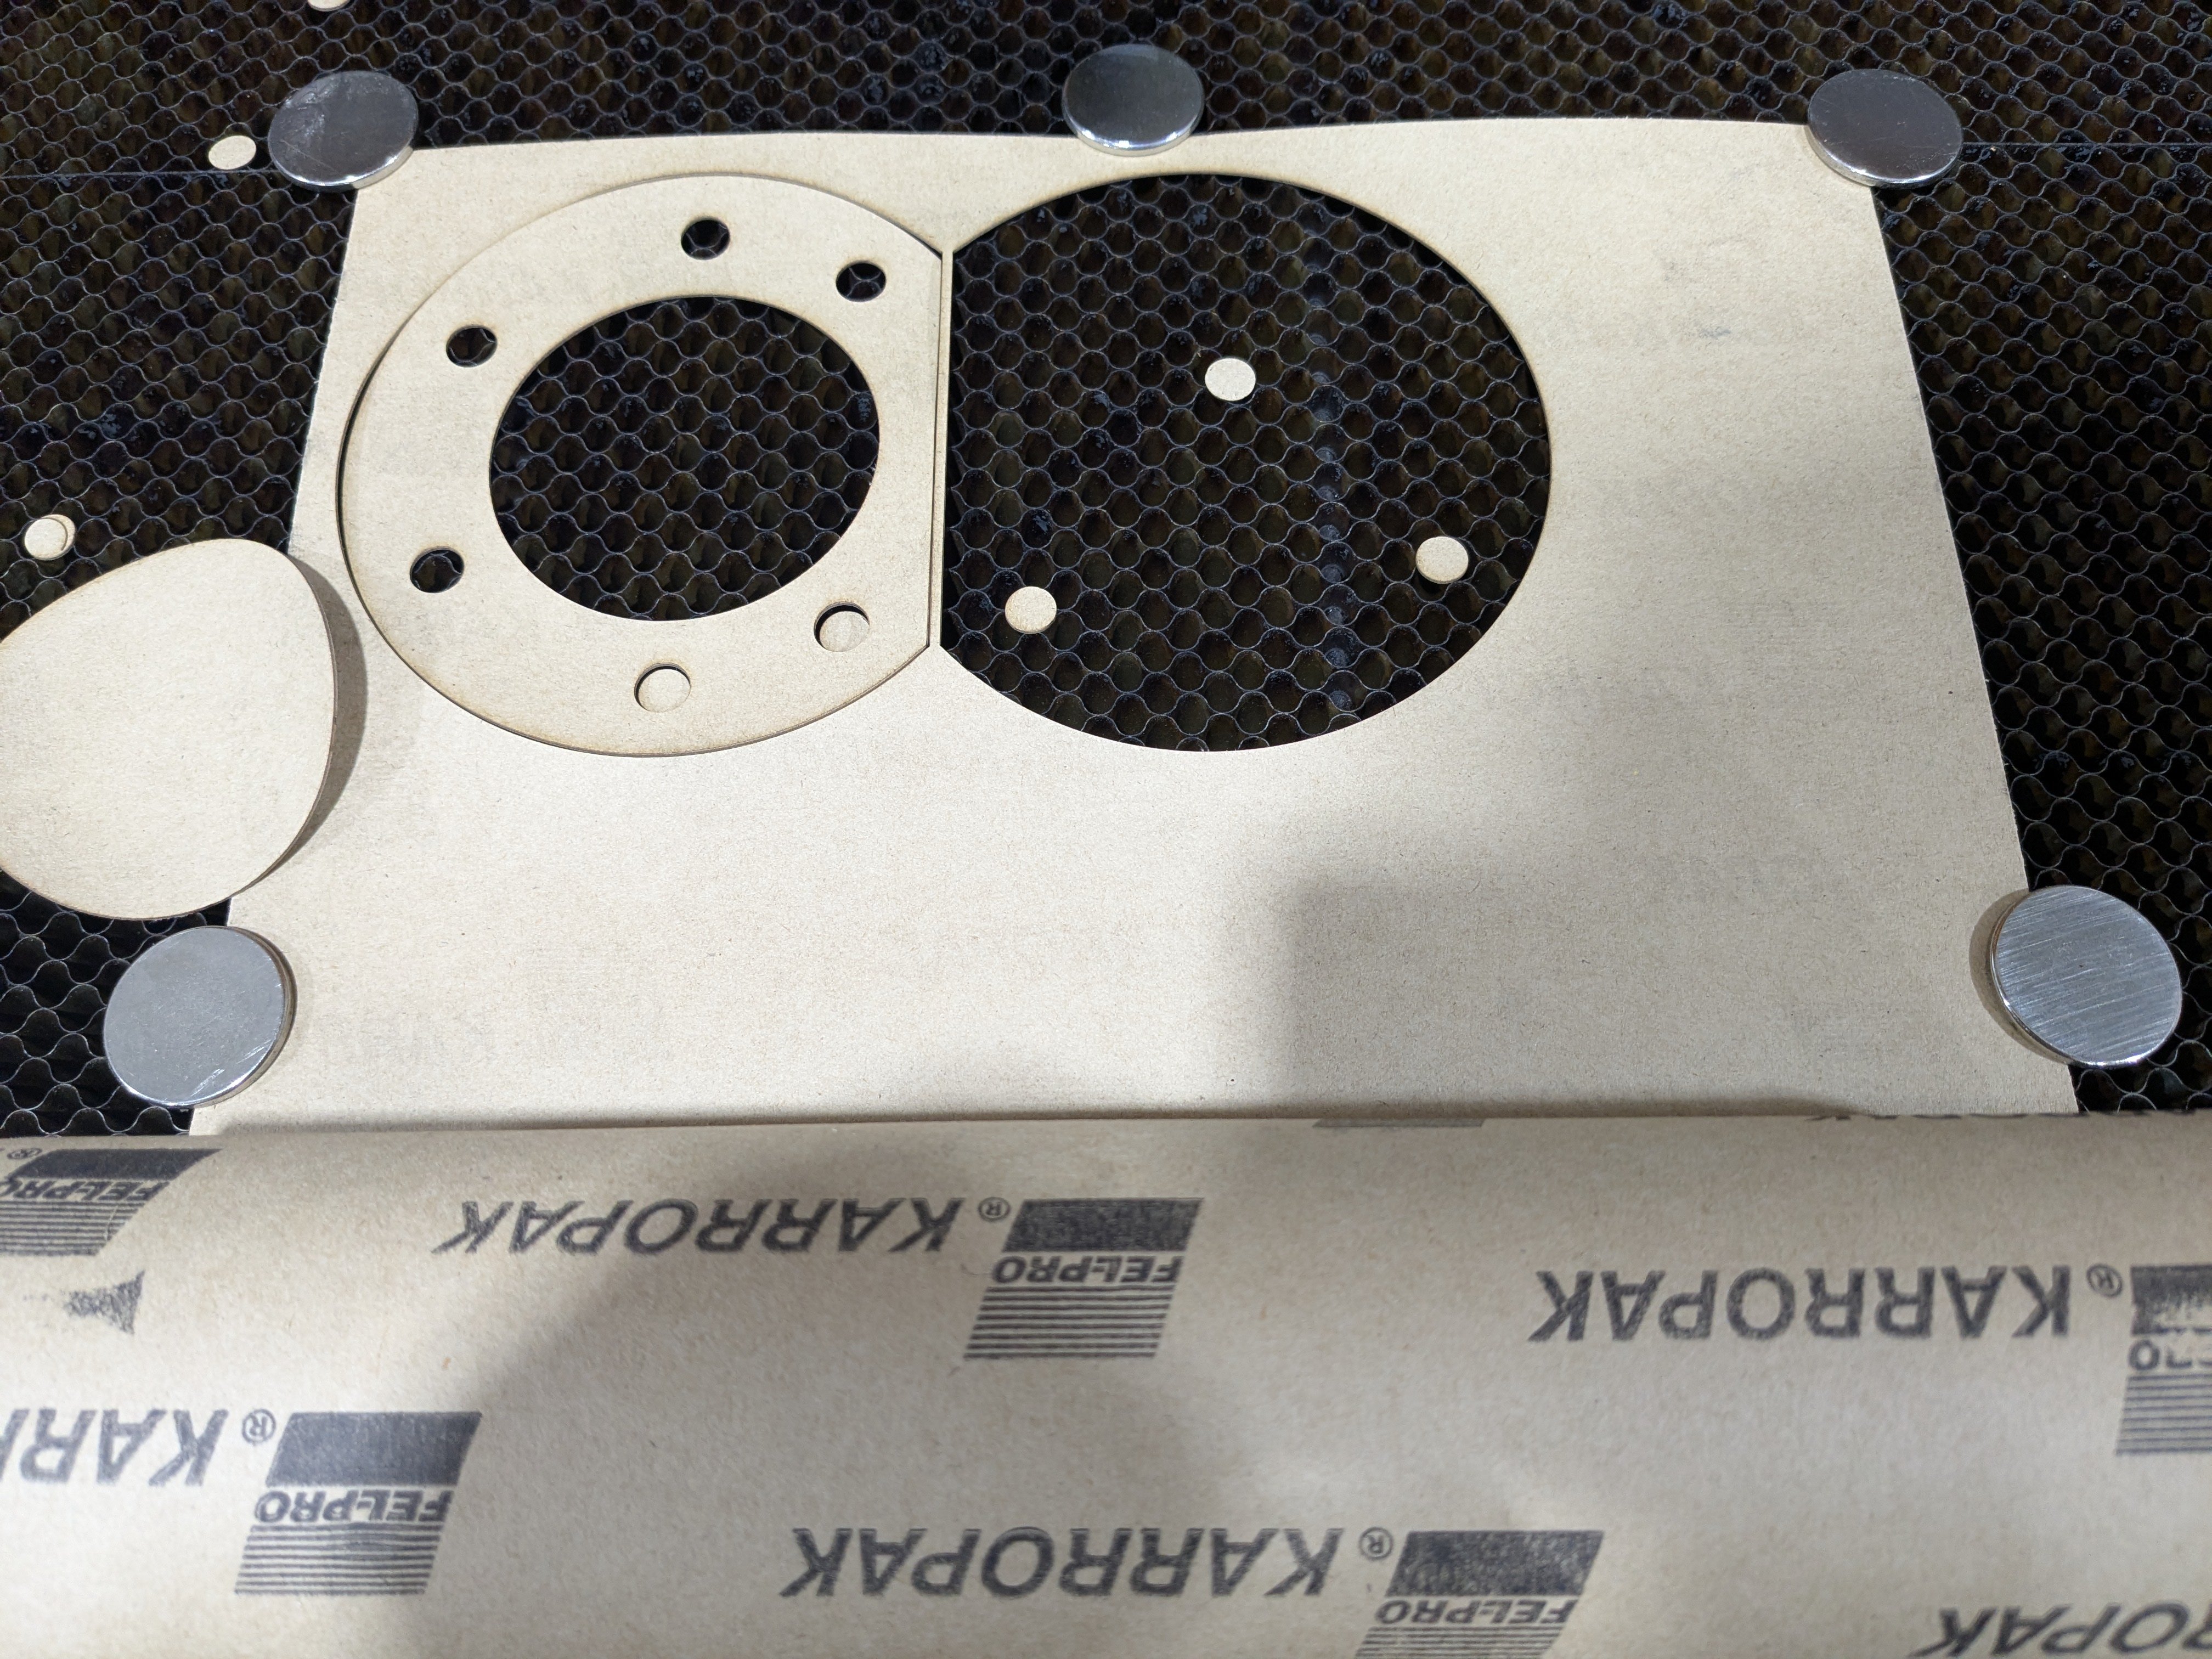
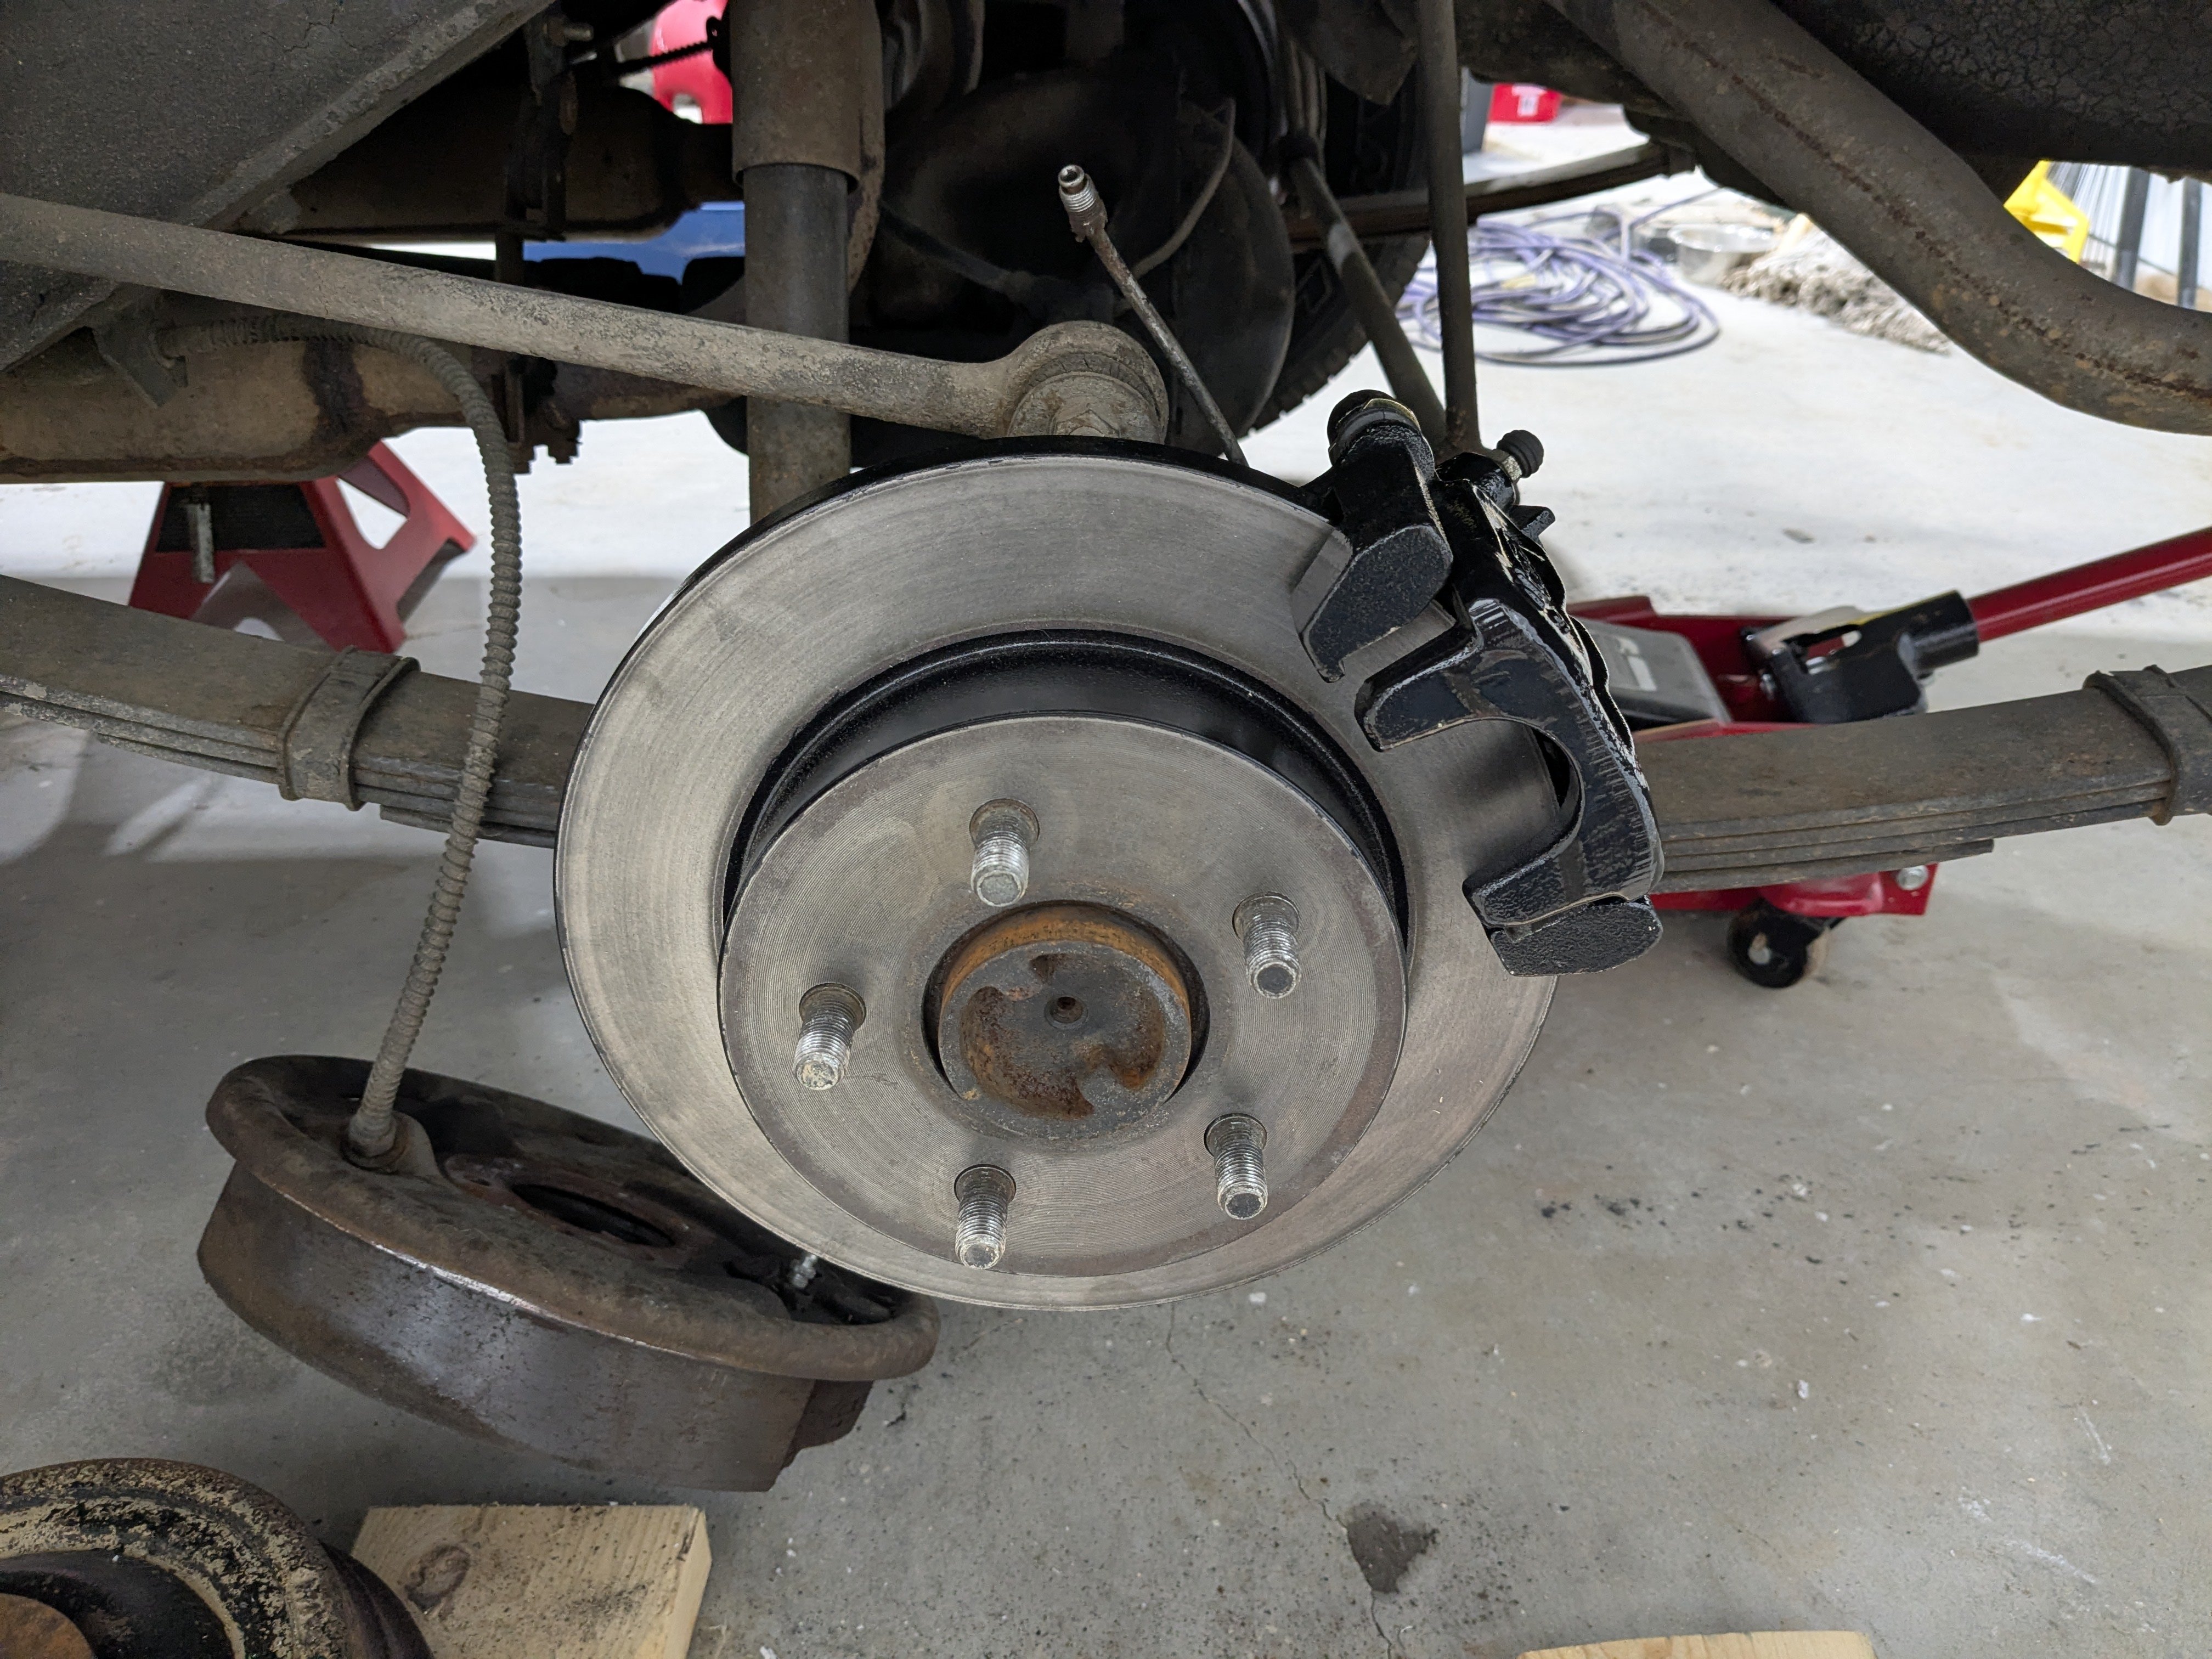
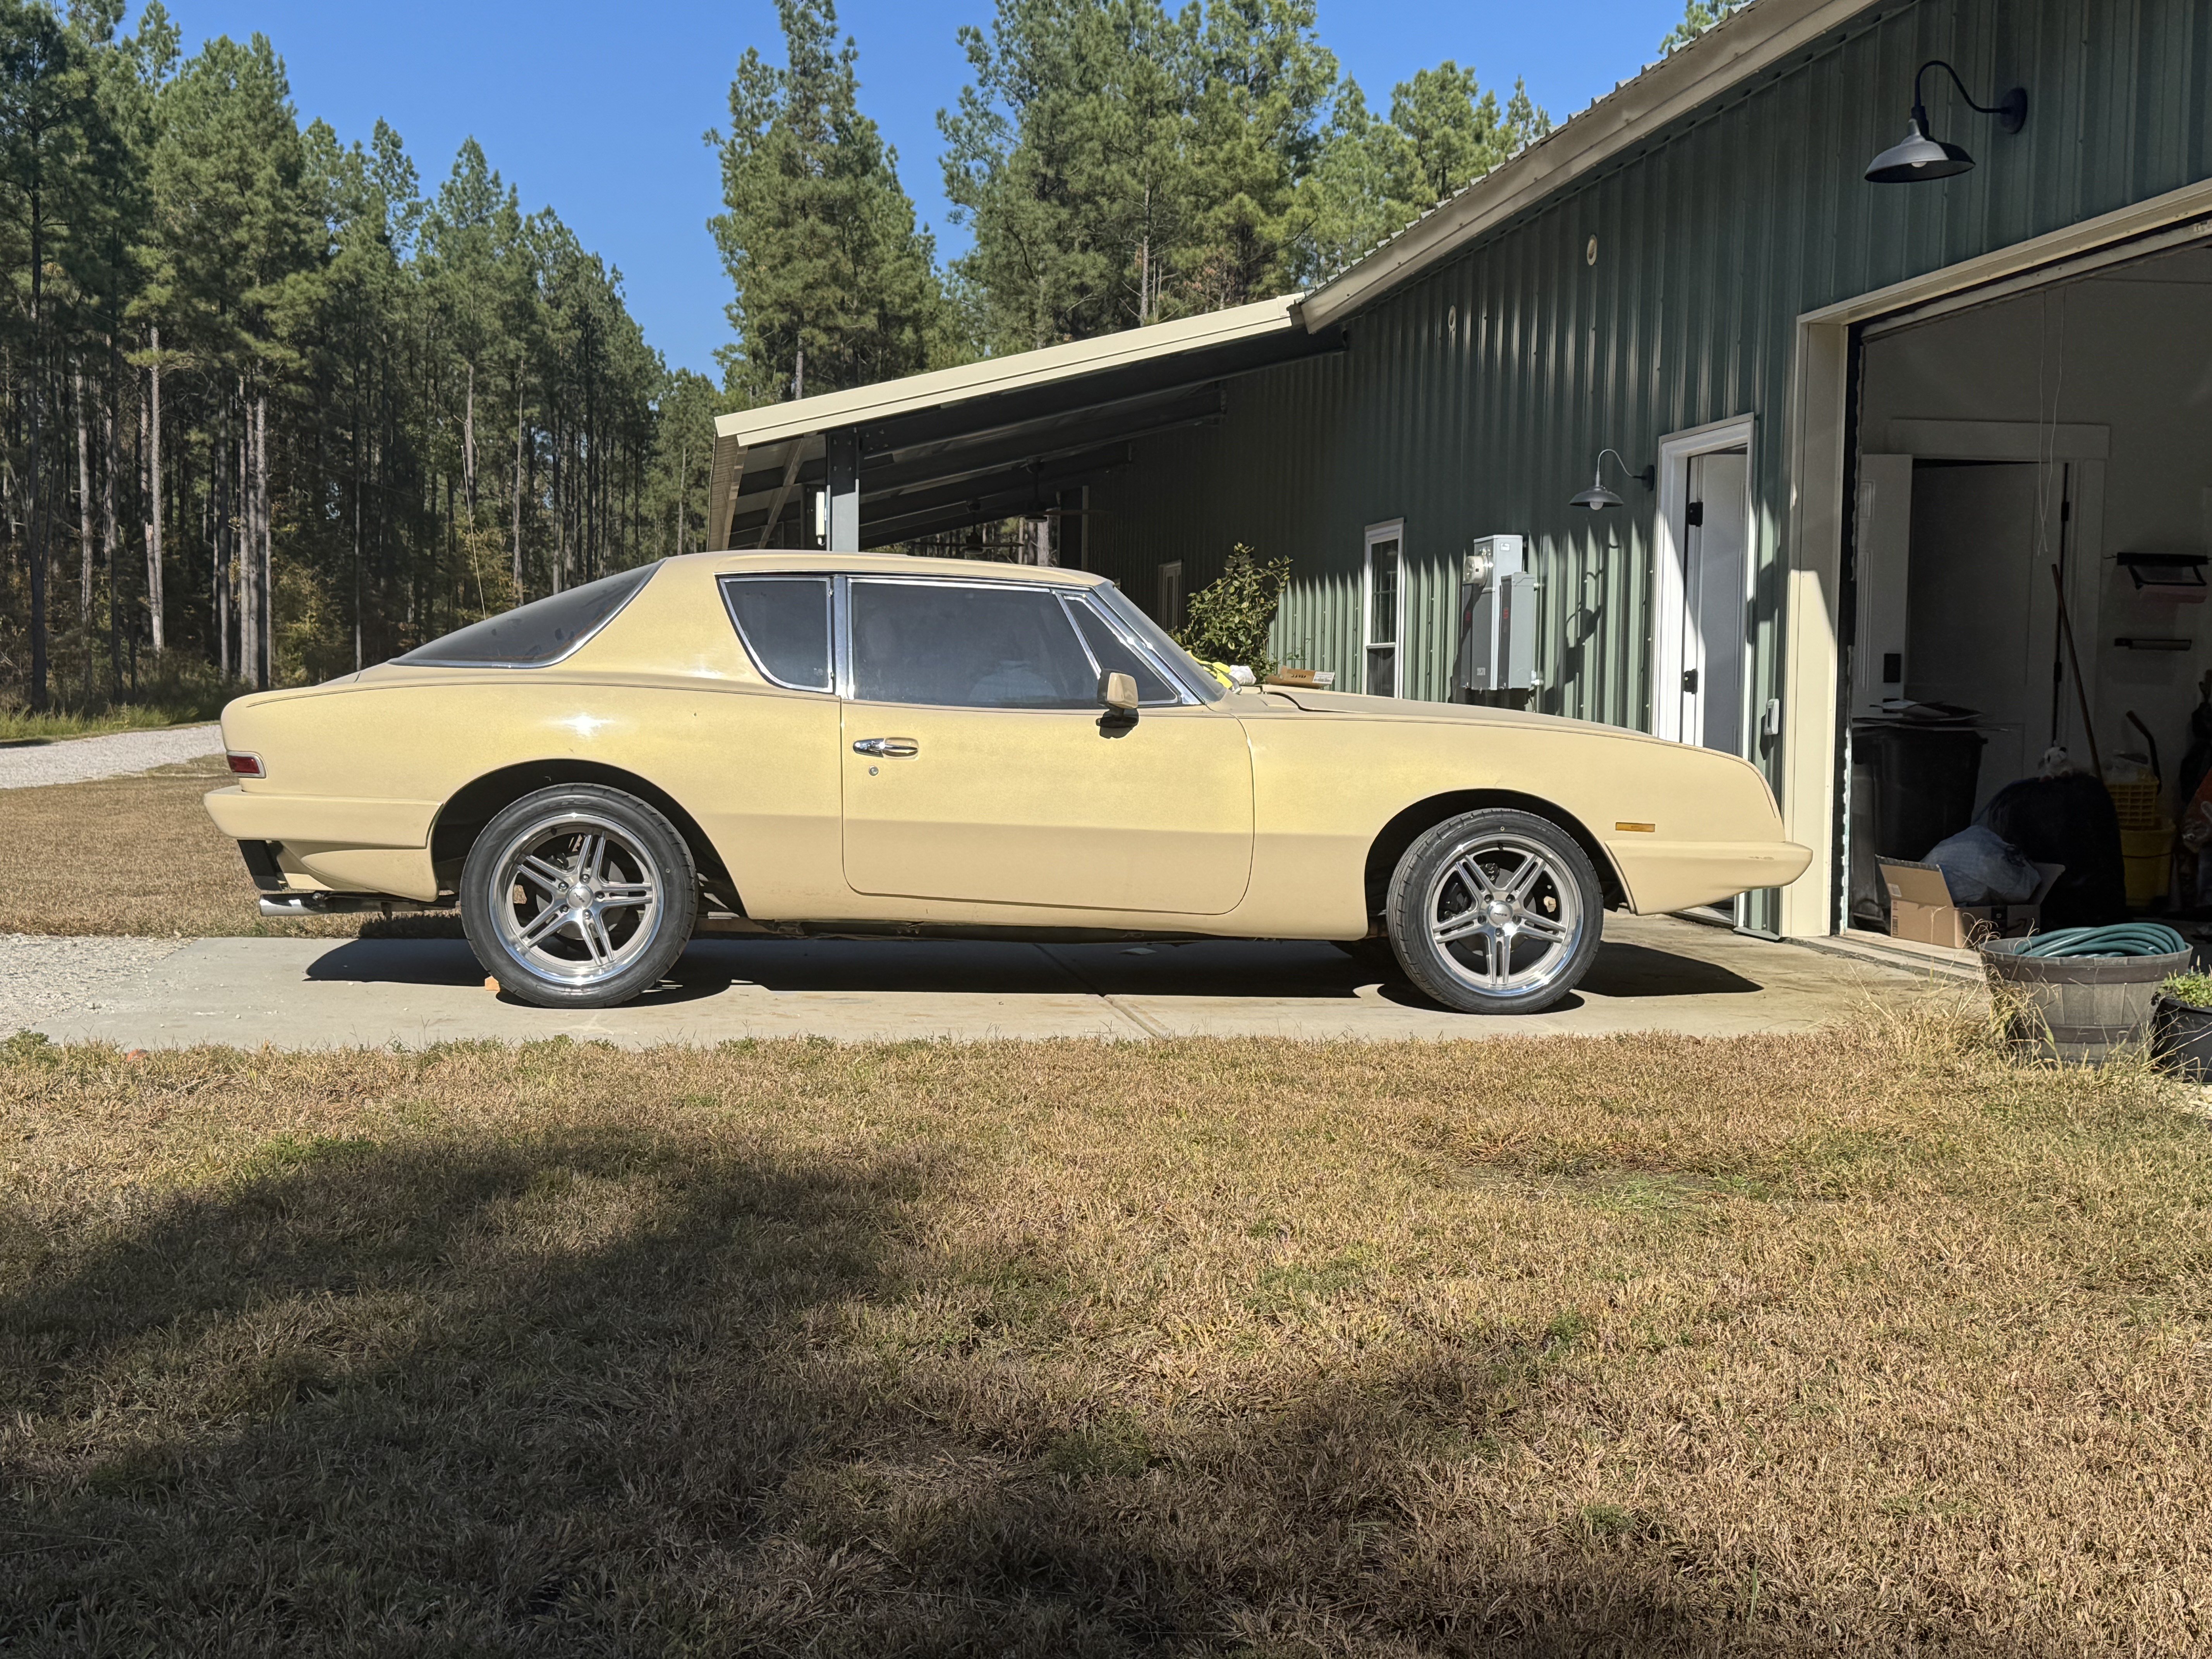
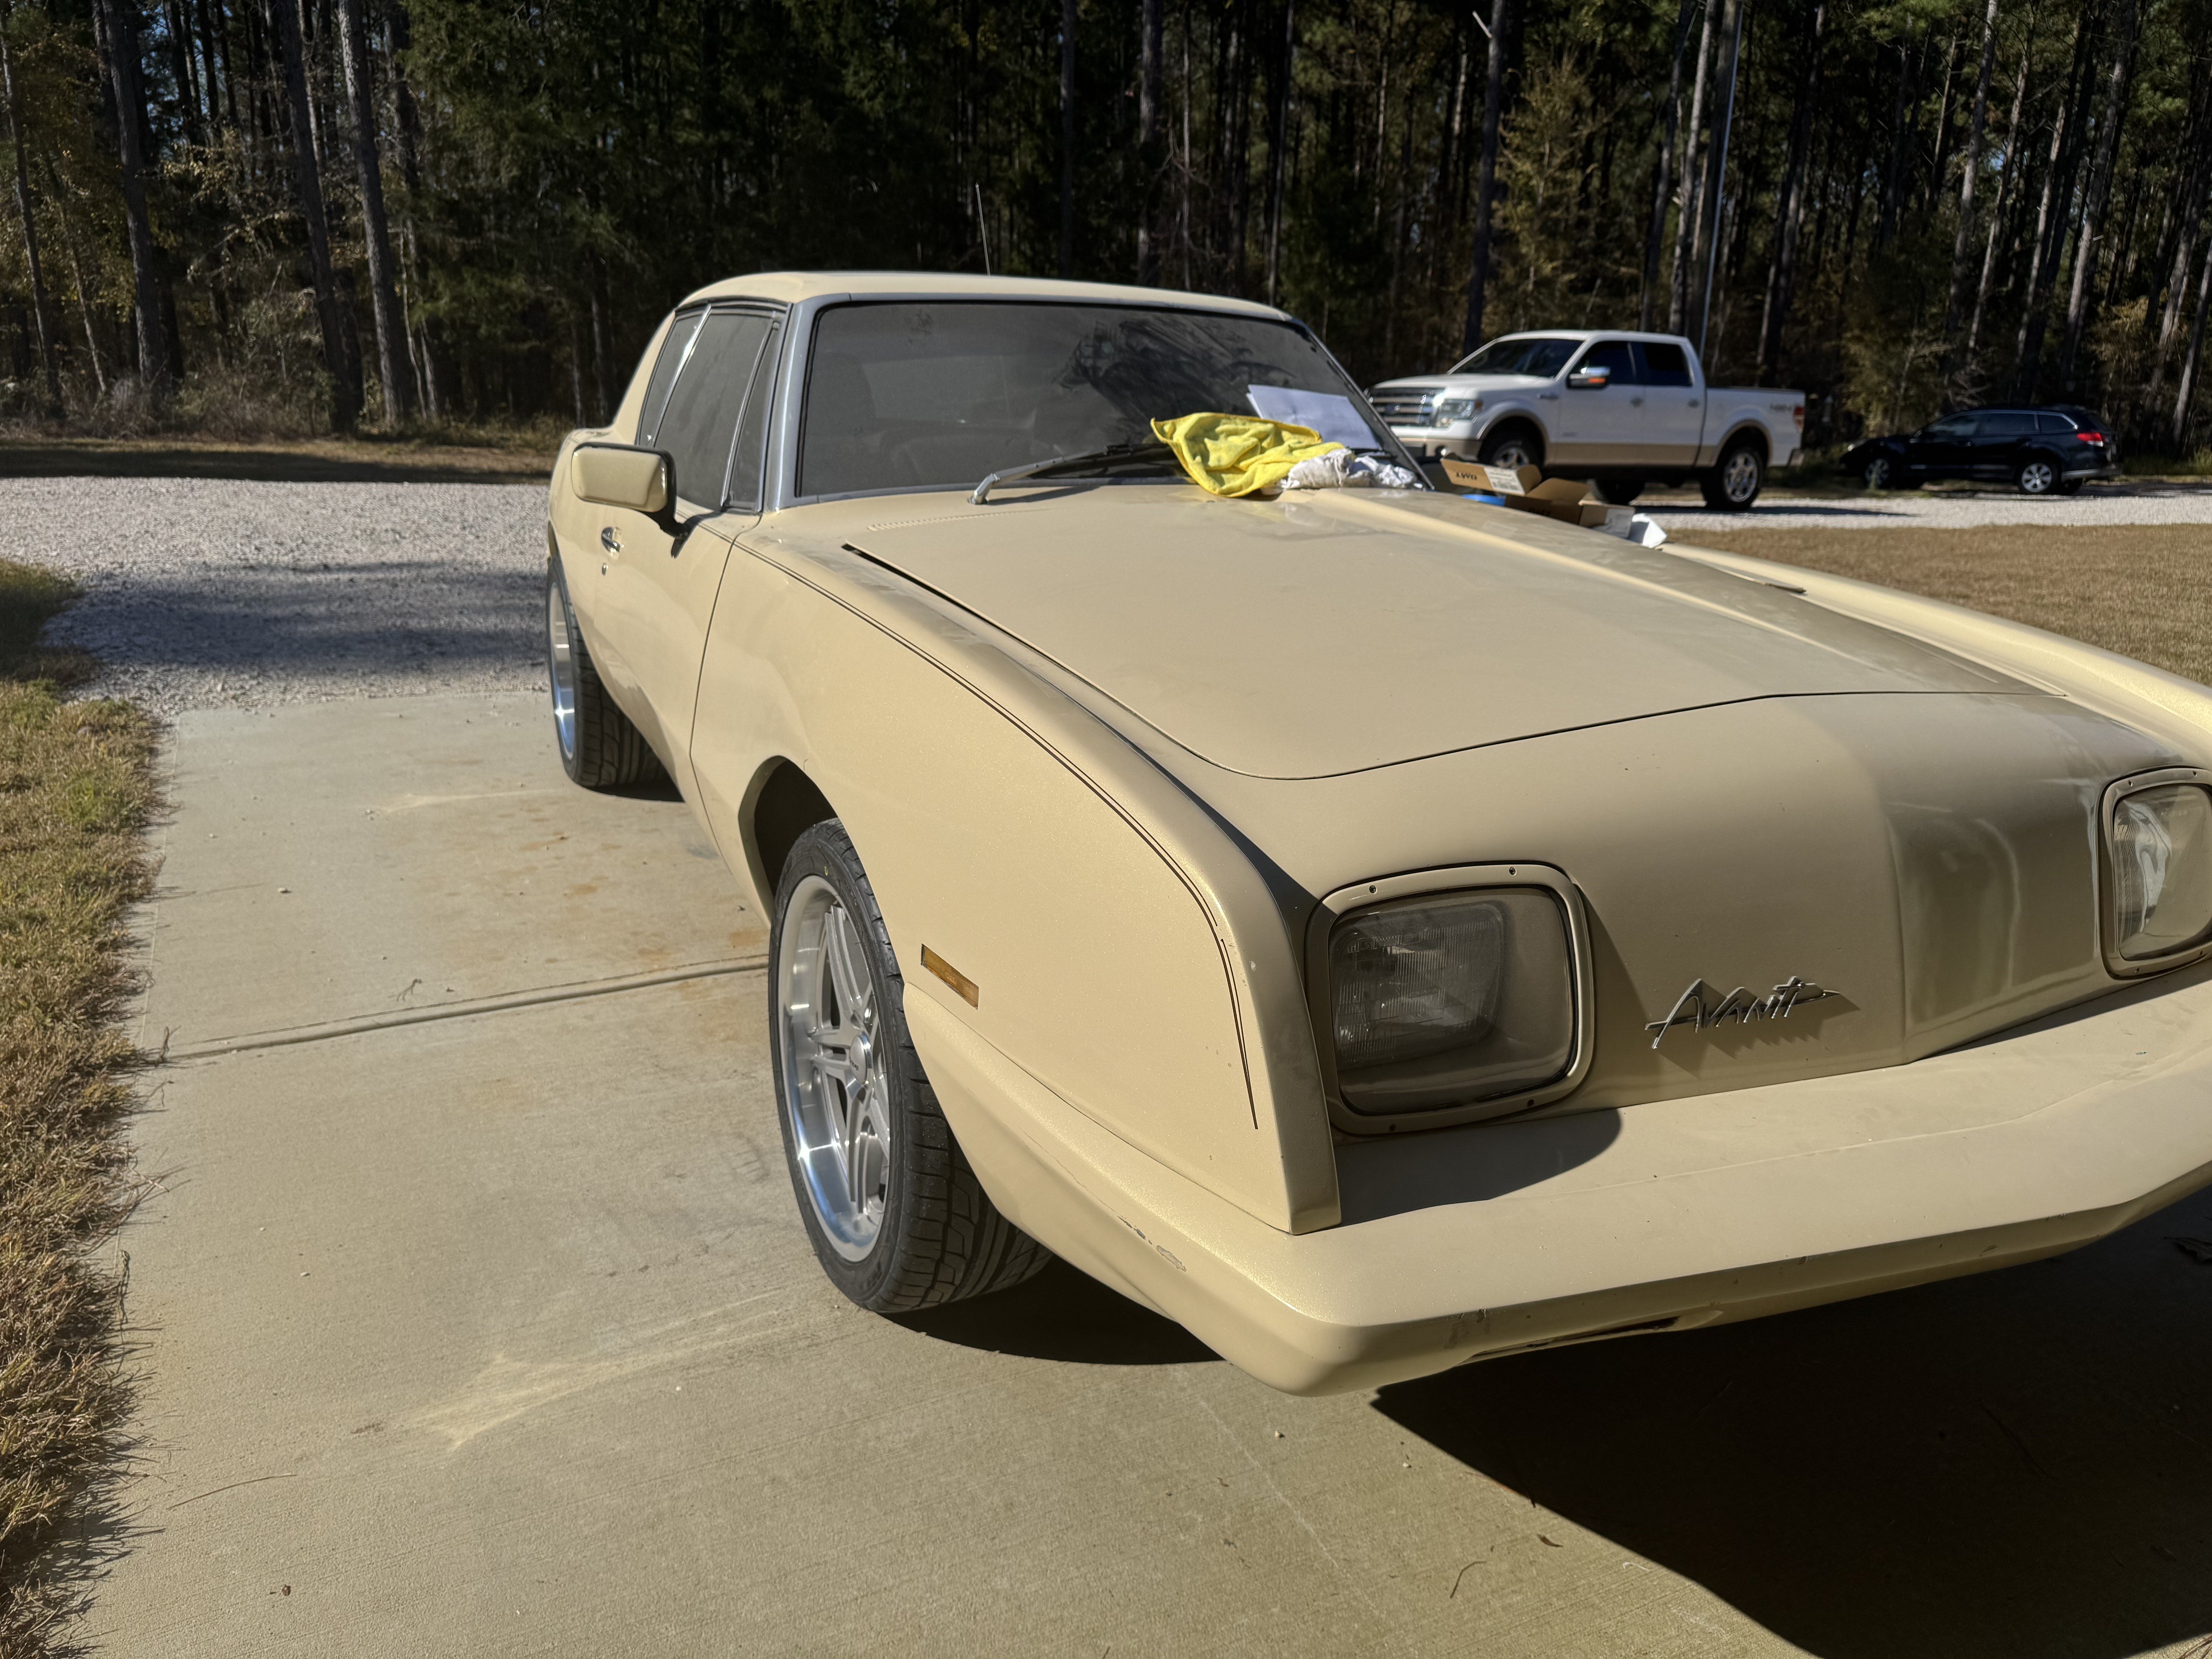
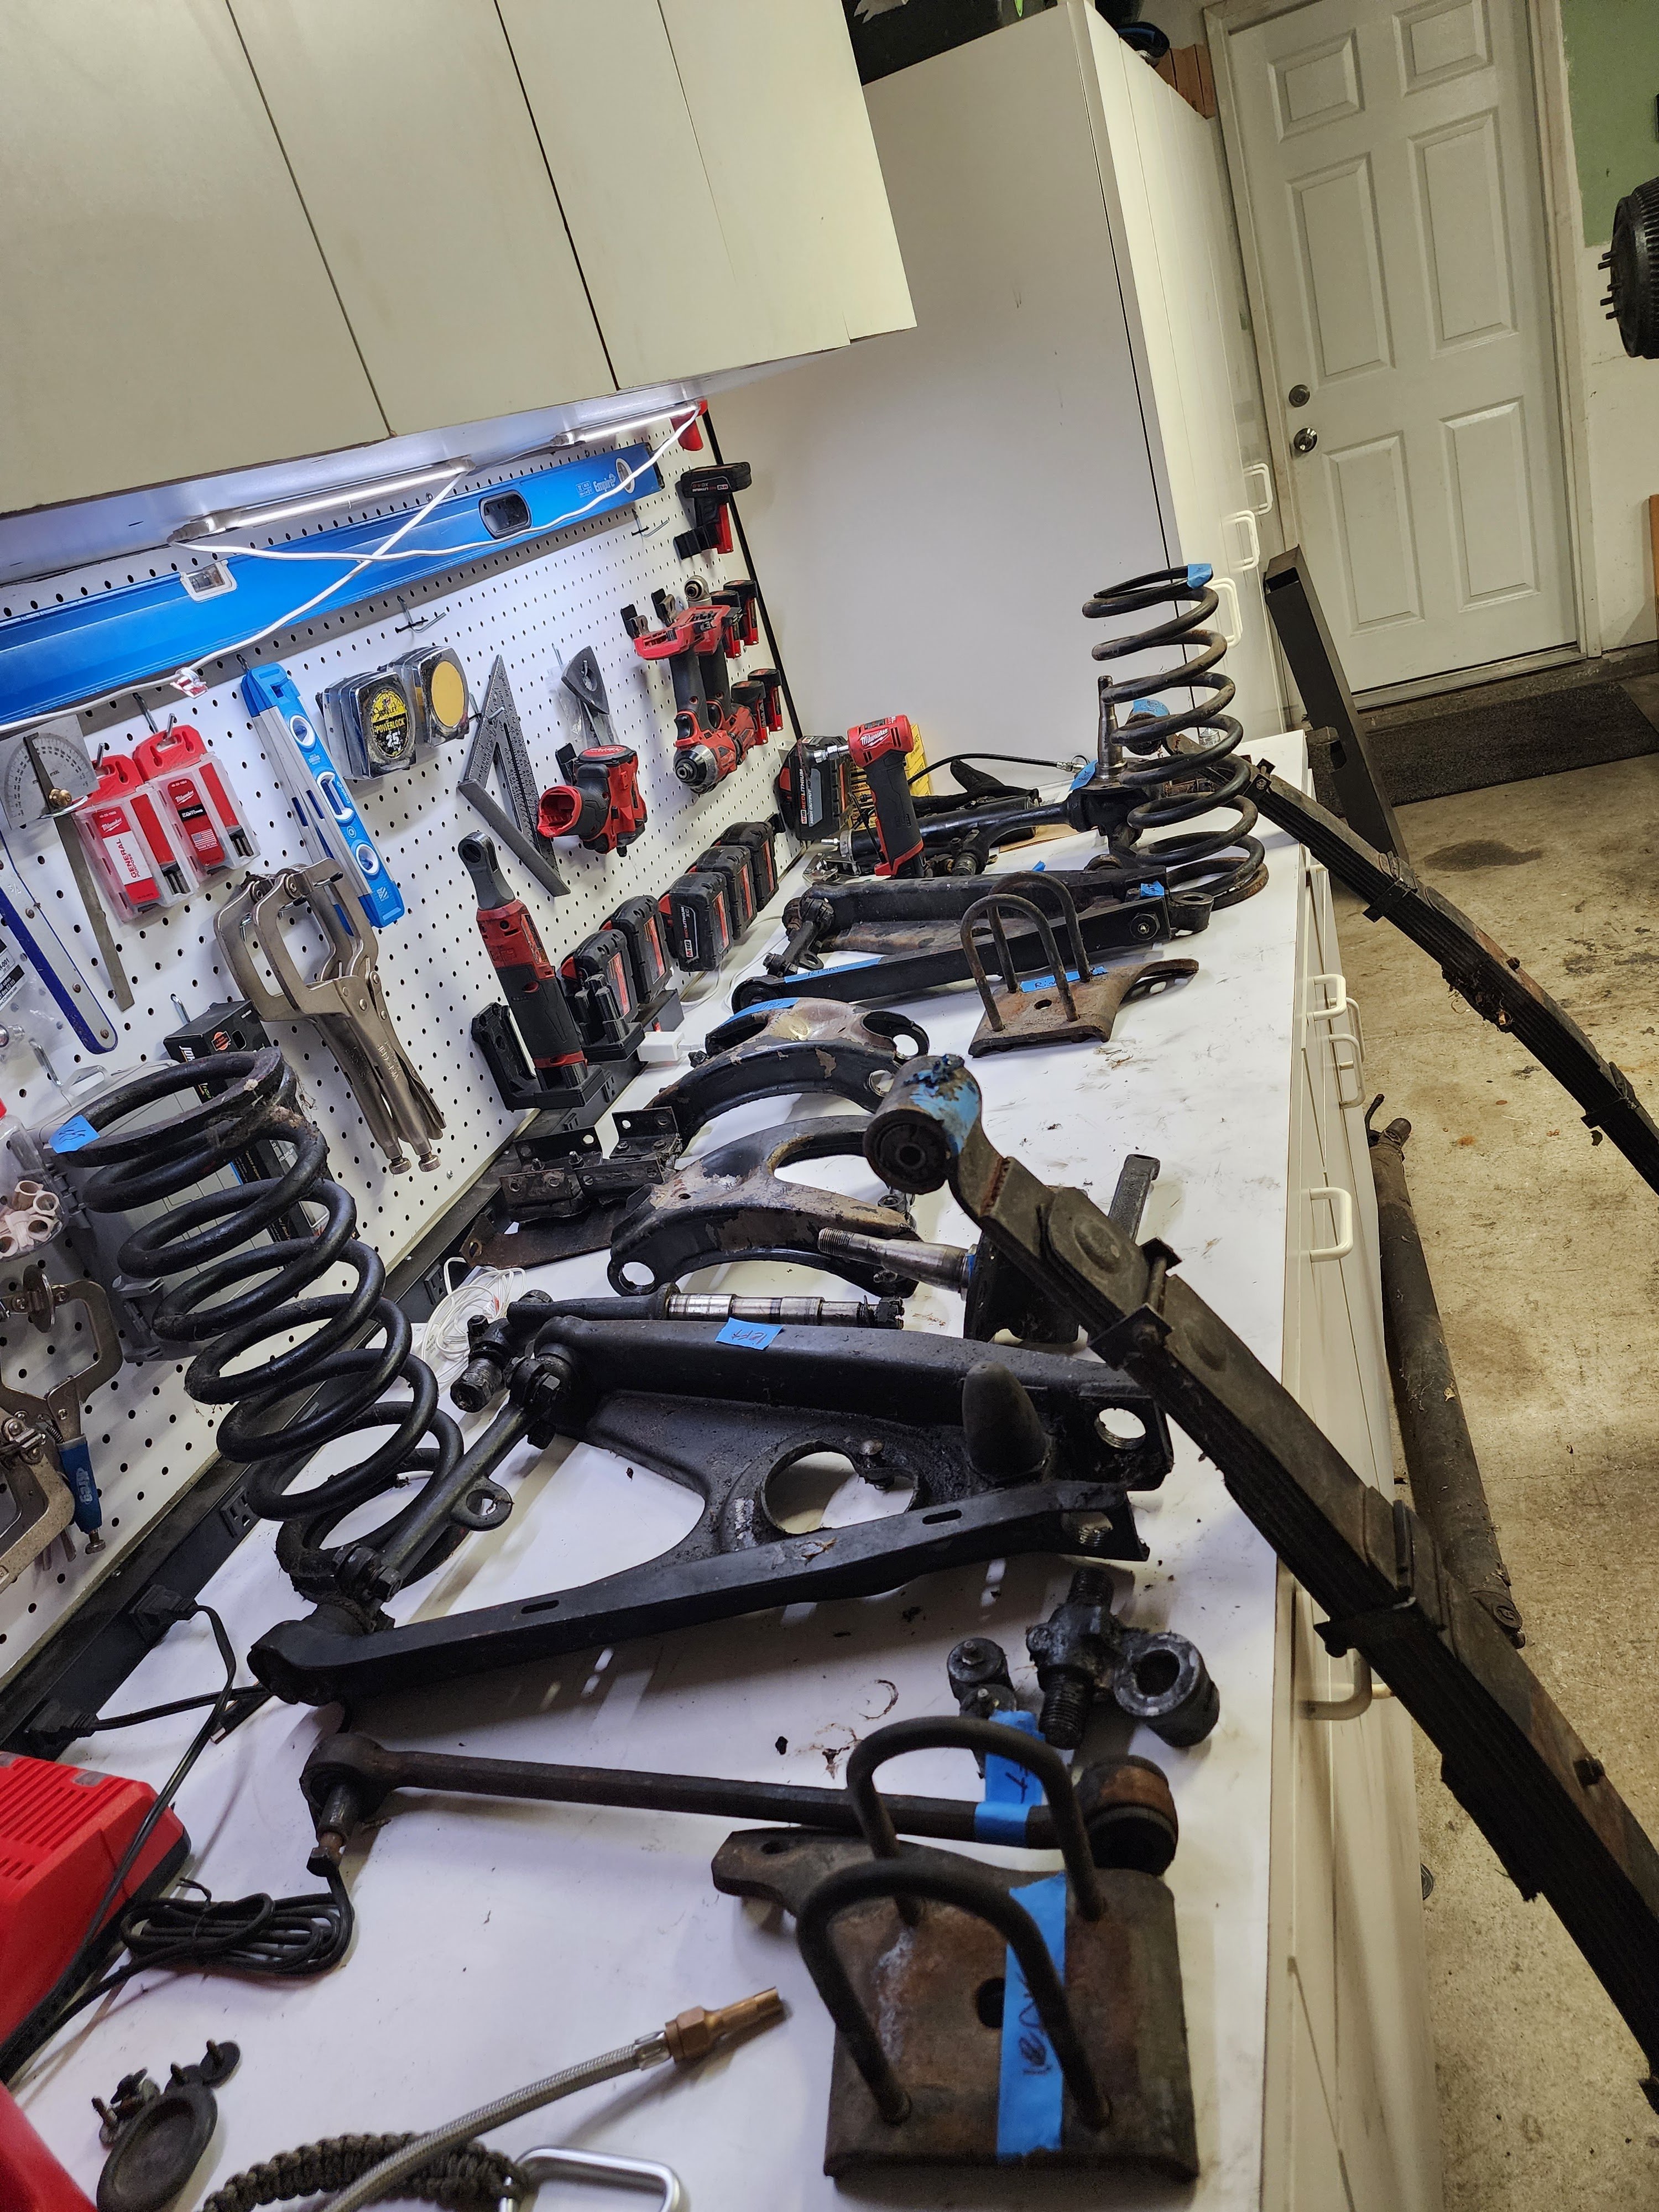
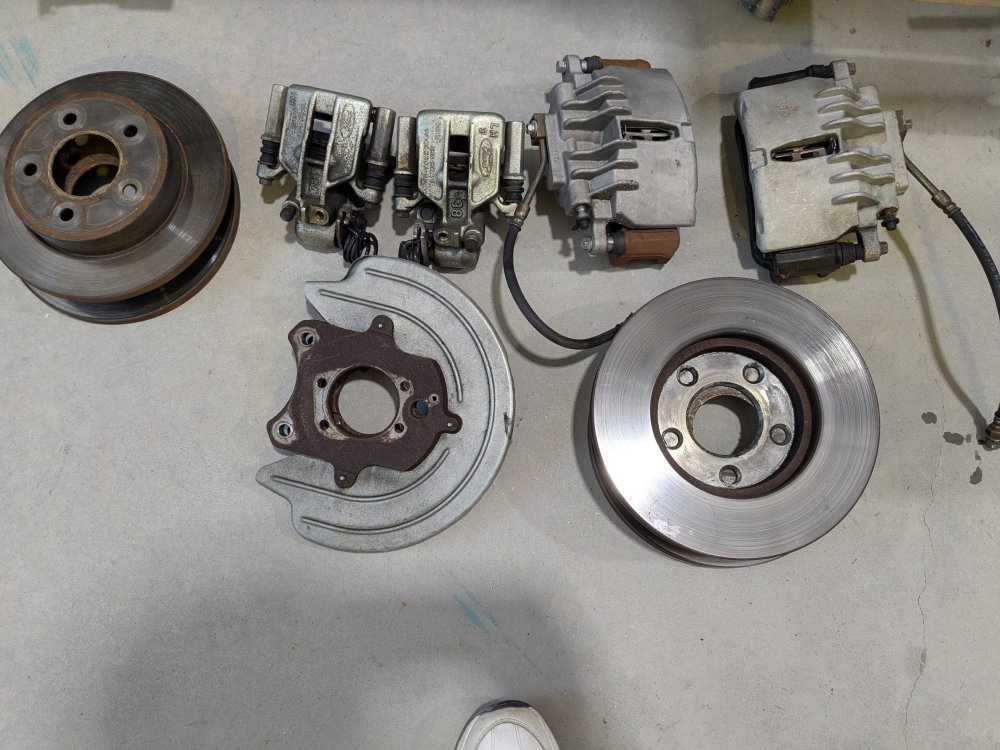
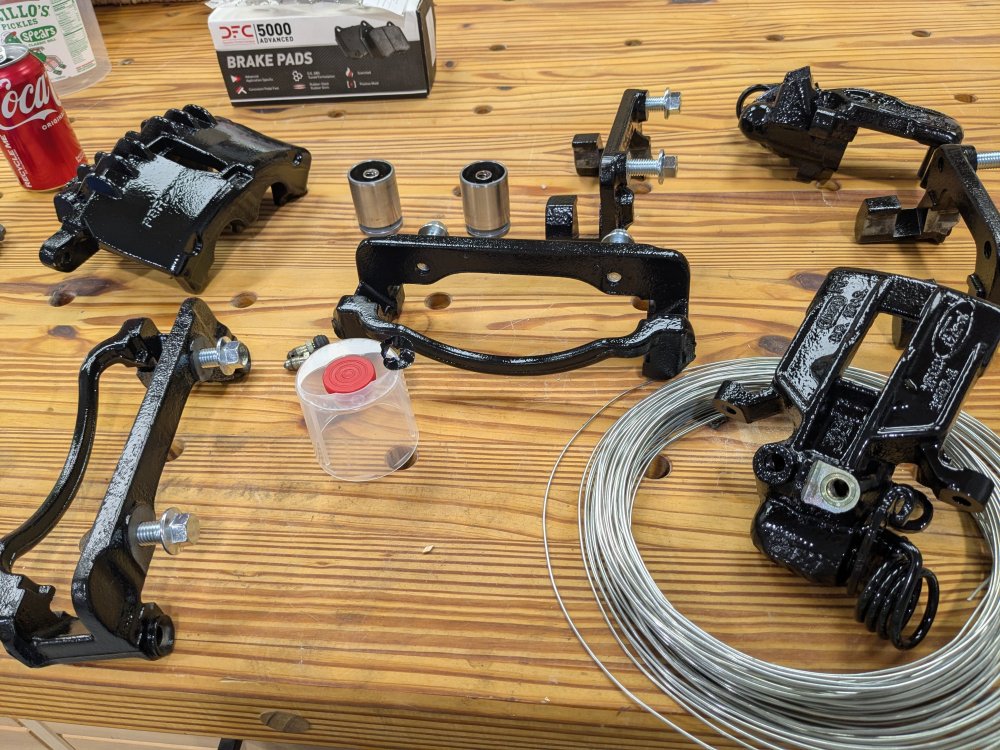
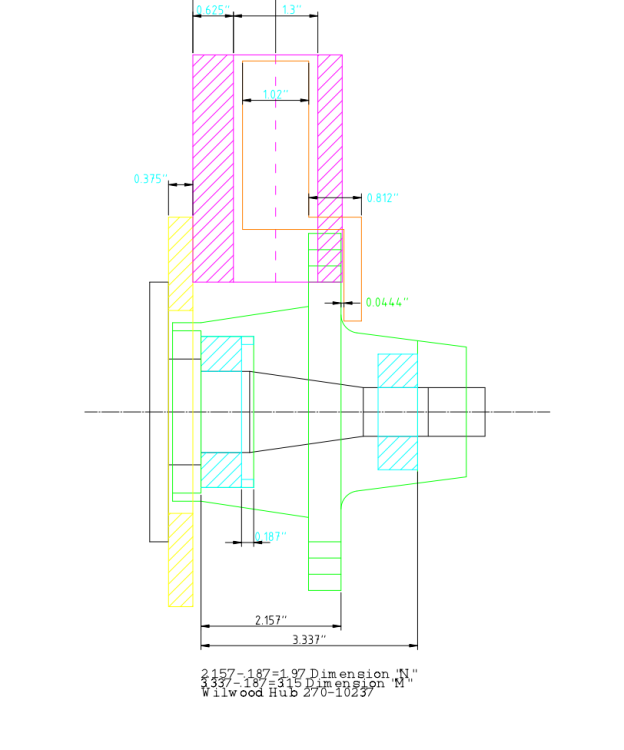
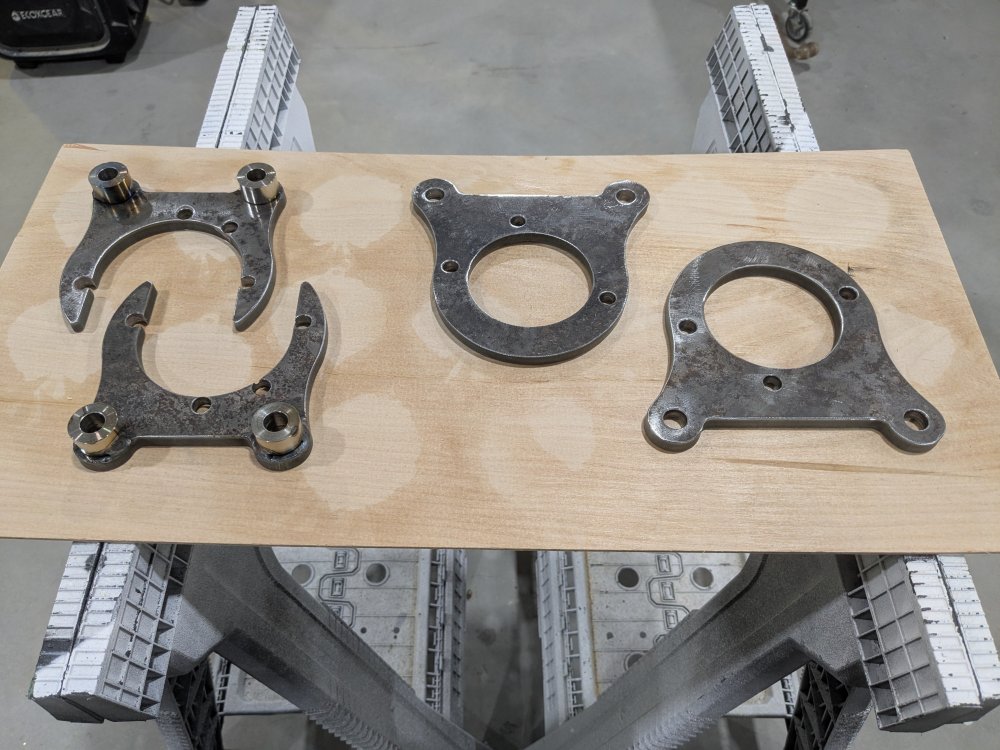
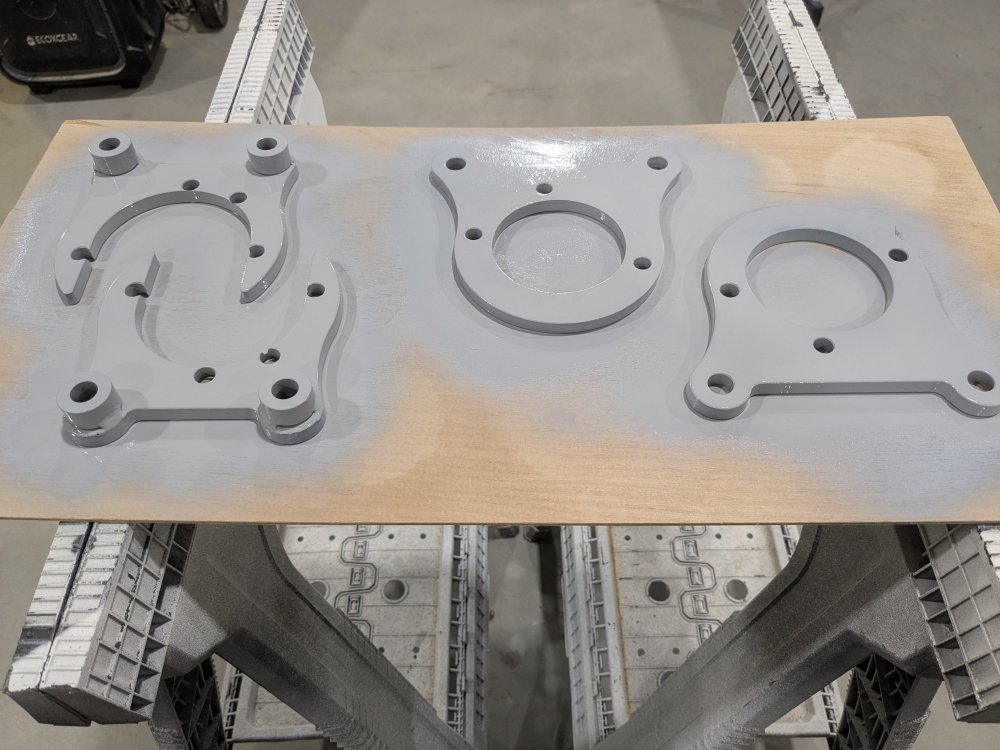
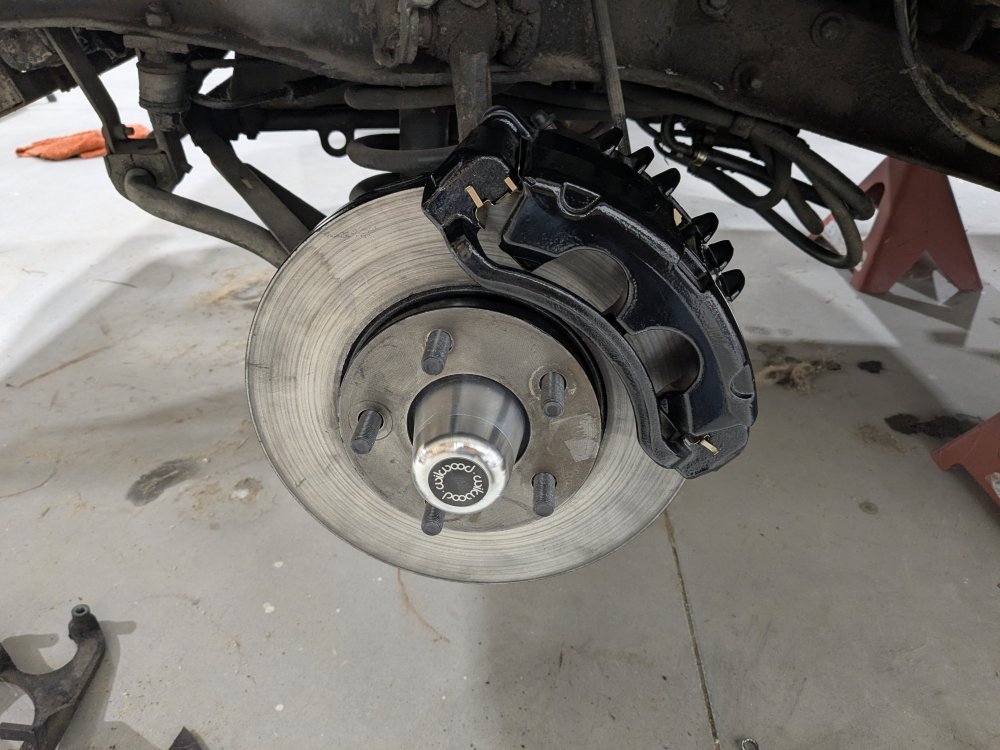
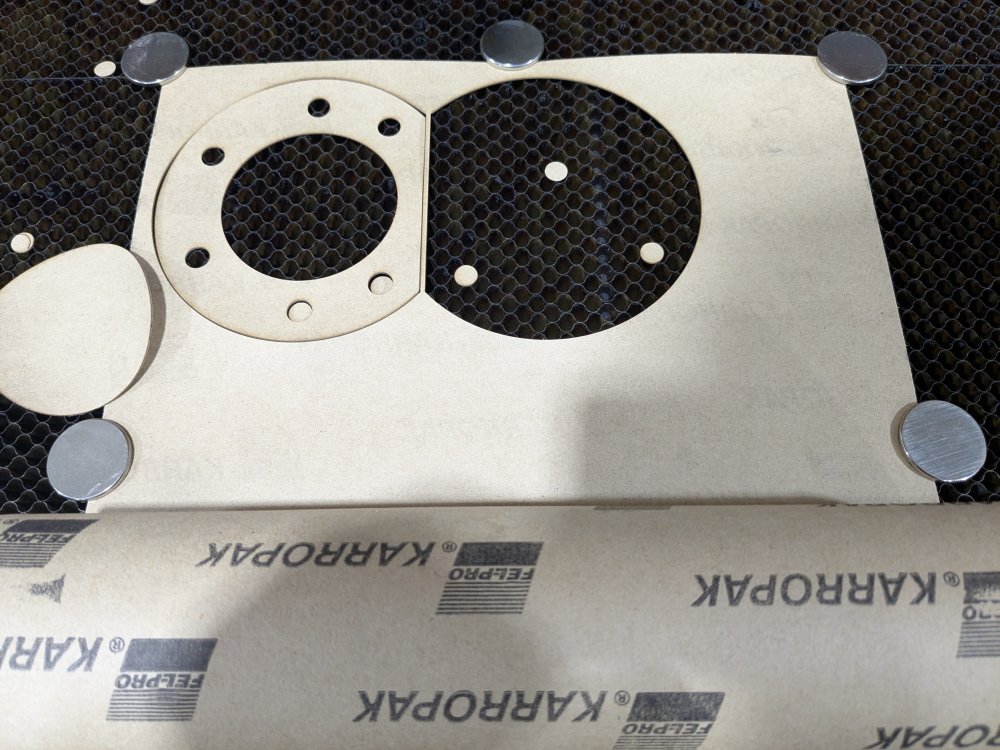
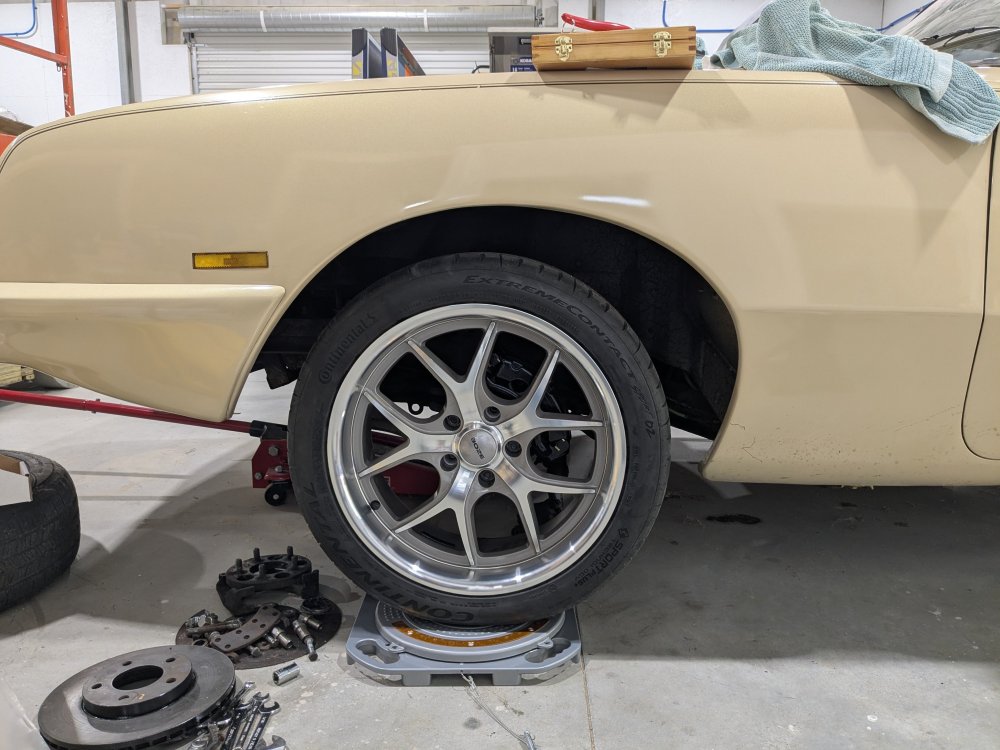
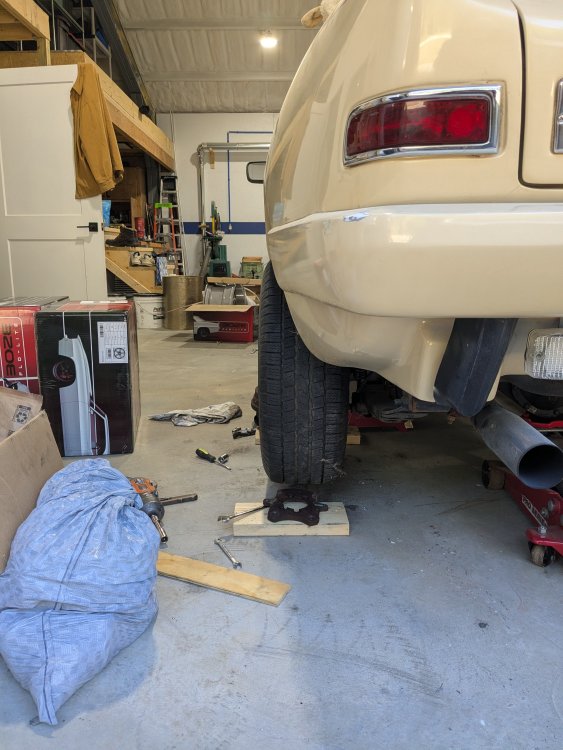
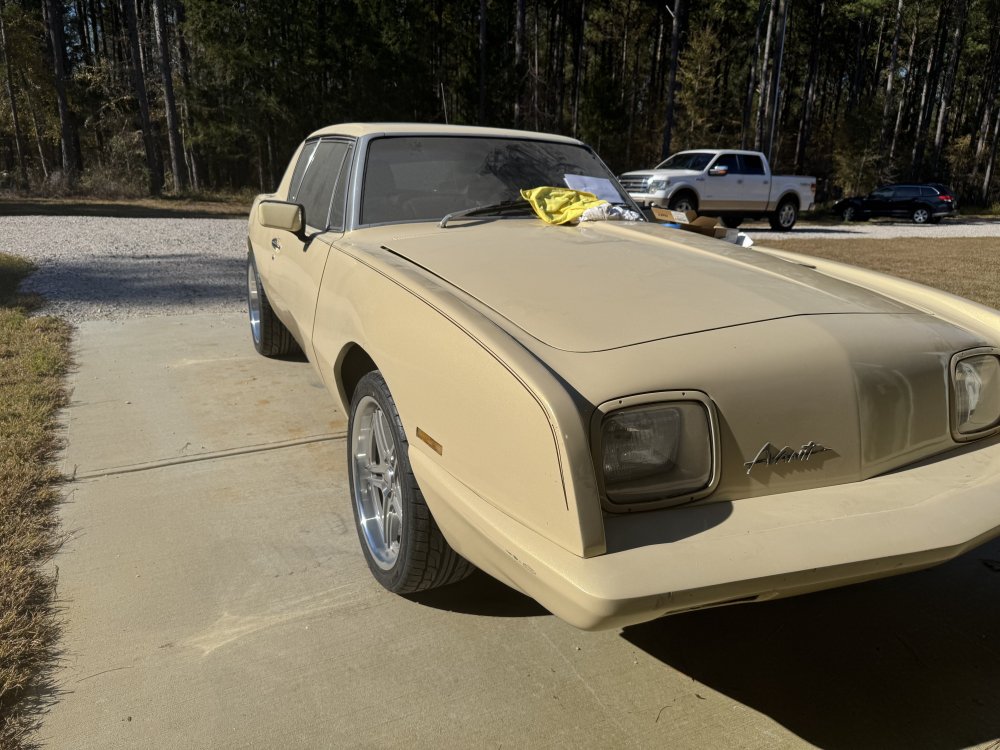
Hi all, I've been lurking here for a while and this is my first posting of many that I hope to share as I begin my restoration (RestoMod) of my 84 Avanti I acquired back in May of this year. I have just begun to work on it as I had many summer projects around the house I promised to get done before I touched the car 😂. So my first project was to modernize the brakes and much to my surprise the front disc brakes are actually from an 84 Z28 Camaro thanks to the help of Mark Ritteringer over on the Facebook group. I'm just not a fan of the integrated hub and rotor setup along with the spacer and bolt pattern adapter that was used on the frontend. I saw some older post using some Ford disc brakes and thought that was a good start. Here's what I came up with, I have a good friend that owns a "Mustang" performance shop and they regularly change out the brakes and scrap the old stuff. I obtained a complete set of 2004 Mustang GT calipers and rotors from a car that basically had 9K miles on it but had setup for 10+ years. Here's what they looked like. I completely took them apart, cleaned them, ordered all new hardware and rebuild kits and prepped them for painting. Seeing how I didn't have original Avanti Hubs, I researched a ton of hours and came up using some Wilwood hubs. Here's a drawing of how it all fits. I have this in PDF and DXF format if anyone would like this. In fact this entire setup I hope to document will be "opened sourced" to anyone interested as long as you use it for your personnel use and not for sale. I did all my proto typing with plywood to make brackets. I have in my shop a 4'x8' CNC router, 4'x8' CNC plasma table and a CNC laser and other wood and metal machines/tools so I was able to make everything. For the Wilwood Hub I had to mill outer diameter down to allow the rotor to fit over it. Turning it down would have been a bit of a challenge as there's not much to grip on for a lathe, so I opted to clamp it down onto my CNC router table and mill it. I don't have a lathe but I have access to one at a local auto machine shop. Note: I used the 3/16" spacer that was originally in the integrated Camaro hub to space out the inner bearing. Plasma cut brackets out of 3/8" steel plate, the holes were all spot pecked on the plasma and final center drilling and drilling were completed on the drill press, the rear brackets have a stand off spacer welded on to get the caliper centered correctly. I'll explain the rear setup in a bit. Final assembly, one note here it's a little hard to see but I used 3 thin bushings between the studs and rotor bolt holes as the rotors hole were larger than the 1/2" Wilwood studs and they don't have any shoulders. For the rear, my axle tube ends have 6 bolts, I've seen others say they only had 4 and my axels are not tapered ends with a hub. So this is where things get a little different through the years and even a year of production I'm guessing. When you eliminate the backing plate on a Dana 44 rear end you have to have a spacer to fill that missing drum backing plate. I found the backing plate is a little odd thickness, a little thicker than 10ga, so I made this plate and lasered a gasket to make up the difference. Also, I had to have the axle flanges turned down and 3/16" to a 1/4" (can't remember the original diameter) to let the rotor to fit over it. The studs have a rather long and large shoulder and I needed to drill the rotors to 5/8". Final assembly of the rear. The nice thing about the Ford rear calipers is the emergency brakes will work with a pull cable setup and are return spring loaded. You can use a universal e-brake kit from Wilwood or Summit. I have all new stainless braided brake hoses as well now. The next part some people will cringe but here it goes, wheels and tires... Getting wheels with back spacing/offsets that will work for an Avanti is some what of a challenge. As luck would have it, my brother lives about 2.5 miles away and he has a 67 RS/SS Camaro and he recently put on some nice Boze Flow-Forged wheels and I was able to mock the front up due to the fact that the Wilwood hubs are made with both the Ford and Chevy bolt pattern. So we mocked up the front like this. Made sure I had clearance all around, wheel lock to wheel lock, these are 18"-8" wide wheels with 245/40 tires. Had miles of room! I went slightly different as a) I didn't want to copy my brothers setup entirely and b) if we went to a car show together and were side by side it would look to obviously they were the same. Originally, my car had 15" wire wheels with 205/65 in the front and 225/70 in the rear. Here's the original rear and the tire was clearly outside the fender. I went with a different style Boze wheels, 18"-8" 235/40 on the front and 18"-9.5 275/40 in the rear, Nitto NT555 G2 tires. We wheeled her out in the sun and my brother took a few pictures for me. I'm going to work on the stance a bit, not much though, remove the front spacer inthe front coils that the factory put in and lower the rear a tad. The rear wheels are actually slightly less sticking out of the fender wells than originally! I do have all the bracket's in DXF format so if anyone is interested in them just let me know. Once I get the stance were I want it, next up is removing the engine and transmission. I'm going to rent a "hotsy" (steam) pressure washer and clean the entire under carriage, engine bay, rebuild the front and rear end, paint and detail the bottom of the car, lots of fun and more mods to come! Kim


-
Hmmm! this is true… people that remember and understand (and care!) what an Avanti is are unfortunately a shrinking group.
-
Good point but I doubt the Youngers even know what an Avanti is. They will more likely look at an old Chev / Chrysler / Ford and more likely than those, some Jap 4 to 6 popper. At least that's what I'm seeing at the Car Shows.
-
There are steel shims at the cowl, rear towers, and tubular cross member under the spare tire well (fiberglass to frame) as well as at the outrigger points for the hog troughs and radiator support. The 4 rubber shims on either side of the X member and the rubber shim over the shock mounts are not bolted to the frame. There are also two rubber seals under the seat belt frame mounting points. I just reused the shims that I removed with the exception of the seals under the seat belt mounting points. They are rubber doughnut shaped and attached to a metal plate. I made new ones from a sheet of self adhesive rubber. The rubber goes on the body side. Attaching a Pic of X member before blasting and painting frame.


-
I think you use steel washers on steel and rubber washers on fiberglass. Pb
-
From memory it is.
-
Wow! Just checked for replacement Sumitomo cylinders. They are running over $250 each from parts geek. Over $1,000 for 4. Sleeving your existing cylinders or purchasing the Cobalt replacement seems to be a good idea.
-
I forgot about the rubber shim in the middle of the rear cross member just over the differential.

-
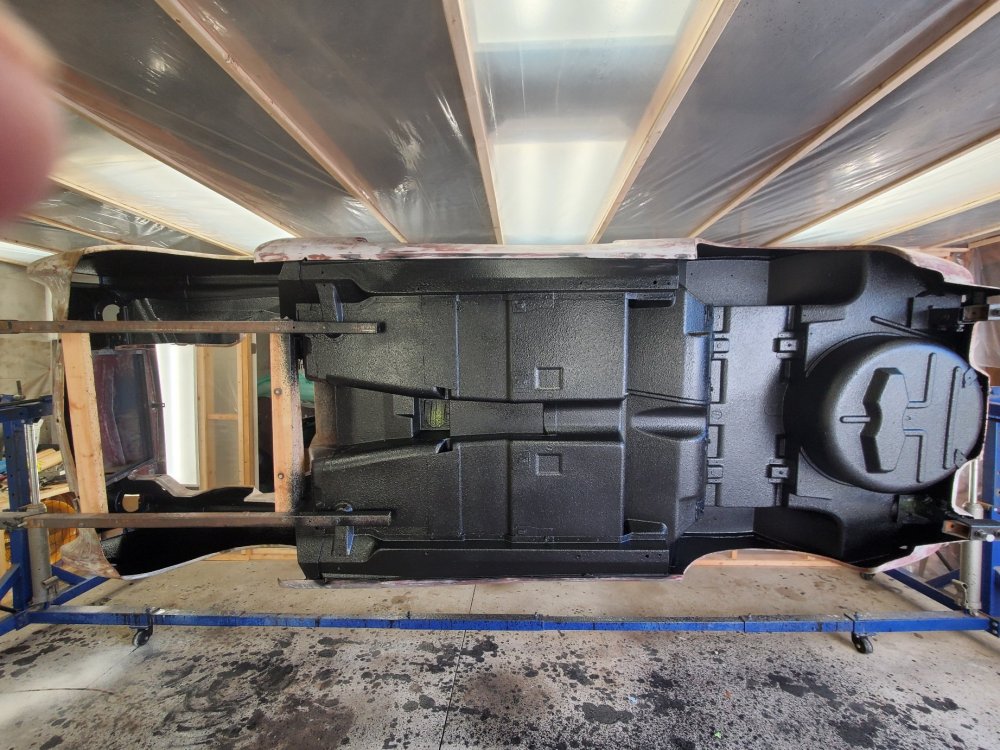
On an Avanti, the body to frame shims are steel. The only rubber ones are just over each muffler on either side of the X member. There should be 4 rubber shims. I am guessing that was to keep the floor pan away from the hot exhaust. I had the body on a rotisserie. I cleaned off the old undercoat and resprayed it with 3M rubberized undercoat.undercoating.

-
The Cobalt cylinders are of modern design and should work better than the original Dunlop design. Check 'em out. The website is: https://mossmotors.com/8777-4-jaguar-premium-front-brake-cylinder-piston-master-kit-2-1-8-mk-i-mk-ii
-

Stan Gundry's "What the Shop Manual Won't Tell You" book
Dwight FitzSimons replied to Pcyco13's topic in 1963-64 Avanti
IF someone could contact Mr Gundry and get permission perhaps the book could be reprinted, or at least photocopied, and provided to Avanti owners. I have a copy but won't copy it without permission. --Dwight (R-4228, R-5407) -

Stan Gundry's "What the Shop Manual Won't Tell You" book
Pcyco13 replied to Pcyco13's topic in 1963-64 Avanti
As I said in my previous post, the man is almost 90 years old and the link expired on September 30th of this year. Apparently his book is no longer available from him. I would like to humbly thank Stan for providing us all with his wonderful book for so many years. He deserves our appreciation. -

Stan Gundry's "What the Shop Manual Won't Tell You" book
DobbM replied to Pcyco13's topic in 1963-64 Avanti
I emailed him a few months ago (I live within 30 minutes of him) and have never heard back. The email wasn't bounced. -
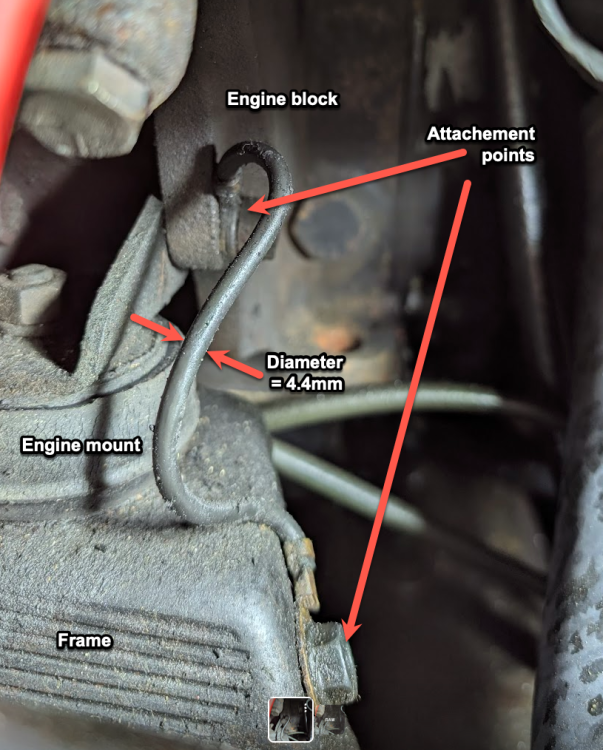
This is the front right (passenger) engine mount. Is the only grounding from the engine to the frame?
-
What year/model Jaguar those Cobalt calipers apply to? Thx. Steve
- Yesterday
-
It is great to see the start of a restoration with fresh and newly painted parts ready for installation. I also have a question that I posted elsewhere but still don't have an answer for. Would you be able to tell me the height of the arc of rear leaf springs? That is, with the spring ends sitting on the ground, curve up, what is the distance from the center (connection point to frame) to the ground? I would like to replace the current "flat" springs on my 1984, and there is a spring manufacturer close enough that will build them to specs..all of which I have except for the uninstalled height of the leaf spring. I know that EatonDetroitSpring has them, but It would be double the cost of a local manufacturer after Canadian $ exchange and shipping.
-
I would love to have a copy of the wiring schematics. If available, please email to jkhowes@msn.com
-
Good fall afternoon. I'm trying to figure out a starter issue. My first thought is that the grounding isn't good enough, thus a full circuit is not there. The negative battery terminal goes to the engine (head?, driver's side), then on the other side there's a 10-14 awg wire from the engine block to the frame at the front, passenger engine mounting block. That to me doesn't seem to be beefy enough to handle the current that deals with the starter motor, but rather for all the accessories. I can not see the top of the starter motor to confirm that the cable from the starter solenoid has a tight connection. Is there a larger engine to chassis/frame wire for grounding? A braided one or something?
-
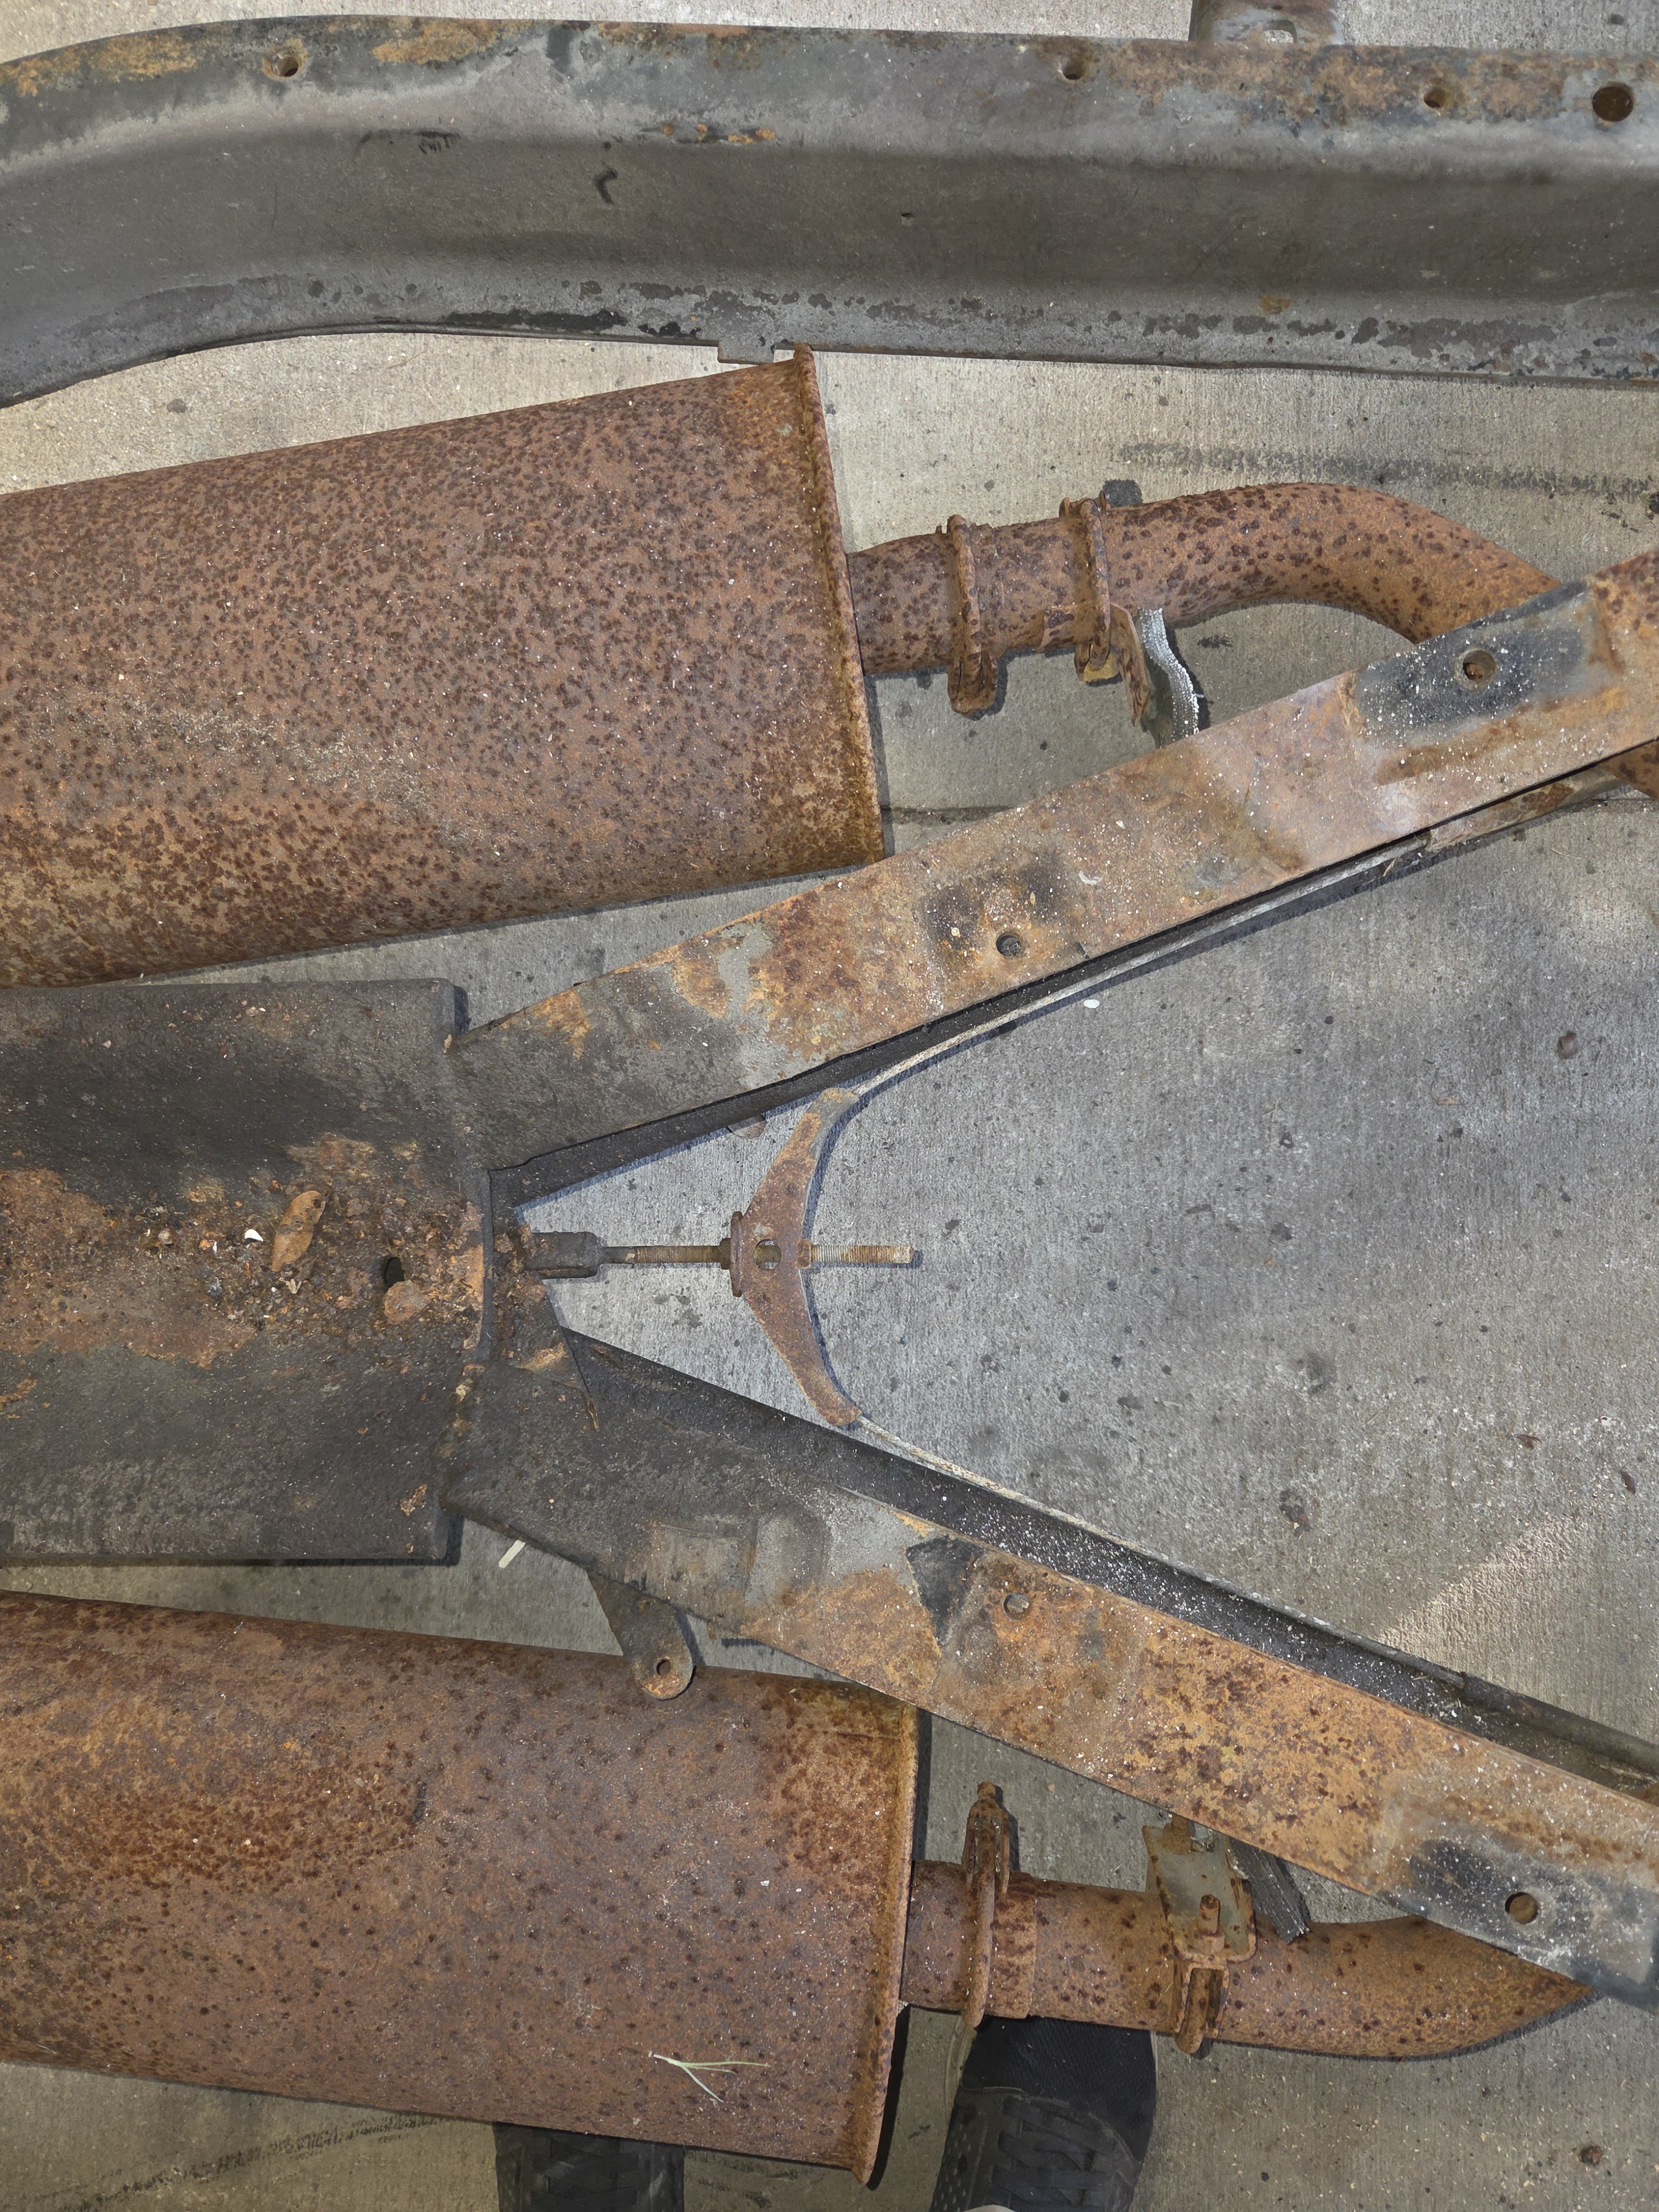
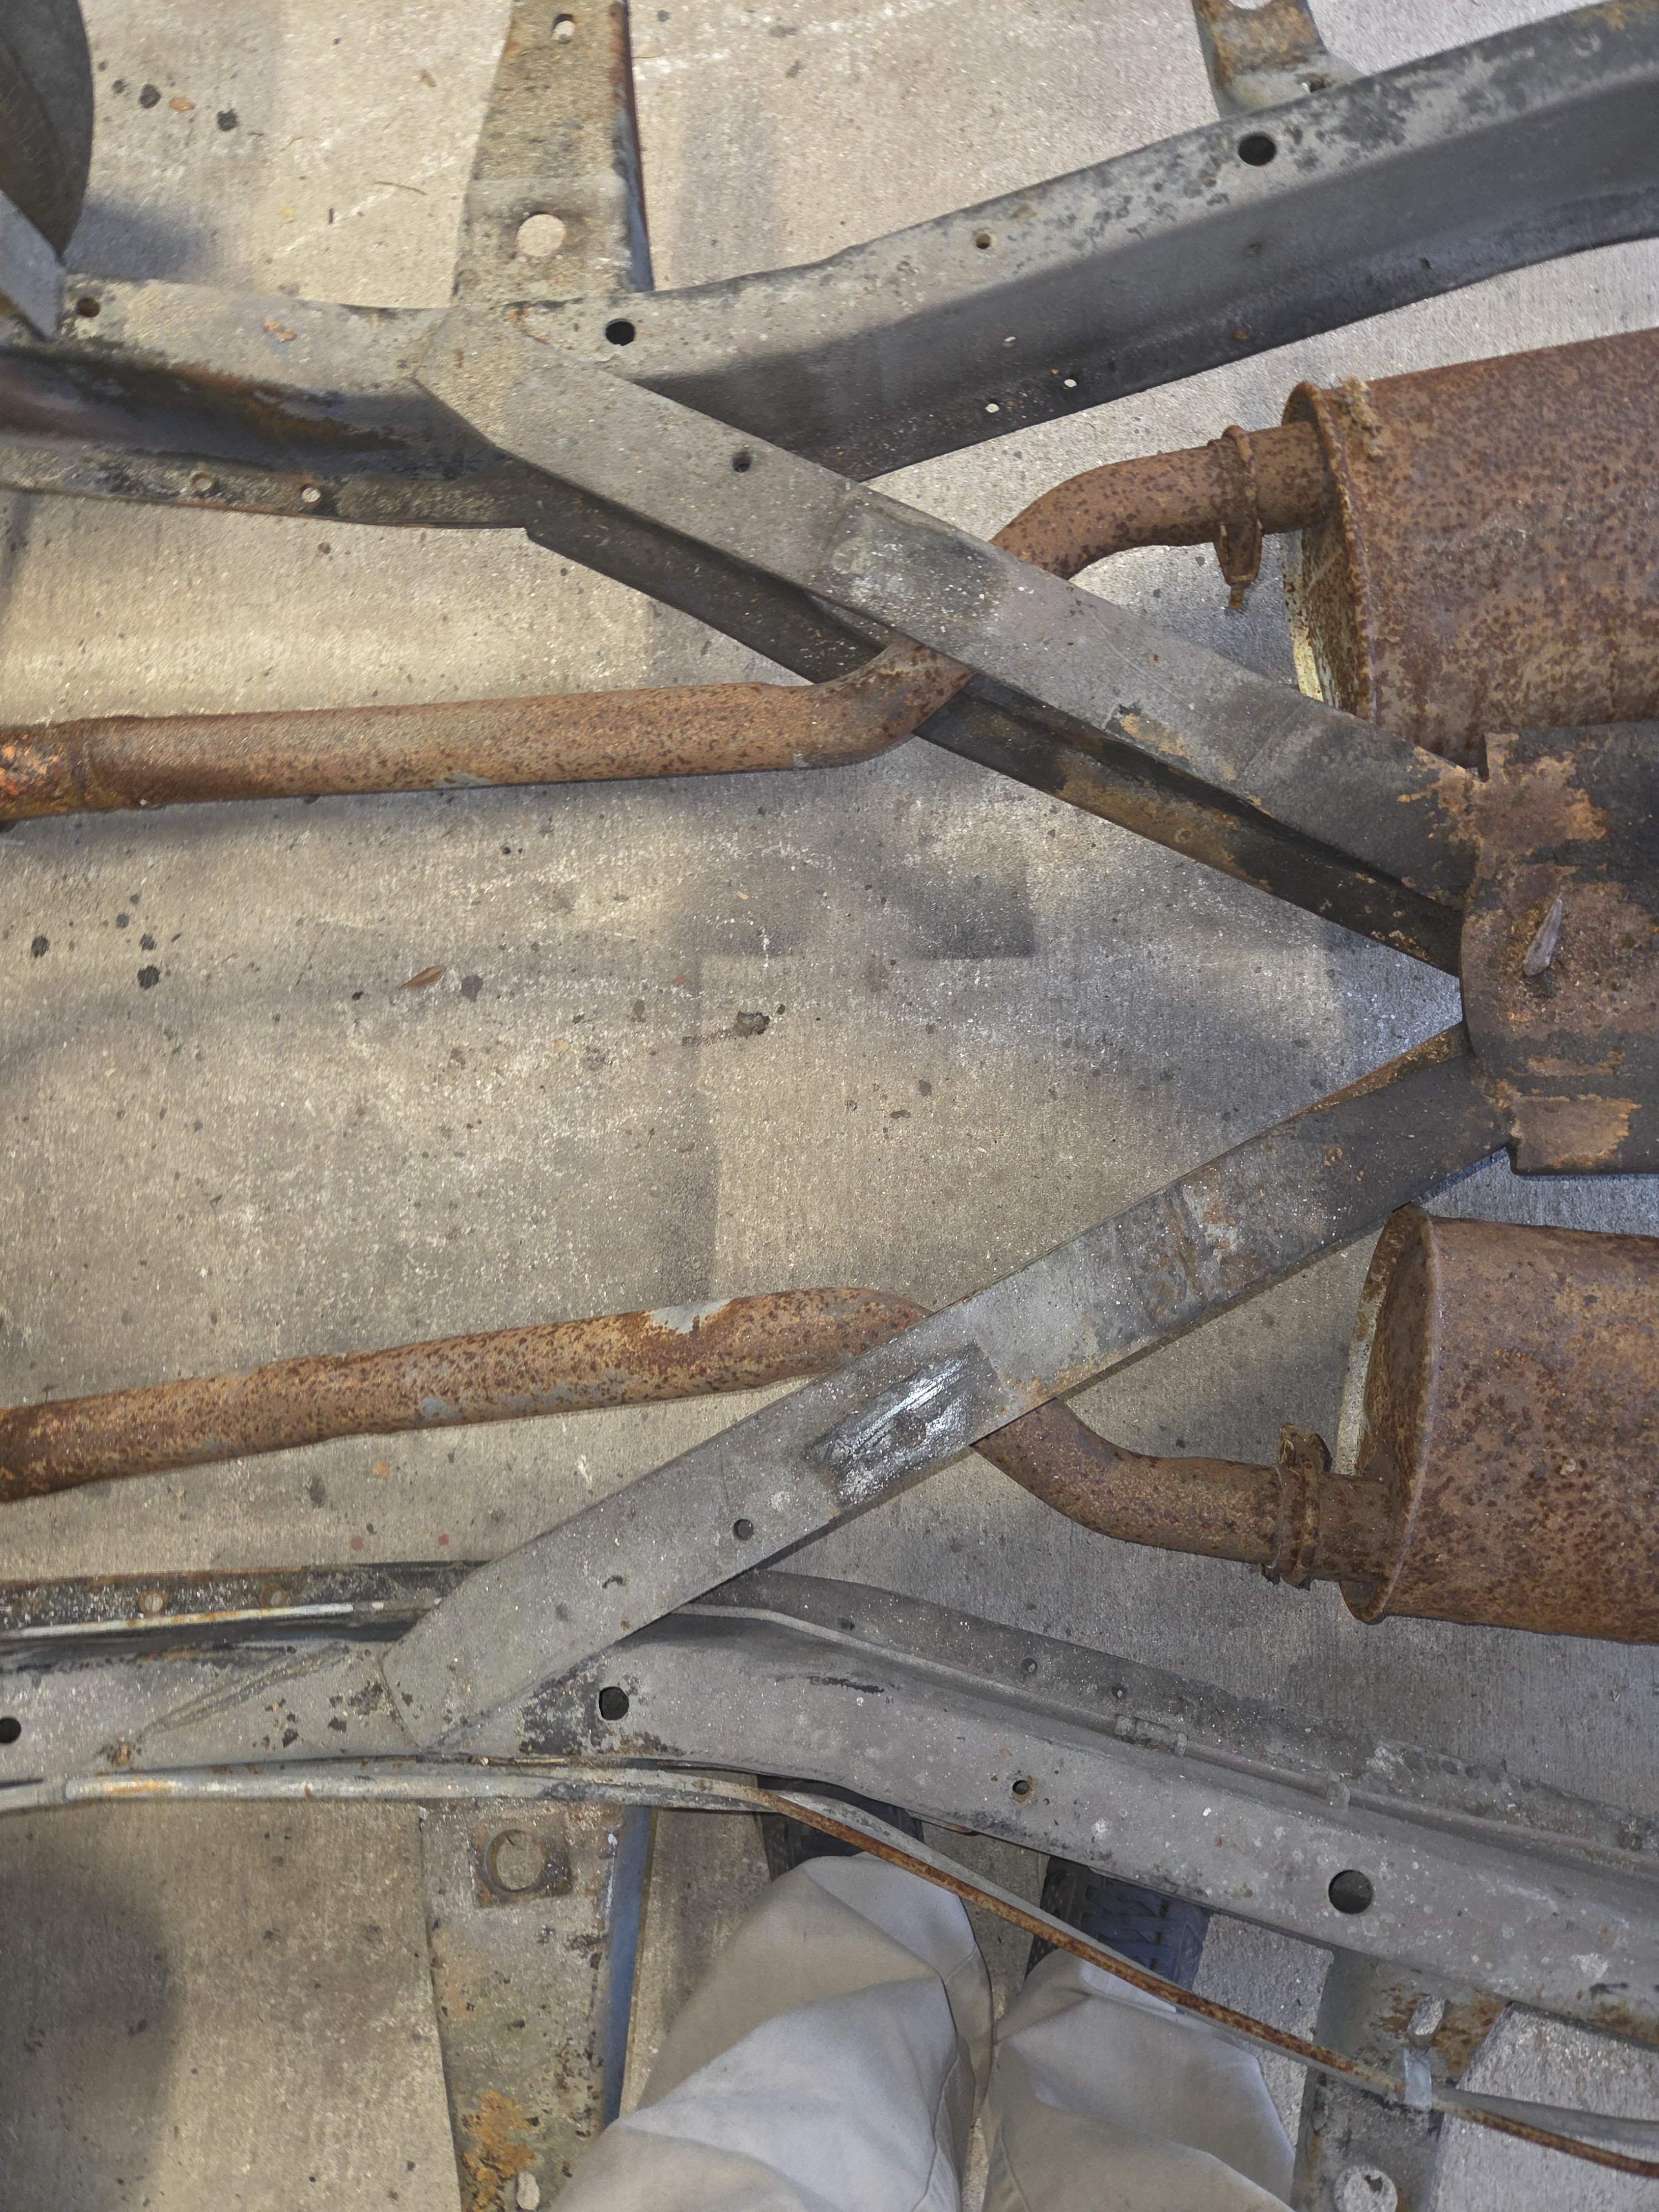
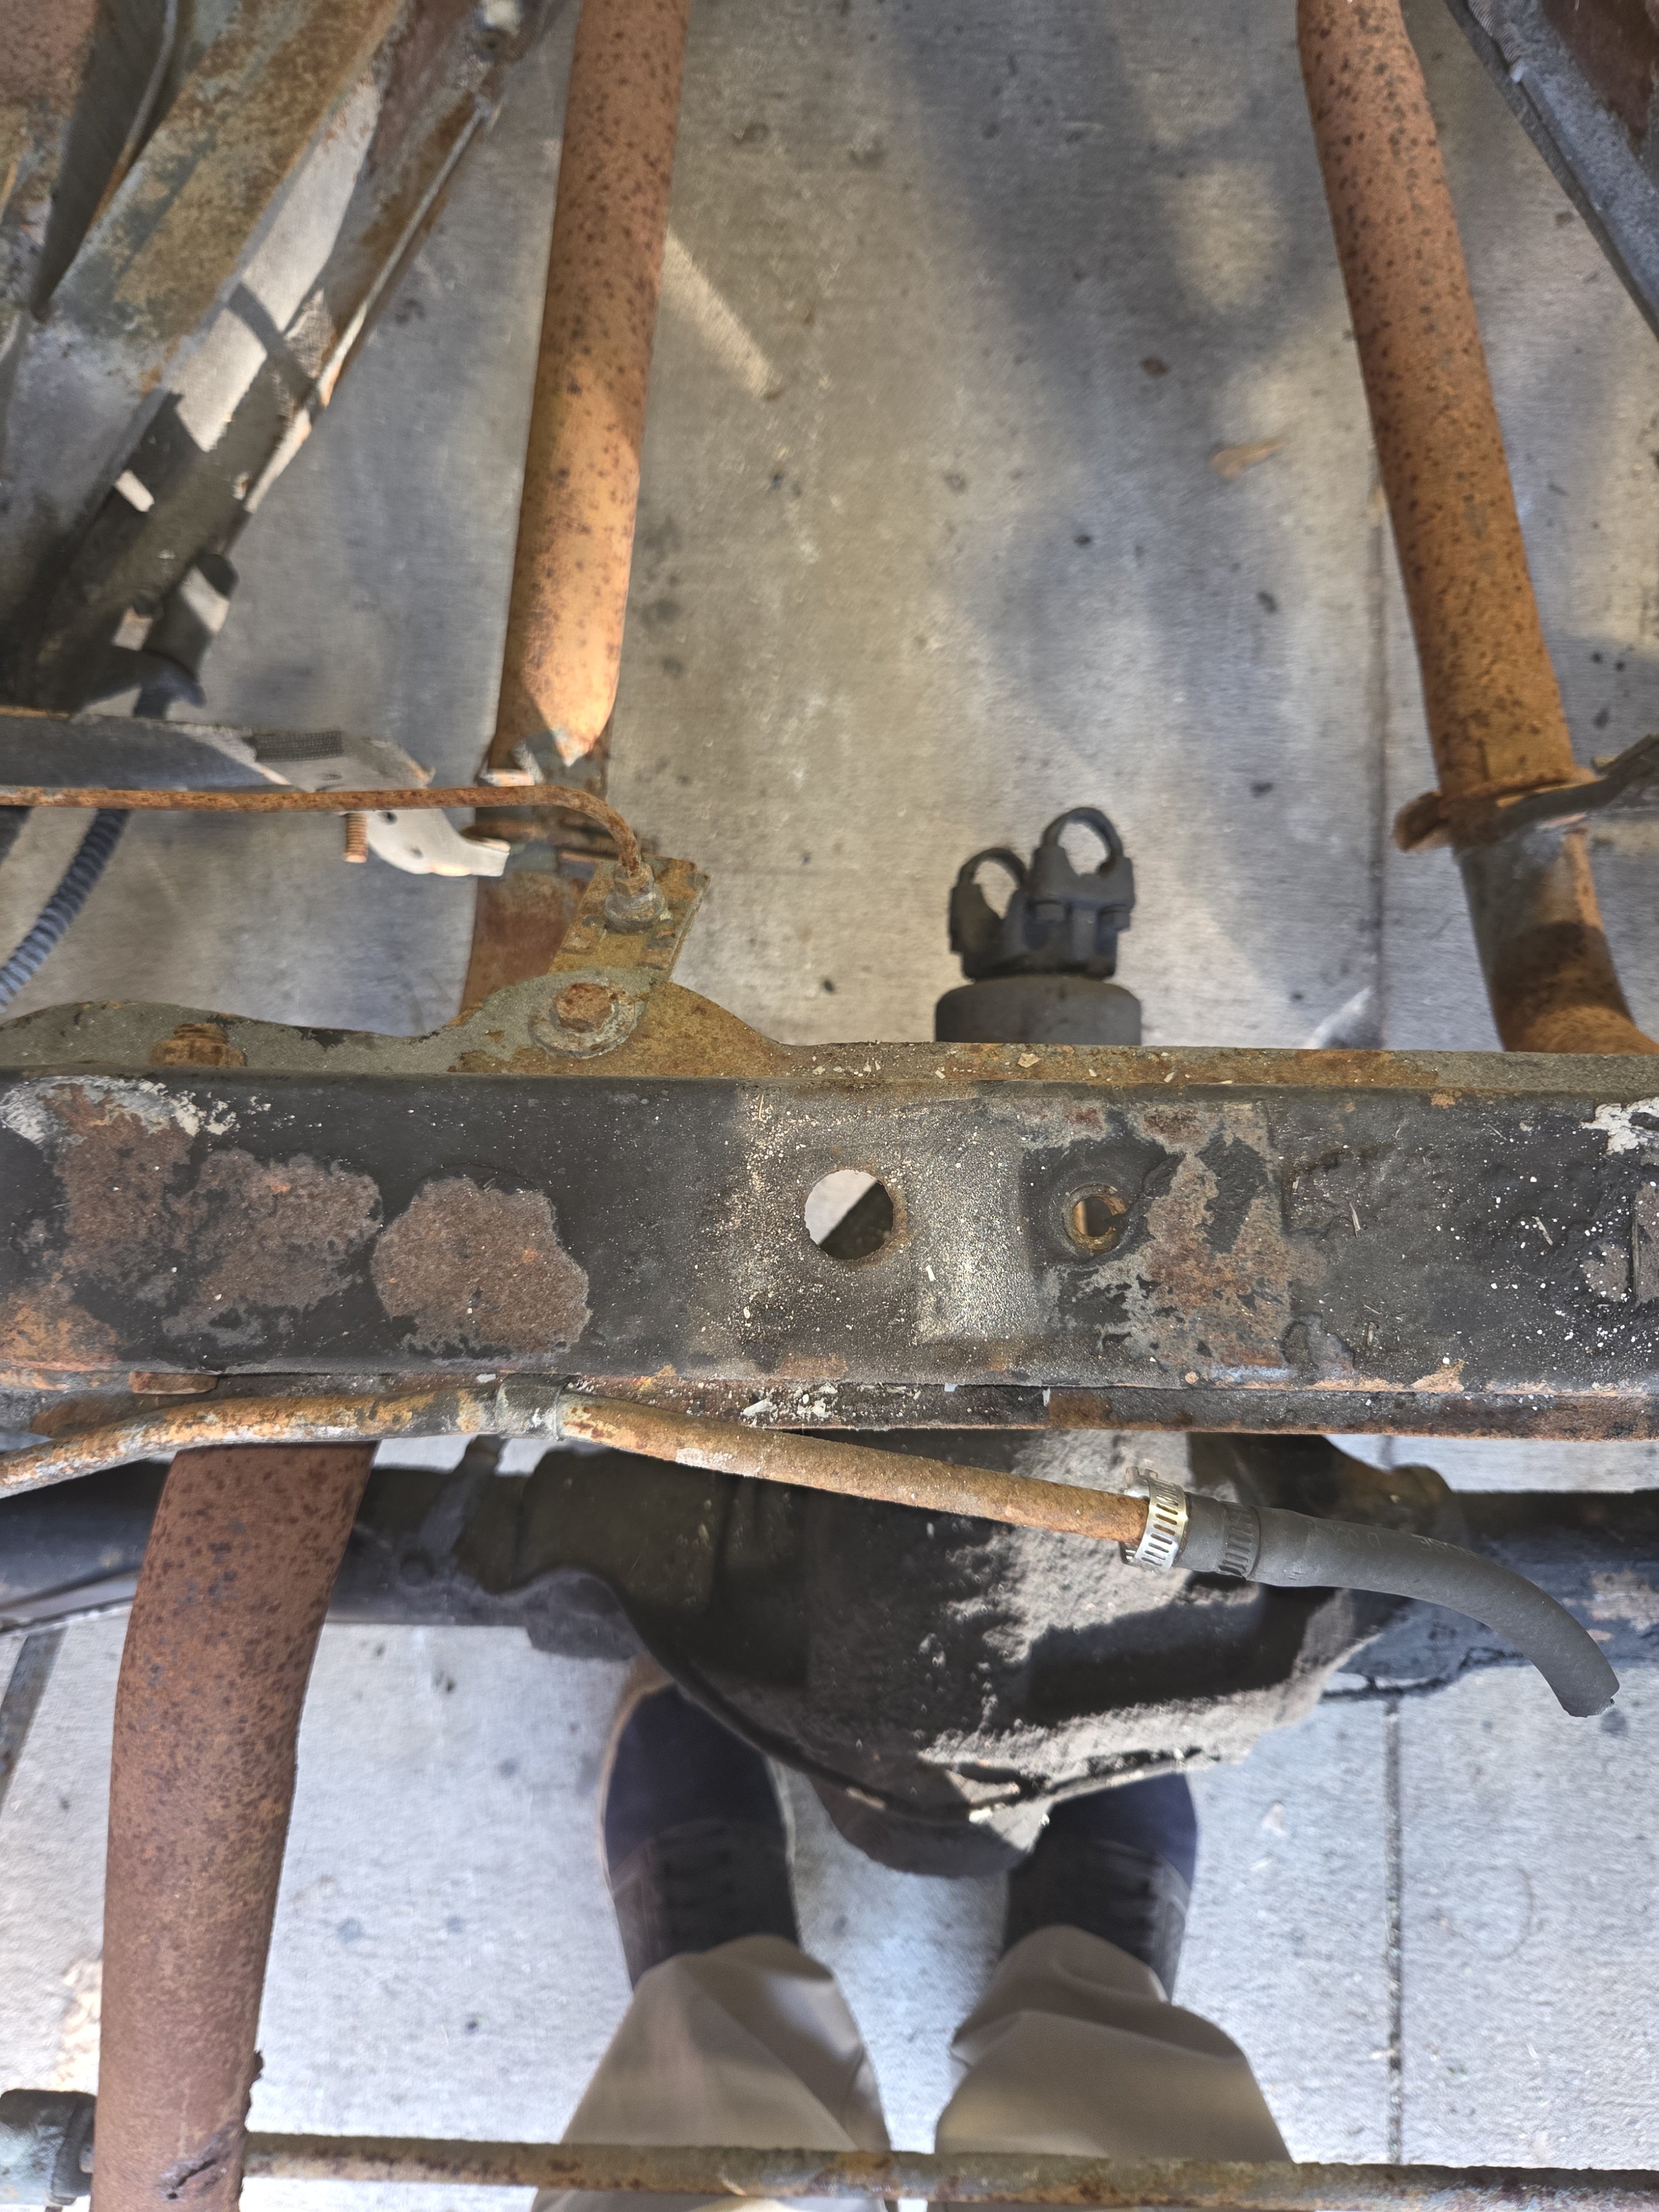
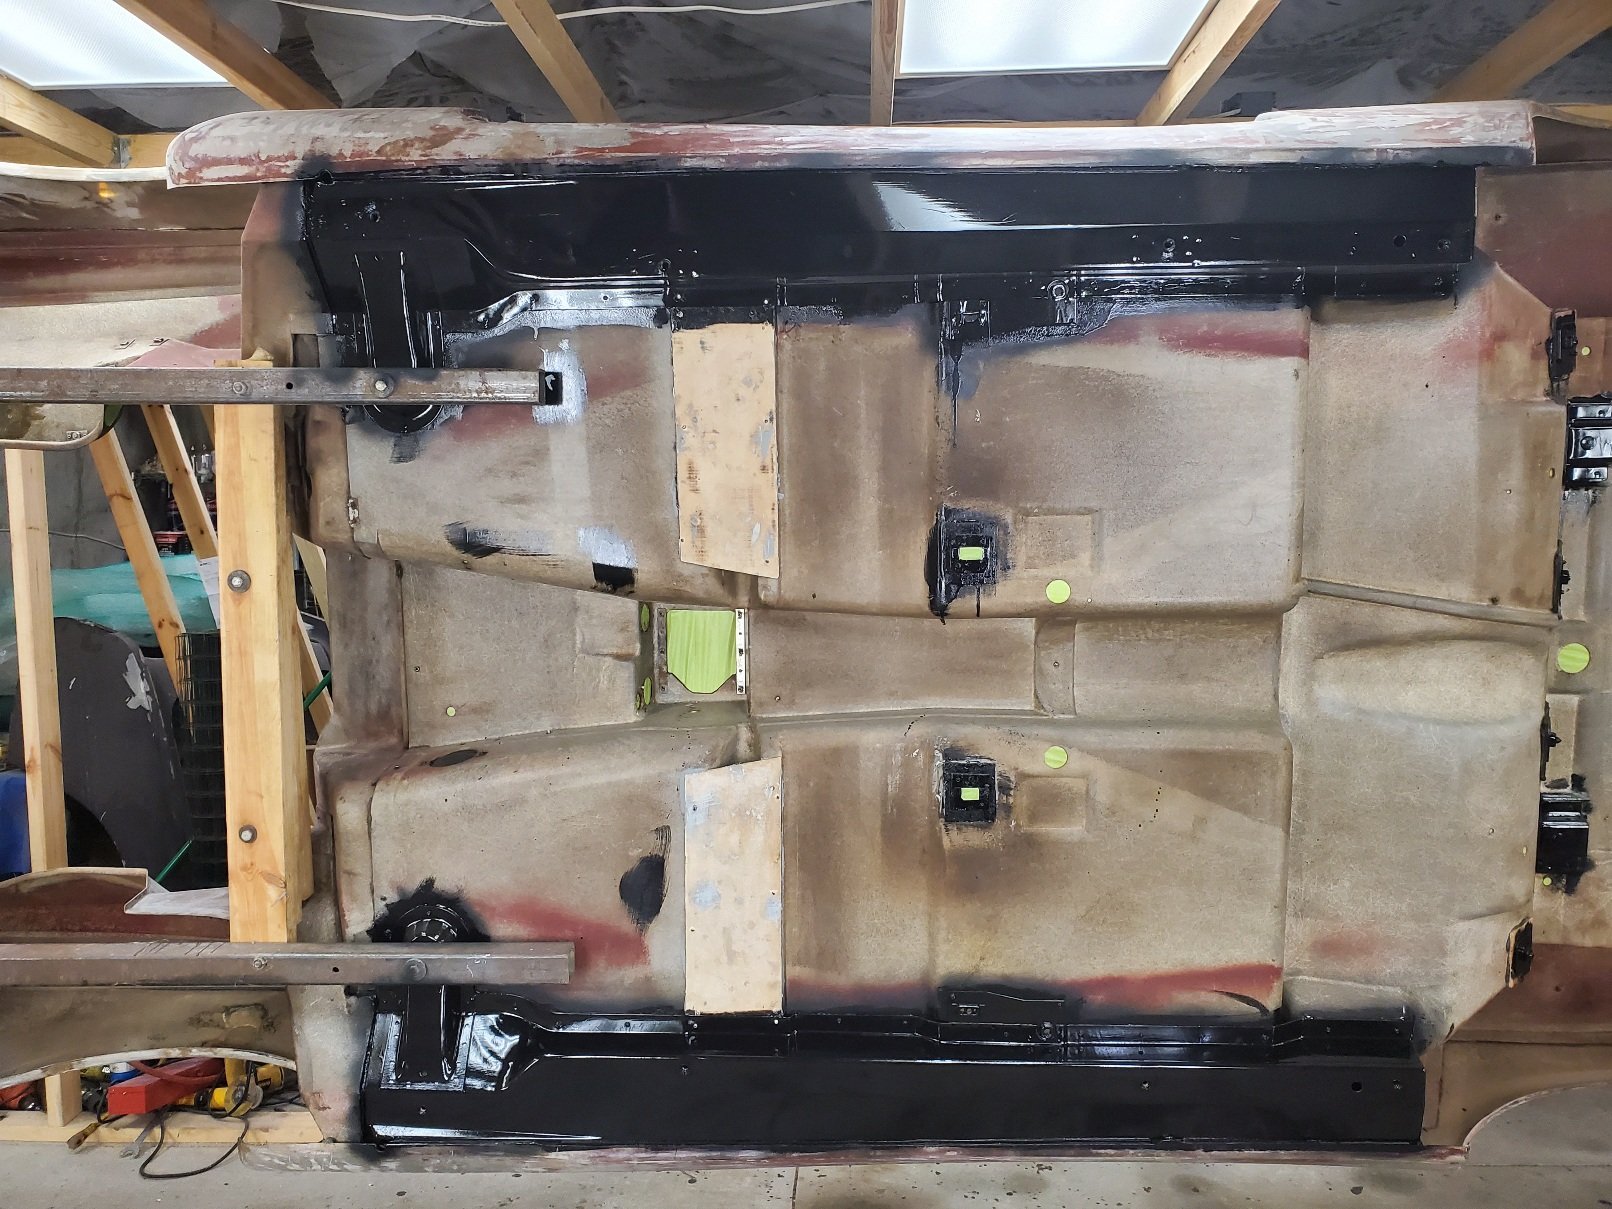
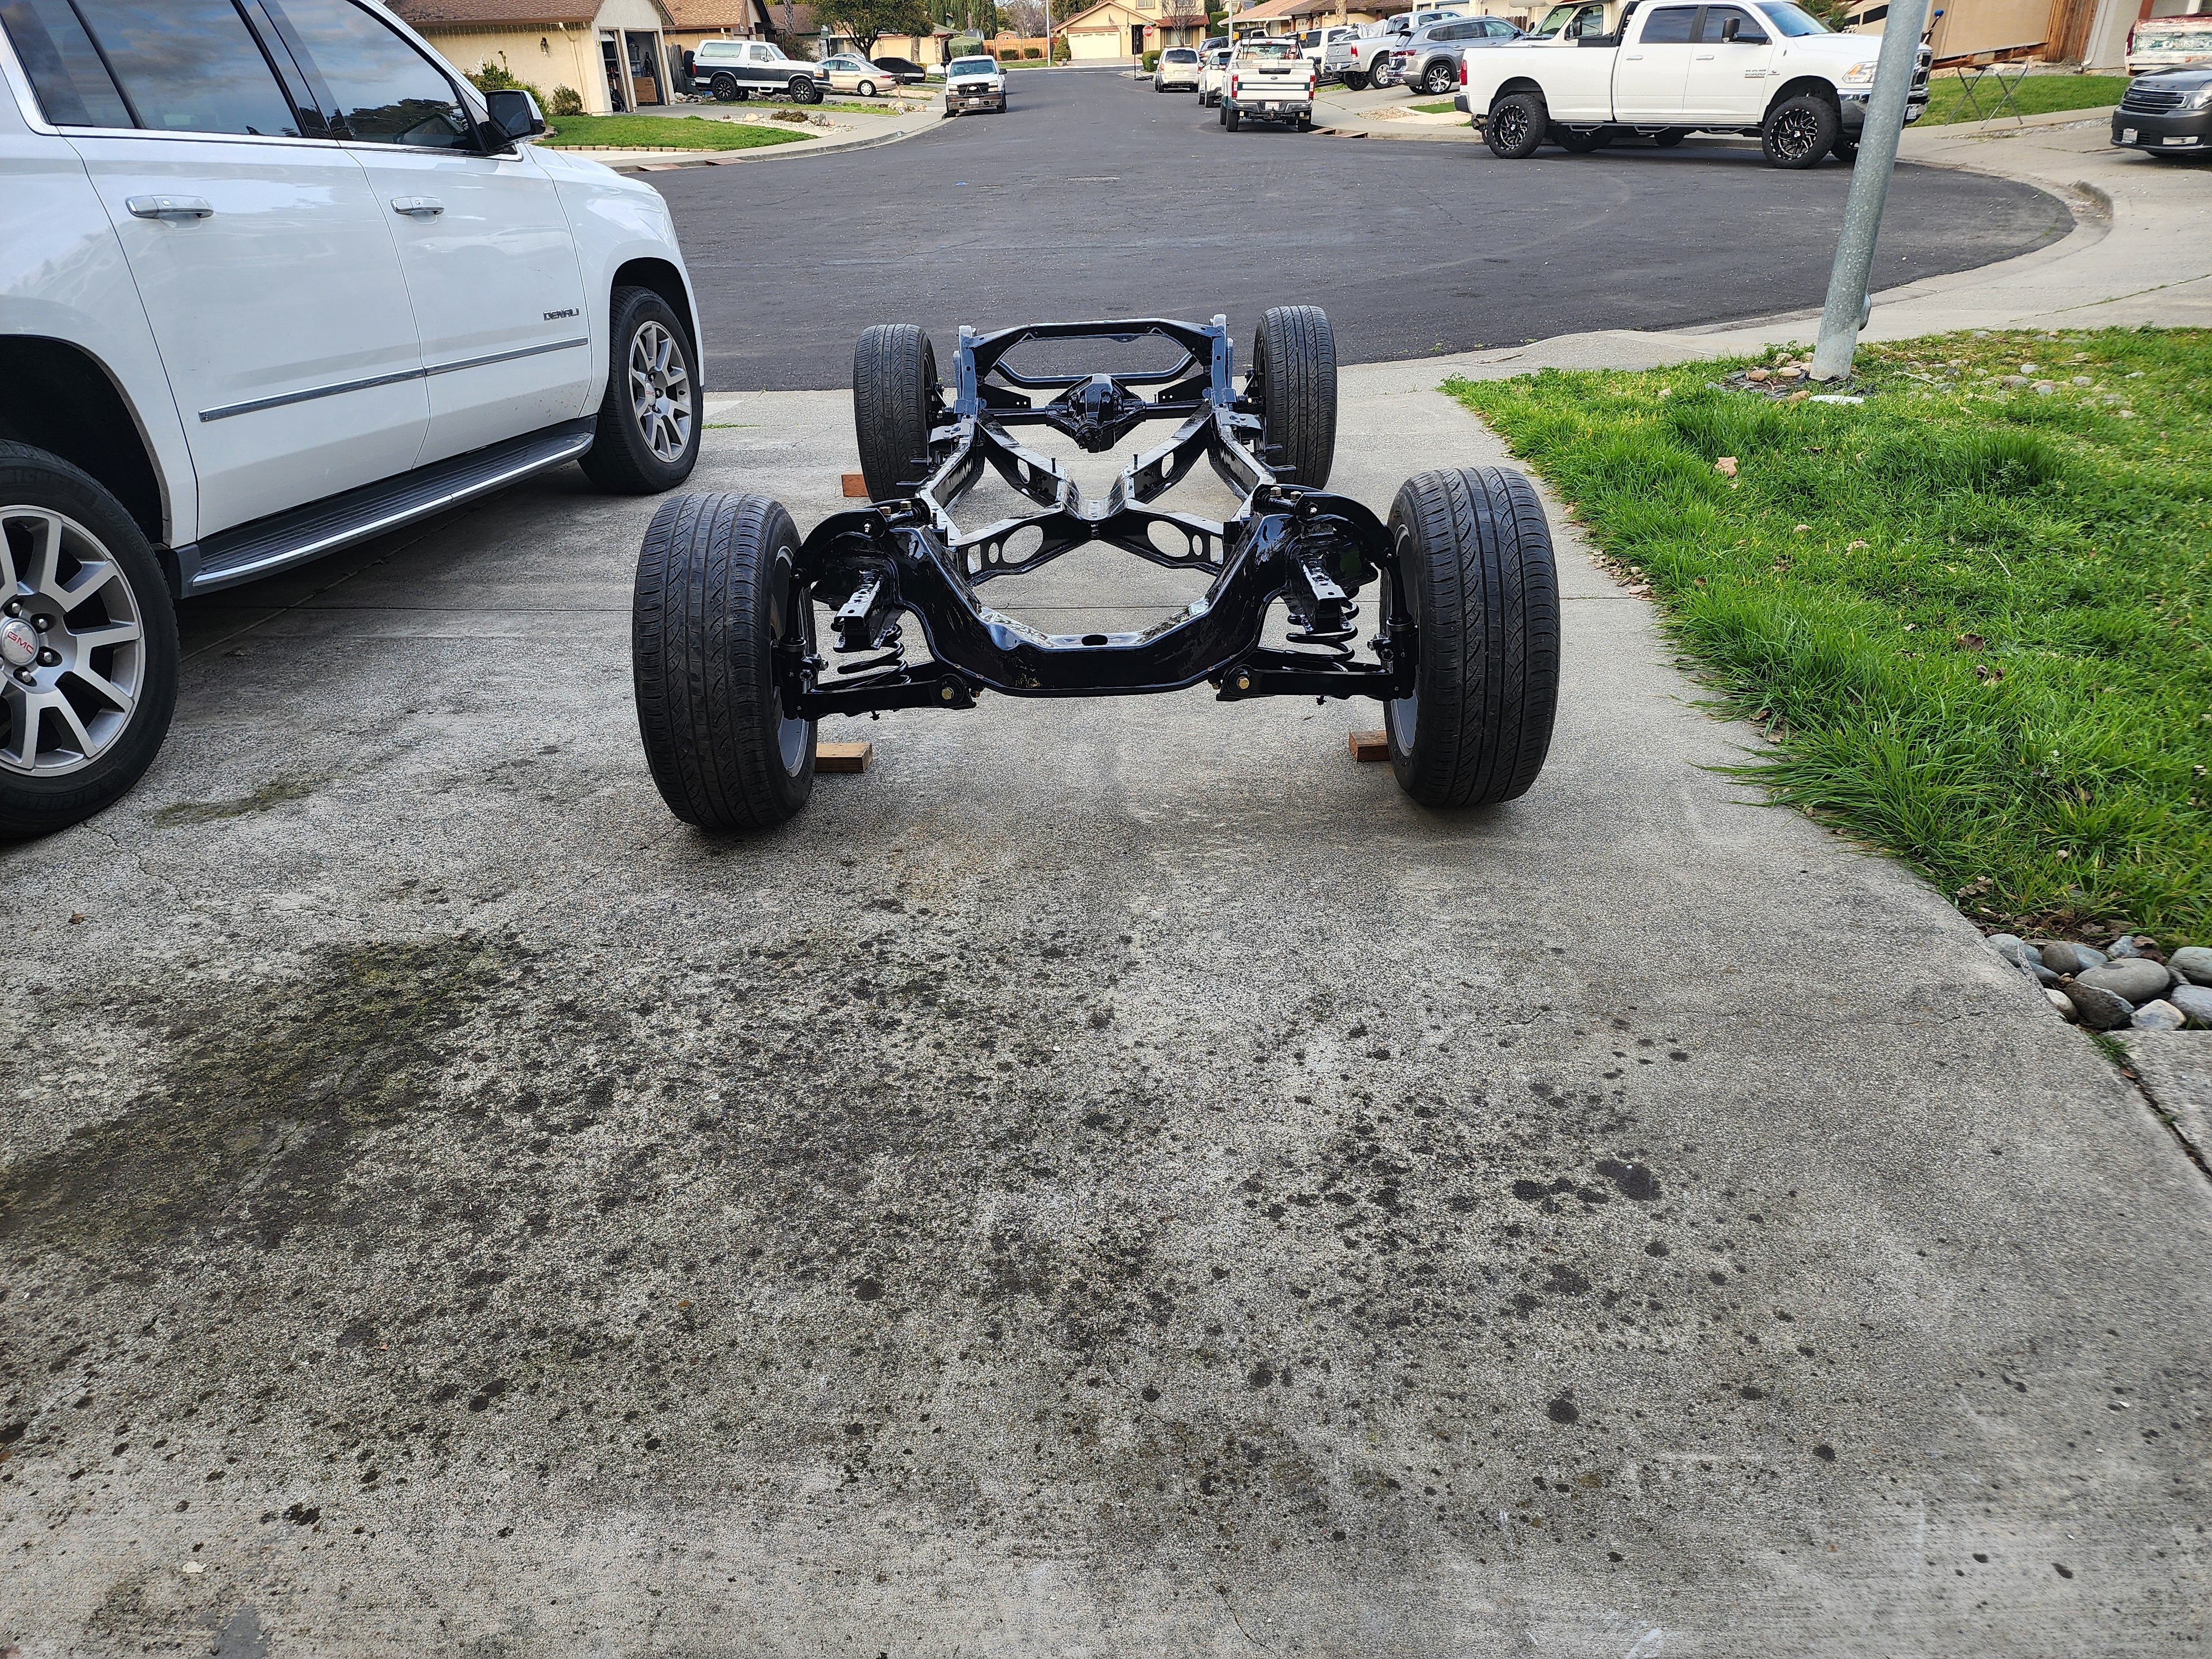
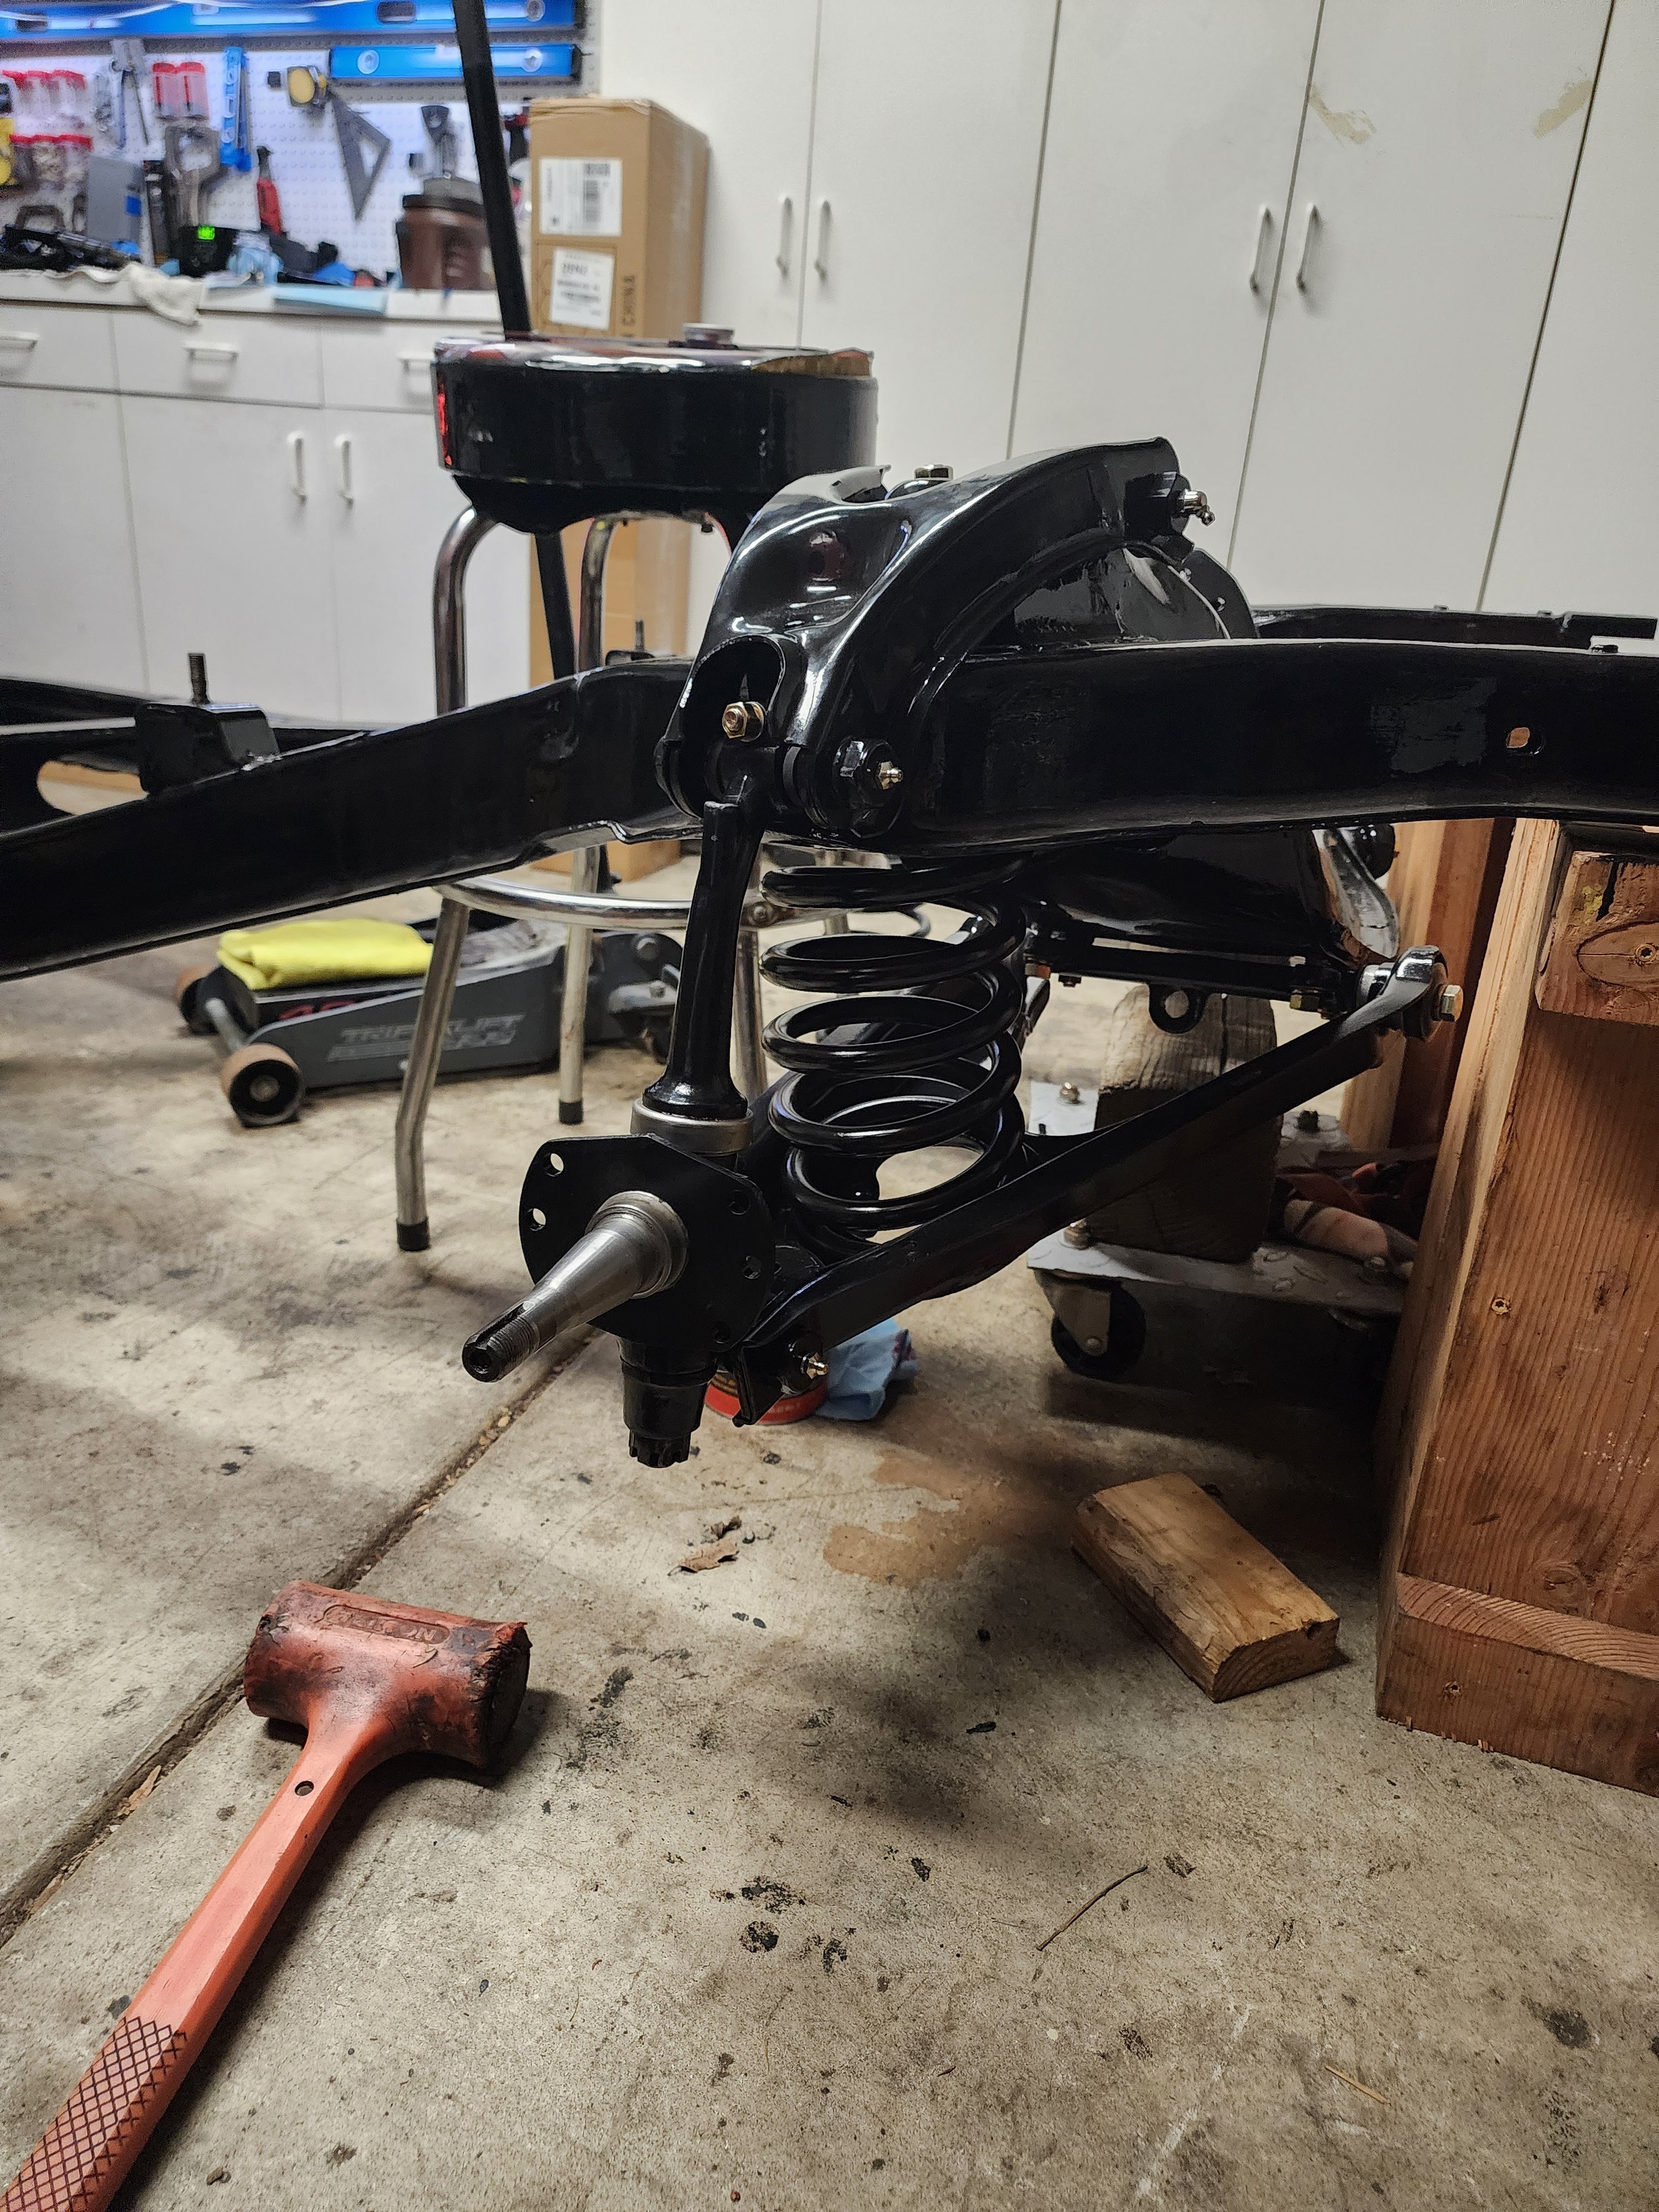
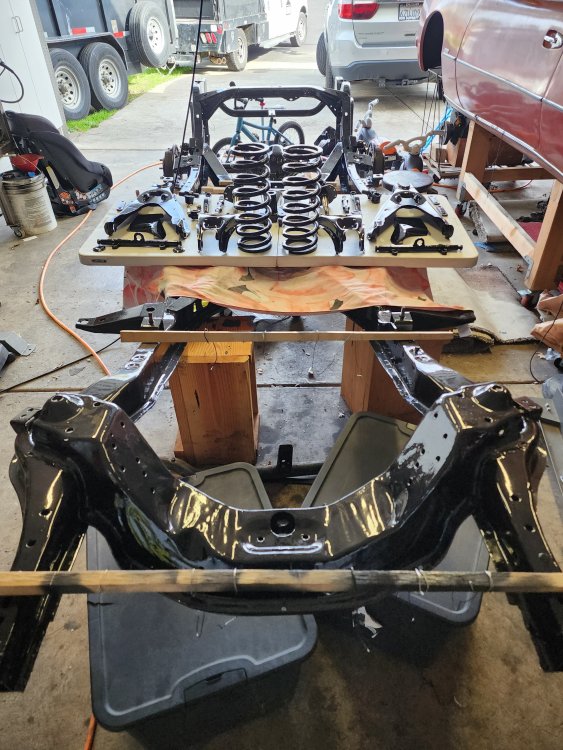
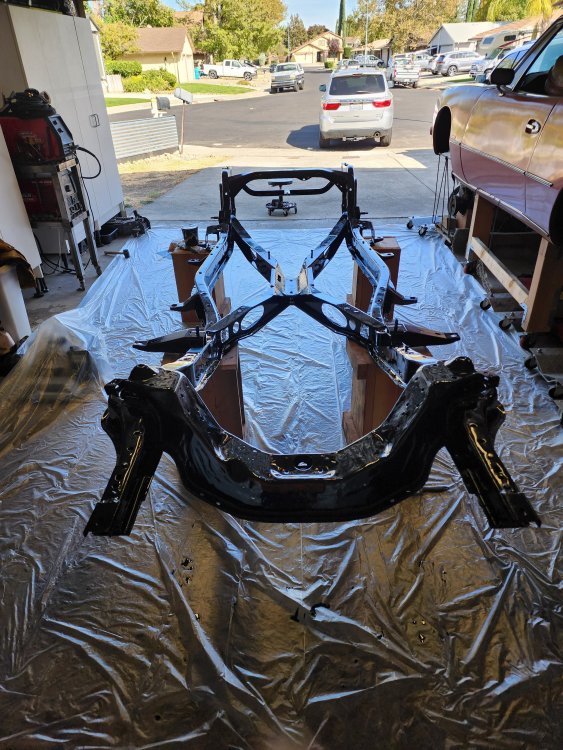
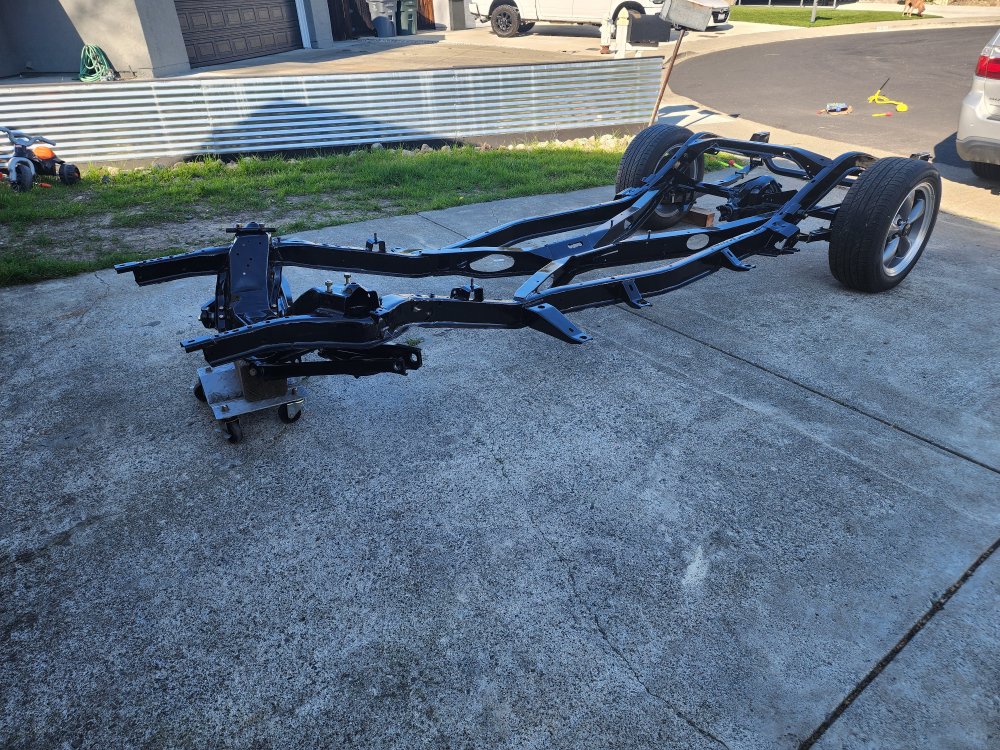
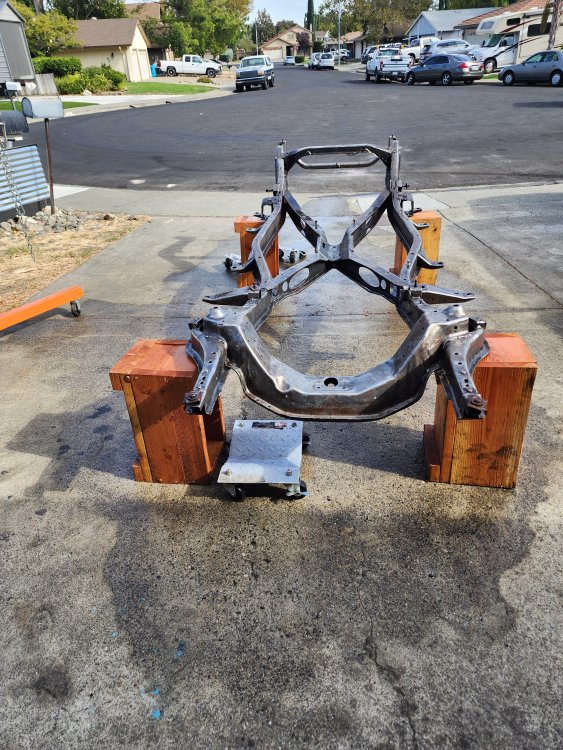
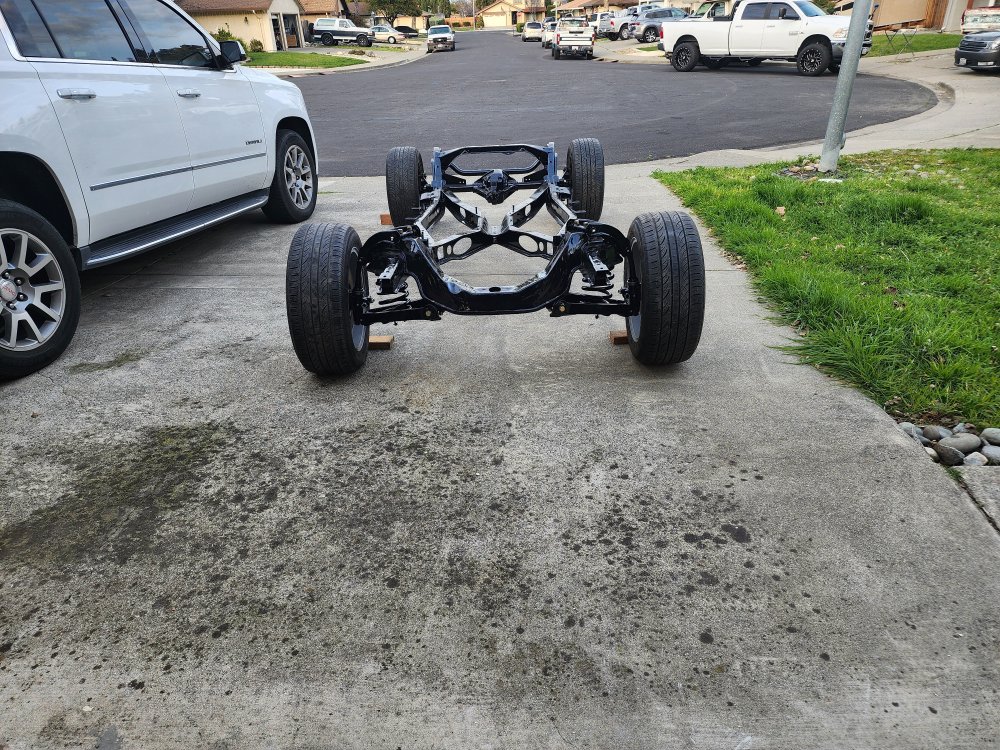
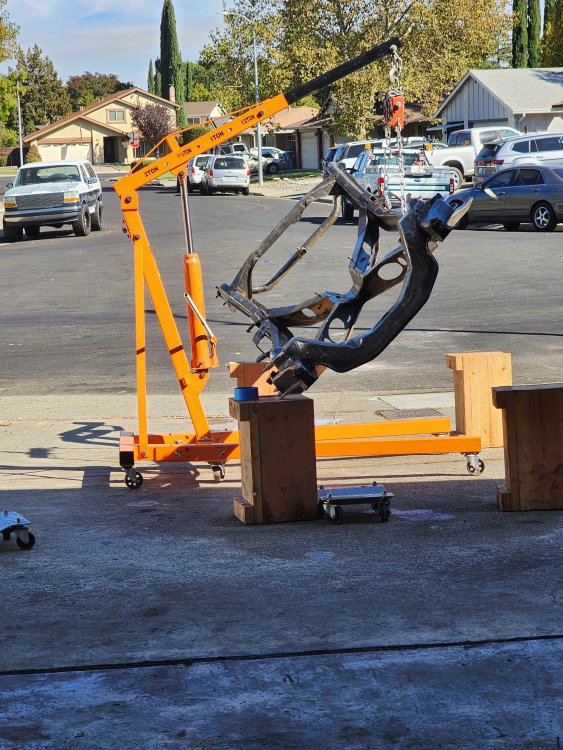
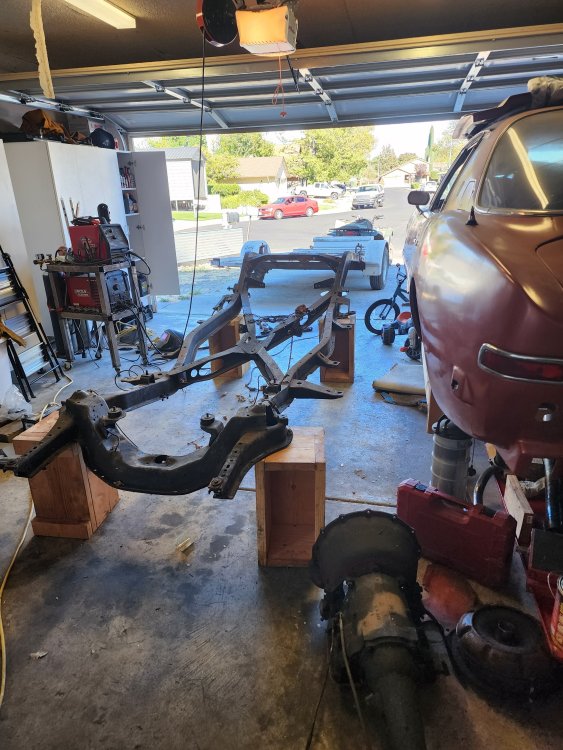
I have started a restoration on a 63 that has been passed down I originally pulled the body to weld in a new rear crossmember. One thing led to another and now in the process of a full restoration. Things i have done so far. Striped the frame down painted it. All new suspension bushing front and rear new hardware rebuilt rear end My plan is to run new break/fuel lines finish up the steering tuner disk breaks front and rear new exhaust. Looking for some advice on things to do before putting the body on. Also what should I use for rubber between the body and frame? Any advice is greatly appreciated thank you here are some photos of the progress


-

Source For Replacement Rochester Quadrajet on 1969 350
Skip Lackie replied to TED DIMON's topic in 1965-83 Avanti
I had a problem(s) with the Quadrajet in my 74. Some of the people on a Camaro forum recommended Cliff's High Performance in Ohio. Cliff discovered that my original carb body was cracked and provided a completely rebuilt Quadrajet that fit and worked fine. I recommend him for Quadrajet parts and service. cliffshighperformance.com -
Posted 7 minutes ago RQB3263/81/305 ..... FRONT SUSPENSION BUSHING REPLACEMENT PROJECT COMPLETE .... USED ONLY NEW MANUFACTURE PARTS FROM STUDEBAKER INTERNATIONAL IN ARIZONA....... BOTTOM LINE .... EXPENSIVE .... MECHANIC VERY METICULOUS AND FIXED A COUPLE OTHER THINGS ALSO BUT..... TOTAL COST PARTS AND LABOR ...$1600.00 !! AND ALIGNMENT NEXT WEEK ....!!.... ALL DONE ALL GOOD ... LIFE TIME GUARANTEE ... BEST WISHES ....BILL IN FLORIDA ....
-
RQB3263/81/305 ..... FRONT SUSPENSION BUSHING REPLACEMENT PROJECT COMPLETE .... USED ONLY NEW MANUFACTURE PARTS FROM STUDEBAKER INTERNATIONAL IN ARIZONA....... BOTTOM LINE .... EXPENSIVE .... MECHANIC VERY METICULOUS AND FIXED A COUPLE OTHER THINGS ALSO BUT..... TOTAL COST PARTS AND LABOR ...$1600.00 !! AND ALIGNMENT NEXT WEEK ....!!.... ALL DONE ALL GOOD ... LIFE TIME GUARANTEE ... BEST WISHES ....BILL IN FLORIDA ....
-

Source For Replacement Rochester Quadrajet on 1969 350
mfg replied to TED DIMON's topic in 1965-83 Avanti
I adapted a used Quadrajet taken from a ‘78 Buick for my ‘83 Avanti everyday driver. I did this to eliminate the troublesome electronic factory Quadrajet which seemed to have a mind of its own! After rebuilding the Buick carb with a zip kit and new composite float, it dropped right onto the stock factory manifold with no major change to the throttle linkage. Biggest challenge was adapting the electric choke from the ‘83 carb to the ‘78 carb…. which wasn’t hard to do. Factory air filter assy dropped right on. The distributor also had to be changed from the stock electronically controlled advance type to the earlier Chevy vacuum advance type… again very easy to do. I made this change approximately 400,000 miles ago… and have never looked back!!