All Activity
- Past hour
-

New long block engine runs well, but has some significant vibration!
mfg replied to Jim S's topic in 1965-83 Avanti
Is the new engine one of the external balance units?… If so, you may not be using the correct flex plate. -
 So, I've squashed nearly all my issues so far ( over heating, steering gear leak etc) But this new engine seems to have some pretty significant vibration. It's bolted up to the same flexplate, torque converter and transmission as the old engine. No vibration when coasting (engine off) so I thing the u joints are OK. One mechanic I know listened to it yesterday and said to replace the motor mounts. I did that today and it made no difference. I'm stumped on this one. Any ideas, i'm all ears. Thanks in advance!
 - Today
-
Need part number or source for steering sector shaft seal
Jim S replied to Jim S's topic in 1965-83 Avanti
Seal replaced, no more leaking steering gear. -
WOW, very impressive on the overall quality of your work. love the added touches you have installed and you should be very proud. I expect to be wintering in and around Texas this winter and will look to see if your going to be in a car show anywhere near me. Love to see it first hand.
-
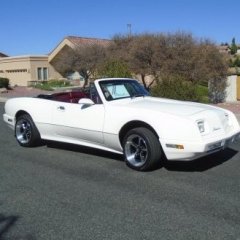
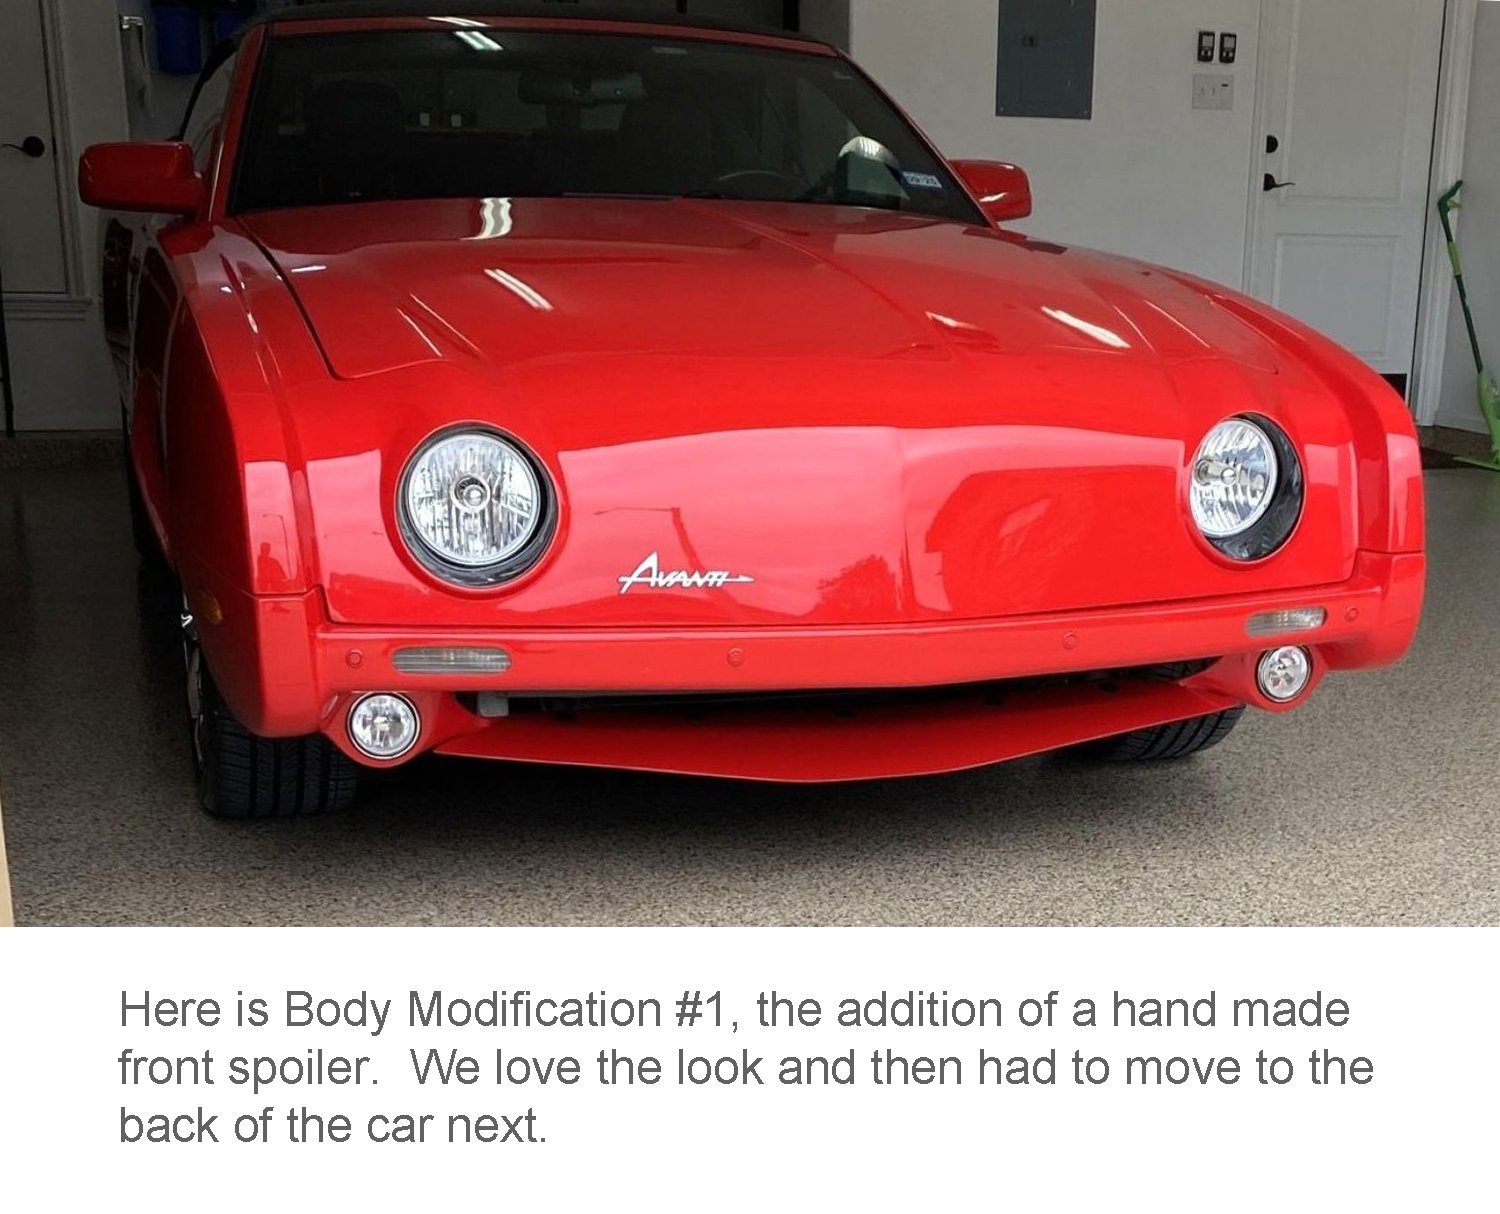
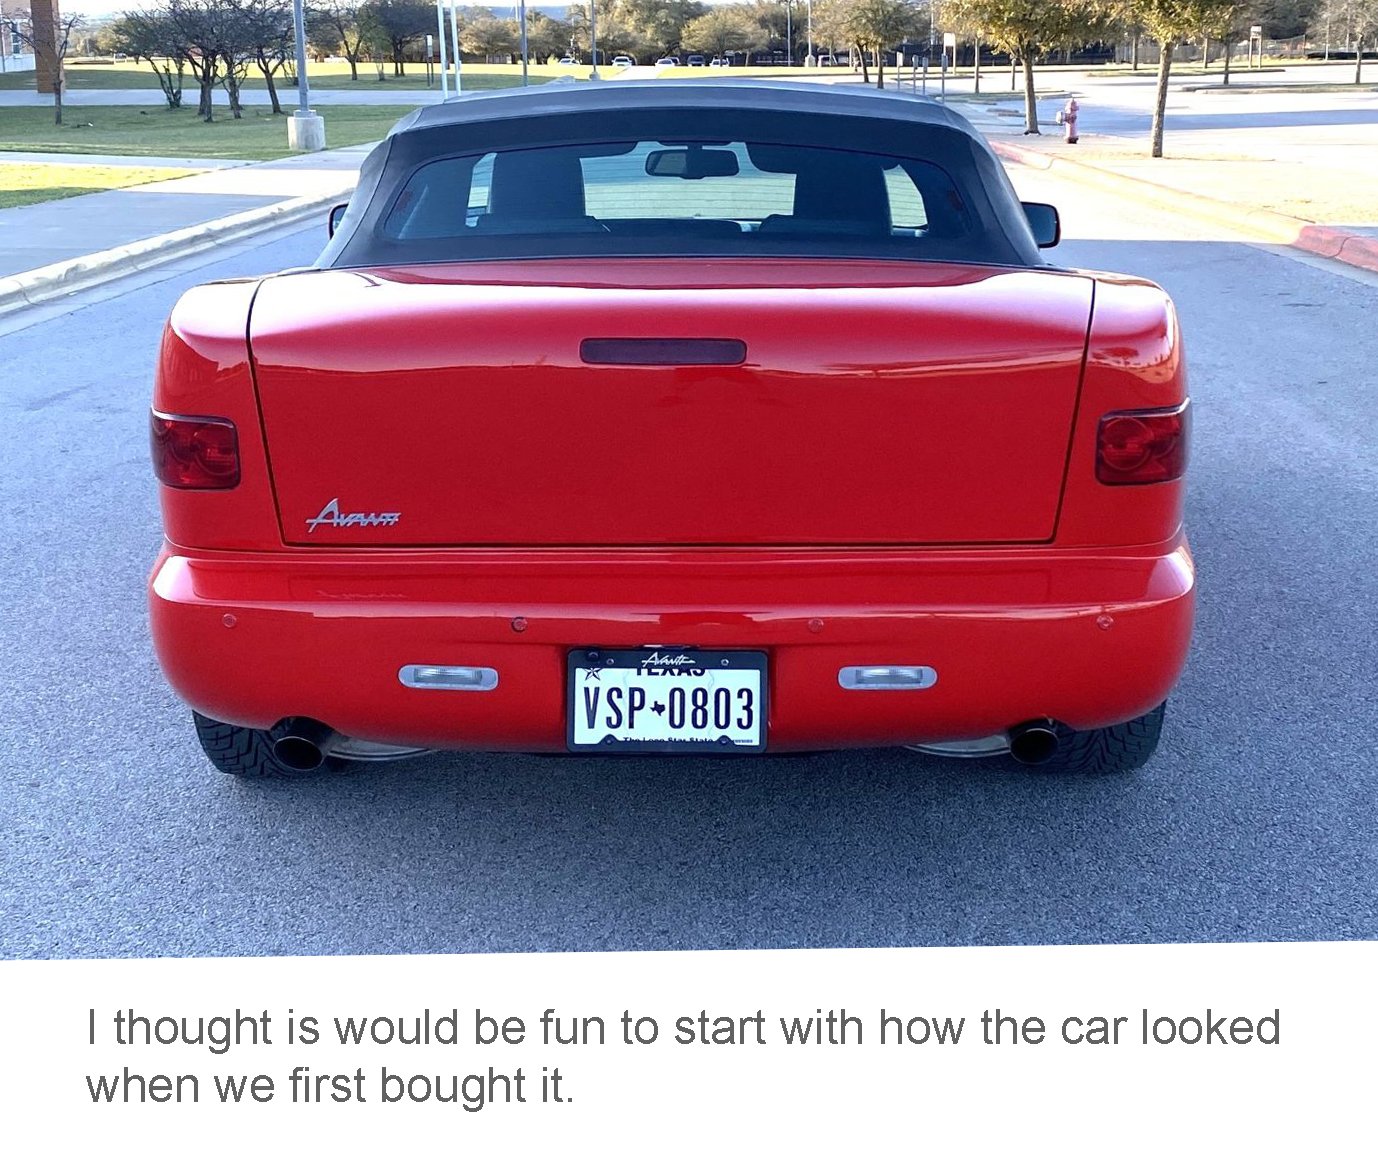
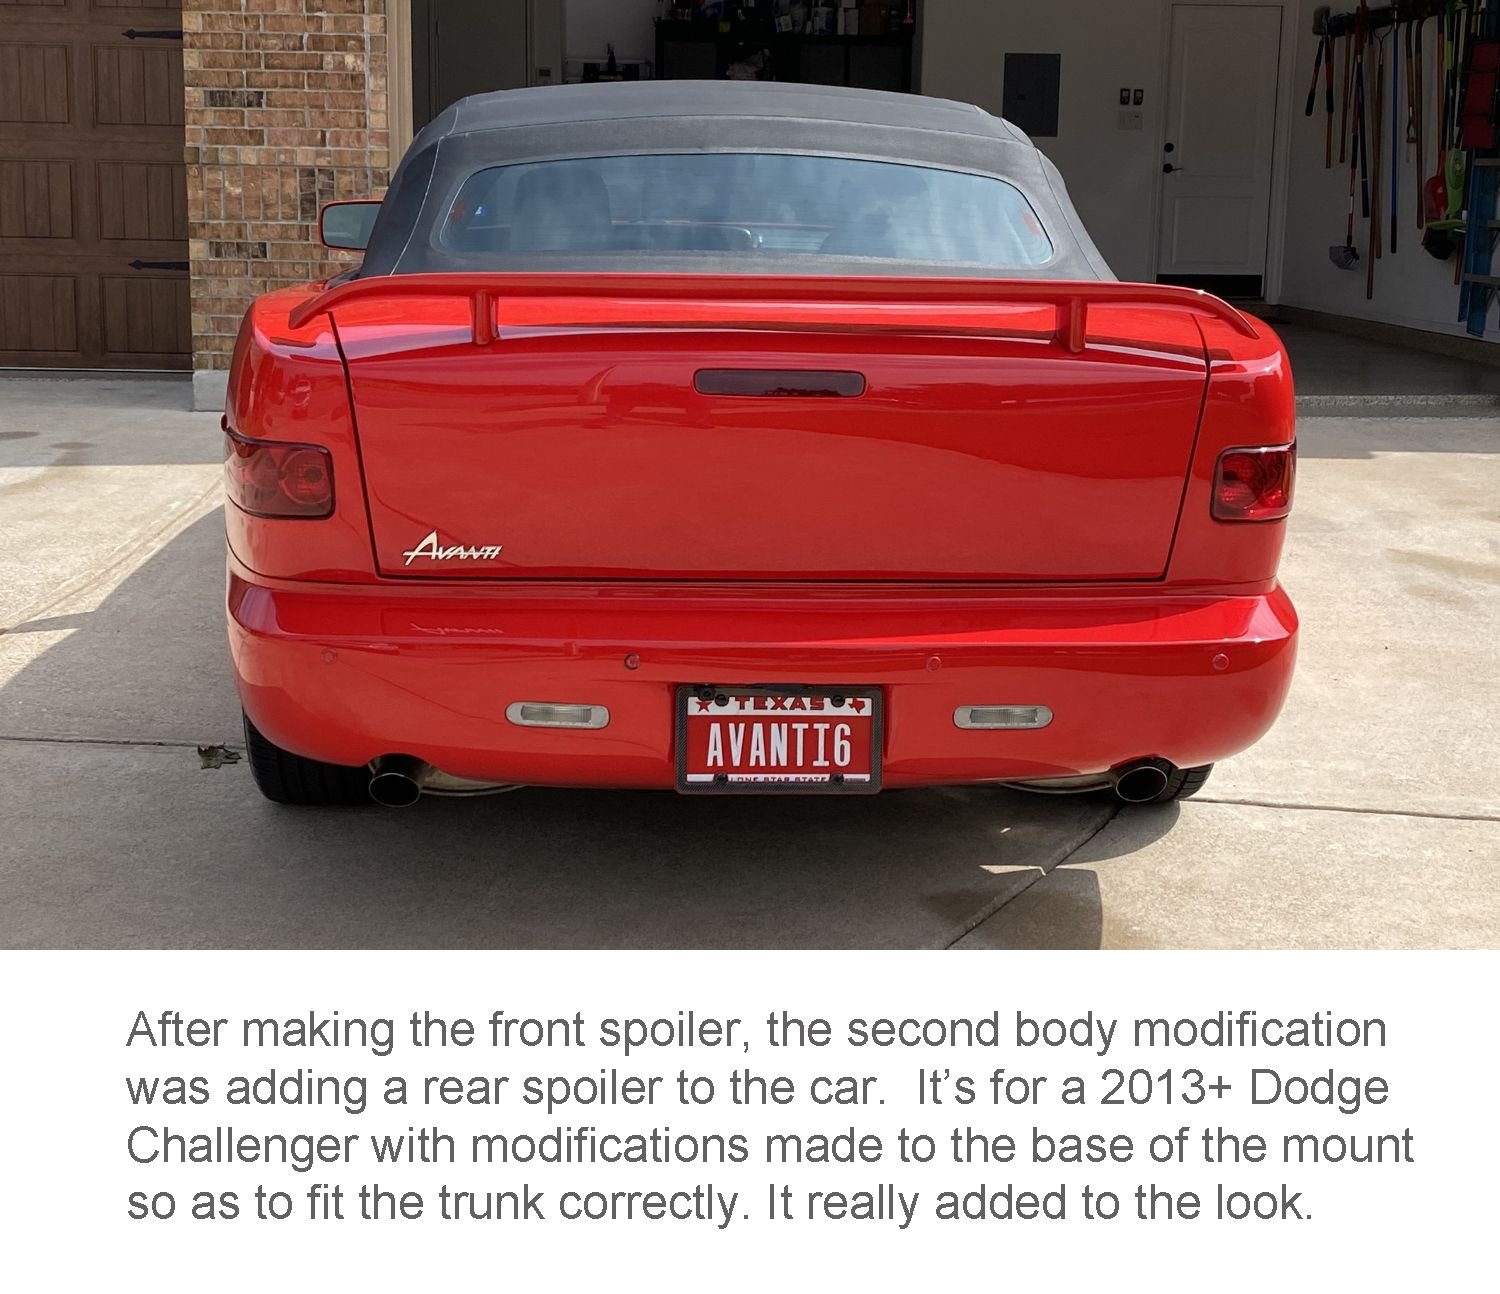
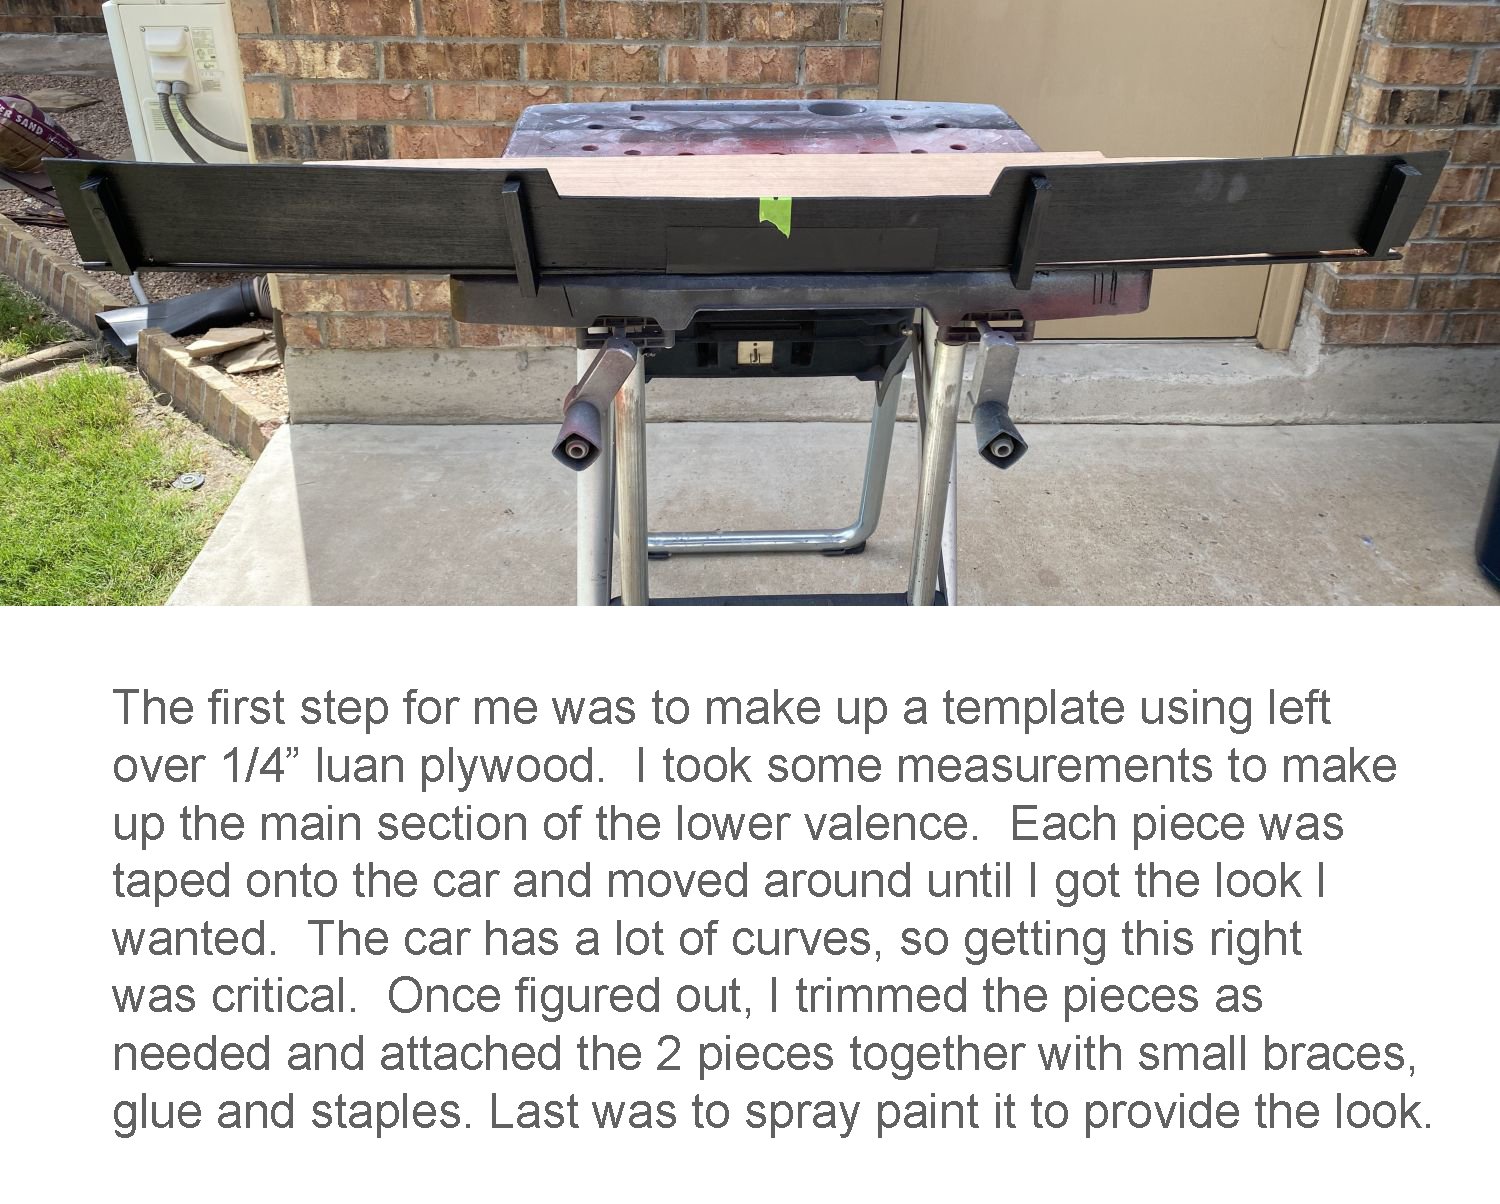
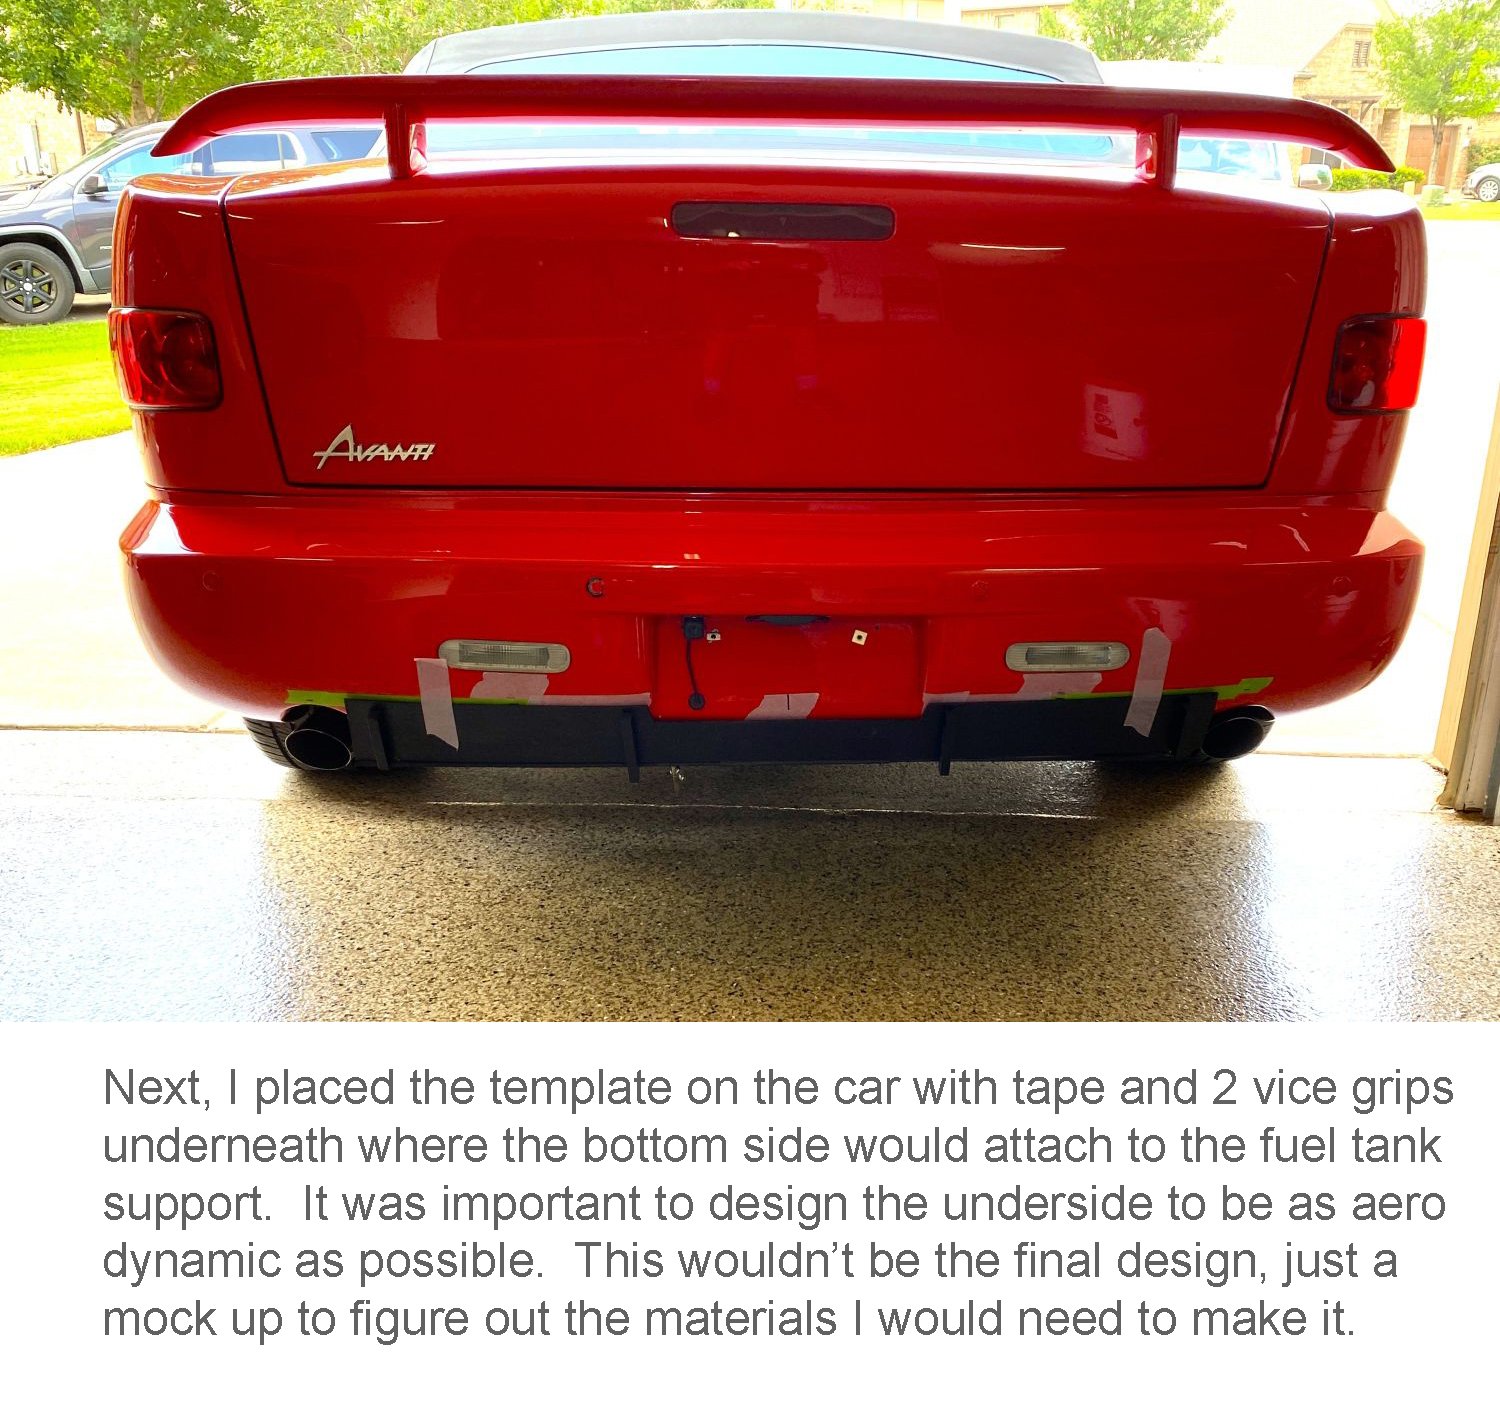
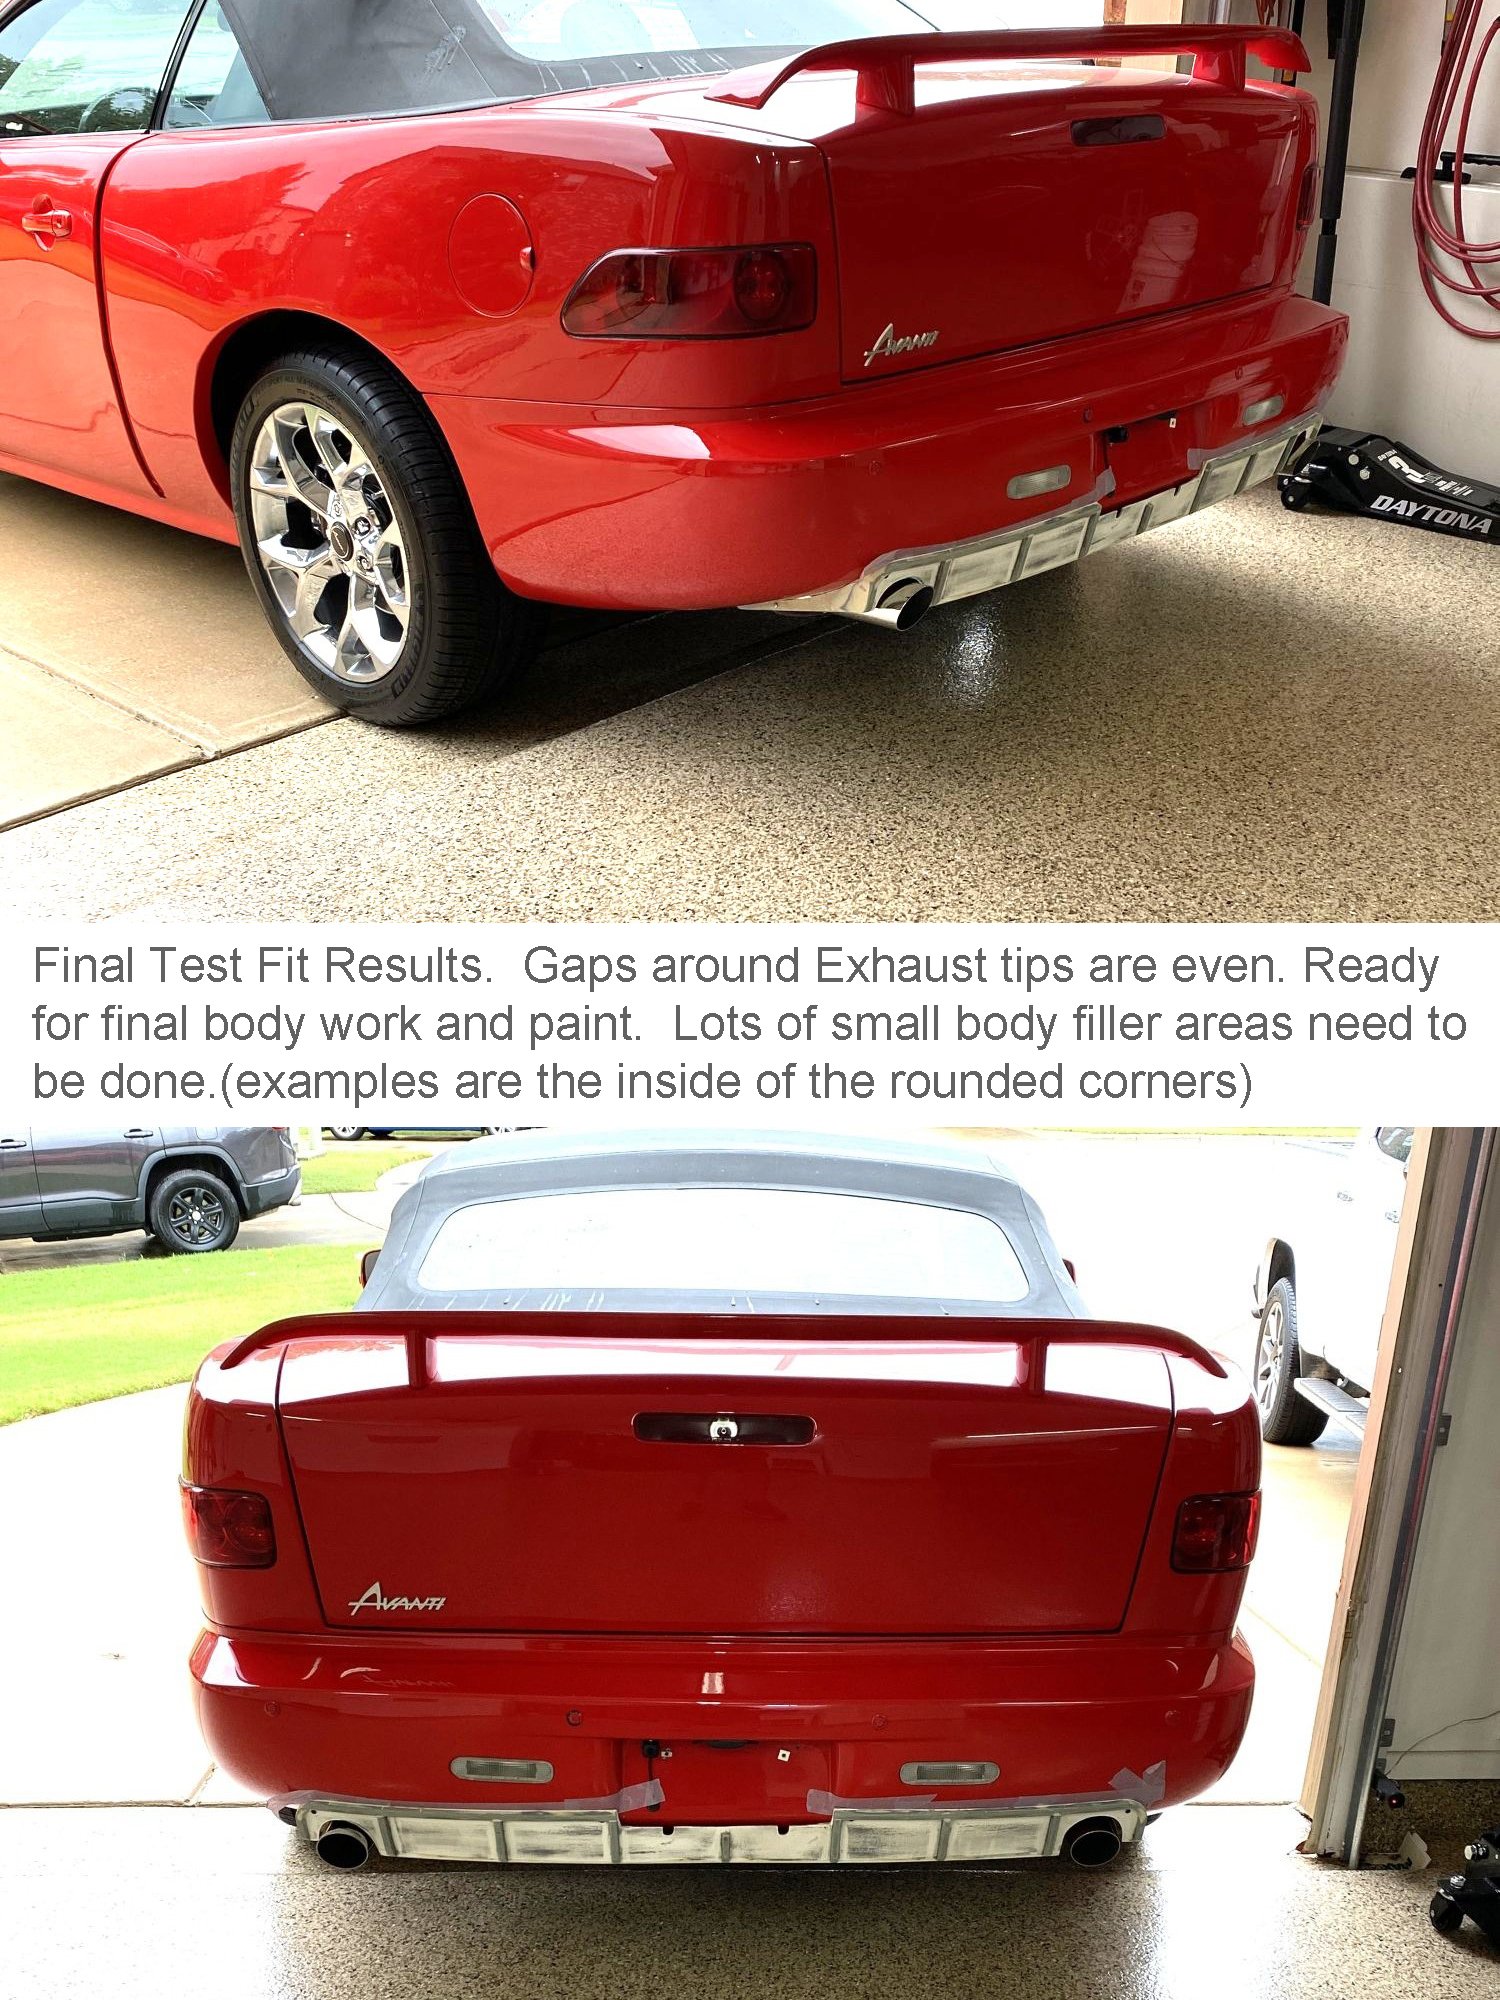
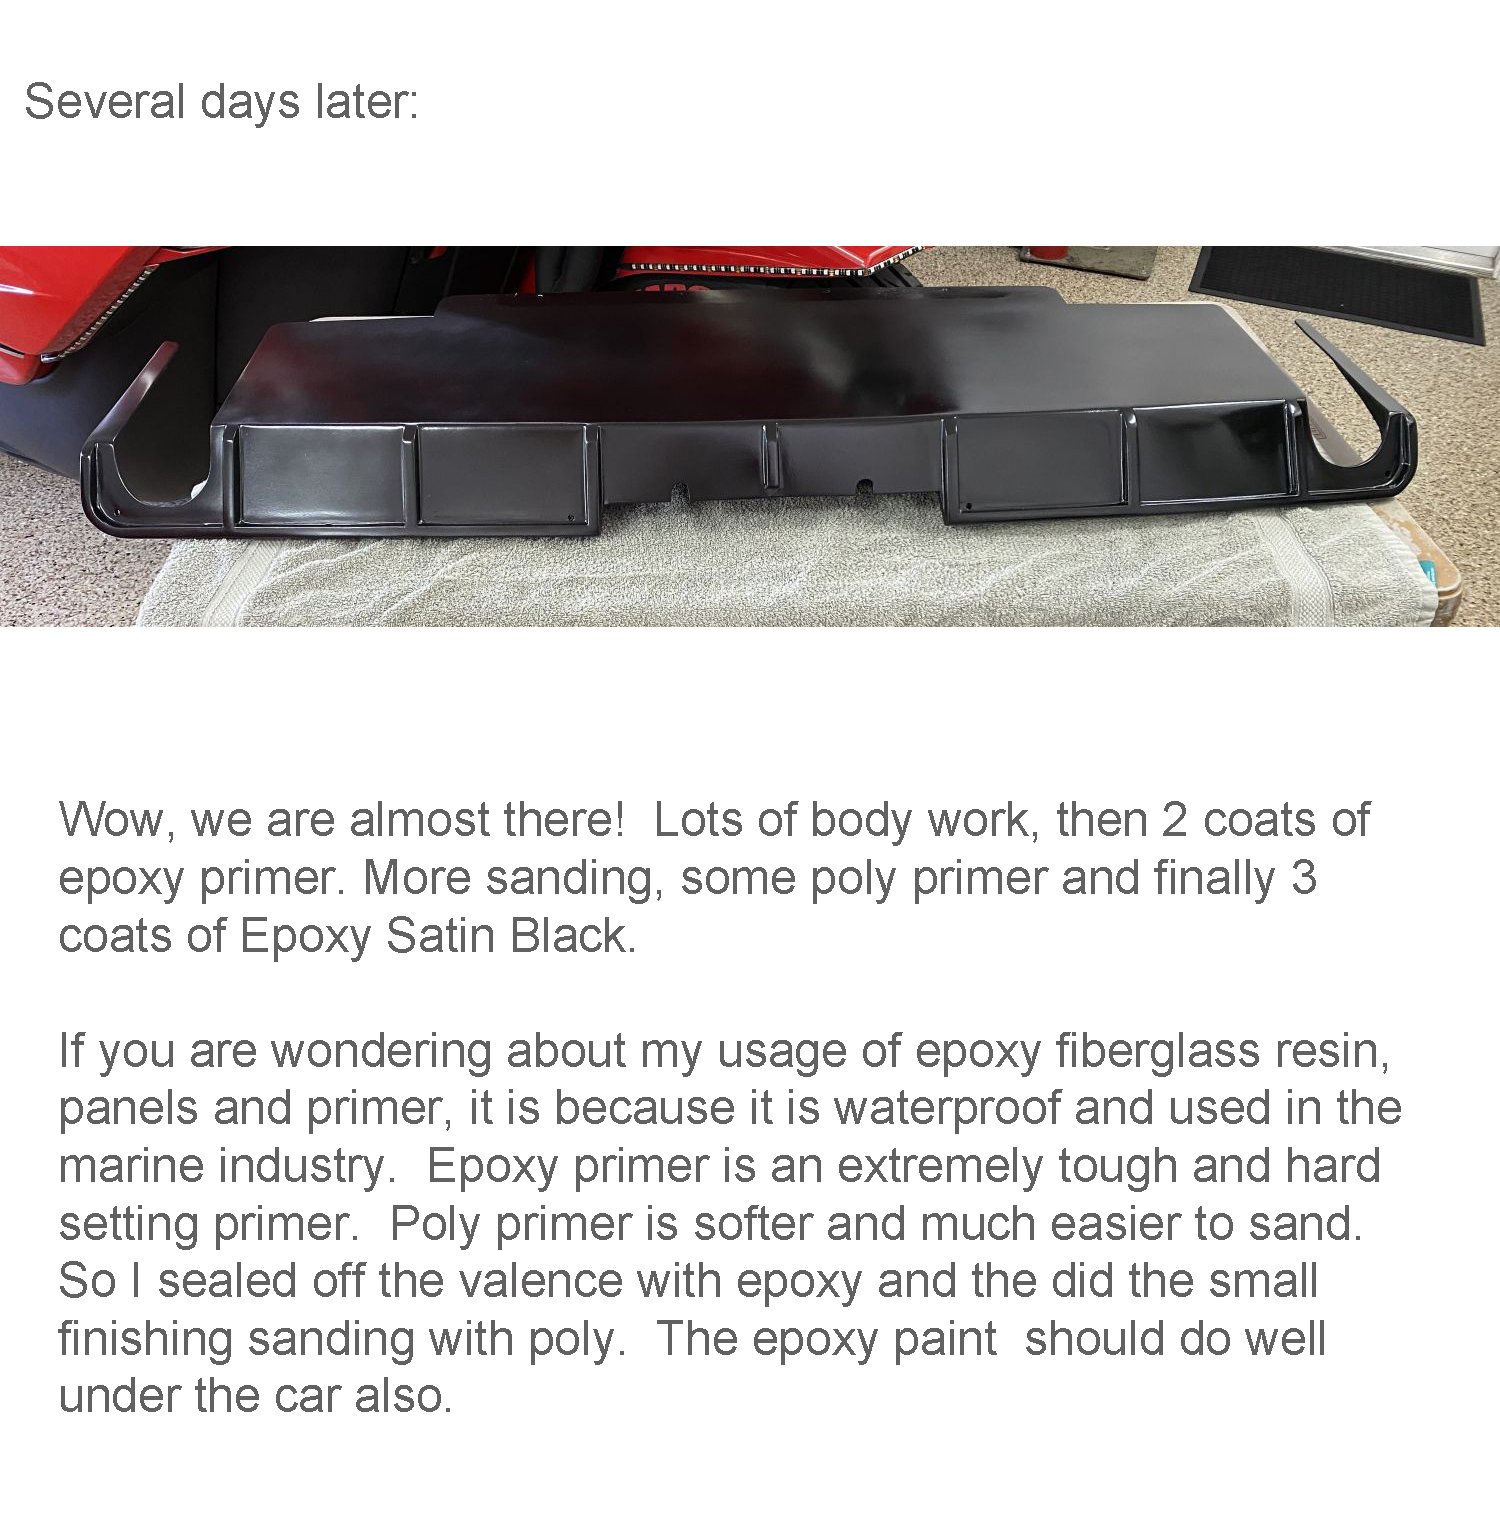
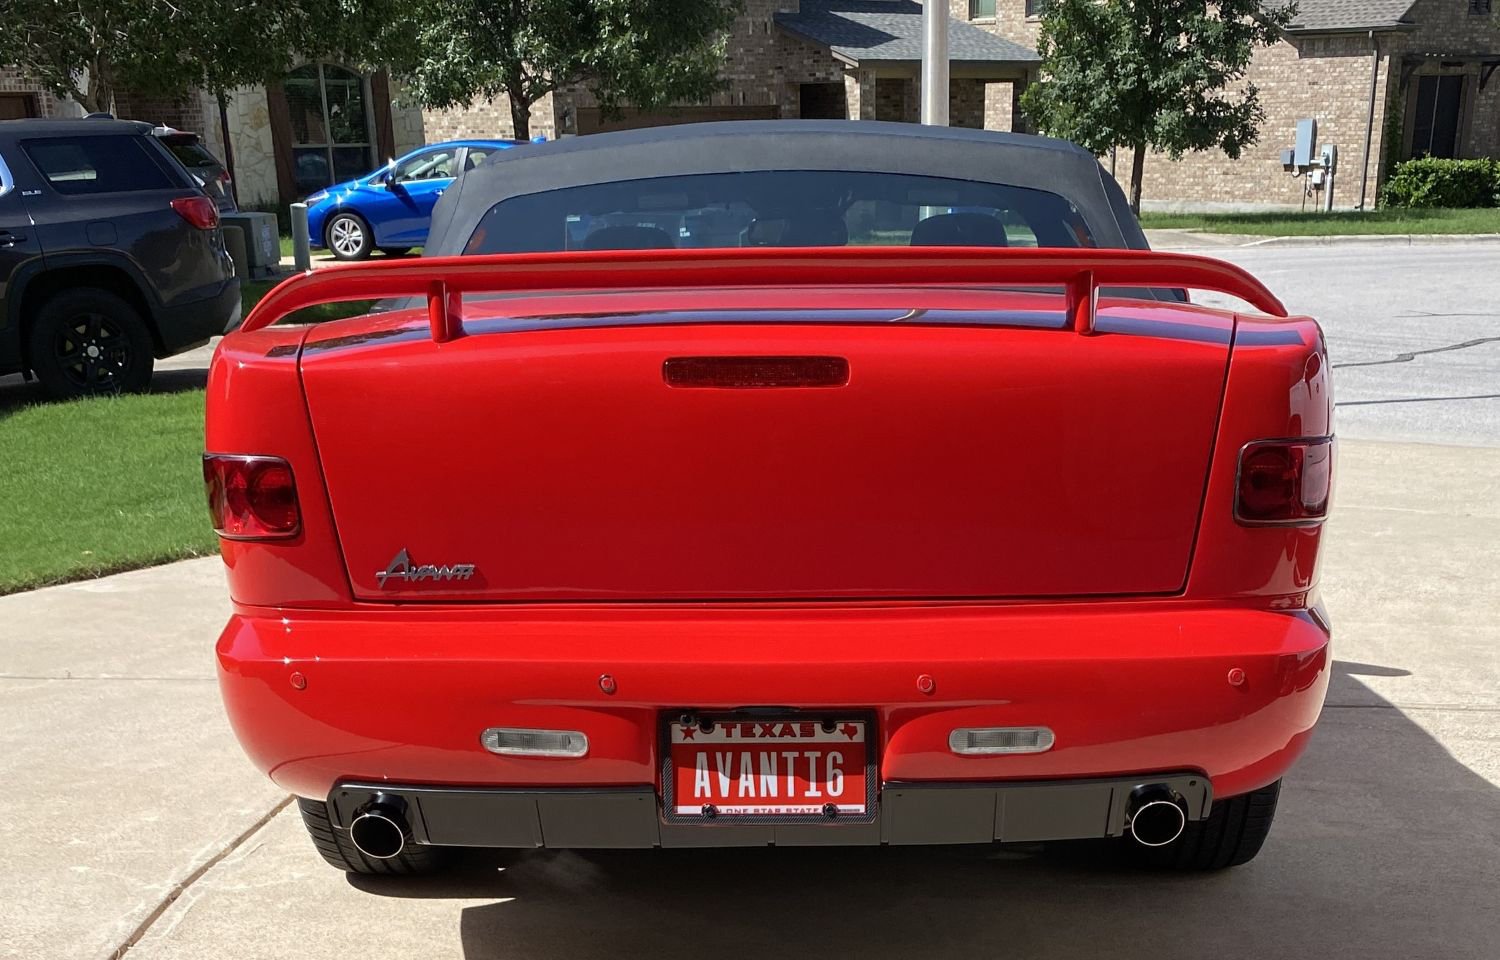
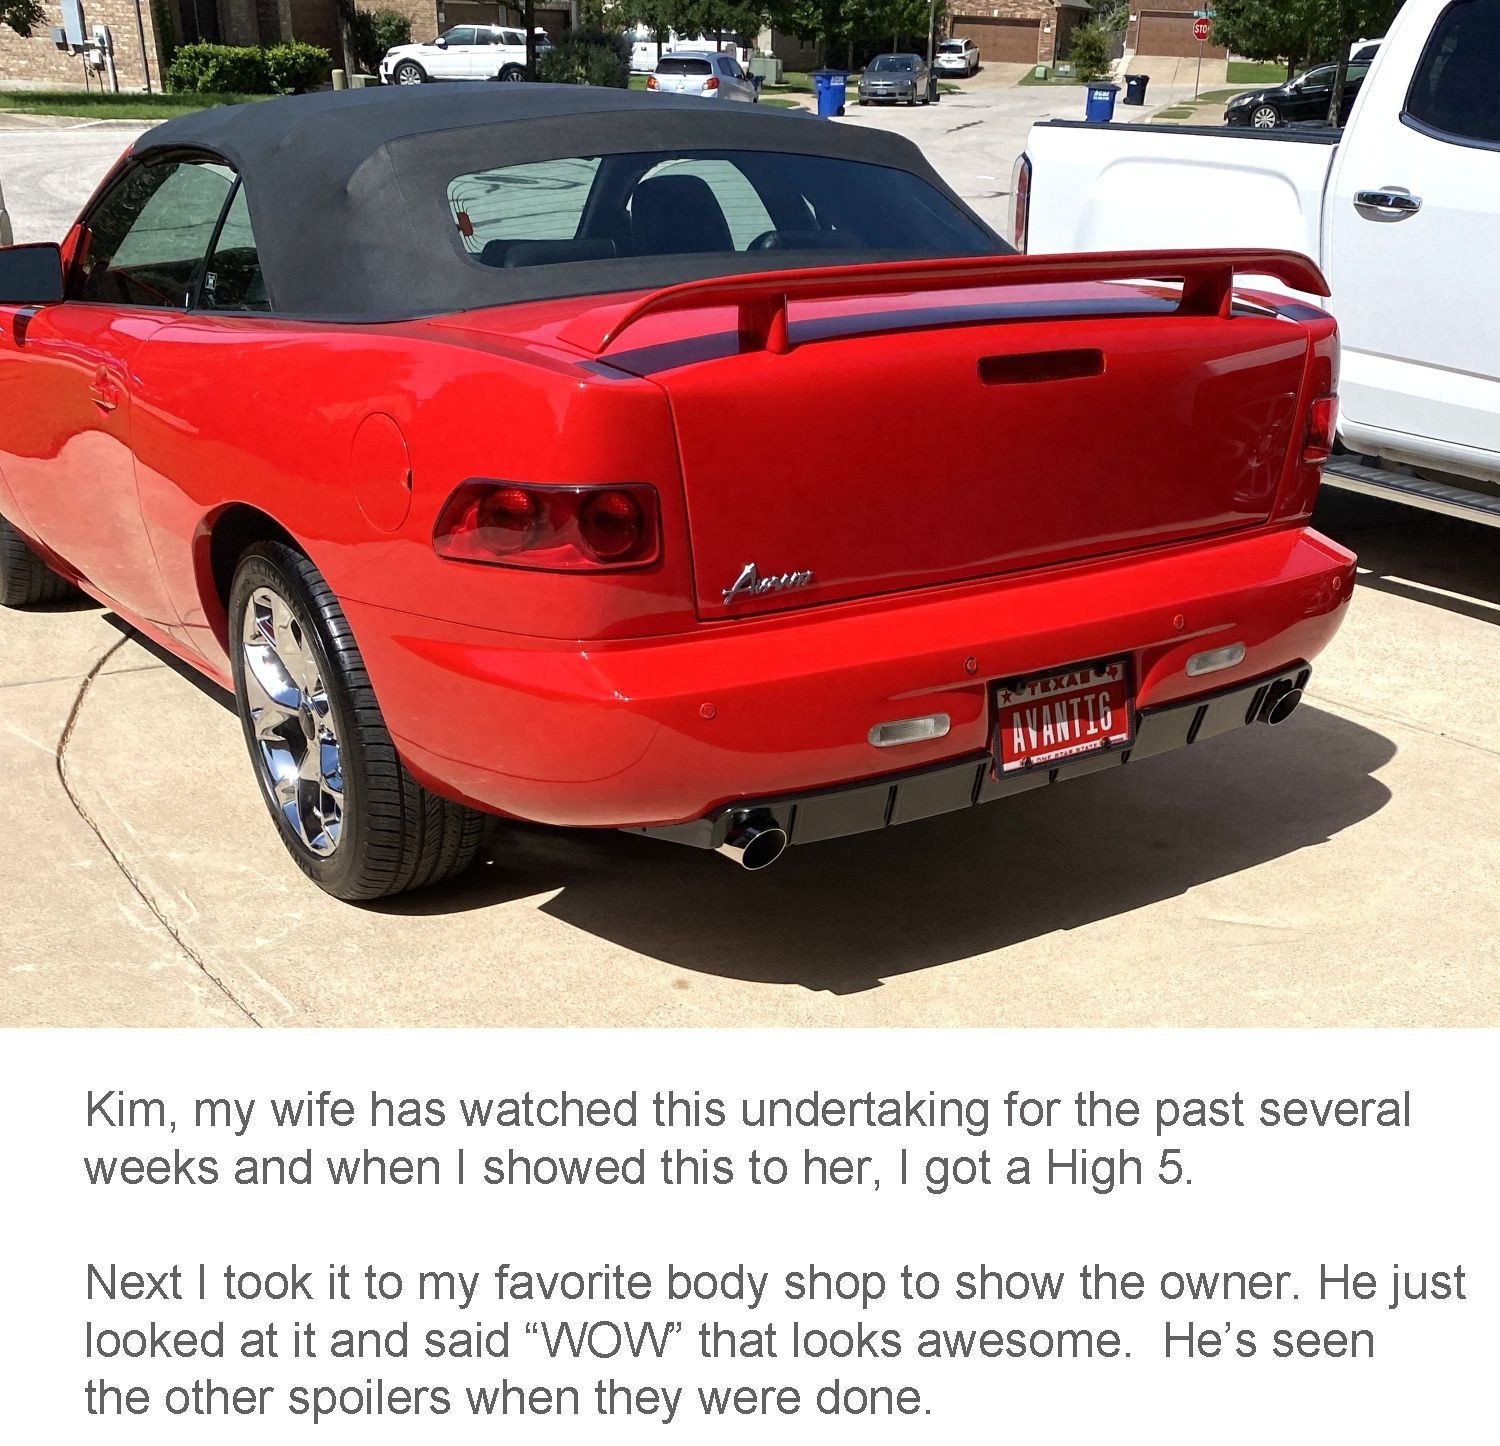
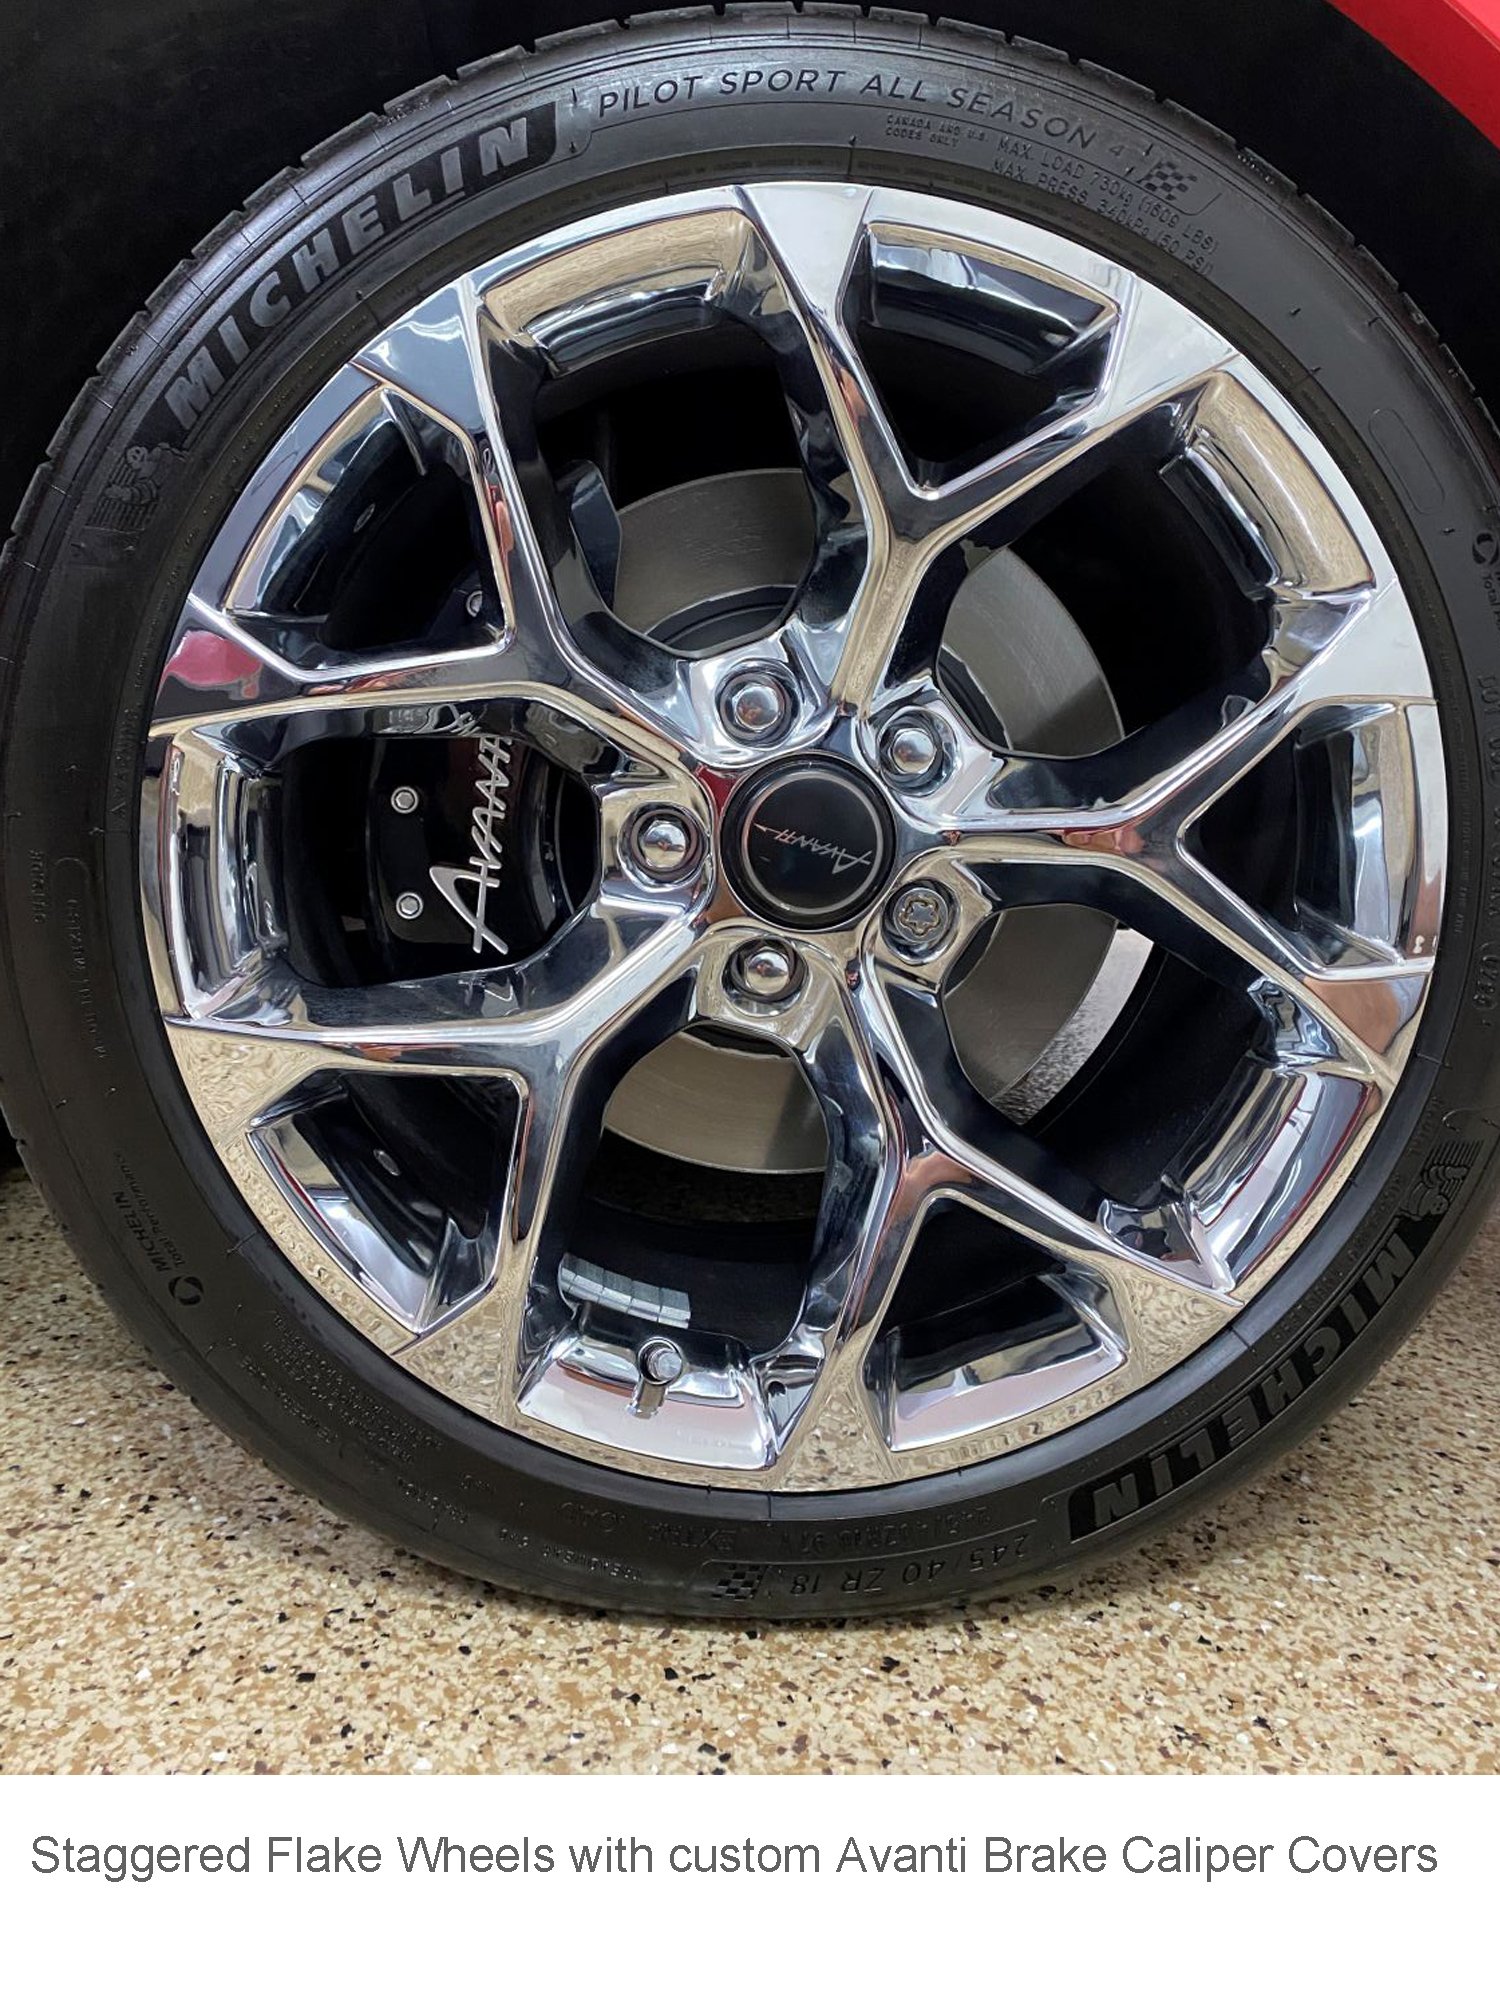
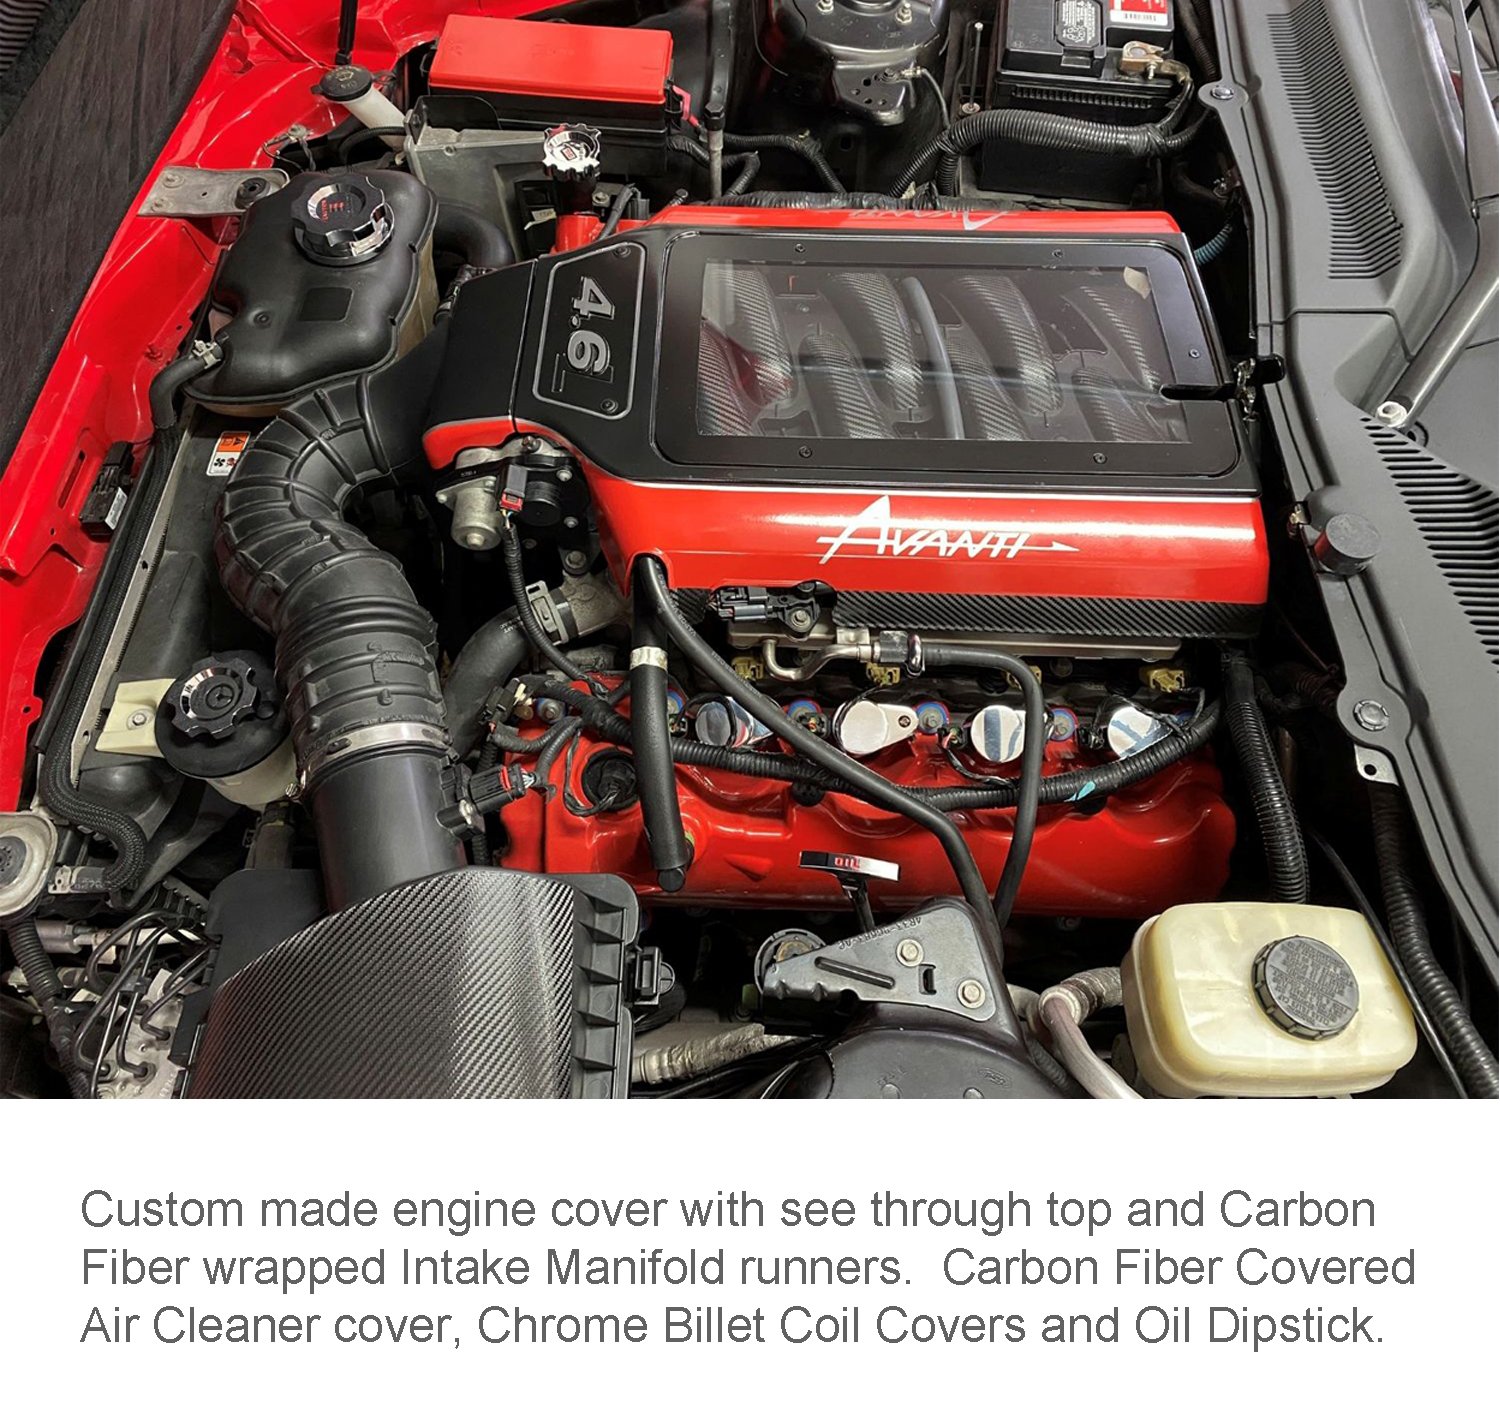
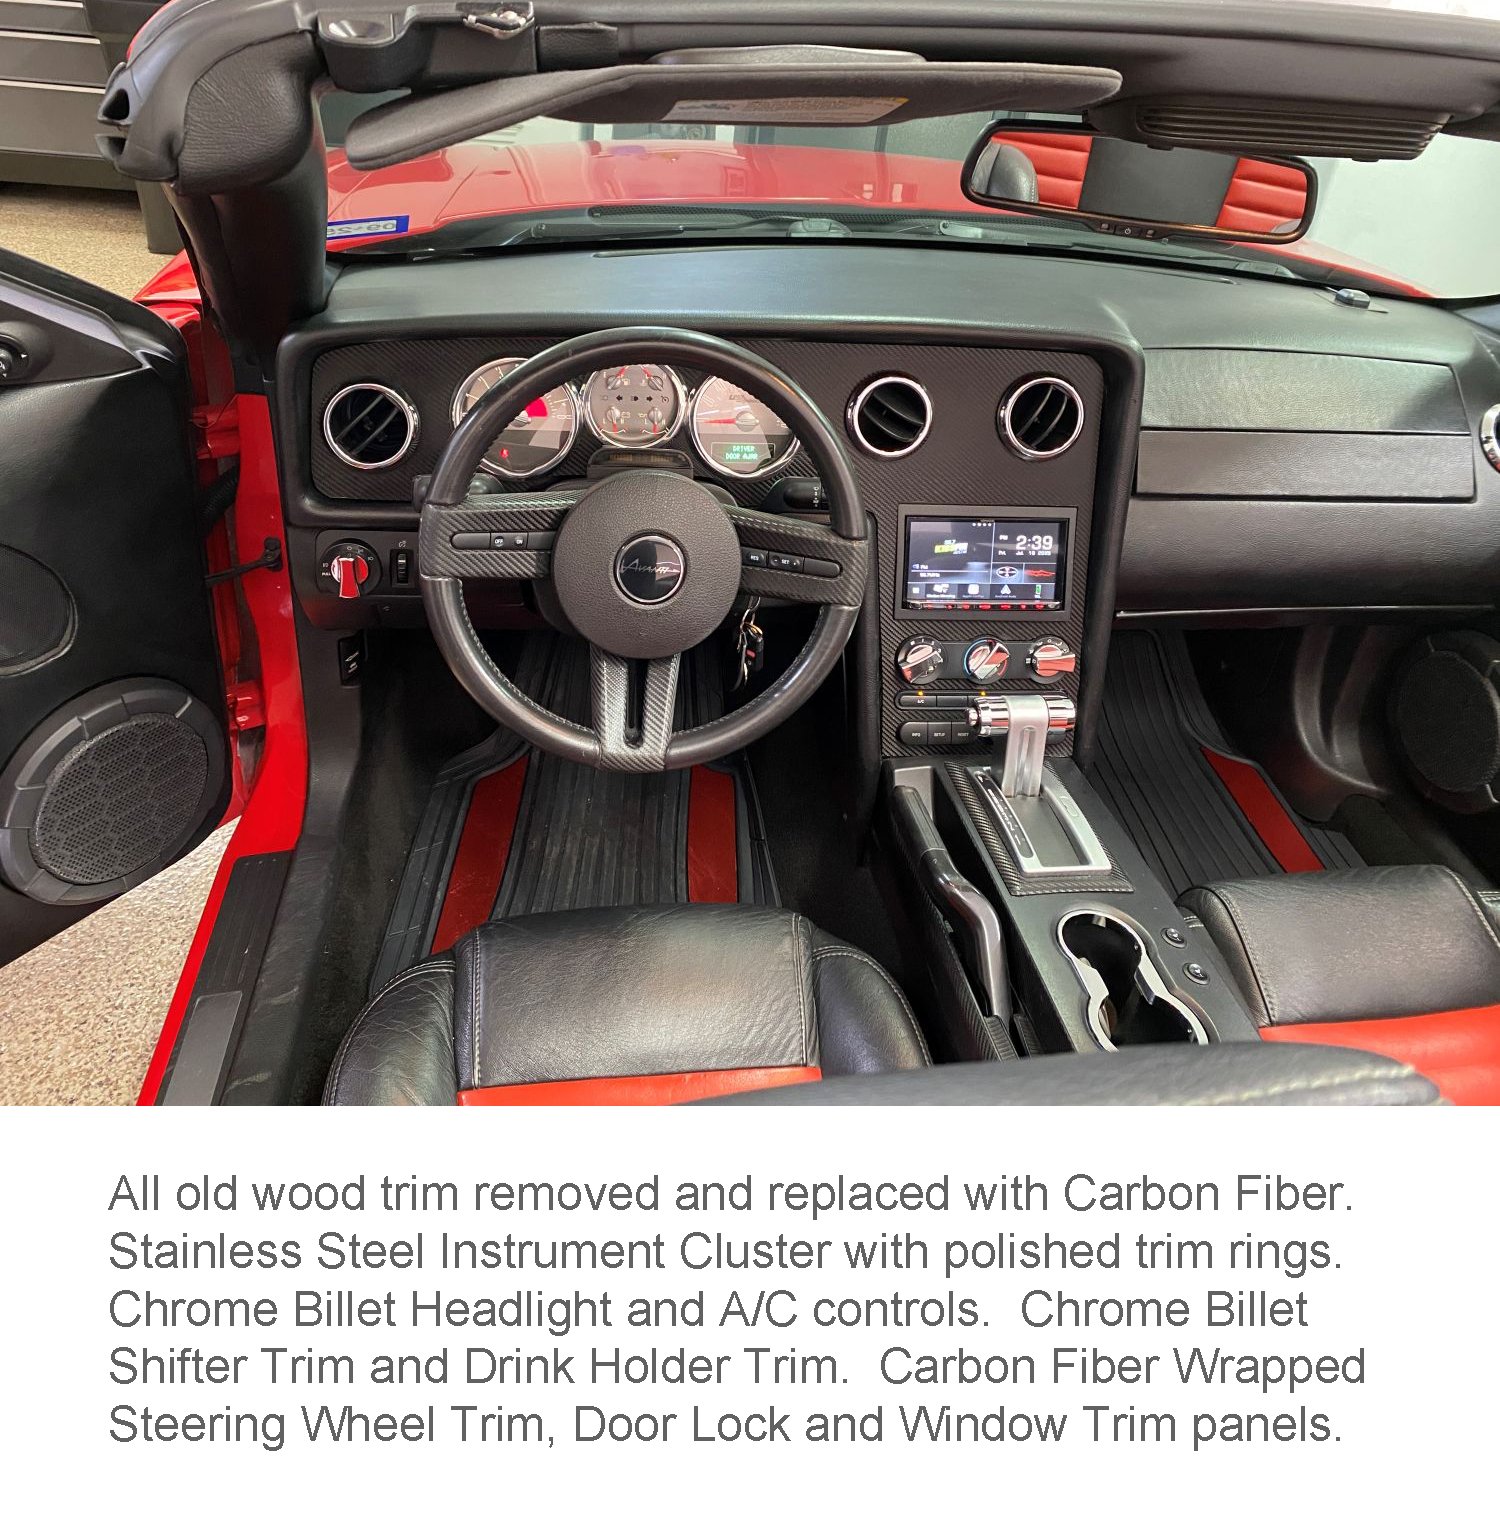
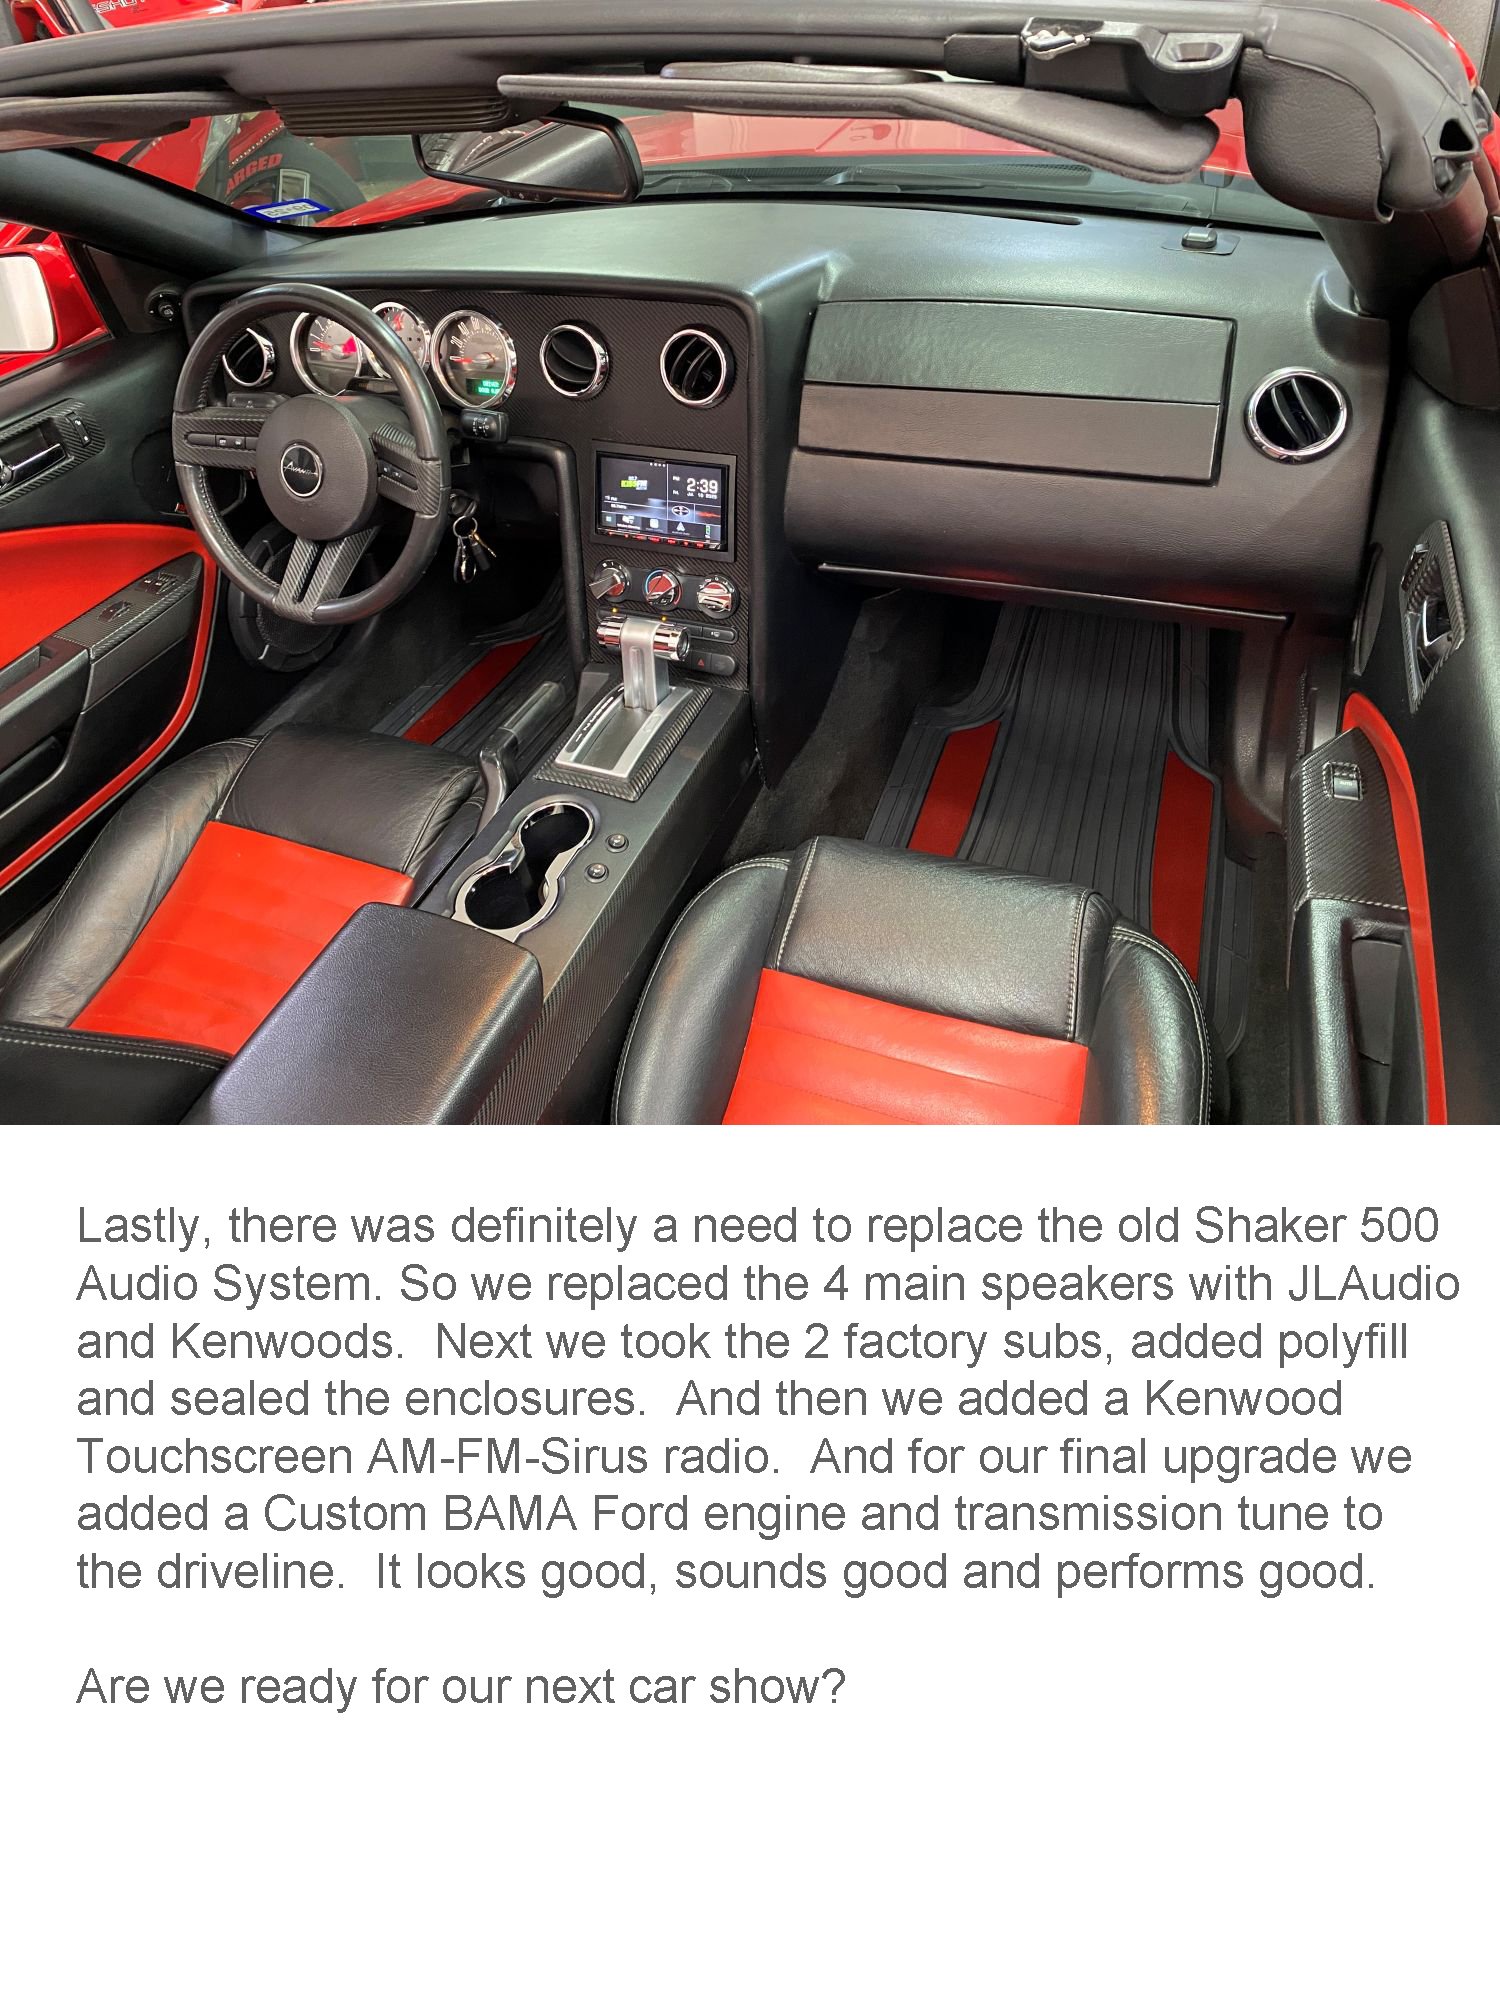
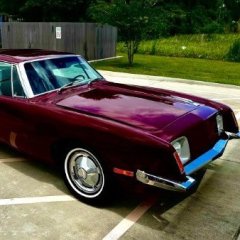
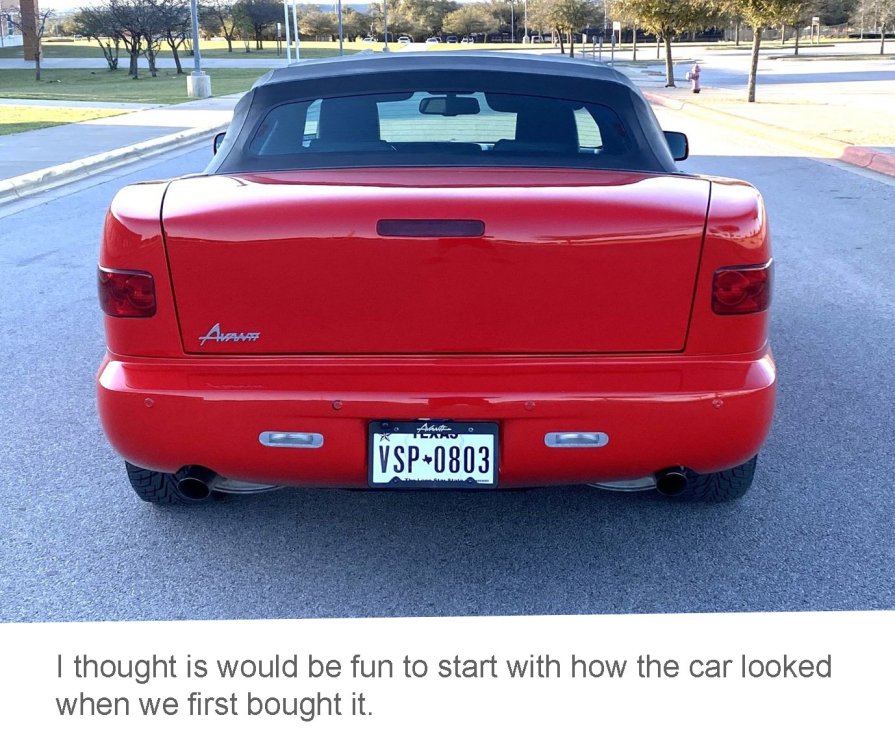
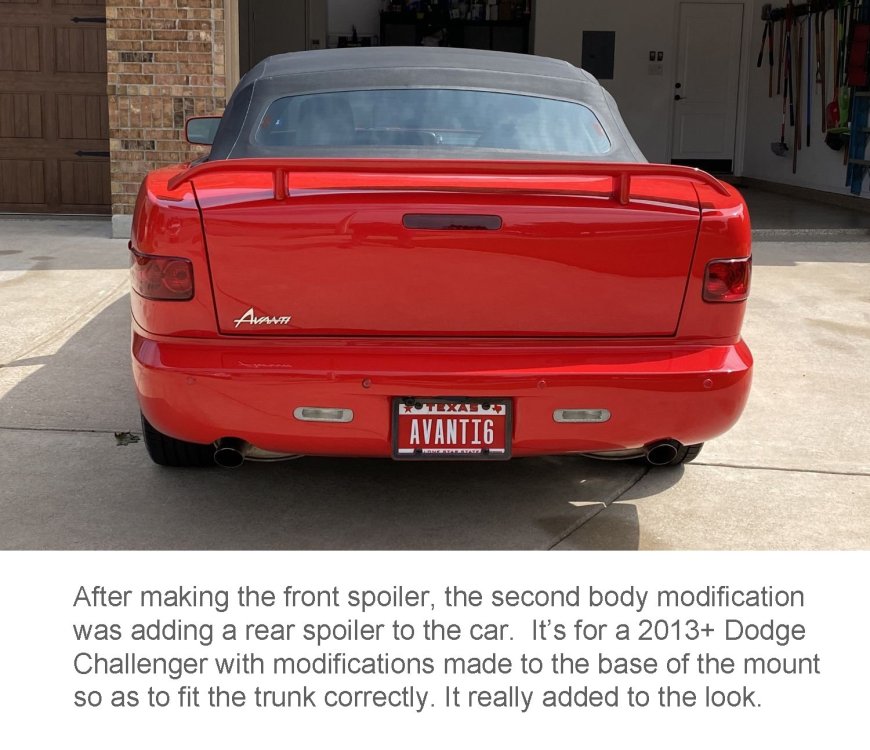
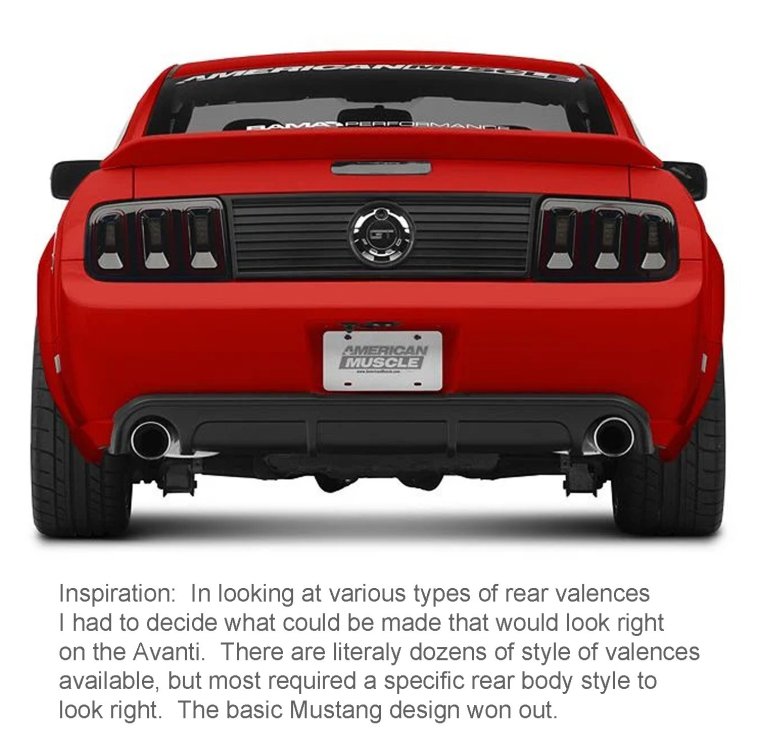
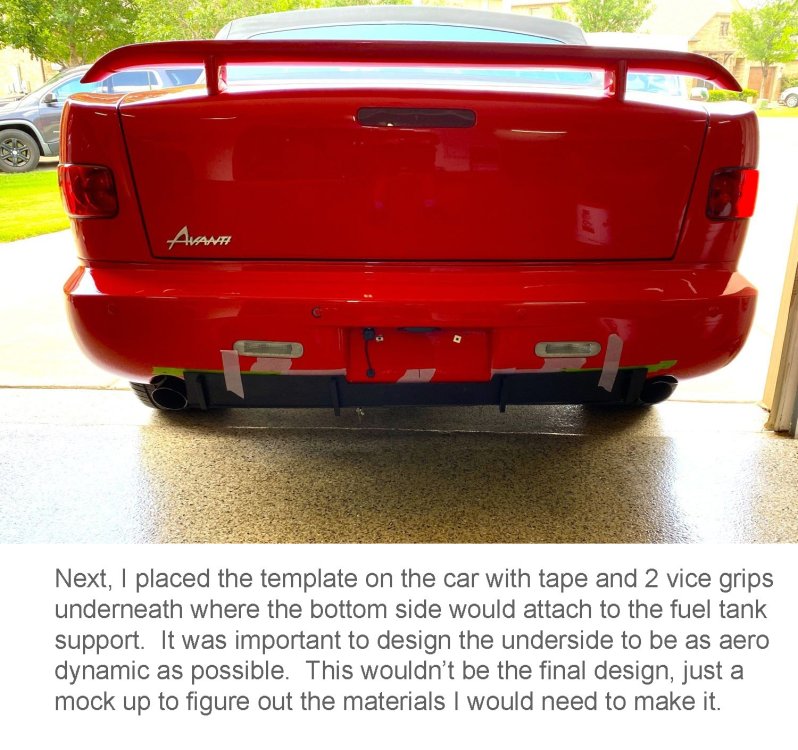
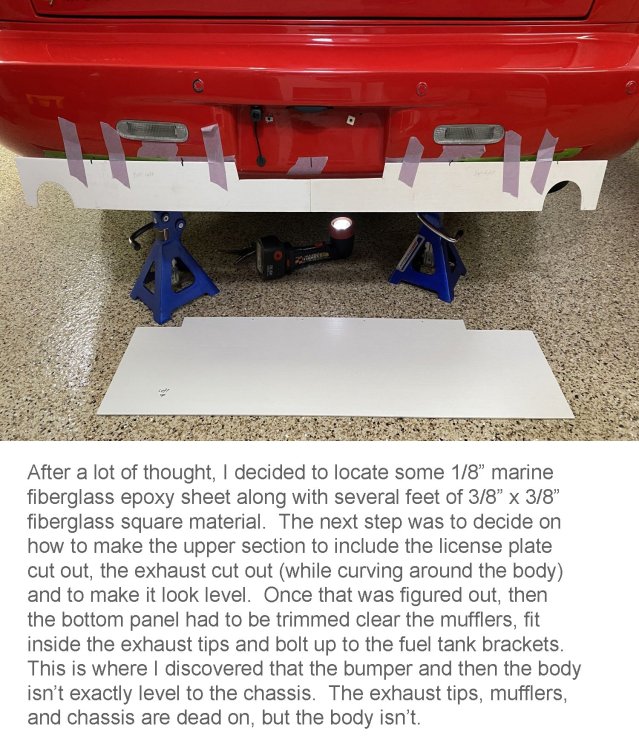
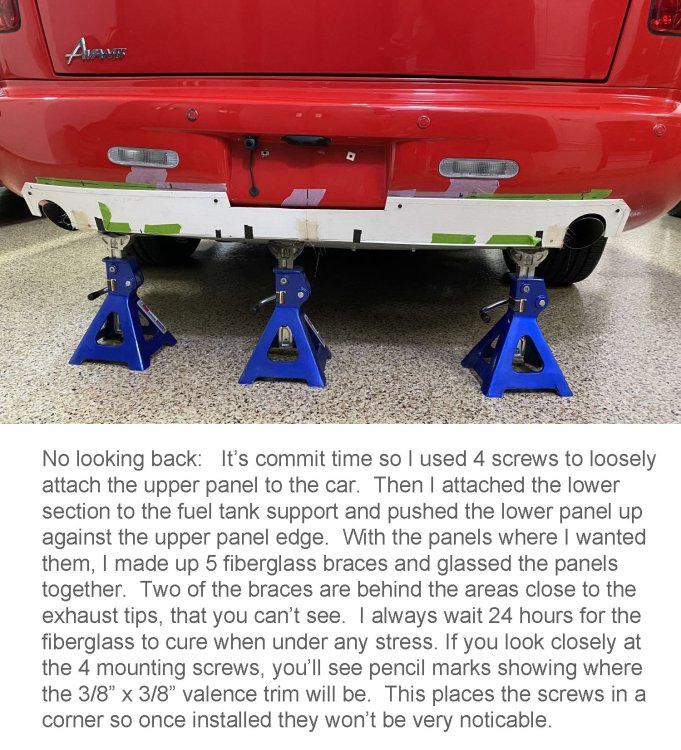
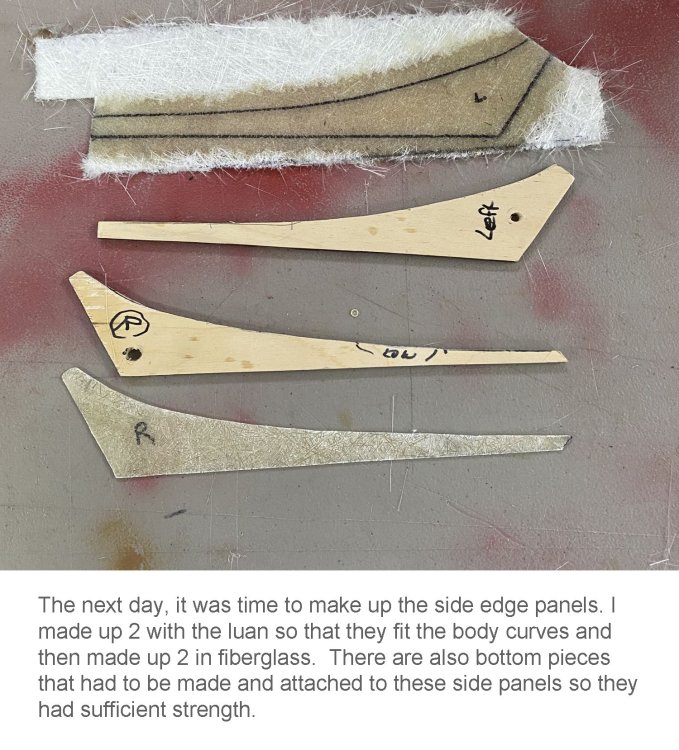
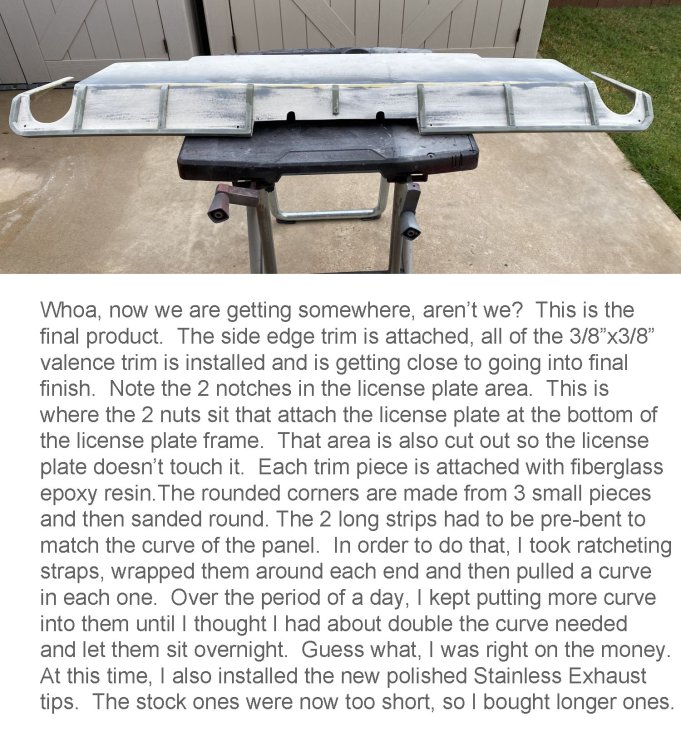
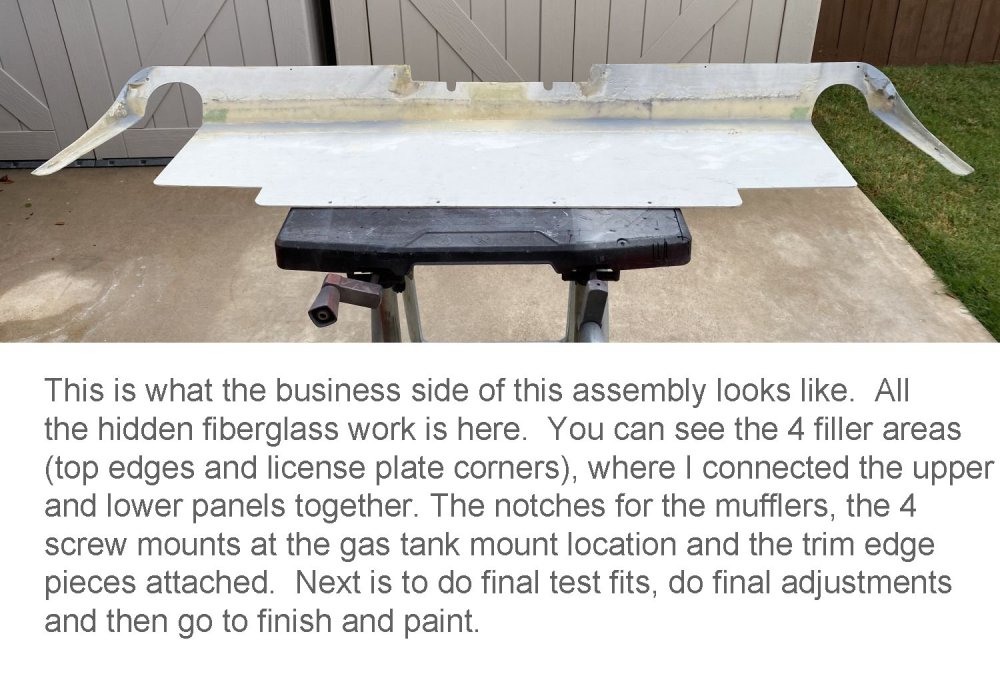
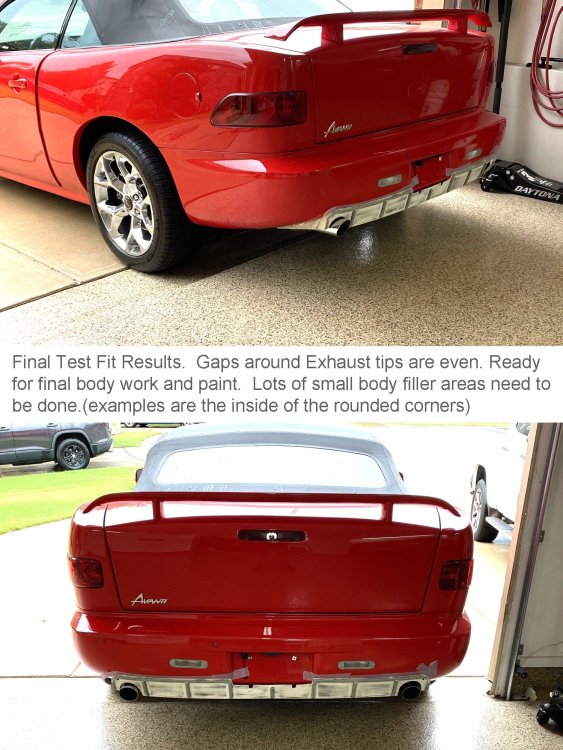
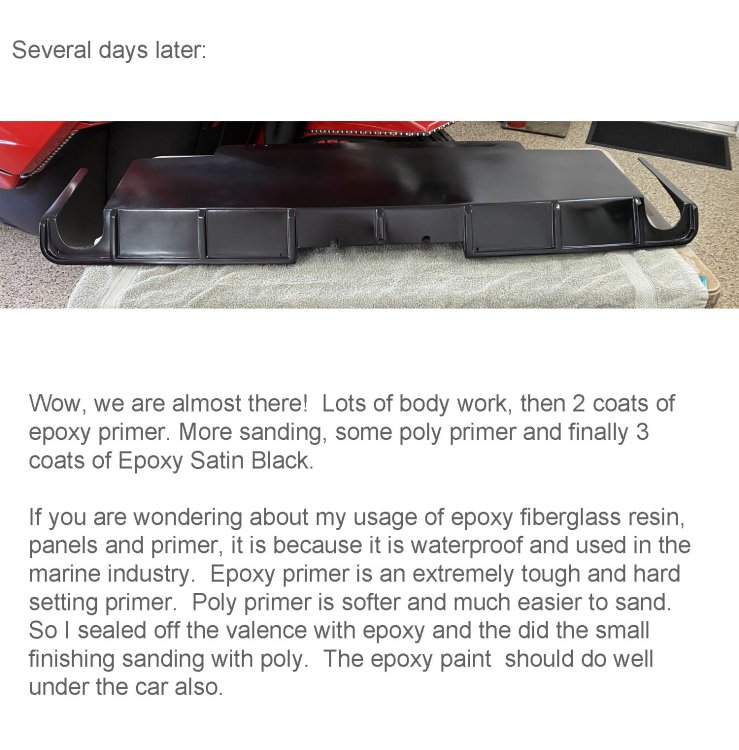
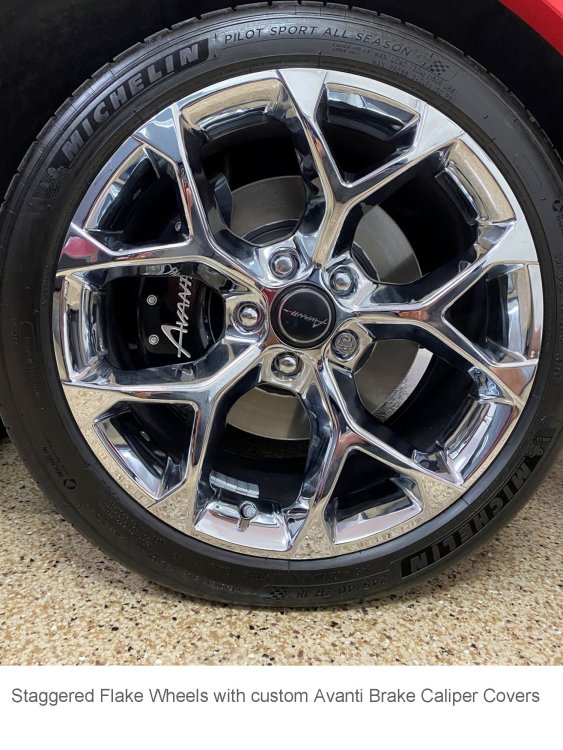
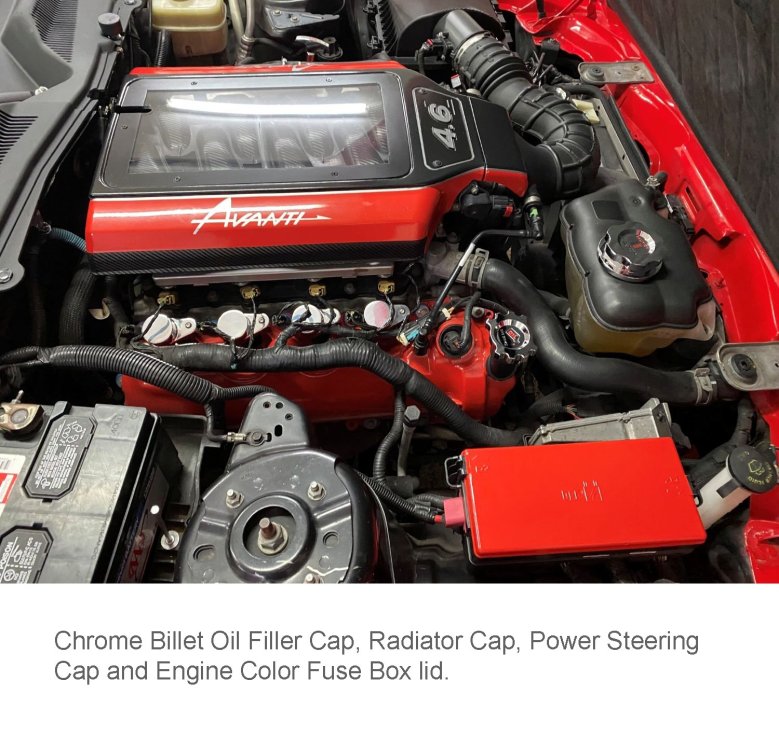
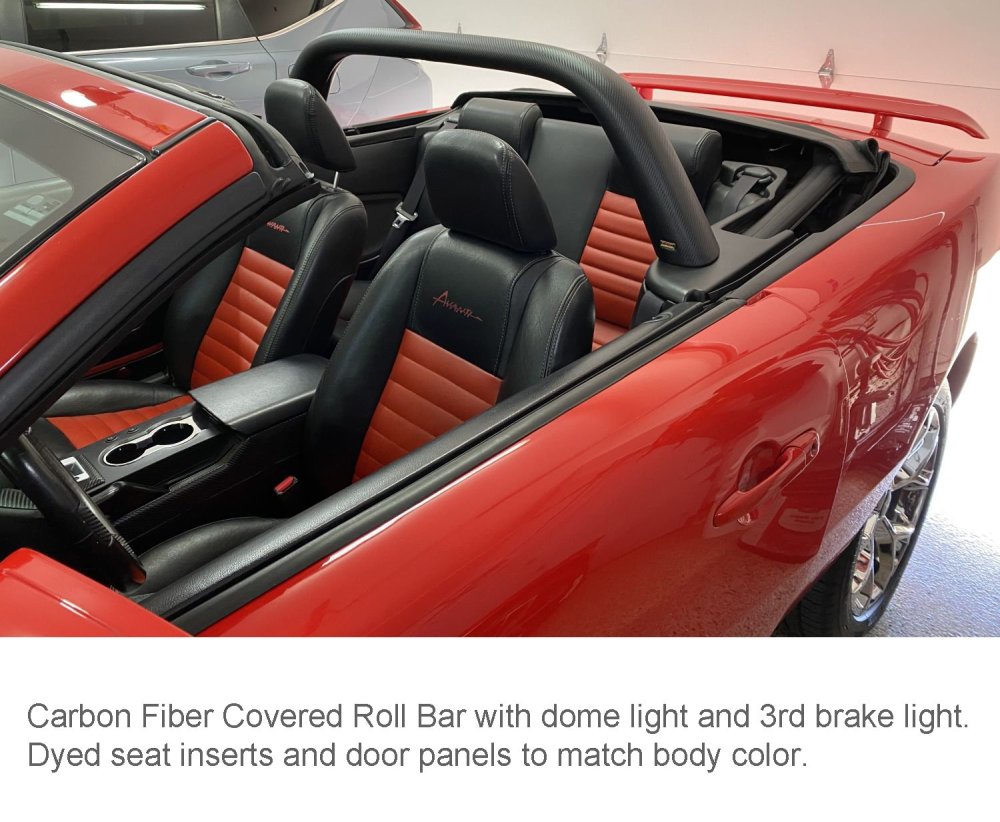
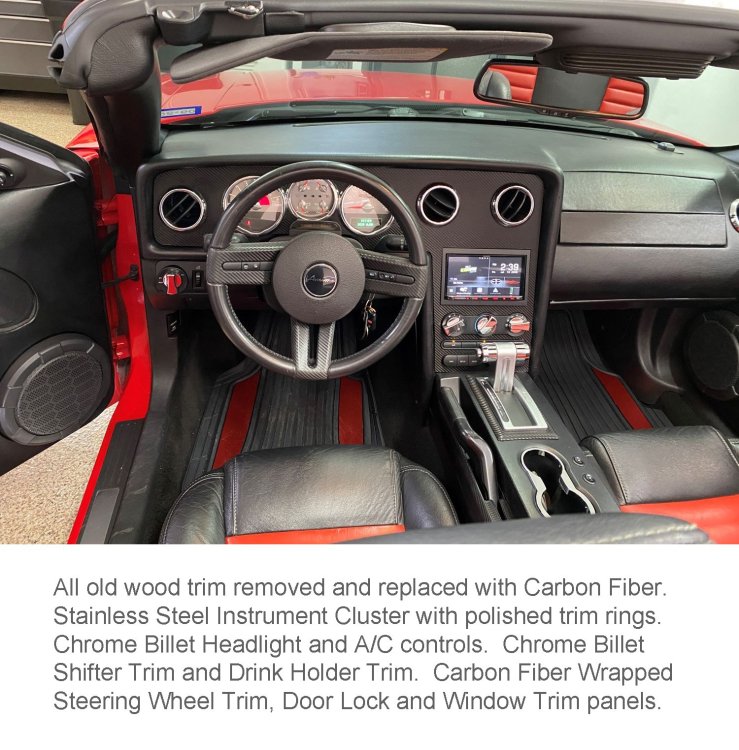
We bought our 2006 Avanti GT Convertible in 2024 from the original owner and it is #11 of approximately 28 cars made in 2006-2007 on the S197 Mustang chassis. I immediately began updating the car to what I consider more modern standards and have posted most of the changes during this year. For our final and most intensive improvement, this post will show you what was done and at the end, I’ll highlight this car’s build. I hope you enjoy it! The modifications to the cars body started with our attending the Mustang Week event in Galveston Texas last April. With hundreds of Mustangs there, I was able to see all of the things that could be done to our car and set out to do each one of them. We got a lot of attention with our “Avanti Mustang” there and next year we are going to blow them away. OK, I’m going to highlight our first 2 body mods and then move into our last, a custom-made lower rear valance.


-
Anybody have a damaged Avanti radiator shroud. I’d like to do some cutting and reforming but don’t want to cut up the good one on my car.
-
Thanks! I'll keep you posted. I'm not going to put it off for 50 years like I did with the fawn steering wheel.
- Yesterday
-
Very true….. Good luck with the project!
-

Need part number or source for steering sector shaft seal
AD replied to Jim S's topic in 1965-83 Avanti
Check this out, from Bob Johnstone's Avanti site: https://studebaker-info.org/Tech/Parts/2013/timkin50151s.html -
72 Avanti has a line coming from the fuel line drain tee.
AD replied to Jim S's topic in 1965-83 Avanti
Yes, there is a filter inside the Q-Jet carb. There was also originally an external fuel filter with a return line to the tank. (by the way this return line to the tank is essential for preventing vapor lock when it's hot). Your '72 Avanti II was also originally equipped with with a charcoal vapor recovery canister as part of it's EPA emissions equipment. This would've been mounted on the right side of the engine along the inner fender. These also had fuel lines and hoses between the canister and the carb, and the canister and the tank. Someone on the past 53 years may have removed it, and one of these line could be the source of your leak. -
Yes, the degree of difficulty will rise on the walnut wheel. However, as with every other aspect of life, Google is your friend. A search results in several "How To" links to restoring and replicating wood grain on plastic steering wheels used on the Avanti and several GM cars built in the 1960s. It just takes time and that's why the folks who restore wheels charge what they do. Materials required are inexpensive. It's the hours of labor that jacks up the cost.
-
I’d imagine trying to replicate the ‘walnut’ paint look would be a real challenge… I’ve seen, on a few of the later Avantis, that Studebaker used a ‘straight brown’ color on the steering wheel on a few of their ‘walnut grain dash/console cars.
-
Resurrecting an older thread…. Years ago I saw a photo of an Avanti R2 engine whose owner had somehow installed a dual groove idler pulley to the right (viewing engine from the front) and slightly higher than the factory iron water pump pulley…….. This took all supercharger belt pressure off of the water pump bearings… although it required custom bracketry and longer supercharger drive belts…..Interesting modification I thought! PS… water pump was still turned by alternator belt.
-
Thanks, filler material is two part slow drying epoxy. Drying time: 24-48 hours for best results for shaping, grinding, and sanding. Paint is primer, base coat, and clear coat. Color matching and painting were both done by a local auto body shop. I can't weld and I can't paint. But, after a lot of research and YouTube video watching I felt I could do the rim rebuilding. All of the "grunt" work prior to painting was done in my garage. If you do it yourself, plan on many hours with a Dremel tool, power sander, mini file set, and progressively finer sand paper. I'll be working on my walnut Avanti wheel next.
-

Need part number or source for steering sector shaft seal
Guy replied to Jim S's topic in 1965-83 Avanti
I was able to get seals from local supplier ( bearing,belt, and chain) -
It's one step forward two steps back. My steering gear box was dry so I filled it. Today I woke up to a puddle of oil under the car! Does anyone have a source or part number for the sector shaft seal on a 72? I couln't find it on any of the regular Studebaker parts sources. Thanks. (also my overheating problem is resolved. Holding steady at 170 degrees!)
-
72 Avanti has a line coming from the fuel line drain tee.
Jim S replied to Jim S's topic in 1965-83 Avanti
Thank-you. I figured that was the case. My 87 (on the Monte Carlo base) had that pump. I wanted to install it on the 72, but there is not enough clearance for it on the Studebaker frame so I had to go with the smaller pump. -

72 Avanti has a line coming from the fuel line drain tee.
ronmanfredi replied to Jim S's topic in 1965-83 Avanti
Some of the fuel pumps had 3 connections on them. The smaller push on fitting was for the return line back to the fuel tank. It is possible that someone installed the incorrect fuel pump that does not have the return fitting on it. If so, you will need to plug it off. -
Very nice job! What did you use as the "filler"? And what did you use to paint it.......... rattle can........single stage.........Base coat clear coat? Or..........
-
Try it sometime with your Avanti. Just keep both hands on the spokes and not on the rim. I drove it that way for a while until I got the replacement later style walnut wheel. Kind of like flying an airplane. 😎
-
Amazing that the fellow you bought your Avanti from was steering it using just the two spokes… I just can’t picture that!!
- Last week
-
72 Avanti has a line coming from the fuel line drain tee.
Jim S replied to Jim S's topic in 1965-83 Avanti
This is the Chevy motor we are taking about now. It has a Quadrajet carburetor with the internal fuel filter. There's only one line from the fuel pump to the carb. So I don't see where a return line would connect? -
I believe that individual assembly techs did some things their own individual way rather than some official standardization. I’ve seen power trunk releases under the dash on the side of the steering wheel and some on the right side. The same might be at play in other assembly areas.
-
Thanks! In my case, the welding was done by a retired high school metals shop teacher who also taught welding at the local junior college. The rest of the rebuilding/filling/grinding/sanding was my DIY project. I figured I'd give it a try and couldn't ruin it more than it was when I got it.
-
72 Avanti has a line coming from the fuel line drain tee.
AD replied to Jim S's topic in 1965-83 Avanti
The T-fitting on the frame should have a pipe plug in the bottom of it, which can be removed for draining the tank. On the passenger side of the engine, there should be three lines at the fuel filter: - one line going into the filter -one going from the filter to the carb -one smaller line going from the filter back to the tank. Is it perhaps this smaller return line you're looking at? Sometime in the past someone may have made a "modification" that you may need to undo.