


brad
-
Posts
1,076 -
Joined
-
Last visited
Content Type
Profiles
Forums
Events
Posts posted by brad
-
-
Well, there is a delete plate listed in the parts catalog! So, I'll gander a guess as to true, they were an option, just like every other thing!
-
There is no secret number on the Avanti rear crossmember
-
the lower nylon bushing
-
No, three bolts
-
nope they were same as other Stude V8s
-
false, there are 5
-
These are the Halibrands as used on Studebakers, No others were factory issued as an option
http://i74.photobucket.com/albums/i280/Swifster/HalibrandWheels-1.jpg
-
Those are good looking wheels but are not the "kidney bean" type that was offered back in 63-64.
The ones Factory Five is offering look more like the ones you'd find on a Cobra...which is what Factory Five makes.
Anyone have a lead on more correct Halibrand reproductions?
I don't know what you mean as "More Correct" The ones offered on Studebaker were the very same as offered on some Cobras and look like the FIA Pin drive, but have lug nuts.
-
Avanti Grey is pretty rare, and not often seen. When done in a modern base/clear formulation it really pops.

-
Updated pics with belts and stuff.
https://www.facebook.com/BezAutoAlchemy/photos/pcb.766499293369347/766499140036029/?type=1&theater
-
If you can find a Parker store they will have or get what you need, and make up the hoses.
www.parker.com
-
Be sure the filler neck is "clocked" the proper way, or the ears on the cap will hit the gas door. someone may have replaced the filler neck hose, and installed the filler neck in the wrong position.
-
-
What car??......some fiberglass POS made by some German manufacturer in Canada.......with an Italian sounding model name. Gimme a while, It will come back to me.
-
Yes, it's just keeping dirt out for now....until I make the carb bonnet.....There are two carbs under there
 .
.That's right an R4 with a supercharger!!!! (not R4 compression)
-
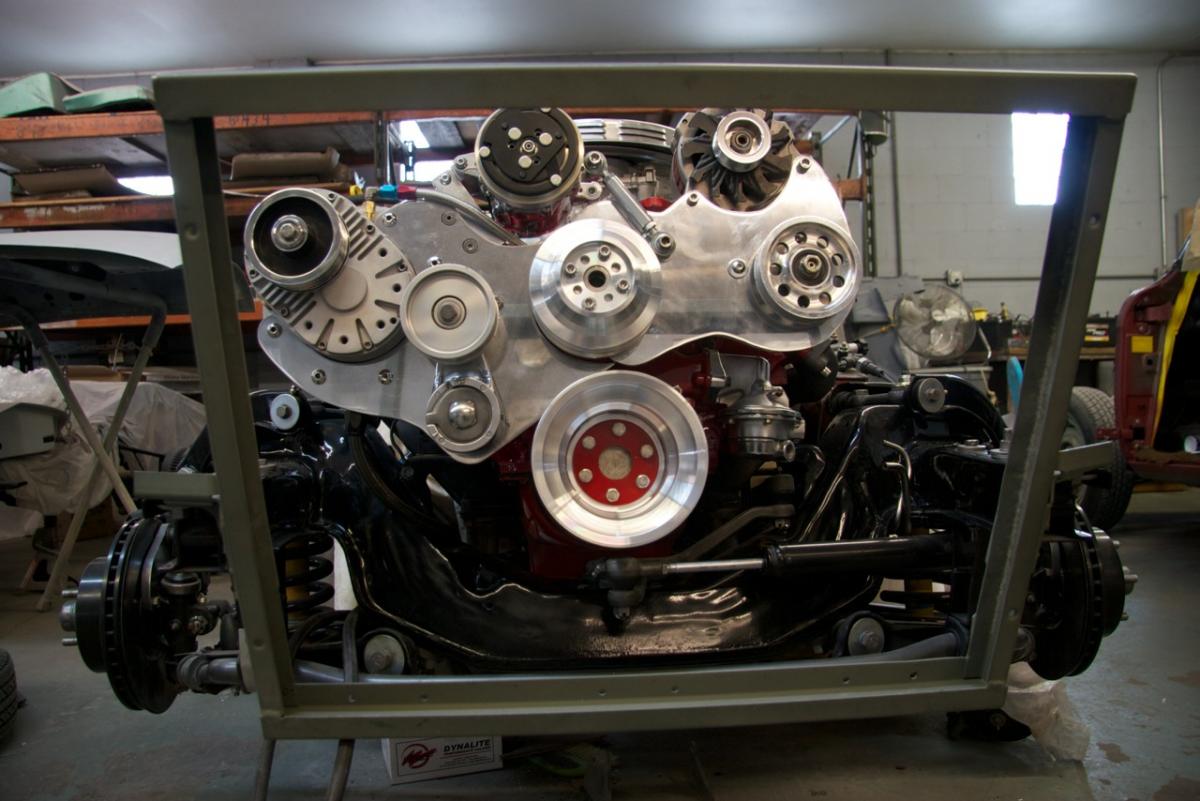
Yes, the belt goes from the crank, over the tension pulley, over the blower, and over to the water pump, back down to the crank. There is a second belt behind the front belt that goes from the crank up to the AC clearing the water pump. From there over to the alternator, down to the power steering pump, then back to the crank.
If the supercharger gives trouble you can use a shorter belt and bypass the AC and run over the water pump over to the alt, and power steering.
I would post more pictures, but I keep getting the message the file is to large to upload. Lew can help me later.
-
Making a serpentine supercharger and accessory drive for this one. Has AC too!

-
The boost will be about the same as an Avanti blower. Increasing spring pack pressure to get more boost would shorten the blower life dramatically. The impeller can be shimmed a bit closer to the srcoll cover for a little more boost, The impeller can be changed to a newer one with the curved intake tips. You can change pulleys to spin it faster....(still shortens blower life), or a VR-4 blower with the vastly improved impeller, If you leave the ball drive behind and persue the Novi gear drive blowers, up to 20lbs boost is available.
Brad
-
There is a wick . A cigarette filter makes a good one.
-
R3/R4 blocks were NOT special castings!!!! They WERE sonic tested for core shift so they could be bored out .093 safely. The heads were going to be the stock offerings on the 320, and 340 planned 1967 model year. They were not special race only offerings designed for the 289/304.5 cu in engines.
All the R3's I have seen or rebuilt had the short studs on the passenger side manifold and no heat riser. Including the first factory R3 Avanti
-
Stock factory supplied superchargers on Studebakers were black. Orange units were Paxton supplied factory replacements or warranty replacements.
Since they are visually more appealing many (including me) paint them orange for more bling.
The white blowers were for 67-68 Shelby products. Blue ones were different year Ford offerings.
-
I supplied Greg with basically NOS R3 Forged True pistons. The R5 pistons were angle milled on the top to reduce compression.
This is the repaired original block. Only the oil pan rail was damaged, not the main webs, or water jacket. You can follow the build in the AACA forums, and some in the SDC forum.
-
There wasn't a carburetor to be found on the R5! they used an experimental fuel injection system from Bendix. It won't matter how many "branches " the boost travels through, unless the displacement changes, boost will remain the same. Boost is volume in vs volume used.
-
Don't forget the secondary carb is the front one. The reason being the idle circuit on the rear carb is closer to the center(of the manifold) for better distribution


Trivia!.....Towing Avantis
in Avanti Trivia
Posted
Well, are you talking about the tie down hooks on the lower control arm shafts?