Zedman
AOAI Forum Members-
Posts
279 -
Joined
-
Last visited
Content Type
Profiles
Forums
Events
Everything posted by Zedman
-
Th Coefficient of thermal expansion for Aluminium/alloys is around 0.0008" per degree Celcius - That's nearly a thou every degree. From that standpoint I'd wonder whether Stress cracking would be a valid problem.
-
Hi Ted- I'm very interested in doing the same and I will be keen to hear of your results. I believe that most of these carbs come with a selection of jets and Metering Rods. There is an excellent article by a well respected Rochester rebuilder by name of Lars Grimsrud here.... https://studebaker-info.org/Tech/Qjet/tuneaQjet.pdf . This is a must read IMHO- it is not just a matter of rejetting, but of the CFM range of the carb as well. As I have a 305 engine, I only need a 600CFM range. Many of the carbs offered are 750's for much larger engines. Many years ago he took on a Chicom Quadrajet copy for a customer and went through it in great detail to get it running right. Metering Rod and Jet sizes were covered. The whole topic was covered on line with heaps of photos. This is here.... https://www.corvetteforum.com/forums/c3-tech-performance/4523417-new-chinese-q-jet-inspected-evaluated-and-tested-the-complete-results.html I'm pretty sure Alcohol blended fuels will more than likely require slightly larger jetting. Good luck-
-
Hi All- I've followed this thread with a good deal of interest because I will be putting RQB3269 back on a new Frame soon. The matter of shimming has been an interest to me. This thread prompted me to look at my reference photos and the 1 1/2" x 2" x 1/8" steel Shims at the rear of the Hogtroughs were stacked 5/8" and at the Firewall they are a stack of six BIG 1/4"plates giving 1 1/4" lift above the horseshoe shaped Stand. this means there was a 'rotation' upward at the front end. Interestingly these all fall within Group 2103-116 but exist as three different part numbers... 287685, ('oldie'- listed in 1959 parts book as an engine mount 1/4" spacer in group 0101-40), 284488 (I'll assume these are 1/8") and an additional different one at the top of the stack of longer length to provide better bearing on the Fibreglass floor which I will only assume might be 1336199. So all up, I don't see a 2" lift even at the front end. 🙃 Dont'cha just love this forensic stuff !
-
Source For Replacement Rochester Quadrajet on 1969 350
Zedman replied to TED DIMON's topic in 1965-83 Avanti
I believe these are the Chicom copies that receive various comments online. The good thing about them appears to be the bellcrank arrangement for the throttle- it appears to be the same as the originals and a drop-on-fit, plus the correct orientation of the fuel inlet (skewed to one side). These can be had much cheaper if you buy them online on Temu and Amazon- 'Bricks and Mortar' stores need to put their profit margin on top. Beware there are two CFM models... the ones for large capacity engines (750 CFM) are actually way cheaper than the ones for pedestrian 350's and 305's (650 CFM) but on the whole pretty inexpensive all around. Most of 'em even come with a kit of various jet sizes. I'm just about done trying to find a Quaddie with electric choke and the correct Bellcrank here in Oz, and despite my reservations, will probably end up with a Chicom. https://www.temu.com/ul/kuiper/un9.html?subj=goods-un&_bg_fs=1&_p_jump_id=894&_x_vst_scene=adg&goods_id=601100904891709&sku_id=17597587194867&adg_ctx=a-3935607e~c-5992c87d~f-d01a0905&_x_ads_sub_channel=shopping&_p_rfs=1&_x_ns_prz_type=-1&_x_ns_sku_id=17597587194867&_x_ns_gid=601100904891709&mrk_rec=1&_x_ads_channel=google&_x_gmc_account=5403696277&_x_login_type=Google&_x_ns_gg_lnk_type=adr&_x_ads_account=4525514603&_x_ads_set=22941029271&_x_ads_id=184778158539&_x_ads_creative_id=771606302339&_x_ns_source=g&_x_ns_gclid=Cj0KCQiAx8PKBhD1ARIsAKsmGbcB05R9dI16NMfleCmHQKElaxZo0BE_tzbjNSo0VAAn4A1ylDNg9KQaAqp9EALw_wcB&_x_ns_placement=&_x_ns_match_type=&_x_ns_ad_position=&_x_ns_product_id=5403696277-17597587194867&_x_ns_target=&_x_ns_devicemodel=&_x_ns_wbraid=Cj8KCQiAx8PKBhC9ARIuAFZ07iBPfOFdM3dr7Lir434E1f-8SuBb1PFTHqH5JXFnMms_bG11Ztf1Uo4kohoChz8&_x_ns_gbraid=0AAAAAo4mICEP_ciMPSaknqRKALVeqFnjt&_x_ns_targetid=pla-2437418753229&gad_source=1&gad_campaignid=22941029271&gclid=Cj0KCQiAx8PKBhD1ARIsAKsmGbcB05R9dI16NMfleCmHQKElaxZo0BE_tzbjNSo0VAAn4A1ylDNg9KQaAqp9EALw_wcB -
Ahhh- so that's the masonite peice... I have counted about 8off 1/8" shims at the outrigger mounts under the hogtroughs of my '18 Avanti II so I figured 2" is too much and would say False to the original question.
-
I reckon the Fan Shroud might well have needed tweaking so Ill say yes to that, but two inches of shim..... I'll say no to that.
-
My compliments SCPO-PD, you are doing a great job ! Great photos . On my own Avanti II, found the little bellows/seal where the brake pedal plunger goes through the Firewall to be hard and decided t replace it, seeing I'm eventually painting the firewall. You're lucky... I can't get the windscreen washer bottle off the top of the firewall.
-
Hi AG-R3. Thanks most kindly for your assistance- this is exactly the information I'm requiring. Regards.... 🙃
-
I have an '81 Avanti II with the dreaded Computer Controlled Carb/ignition/TC lockup controls. I expect the Oxygen sensor is probably stonkered given its age and thought I'd better research a replacement. This is proving more daunting than I thought. To cut to the chase... Does anybody have any knowledge of a direct replacement for the two-wire O2 Sensor on these cars?
-
Hi Ronmanfredi- Do you have any advice on how to remove the headlining/upholstery et-al ?.... photos , anything ? I need to do this job too and any prior knowledge would be really helpful. 😕 To be honest I have considerable rust damaged parts up there and I might end up with a removal instead of a restoration.
-
Not really a trick- hard work actually, but it works...... A half of a 24TPI High Speed Steel hacksaw blade with a bit of rag taped up for a comfortable handle. Remove the centre bushing and rubber. I use a little propane torch to heat the tube and burn the rubber enough so you can rip the tube out with vicegrip pliers. Once that's out, get really comfortable and use the hacksaw blade to make a slit inside the tubing bore along its entire length. It's not easy put patience will reward you. Eventually the tube can be made to collapse slightly and it can be driven out with a drift. It really helps if you can access a lathe and make up a drift to suit with a piloted end that will fit loosely into the Bush bore and a nice square shoulder to push with. Before pushing new Bushes through DO give the Frame Bore a little cleanup with abrasive cloth or you will likely have the new bush fight you.
-
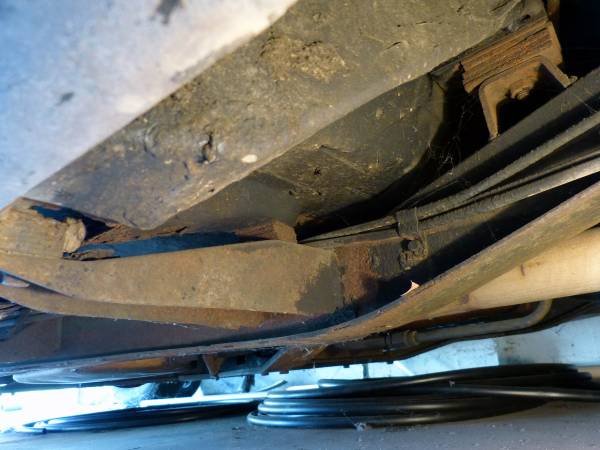
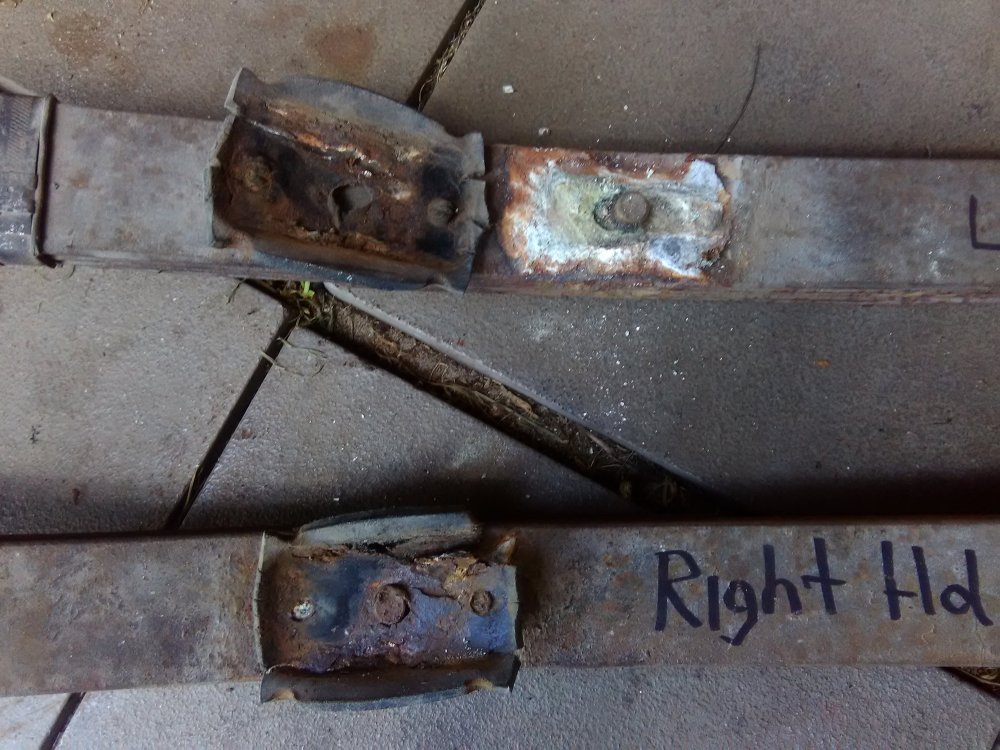
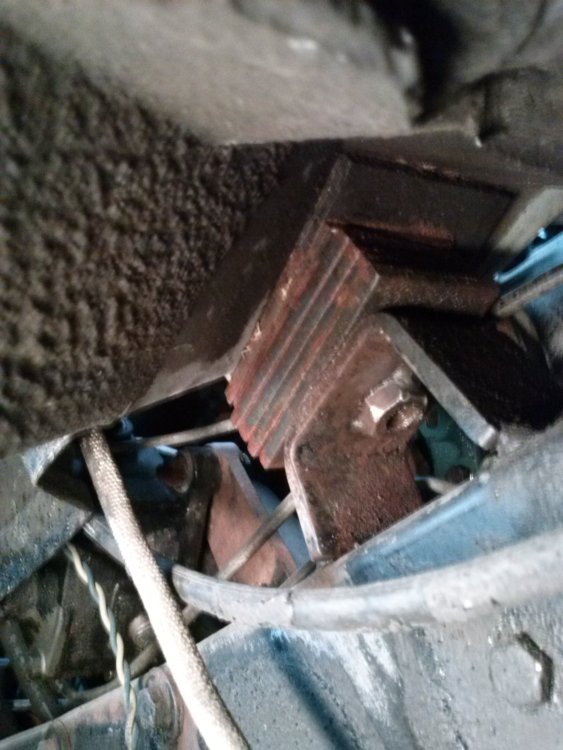
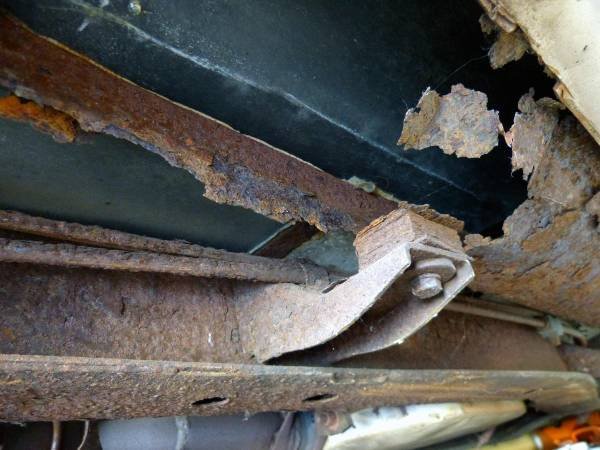
Here are a couple of photos of my '81's Rear Springs as removed. The general condition of the Rubber pads and Aluminium Wedges is clearly very poor due to age and Corrosion from salty roads. One wedge was nothing but crumbly muck. I'd imagine your vibration could be attributed to something like this. I will be replacing the Wedges with new ones once I have the car assembled again and I can properly measure the Pinion Angle. There was only enough of the 'good' wedge left to measure an approximate 2 degree tangent. The rubber Insulation pads are available from SI- Page 261 of the current catalogue ... Part no 554620. Wedges are not listed, but are available elsewhere on the Web.
-
Absolutely ! Still a tough job but better done than not. I find I have to split the Tubing longditudinally with a hack saw blade in order to remove it... never had much luck pressing 'em out.
-
Hi 64studebakerAvanti- Yeh lots of shims but it is an Avanti II with a Chevy engine so I wonder if that's why. About an inch at the Hogtroughs. When I put the body back on I will be looking as to whether I might eliminate a few, perhaps. Your comment about Rubber insulators for the Mufflers - are these rubber Suspension Straps for the restraint of the Exhaust system or something else? I have recently had a full dual Exhaust bent up and fitted to this chassis buildup.
-
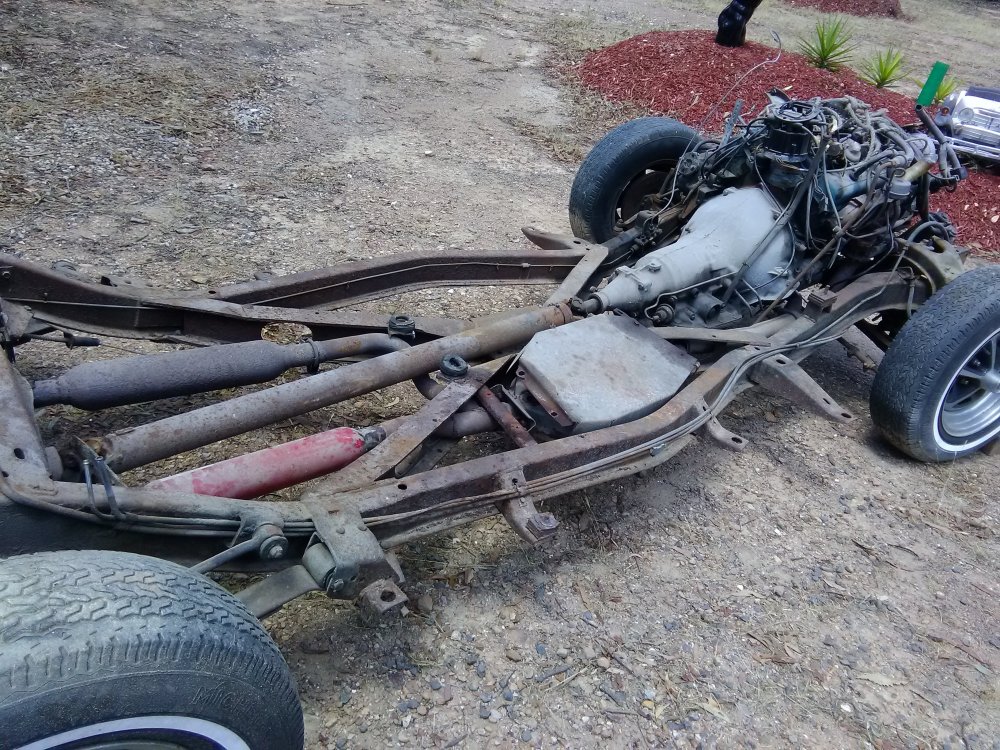
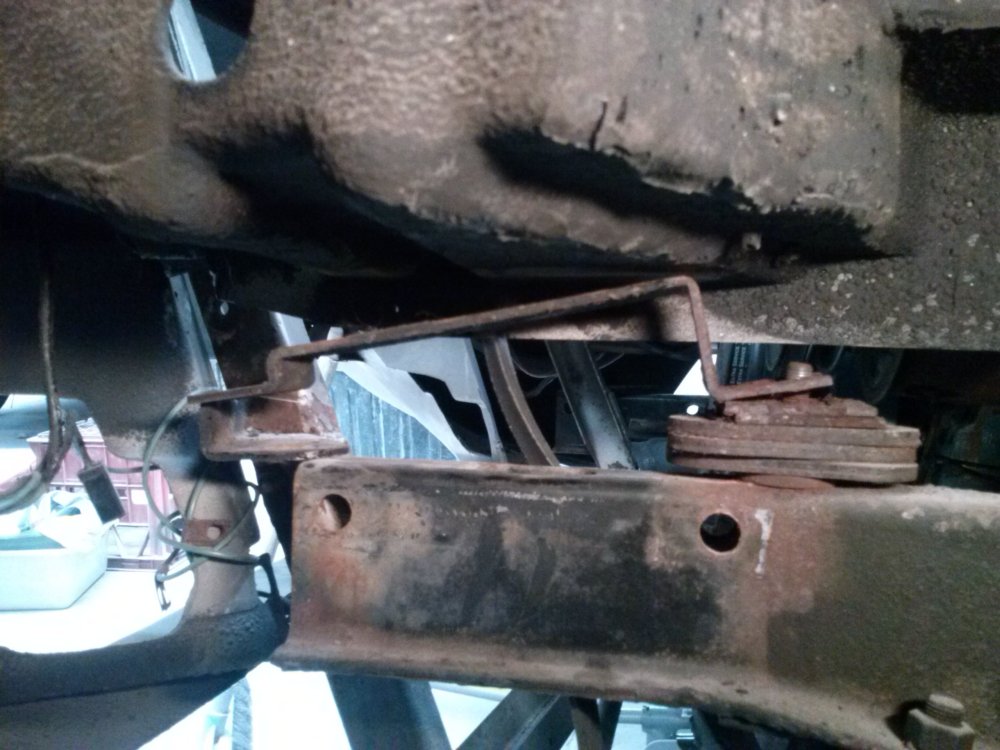
Doing a Frame-off rebuild is a challenge, but boy oh boy, the satisfaction is so rewarding. . Not to mention the ease of buildup because you can get at everything because it's right in front of you. The feedback you are getting is dead accurate but I'll post some photos for your benefit. The following comments and photos relate to my 1981 Avanti II The 1/8" approx rubber 'tyre sidewall material' live up on the Crossmemeber above the Rear Axle as shown in the picture. These were not bolted- rather just taped on. I think these were an anti chafe measure There are two Rubber Doughnuts (water splash mitigation?) interposed between the upper X Frame rails and the body where the Seat Belt bolts go through At the 'A" pillar/Toeboard there are a stack of large 1/4" thick shims- the top one of these is longer to offer more contact with the fibreglass and is not shown that way in one photo, but is in a closeup.. At each Body mounting along the Frame there is a stack of 1/8" STEEL Shims 1 1/2" x 2" (and some thinner ones for fine adjustment) There is a STEEL shim at the rearmost tubular steel crossmember pad- mine only had one of 1/8" and it measured approx 1/12" x 3" And just in case you don't have one, (add one !) there is a Battery box Reinforcement bar up front and on the left top Frame The photos here should show all of these details...
-
Source For Replacement Rochester Quadrajet on 1969 350
Zedman replied to TED DIMON's topic in 1965-83 Avanti
Hi Ted- I'd strongly suggest a total rebuild of your original by a well experienced technician. I'm looking for one too, because I'd like to eliminate the Computer controlled unit one day, but I dont want different Throttle Bellcranks to the original and I'm not having a lot of luck finding that. I may relent eventually and try a Chicom Copy... -
Dwight- I bought a Steering Coupler Rubber that is the equivalent of a Dorman 31000 to replace my original. Low priced and fitted ok. Caveat Emptor.
-
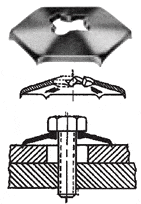
Hi 64studebakerAvanti.. Try here.... https://www.wclco.com/lock-washers/toothed-lock-washers/pyramidal-type-lock-washers/
-
I dug out my original old mounts (I'm resistant to chucking things away) ... There is an embossed number on the rubber - 330973 The spacing in between the bolt-hole 'Ears' is exactly 2 5/8" What is important and I see advertised, is that they fit corvettes from 1972 to 1984. They are the safety "Locking" type mounts. The ones I replaced were exactly the same as the new ones- these feature the extra 'Spacers' in between the Bolt Ears. They are in the chassis at this time so I know they fitted. On further research, I'd recommend your looking at this site https://tech.corvettecentral.com/2011/02/introducing-correct-c2-c3-motor-mounts-from-corvette-central/ I hope this helps.
-
Thanks for that idea and the TC lockup info, MFG.
-
Brake pedal goes almost to the floor before brakes engage
Zedman replied to Jim S's topic in 1965-83 Avanti
Jim- I dropped the ball on the subject of Proportioning/Combo Valves, and forgot to mention what ALSO needs to be done.... If you have tried to bleed your brakes without the 'Special Tool' and the Shuttle Valve has indeed moved over- then you must RESET the valve manually (i.e. re-centre the shuttle). There should be a little 'pin' on one end of your valve, often covered by a rubber cover (just visible on the brass valve in the picture I posted). This pin may be sticking out somewhat, indicating the valve has moved over. You will need to push this back in otherwise the 'Tool' will not impinge on the groove in the middle of the shuttle. However, because your front brakes are operating, the shuttle valve will have moved inward. To help re center it, crack a bleeder on one of your Disc Calipers and give the Brake pedal a push. This ought to simulate a front brake "failure" and the shuttle valve ought to move the other way. One way or another, just ensure the Shuttle is centered before screwing the Bleeder Tool all the way in. Sorry for long explanations, but as an ex high school teacher, I know that you can't afford to throw doubt. -
Hi Ronmanfredi.... Yes, a kit is made by B+M but here "In the land down under" it's might pricey at $620AUD minimum. If and when the Computer fails, I will either bite the bullet for the above or fabricate a manually operated system that I can cancel by a tap on the Brake pedal. I need some help designing this but I'm looking at a simple instantaneous pushbutton through a relay for initiation and another Relay to disengage the latter through a switch at the Brake pedal.
-
Brake pedal goes almost to the floor before brakes engage
Zedman replied to Jim S's topic in 1965-83 Avanti
Thanks Jim- BTW what valve do you have and is it mounted on the left hand inner Frame Rail or is it up top with your Master cyl? If its a Kelsey-Hayes unit (like my old one) it will be OLD. I wasted a huge amount of time researching this obscure little bugger only to find it was likely to be pretty well stonkered. There are some parts for it but it not all, so it's not really worth it. I opted for the GM PV-2 valve and it was plentiful, cheap, Brass not Ferrous and a 100% bolt-up fit so long as you use some of the old fittings. Picture attached so you can see the similarities... -
Brake pedal goes almost to the floor before brakes engage
Zedman replied to Jim S's topic in 1965-83 Avanti
I think the use of a Combination/Proportioning valve in a disk+drum brake system is a worthy addition. I hope I'm not telling you to 'suck eggs', but one purpose of the valve is to redirect fluid to the rear brakes to avoid locking up the front brakes. the other purpose is to sense an open circuit, and then direct all fluid to the effective brakes- front or rear. The tool is used when bleeding.... you remove the brake warning light switch from the valve and replace it with a rigid pin that prevents the shuttle valve moving to either side (trying to redirect flow one way or the other). I had an obscure Kelsey-Hayes Valve on my 1981- I'm replacing it with a GM PV2 valve and its even a bolt-up fit with the old one. The valve came with the bleeder tool. See this video for a clearer explanation. I'll bet this is what is causing your problem.

