Zedman
-
Posts
288 -
Joined
-
Last visited
Content Type
Profiles
Forums
Events
Everything posted by Zedman
-
Dwight- I bought a Steering Coupler Rubber that is the equivalent of a Dorman 31000 to replace my original. Low priced and fitted ok. Caveat Emptor.
-
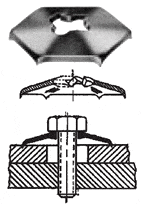
Hi 64studebakerAvanti.. Try here.... https://www.wclco.com/lock-washers/toothed-lock-washers/pyramidal-type-lock-washers/
-
I dug out my original old mounts (I'm resistant to chucking things away) ... There is an embossed number on the rubber - 330973 The spacing in between the bolt-hole 'Ears' is exactly 2 5/8" What is important and I see advertised, is that they fit corvettes from 1972 to 1984. They are the safety "Locking" type mounts. The ones I replaced were exactly the same as the new ones- these feature the extra 'Spacers' in between the Bolt Ears. They are in the chassis at this time so I know they fitted. On further research, I'd recommend your looking at this site https://tech.corvettecentral.com/2011/02/introducing-correct-c2-c3-motor-mounts-from-corvette-central/ I hope this helps.
-
Thanks for that idea and the TC lockup info, MFG.
-
-
Brake pedal goes almost to the floor before brakes engage
Zedman replied to Jim S's topic in 1965-83 Avanti
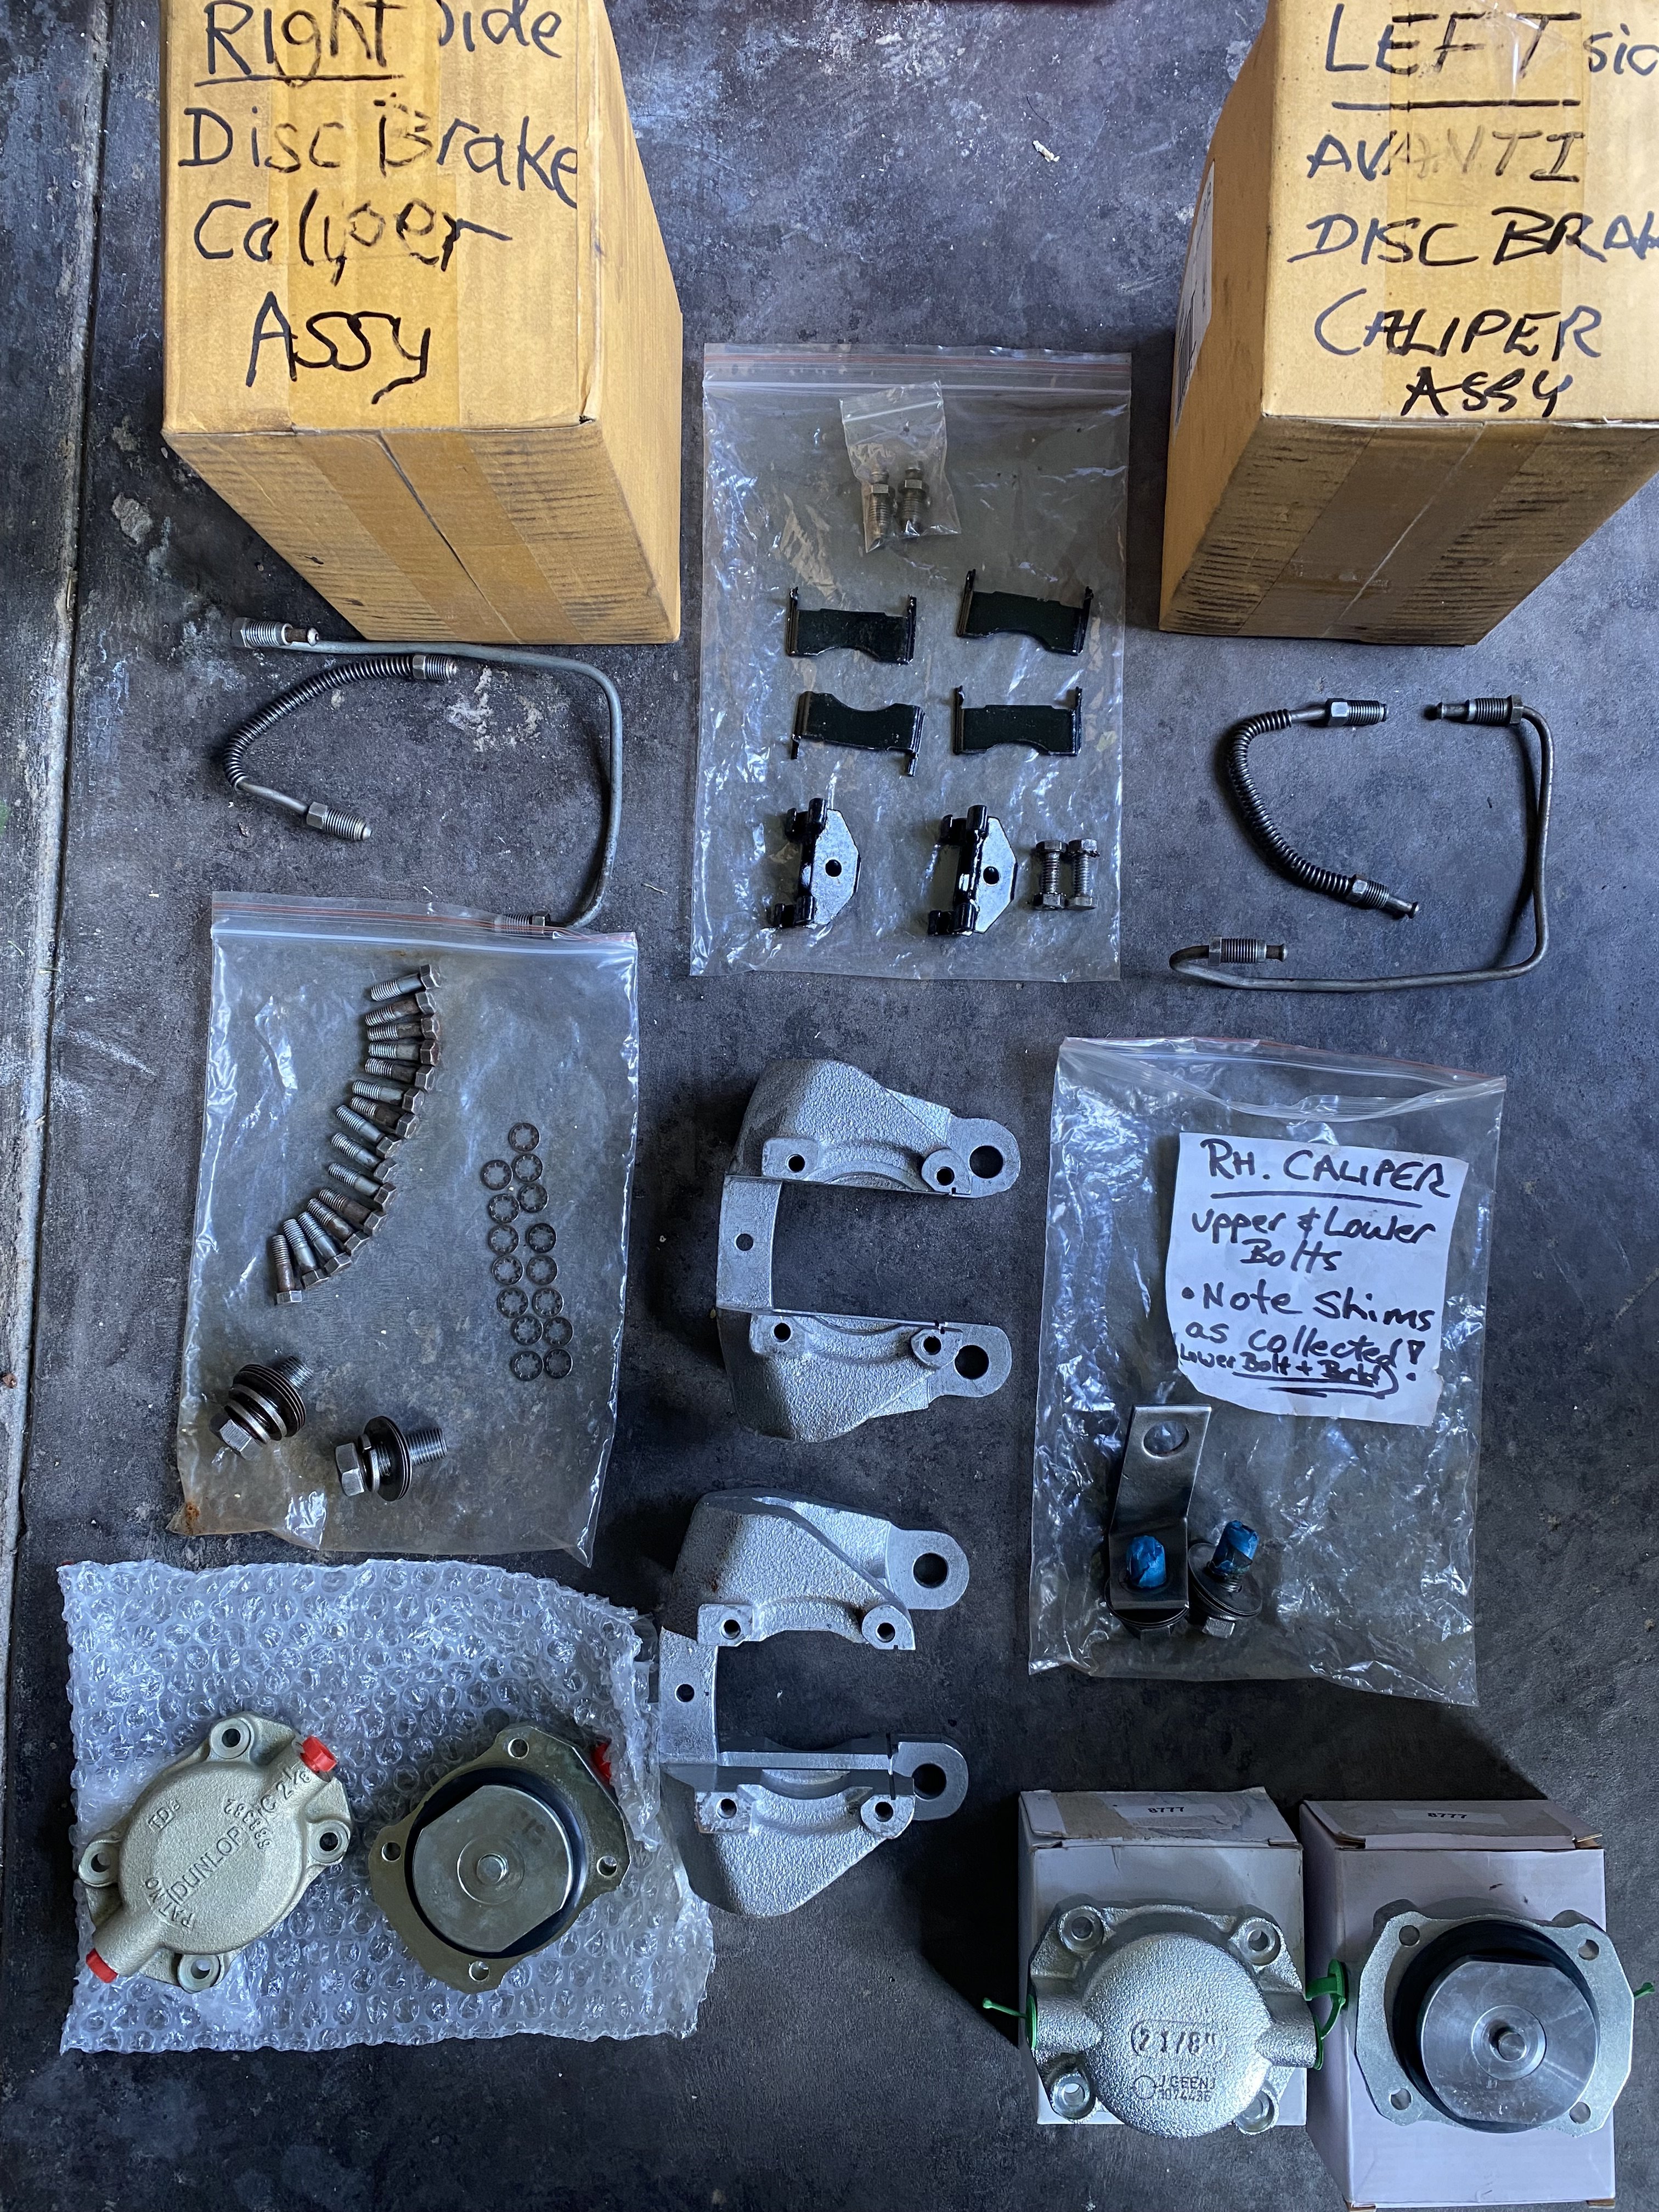
Jim- I dropped the ball on the subject of Proportioning/Combo Valves, and forgot to mention what ALSO needs to be done.... If you have tried to bleed your brakes without the 'Special Tool' and the Shuttle Valve has indeed moved over- then you must RESET the valve manually (i.e. re-centre the shuttle). There should be a little 'pin' on one end of your valve, often covered by a rubber cover (just visible on the brass valve in the picture I posted). This pin may be sticking out somewhat, indicating the valve has moved over. You will need to push this back in otherwise the 'Tool' will not impinge on the groove in the middle of the shuttle. However, because your front brakes are operating, the shuttle valve will have moved inward. To help re center it, crack a bleeder on one of your Disc Calipers and give the Brake pedal a push. This ought to simulate a front brake "failure" and the shuttle valve ought to move the other way. One way or another, just ensure the Shuttle is centered before screwing the Bleeder Tool all the way in. Sorry for long explanations, but as an ex high school teacher, I know that you can't afford to throw doubt. -
Hi Ronmanfredi.... Yes, a kit is made by B+M but here "In the land down under" it's might pricey at $620AUD minimum. If and when the Computer fails, I will either bite the bullet for the above or fabricate a manually operated system that I can cancel by a tap on the Brake pedal. I need some help designing this but I'm looking at a simple instantaneous pushbutton through a relay for initiation and another Relay to disengage the latter through a switch at the Brake pedal.
-
Brake pedal goes almost to the floor before brakes engage
Zedman replied to Jim S's topic in 1965-83 Avanti
Thanks Jim- BTW what valve do you have and is it mounted on the left hand inner Frame Rail or is it up top with your Master cyl? If its a Kelsey-Hayes unit (like my old one) it will be OLD. I wasted a huge amount of time researching this obscure little bugger only to find it was likely to be pretty well stonkered. There are some parts for it but it not all, so it's not really worth it. I opted for the GM PV-2 valve and it was plentiful, cheap, Brass not Ferrous and a 100% bolt-up fit so long as you use some of the old fittings. Picture attached so you can see the similarities...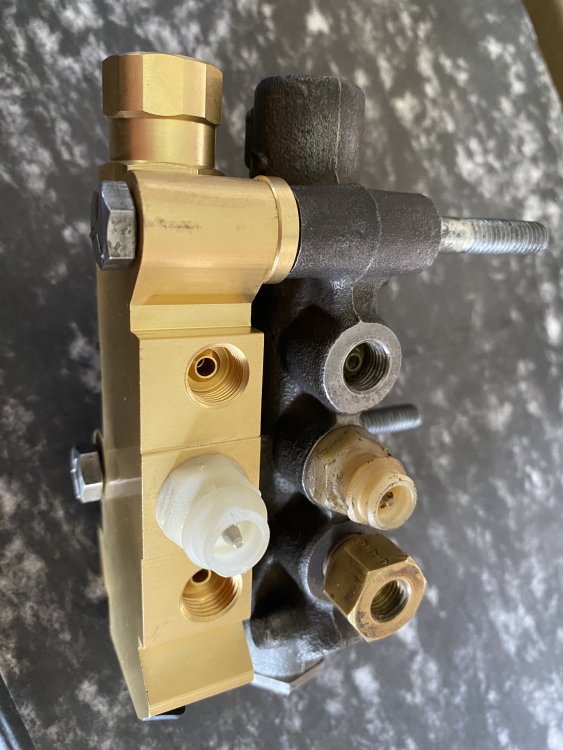
-
Brake pedal goes almost to the floor before brakes engage
Zedman replied to Jim S's topic in 1965-83 Avanti
I think the use of a Combination/Proportioning valve in a disk+drum brake system is a worthy addition. I hope I'm not telling you to 'suck eggs', but one purpose of the valve is to redirect fluid to the rear brakes to avoid locking up the front brakes. the other purpose is to sense an open circuit, and then direct all fluid to the effective brakes- front or rear. The tool is used when bleeding.... you remove the brake warning light switch from the valve and replace it with a rigid pin that prevents the shuttle valve moving to either side (trying to redirect flow one way or the other). I had an obscure Kelsey-Hayes Valve on my 1981- I'm replacing it with a GM PV2 valve and its even a bolt-up fit with the old one. The valve came with the bleeder tool. See this video for a clearer explanation. I'll bet this is what is causing your problem. -
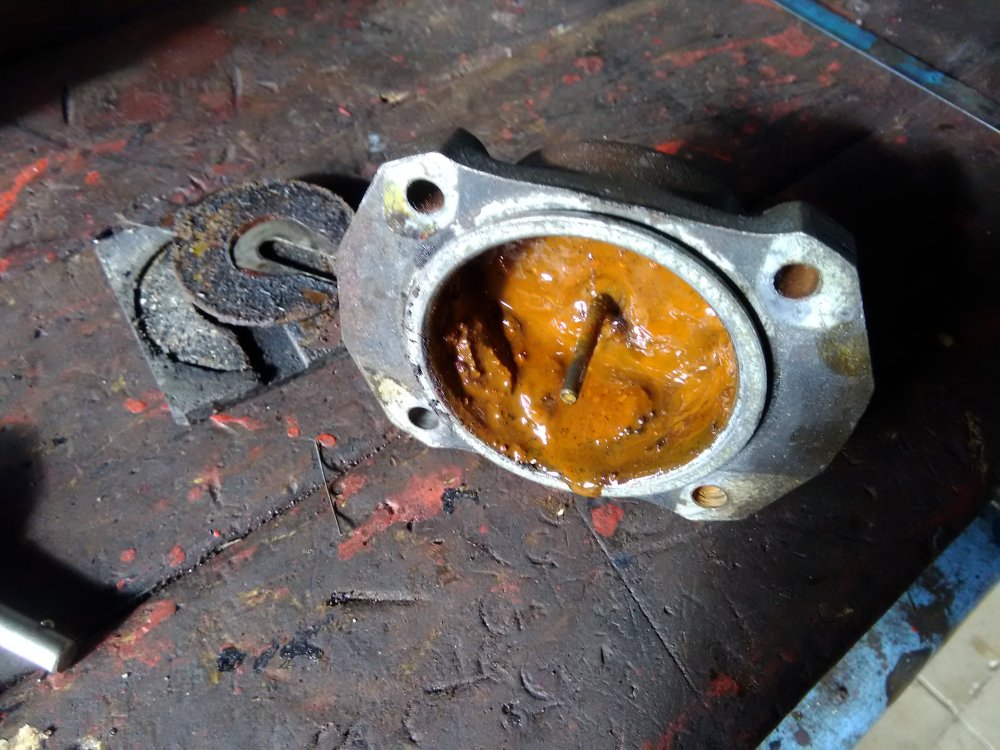
I'd say you have rusted bores. Go with 2 1/8" Jaguar stainless steel pistons and Cylinders (come all complete with seals) or the 'Cobalt' ones. I bought Stainless units through a Jag specialist- not that much more expensive than original Cast Iron ones. You might want to think about renewing brake lines if you find rust.

-
I set out to rebuild my 1981 Avanti II TH350 transmission knowing what the rubbers in stude boxes looked like after 40 years. Wished I hadn't bothered because it was fine apart from a dead relay in there (Relay ?.. I did learn rapidly that I had a TH350 'C' which has a lockup Torque Converter and needed different Valve body gaskets.) With this transmission I will either have to keep some emissions controls and the Onboard Computer or fabricate a manual switch/relay system to initiate and shut down Lockup. I have a Rear end ratio of 2.89:1 so this ought to be near enough to overdrive. I believe these came out of the Avanti factory from 1980 -81 for about three years. Might be a worthy choice along with a manual lockup switch.
-
Very nicely done- If I did one similar, I'd like to engrave it... "For Sherwood Egbert"
-
Brake pedal goes almost to the floor before brakes engage
Zedman replied to Jim S's topic in 1965-83 Avanti
Jim, what year is your Avanti?.... Does it have a proportioning/Combination Valve? If it does, did you bleed your brakes using the centering tool made for this purpose? If you don't use this tool to fix the position of the internal shuttle valve, half your system will be left unbled. -
A sliver one was in the supplier's stock straight away so I went with that. I felt the body colour being Tan/gold looking, Silver would be in keeping with the rest of the trim. These Bonnet 'spears' look so good I really don't know why more of 'em weren't ordered by Avanti II owners.
-
Thanks a bunch MFG. At the chagrin of purists. I even included the Studebaker 'S' emblem in my parts order.. I know it's not correct and goes against my own principles somewhat, but I just plain want it there. 🙃 I'd love to put Studebaker script Badges on it too but I'll resist that notion !
-
-
My 1981 Avanti II didn't come with the Studebaker Bonnet Ornament set (though it was an option) but I really like the look so I bought one to put on. To expedite placement of holes, would someone be so kind as to provide the measurement from the front edge of the Bonnet to the front edge of the potmetal ornament, please? Thanks.
-
Will Carter four Barrel?
-
Hey Jim- you might want to look at these pages on Boosters before you go further... This has been helpful to me. https://www.studebaker-info.org/Tech/Brakes/Boosters/avantiboosters.html
-
Regarding my posts on Door mounted 'Intrusion Bars'- Thanks for the input, everybody. Unless Steel tube/bar is embedded in the doors during layup, I suppose their presence is still indeterminate. I was hoping somebody with knowledge from the factory floor might chime in. I may push this query on the SDC Chat pages to see if a wider audience may shine some light on the subject.
-
Makes me think that rather than opening 'em up, it might be prudent to just marinate them in Kerosene for a few hours....
-
I'll have a stab at it ..... (3) $69224 ?
-
-
Hi AG-R3- my apologies for hijacking the thread somewhat, but your post infers that Avanti Motor Corp placed 'Anti Intrusion 'Bars/ Barrier' within the doors of our cars. This is a query I had made a couple of years ago and nobody on this Forum could verify it. So, do our Avanti II doors have Intrusion Bars in 'em... ? As of what year? Can these be seen without removal of the door trims?.. The reason I'm asking this is that here in Australia, I know that when I have my car Inspected prior to roadworthy certification, the presence of Intrusion bars is mandated. I'd assumed I would have to install something there- hopefully I won't after all.
-
Browsing Youtube today, I found an interesting instructional video on how the Avanti Door lock system works. It is worthy of a look.