brad
-
Posts
1,114 -
Joined
-
Last visited
2 Followers
brad's Achievements
")


-
I have one somewhere on the parts shelf. I think it's a Carter pump. Kinda reminds me of the AC type of electric pump that pulses when it runs. I'll have to double check to be sure the brand.
-
Dave has one at Garys, and one here with me, the DueCento of Richards, Dave Paris' race car,(the Terrible Turkey) and the one red one ( R3) from BC Canada. is five I know of.
-
At least 5, but I'm gonna say 7.
-
Emergency 4 way flashers? Of hand brake light.
-
Curious .. do You shoot for authenticity or modification?
brad replied to aardvark's topic in Avanti Pub
I've built them for authenticity and concourse national non Stude AACA judging for Amelia Island. Also some of them most heavily modified ones using Stude power you will ever see. It depends on customer preferences, and desired shows.


-
Rodgers bracket is for a Sanden 508. I made my own bracket, and used a 7176 series. it is serpentine. They do make them in V-belt too.
-
I installed one on the R4 clone I showed at MCACN in 2016. Pretty straight foward installation. I made an aluminum adapter to interface the mounting from the booster and the firewall. I used an adjustable heim joint on the linkage to the pedal. I installed the booster so the accumulator was at the top, and it snuggled nicely into the inner fender cutout for the original brake booster area. If you want to use AN lines, fittings are available from several sources.
-
If you loosen the through bolt that holds the springs, and the two mounting bolts up top, you can shim between the body and the hinge to lower the deck lid. Adding shims between the hinge and the lid itself will raise it. Often when new weatherstrip is installed, it is done incorrectly. It should NOT be glued against the inner rib the the deck lid all the way around. on the sides, and top it should be 1/4" away, only on the bottom is it glued tight to the edge. Also most replacement rubber is too stiff. Mustang fastback wetherseal is much more pliable, and has the same cross section.
-
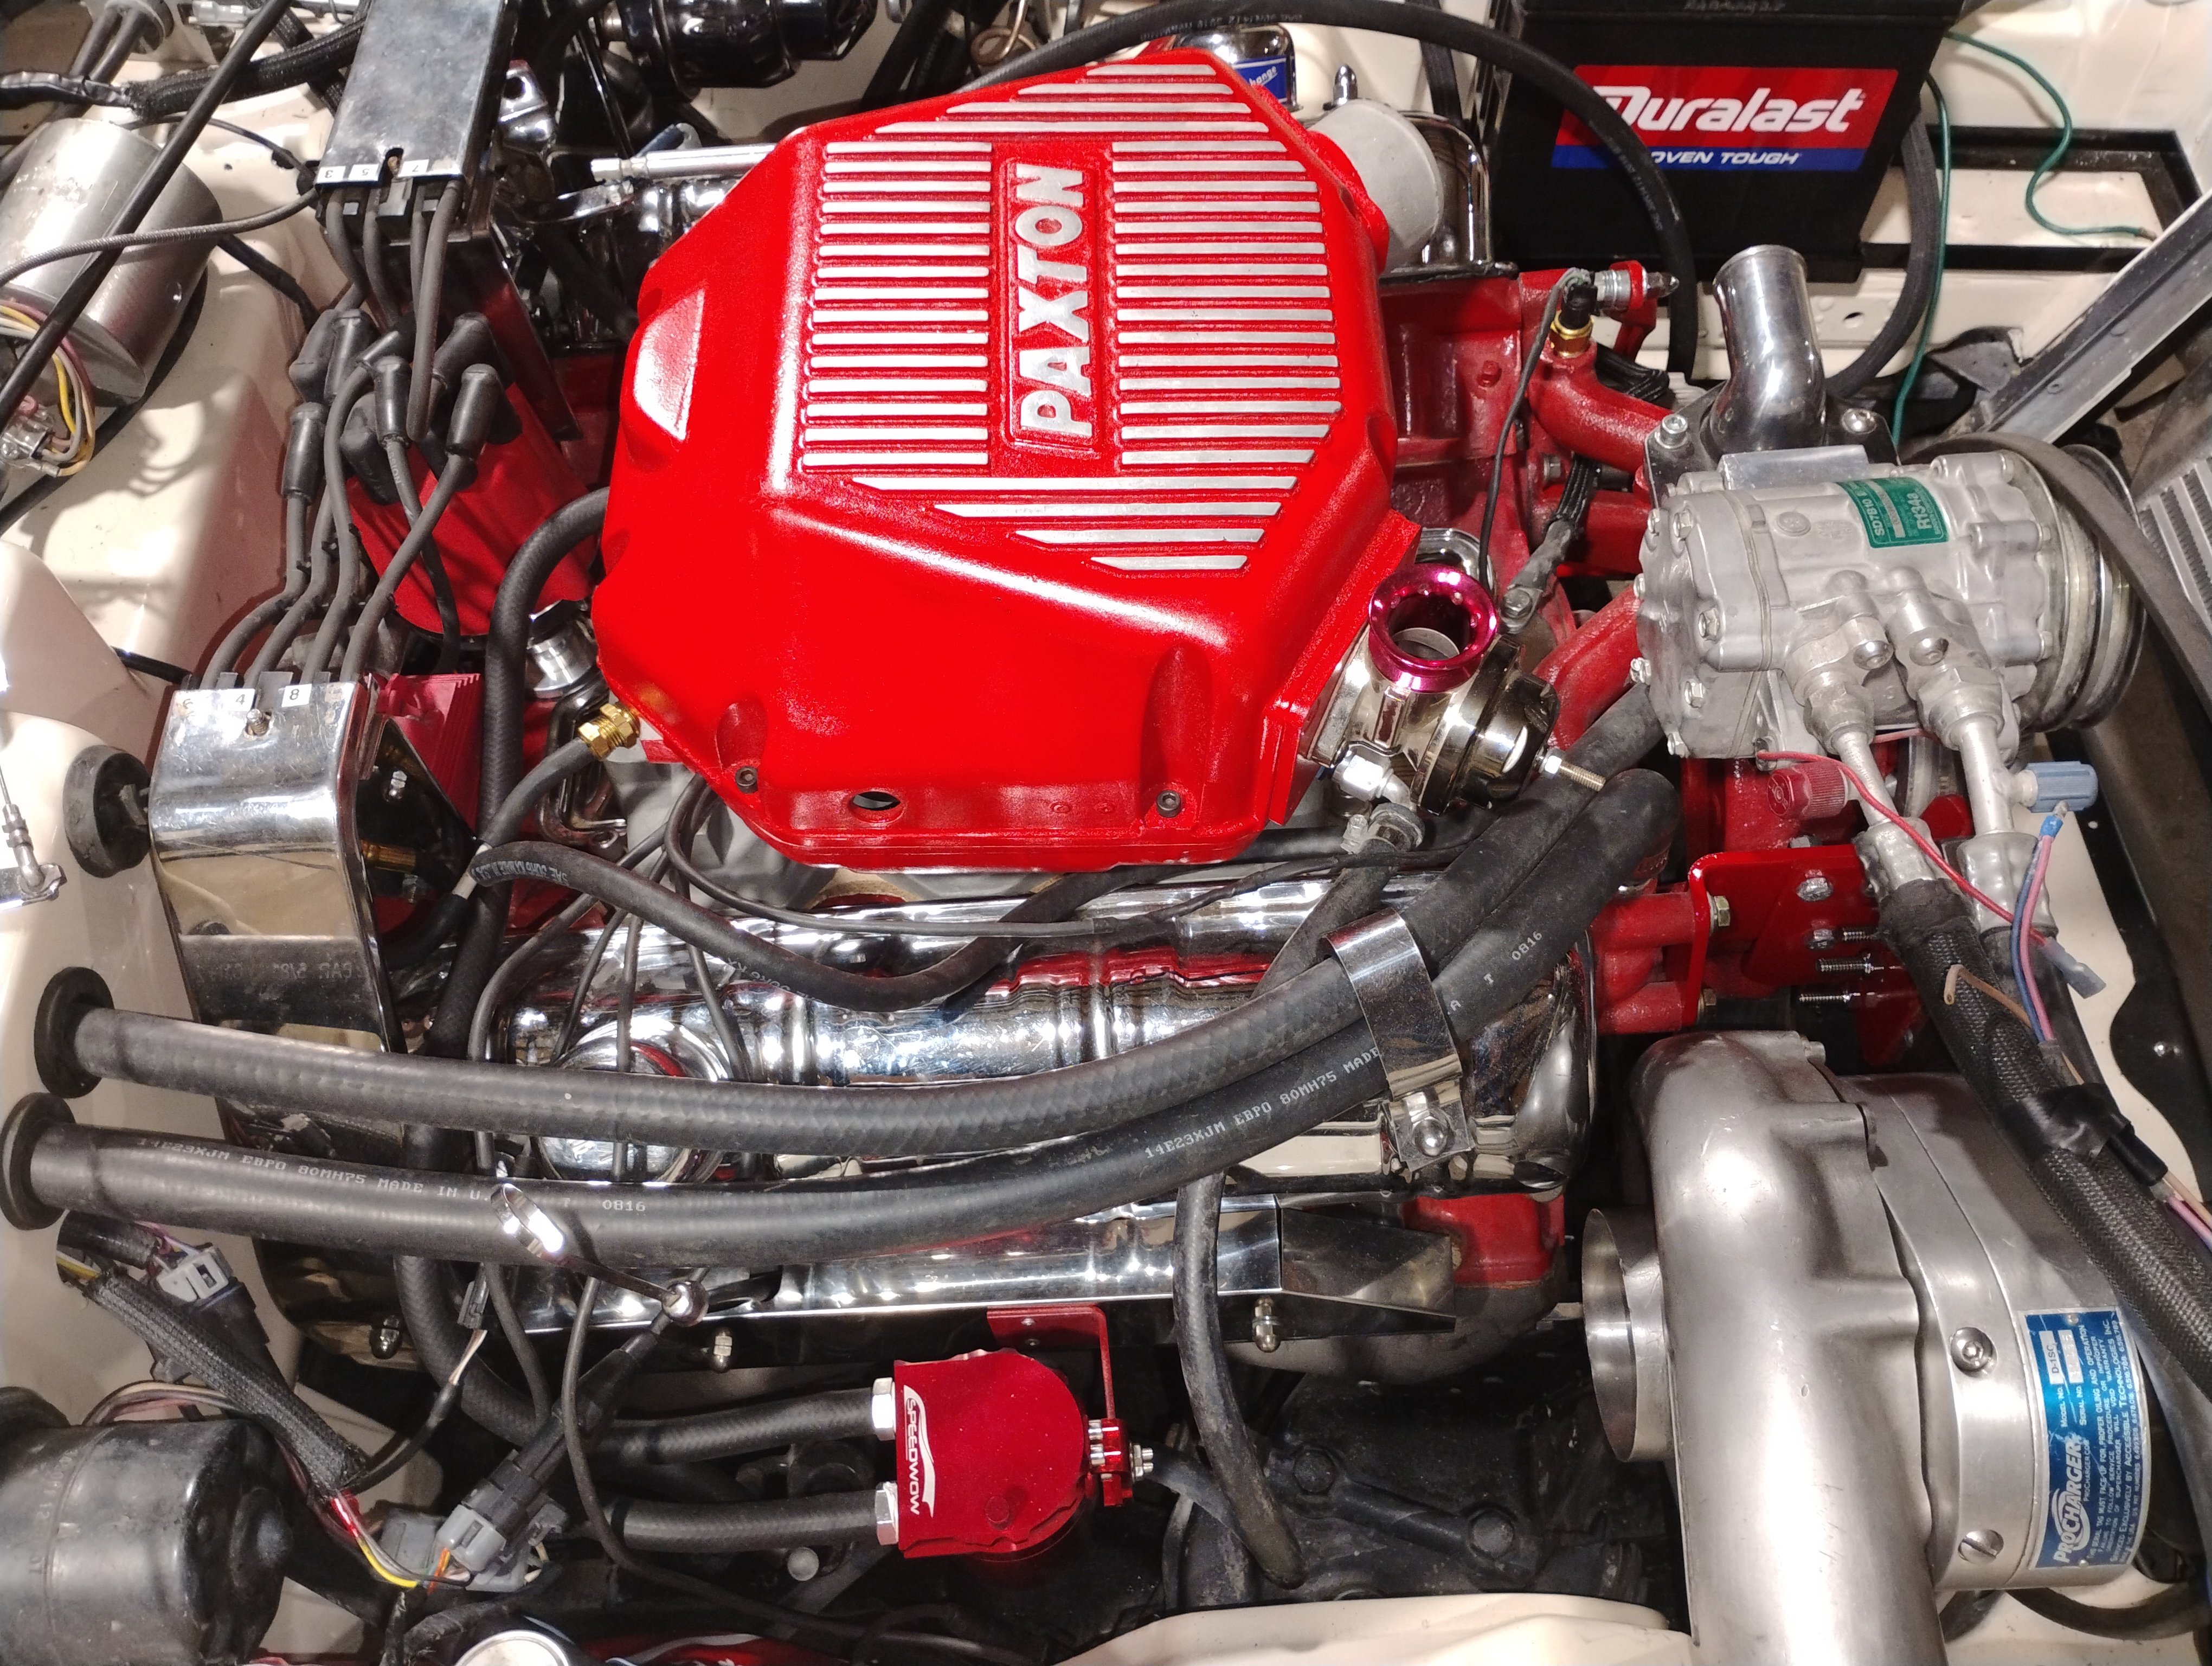
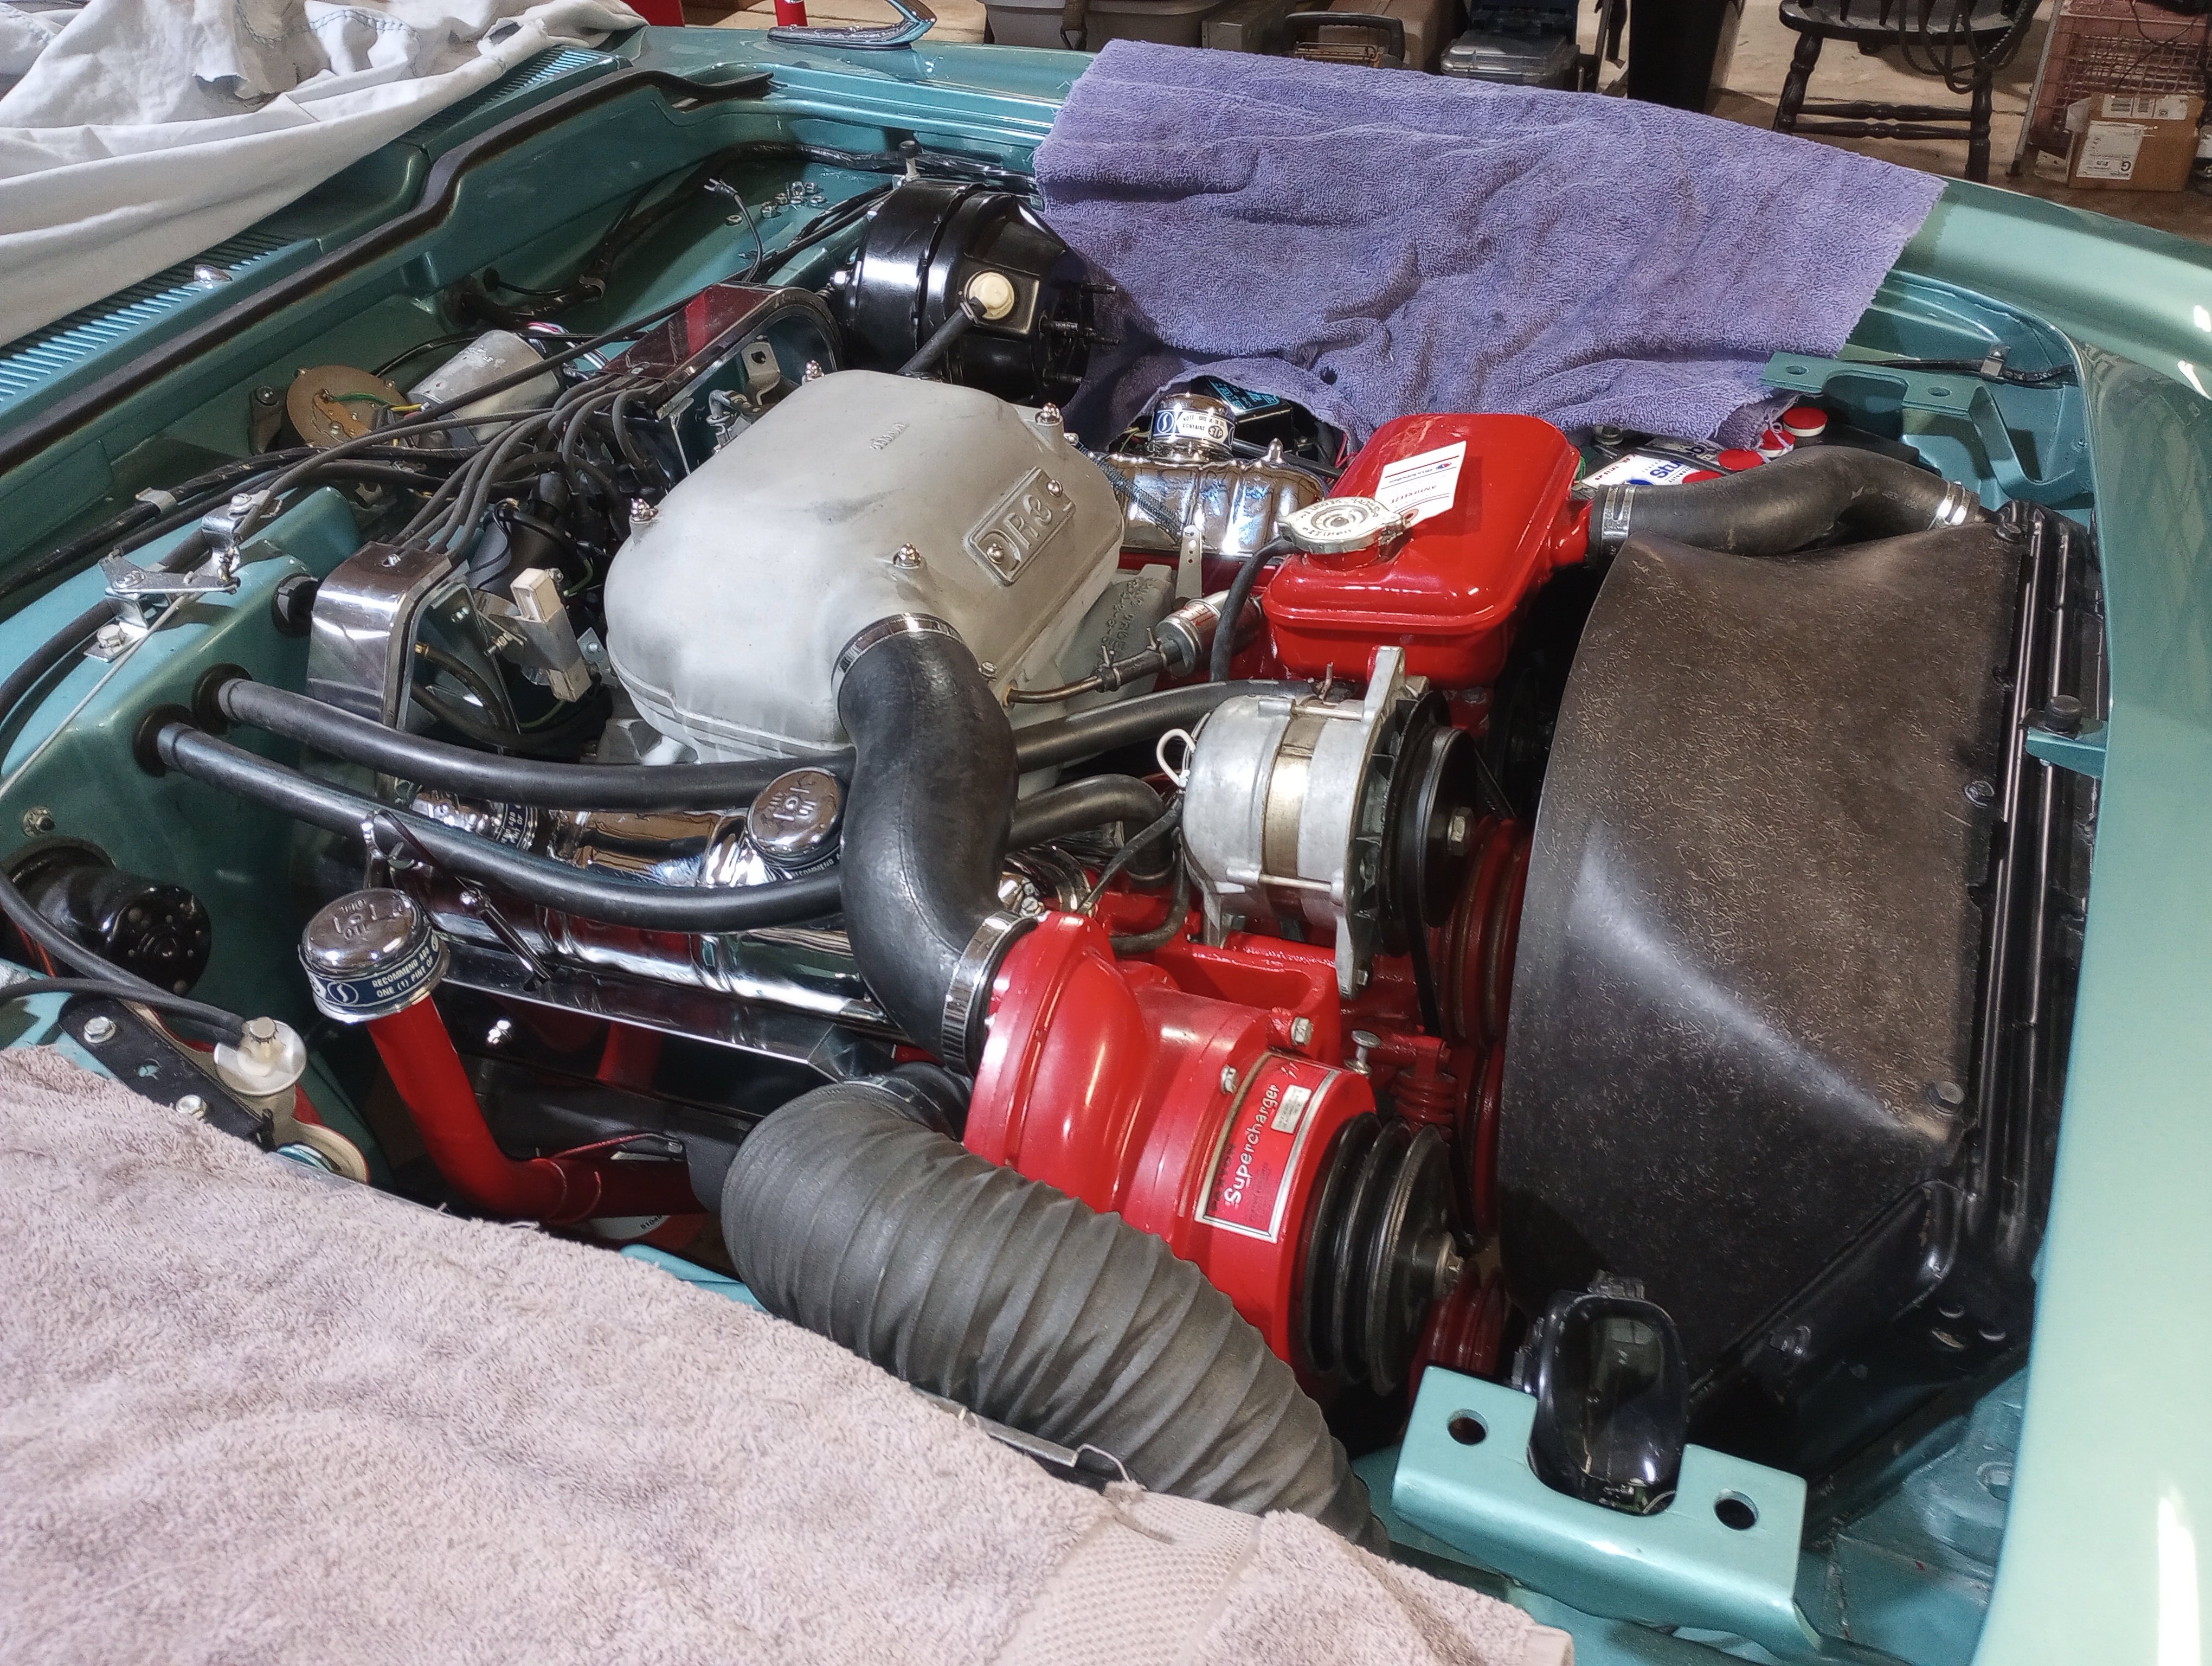
It depends on the boost levels of the supercharger. anything much higher than stock 4-5 lbs will slip the belts at higher RPMs. Serpentine belts are "grippier".
-
The kicker diaphragm (not the bracket) is the same as some Pontiacs. Not sure what year(s).
-
The turn signal switch itself is located down the column nearer the floor. The cable runs to a bracket on the switch at the switch end, and to the lever mechanism under the steering wheel. You have to pull the wheel. There is no electrical part under the wheel like non-tilt cars except for the horn contact. It is the same as 63-65 GM Saginaw tilt wheels but the column itself is a Stude only part. After 65 they were totally different.
-
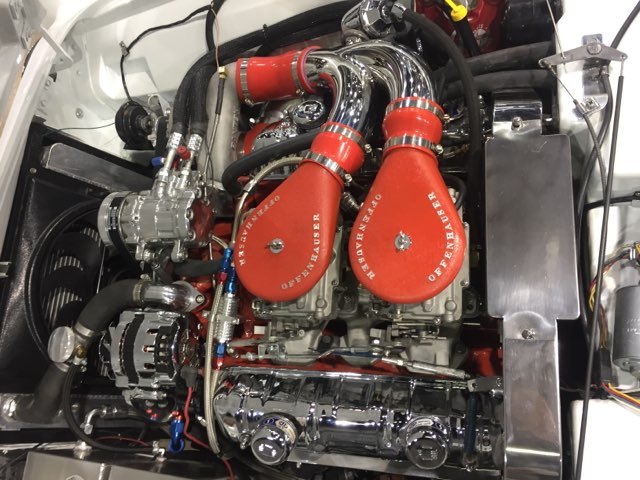
This is one setup I constructed. I used a Chrysler lower pulley and the waterpump pulley is grooved as it has to turn in the same direction. I think I used a Ford belt tensioner. It's been a few years...back in 2016.
-
On the 61 Hawks? They even had dash plaques that touted them as "Gran Turismo" limited edition. James Mason, a British actor posed in the ad.
-
Ed George only has the R5 pistons in his R3 engine. Greg has the original R5 and had a section of the pan rail welded when it had damage. I supplied R3 pistons to Mr. Cone when the originals were long gone. The R5 piston is essentially a regular R3 Forged True but, the crown is angle machined for slightly lower compression. Necessary with two higher output superchargers. The specially stressed blowers would last approximately one run. (7 miles)
-
Every frame off that I do, I replace the rear shackle bushings in the frame while you can access them.