Zedman
-
Posts
279 -
Joined
-
Last visited
Content Type
Profiles
Forums
Events
Everything posted by Zedman
-
I believe you will need to remove the original Rivets. These can be replaced with similar rivets if you trim the length so when assembled , you have only 1 x the diameter protruding. These can be gently mushroomed over with a hammer (buck the head end on a soiid flat steel surface) to secure the cover once again. Tinmen's or pan head rivets ought to do. You might even be able to use suitably sized flat head nails as substitute rivets (done that before). Pop rivets might do but use steel ones not Aluminium otherwise they might loosen up in service.
-
Thanks Ron- I will compare that carb number to the ones I see here in Oz and pick one up eventually. My 305 will likely require a re-jet smaller , I excpect.
-
Thanks MFG- I have recently fitted a dual exhaust (minus Cat- I'll take a risk.. ) whilst the body is off the Frame. The Carb and Distributor are up for substitution after I get the car reassembled and inspected for roadworthy. I'm looking for an Australian delivery carb that was jetted for the Holden 308 or Pontiac Parisiennes befor the late 70's.
-
Hi All- As an aside whilst this thread is open... I have a 1981 EME Carb that I'd like to replace with an un-ECU controlled Quadrajet someday. Would somebody mind putting up what Carb Code numbers might be a good idea for substitution. BTW if I do go down this route , the AIR Injection system and Catalytic converter will also be gone too. Charcoal Canister will be staying , however. Thanks...
-
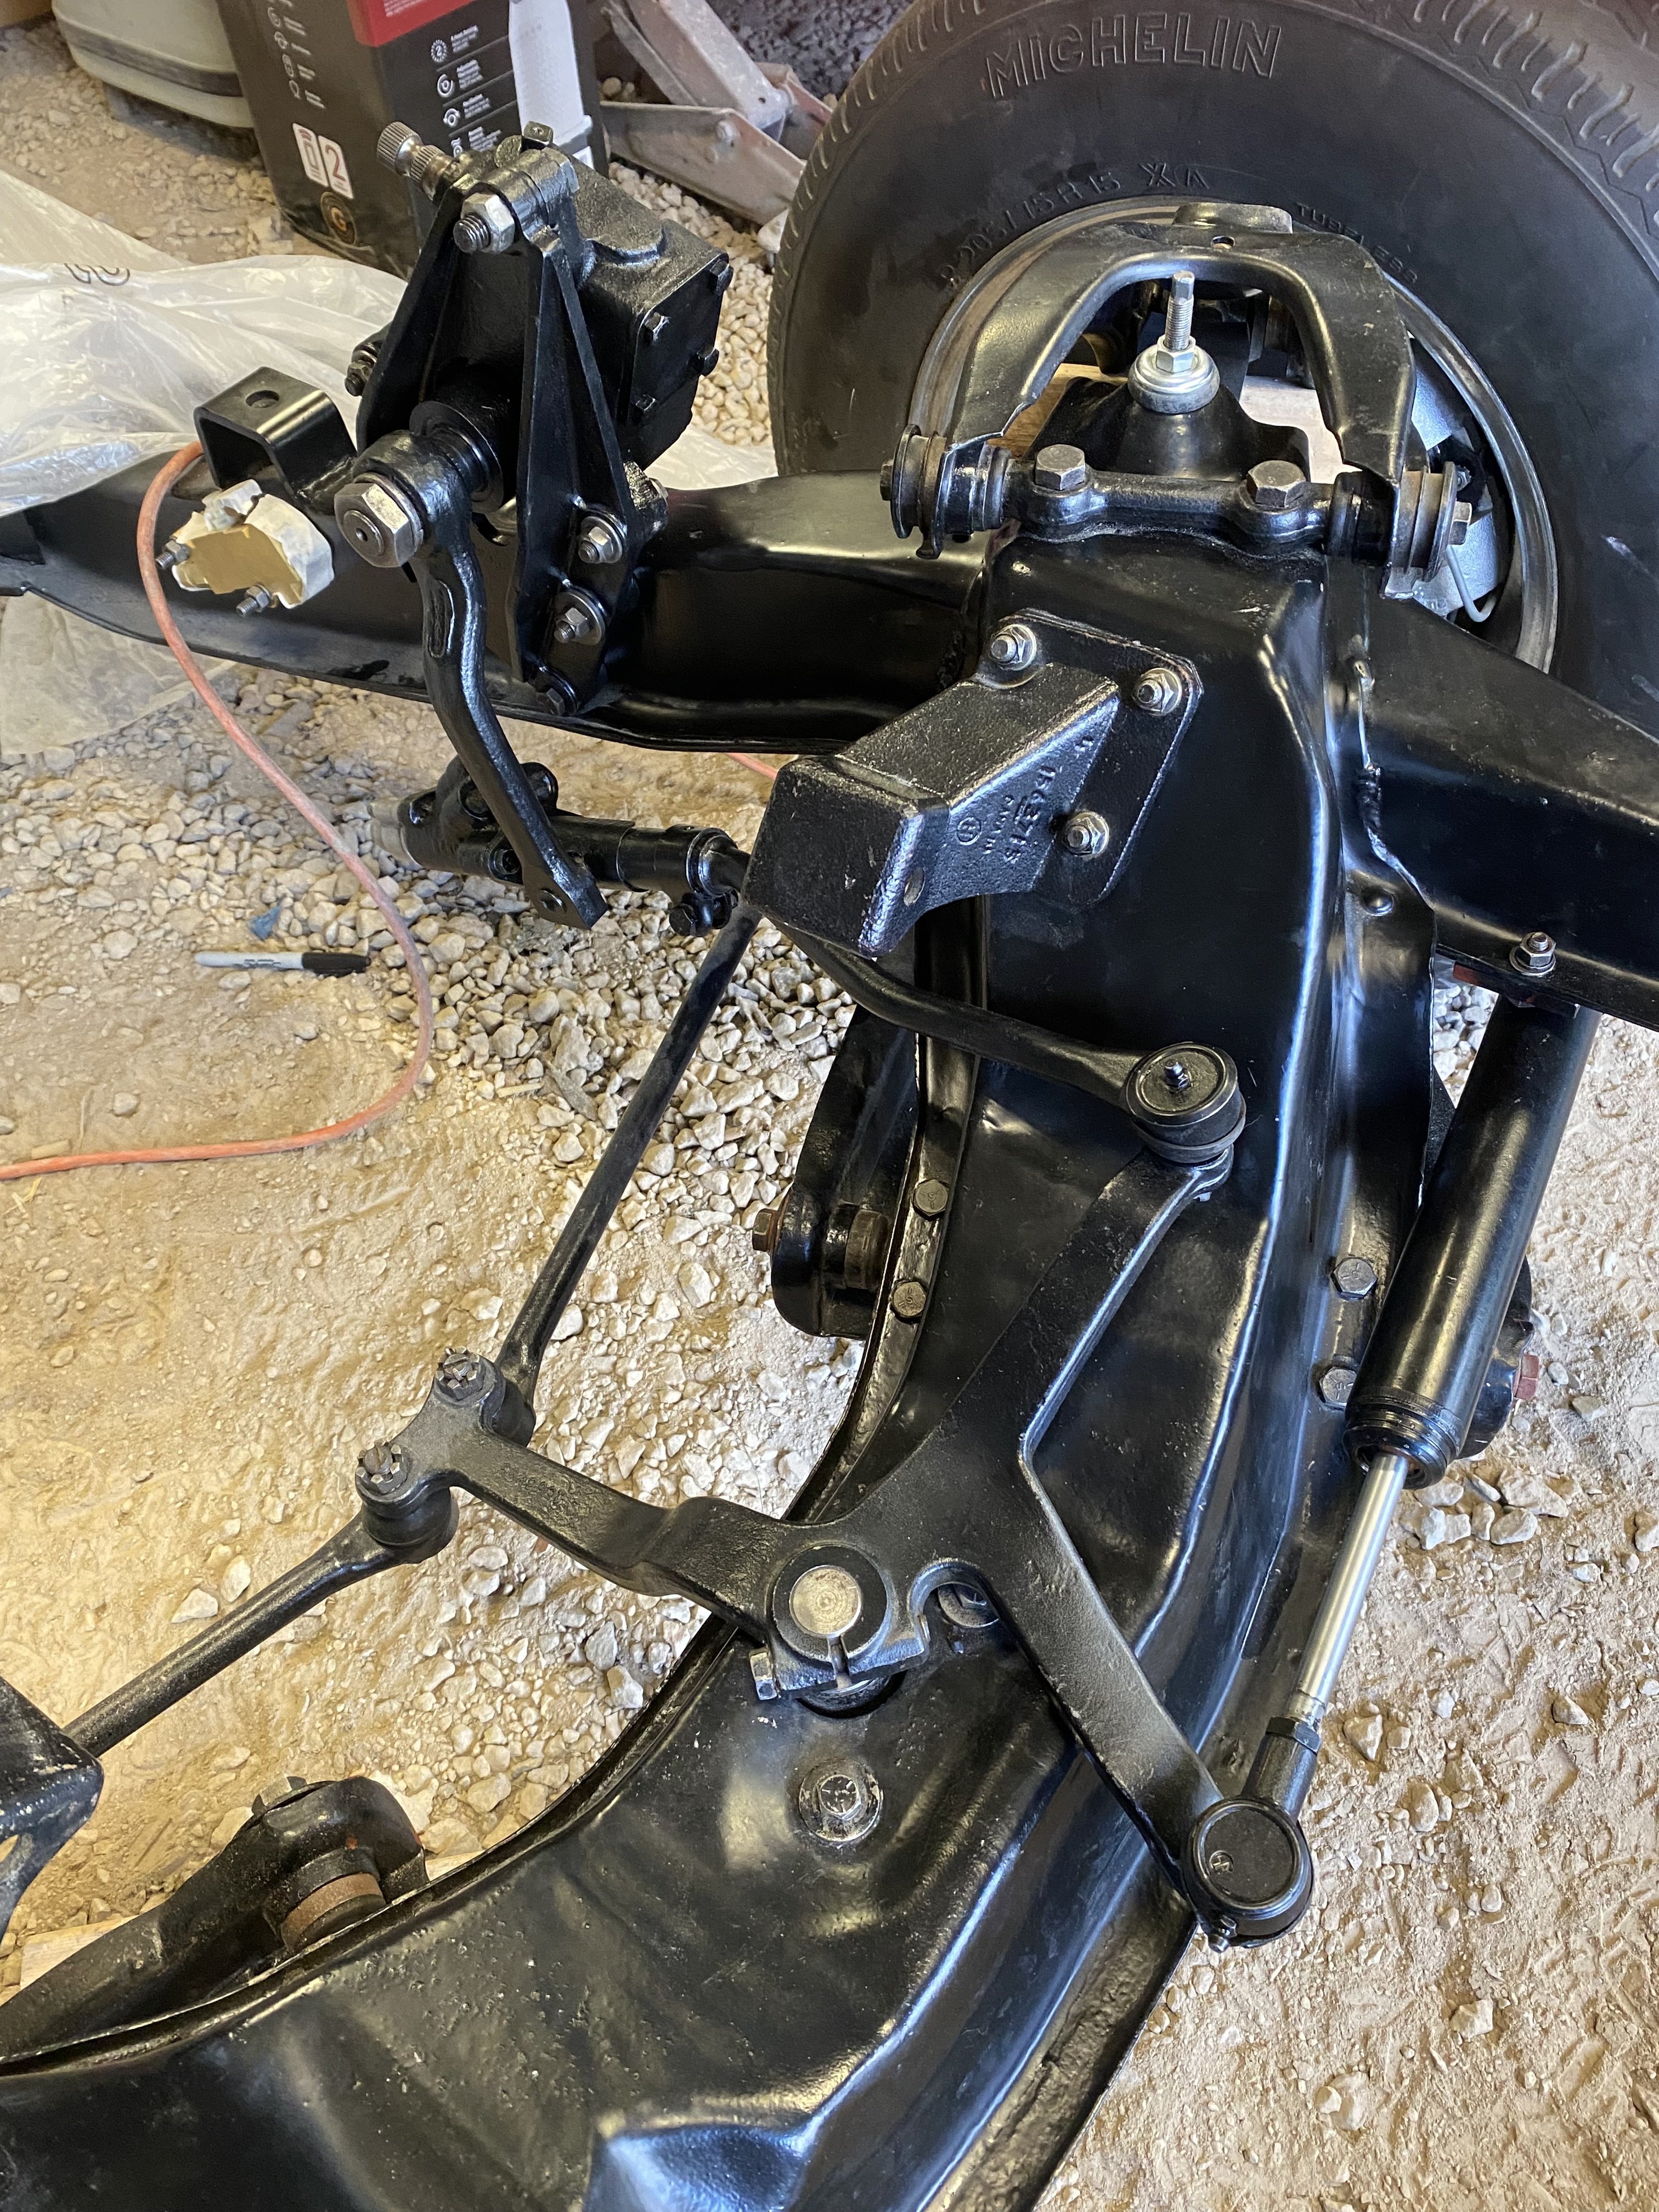
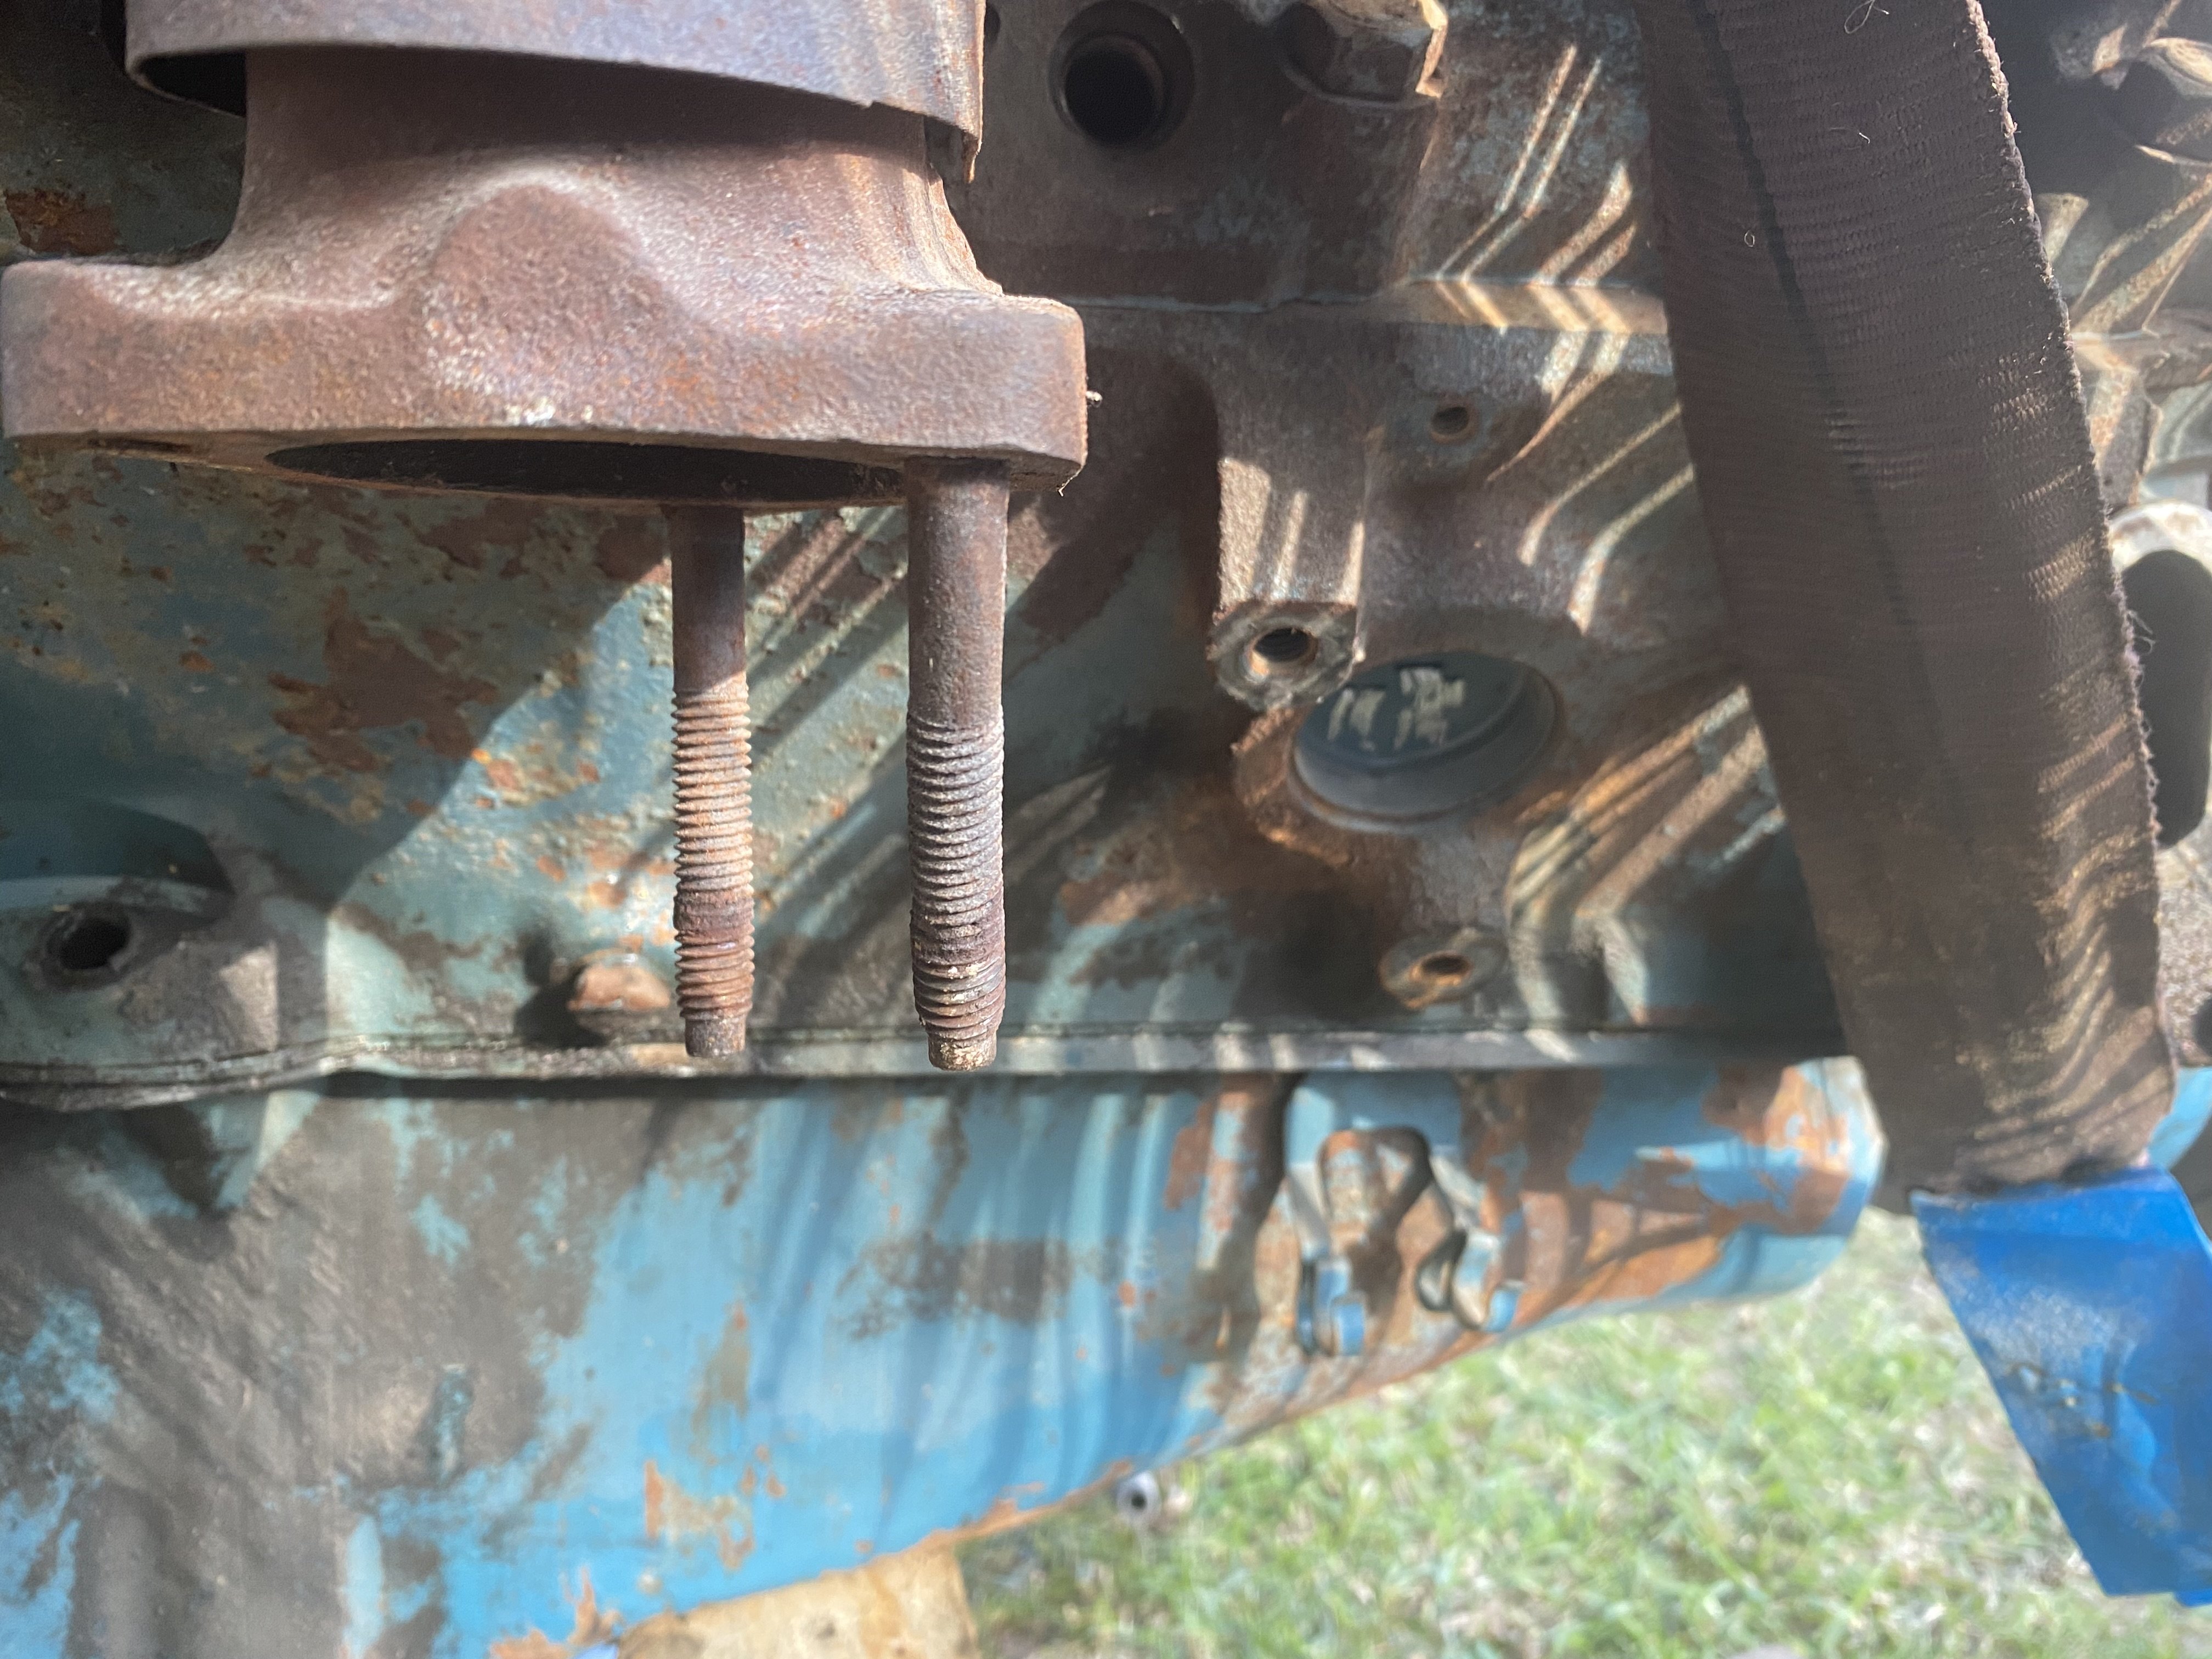
Hi Klaus- I'm making a few assumptions here but having replaced the mountings for my 1981 305V8 recently, I'd wonder whether they might be the same because these engines are small block Chev. I used the same ones recommended for Corvettes 1969 to 82. I have engine mount 'pedestals' on my Front Crossmember as in the photo. If yours are the same, I'd look at the corvette mounts. By all means let me know if I'm wrong !


-
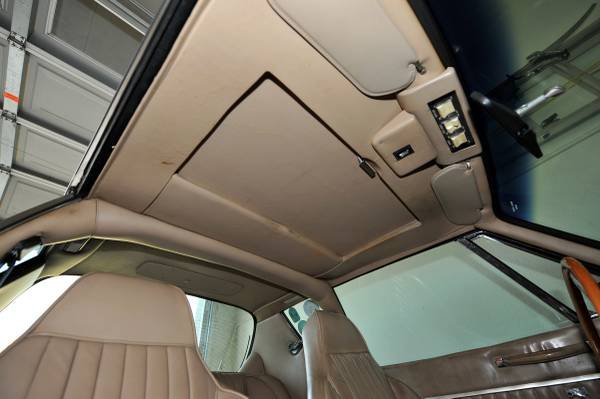
Thanks for the feedback everybody- Question for Ronmanfredi and Geoff.... How does the roof Headliner come off? I have no Idea how to remove that and I'm wary of spoiling it. 🤨 My Sunroof is already well corroded and I reckon it will need removal for any repair/restoration.
-
Geoff- I applaud your pioneering work and the photos help tremendously. I cannot help but think repairing my sunroof might be folly given I have extricated some really rusty metal pieces so far. In any case your pictures paint a very good picture of what is in store- thank you and keep 'em coming ! 👍
-
Update- I have managed to remove the outermost screw easily, however the innermost one is rotating without releasing. We have pushed wedges under the base of the bottle and rotated the screw in an attempt to raise it, but no go so far. I don't wish to resort to butchery so if this won't come out I think I'll have to very carefully grind off the head of the Screw using a finger belt grinder or similar. Going overseas for a month shortly so this might be a dead thread until I get back....
-
Thanks Grant- much appreciated... I had gotten under there but will be a bit more prepared for what to look for, next time.
-
Appropos 1981 Avanti II - Can somebody please provide some feedback about how to go about removing the windscreen washer reservoir/bottle. How is it attached? Repainting the engine bay soon so info is very appreciated. I'd hate to bust it. 😒
-
My Avanti II 1981 model had the Kelsey-Hayes Proportioning valve on it and orignal Bendix Calipers when I broke the car down for frame off resto. Because the K-H unit is a bit of a rarity and hard to replace parts for, I decided to go with a brass GM PV2 proportioning valve . This valve is specifically for Disk & Drum combination and is a bolt-up replacement for the K-H valve. From what I have researched, a proportioning/combination valve is there for the purpose of allowing the rear brake drums to apply just ahead of the front Discs- that's all. This is to prevent the front brakes propping, and causing the rear end to 'come around'. For this reason, I wouldn't fob off the idea of using a combination/ proportioning valve. I wonder whether you might have a an issue with the right rear brake applying with more gusto- causing a right hand veer. May I suggest checking the orientation of the Shoes, adjustment of the shoes, the condition of the rear Flexible brake line (they are often blocked- like mine were), the condition of the brake lines along the rear Axle (I found mine crushed !) and condition of the rear brake cylinders. After that, maybe look at utilising a propvalve?
-
I'd like to thank all of you who have contributed to this query. Despite the simplicity of applying sealant to the area, I feel that I won't get away with it when the car goes for inspection. I'm leaning toward fabricating a two piece steel cover that can be attached either side of the hole and possibly adding some heat sheild material to it or a flue seal. Either way I reckon that the area needs something to negate heat flow into the cabin. 🙃
-
thanks Peter- I will do that, thanks for the idea.
-
Thanks Mel- yes that is the plan... looking at something called Dynamat over here. I will be placing this stuff underneath the floor in the Transmission Tunnel and inside the shifter box to ward off heat from the engine and trans. Of course I will be doubling that up with something similar on the inside as well. An owner I know over here owns an all black Avanti R2 and absolutely swelters in our summers.
-
Thanks for that, Ronmanfredi- I thought that stuff looked like melted bituminous muck. Ok, That appears to answer my query. Having to submit to a roadworthy inspection when the car gets finished, I can probably assume that a handful of semi-solid sealant will go down badly. I'm leaning toward using a modified flue seal plumbing fitting here or maybe something made up from a bit of Dynamat heat insulation. (going to apply this to the Transmission Tunnel while I still have the Body off the Chassis) Just an idea at present but I will see how I go with it. Thanks for the information- it is a big help 🙃 (Aussie smiley).
-
Wayne- Thanks for coming in on this topic. It is my belief that this car has come to me 'as is as was' from the factory- it has an original 67000miles on the clock. I will have a better look at it from the inside when I'm there again (its 75 miles away). It does have a tilt adjustable collumn. Meanwhile I'd dearly like a few more members to chime in with any other details. I sent an e mail to Dan Booth on another subject a month ago but never received a reply- I wondered if I had the right address.
-
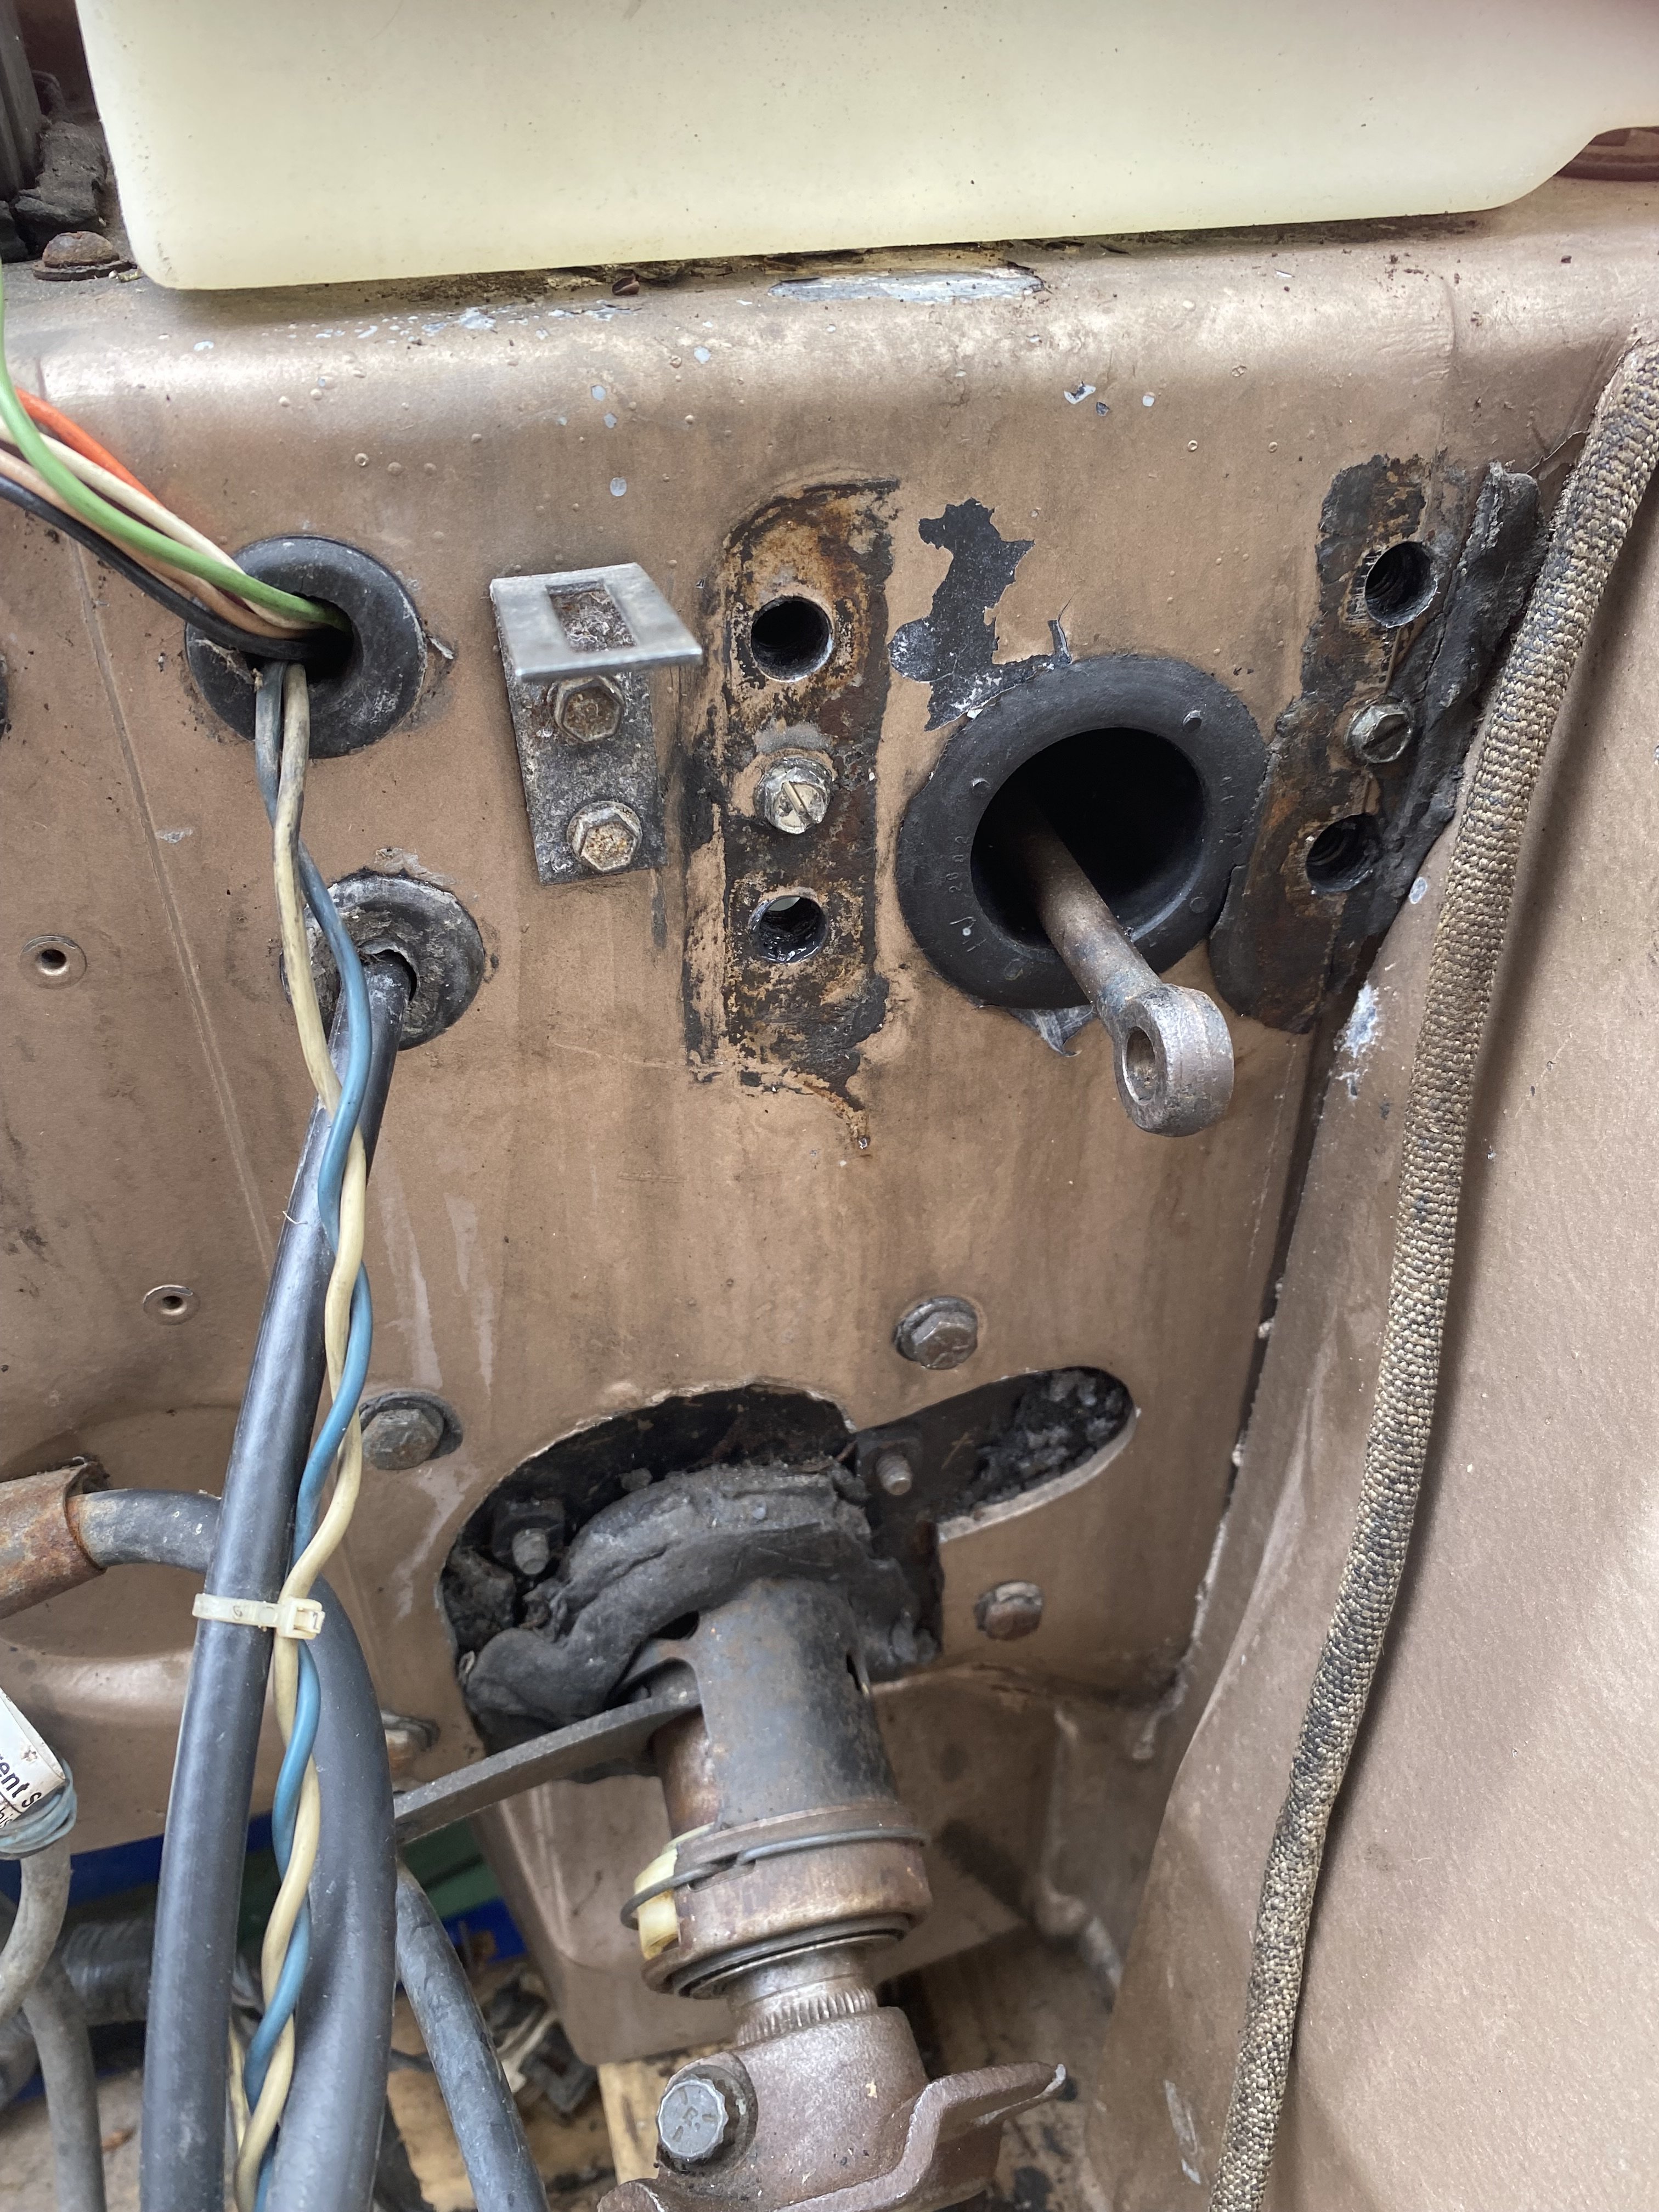
This is what my '81 Avanti II's steering column lower end looks like where it comes into the engine bay. Is there a seal or collar something to go here? Might somebody show me a picture of what it ought to look like perhaps? There's an engine bay repaint coming up and the body will be going back on its Chassis soon, so I'd like to get this sorted out whilst I've still got plenty of easy access. Is it available from Studebaker International by chance? .

-
Apologies- I've posted this thread in the wrong group.. Thanks for the replies Gunslinger and MFG. It has been hinted to me that the colour is actually a Cadillac line.
-
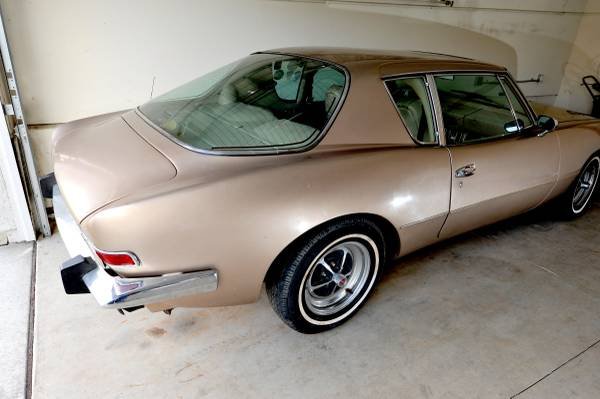
This is my 1981 Avanti II before I acquired it from the previous owner. The paint and fibreglass has suffered somewhat in the nearly 10 years I've taken restoring its rusty Frame so it is to be repaired and repainted soon. Could somebody let me know what this colour is and is there any data to be had appropos its tint makeup, please? It's definitely not gold- more light brown/tan.
-
Hi Klaus-I have a really nice '81 Avanti II with a 305 V8 and TH350C transmission (with lockup TC) with only 67,000 original miles (but rotted out Frame and non existent HT's !). It has been untouched since new and largely laid up for 17 years before I bought it and imported it into Australia. Like yourself, I felt that I should rebuild and renew knowing what old transmission seals look like given time (I have a Blog here... http://studebakerflightomatic.blogspot.com ). The engine had a worn out camshaft and I really didn't need to rebuild the whole thing but I did. I completely disassembled the TH350 and rebuilt it (even paid for a dyno test to make sure I hadn't buggered it up). I learned an awful lot about this Transmission the hard way and now have the benefit of knowledge. However... as I started to go through the parts, I found that despite its age, it was absolutely perfectly serviceable and was a waste of time. Oh yes , I did find the lockup solenoid faulty and the Speedometer drive will need to be re sealed, but the rest- perfect, Friction Discs/Clutch Plates perfect, with nice soft O rings everywhere. I know I seem to contradict myself, but if your tranny is going to cost you big dough, if it is functional, maybe leave a sleeping dog lie and spend it elsewhere? Best of luck- you are gunna love that car !
-
If there is anybody out there that provide any guidance / advice om removing a headliner (on an '1981 model or thereabouts) and / or getting at the bulk of the 'Moonroof' , I'd really like to hear from you. My Moonroof . I feel that I need to dive into investigating the Moonroof Before I get involved with repainting the body in 2025. I've already fished out some rusted sheetmetal from up there and know that I'm in for heartache if i don't investigate it now. whehter I repair it or delete it- only investigation will determine that path. The sliding panel in the ceiling is stuck and had to be pushed back forcefully just to gain a small opening, so far.