


Jim78
-
Posts
275 -
Joined
-
Last visited
Content Type
Profiles
Forums
Events
Posts posted by Jim78
-
-
There should be a lug of the bell housing sticking out toward the frame rail. It should have a tapped hole in it. The ground strap attaches there.
-
I believe that you are referring to the "rag joint" coupler of the steering column. Looking at the clearance on my '78, it would seem that there would be enough clearance to get the bolt in. If not, simply put the bolt in the hole of the manifold before you put the manifold into place. As far as tightening, you may need to use a box end crowfoot (pictured)or some such adapter. Obviously, it will affect the reading of your torque wrench, but it is simple math to calculate the new value.
PICTURE DELETED DUE TO ATTACHMENT LIMITS
-
Don't be hasty to delete the A/C. When you drive on the next hot summer day, it may seem like a good idea to repair the A/C instead of removing it. Also, the lack of A/C would lower the value if you were to sell the car.
-
On 9/25/2018 at 6:40 PM, Ron Dame said:
when and where were the heat escape holes bored? What size? Mine runs hot and I run on the highway with the hood popped.I'd like something more elegant
Here you can see the location of the holes. The passenger side has the same.
-
Bear in mind that all four keys are different blanks. Attempting to go to a single key would be a monumental ($$$) task. Just consider the lock situation one of the charming peculiarities of the Avanti. ?
-
My '78 has 4 different keys from the factory. Since the ignition switch is MOPAR, the key is totally different from the door locks (GM?). The glove box appears to be a Studebaker leftover, and the gas door appears to be an ugly lock from Nate Altman's desk drawer. What were they thinking? BTW, that gas door lock annoyed me enough that I replaced the door with an earlier style, without a lock.
-
If nobody replies with that exact size, I would suggest that you google "tire dimensions - images" . There are many charts there that show tire dimensions. Compare the width of your existing size to the P295 65R, and cut a block of wood to half of the difference. Use it to check the clearance. Be sure to check both sides, as they might not be the same. Otherwise, find a tire shop that will sell you one very used take-off P295 65R cheap to do a trial fit before buying the new tires. If the clearance is close, have an assistant push the body side to side while you are checking, to simulate cornering. Sometimes a tire that appears to fit OK will rub in a turn.
-
-
I was wondering if it is it possible to remove the blower without removing the evaporator assembly. Has anyone attempted that?
-
Well, I removed the vertical chrome strip which I found to be fastened by only one stud/nut. Then after MUCH poking and probing with a pick, I discovered that the right side panel was held on by no less than EIGHT sheet metal screws. Of course, all of these were deeply buried in the plush shag carpet on the panel. The good news was that the problem with the fan was that some of the insulation around the expansion valve (?) had unwrapped and was touching the squirrel cage fan, preventing it from turning. Easy fix, and I won't have to remove the fan after all. You've got to get lucky once in a while. Needless to say, there are now less than eight screws holding the panel on.
-
I need to remove the A/C blower motor on my '78. I am looking for some guidance on removing the console side panels under the dash. After removing the front vent panel, I see a nut on a stud that appears to hold the vertical chrome trim on each side. The outside of the panels is smothered in shag carpet, and I haven't yet located any other fasteners. Should I be looking for sheet metal screws, or is there something else fastening the panels?
-
Interestingly, the Avanti shop manual does not give wheel lug torque specs. Personally, I use 65-70 ft.lb.
-
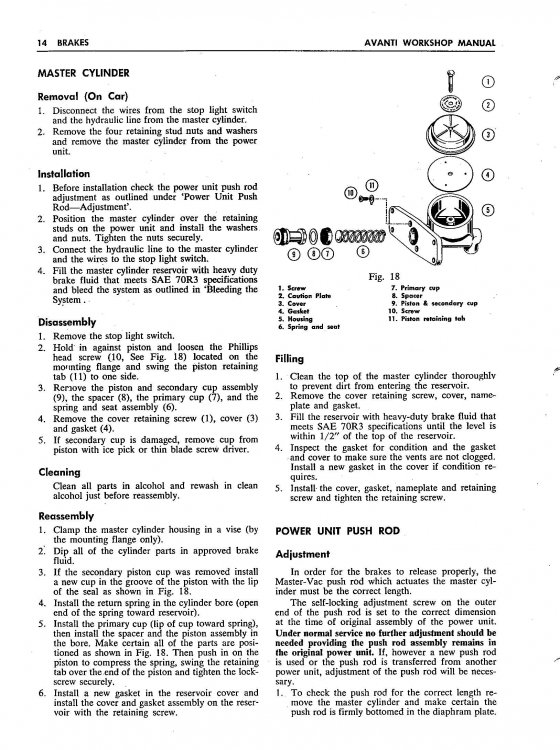
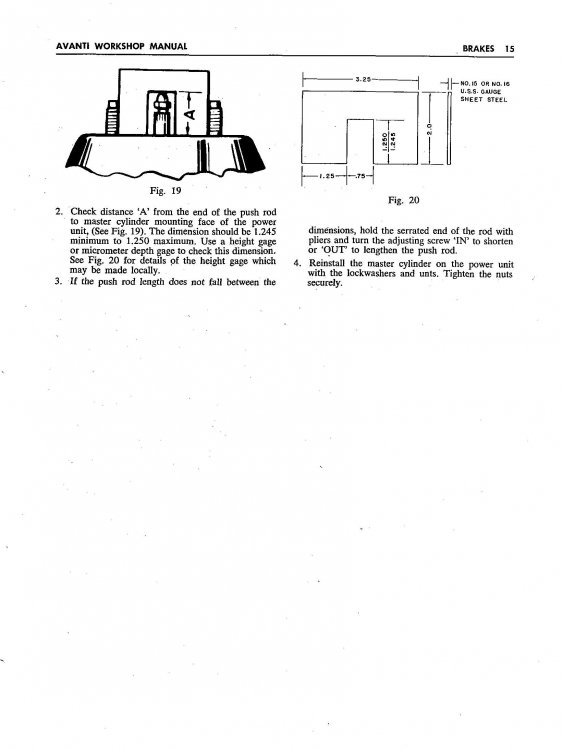
The adjustment between the booster and the master cylinder is critical. Too long, brakes will not release. Too short, pedal travel will be excessive. The setting for the early models is shown in the shop manual. HOWEVER, using this dimension would require that the depth of the indent in your M/C would be the same as the original M/C. If not, the length of the adjusted rod would need to be changed accordingly. I don't have an original M/C handy. Perhaps someone who has one could take a depth mic and tell us exactly how deep the indent is. IIRC, I have seen some discussion of how some have had to make extensions to get the proper clearance between the booster rod and the M/C.
-
One option is to put shims under the rear ends of the seat rails, where they bolt to the floor. Depending on the thickness of the necessary shims, you may need longer bolts. This will tilt the entire seat. If your seats are like those in my '78, there may also be an option of shimming the lower plate (with the loop) of the seat latch mechanism. I haven't tried this, but it appears that a shim here would tilt the seat back forward. Again, longer screws may be necessary.
-
Additionally, check the cylinder heads. The numbers can be seen with the valve cover removed. The "XXX624" heads are some of he poorer performing, and are prone to cracking. There is much information about SBC heads on line. Google is our friend. It's all about how deeply you want/need to get into a rebuild. At some point, a crate motor becomes a good idea.
-
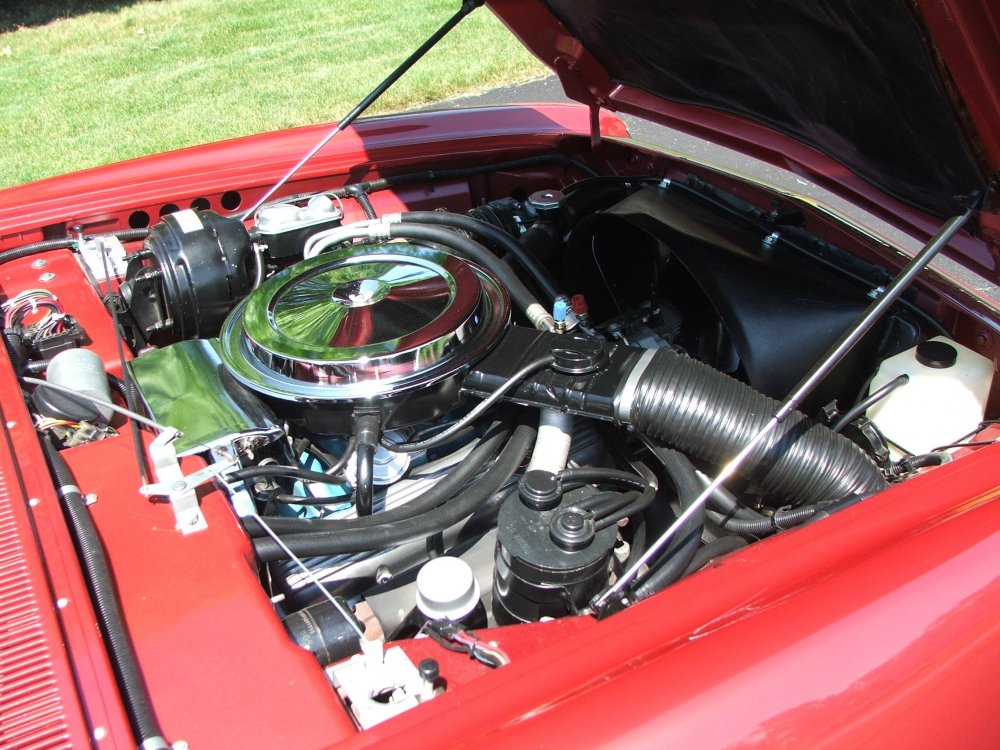
On the front of the right side of the engine block, behind the alternator (may require removal) there is a stamped number. Copy this number and google "SBC engine codes". There are several sites such as http://www.nastyz28.com/sbchevy/sblock.html
These will decode into the manufacturing plant, date, and suffix code. For instance, my '78 (blue engine) code is V1001CLM which tells me that it was built in the Flint plant on October 1, 350 AT, L48 185HP, Corvette/Monte Carlo.
It is equipped with ignition static shielding, as would be the Corvette. All that said, if you look at '77 or '78 Corvettes with the L48 you will see that the alternator is on the left side, and the A/C compressor is on the right. There may be other variations, but it appears that most of the rest is the same. Note that the chrome air cleaner top is not original to the engine, but IMHO looks much better. Got that from "Corvette America", reasonably priced.
Note that the date code indicates a month and day, but not a year. Since my Avanti was shipped from the factory on Sept. 26 1978, the October motor date makes it 1977. If you have a valve cover off, there is a number on the cylinder heads, too. This number defines the model of head, and a manufacture date, including the year. Mine is Nov 10 1997, which makes sense with the date on the block.
PHOTO DELETED DUE TO ATTACHMENT LIMITS
-
10 hours ago, WayneC said:
Jim, its on page 27, lower right corner. Search doesn't seem to work for me.
To clarify, it's on page 27 of the catalog, which shows up on page 16 of the .pdf file. On the website itself, you can click on "SHOP" and enter 801202 in the part# block.
-
Go to http://www.studebaker-intl.com/catalog.html
Download the pdf file for "Manuals and related items" and go to page 16, or search part # 801202 for the CD.
-
Studebaker International offers a CD that includes both the shop and parts manuals for $19.95.
-
The fan switch has a definite click to OFF when rotated counterclockwise. When the switch is rotated clockwise, there should be a definite click, and the fan should come on at its highest speed. Rotating it further, the fan speed decreases. This switch must be on in order for the compressor clutch to operate. That said, when the fan switch is on, the compresssor clutch is then controlled by the thermal switch (thermostat). The fan switch should be available, or at least a generic substitute. It is just a rheostat with an OFF position, like an old radio volume control. You would need to get one with the same resistance, and an equal or greater wattage rating.
-
FWIW, I installed the Turner brakes on my '78 with Magnum 500 wheels. No issues.
-
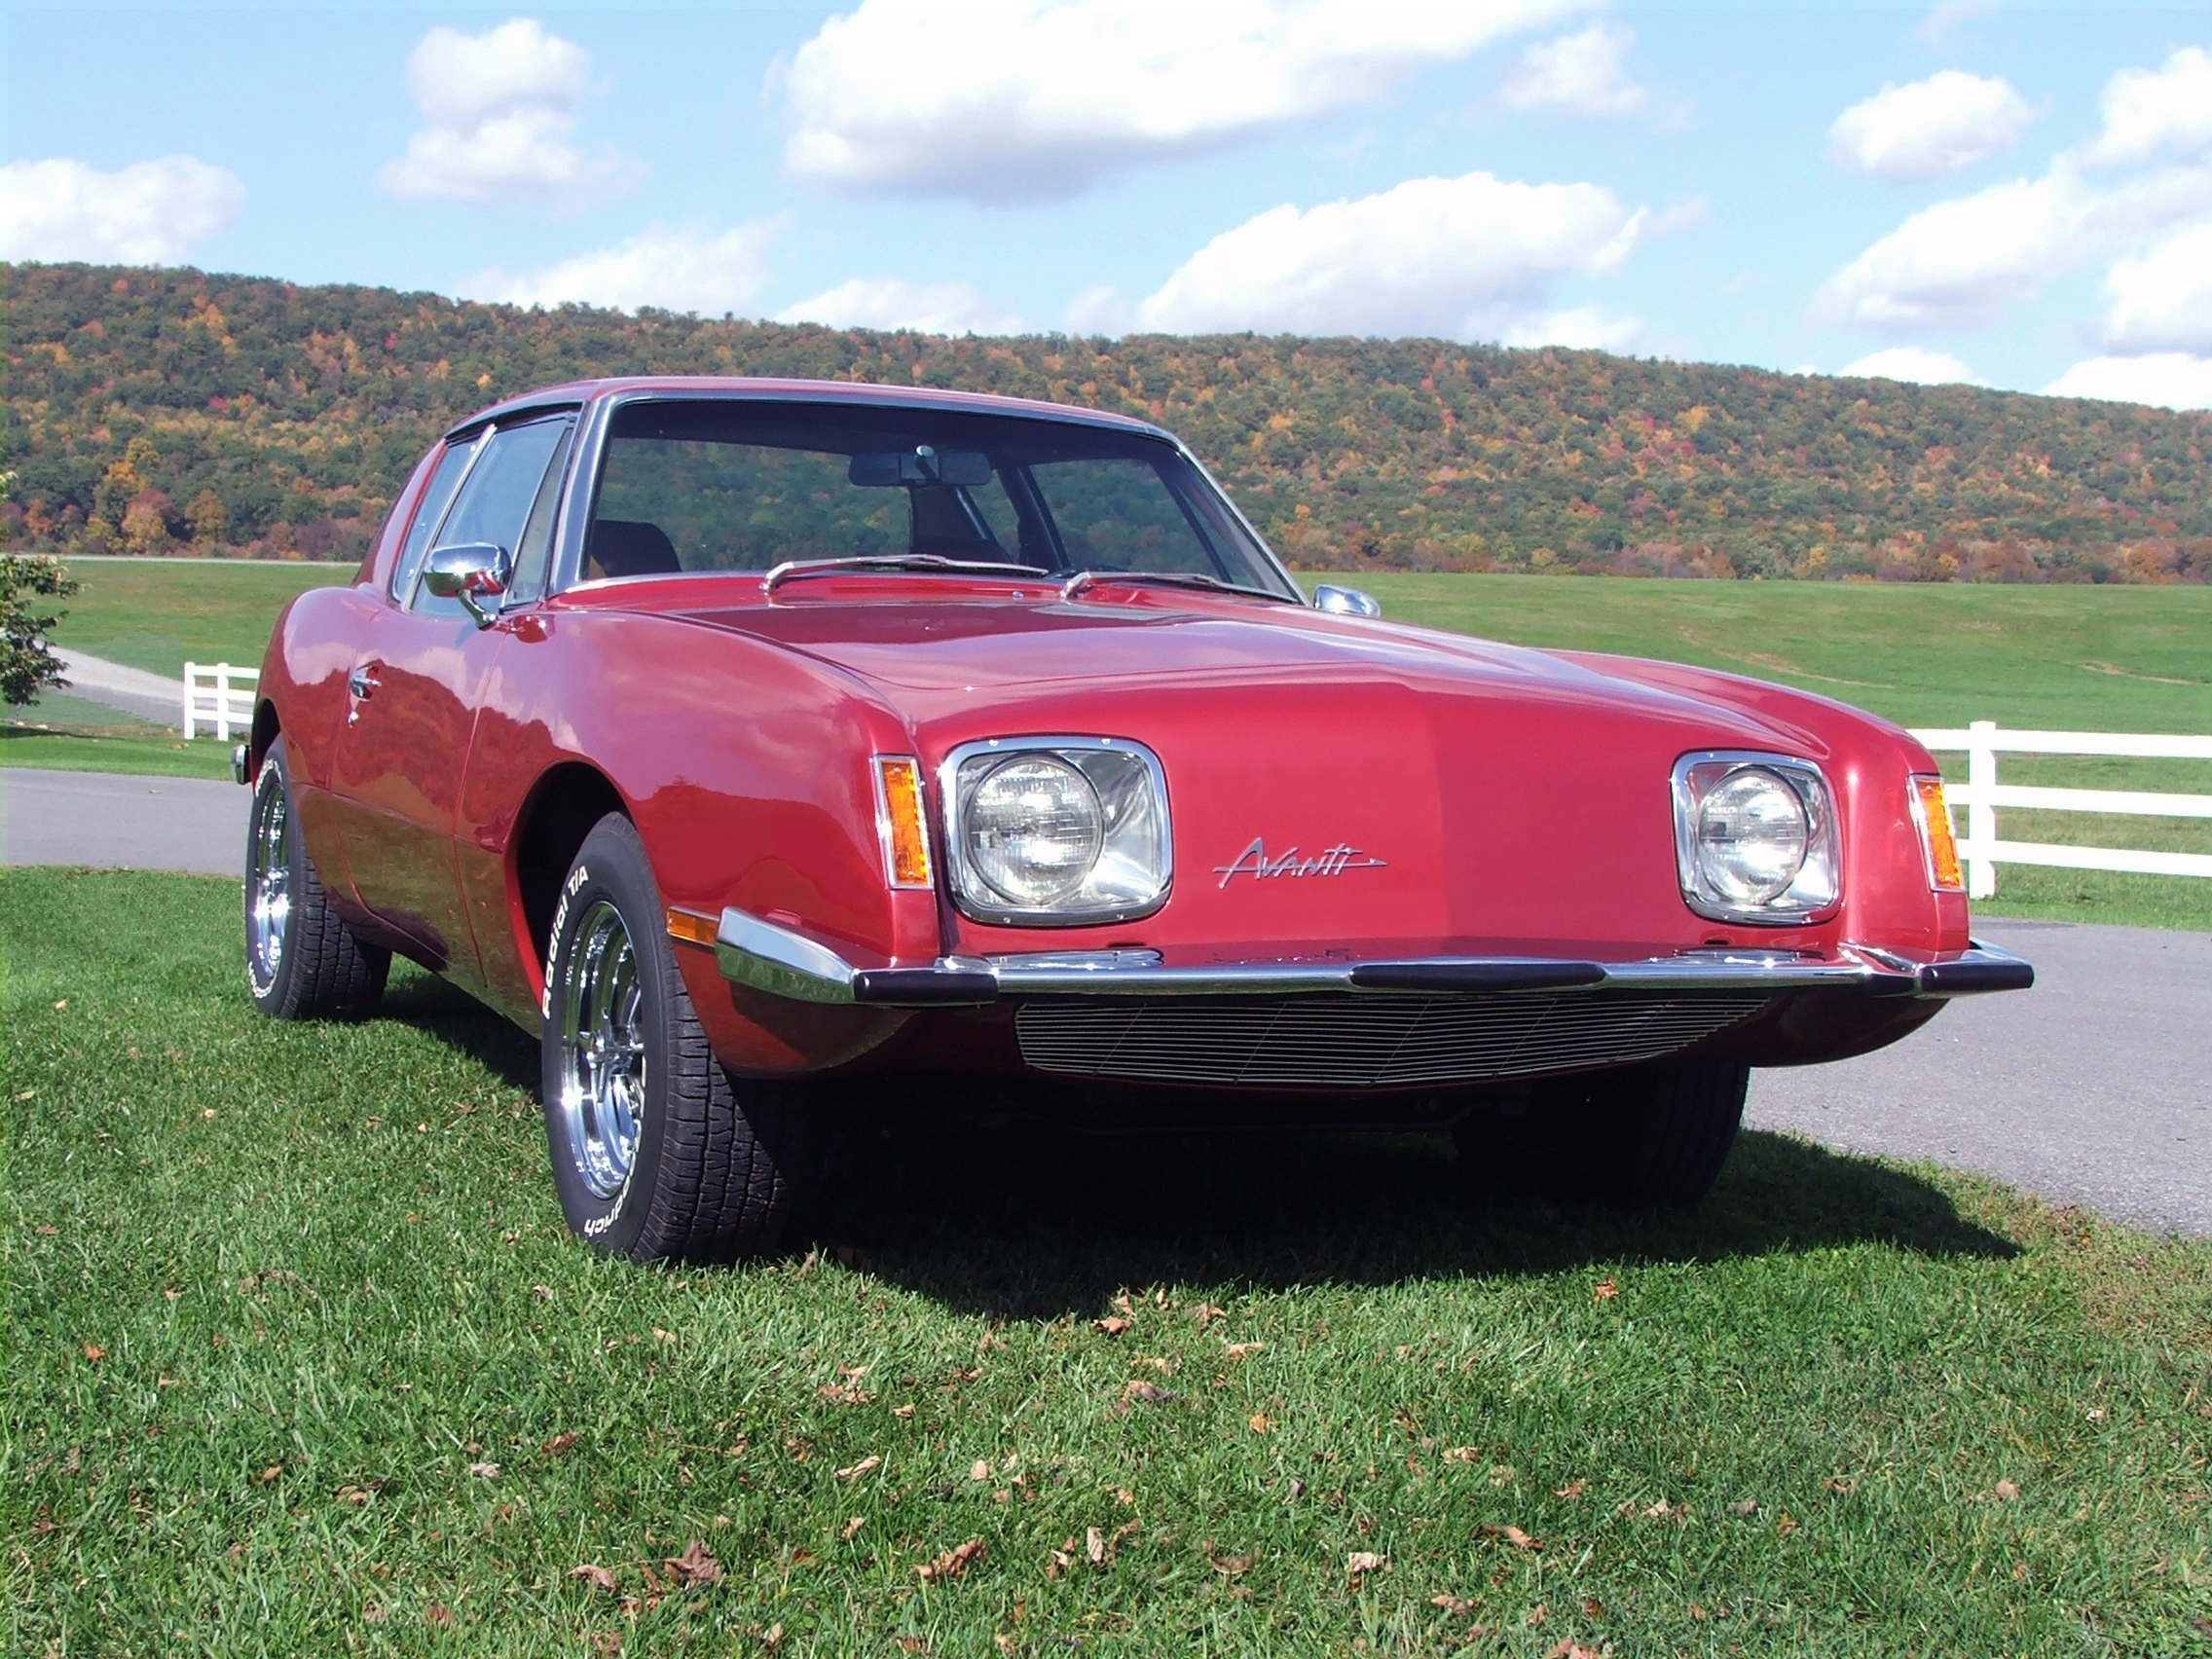
After driving a '63 for many years, I was looking for the "best of both worlds". I prefer the look of the '64 but enjoy the creature comforts of my '78. So, the '78 no longer has the cow catcher and frame extensions, rear bumper "boxing gloves", rubber side moldings, Lark "II" insignias, gas door "tool box" lock, or the "Star Wars" windshield squirter. These are all things that were added on and IMHO detract from the appearance of the car.

-
11 hours ago, Cbitz23 said:
Okay so I haven't sent back the core so I have the old caliper. One piston looks terrible the other one looks in really fair condition. They're extremely hard to try to get out I guess from age. What's the easiest way or best way to get them out?
Compressed air will usually pop the piston out. At 100 psi, you'll have 240 pounds of force. If that doesn't do it, re-install the caliper, bleed it, then remove the pad from that side. Hit the pedal, and it WILL pop. Note that the ring seal will probably be damaged during the removal, but they are available. It's been a few years since I bought a seal kit, but IIRC I got it from NAPA. My notes show it as a Wagner F46462. Otherwise, I see that Studebaker International has the seal kit for $72, and a new caliper for $110. If you haven't visited Bob Johnstone's Studebaker Info site yet, I would highly recommend it. http://www.studebaker-info.org/rjtechdec2017p1g.html#dunlopreb
The interchange list shows a Girling kit SP-2556. It that is correct, there is a kit on ebay. https://www.ebay.com/itm/Jaguar-XK-XKE-XJ-E-Type-Nelson-GIRLING-N51917-SP2556-Brake-Caliper-Rebuild-Kit/302120807437?epid=2250937742&hash=item4657cdac0d:g:YEMAAOSwImRYEVQf
-
Since you only need the piston, not the whole caliper, you may be able to find a used one at a reasonable price. The calipers are usually scrapped because of rust pitting of the housing. Since there is a sealing ring on the piston, it doesn't really matter if it is a bit corroded. A quick clean-up will do. If necessary, the seals are readily available and not very expensive. Since your caliper is the same as the Studebaker, you may also want to post a request for a piston on the SDC forum, which has many more readers than the AOAI. A used piston would have the adjusting and return springs already installed. It's a friction fit between the adjusting spring and the adjustment pin. Your broken piston is removed by undoing the dust cover and applying compressed air to one fluid port (blocking the other). Re-assembly is a matter of lubing the piston with brake fluid and pushing it over the pin and down into the bore. Here's how it all goes together:


GM A6 compressor
in 1965-83 Avanti
Posted · Edited by Jim78
I'm surprised that they were still using the A6 in '83. Is your compressor on the left side of the engine? If so, I can get some pictures of the brackets on my 350.