

Jim78
-
Posts
273 -
Joined
-
Last visited
Content Type
Profiles
Forums
Events
Posts posted by Jim78
-
-
What is the recommended lubricant for the "forklift" type steering boxes?
-
The electric trunk release is listed as a $50 option on the 1978 model.
-
My '78, RQB 2758, was factory filled with DOT5 silicone fluid. There is a decal on the top of the brake booster warning to use only DOT5. Yours was probably the same. However, there is no guarantee that someone hasn't changed the system to a different fluid. If you are unsure, the best bet is to take a small amount of fluid from the reservoir ans see if it mixes with a sample of DOT5 and not with DOT3 or $.
-
13 hours ago, JimM said:
How many bulbs are in and about the shifter? I know only one that lights the gear selector. Your pix is much brighter than my 1975.
There is a metal shield around the bulb on the shifter that has a small hole in the top to direct the light to the plastic shift indicator. If this shield is not in place, the bulb will light up a much larger area. That would seem to be the case in this photo.
-
Try the bulb in one of the taillight sockets. It's possible that the bulb is defective.
-
-
22 hours ago, Ron Dame said:
Bump:
How do I get the panels off of either side of the evaporator?
IIRC, there are screws buried in the carpet. Not easy to find.
-
54 minutes ago, Ron Dame said:
And an aluminum A6 is 134A compatible I assume?
Yes. I'm running 134A in my '78.
-
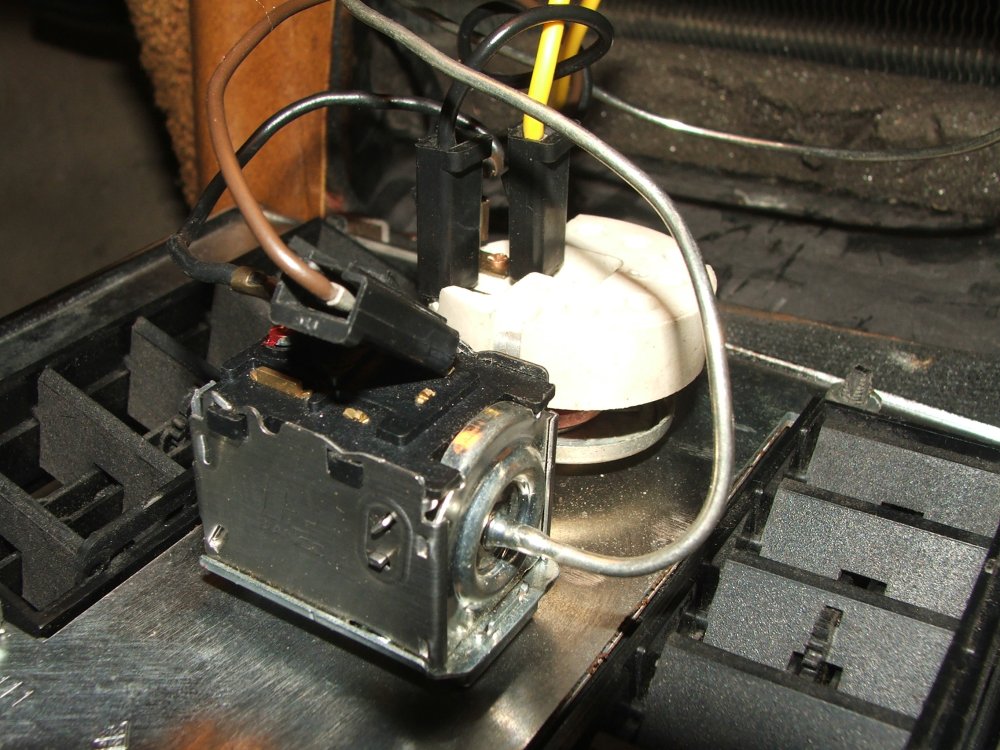
As you note, there is no binary pressure switch in the system. I added one in my system when I changed the compressor. The brown wire is direct from the thermostatic switch to the compressor clutch. The power to that switch comes via the black jumper from the fan switch. The yellow is the 12V supply to the fan switch. The black wire goes to the fan. The fan must be on for the clutch to engage. No relays. If the power is intermittent, there is probably an issue with one of the switches, or it's just the thermostat operating. A 12V test light would be an easy way to troubleshoot. Also, make sure that someone hasn't mixed up the wire locations on the switches.
BTW if you ever need to replace your compressor, I highly recommend an aluminum replacement for the A6. Dimensionally identical, bolts right in, more efficient and about 20 lb. lighter!
-
10 hours ago, Jred said:
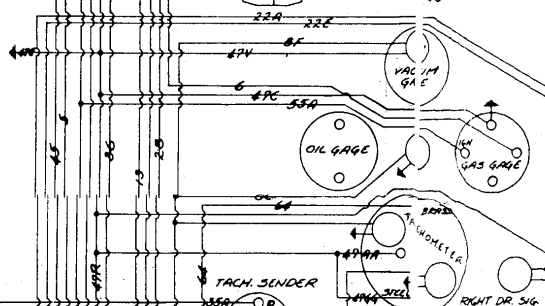
I’m currently replacing all the lights in my dash. I have the tach out getting rebuilt. Anyways I pulled out the fuel and oil gauges as I thought I might try pulling them apart to clean the inside of the lenses. Decided not to after examining them. Went to put the gauges back in and now my fuel gauge doesn’t seem to read anything. Worked fine prior. I had taken some pictures of the wiring prior to pulling things apart but the lighting wasn’t the best so now I want to confirm the wiring. Does anyone know the proper placement of the wires for the back of the fuel gauge? The manual I have is black and white and I have not seen a proper description of wires that match mine.
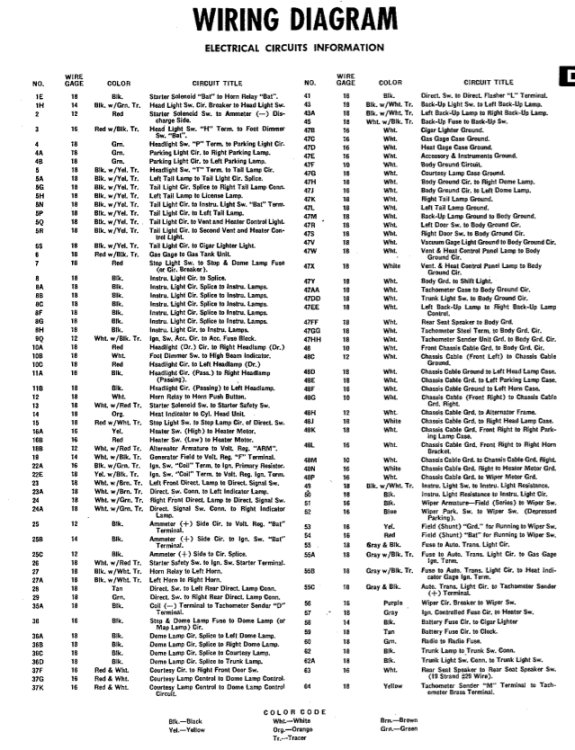
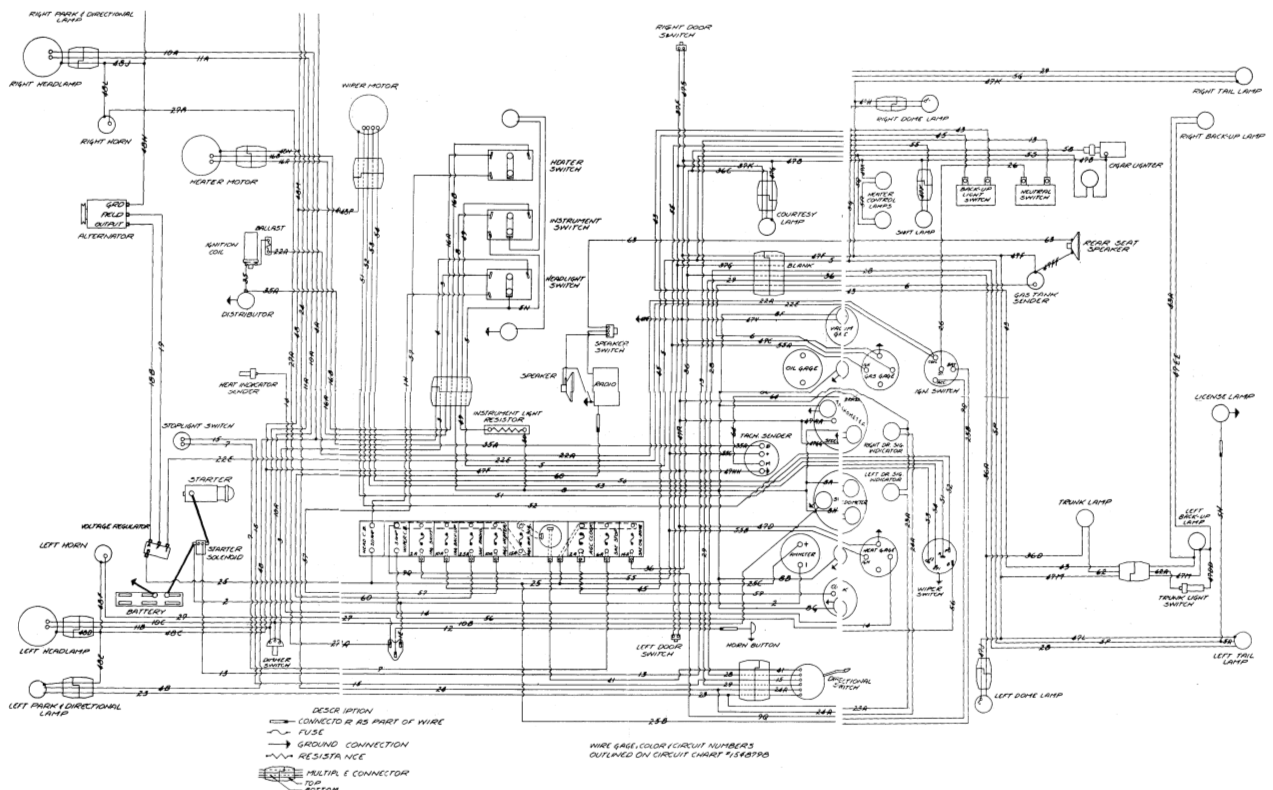
You may have blown a fuse. Check for 12V with the ignition in the ON position. If your wiring is the same as the Studebaker harness, the gas gauge would have wire 47C (white) to ground, 55A (gray w/black trace) to the fuse, and 6 (red w/black trace) to the sending unit.
-
16 hours ago, John D said:
Thanks all, the tank is in ok condition, but there is a small paint blister in the hood where clearance is tight (was there when i bought it). The thermostat is starting to act up a bit so I figured I might as well convert it when I replace that.
When you change over, you will need to add a coolant recovery bottle. These may still be available from Nostalgic, or a generic one will work if you're not concerned about authenticity.
-
My records show that I got them from Studebaker International: "upper radiator hoses – SI #1700928, #1700929"
-
Yes, that knob is identical to the one on my '78. There is a mate to it that is marked "AIR" that controls the fan speed.
-
The metal line often has bends that are too tight to be done properly by a hand bender. Since this is basically a Chevy crate motor, these lines are readily available from many vendors. I have bought a number of engine parts like this from Corvette America.
-
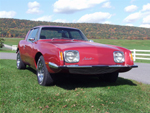
There is some information about its history on Bob Johnstone's site.
https://www.studebaker-info.org/avantiRQBx2.html
-
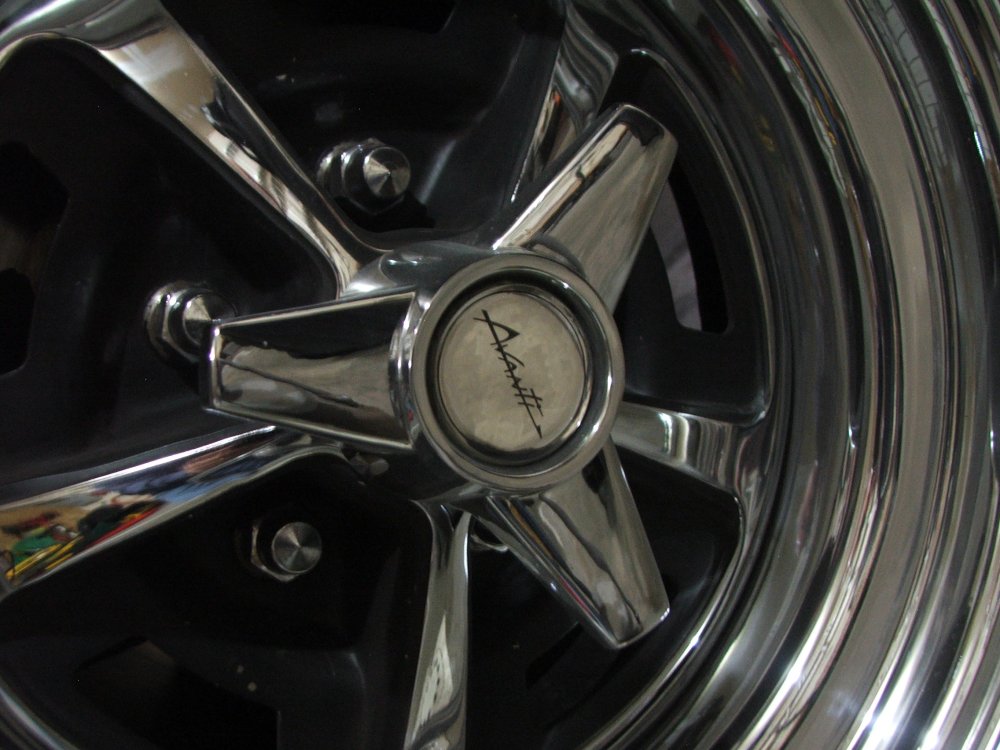
17 hours ago, pantera928 said:
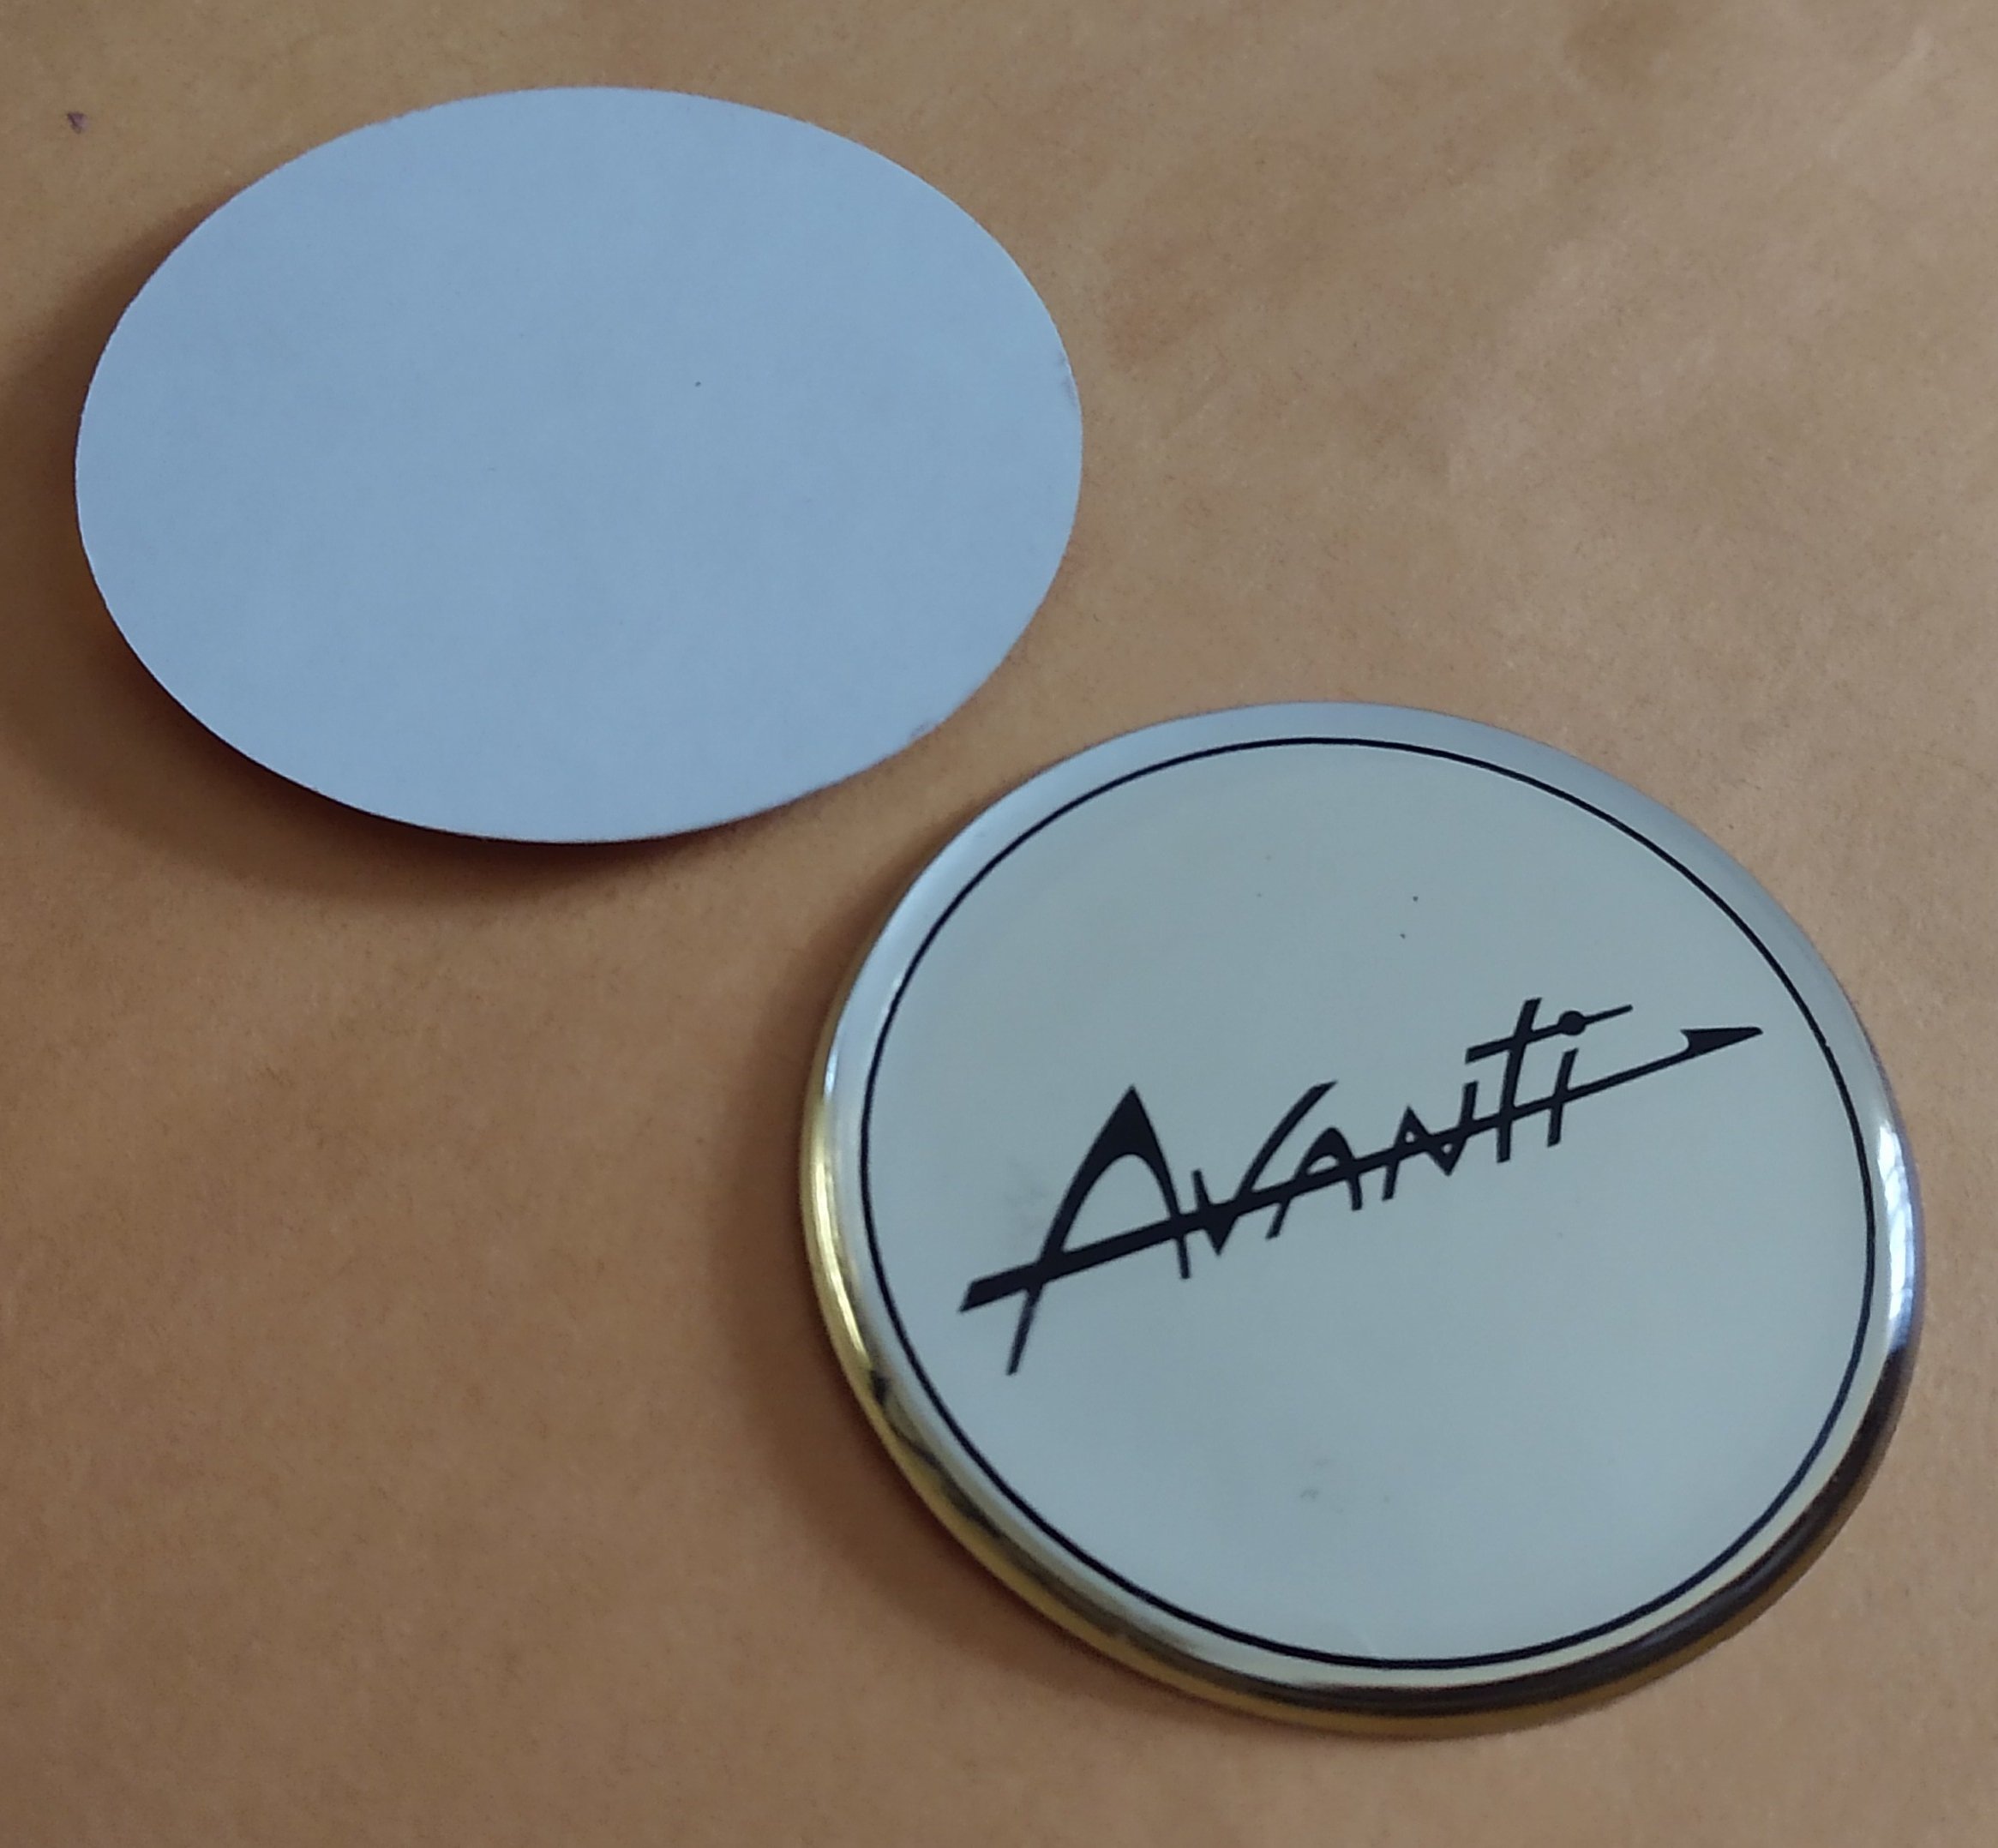
Would love yo find a set of decals like that
They aren't decals. They are plastic buttons about 3/32" thick, with an adhesive tape backing. I installed mine with silicone adhesive about 10 years ago, and they've held up really well. I do have a couple of spares, JIC. I recall getting them from Studebaker International at the York Swap meet many years ago. They had both "silver on black" and "black on silver" types. Personally, I prefer these.

-
The logo buttons were also available with a silver background, which I prefer on my Magnum 500s. They fit perfectly in the recess of the center cone or spinner.
-
I have what appears to be the original jack. But, the handle is missing. Since an Avanti needs to be jacked under the lower control arm or the axle, the screw of the jack is parallel to the car, rather than the typical "modern" jacks which are used at body jack points with the screw perpendicular to the vehicle. The newer jacks and replacement handles are short since the jack is out where it is accessible when in use. These short handles would require literally crawling under the Avanti during the jacking process. The jack that I used with my '63 Avanti was a Sears two-speed scissor that had an extendible handle that was short enough to stow properly, but extended long enough to reach the jack points without getting under the car. Best bet at this point looks to be to get out the torches and some steel rod and fabricate an extendable handle. My jack and spare have never been used in 44 years, but it would be my luck to get a flat now that I know that I don't have a jack handle. 😆
-
Another spot to check is where the windshield wiper transmission goes through the cowl. A bad seal there will cause problems. Also, check for a crack in the fiberglass there, as that has been known to happen.
-
13 hours ago, Gunslinger said:
It would probably be easier and cheaper to go to Walmart or Pep Boys, Auto Zone or other and simply buy a new scissors jack with its own handle. They're not expensive. While it's been some time, I purchased a Mr. Goodwrench scissors jack from Walmart for about $15.00. It fits in the storage compartment the same as the original.
I have looked at that route, and found the same issue of short handles, as "modern" scissor jacks are intended to go under the body jack points, with the screw perpendicular to the vehicle. Obviously, that doesn't work on an Avanti. It looks like my best bet may be to buy a length of 3/8 steel rod and bend my own handle.
-
I recently discovered that the handle for the scissor jack in my '78 is missing. All of the replacement handles that I find on line are very short and would be pretty useless for jacking an Avanti. Is anyone aware of a source for a longer handle?
-
This is about as good as it gets.
https://studebaker-info.org/Tech/Diagrams/AEC/aec.html
If you have specific issues, you might find some first-hand info here on the forum. Try the search function.
The Studebaker 63-64vdiagram is sometimes helpful, but a number of changes were made by '74

-
If I'm not mistaken, your '80 would already have the "quick steering" arms. As noted above, they were implemented to compensate for the forklift steering box. I don't know when that change was made, but my '78 has the forklift box. I think that the "quick steering" term came when owners of older Avantis with the original steering box realized how these arms would affect the steering response.
-
A picture would be worth a thousand words.


Safety switch: Neutral or Park
in 1965-83 Avanti
Posted
It should start in both P and N. I have found these switches to be prone to corrosion of the contacts. You can carefully bend the tabs to open the switch, polish the contacts and re-assemble. Proper adjustment can be a little fiddly since the switch adjustment must match the gates on the shifter.