


Mel
-
Posts
110 -
Joined
-
Last visited
Content Type
Profiles
Forums
Events
Posts posted by Mel
-
-
From a LONG, LONG, LONG time Avanti owner, 32psi in front and 30 in the rear. That's what I've run for 6-7 years and have had good luck with handling and tire wear.
-
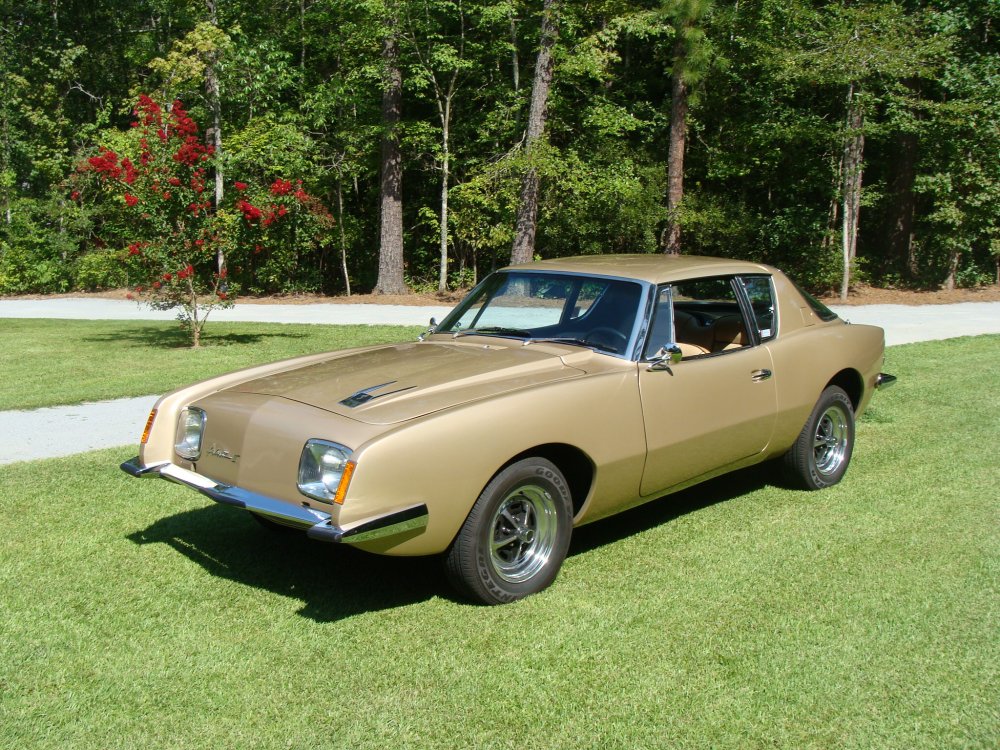
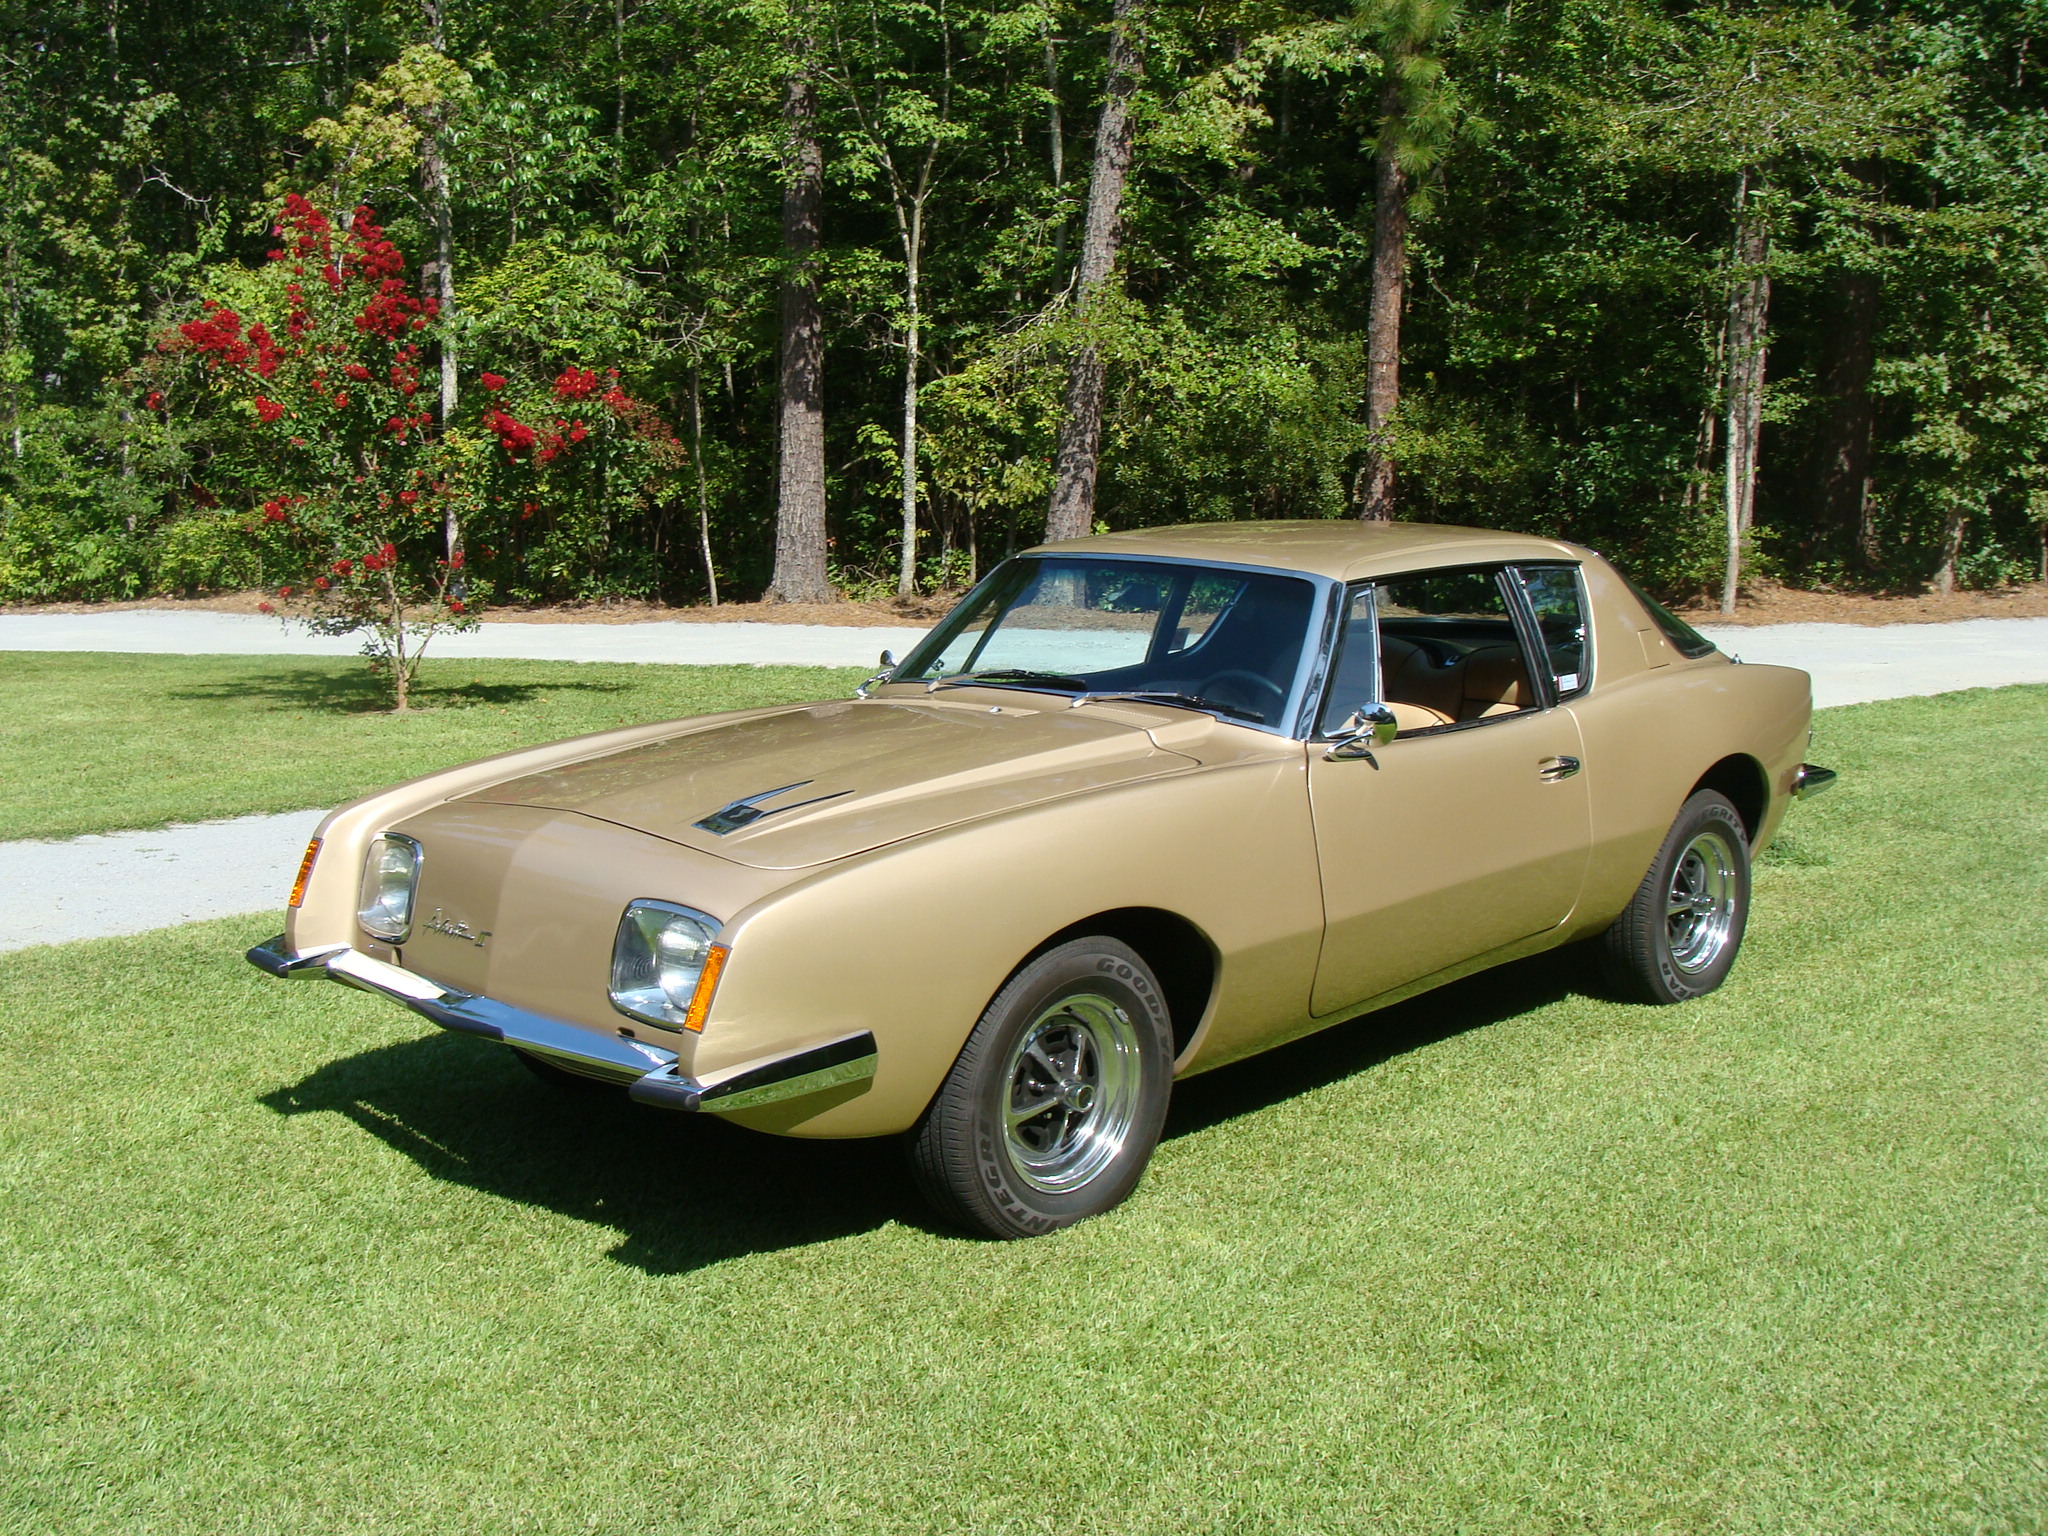
Not many of us '66's; mine is RQA 0108. Your car looks very nice in the pictures. There is always something to learn about these cars.
Yours should have the 327/300 Corvette motor. Be sure to put a bottle of the ZDDP in your oil when you change oil, or, use Valvoline VR1 racing oil which has zinc in it. Newer blends of oil do not have zinc and the flat tappet camshafts like zinc.
I had a GM 700R4 transmission put in mine which, with the torque converter lock-up and overdrive, lowered the engine RPM from approx. 3150 to 2200 at 70mph which allows you to think and talk to your passenger on the freeway. Less stress on the engine and better gas mileage are bonuses.
If you don't have the Turner Brakes , at least on the front, I would. Shimming up the pads on the original set up is a pain and the pads are much smaller, and hence have less stopping ability, than Turner's set up.
Perhaps I should not have volunteered the three items above until you indicated what you have done to the car, what you plan to do, etc.
Mel (North Carolina)
-
Did you get it fixed yet? I wrote an article which is in issue #170 which has a diagram for a 'headlights on' reminder circuit which I put on my '66. The article has two circuits described; the one that may apply and be of interest to you begins at the top of page 48.
-
One other item to be SURE to check is the 'universal joint' that connects the end of the steering wheel shaft to the steering box. This is made of fabric impregnated rubber, of some sort, and if this breaks, as has been known to happen, you will have a WHOLE LOT lot of free play.
-
You have to remove the two screws at the top of the cover plate. Then remove the two knobs on the A/C controls with a small allen wrench and then the two nuts under the knobs; the plate will then come off. Then you can get to the tabs on the back to remove the deflectors. Hope this helps.
-
'66 RQA-0108. Have found the rear brake cylinder at a couple of sites for $89.50. Considering how much I have in it, I'm not sure why I should try to save a few bucks but does anyone know of a cross-referenced replacement which is any cheaper? I've tried to recondition the cylinder but the diameter is so small I can't get a brake hone in it and it leaks intermittently. I have a repair kit that, I think, came from a Toyota but I'm not sure.
I'm not sure if the brake lines have ever been changed. Has anyone done this and how difficult is it? Can flexible hydraulic lines be used and has anyone done this?
Thanks!
-
As SilverStude said, you probably need a Ford style solenoid. Chevy starters of that era were known for having weak solenoids. Jon Meyer told me that GM had actually sent out a field notice around that time regarding the problem and weaker internal springs as a fix.
Fred88 below noted the parts you need. In issue 174, pg. 7 of AOAI magazine, I noted that Summit Racing sells a kit for this problem for $19.97, Summit p/n SUM-G1750. The kit includes the solenoid and a bit of hardware but you'll also need a jumper to run from the new solenoid to the starter. I bought this jumper at Advance Auto for around $5.00 (This jumper is about 6-8 inches long and is probably #4 wire with a terminal on each end which is essentially a flattened piece of metal with a 5/16" (or so) hole drilled in it to allow it to slip on the starter and solenoid terminals. Hope this is clear.) I was always apprehensive about whether the car would start, particularly when it was hot, but I put this kit on and have not had a bit of trouble with it.
-
Bill,
You don't note what year your car is but, if an early edition (probably pre-1970 -- wiring color-code issue but I'm not sure) you can look in issue #170 on page 47 where there is an article I wrote up describing the headlight relay circuit I used; as noted in the article, it is essentially the same as on Bob Johnstone's website (but slightly different as noted in the article). I mounted the relays up under the fuse block and they are well hidden. I ran the main feed to the lights from the existing 20 amp breaker but, for high intensity lamps, you can certainly feed it from the main battery feed with a breaker or fuse in the line. As with any task under the dash of any car, the job was not hard at all but does require some dexterity. My headlights were dim and occasionally flickered; I've been real happy with the results. Good luck.
Mel
-
The heat riser on my '66 ('67 GM motor) does not work. It is not stuck and can be freely rotated in the riser housing. The bimetal spring is in place and mounted to the rotating part of the valve but it is not attached to the housing of the riser. The end of the spring looks bent back an inch or so from original and does not seem to align properly any way I try it. Does anyone know if there is a diagram of this thing somewhere? Thanks for any ideas.
-
Eaton made some rear springs for me. I haven't looked lately but when I bought mine, they listed two prices, basically one for wholesale and one for retail. I told the guy he could send them to a friend's shop or directly to me; he said he'd send them to me for the wholesale price and did. He also asked me if I wanted 'heavy duty' for no extra cost; I said 'sure.' I think they just added an extra leaf. The car sat up a bit high so I put in 1.5" lowering blocks which brought it down to a nice height. I wrote an article on 'electrical circuits', etc., which is in Issue 170 which has a bit about this. Good luck.
-
In Issue 170, I submitted an article regarding electrical circuits, etc., and also included a hint on these air vents. I had the same problem in mine as the fiberboard 'flaps' disintegrate over time. Basically, you can push the pivot rod holding the flap upward and the bottom of the setup (plastic tube?) downward and pull the bottom of the flap inward. (You'd have to do this anyway to replace the setup.) I then drilled the rivets out of the mount and used paperboard to fashion templates and then used the templates as guides to cut aluminum plates. I'm not sure of the gauge but the aluminum was 0.125" (1/8") thick. I then riveted the plates to the original mount rods. It took a bit of trial and error to get the templates right but, once I got them right, I cut the aluminum plates and they fit very snugly -- probably as snugly as the original and they will not disintegrate. I painted them black right before the last placement and painted the grill covers at the same time. I've been very pleased with them. As I recall, I believe the flaps are the same but the mount rods may be different; i.e., I used the same flap template for both sides. Good luck.
-
Problem first arose a couple of years ago. Car had sat for about an hour on a quite warm day and the amp meter pegged (-) when I tried to restart it. A couple of taps on the solenoid and the car started. I had to make a couple of stops before getting home and it did the same thing once more. New starter and solenoid and the problem was not seen for about another year and a half. About three months ago, the problem arose again. At that point, the battery was at least six years old. (I've had the car for six years and it was the battery in the car when I bought it.) The battery is in the trunk. I replaced the battery and replaced the #4 multistrand ground wire from the battery to the engine with #2 fine stranded copper wire and figured the problem was cured. A couple of days ago, it balked again. I hit the start position on the ignition switch 5-6 times and it then engaged and started.
I'm pretty sure heat is causing the problem. From what I understand, these cars don't have trouble getting heat out of the engine but do have trouble getting the heat out from under the hood.
The starter has the standard heat shield around it but I wonder if someone knows if there is some aftermarket heat shield that is effective.
Is this a problem with the 327/300 motor, in general?
Does the 'Hi Torque' starter work? (I believe these are for the very high compression, racing setups but I'm not certain.)
Thanks for any help.
-
Thanks for the feedback,guys. Basically, my problem is it just doesn't seem to idle, accelerate, run, etc., smoothly. I'm beginning to think I may be spoiled by the electronic fuel injection in everything else I own.
In the Avanti: good, even compression; ignition is good; idle vacuum, on an undamped gauge, is steady so I don't think any valves are sticking.
Essentially, I was wondering what particular setup others had found that works well -- which accelerator cam, which vacuum secondary spring, should the restrictor ball be left out in the vacuum secondary, etc.
And, is the available gas (93 octane with ethanol) a big part of the problem? Are people using octane boost and to what octane level are they trying to get the gas in the tank.
Thanks for the tips and links, guys.
Mel
-
'66 327/300 hp Corvette motor with the PowerShift transmission and, I think, a 3.07 rear axle. The ignition is in good shape. It has the Holley 4160-3367 carburator which, from looking at catalogs, Corvette apparently used for a couple of years in the 66-67 era. If you've played around with this carb., you know it has several points of adjustment. I've bought a couple of the adjustment kits and am wondering if anyone has extensive experience with the setup. Specifically,
1. Which color accelerator pump cam works best?
2. Which vacuum spring? Originally, my secondary was not working at all due to the diaphragm not seating. It is now seated and the diaphragm will retract (under load) if the secondary throttle plate is disconnected, but will not retract if connected. The throttle plate does not appear to be binding at all. I'm thinking I need a weaker spring in the vacuum secondary??
3. I read that, for the 3367, take out the restrictor ball which is between the secondary diaphragm and the (carb.) body. This now allows the diaphragm to retract, as in #2 above, but I'm wondering why it was in there in the first place if it shouldn't be.
4. I've not changed the pump shot nozzle and do not know what size it is.
5. I've read that, if you run the idle jets in fully and the engine stalls, the power valve is working properly. Plus, from what I've read, this valve is apparently not as critical as some of the other adjustments.
6. I run the 93 octane gas, the highest you can get in North Carolina. Plus, it "MAY CONTAIN UP TO 10% ETHANOL." I put a bit of octane boost in the tank whenever I fill up but am not sure if it is helping. I'm thinking the gas is a fair part of the problem.
7. Which spark plug seems to work best? Platinum? Regular? Does it matter?
Many thanks for the feedback.
Mel
-
Hope this post isn't too late to be of help. After I bought my '66, I found out some of the wiring was fried. I initially thought about trying to replace just the wiring but ended up taking the dash out and doing an extensive 'under dash' rework. From what you'd have to do to take the instrument cluster out, I think you could go just a bit further and take the dash out as the hardest part is getting all that stuff on the cluster loose. I replaced the (totally deteriorated) boot around the brake rod, fixed a pin-hole leak in the heater core (which had not reared its ugly head up to that point because I bought the car in early summer and had not used the heater up until the time I took the dash down) and replaced the hoses, fabricated new 'doors' and seals for the side air vents seals, replaced the totally rotted defroster hoses, changed all instrument dash bulbs, oiled up all the vent and heater control cables, etc. I'd suggest getting your ideas together to do all these things, including of course changing your fried wiring, at one time as taking the dash down is kind of a pain but totally doable. Hope this helps.
-
'66 with the 327/300 Chev. motor. I'm thinking of putting on an electronic ignition (EI) setup. A local guy who builds racing engines assures me that, for about $100, I'll have a much better ignition system -- more reliable spark, better advance curve, ... and that it essentially sits inside the distributor cap. He also says I just need a 12v supply. With the 'thermistor' wire from the ignition, I'm getting about 4v to the coil at 'run', 12v on 'start' circuit, as normal. So, a couple of questions:
1. Experience (+/-) with a particular type of EI setup,
2. The tach sending unit is driven by the points. Is the original tach set up compatible with an EI setup?
Thanks.
-
I purchased the rear leaf springs for my 66 from Eaton Springs in Detroit. www.eatonsprings.com Same price for regular or heavy duty.
-
Putting new bearings, etc., on the rear axles on my '66. As such, brake backing plates come off and, upon replacement, I bled the cylinders. DOT 3 fluid is much more expensive than synthetic at the local AutoZone -- literally, several times more expensive. I've owned the car about two years and, as I do not know the history of a brake system overhaul, or if there even has been one in the last few years, I'd at least like to flush the entire system. None of the front or rear cylinders leak and brakes are good but the fluid I bled out of the back cylinders was somewhat cloudy. I'd guess that synthetic fluid would not harm a system as long as I flushed the entire system, but I do not know. Does anyone?
-
Question is...does your car want to stall with the A/C on? If not don't worry about the idle compensator.
Good question. I've just gotten it back and haven't 'shaken' it down enough yet to see if I actually need one. Thanks.
ErnieR
-
It looks like someone changed the carburetor on your car sometime in the past. Holley makes a compensator for their carbs...they call it a dash pot. It's available from Summit Racing. They list several mounting brackets...they say universal but I would get the model number off your carburetor before buying one blind.
Thanks for the info.
-
Mine has the Holley 4 barrel. Anybody have any additional info? Thanks.
-
Does your 327 still use the Carter AFB carburetor? If so, it will probably use the dashpot or idle compensator that was used on R1's and R2's. I believe Studebaker International and Jon Myers carry reproductions of them. You might check with Edelbrock to see if their electric a/c idle compensators will work on an original AFB. If so you can get one of theirs from Summit Racing or Jegs...they're not really inexpensive but the repro dashpots aren't either.
If your engine has a Quadrajet, you'll have to source a compensator from NAPA or someplace similar. Maybe even Corvette parts suppliers like Corvette Central, Eckler's or other might have it, but I believe Avanti Motors didn't begin receiving Quadrajets in place of the AFB until 1969.
Edelbrock's compensator would be my first choice if it can be used on an AFB, otherwise get a repro unit from Myers or SI...my opinion only.
-
The A/C did not work on my 66 with the 327 Corvette motor when I bought it and I replaced the compressor with one from Vintage Air. As I write this, I've got it in an A/C shop, having the guy evacuate the system and recharge it with R134. (A tag under the hood indicates it had been charged with 134 some time back.) It does not have an idle boost for when the A/C is engaged and I need to know if anyone knows the setup, where I can get one, etc. Many thanks!
-
As Ernier noted, changing the rear leaf springs made all the difference in my '66, also. (I also put on new front and rear shocks.) My springs were so sagged they were sagged slightly beyond level, not even slightly curved upward.
Eaton makes springs for all kinds of cars and makes them up after you order them; they have the plans and make them up new. I was hesitant to order NOS springs from a Stude parts dealer thinking they might have lost some of their 'springiness' if left sitting around for 35-40 years, probably not but I certainly don't know. Anyway, I called Eaton (313-963-6820 www.eatonsprings.com) and they had regular and heavy duty springs -- same price. $479.00 plus shipping which was cheaper then NOS. They had two prices listed, one of which, I believe, was for a garage to purchase and the other for you and me. I told the guy on the phone I was having some work done at a garage (which was true) and could have the garage purchase them for the cheaper price and sent to the garage or he could sell them to me for the cheaper price and send them to me. He didn't hesitate at all, sold them to me for the cheaper price and sent them straight to my doorstep. Perfect fit.
As I said earlier, regular and heavy duty were the same price. I think they just add another leaf but I'm not sure. I got heavy duty and they really raise the back end of the car up pretty high. I think, to do it again, I'd probably get regular duty as the heavy duty probably set it up higher than the stock 63-64 which, as we all know had more of a rake than the '65 and on models. I like the aggressive rake but it is a bit much.
Good luck.
Electrical
in 1965-83 Avanti
Posted
Per WayneC above, get the wiring diagram. If you don't have the diagram, I'd probably start fault tracing by checking, with a meter, to see if you have power to the overhead. Being you had taillights, and now don't, I would guess you had power to the overhead, at least initially. If you don't have power now, you may have blown the circuit breaker on the fuse block. If you do have power to the overhead, proceed at your own risk, but I'd try eliminating the switch from the circuit -- i.e., try jumping wires together to see if you can get headlights, parking lights, ... to light up. Basically, the set up is that the switch on the left side supplies power to the switch on the right (e.g., left - power on/off to the lights, right - headlights/parking lights; left - power on/off to the instrument lights, right - instrument lights dim/bright). You should have two wires coming off the (headlights/parking lights) switch on the right, one leading to the headlights, the other to the parking lights. You can put power to either of these wires, either from the power to the overhead or directly from the battery, and the headlights or parking lights should light up. Again, proceed at your own risk.
Being you had the tail lights working, I doubt you have a 'short' but probably an 'open.' Look inside the switch and you'll see, as I recall, it's not a rock-solid setup and these switches do get dirty. I just looked in Studebaker International's catalog and did not see a listing for them. You might try Nostalgic Motors if you need switches. The headlights switches, particularly, have quite a bit of amperage going through them and a relay set up routes most of the current away from the switches. (See AOAI magazine #170, pg. 47 for a circuit and write-up.)
You might want start with making sure your bulbs are good and you didn't blow them when you shorted the switch, initially.
Keep us posted.