


brad
-
Posts
1,076 -
Joined
-
Last visited
Content Type
Profiles
Forums
Events
Posts posted by brad
-
-
Those holes (without the plugs) are to let boost into the passageways to equalize boost pressure from the throttle plate bores to outside the bores of the throttle shaft, so it doesn't push fuel out the throttle shaft.
-
It's in the mail now...Shipped it out Friday.
-
How about dual 4s AND supercharged?
-
Edelbrock 74-47 with the orange step up springs (4" hg) work great. order from Summit. I also use a little leaner jet, a .98 instead of the stock 101. 93 secondary jets.
-
The doors have to be closed for the inside lock knob to be able to lock the door. From the outside, only the key locks the doors.
-
There should be a hole in the movable arm, and the mounting bracket. loosen the hold down bolts, and pit a drill or pin to line up the holes, then tighten the hold down bolts. That should in theory get you there.
-
I sent one to Switzerland a few years ago, the only metric gauge was the speedometer. oil was still PSI, and temp was Fahrenheit.
-
You can get them installed wrong on the opposite sides, so keep track of which is which. After the crank part is installed, then the center idler plate is screwed to the door with the three very short bolts. Anything longer will hit the transfer arm that was bent and bind it up. Then crank the regulator all the way to the top, and then line up the forward bolt of the short track. then reach in and push on the short track to line up the 2nd bolt hole. If you try to do it with the regulator down, the spring pressure is much greater, and injury is more possible. What you want is the spring to wind up and exert more pressure as the window is lowered. That counterbalances the weight of the glass and frame.
-
Any diaphragm spring clutch will be far easier to depress, and hold better than the old Borg & Beck stock clutch. Most woll require a modification to the bellhousing to clear the pressure plate. You have to grind away the interior "bumps". but other than that it's a bolt in good modification and far easier on linkage parts.
-
Each and every instrument has to be removed from the back side to remove the dash overlay.
-
I used a retractor installed hidden under the rear armrest ashtray bolted to the roll bar. Up from there, anchored to the upper roll bar, then the free end anchored to the floor in the stock outer anchor location on the hog trough. Inner latch buckle to the inner regular seatbelt mounts near the driveshaft tunnel.
-
I use the WIX white filter, and wipe off the printing with lacquer thinner, Paint the bottom portion with 'wrinkle texture' red paint, and use the repop Studebaker decals to make them look like a factory filter. But it's modern production and the filter medium isn't rotten and dried out, and there are no hidden insects in them.
Never use a 60 year old consumable part when new is available. This goes for rubber parts too.
-
I think B9 was the lowest #
-
All the upper upholstery were panel card material, a dense cardboard. Covered in jute on the upper pieces, Cotton batting on the sides, and foam on the pieces on the doors, and upper 1/4 above the side panel where it rolls over the opening of the 1/4 window. The rear piece where the courtesy light is has the vinyl folded over the top only, then it was screwed to the body, then the jute glued then the remaining flap of vinyl glued to the body, and folded over the window openings (both the top of the 1/4 window, and the rear window).
-
Found one, Thanks
-
Need a Lionel Stone reproduction intake, not R3 sized. For project. Have a slightly taller Jeff Rice intake to trade.
-
The steering box should have a lower mounting bolt that is slotted in the frame so it's shaft angle is adjustable to line up with the steering column. That is a good reason to keep the box to frame bolts loose when replacing the rag joint, and lower column bushing. Tighten the frame bolts last after so there is NO binding anywhere in the system.
-
Closer to 1 1/2"
-
Air filter, and oil filter.
-
Sure, roller cam too. And don't use 50 wt oil! With modern thin low tension rings, it will rev to the moon, and make more horsepower than you ever imagined!
-
The doors are not one adjustment at the mounting. That is they have room to loosen the bolts, and make adjustments then tighten the bolts.
-
On 1/4/2025 at 10:31 AM, mfg said:
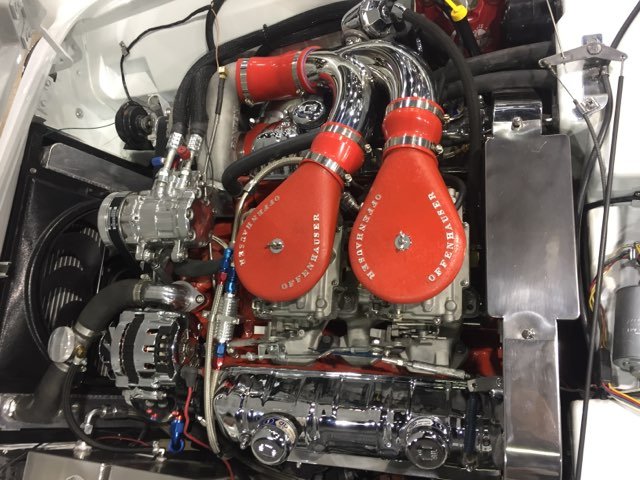
Both of these ultra rare Stude Avantis are ‘over the top’, however, I must say that the turquoise over turquoise R3 is extra spectacular!!
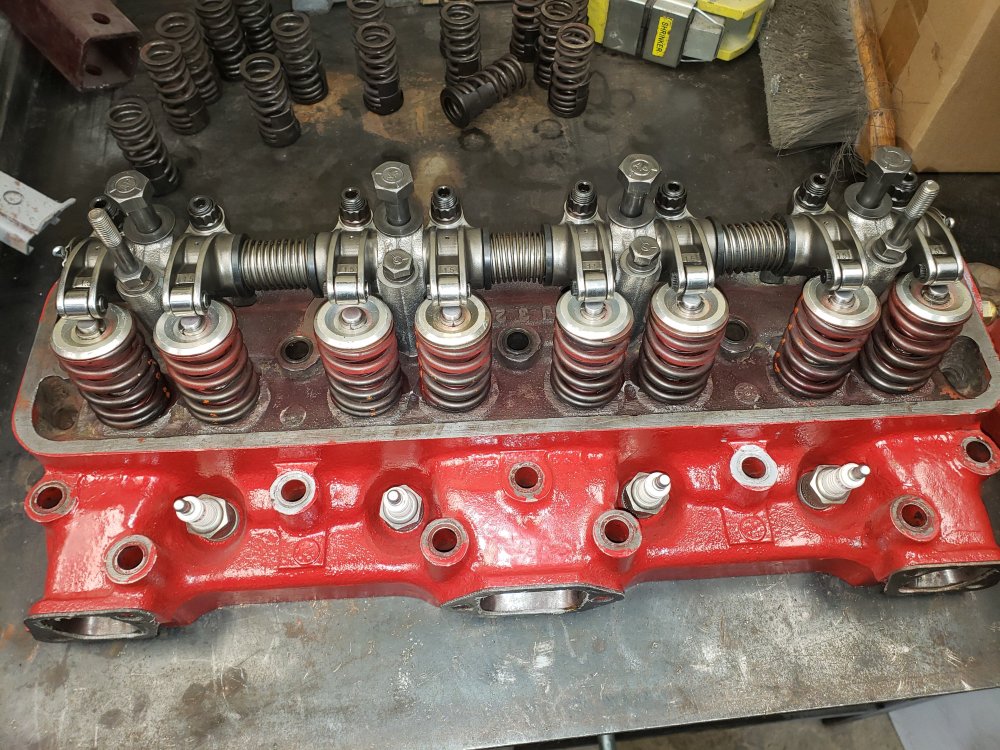
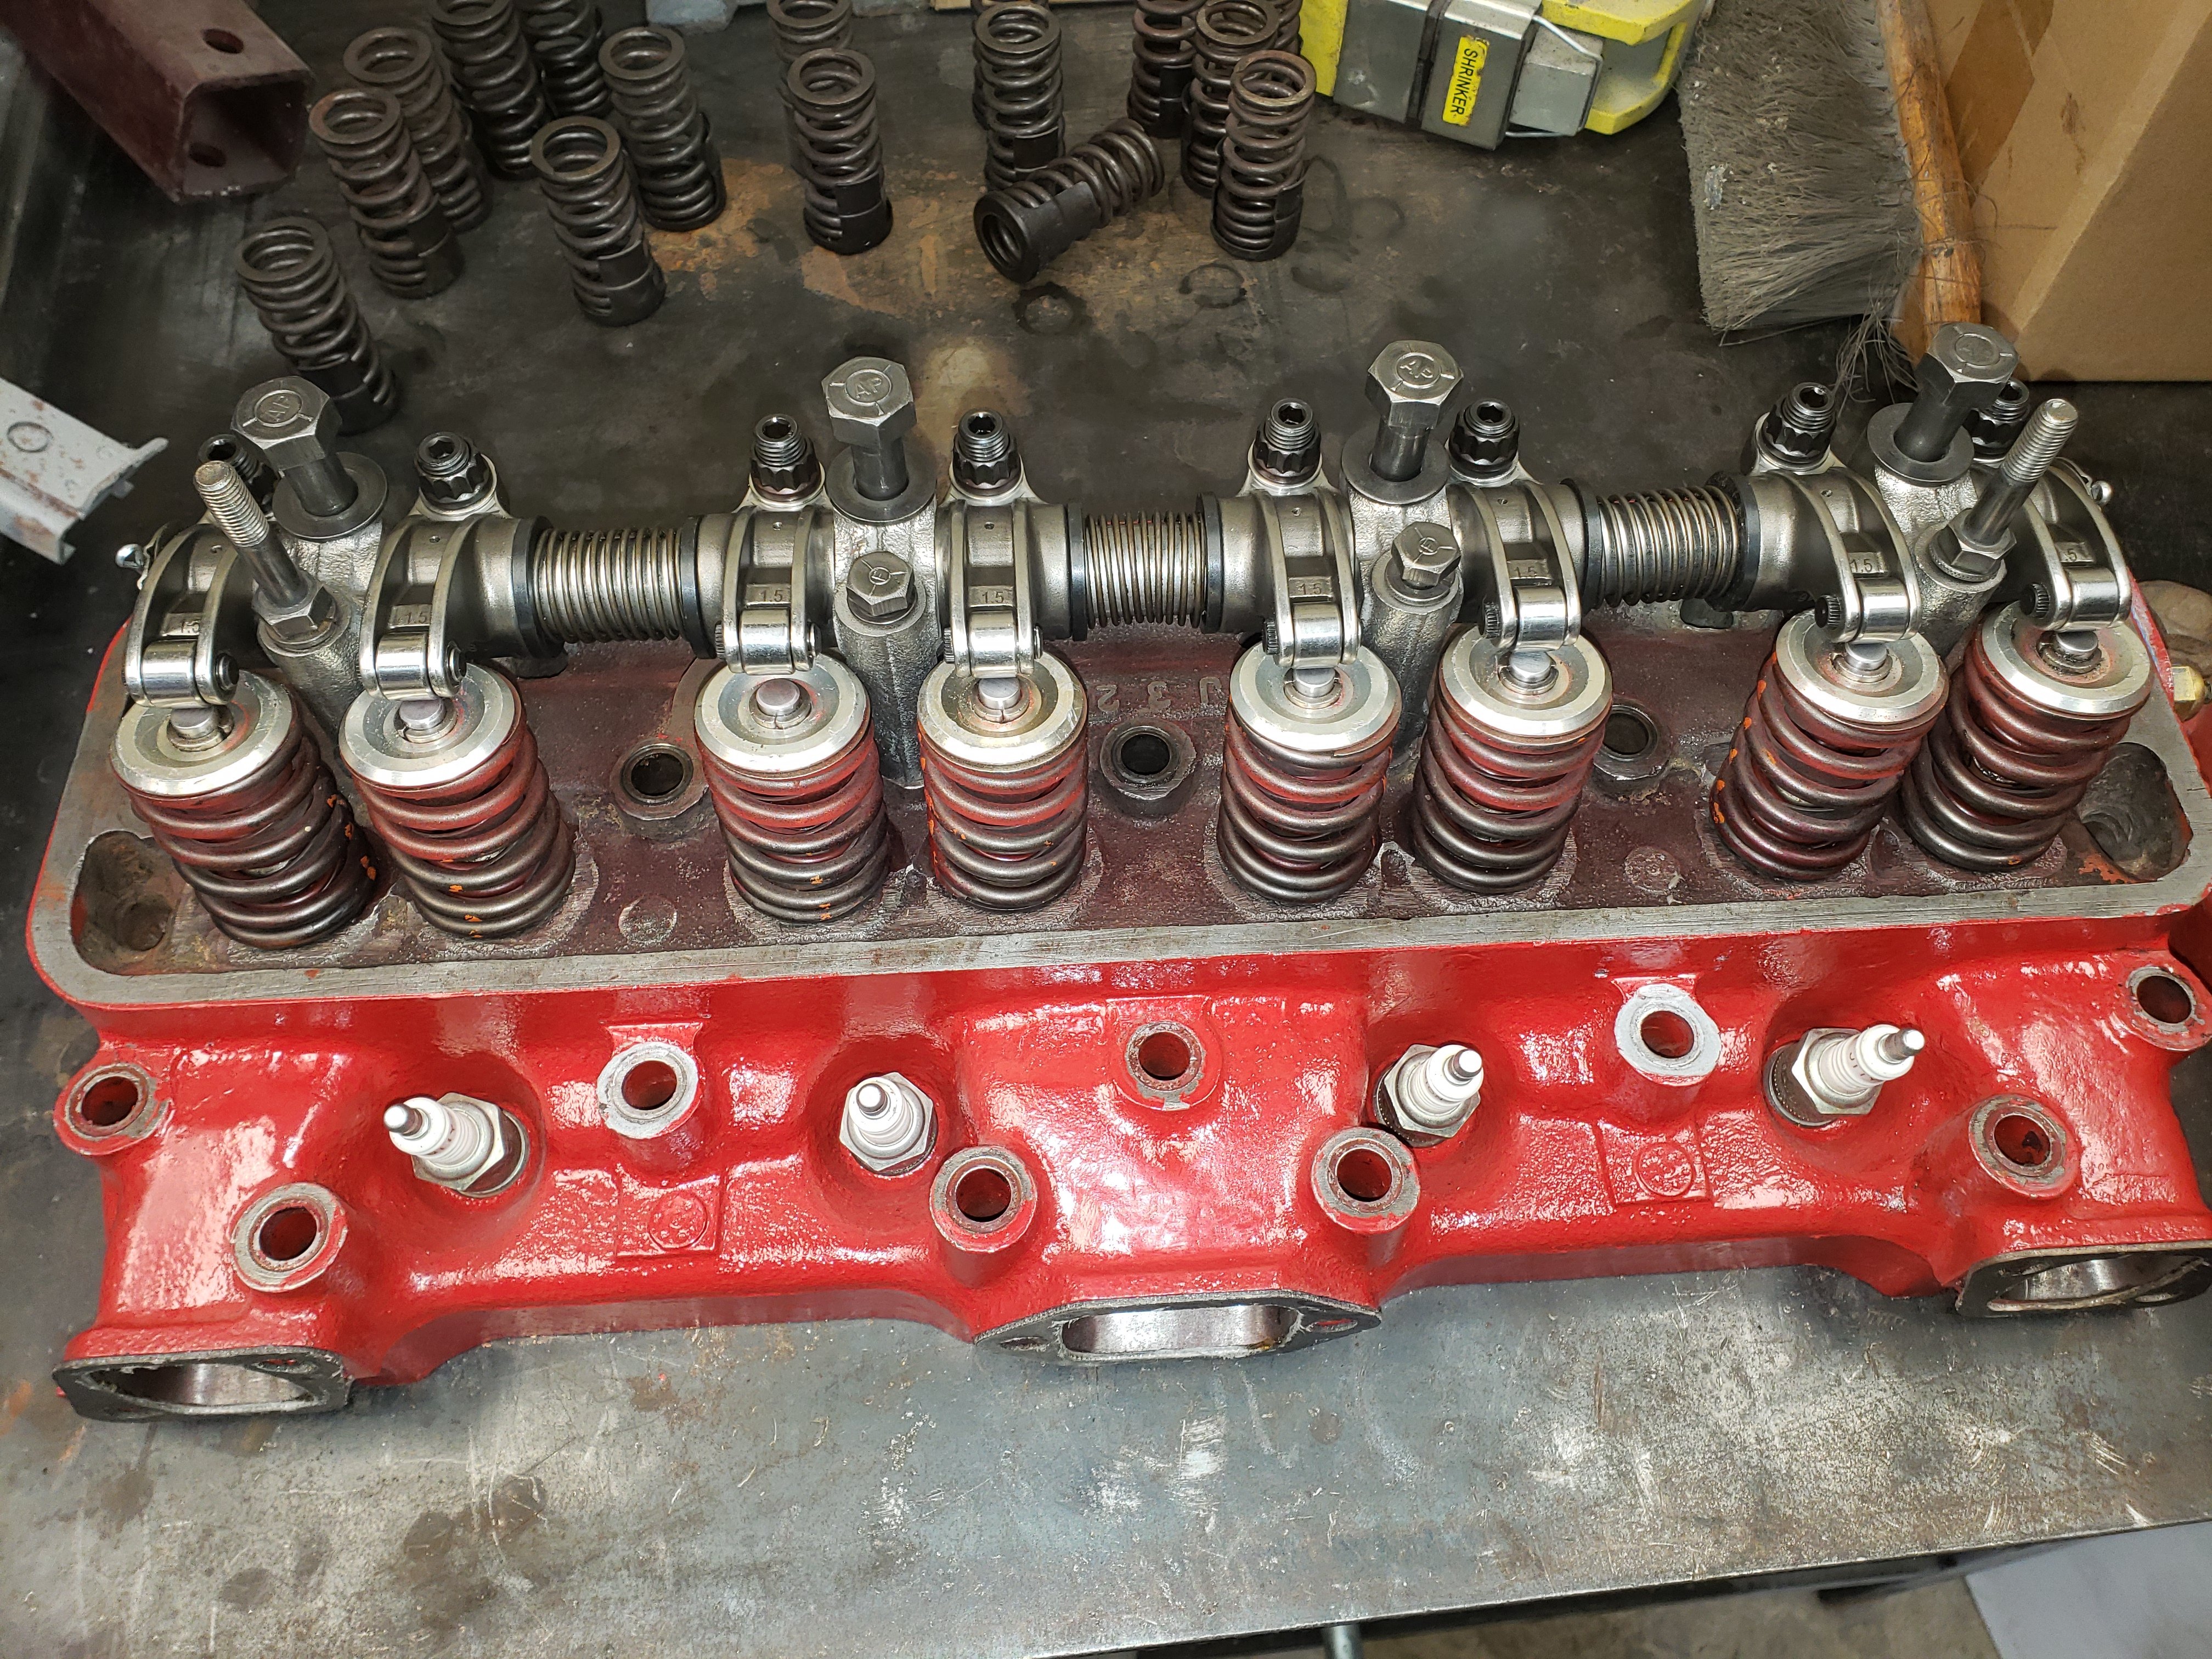
I worked on both these cars. The one in question hasn't run in many years. I wouldn't attempt it without going through it completely. The Turquiose one I recently refreshed the valvetrain.
-
55 was also the last year for the floating oil pickup tube. Earlier 232 oil pumps had spiral gears instead of spur gears.
-
I built an engine with both the full flow and the by-pass filter on top. You can't have too clean oil in my opinion.
Spark plugs for R1
in 1963-64 Avanti
Posted
I use Autolite Platinum AP85. Champions are now China sourced, and quality is non-existent.