


adamderosa
-
Posts
107 -
Joined
-
Last visited
Content Type
Profiles
Forums
Events
Posts posted by adamderosa
-
-
Javier,
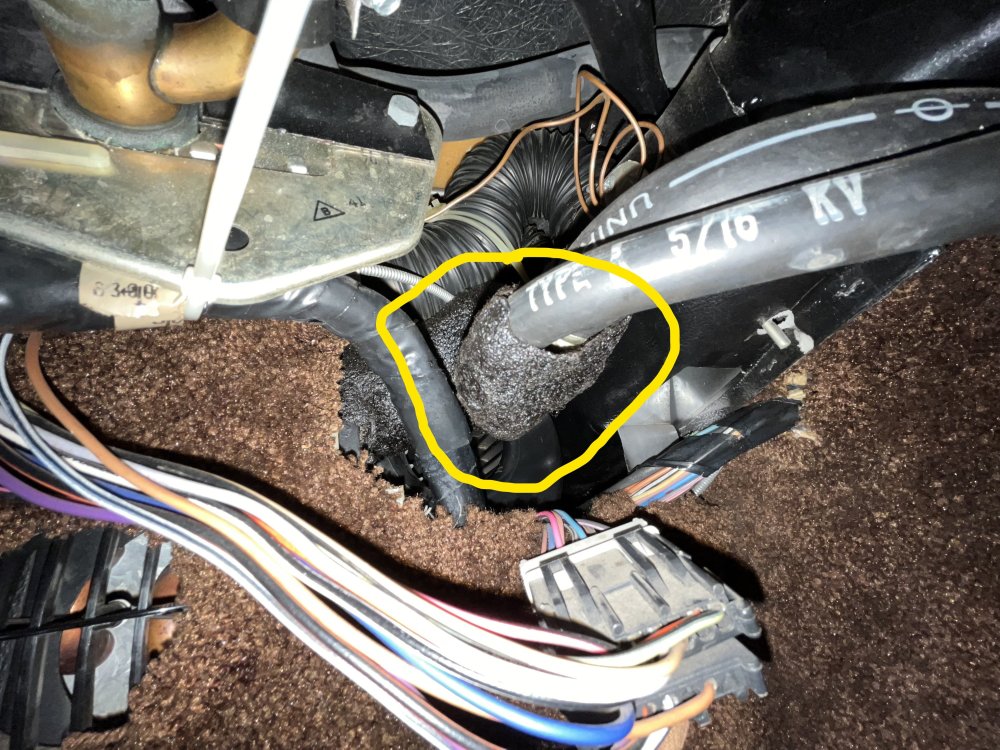
The expansion valve will be connected to one of the hoses going to the evaporator. You'll need to peel back the black insulation to get to it. The capillary tube goes between the expansion valve and the evaporator, and is used to cycle the compressor on/off to maintain the temperature set with the control knob.
-
Kodjo,
Is the diagram you provided for an Avanti? I did not change the position of the expansion valve; it is mounted on the supply side to the evaporator. If it were on the outlet side the system would not work.
-
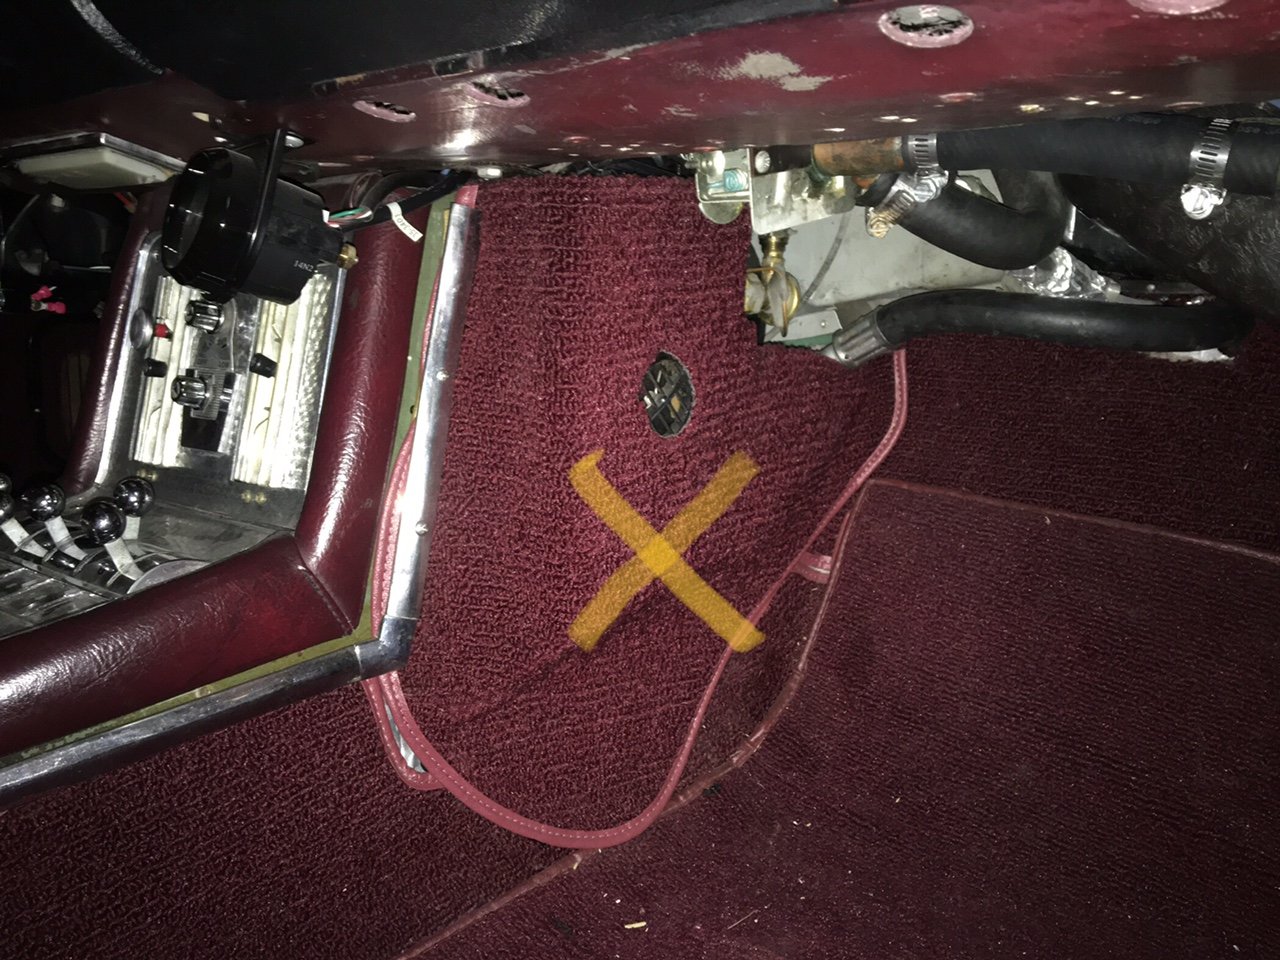
As Kodjo stated, you should be able to get to the expansion valve through the opening above the right ( passenger side) console panel.


-
4 small questions:
1) is there a typo in your expansion valve number? I found a 33076-VUI. Yes, you're correct - I made a typo; sorry!
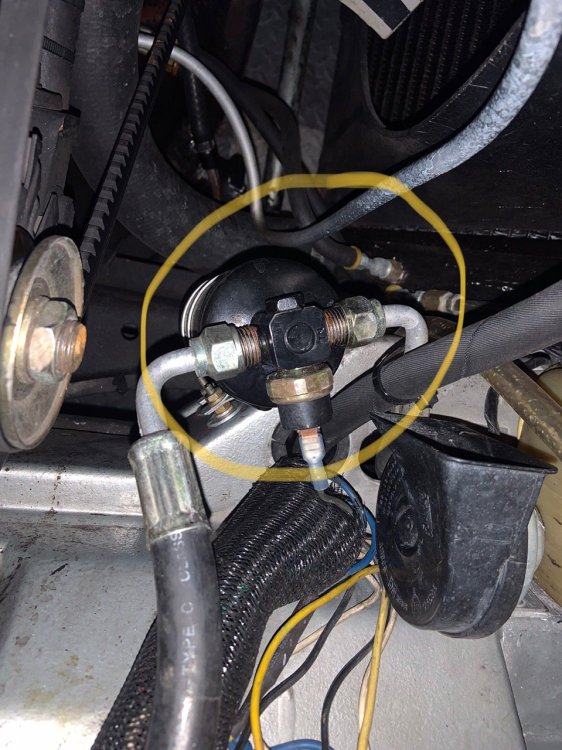
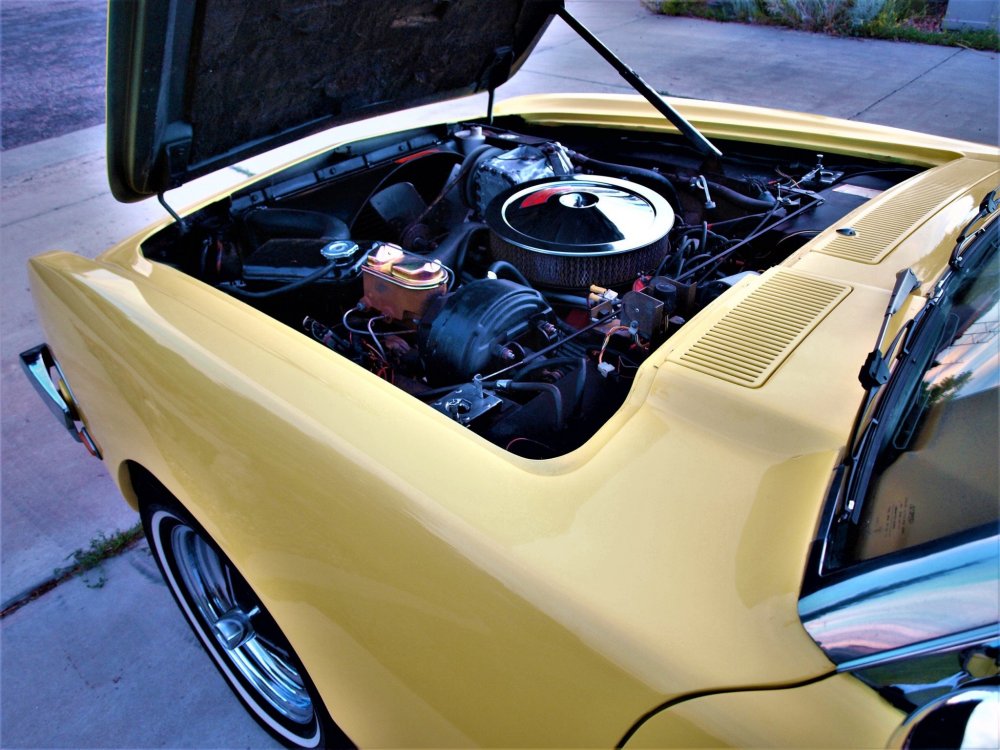
2) *where* is the Drier located? On mine, the receiver/drier is located on the passenger side inner fender. I'll try to post a pic.
3) *IF* I wanted to go ahead and replace the evaporator, did yours have any identifying size/type/model that would allow me to hunt for replacement? I can maybe save that for last and see if the current one works, but if I'm going to replace the expansion valve, maybe it could all just happen at once. I'm not aware of any numbers on the evaporator; perhaps I just didn't notice at the time. If you wanted to replace it you could see what aftermarket one had similar dimensions or contact Dan Booth at Nostalgic Motors, or another Avanti parts vendor and see if they have one.
4) are you happy with the results and the parts? anything you would do different? I measured and will go for the larger 22" wide condenser (23" would be perfect but thats not an option I can see). Yes I'm very happy with the results and would not do anything differently. I live in AZ now and it will cool quite well even when its 110 outside. The only problems I've had were a couple of leaks from the crimps of the hose fittings (and this didn't occur until years later), which required me to have one of the hoses re-made a couple of years ago. For this project to be successful make sure you're not letting in hot air from the outside through missing firewall grommets, worn or missing seals at the footwell vents, etc.
thanks so much for all that help! I feel I am well on the way now. You're welcome! And by the way, since all Avantis are a little different your installation will probably differ slightly, and since this is not a "bolt-in" kit be prepared to do a little fabricating for things like mounting brackets. The Vintage Air catalog is a great source for information too. There are other old car air-conditioning vendors out there that are probably helpful as well.
-
Javier,
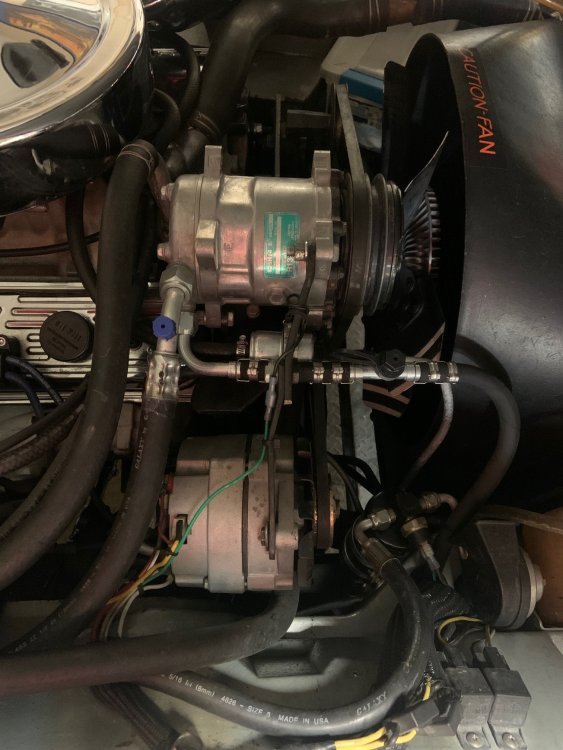
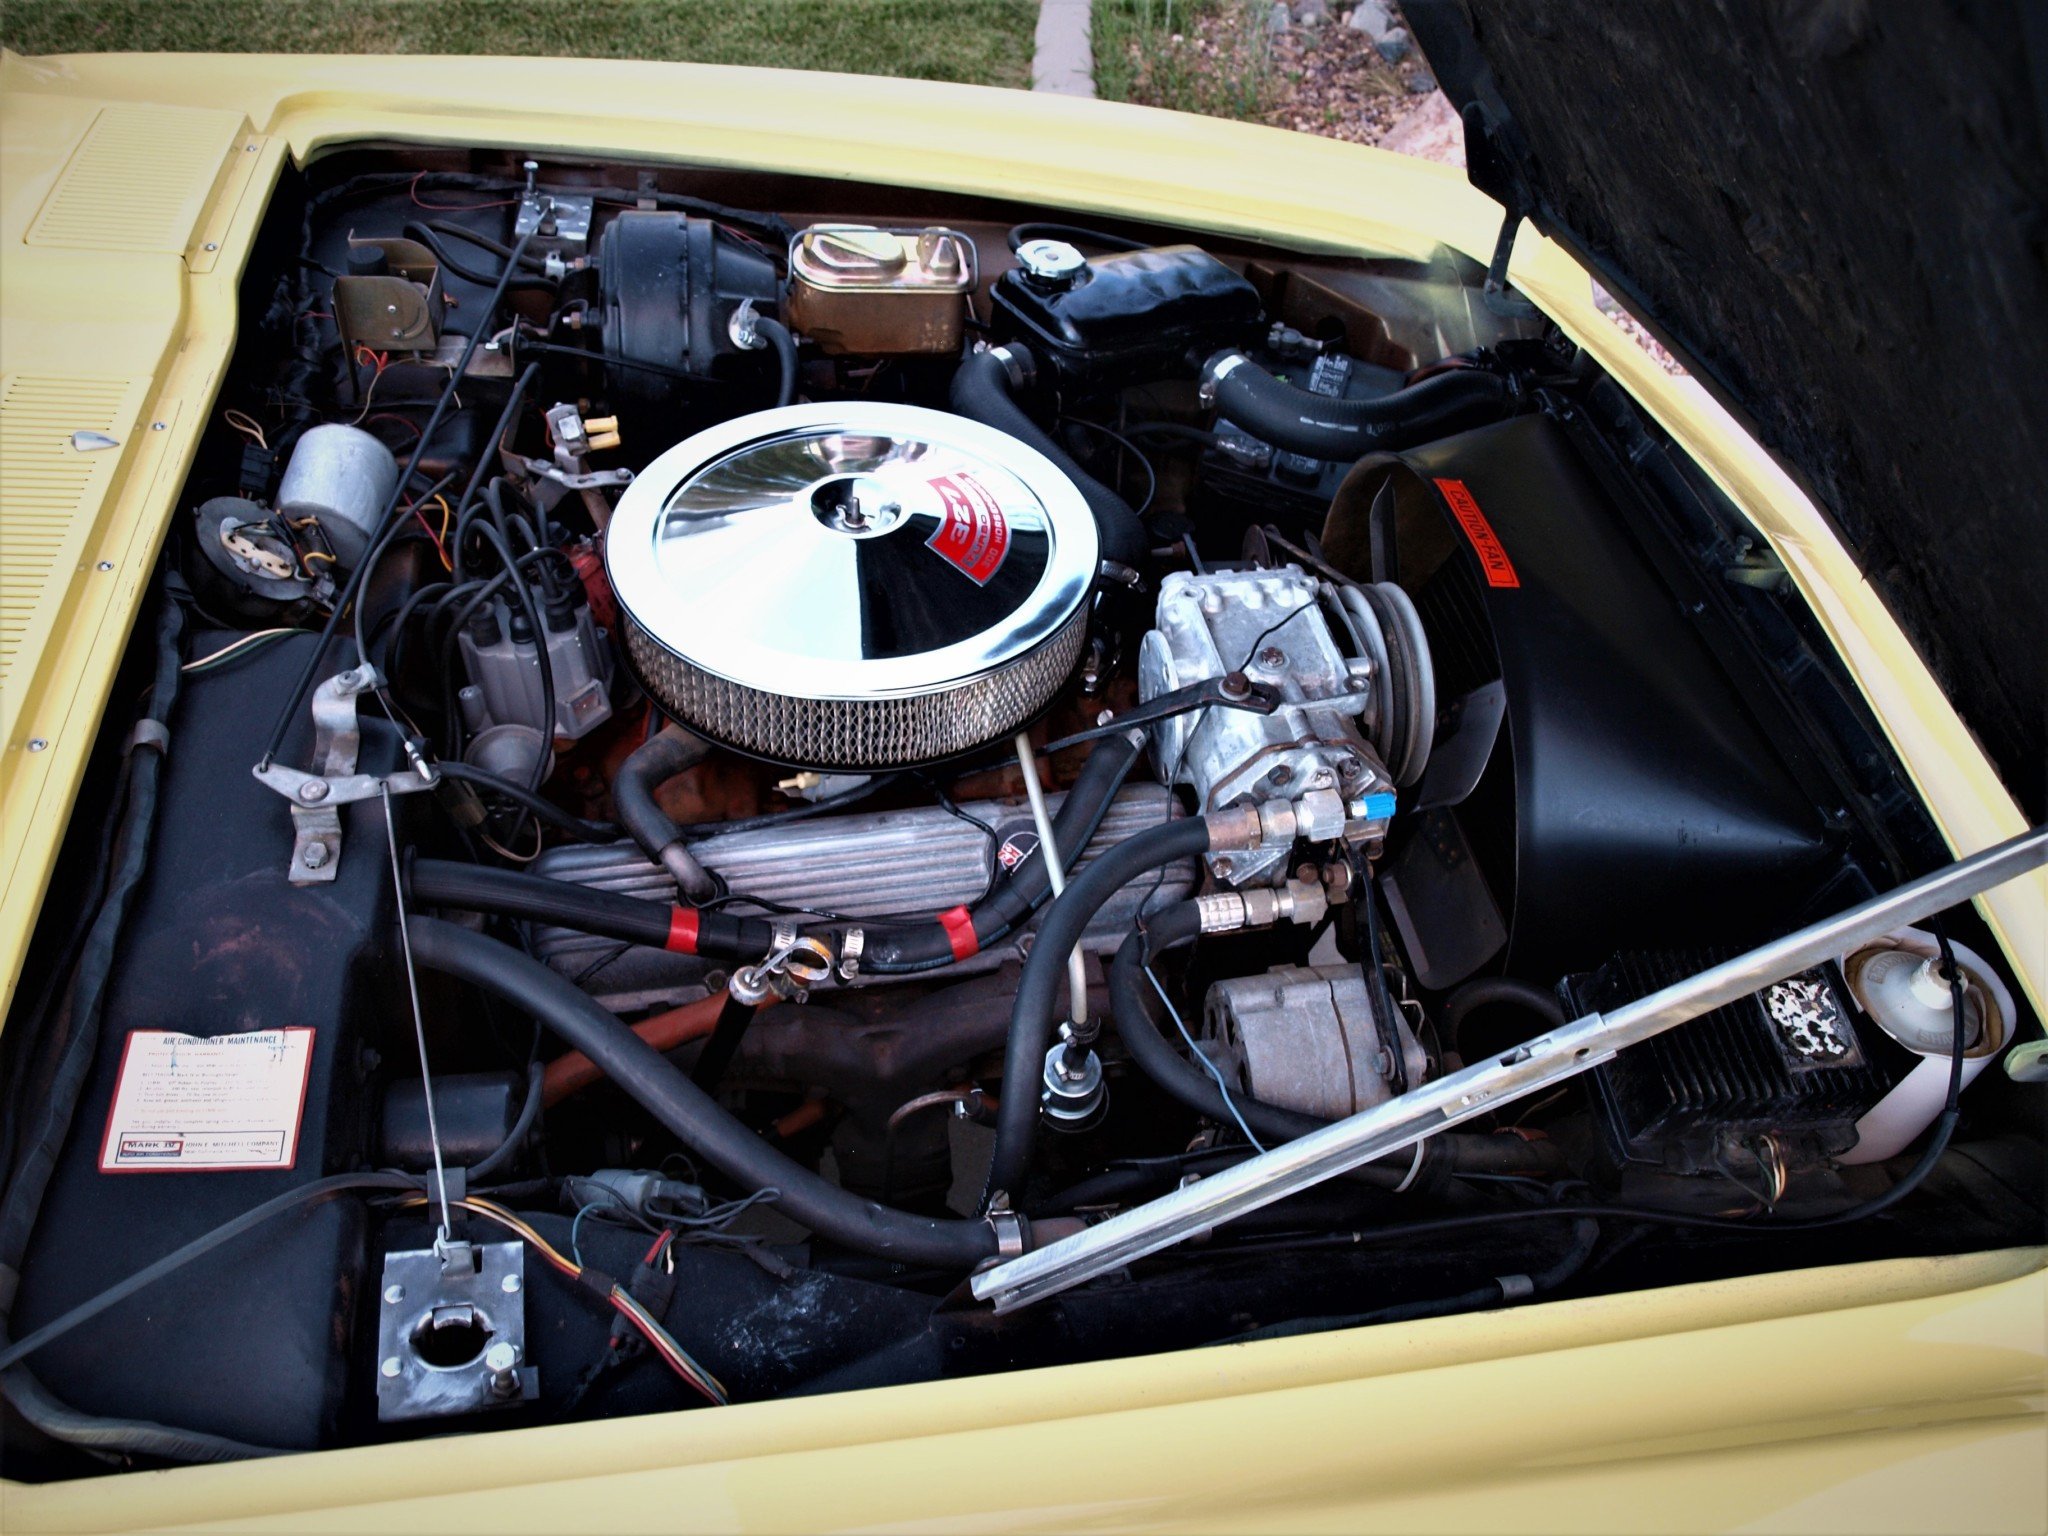
I converted my "72 to R134a back in 2004, using components from Vintage Air. The only piece I kept from the original system was the evaporator, which I first removed to have flushed and tested for leaks. Since you asked for part numbers here's what I installed:
Expansion Valve Kit P/N 3306-VUI (The expansion valve is located in the console, attached to one of the fittings on the evaporator. You should be able to see it on the passenger's side, It may be sealed up and covered in insulation)
Thermostat P/N 11013-VUE
Receiver/Direr w/ binary switch P/N 07322-VUC
14x20" Condenser P/N 03261-VUC (the next size larger probably would've fit too and worked even better)
I used a Sanden compressor, but the one you're looking at should work ok too.
I purchased my components through a Vintage Air dealer and installed them myself. Then, I bought the hoses and fittings and figured out how they needed to be routed, at what length and with which fittings. I brought the hoses back to the Vintage Air dealer and had them crimp the fittings on. Finally I installed the hoses and brought the car to them to have the system charged.
The evaporator is a pain to remove, but not impossible. There was a recent article on this in issue #194 Spring/Summer 2021 of Avanti magazine.
You should be able to remove the condenser through the grill opening without removing the radiator.
I'd be happy to answer any questions.
Good luck!
-
Sorry I don't know the resistance value range of the temp sensor. But, if you remove the wire from it, the gauge needle should go to one end of the scale, and if you then ground the wire the needle should go to the other end of the scale. This will at least tell you if the problem is in the sender or in the gauge and/or wiring. I went through some notes of mine and many years ago I replaced my sender with a NAPA # 170-1566. This does not seem to be in their system anymore but perhaps someone at NAPA could help if needed.
-
If you have access to an infrared thermometer you can take a reading at the thermostat housing and compare it to the gauge reading. If they both read low after the engine has been run a while you likely have a thermostat issue. If the infrared thermometer reads operating temp (180-ish) then you have a gauge issue.
-
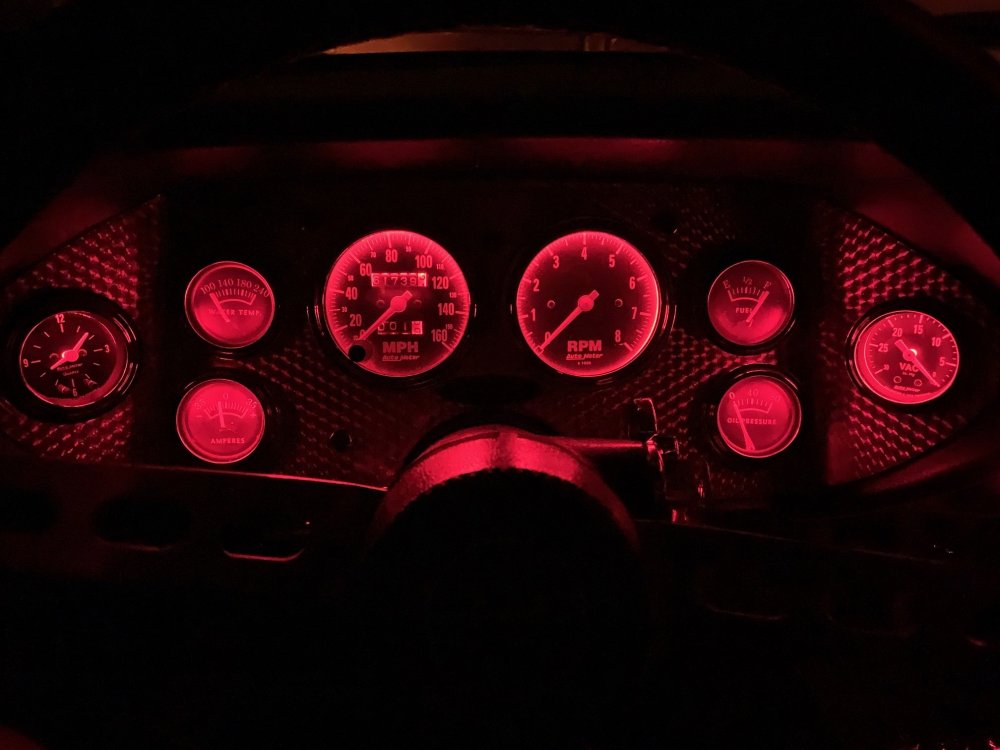
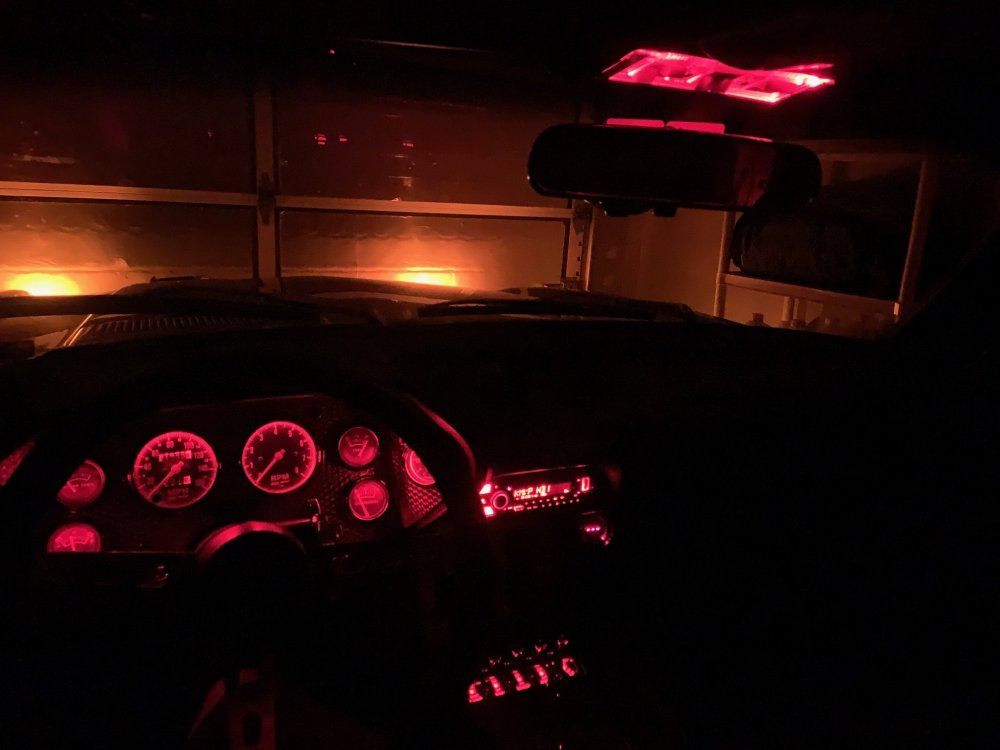
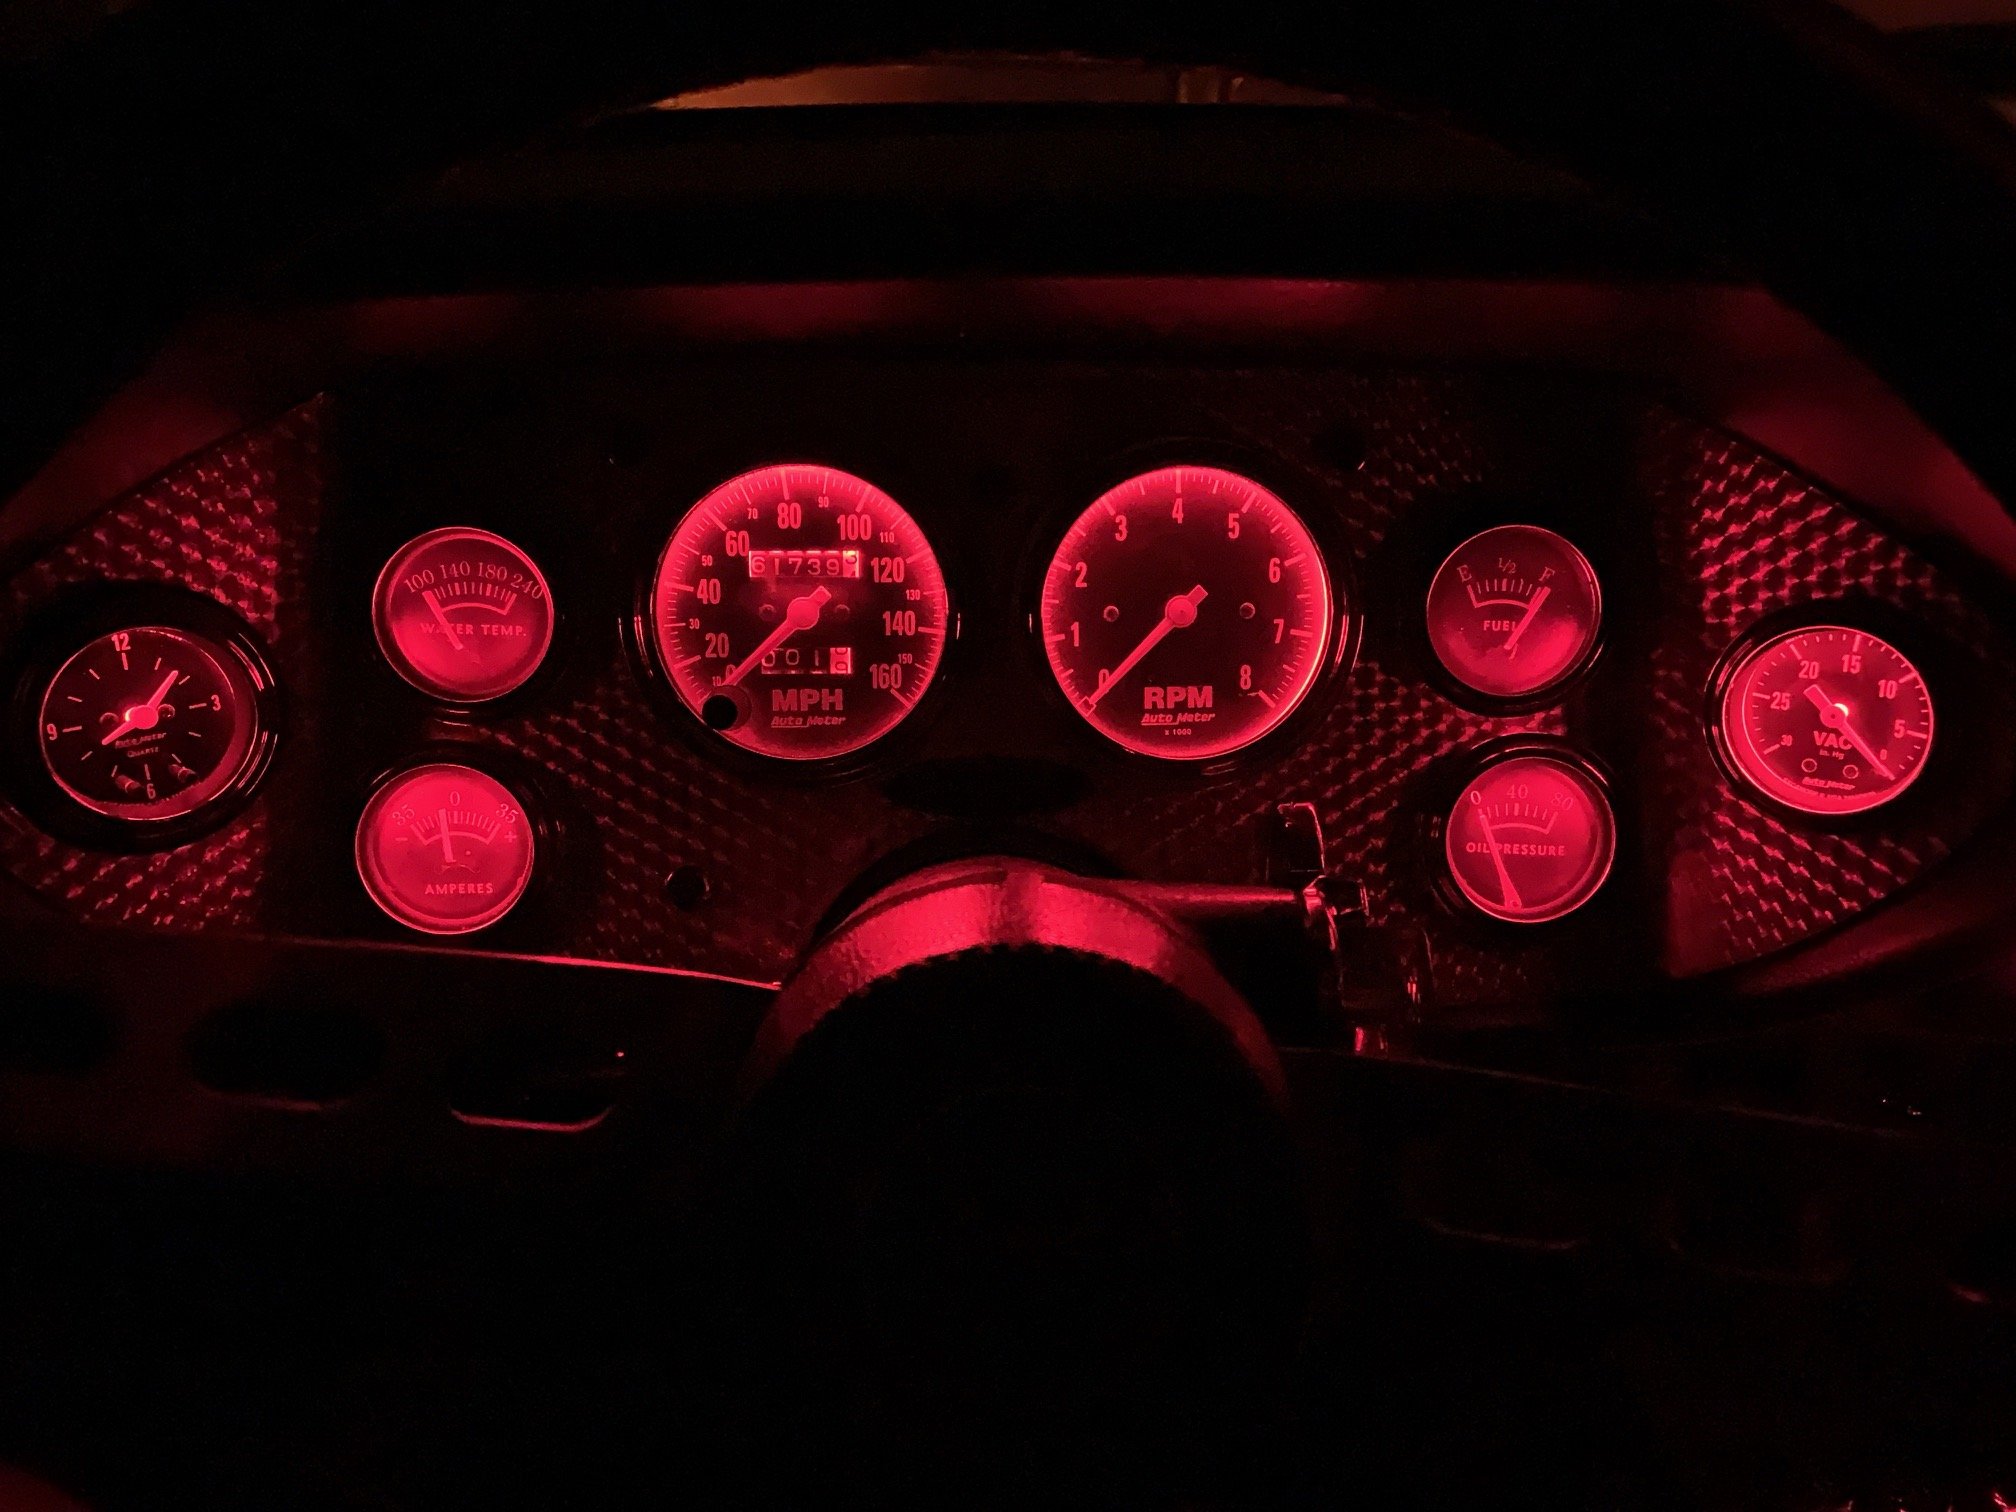
I ordered mine from www.superbrightleds.com - here's the link:
You can order the LED's in red, white, or other colors.
The hi-low rocker switch will no longer change the light intensity with the LED's. If you'd like that to work you can replace the dimming resister with an electronic module like this:
https://www.autometer.com/module-dimming-control-for-52mm-gauges-up-to-6.html
-
This Avanti appears to have extensive frame corrosion in addition to rusted out hog troughs. It would be expensive to repair. Finding another solid frame would probably be less expensive than repairing this one. With rust this severe the A-pillars around the windshield should be inspected too. This will require removal of the stainless trim around the windshield.
-
I was not able to attend this years Avanti meet in Indianapolis. Does anyone know if the tech session was recorded, and if so where/when it will be available for viewing?
-
I know what you're talking about, my "72 was set up this way when it was stock. Unfortunately I've made some changes to it over the years so while I can't show you pictures of mine I was able to find some of another '70 Avanti which hopefully will be of some help. For the V-belts, the one closest to the engine goes from the first crank pulley groove to the power steering pump. The middle one goes on the middle groove of the crank pulley and around the water pump and alternator. The third most forward belt goes on the third groove of the crank pulley, and around the idlers and AC compressor. You adjust the position of the idlers to adjust the belt tension. I hope this helps.

-
On the diagram I have it shows wire #14 (orange) on the top, wire 47D (white) should be on left if looking at the gauge from the back, or towards the center of the car, and wire 55B (Grey with Black trace)should be at the bottom.
-
Dan Booth at Nostalgic Motors has those bolts available for $5; I just bought one along with the rag joint last week.
-
-
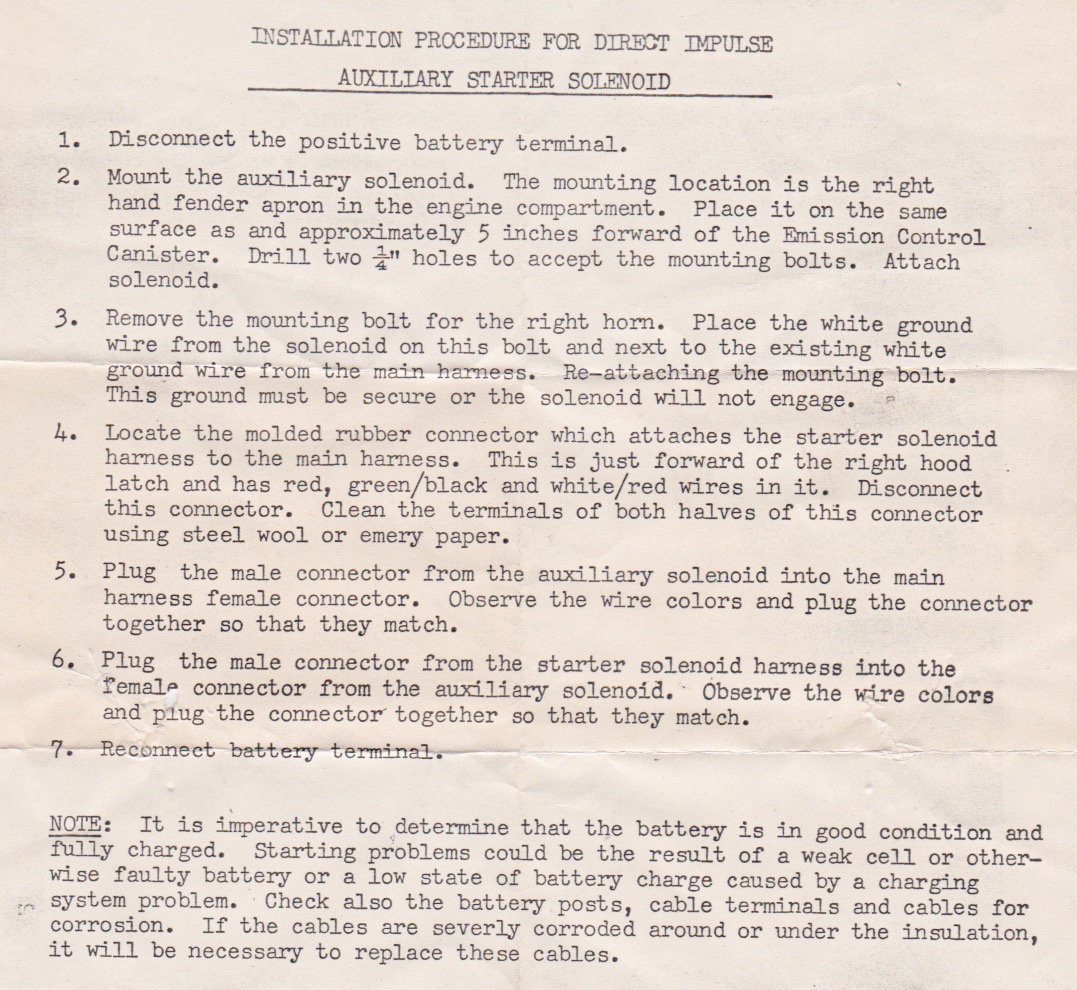
It's very interesting that the factory had a modification to add an aux starter solenoid. This was something I had to do on my Avanti many years ago to cure a hot no-start problem. Jred, could you please scan and post the instructions that a partially shown in your picture?
-
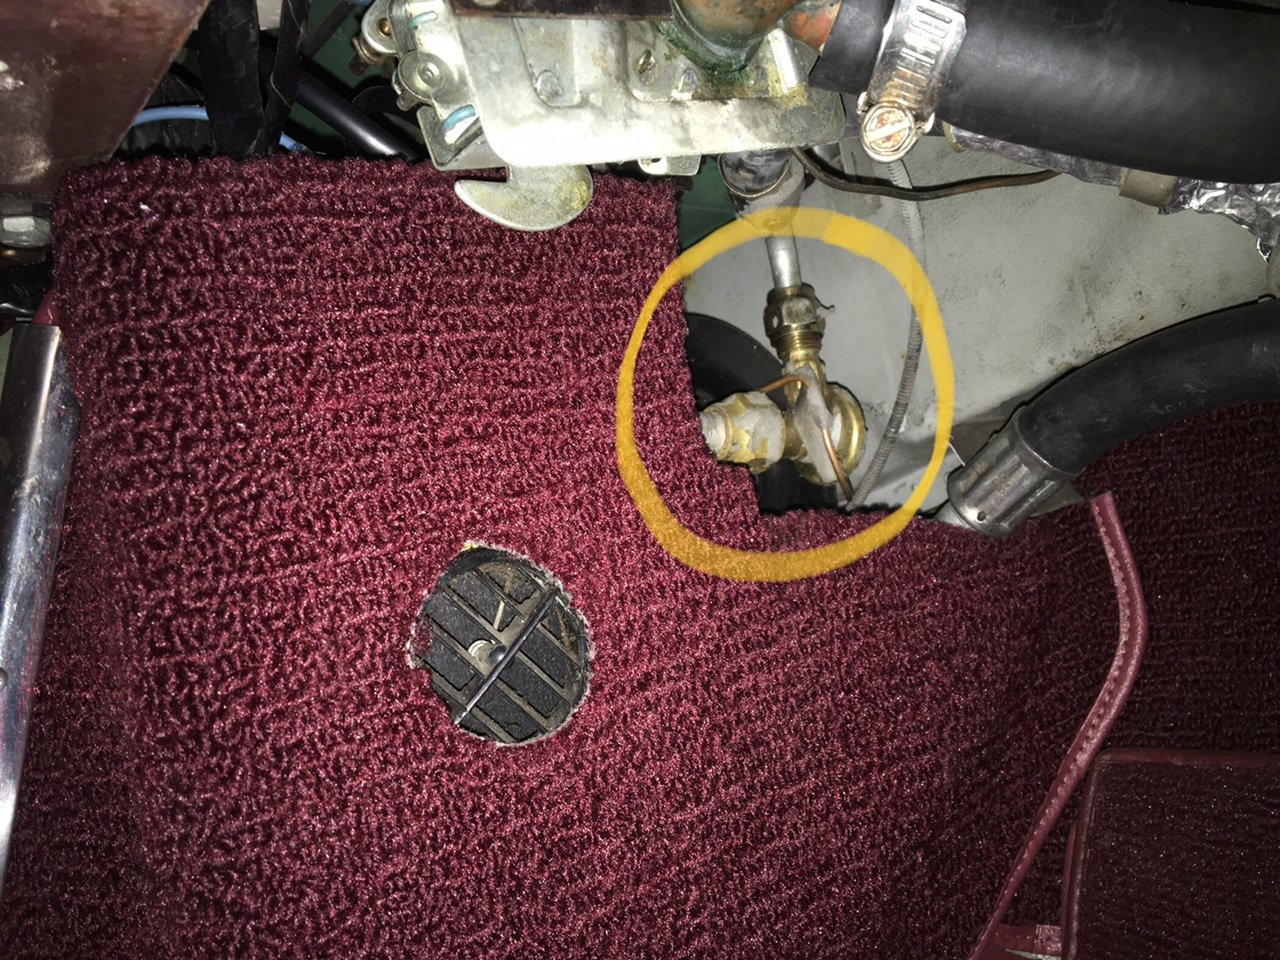
My '72 Avanti II with the 400 Chevy engine and 2-barrel carb used this fuel filter. When they became expensive and hard to find (back in the '90's) I modified the plumbing to use a less expensive, easily available filter.
-
That's a nice modification; thanks for sharing.
-
Man, those look great! What size tires did you use and are the front & rear tires the same size?
-
That looks fantastic! You do amazing work!
-
Excellent! Glad you found a solution and thanks for sharing the information!
-
Jegs has re-manufactured Q-Jets. I have one of these on my Avanti and it works quite well.
https://www.jegs.com/p/JEGS/JEGS-4-bbl-Remanufactured-Quadrajet-Carburetors/752437/10002/-1
Or, you could order a rebuild kit for the one you have. Q-Jets have a few tricks to taking them apart and putting them back together though so be sure to study up if you have not done this before.
-
Avanti Jacking Instructions.pdf
Try printing one of these on full-sheet label paper; it should be pretty good and the price is perfect.
")
-
You should be able to find rear brake shoes at your local auto parts store; they are #228 and were common to many makes and models. . Tell them your looking for brake shoes for a '69 Chevy Caprice.
-
Back in 2006 I removed the TH400 transmission from my Avanti and installed a TH200R4. Although I don't have a step-by-step guide for this, I can give you some info and perhaps answer some questions you may have.
Things you'll need, besides the transmission:
1.Torque converter for the TH200R4 transmission. (i'm assuming you'll want a lock-up torque converter to get the full benefit of this installation)
2. Correct flex plate to mate with the torque converter. (the one you have now may not have the proper mounting holes in it to connect with the torque converter.
3. Dipstick tube and dipstick for TH200R4.
4. Flex plate dust cover for TH200R4 Something like this https://www.tciauto.com/gm-universal-dust-cover.html
5. Correct transmission yoke for TH200R4 (depending on what transmission you have now this may or may not be different)
6. Method of providing for torque converter lock-up. There are several ways of doing this, from a simple toggle switch to electronic devices that sense vehicle speed. I used a pair of vacuum switches and a relay that works quite well. It's a home-made device and I'd be happy to share the details with you if you're interested. Otherwise there are many products available in the after-market that work ok too. Take a look through a Jeg's or Summit Racing catalog or at www.tciauto.com
7. Proper speedometer gears for the transmission. These will be determined by the rear axle ratio and tire size. Your transmission builder may have already taken this into account for you but if not there are calculators on-line that will tell you which gears you need.
8. Throttle Valve (TV) cable and carb mount bracket. There are several vendors available, once source is TCI auto. https://www.tciauto.com/transmission-accessories/tv-cables-and-accessories.html
9. PRND321 shifter indicator to replace your current PRND21. These are available from our Avanti parts vendors. You may also need to modify, adjust, or replace the shifting control rods from the gear selector. I was able to re-use my existing rods although I cannot select all the way into 1 on the gear shifter. All of the other positions work fine so I left it as-is.
I was able to use the rear mount and cross-member that were in place for the TH400 transmission. The TH2004R lined up perfectly. You will need to get different bolts to attach the transmission to the mount though as the threads in the TH2004R are metric.
My old driveshaft, with the TH200R4 yoke installed, turned out to be too SHORT so I had to get a new one fabricated. Others have said that they had to get their driveshafts shortened so you may just have to wait and see what you're dealing with once the transmission is installed.
Some other things that come to mind - if you're planning on doing this without the car on a lift, you will have to get the bottom of the car about 20" off the ground in order to get the transmission out. I had to place blocks under my jack stands to get the additional clearance. You may discover that the exhaust system is in the way and preventing the transmission from dropping down. I wound up making a cut through one of my pipes so I could move it out of the way, and just welded it back together when I was done.
Although this conversion is a bit involved, the results are well worth the effort. It really changes the character of the car, especially at highway speeds.
Good luck, and if I can answer any other questions please ask.


"Broke" Brakes On '83!!
in 1965-83 Avanti
Posted
I have experienced this in my Avanti as well when it's really cold. I believe what may be happening is that the diaphragm and seals inside the brake booster become stiff at cold temps and cannot function properly until it warms up a bit.