


Rick Allen
-
Posts
151 -
Joined
-
Last visited
Content Type
Profiles
Forums
Events
Posts posted by Rick Allen
-
-
On 7/3/2024 at 11:00 PM, Dwight FitzSimons said:
I suspect the Studebaker employee's exact words were "oops, rats."
Below is a pic of my '64 Avanti R2 engine number. As mentioned these engine numbers apparently were hand stamped and irregularities occurred..\
I notice that the two engine numbers used different fonts.
--Dwight
.thumb.JPG.25e9103e1691e35fbbfb74bf6758f8dc.JPG)
Possibly the worker who stamped that engine block previously worked in a factory making signs like the one below,,,

-
Currently running on the bring-a-trailer auction site for $30K with 3 days to go.
Nice '64 R2 maroon with red interior, not factory perfect but still a nice car.
I'm looking at the engine number and the die for the R is not the same as the rest of the stampings and I don't see the last number (1) which according to the should be K321. I know that back then all stampings were done by hand, and I guess depending on who came in that morning and grabber the stamping tools, no 2 engine numbers would be lined up perfectly.
In any event, wondered what others thought of that engine number vs what is on the production order. Also, I remember this same car being on the auction before,,,
below are some pictures and the link to the auction is below,,,
.thumb.webp.8b7db2ef3cbd23694460f3aceb3b685e.webp)

-
4 minutes ago, mox said:
Hi, I just sold 6 of those covers to a gentleman in Massachusetts. A/C 3521, they were offered as an option on all Studebakers 64 to 66. Same cover used by other makes like early T Birds with a different centre.
Thank you for that information I don't ever remember seeing those hubcaps on anyone's Avanti but now I know they're not specific to Avanti just a Studebaker option for their cars,,,
-
Came across someone on Facebook marketplace looking for an original set of 63/64 Avanti wire hubcaps, did such a thing exist?,,,
-
14 hours ago, ronmanfredi said:
The tach signal is picked up at the HEI distributor cap. Pull the wire off the distributor cap (or all 2-3 of them), clean the connections and reinstall. Also, check the ground connection at the back of the gauge (white wire).
Thank you, I'll try that,,,
-
Just got my '83 out of storage after 18 mounts, it started right up after a little gas down the carb but I noticed the tachometer is only moving very little, idle at 400 rpm, normal hi-way driving 7-800 rpms, it was working fine when it was parked.
Anyone have any suggestions as to what may cause a tach in these cars to act like this and how to correct it?
I should add, everything is factory, no aftermarket ignition or any other parts were changed!
-
On 5/16/2024 at 10:15 PM, Joemama said:
New York
Where in New York?,,
-
1 hour ago, Rick Allen said:
Titled as a '64, round headlights, later production number, one of the last 809/810 produced, so it could be either one,,,
My car is all part, the engine is out for rebuild but I did find the fuel pump and the restrictor is on the fuel pump itself so I guess it's a '63,,,
-
On 4/24/2024 at 1:54 PM, Dwight FitzSimons said:
Which year?
Titled as a '64, round headlights, later production number, one of the last 809/810 produced, so it could be either one,,,
-
2 hours ago, Dwight FitzSimons said:
Mark L, which year Studebaker Avanti is your car: '63 or '64? The restrictor is at the fuel pump on '63s and up at the filter closer to the carb on '64s.
That the car's problem only began after you reattached the return line is suspicious.
--Dwight
Does anyone have a picture of this restrictor and return line to post?,,,
-
52 minutes ago, TerryR2 said:
Great, thanks...thats what I was thinking. In the trash now.
If you have the room, maybe hold on to it for a few days, someone may recognize it and it may be valuable to someone,,,
-
2 hours ago, Leo B said:
Im thinking to change to Dual. Is this simple solution?
https://avantiparts.biz/dual-master-cylinder-conversion-kit/
I'd be surprised if Bob was having these made, more likely selling a replacement master, maybe like the ones suggested for a '74 Dodge Coronet and other Mopar of that vintage; you can by one of those from RockAuto or E-bay for under $40,,,
-
9 hours ago, BillyBob said:
Motor in car. What is best way (spray or brush) and best paint to paint motor?
- intake & exhaust manifold removed
- heads off
Looking for experience.
Thanks!!
Either way will work, spray painting itself would be a lot faster but the prep work would take a long time because I would think you would have to do a lot of masking to prevent overspray on other areas under the hood.
On the other hand I have done engines while in the car using high temperature ceramic engine paint and a foam brush, I felt that type of paint applied with a foam brush adhered better than the spray paint and you won't get paint runs as you might, using a spray can in a confined area, so close to what you're trying to spray, but as I said it's a matter of preference,,,
-
6 hours ago, A0136 said:
Yes brake hose bracket

Thank you for the picture that helps a lot.
I see you have the brake pads from Moss and now I remember you did comment to one of my posts back when I had purchased the Cobalt calipers and Moss pads.
Back then I had made the comment that with the Moss pads and Cobalt calipers there was about a 3 mm space between the top retaining clip and the top of the pad and I wondered if the pad would move up and down.
Being you still have the original Dunlop calipers is there also a space between repainting clip and the pad and if so, have you noticed if the pad was able to move up at all when braking?,,,
-
11 hours ago, 64studeavanti said:
Check plate 11-3 in the parts manual. 1107-33 is the reference. One end attaches to one of the caliper bolts. The other end is for the hose/pipe.
Thank you for your reply, I will get my books out today and check the reference you had sent me, I appreciate it,,,
-
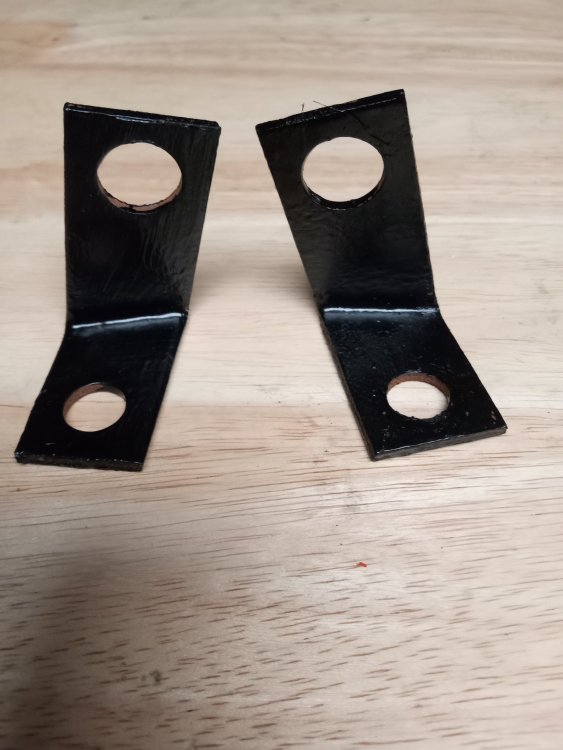
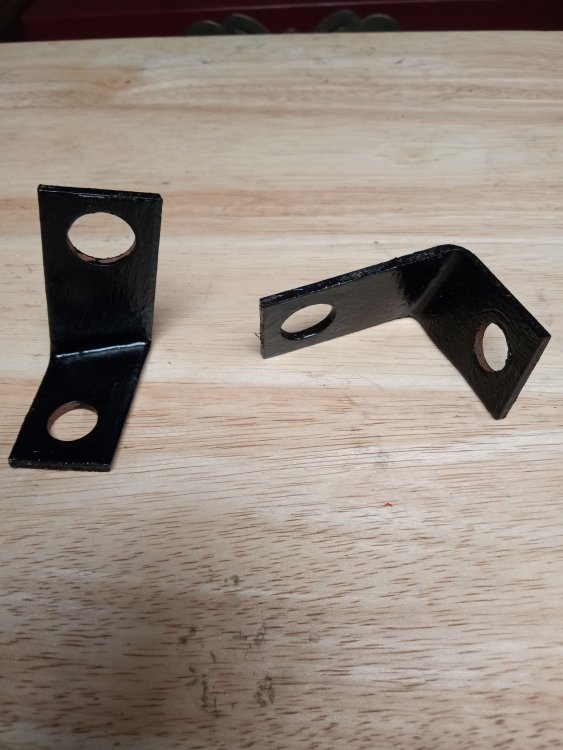
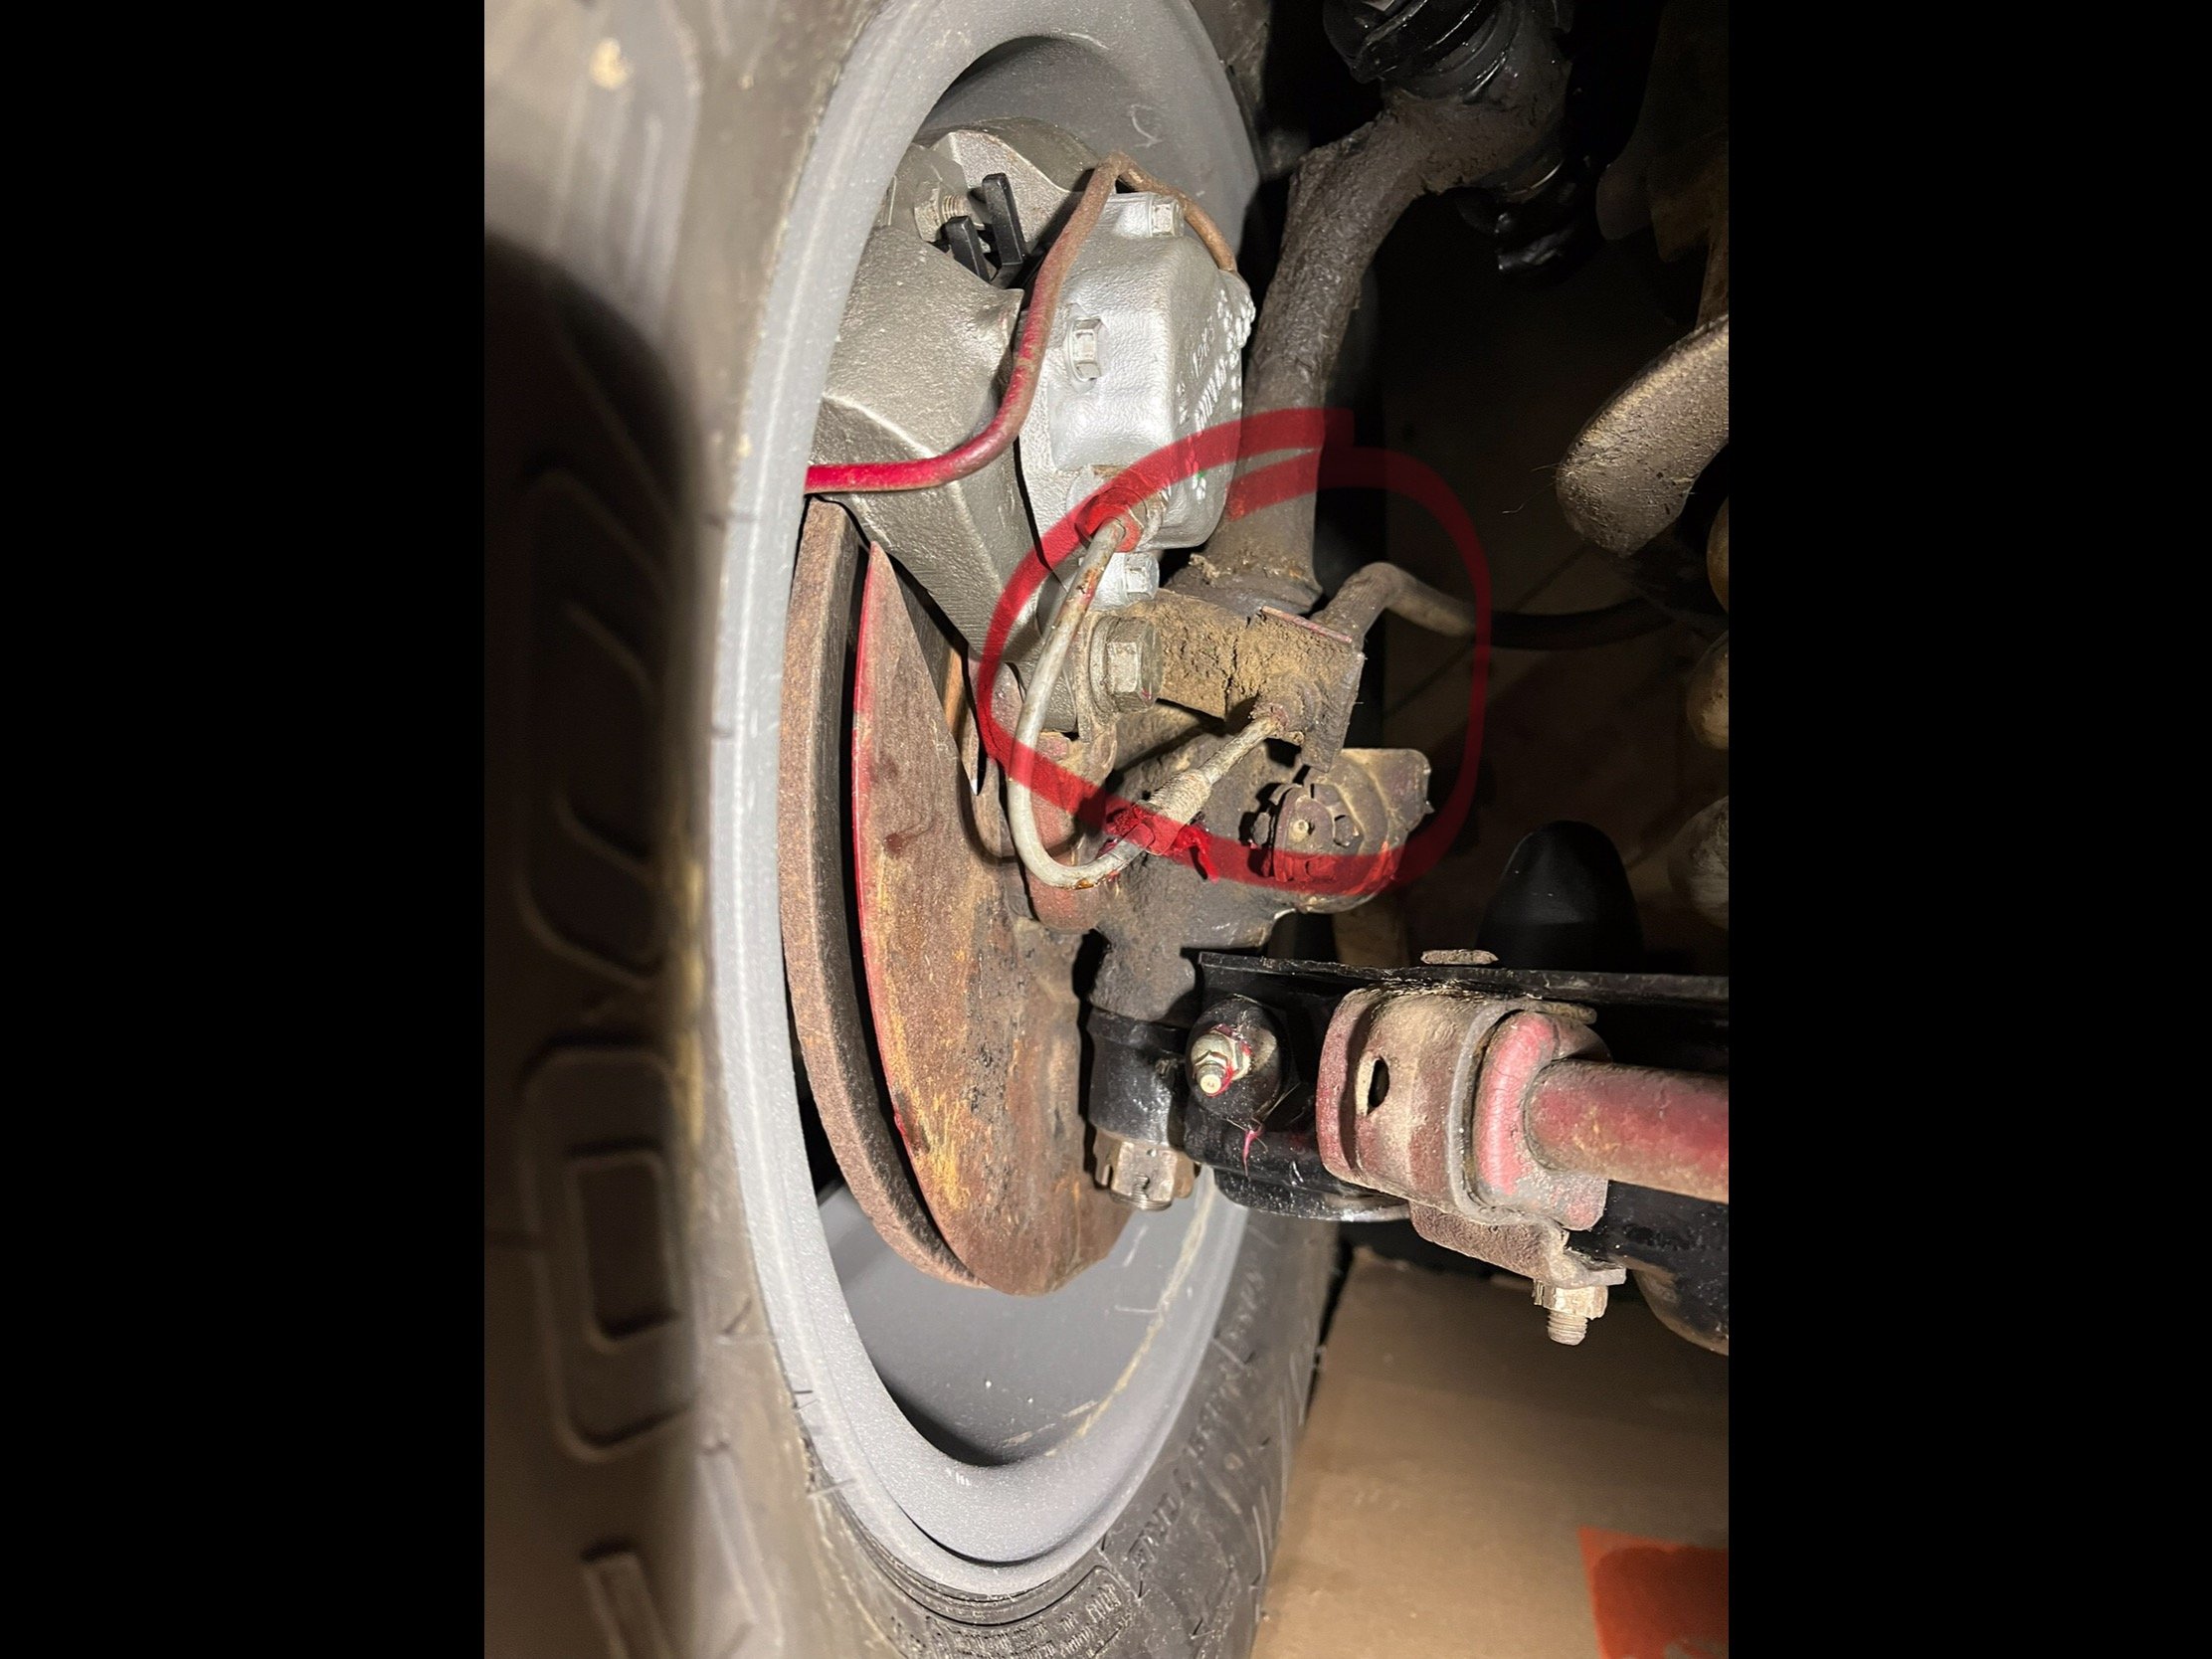
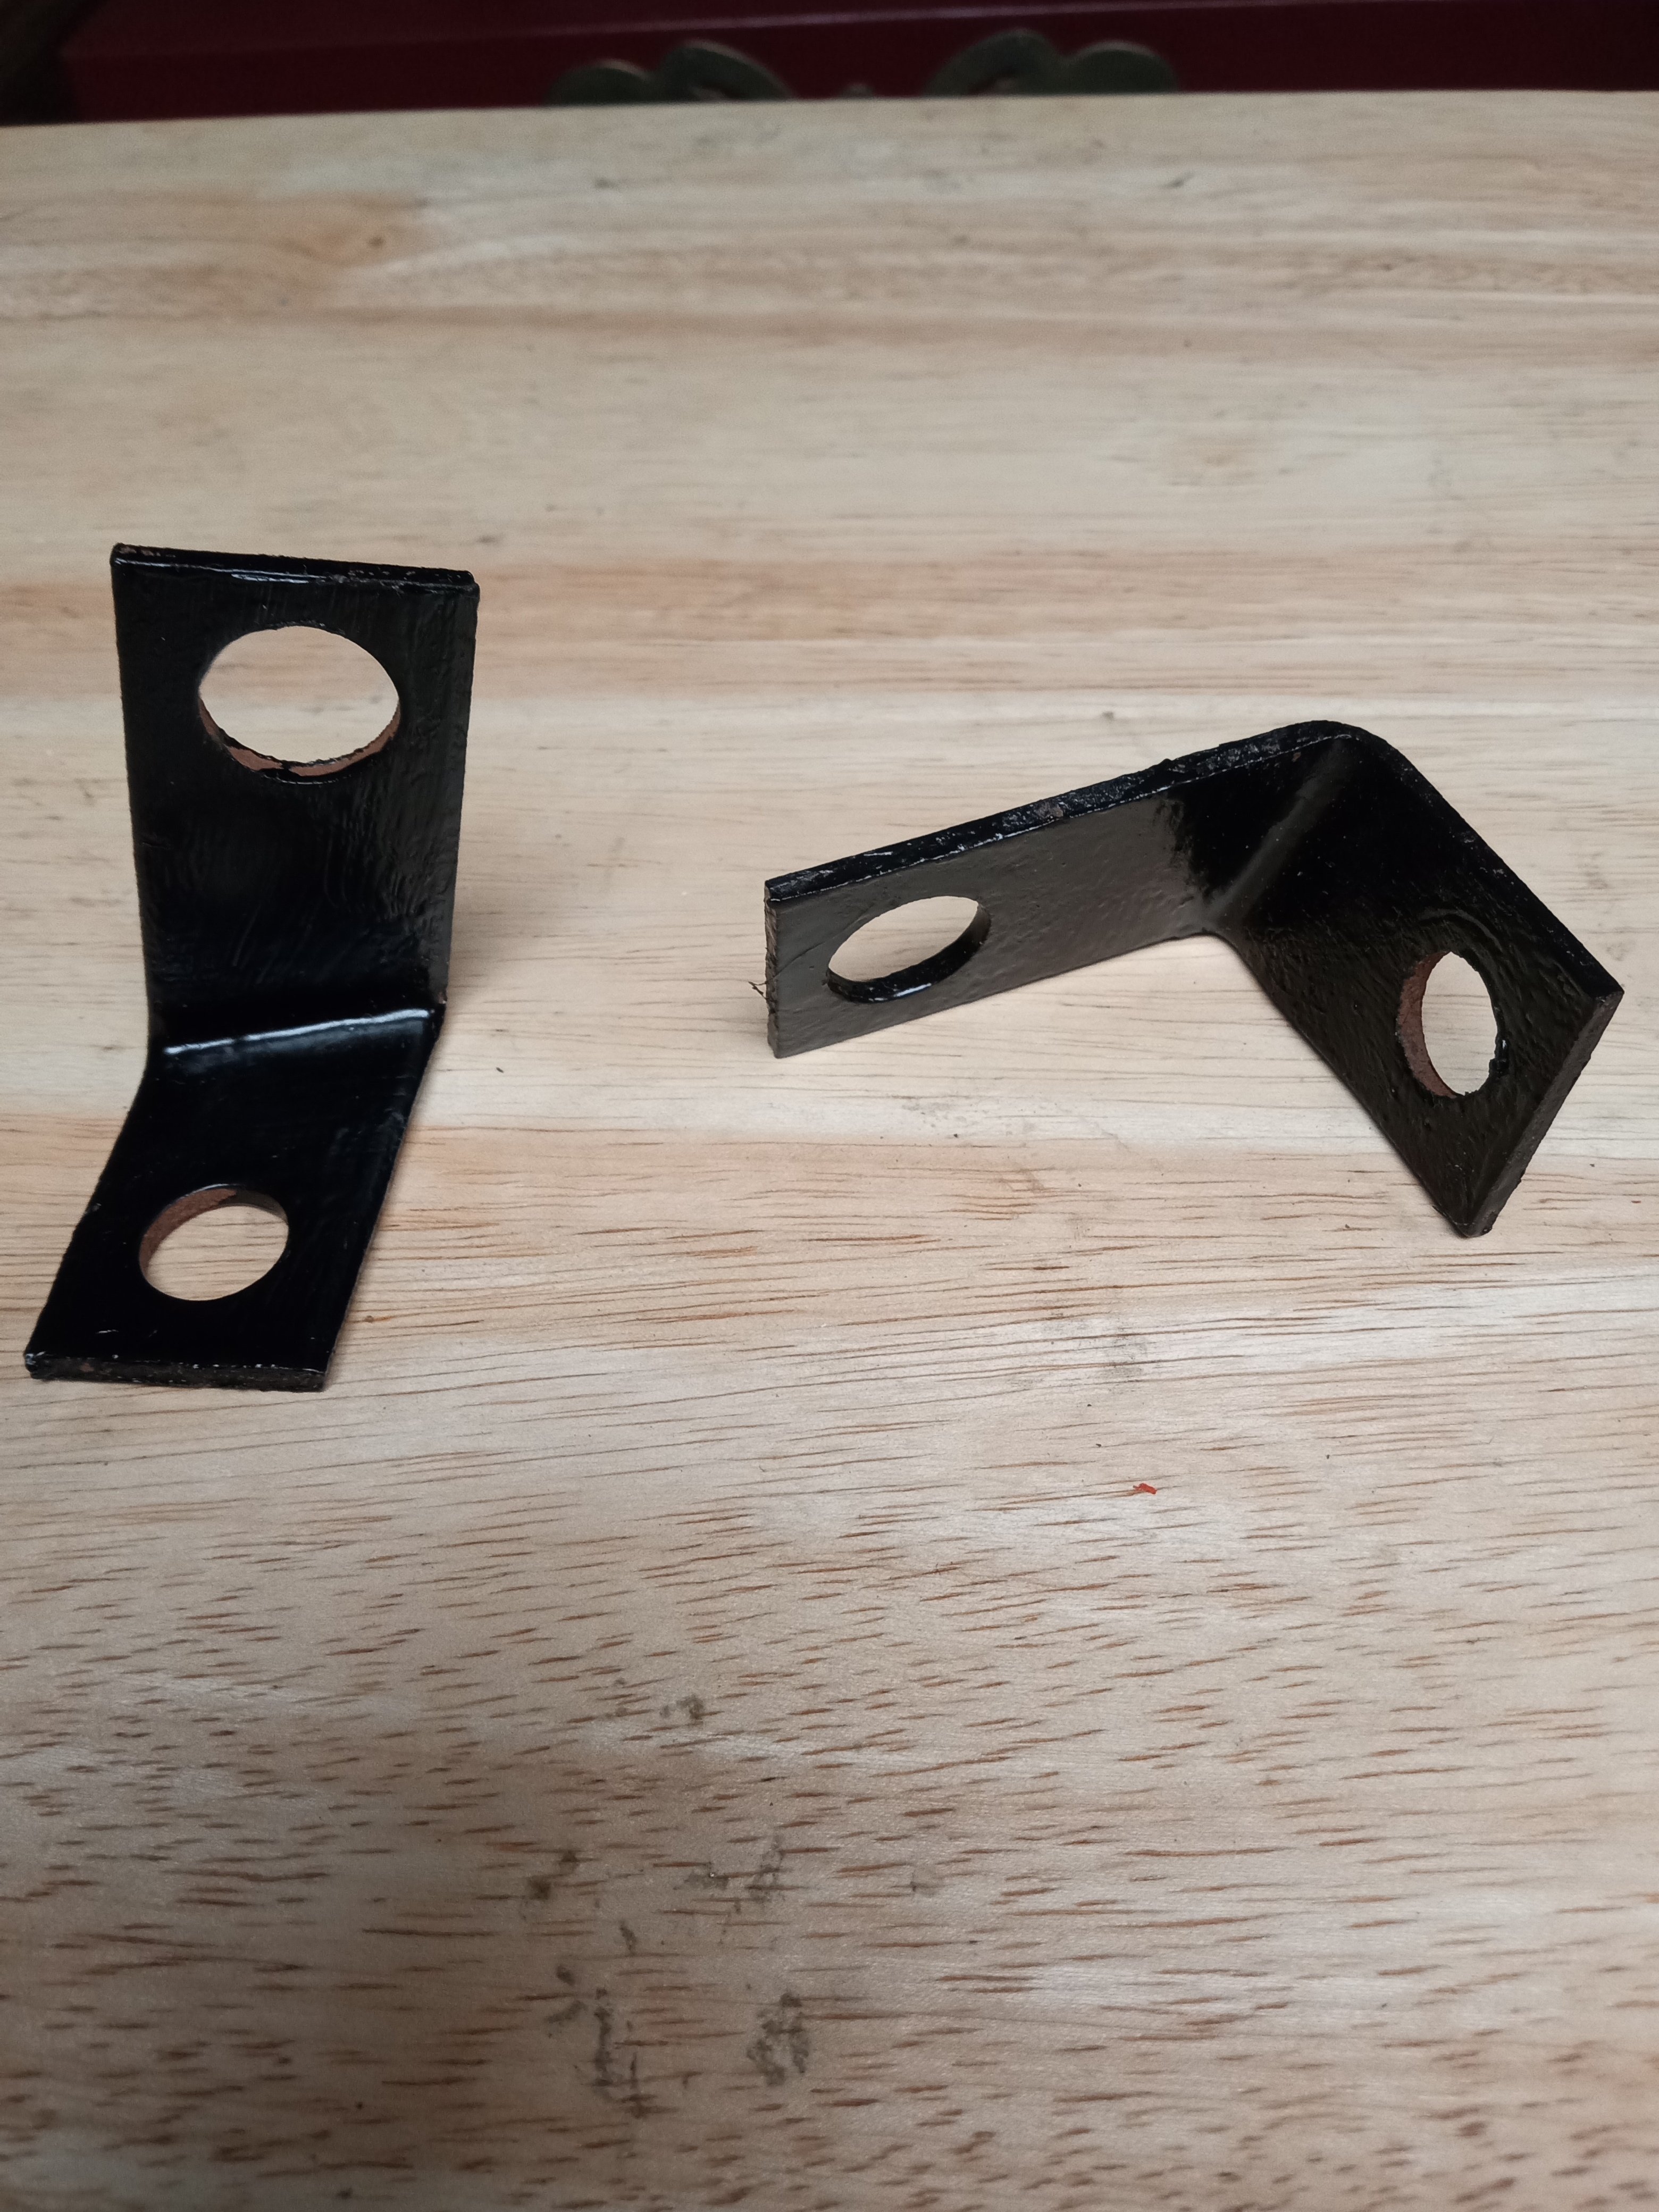
My '64 R2 was almost completely part when I bought it, rotors were on but nothing else, now I'm putting the brakes back together, already did the rear, working on the front and can't seem to find in the parts or service manual where these to angled brackets fit. Seems like they are part of the front system, one hole in the bracket is 1/2" so must bolt on somewhere with a 1/2" bolt and then the other hole in the bracket is larger, 5/8" or so, might hold rubber brake hose? Or am I way off?,,,
-
1 hour ago, DWR46 said:
Take out the bleed screw. You will find it has a conical indentation instead of a tapered point. The conical indentation is what presses against the ball to seal the bleeder. Many people lose the ball and then tighten the bleeder super tight to try to stop the seepage. All that does is ruin both the bleeder and the ball's seat in the cylinder.
So being a special bleeder screw, back when the car was new and for years after, I would imagine gas stations/garages, where most would probably have service done after the warranty, would have these bleeders on hand? After all, how many cars had disc brakes in those years and those who did, were probably foreign (like the XKE setup on Avanti?,,,
-
10 minutes ago, 64studeavanti said:
It would make no sense to go on the input side. If that were the case, the brake fluid would effectively stop the flow into the pistons, meaning no brakes.
It does go into the bleeder port. I believe the theory is that it helps prevent air from entering when bleeding the brakes.
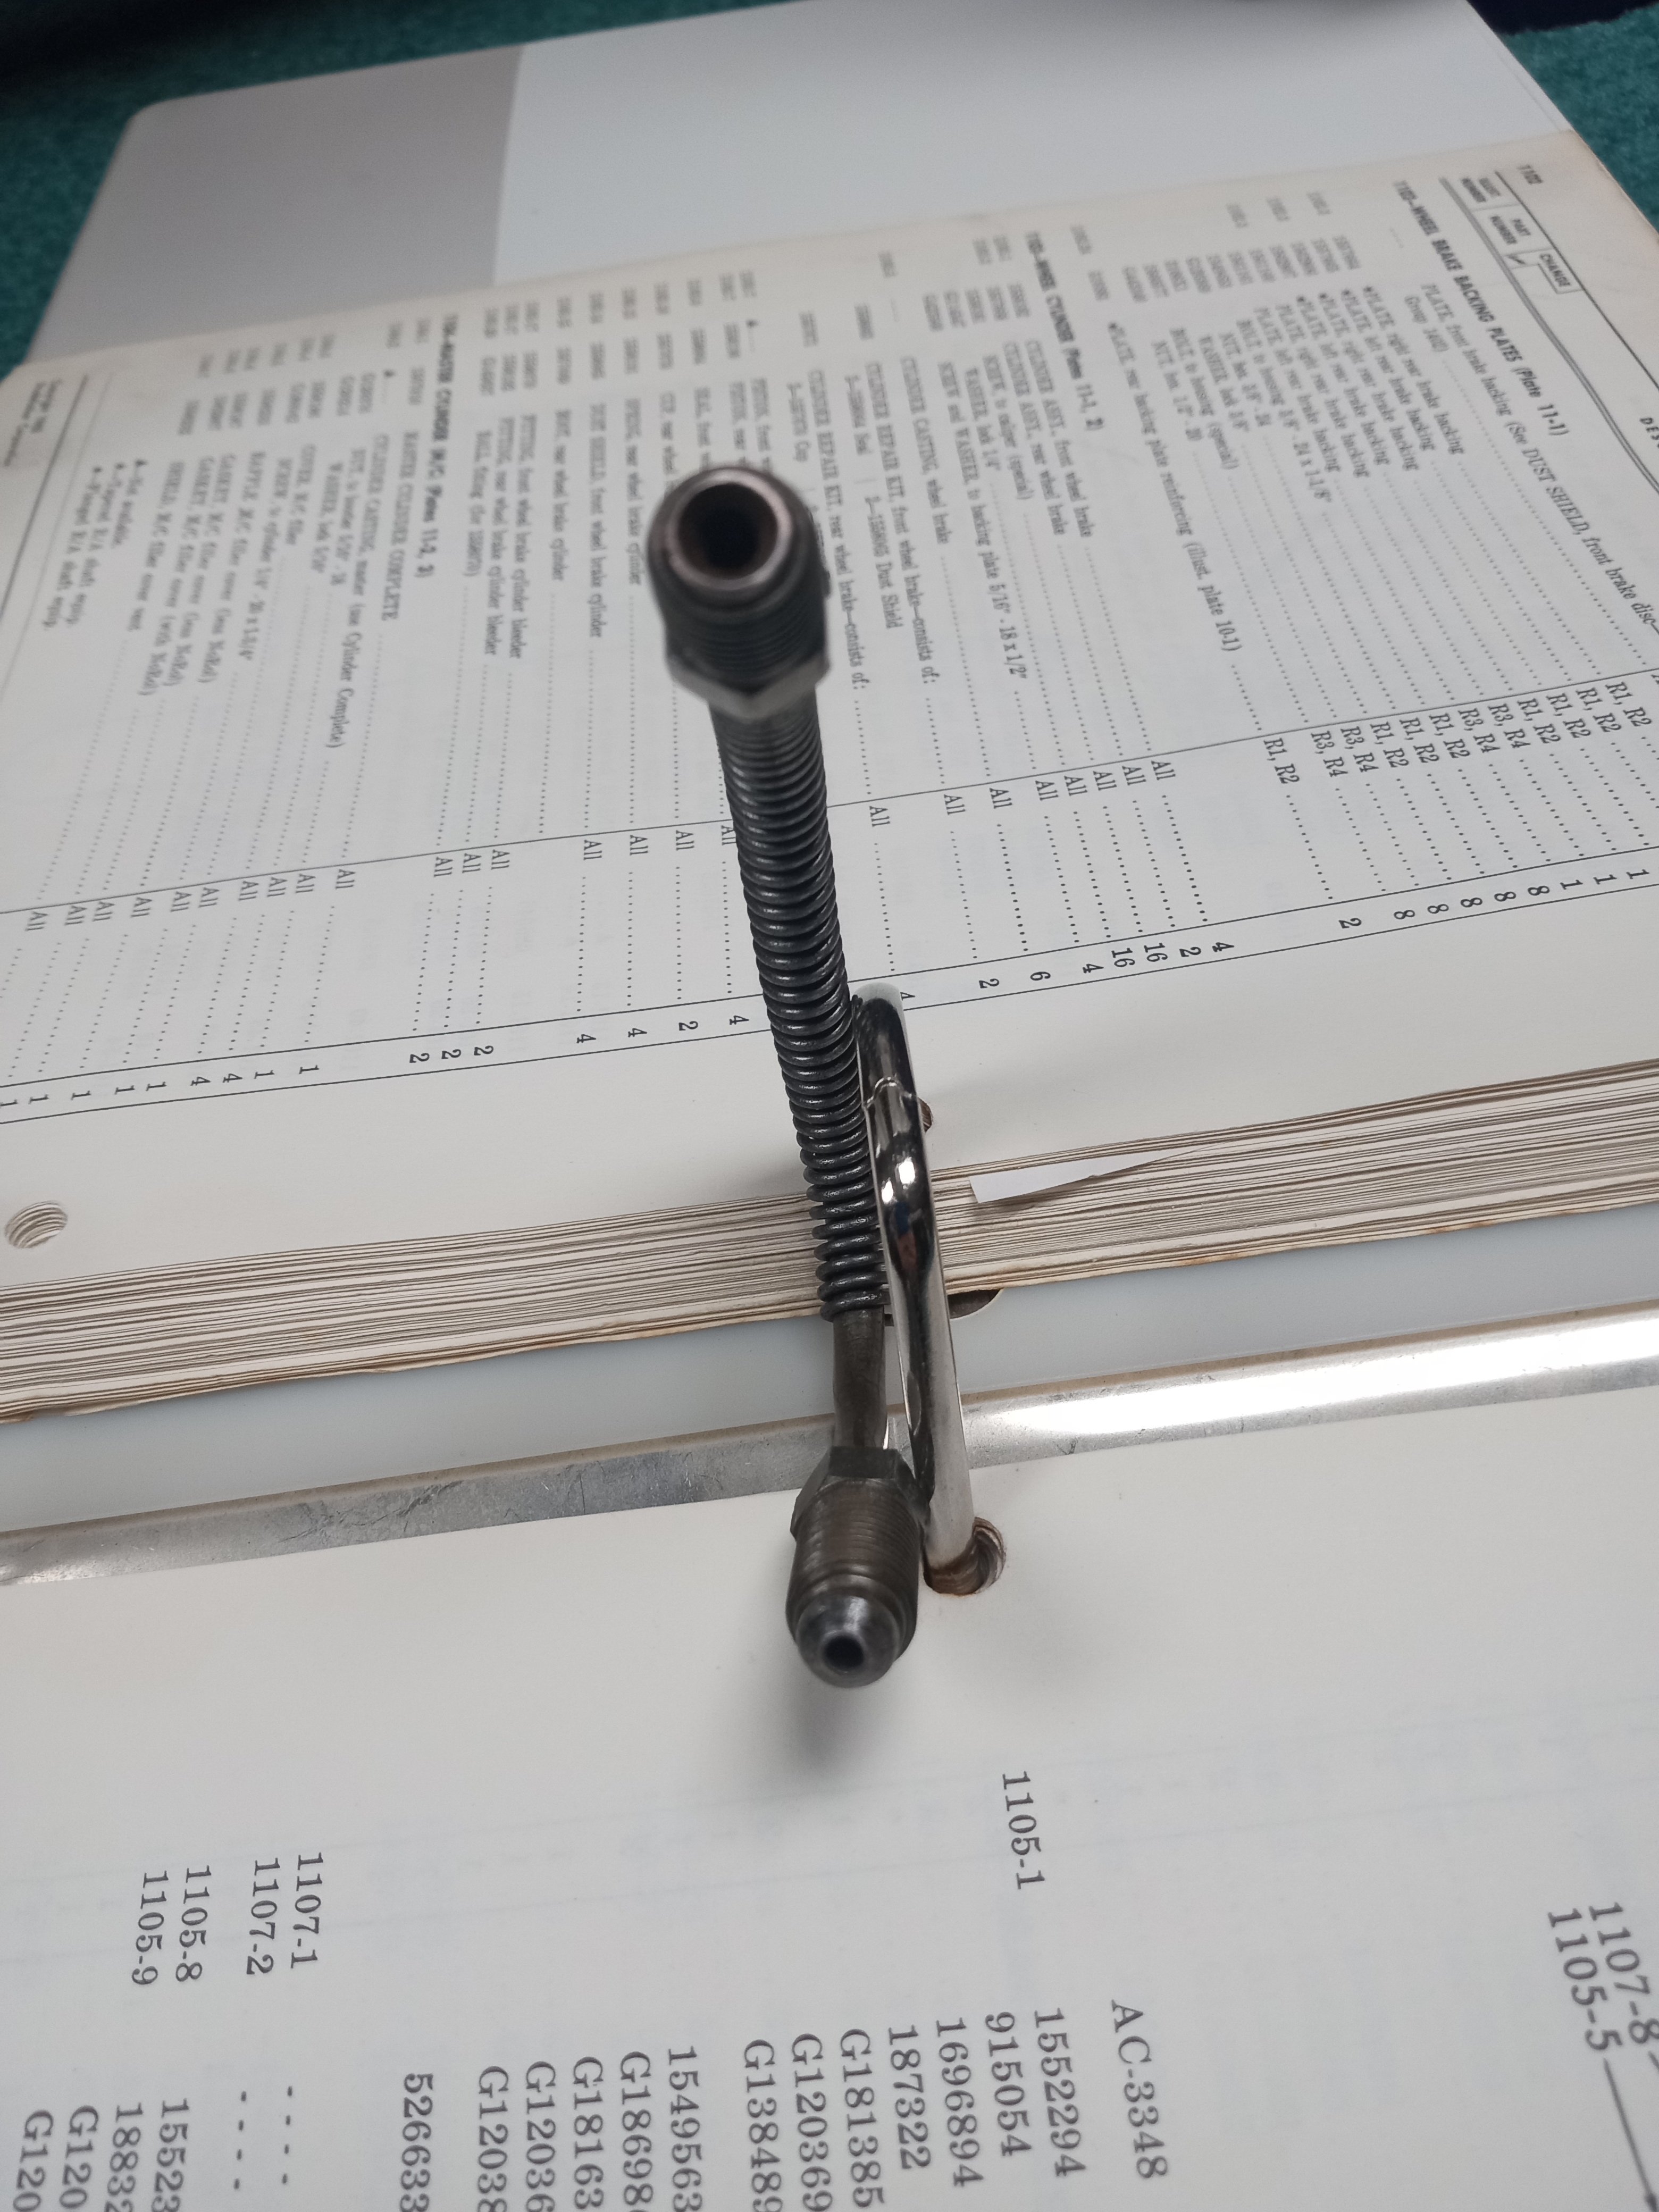
Yes, that would make sense, and the larger flare on the short section of brake tubing would connect to the rubber hose,,,thanks
-
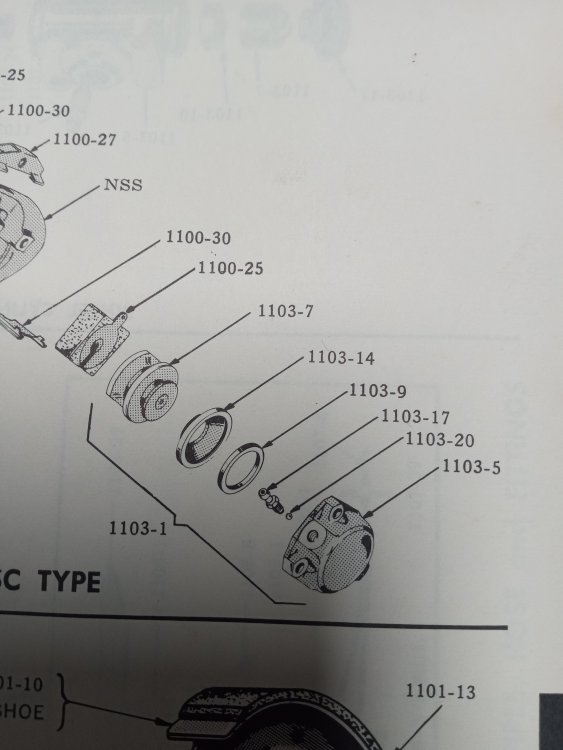
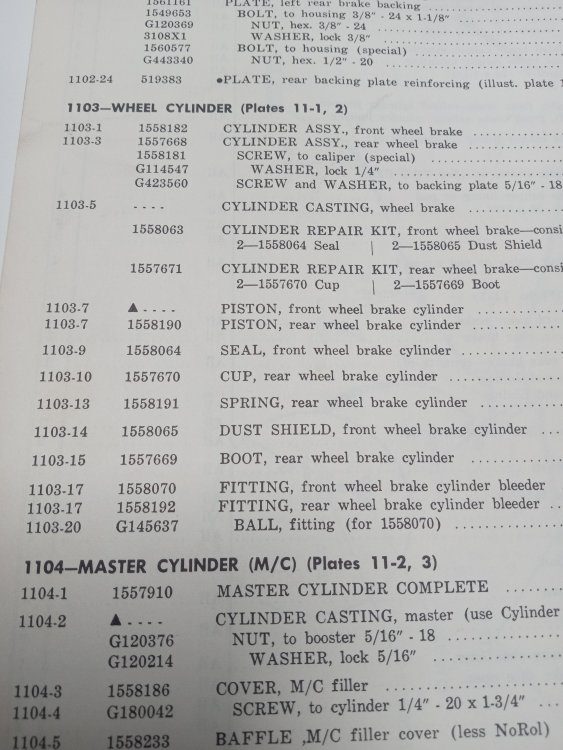
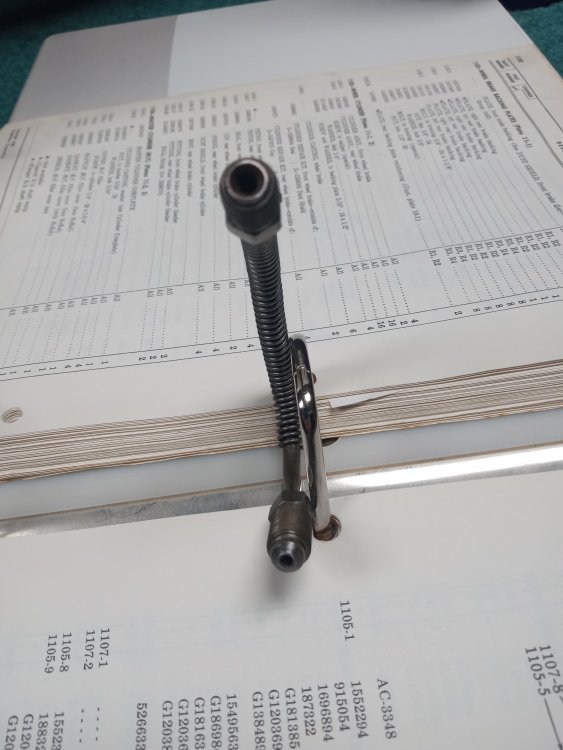
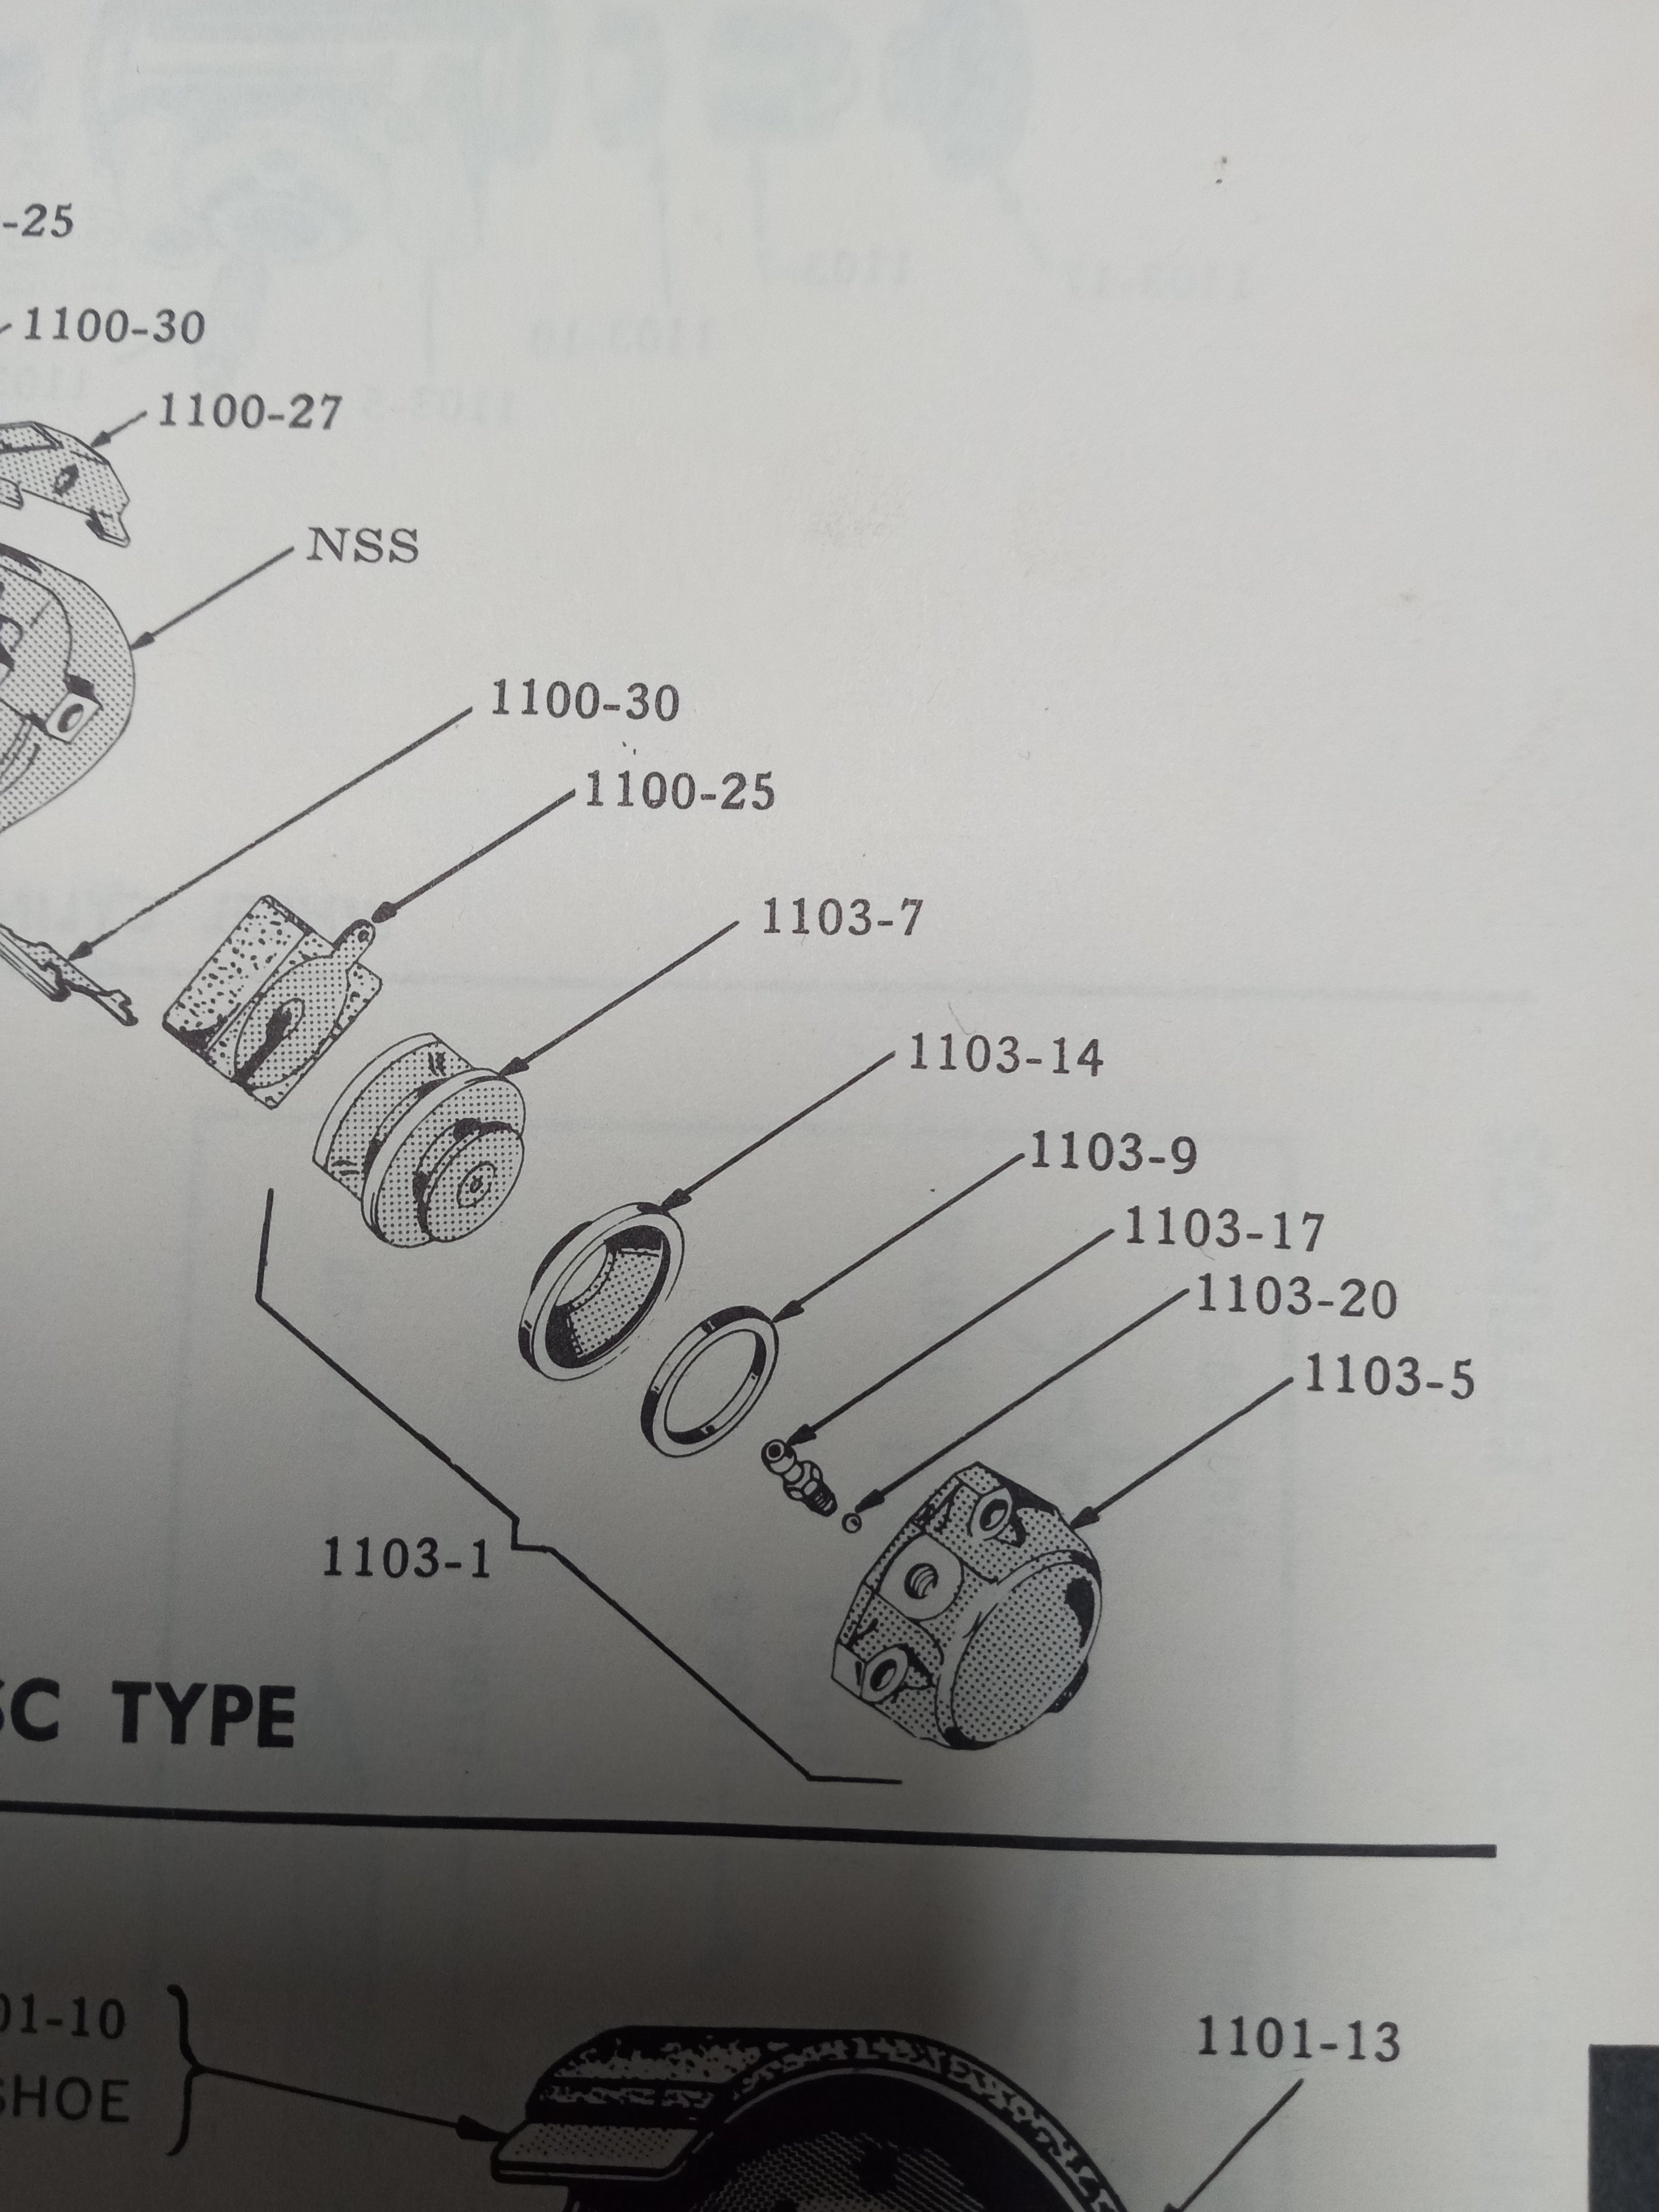
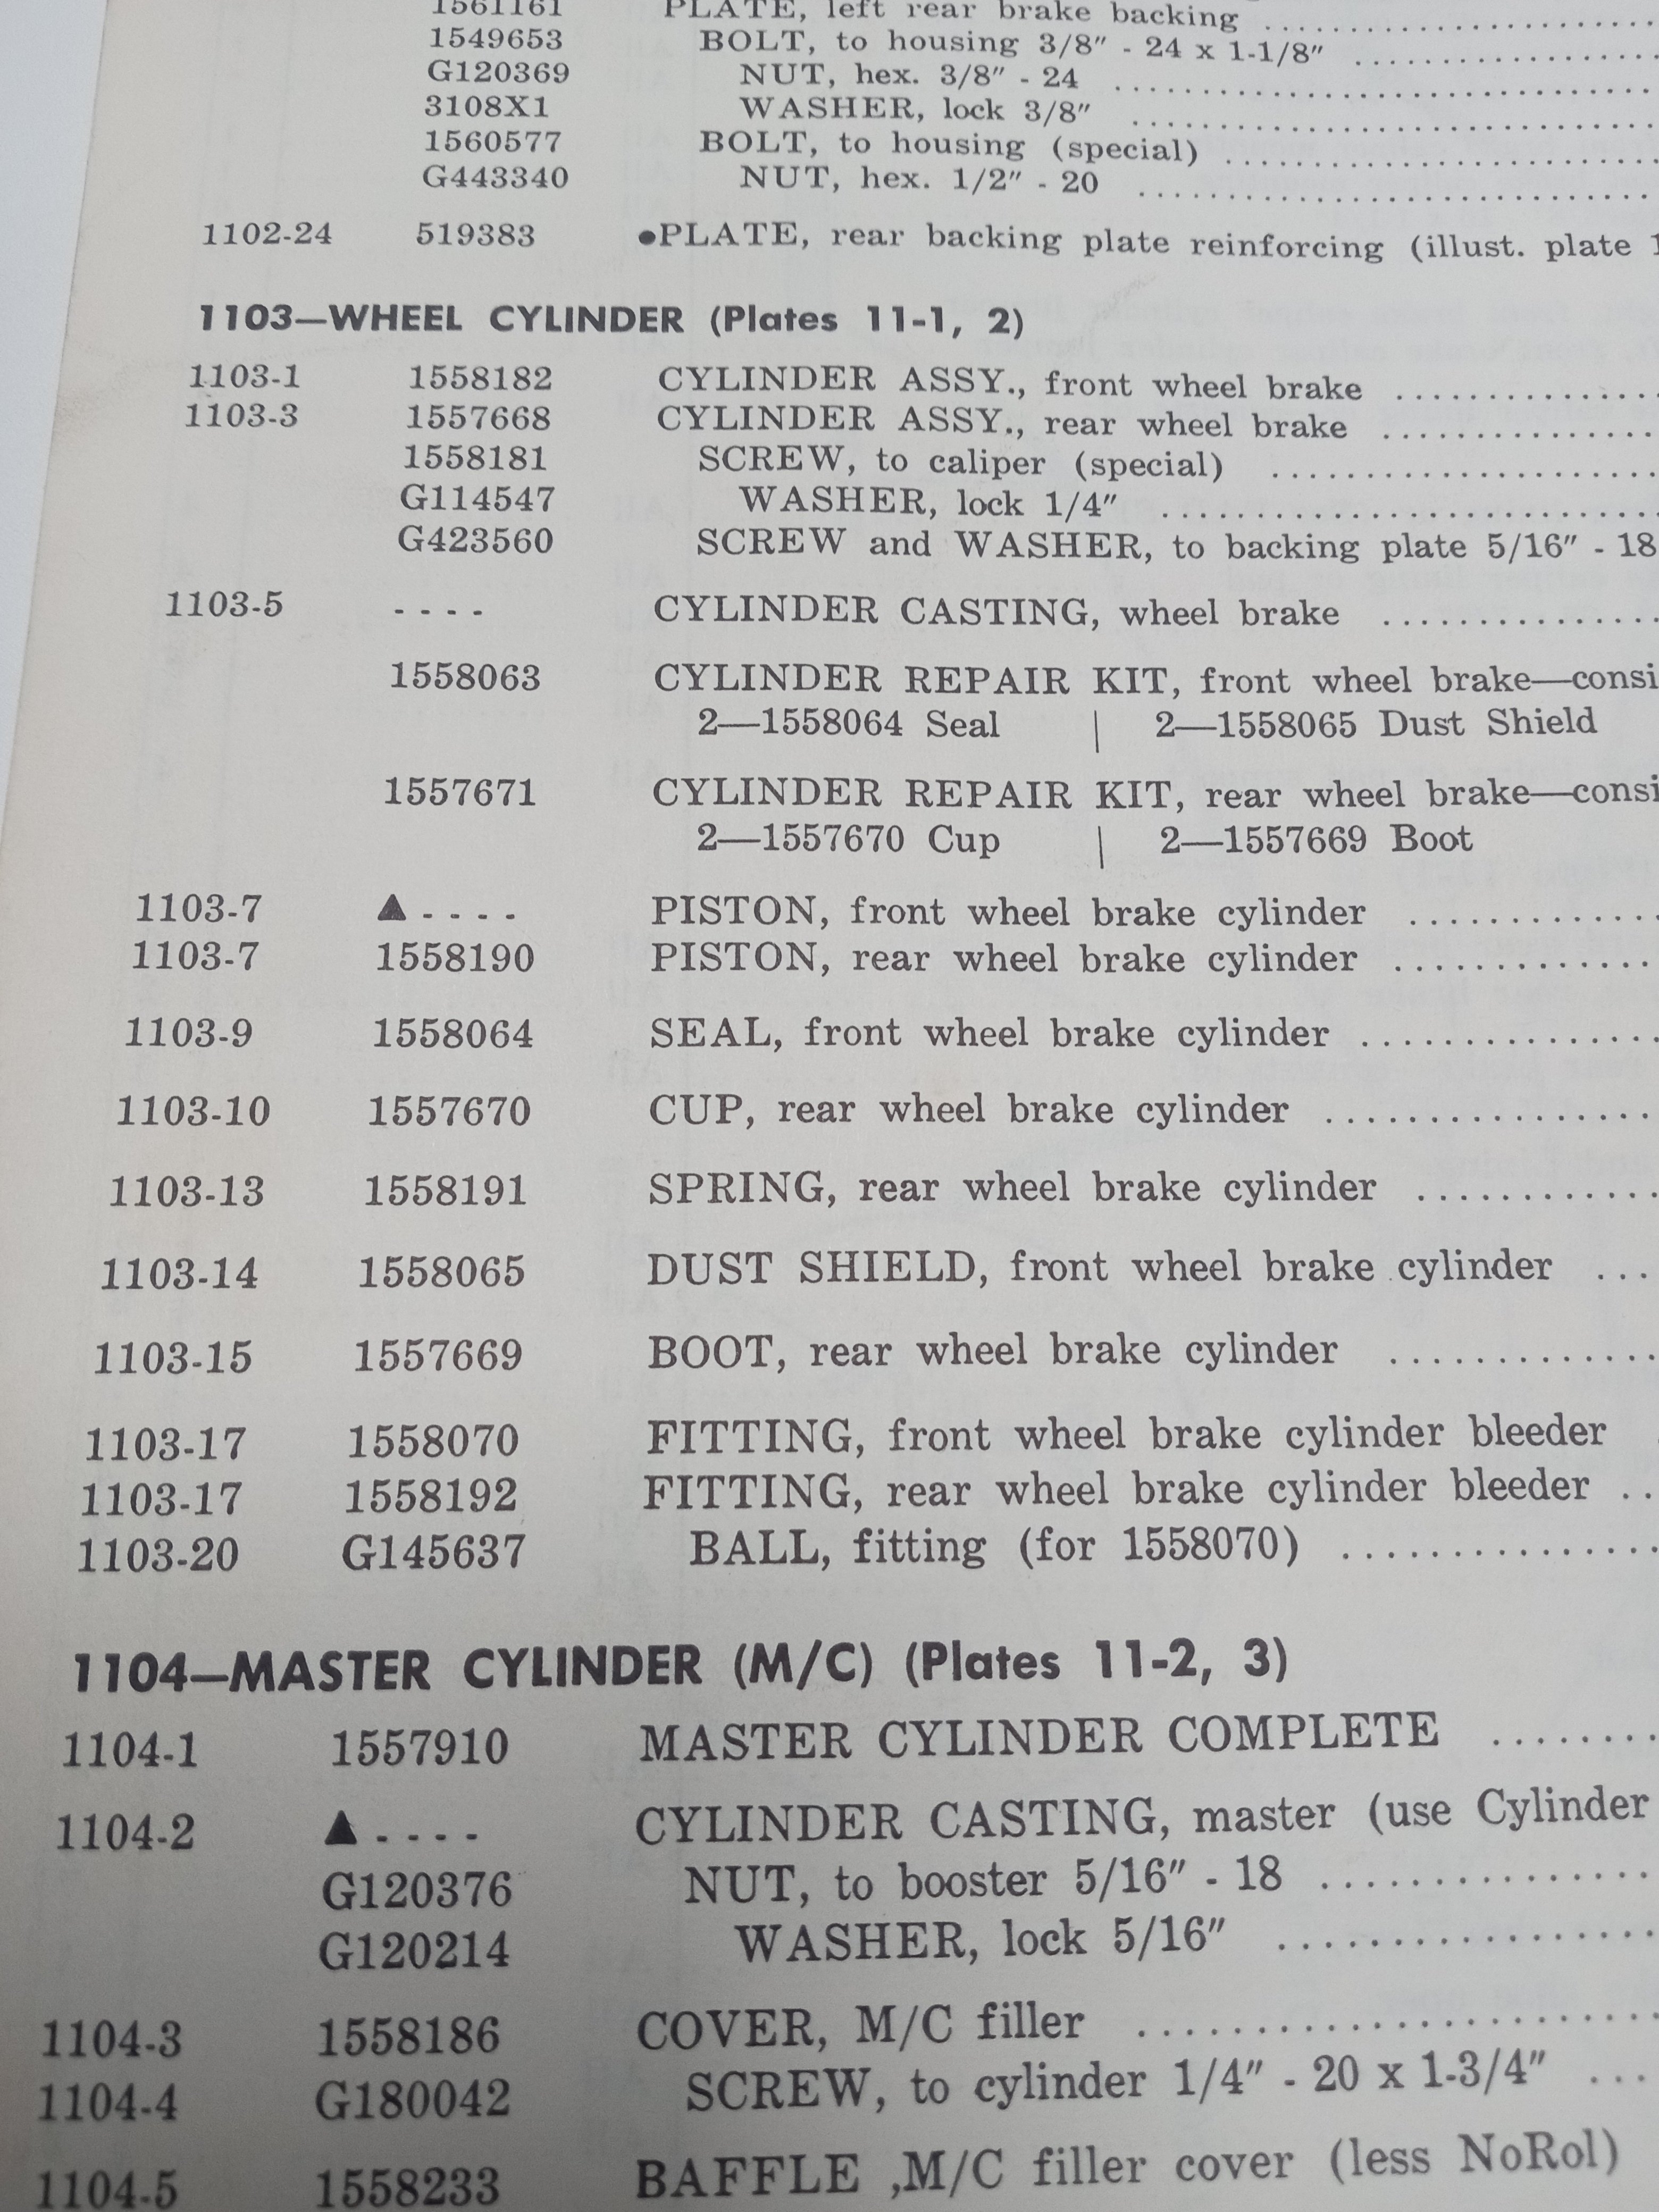
Not sure where this (check?) ball should go. The book shows it going into the bleeder port of the piston cylinder casting, and the parts page also shows the ball G145647 (illustration #1103-20) as being "for" that fitting 1558070 (illustration # 1103-17).
However, looking at the short section of brake line that connects to the rubber brake line, it's clean that one end is flared for a ball (as pictured)!
So wouldn't that be where the ball would go, in the port of the casting that connects to the rubber brake line/hose?
Also, I assume this ball acts as a check ball, but I don't see how if the line is tight then it would be holding the ball against the port opening?
-
Who can tell me what the amperage is for the factory alternator on my '64 R2, it does not have air conditioning?,,,
-
9 hours ago, South Shore Motors said:
I actually kinda like the wheels. Oldsmobile, aren't they? Looks like you already had them on the car before you sold it, 20 years ago. Unless you're planning on a restoration, I'd leave em on there. I've had dreams where I re-acquired a car I'd previously owned... Think it's fantastic that you got yours back.
The wheels aren't bad looking at all on that car but I think Oldsmobile is a completely different bolt pattern isn't it?,,,
-
50 minutes ago, Dunkin said:
Any tips on removing these and the knobs? Thank you.
Front knobs/tone controls etc just pull off, then remove the two nuts and washers. Under the dash electrical connections and antenna wire obviously need to be disconnected.
As I remember there is one more chassis nut to remove, located on the bottom corner, passenger side toward the firewall, I used a quarter inch socket, don't remember the exact size, perhaps 7/16 or 3/8 in.
The hardest part is getting access under the dash, after removing the fiberglass panel on the passenger side at the transmission hump, you need to squeeze yourself in on the floor to reach up under the dash at the back of the radio. If the passenger side bucket seat is removed it will make this whole lot easier,,,
-
Are 225/70/15 a good size for a slightly wider tire for my '64 R2?,,,
-
23 hours ago, Dwight FitzSimons said:
Others have recommended a type 51 battery as a replacement for the 3EE battery in a '63 Avanti. Below are the dimensions. The 51 battery is 0.68 inches wider than the 3EE, so that is the critical dimension. The height is about the same (51 is 0.23" shorter). Below are pix of a '63 Avanti with a type 51 battery installed. It looks like only the rearward hold down is needed.
--Dwight
51 and 51R battery dimensions: 9.375 x 5.0625 x 8.75 inches (L x W x H)
3EE battery dimensions: 19.94 x 4.38 x 8.88 inches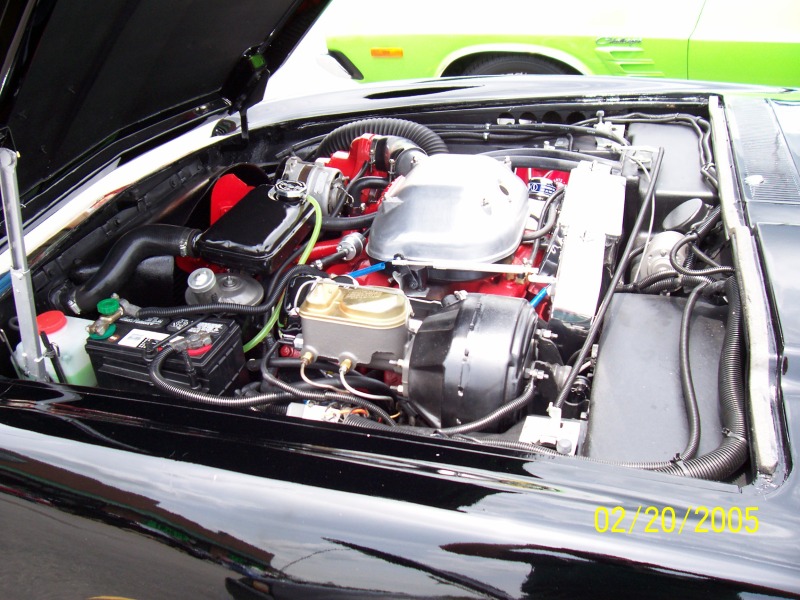
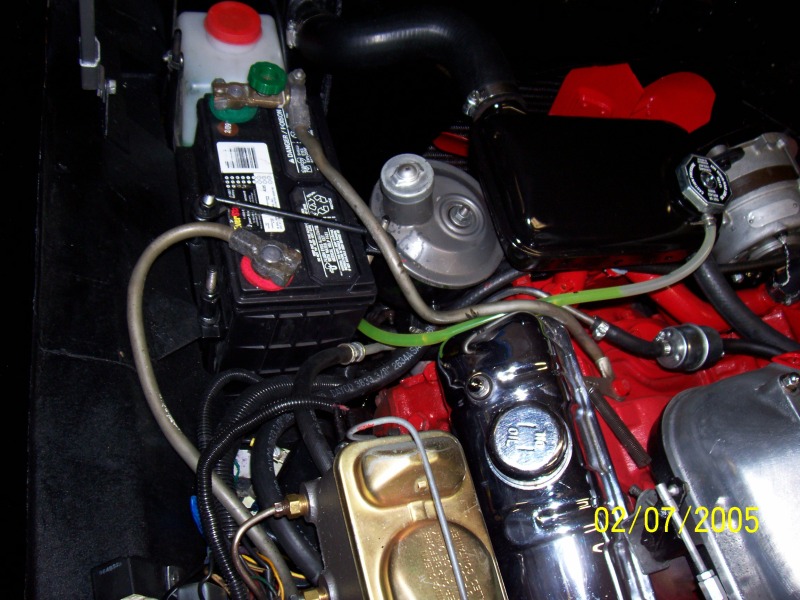
What is the difference between the 51 and the 51R battery?,,,
.JPG.d96bee853b0ec85f91f0c78858f67b18.JPG)

.webp.5ea5a73d4fe5863b15dea5b1a347b497.webp)

Electronic distributor and very hot coil.
in 1963-64 Avanti
Posted
Colis get hot but maybe not that hot depending on the outside temperature of where you live, in the NE, it's very cold here now.
Test the coil with an OHM meter, with everything off, disconnect all the wires (3) to the coil and measure from either one the + or - side terminals with one meter lead and the other lead to the main coil wire lead (center), it should read high, 9 or 10K or higher on the ohm meter, if it reads much lower, it is bad.
On the low side, measure the + and - terminals with one lead of the meter on each, depending on what coil was sold with your kit, it should lead 0.5 ohms or less; hope this helps,,,