


JavierB
-
Posts
112 -
Joined
-
Last visited
Content Type
Profiles
Forums
Events
Posts posted by JavierB
-
-
Okay, so I've figured out that what you have is a CR3001.
There are several places where folks discuss this radio. In this Pelican forum there is a guy who offers to send a pdf of his manual if you DM him:
https://forums.pelicanparts.com/porsche-911-technical-forum/810470-help-80s-stereo.html
-
From the looks of the faceplate icons, the knob controls seem to be fairly similar. Yours may just have a couple of different features but a lot of it will be the same. They are both from the same 1980 era so likely to share a lot of design elements.
(If it's NOT the sacramento, then which is it? does it not have a model or label on it? )
https://avanti4245.files.wordpress.com/2021/02/sacramento-manual.pdf
-
Surely SOMEBODY has worked on their handbrake lever on this forum? a diagram? a picture? anything?
-
I believe this model is called SACRAMENTO.
check out this:
https://avanti4245.files.wordpress.com/2021/02/sacramento-manual.pdf
-
Hi folks.
My parking brake seems to occasionally slip when moving the lever, resulting in incomplete engaging or disengaging of the brake. So I need to troubleshoot this, but cannot find any tech articles or info on accessing or adjusting this lever. So far all the tech stuff I've seen is about the earlier dash-mounted brake, but nothing on the Avanti II center console unit.
I've never removed the center console, and so any advice, images, steps anyone might have about getting it off to work on the ratchet lever, and any steps on making adjustments or checking parts would be super helpful. (for example, is this lever shared by other cars with better documentation?)
Thanks in advance to anyone with any pointers or links.
-
STUART!
I know this thread is 2 years old but do you have updates on what that unit was and what it does?
My 81 has the same unit, and I was in midst of a plan to change my mechanical speedo to an electric one when I discovered this thing in my way. I can't really do my conversion with that in the way. As a matter of fact it looks almost exactly like the Hall Effect unit I was going to install for my speedo.
The manual for the Dana Cruise says something about a magnetic pickup on the driveshaft and nothing at all about speedo pickup, but maybe its an updated system and not in the manual? I've never actually used the cruise yet, but don't want to permanently disable it if I can help it. can I rewire this signal to use the same electric pulse as the speedo?
Any advice here helpful. Ugh, always questions.
-
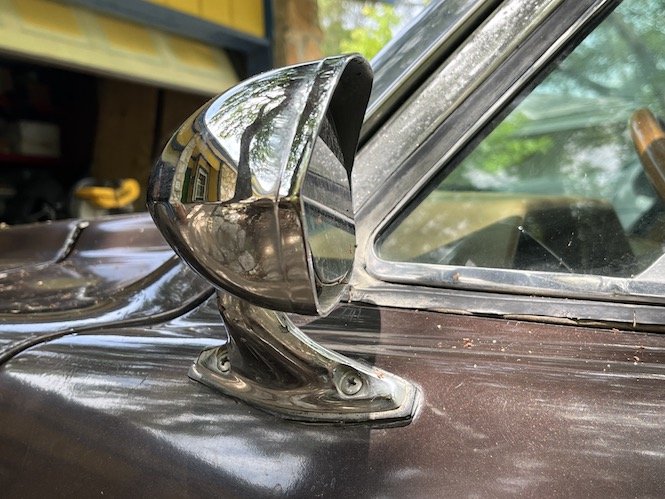
My 81 has the AMC Javelin / Jaguar XJ6 style door mirrors. Both highly trashed. So I'm looking for replacements.
Unfortunately the bolt holes for these mirrors are 2-5/8" apart, which seems abnormally spaced. Its also not a specification that anyone notes on aftermarket mirrors. They always just say "Fits 72 Camaro" or Fits "68-77 Cutlass" but thats not helpful for someone with an Avanti. (or an AMC Javelin for that matter).
I frankly would rather not have to fill holes and drill new ones if there was any possible way to use the existing ones and get some decent chrome mirrors. I would even consider getting repro Javelins if I could get the passenger side with convex glass and a remote cable so it holds its position.
anyway, if anyone knows more than i do about replacing door mirrors (i know zero), please chime in. I'm looking for chrome mirrors that are period style but also daily-driver functional and safe. And most important, that FIT THE HOLES.
-
On 6/4/2022 at 6:13 PM, pantera928 said:
Just curious to know. did you find a replacement seal for the Skytop sunroof? They tend to go bad after time
I used a seal for an airplane door I found here:
https://www.brownaircraft.com/product-p/ba-4555.htm
and because I thought it needed more depth, i put a 1/8" flat rubber strip behind it:
https://www.amazon.com/gp/product/B07WR1WG72/ref=ppx_yo_dt_b_search_asin_title?ie=UTF8&psc=1
I've never seen a good image of the exact profile of a new stock one, so I went off what my battered old one looked like to the best of my ability, and this sandwich looks like a good match. It seems to work well so far after a year.
I literally scoured the entire country for an original seal and called dozens of dead ends, so I dont think originals are to be found anywhere.
-
On 5/29/2022 at 12:29 PM, pantera928 said:
So do you think it makes the car cooler?
Can't say for certain. Fixing the skytop was the first thing on my list when I got the car, so not much to compare it to.
-
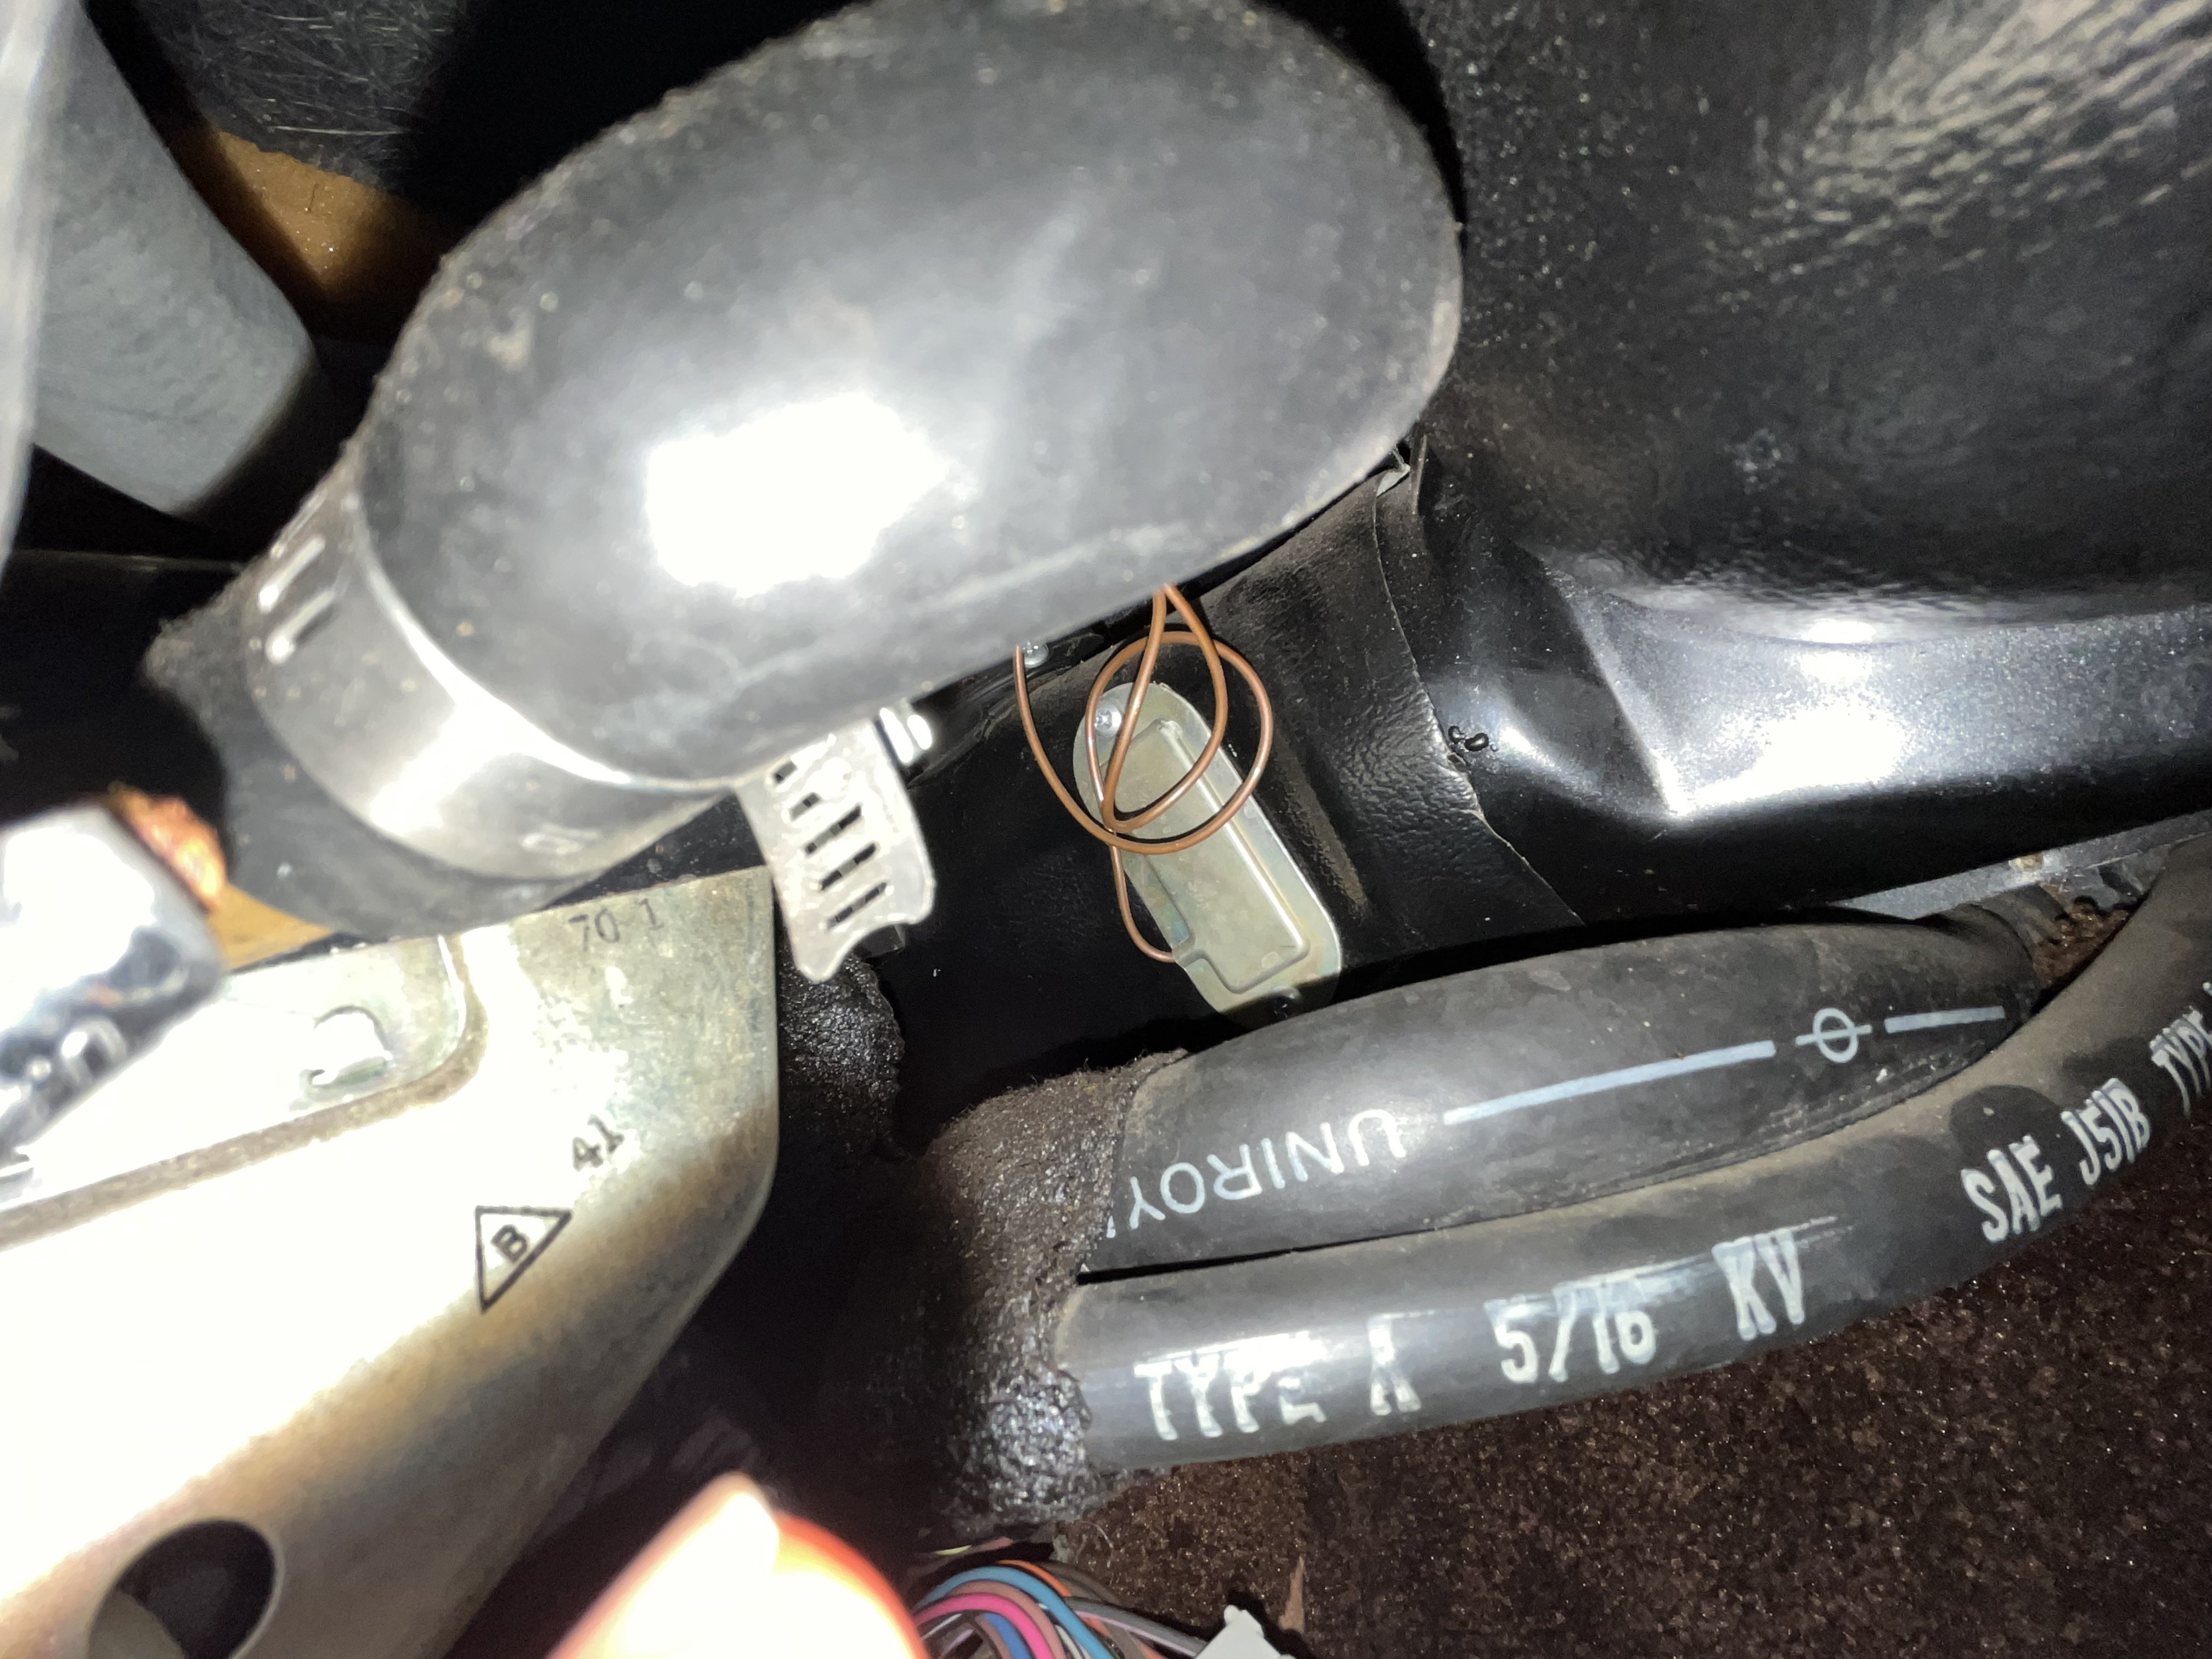
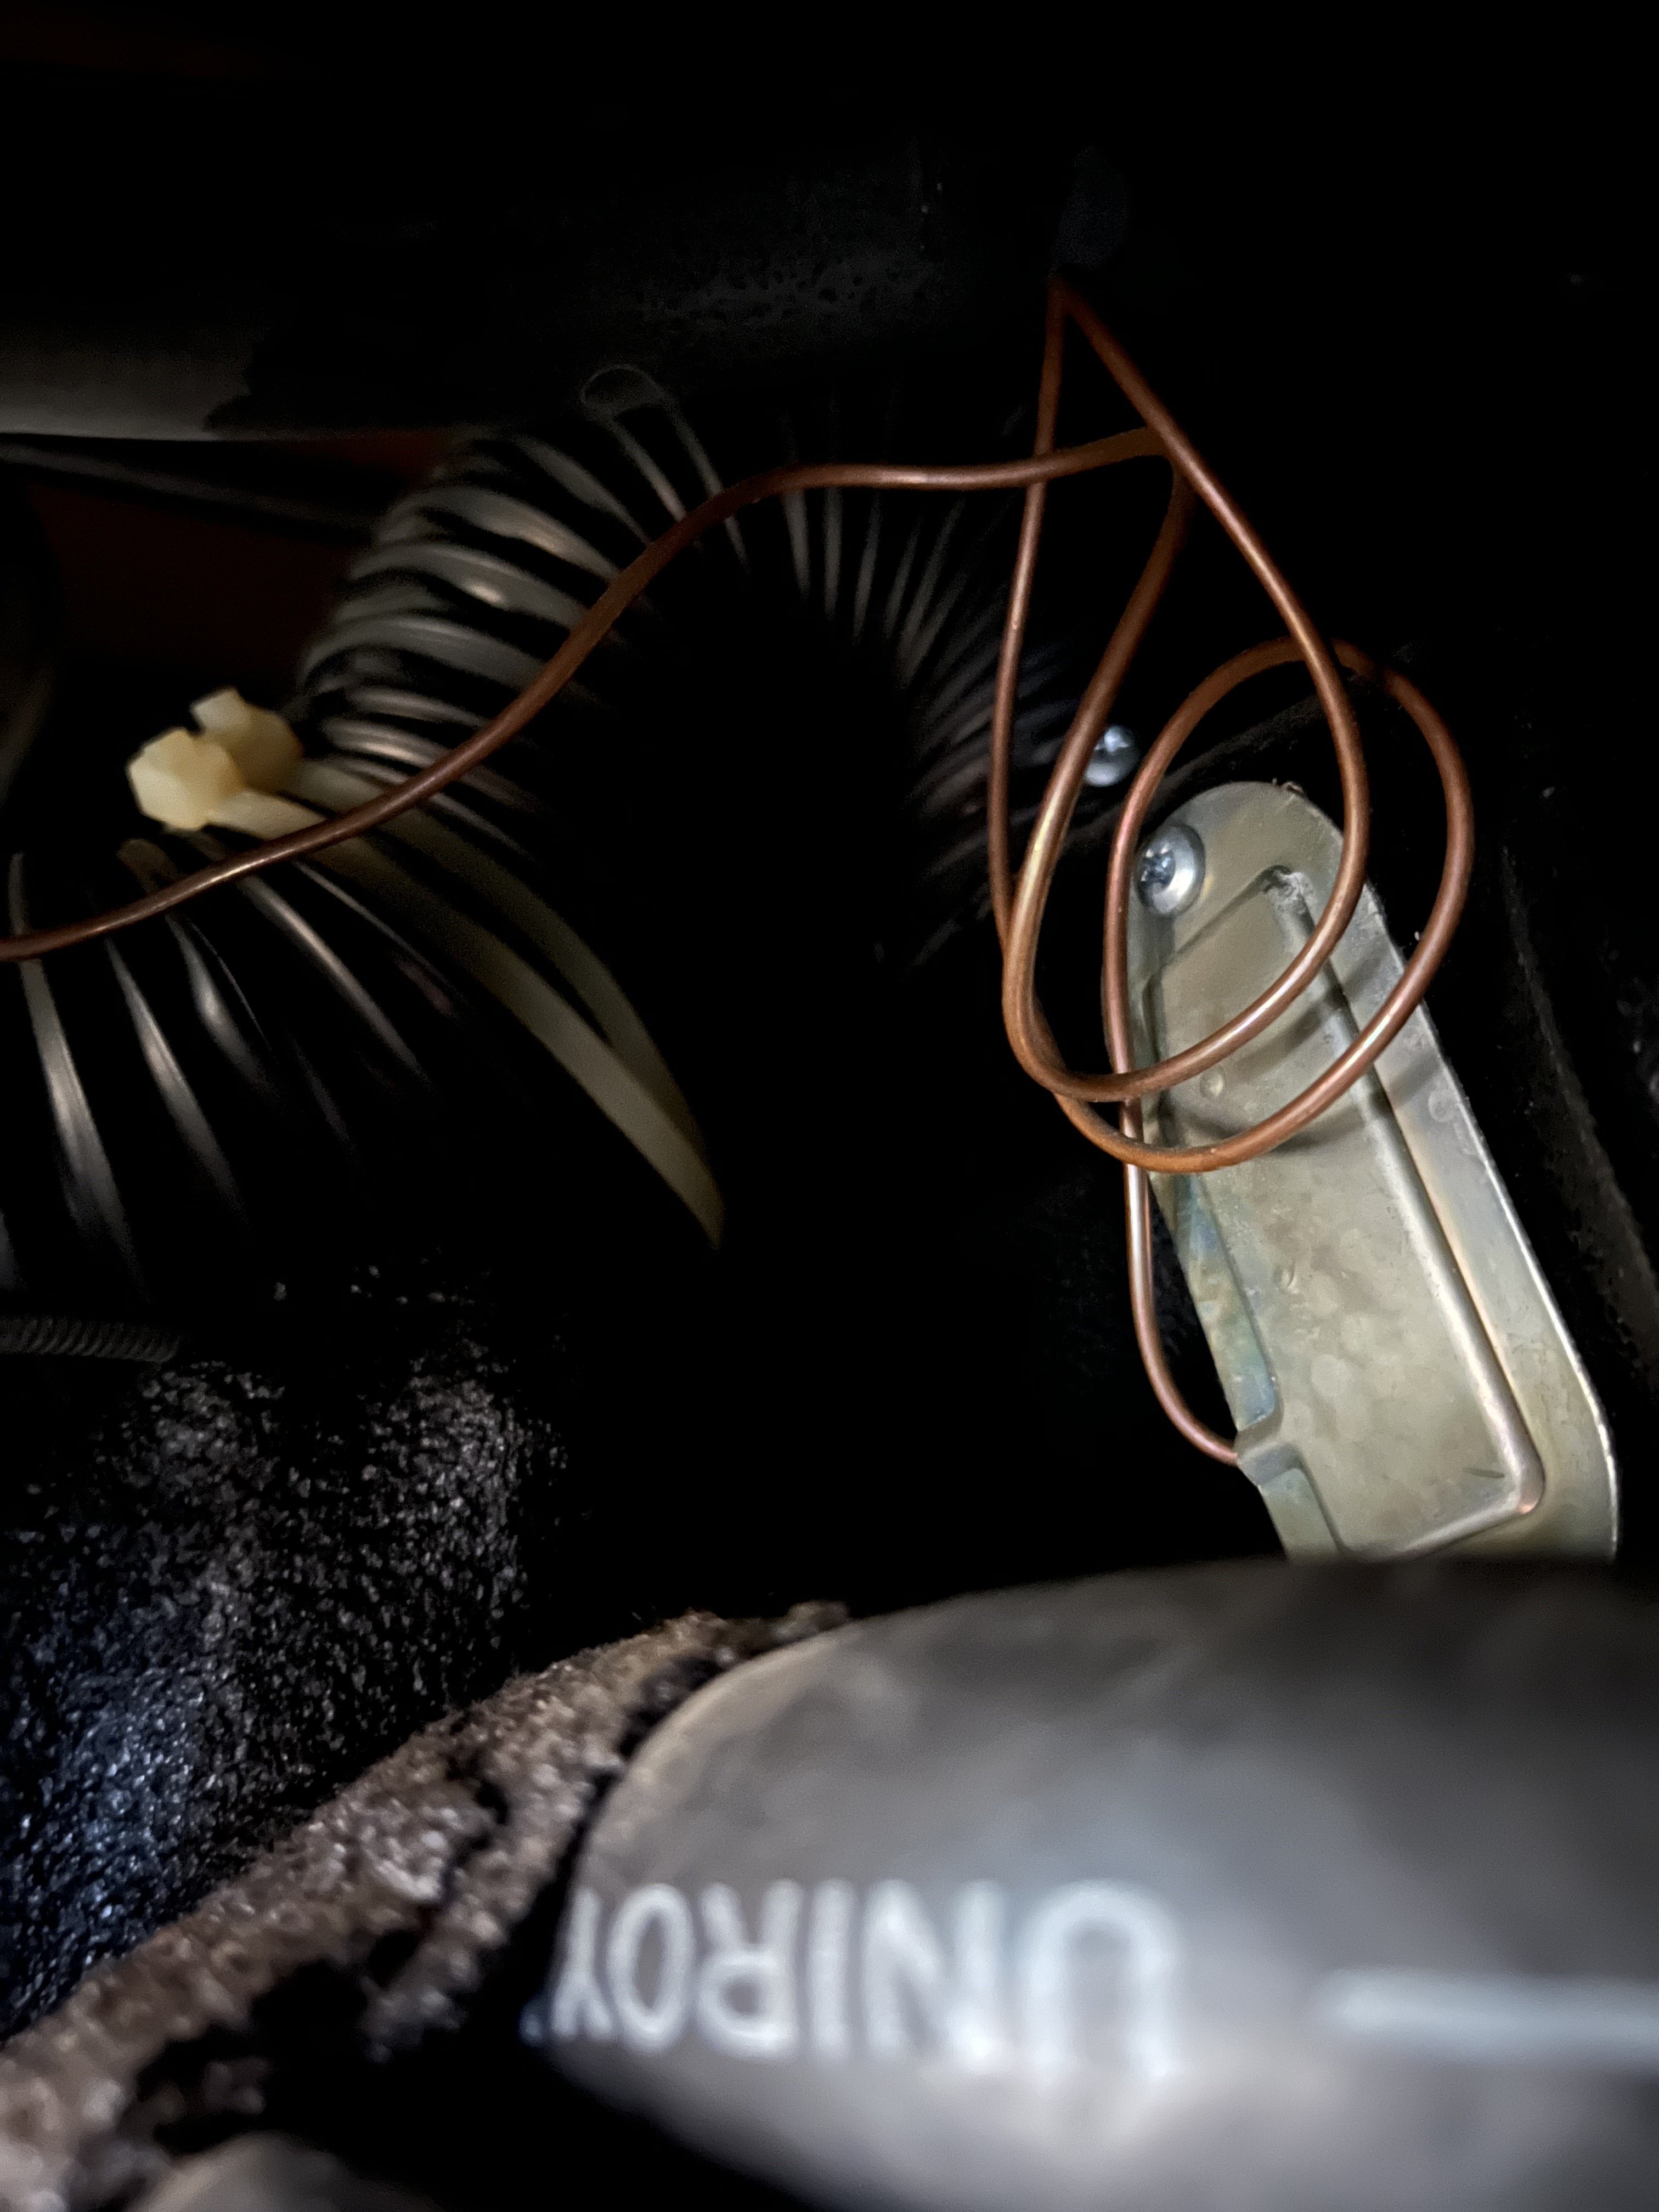
The small green lens on my dash turn indicator has somehow fallen out and vanished. One of those mysterious disappearances. it had become unattached, and I disassembled it to try and reglue or reattach but it just fell and is gone.
SO... is that ridiculous tiny part available? or should i replace both Left and Right ones with some other matching bit of glass or plastic. what do folks recommend?
thanks for any tips.
-
4 hours ago, pantera928 said:
How hard was it to remove that panel and install that reflective insulation? It seems like that would make the car easier to cool in the Summer
Well, I removed it as part of the entire moonroof repair process, so it came out AFTER removing the glass. once the glass is removed you slide the metal panel forward and then push up to bow it out of its tracks. Not hard. But you have to be willing to do the whole removal and replacement of the glass panel, which again isn't too hard, but it is a bit finicky to realign.
-
UPDATE:
I forgot about this posting, but what I wound up doing is gluing down a thin reflective insulation and it has worked out great. The panel is noticeably cooler to the touch on a sunny day.
The whole moonroof works well now.
-
UPDATE:
While yes, I agree that running new wire would be great, thats just not a near term project. What I discovered is that the rear three-wire system is a fairly common thing called "Common Ground" wiring, which is still stereo. A new head unit or amp can use common ground wiring by first running the four wires into whats called a "Floating Ground Adapter", which then spits out the correct three wires. Its a $10 little doohickey that fits fine behind the radio and is available from Crutchfield or other vendors. Took just minutes to wire up and works like a charm. Heres the link to the unit itself if anyone else needs this:
https://www.crutchfield.com/p_142FGA/Scosche-FGA-Floating-Ground-Adapter.html
-
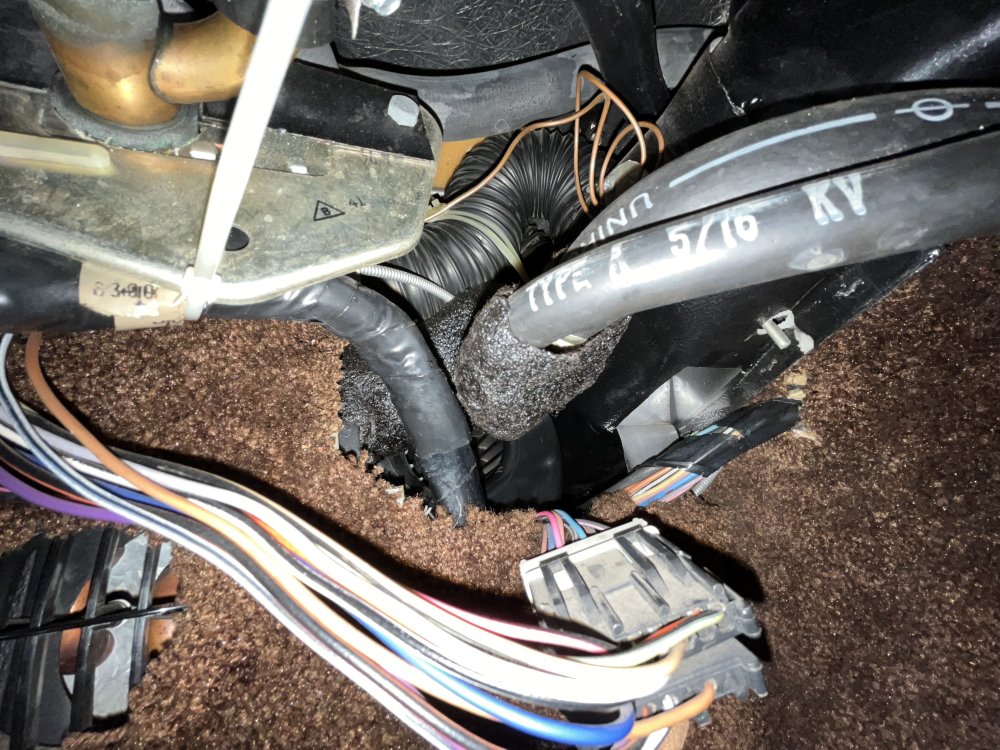
Hi everyone.
I'm in the process of installing one of those Custom Autosound 740 stereos to replace the old cassette stereo. I figured it would be pretty simple unplug harness, plug in new connections, done... and of course its not.
The wiring behind the radio is hilarious, with multiple pigtails and dead ends and wires jumping multiple terminals in the harnesses. It took me a full day to just figure out what was going on. An entire set of wires leading away from one of terminals turned out to all be cut and dangling loose behind the glove box. Lord knows what was done here.
In any event, after untangling the mess and removing the dead ends, it seems that I have 7 useful wires leaving the area, and only 3 reappear in the trunk, where one of them is split, so I'm guessing I have stereo up front and the rear speakers are wired in series/mono. My question is does anyone have a sense of where the speaker wires travel and how hard it might be run a fourth wire to get true stereo in the back?
Thanks for any thoughts. another simple project becoming a rabbit hole, alas.
-
2 hours ago, adamderosa said:
Javier,
The expansion valve will be connected to one of the hoses going to the evaporator. You'll need to peel back the black insulation to get to it. The capillary tube goes between the expansion valve and the evaporator, and is used to cycle the compressor on/off to maintain the temperature set with the control knob.
Thanks! Yes, I figure its in that insulation blob after hunting everywhere else! Thanks all. I think I can actually get at that! I hope... 🙂
-
OR... maybe the valve is in that black glob of insulation? Both of the two AC hoses disappear into this blob, so would it make sense that the valve is there?
Maybe the copper tube is for something else involving the heater.
-
Heres another image of this little panel. I guess I'm going to take that off and see whats behind it?

-
On 1/6/2022 at 8:49 PM, adamderosa said:
As Kodjo stated, you should be able to get to the expansion valve through the opening above the right ( passenger side) console panel.
So, I have a LOT more junk going in and and out of there than you do. I can't see anything that looks like an expansion valve. My guess is that the thin copper tube is the capillary tube that goes from the sensor to the valve, but the part that I can follow tucks behind the big hoses into this little brass panel. So is that the sensor side or the valve side? Its so hard to see whats going on! The other side snakes deeper toward the evaporator. Two pix are attached. Advice?

-
13 hours ago, adamderosa said:
One other query: To replace the expansion valve only, do I have to do the intense disassembly of everything, or did you have an easier access way to get at it? I know its in the console, but I'm really new at this car, and don't really know how to disassemble the console to get at it.
-
Hey guys, if i just wanted to replace the Expansion Valve and Evaporator thermostat, but leave the Evaporator core alone, do I still have to rip all that stuff out to get at the Exp Valve? Or is there an easier access to this? I have an 81. Advice?
-
If you ever do a full gauge swap out, I am curious about that. I also think the illumination on my gauges suck, so I'm thinking about replacing all of them with something that looks vintage but is backlit.
-
1 hour ago, A83 said:
I replaced mine with Nu-Relics - warranty is for life - I am happy with them -
A83
Did you have to cut a piece of the inside fiberglass bracing to get it to fit? That has been my primary hesitation in going with the NuRelics is I saw an install video about having to cut a segment out and it gives me a bit of pause.
-
14 hours ago, adamderosa said:
Javier,
Expansion Valve Kit P/N 3306-VUI (The expansion valve is located in the console, attached to one of the fittings on the evaporator. You should be able to see it on the passenger's side, It may be sealed up and covered in insulation)
Thermostat P/N 11013-VUE
Receiver/Direr w/ binary switch P/N 07322-VUC
4 small questions:
1) is there a typo in your expansion valve number? I found a 33076-VUI.
2) *where* is the Drier located?
3) *IF* I wanted to go ahead and replace the evaporator, did yours have any identifying size/type/model that would allow me to hunt for replacement? I can maybe save that for last and see if the current one works, but if I'm going to replace the expansion valve, maybe it could all just happen at once.
4) are you happy with the results and the parts? anything you would do different? I measured and will go for the larger 22" wide condenser (23" would be perfect but thats not an option I can see).
thanks so much for all that help! I feel I am well on the way now.
-
12 hours ago, adamderosa said:
Javier,
I converted my "72 to R134a back in 2004, using components from Vintage Air. The only piece I kept from the original system was the evaporator, which I first removed to have flushed and tested for leaks. Since you asked for part numbers here's what I installed:
Expansion Valve Kit P/N 3306-VUI (The expansion valve is located in the console, attached to one of the fittings on the evaporator. You should be able to see it on the passenger's side, It may be sealed up and covered in insulation)
Thermostat P/N 11013-VUE
Receiver/Direr w/ binary switch P/N 07322-VUC
14x20" Condenser P/N 03261-VUC (the next size larger probably would've fit too and worked even better)
I used a Sanden compressor, but the one you're looking at should work ok too.
I purchased my components through a Vintage Air dealer and installed them myself. Then, I bought the hoses and fittings and figured out how they needed to be routed, at what length and with which fittings. I brought the hoses back to the Vintage Air dealer and had them crimp the fittings on. Finally I installed the hoses and brought the car to them to have the system charged.
The evaporator is a pain to remove, but not impossible. There was a recent article on this in issue #194 Spring/Summer 2021 of Avanti magazine.
You should be able to remove the condenser through the grill opening without removing the radiator.
I'd be happy to answer any questions.
Good luck!
THANK YOU for this. Great information, and thanks so much for the parts list! exactly the kind of thing I was looking for! this helps a lot!

1981 Troubleshoot Parking Brake Lever/Ratchet
in 1965-83 Avanti
Posted
Okay, in the absence of any photos, I am uploading some here:
1) The console on my 81 is held on by two screws on either side of the front of the panel, and one in the far back through a metal tab. The back one is easy to remove once you find it in the carpet. The two side ones require an offset ratcheting phillips screwdriver to undo, unless you want to remove both seats. The image shows the screws and the rear hole. Hope this helps somebody and adds to the piecemeal knowledge of the Altman cars.
2) Various shots of the mechanism.