

tanda62
-
Posts
150 -
Joined
-
Last visited
Content Type
Profiles
Forums
Events
Posts posted by tanda62
-
-
I have bought many things from Bob and gotten great service. Really friendly guy who has a lot of knowledge.
-
This is timely as I am getting ready to replace my vent doors and reinstall them. Your list and pictures are great - thanks! I was also thinking a tight wire mesh attached to the cowl air intake might help keep some of the debris out of the vents.
Tom
-
I got this pump from Holley https://www.holley.com/products/fuel_systems/fuel_pumps_regulators_and_filters/fuel_pumps/efi_fuel_pumps/efi_electric_in-line_pumps/parts/12-920
It does 80gph and is designed for the Sniper EFI.
-
Good eye. Still working out my wiring. Since I am using a Holley Sniper EFI the fuel pump will be wired into the harness that came with it and the relay Holley included. Right now I am trying to work out how many other relays I will be wiring into the car. So far the list may or may not include: Ignition, Headlights, Wipers, Heater, A/C, Electric Steering and Electric Fans. Building a custom wiring harness is fun...umm not really just a necessary step.
-
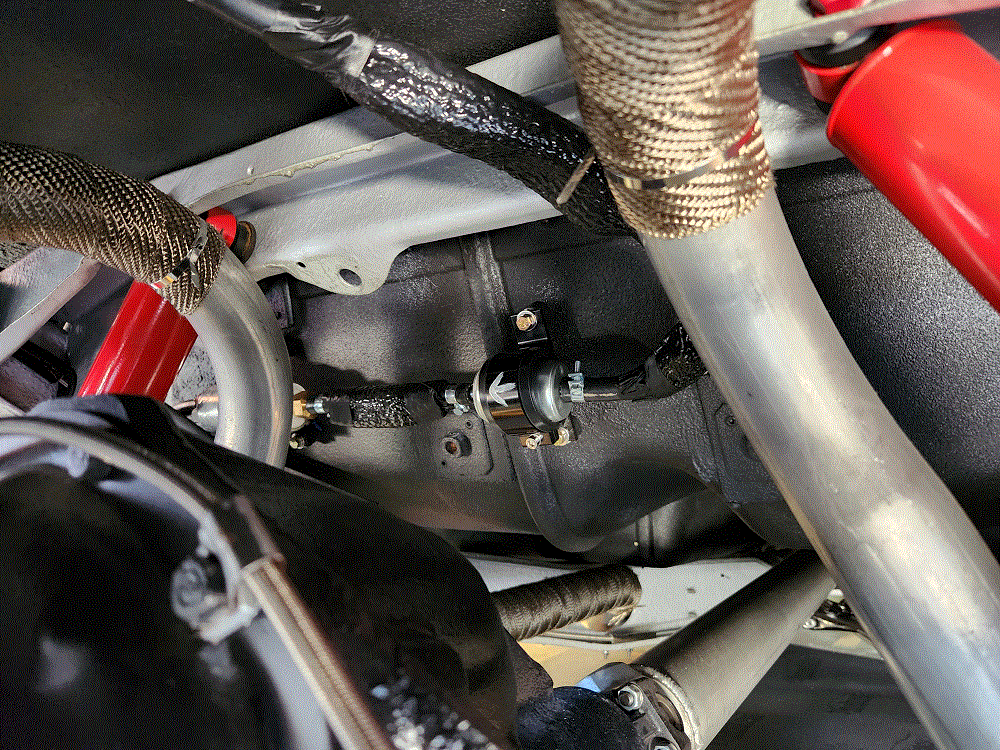
Got my tank and electric fuel pump installed. The pre-filter is shown in the pictures while the post filter is mounted along the frame rail where the stock drain is usually located. I covered the fuel hose and the pump with some heat sheathing since the exhaust is so close. Mounted both the filter and pump on rubber mounts to hopefully reduce the noise.
-
You may want to look at McMaster-Carr (https://www.mcmaster.com/) I have found many hard to find items from them for my car.
-
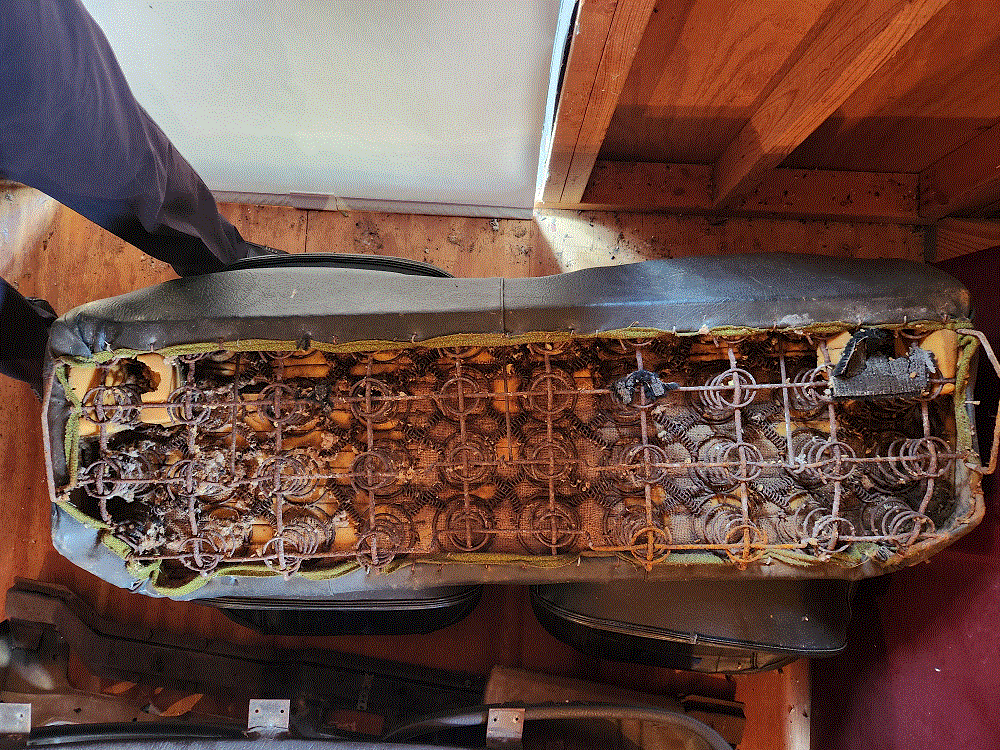
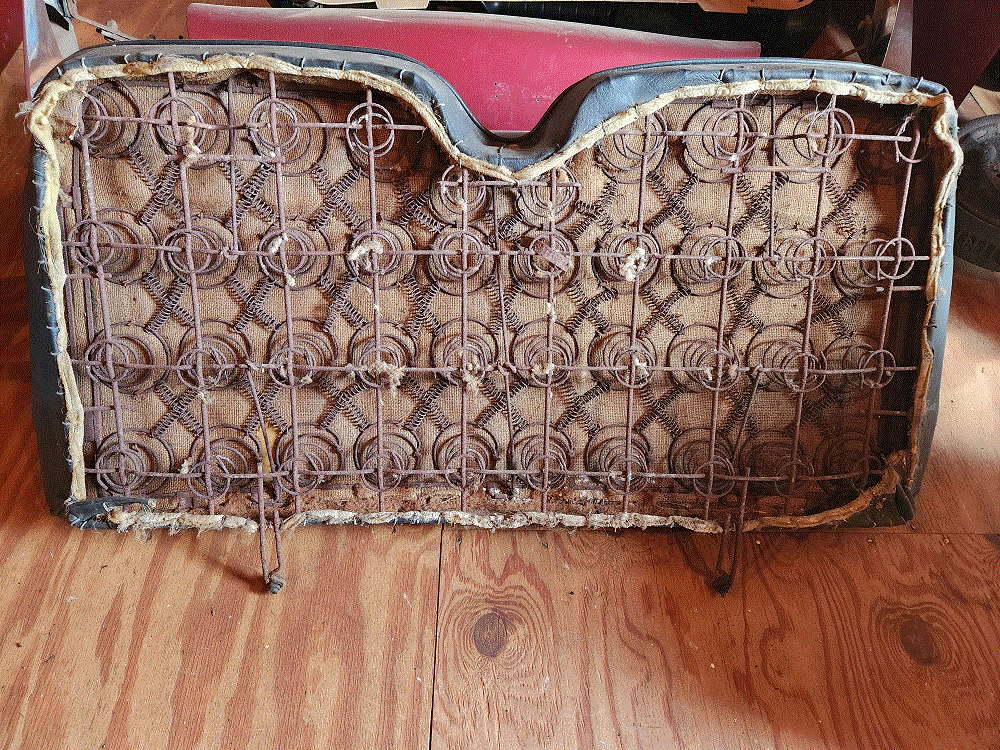
The seats look great and so very period! Your whole interior looks so good!
-
I am also 6' and fit comfortably.
-
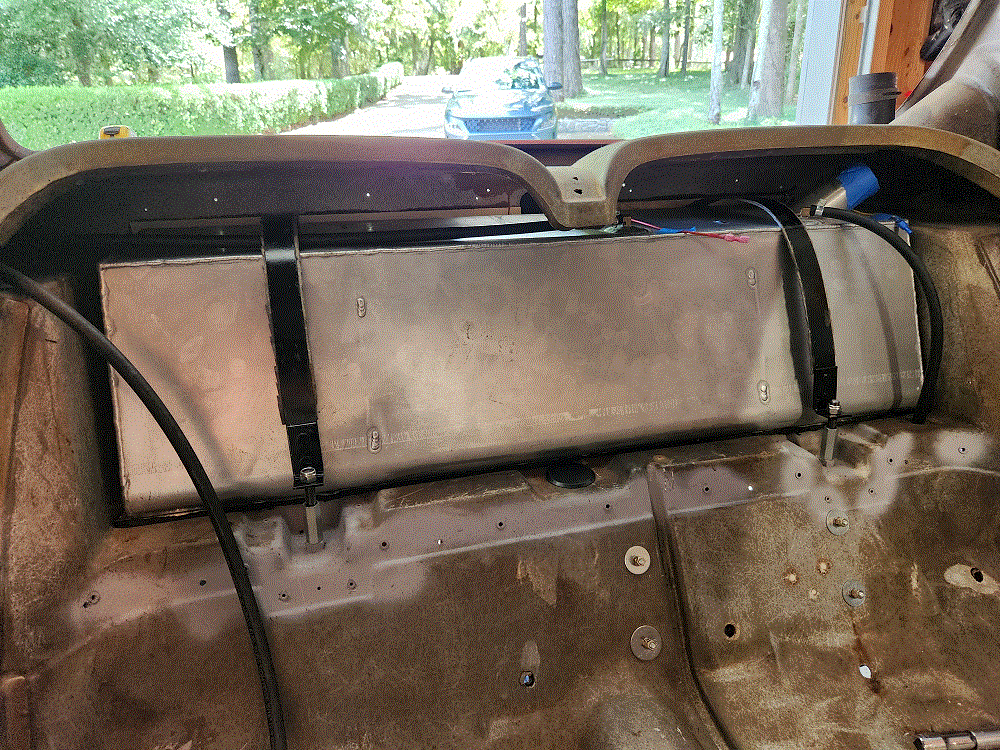
Here is an option that i am considering for my car. Very lightweight, small size and plenty of power. Downside is cost but if you are replacing batteries this one might save over time.
https://shopbraille.com/products/braille-g30-greenlite-lithium-battery
Tom
-
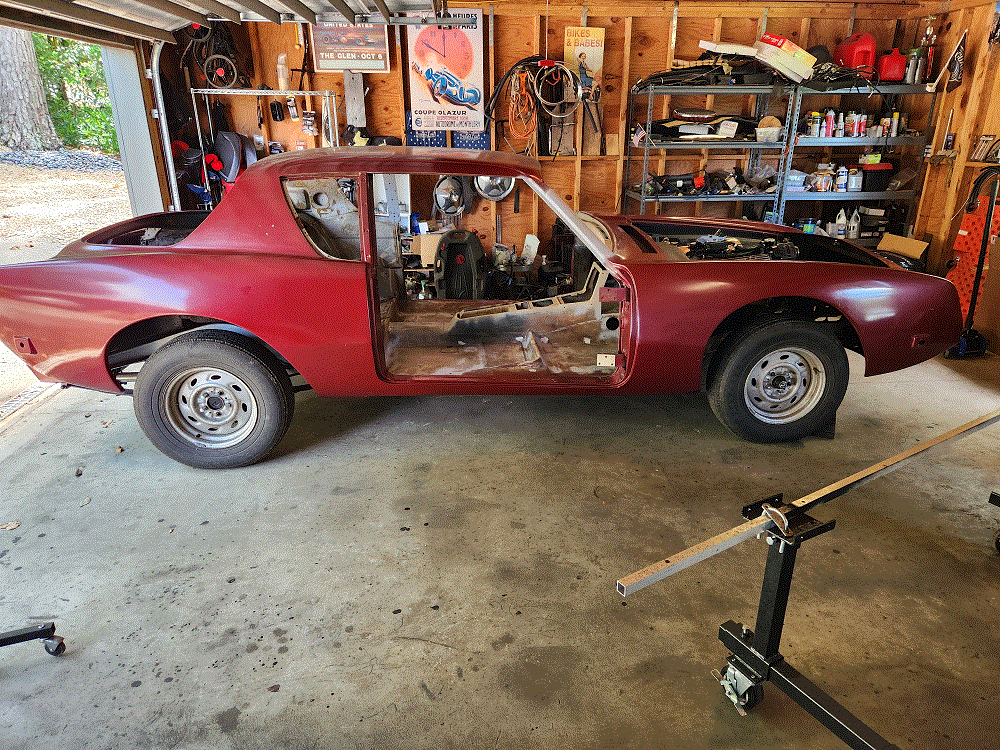
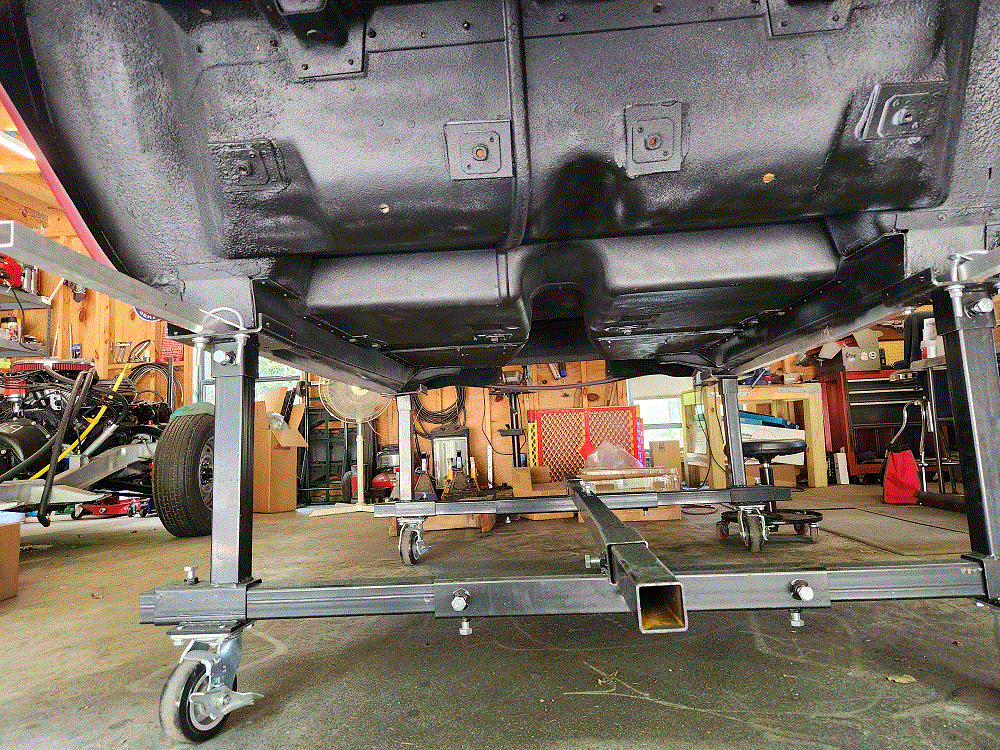
The body is back on the frame. Took 7 guys to lift it and place it on the frame. The only place that caused an issue was the accelerator bracket on the back of the engine as we got too close and scraped the paint - nothing a little touch up can't fix.
-
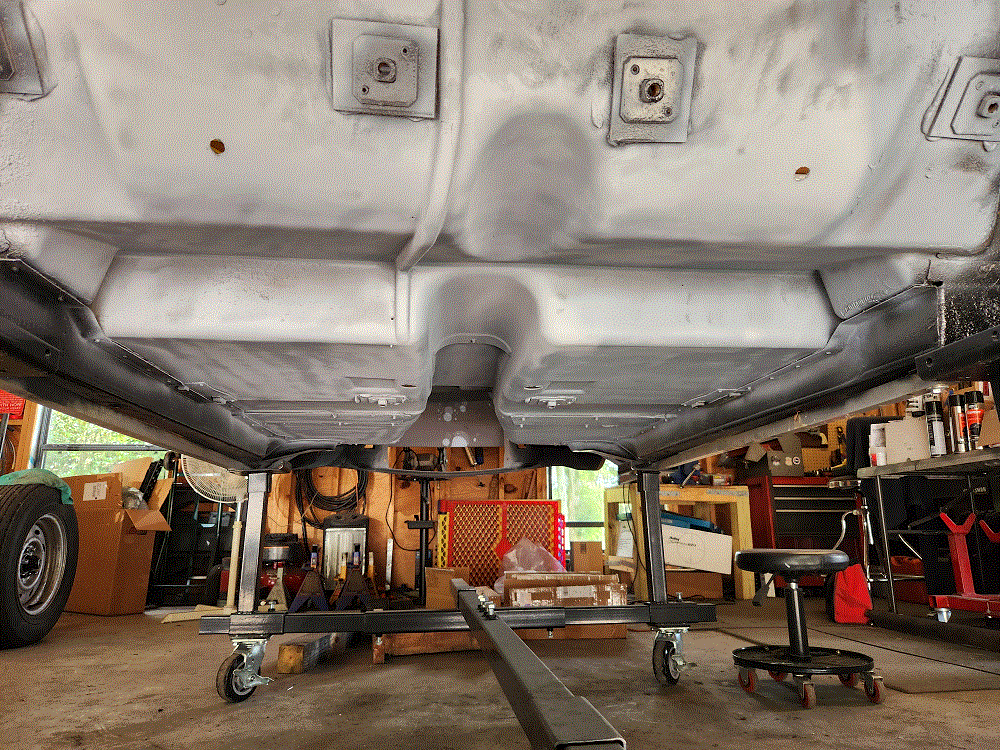
Got the engine bay and underneath primed and painted black. Also put undercoating in the wheel wells. Quite the icky job...

-
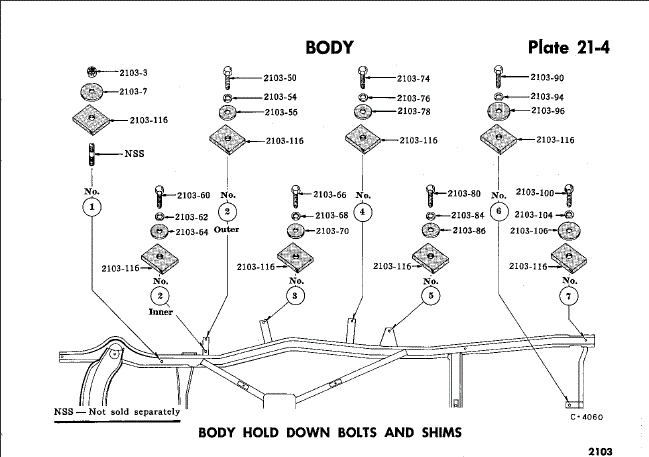
This diagram from the parts manual shows the location of the bolts (13) and studs (2). The diagram does not include the two bolts that hold down the radiator saddle.
-
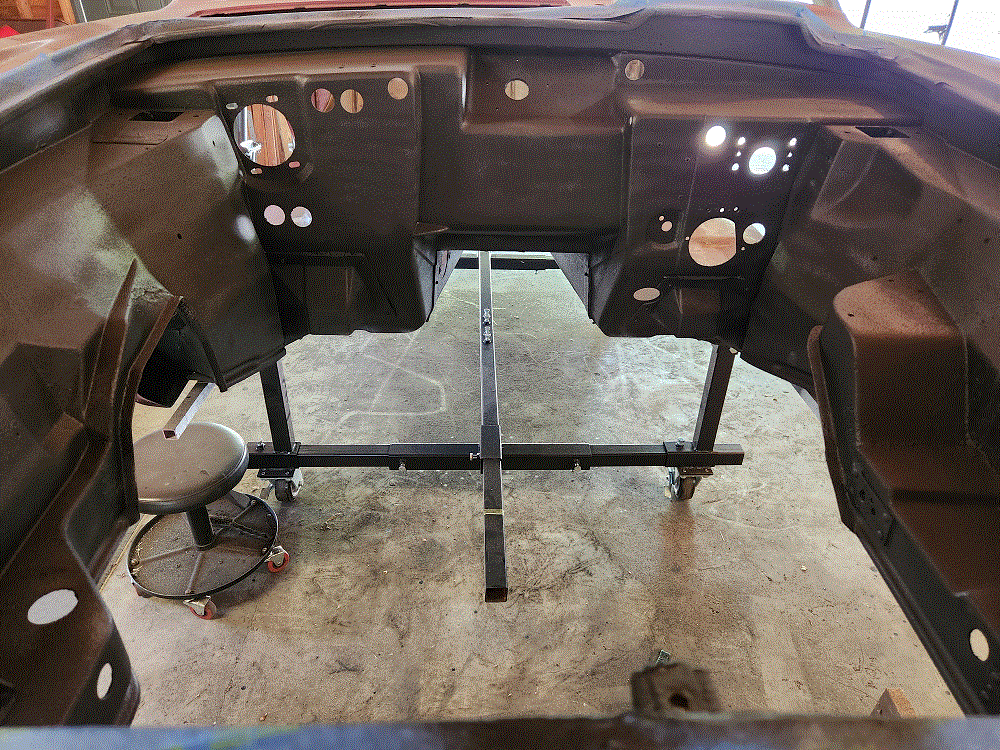
I am almost ready to put the body back on the frame and am wondering if anyone has any tips from thier experience. Thanks, Tom
-
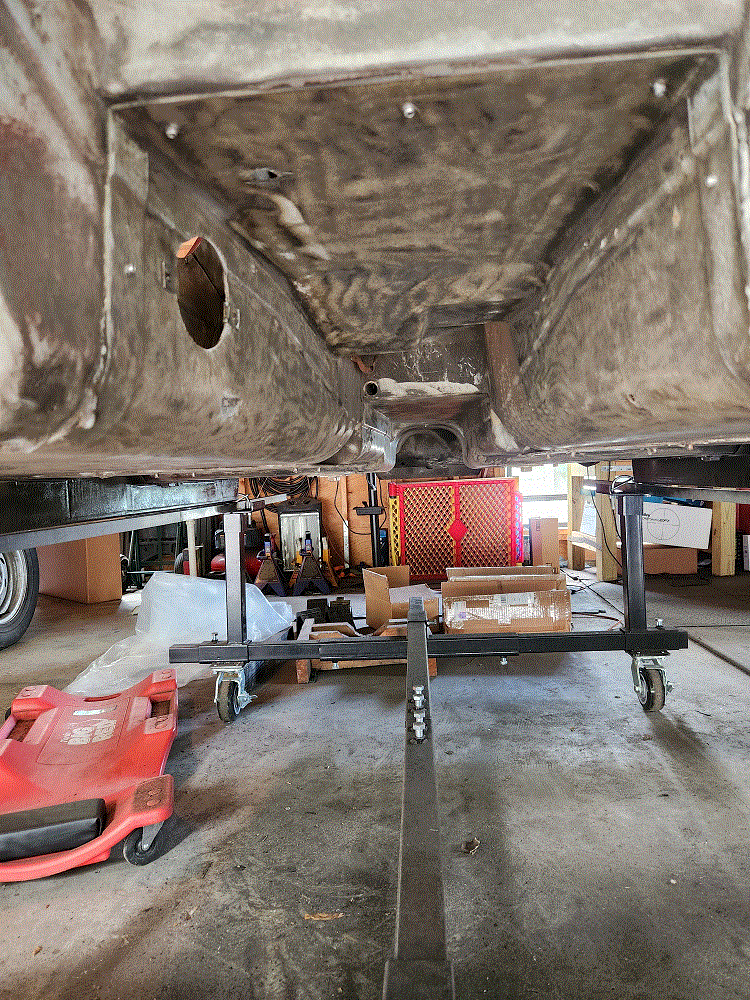
Using a wire brush to clean the road dirt, oil and a layer of black paint from underneath the body. I do plan to paint the underneath black and wonder if that was something the factory did?
oh and in case you are wondering, yes I am a masochist for doing this job. 😝
-
I have purchased several things from Bob and he is great.
-
-
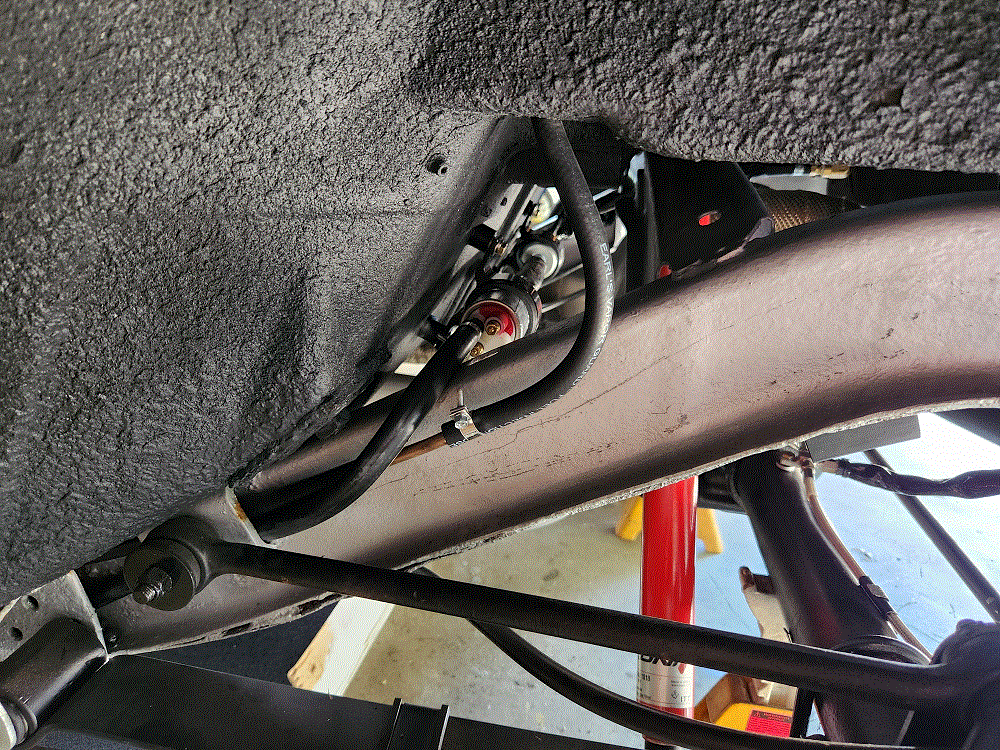
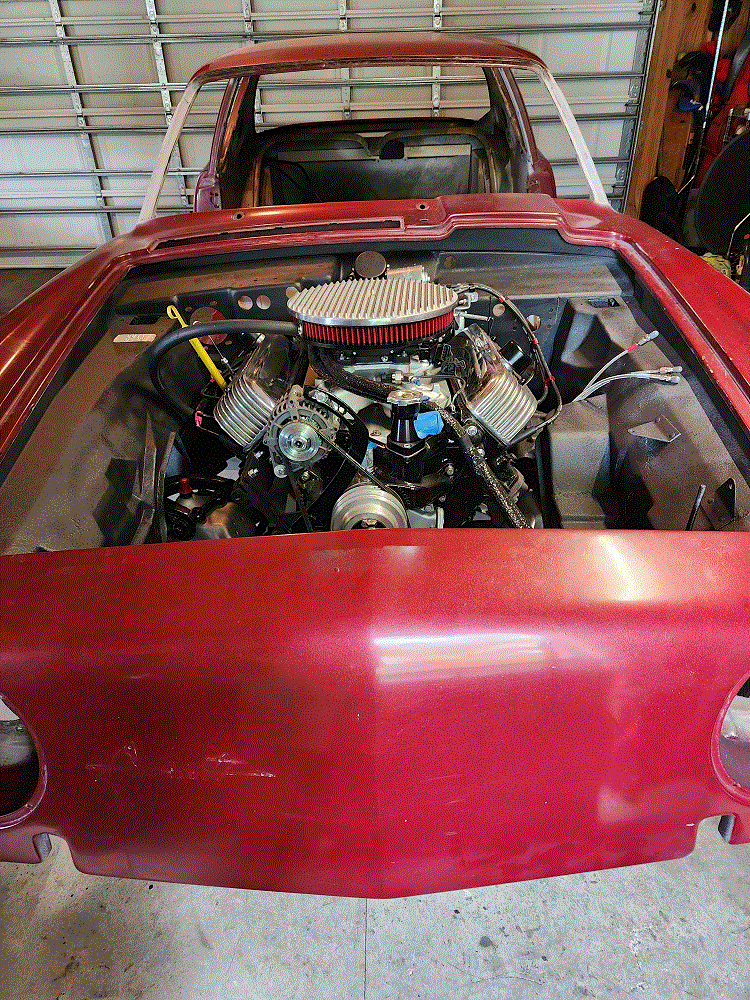
When looking for a solution to mount my coil for the Holley Sniper configuration I came across this bracket from Mancini Racing (https://www.manciniracing.com/corebrunmo.html)
After getting a Stud with Spacer 3/8-16 thread x 5/16-18 thread from of all places a restaurant supply company (https://www.etundra.com/catalogsearch/?keyword=2661128)
I have nice and solidly mounted the coil behind the Sniper and next to the distributor. And it nicely clears the 14 inch air cleaner.

-
is this what you are looking for? These are pictures of both before they are going to be restored one of these days.
-
2625. Also mine has an L on one side and an R on the other.
-
Message has been sent.
-
I have this 55 Amp alternator https://avantiparts.biz/alternator-avanti-55-amp/
Brand new, never used in the box. Send me a message if you are interested.
Tom
-
That is an interesting lead, thank you for the information on Rogers Protofab.
-
After doing extensive searches I have come up empty in my quest to find brackets for this alternator (https://www.summitracing.com/parts/TFF-7937BST) and this A/C compressor (https://www.summitracing.com/parts/TFF-4517NCDP)
With all the modifications I am adding to the electrical system (Sniper EFI, electric steering, A/C, stereo, electric fan and more) I need to up the amps.
I am trying to fit this on a 1963 289 R1 with A/C. Summit said this would work (https://www.summitracing.com/parts/UAC-45002900FC) for the A/C compressor but the brackets are too wide for the feet on the compressor.
Before I design and make my own brackets, I am reaching out here to see if anyone else has found a solution to mount this combination of alternator and A/C compressor in their Avanti. There are plenty of solutions for Hawks, Larks and Avanti IIs, maybe someone has adapted one of those?
Thanks, Tom
-
Thank you very much for the information Lew!


Dynamat on the inside
in 1963-64 Avanti
Posted
Finally finished installing the first layer of Dynamat. I plan on putting in some Dynaliner in on top of the Dynamat in the headliner area and the driver and passenger footwells and the firewall. The Dynamat is easy to cut but since I am not a professional getting the correct shape for an area was a challenge and a lot of patch work has been done.
I hope this stuff helps to cut down on noise and heat as advertised.
Tom