SCPO-PD
-
Posts
111 -
Joined
-
Last visited
Everything posted by SCPO-PD
-
Thanks Adam - I got it aligned and hooked up.
-
Brad - Please forgive my ignorance but can you please give a little detail on this as I am struggling to "find" Neutral on the floor shift on RQB3616 in order to get the shift linkage properly aligned. The position that I think is Neutral does not allow me to shift to D2 or D3....
-
Avanti Dayton wire wheels for sale
SCPO-PD replied to GaryBe's topic in Avanti Parts For Sale or Wanted
Gary - Are these still available? I have RQB-3616 and here original shoes were rusting when I bought her. If so let me know as I will be making my way around the beltway next week..... -
I am in the process of replacing the 305 in my 1983 Avanti with a 350 and am taking advantage of this effort to include the removal of the ECU. As I was pulling the wiring harness through the fire wall I found a handful of the wires making their way to a double ganged plug / connector vice making their way out to the engine compartment. This same connector set has wires using the same firewall pass through. Any clues??? As we know the wiring diagrams for the Avanti are somewhat lacking....
-
Adam - MUCH THANKS for the pictures. I am getting ready to put my th700 back in and couldn't remember the connections -yes I forgot to take pictures.....
-
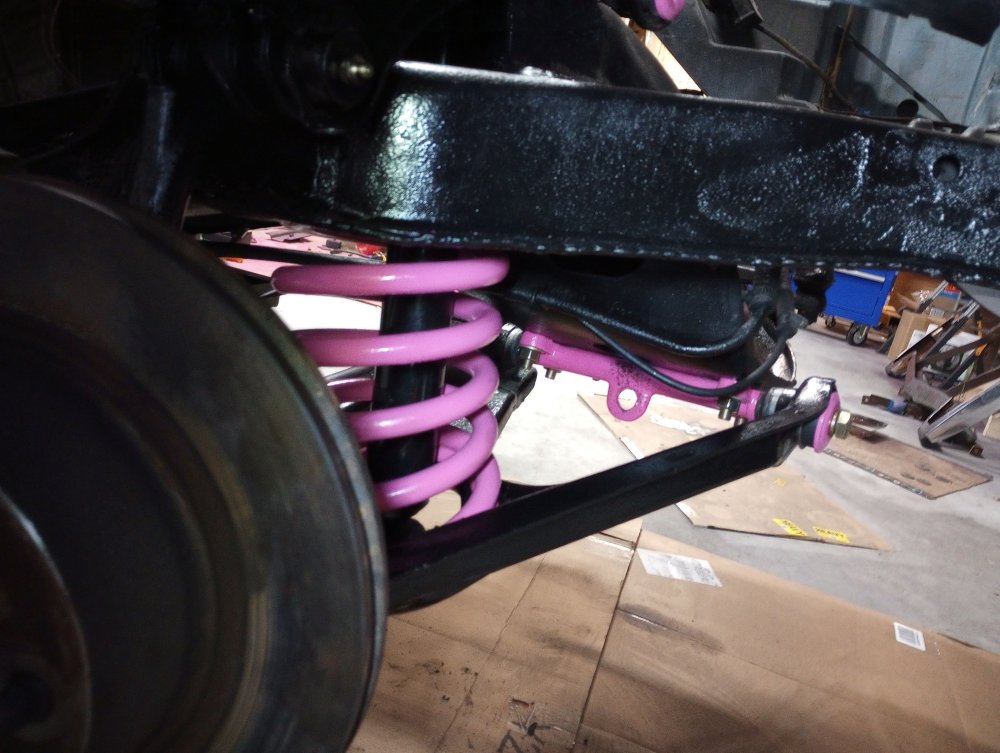
Update on the sway bar dilemma... SI sent me the installation instructions, and they worked for the most part for the center mounts. I actually ended up using some ratcheting bar clamps from my wood shop to get the clamps in place and aligned for the bolt. MUCH easier than the recommended screwdriver and pry into place.... The connections to the lower control arms were a completely different story.... After struggling with the clamps and screwdriver only to end up having the tab fall out of the slot due to prying force.... I pulled out a good old fashioned pipe wrench and the first one attached in less than 15min. The remaining connection required a ratchet strap to pull the sway bar to the control are so that I could then use the pipe wrench to finish it up. I have pictures posted on RQB 3616 FB Page @ https://www.facebook.com/profile.php?id=100090777883233
-
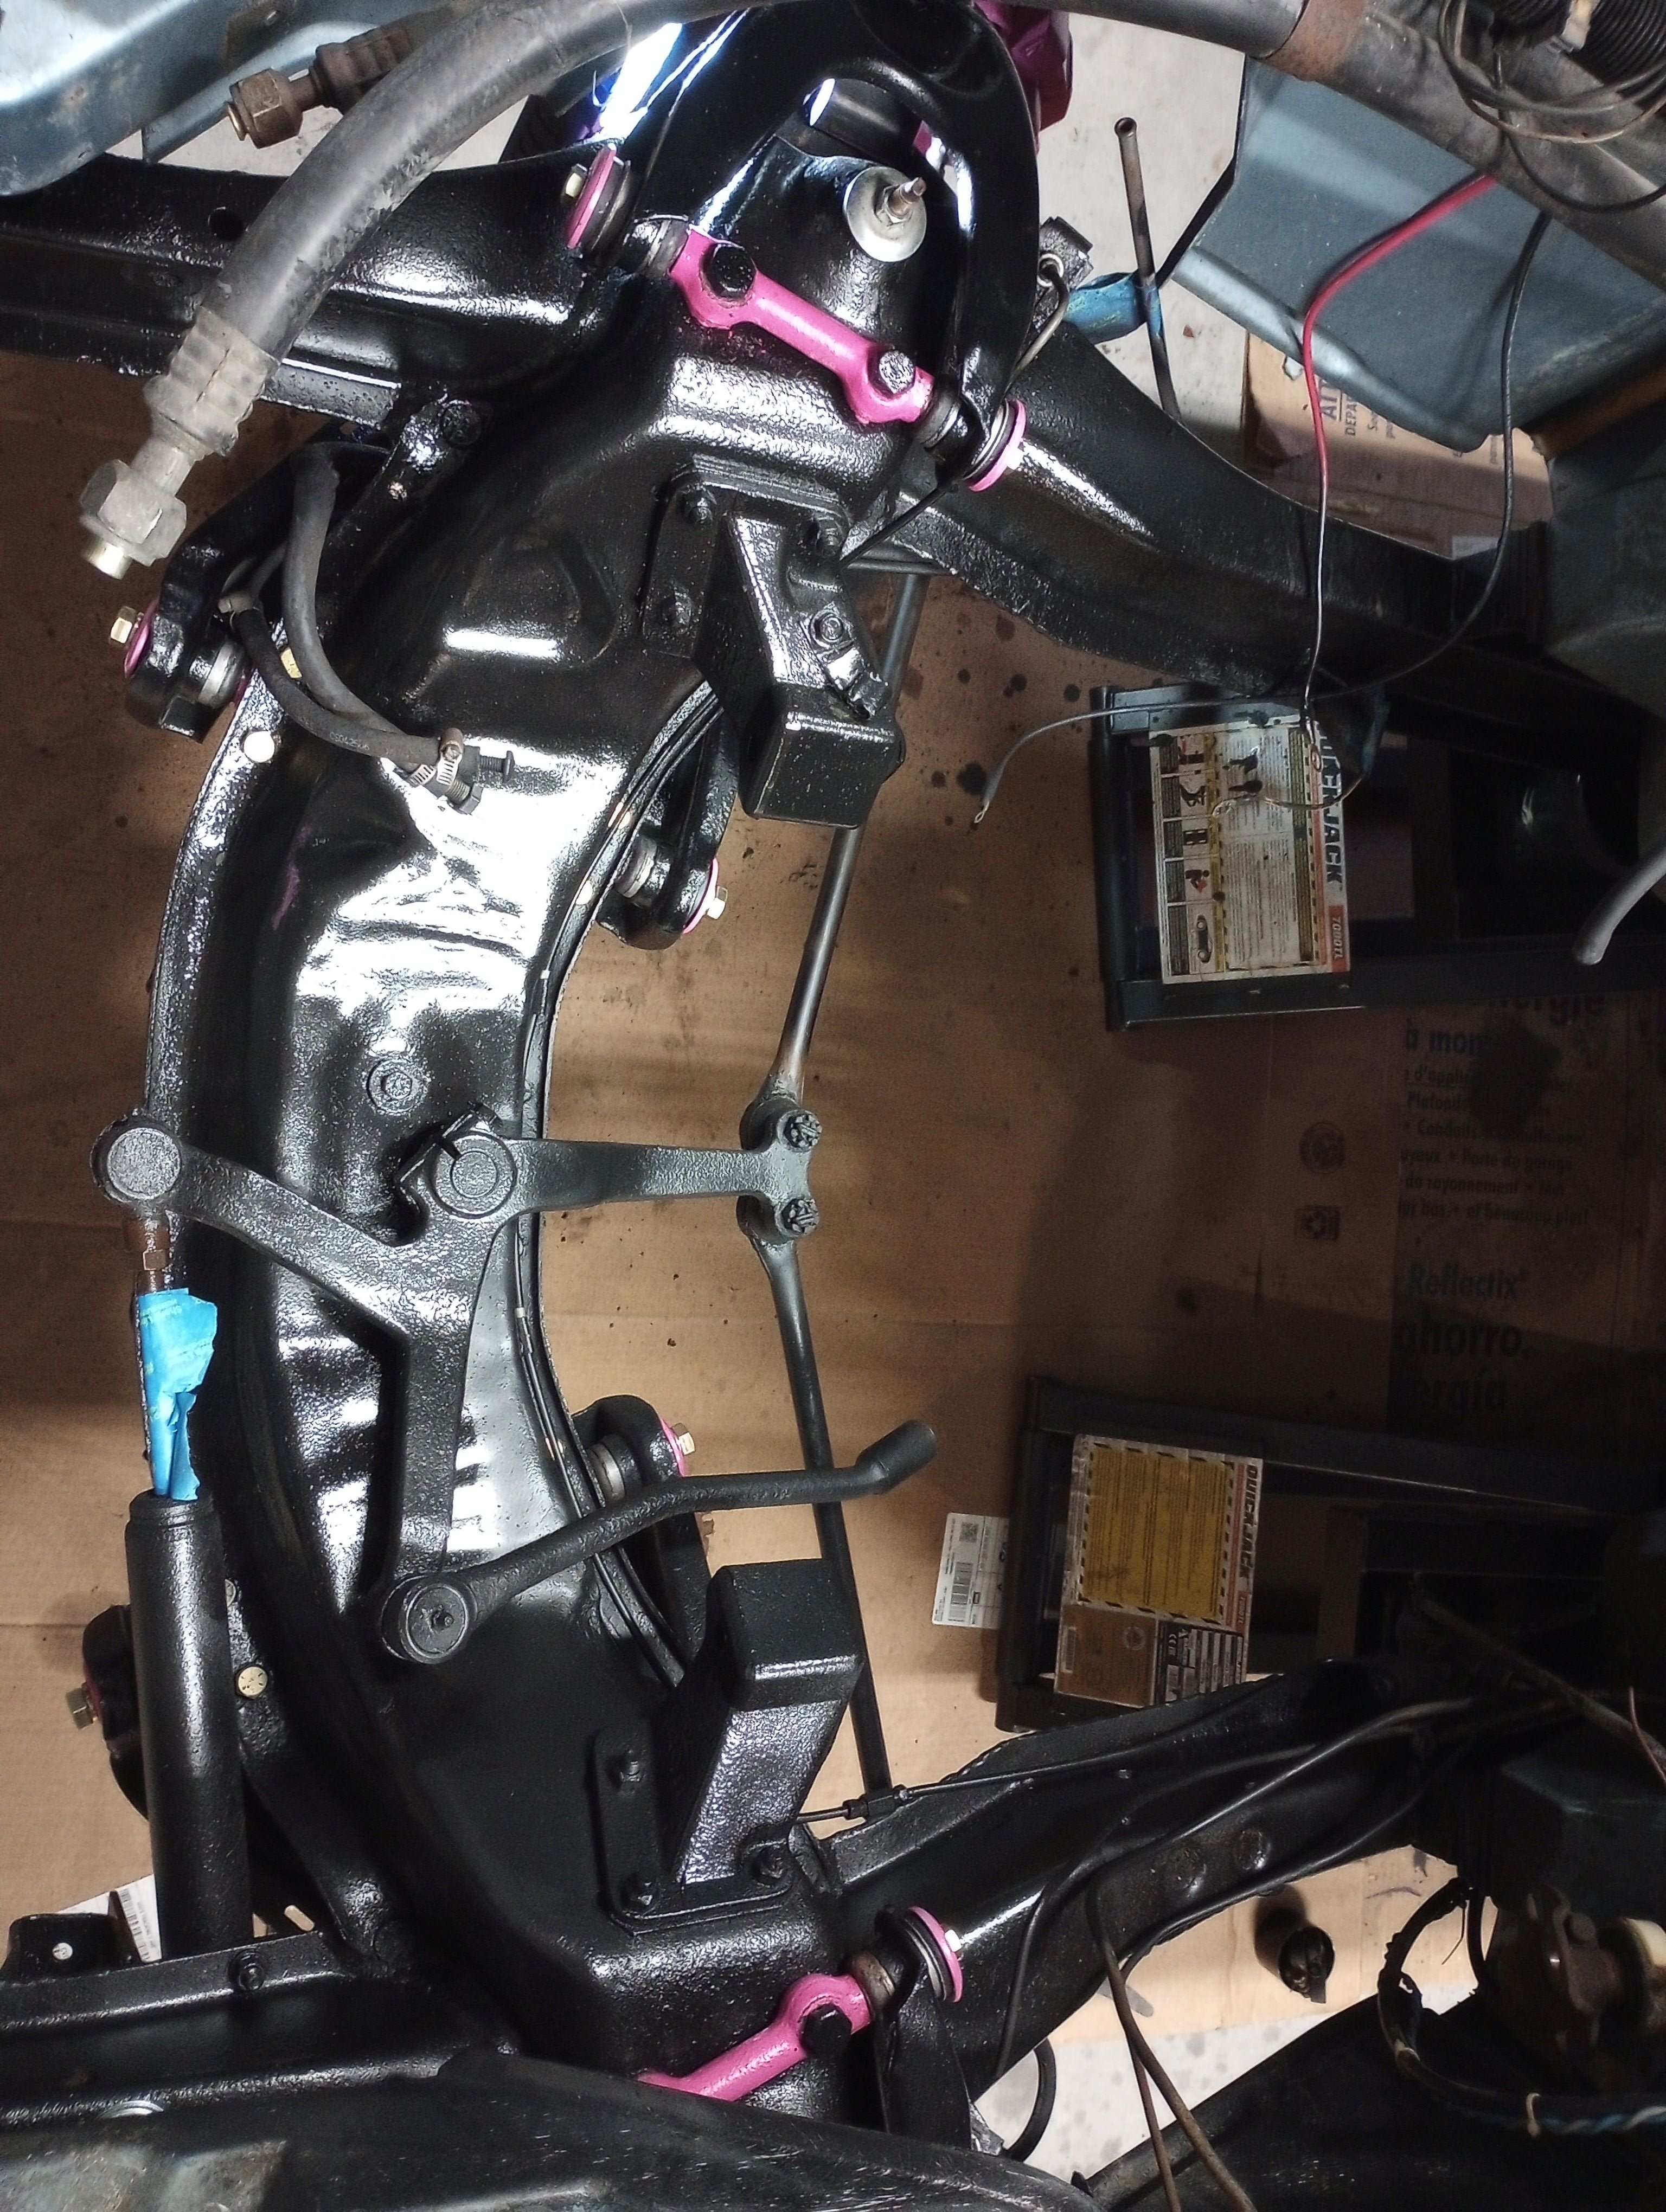
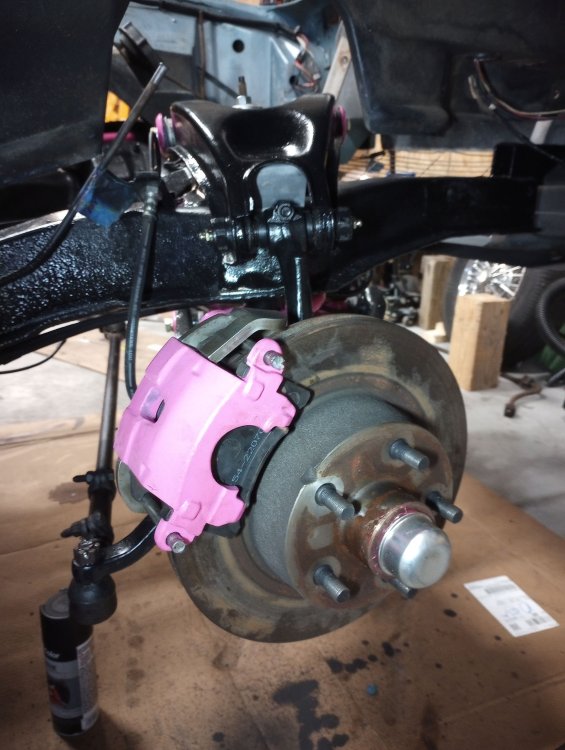
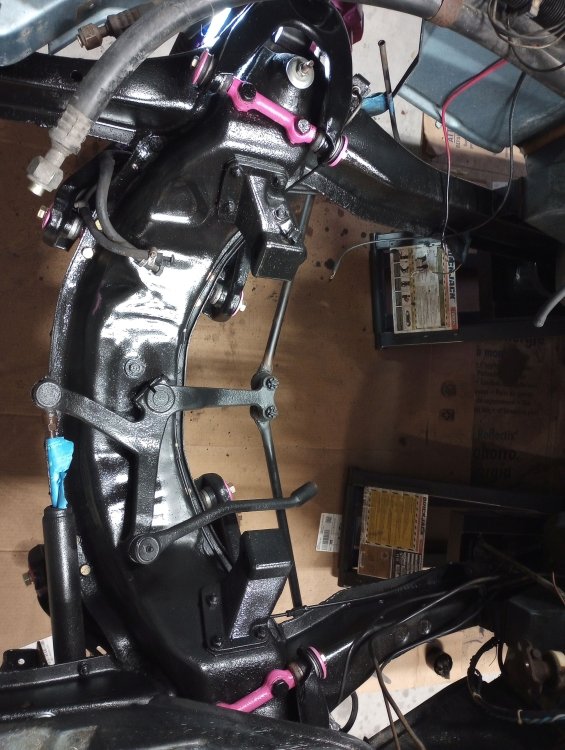
Don't Laugh too hard... The Compartment paint is VHT Engine Metallic - Titanium Silver Blue SP403 The Pink suspension highlights - VHT Engin Enamel - Hot Pink SP756
-
Well I painted the new heavy duty front sway bar hoy Pink to match the other suspension highlight and thought I would get it installed this weekend. Oddly the straps that hold the new bushings to the control arms and frame brackets are not deep enough to hold the bushing and make the connection. I called SI and sent pictures and am awaiting an answer / response from the shop that fashioned them..... Anyone have any insight??
-
Thanks Zedman. My bellow/seal is hard but I simply put it in backwards for now.... My washer bottle removal didn't work as well as I wished. One of the bolts came out fine. The other (outboard) just spun and spun. I ended up cutting the bolt with a hacksaw blade. Found out that the bottle split allowing the embedded nut to spin.... Couldn't find a replacement bottle so after some YouTube search I found an epoxy & gauze patch idea that holds water. I will reinstall the tank with the one bolt and some heavy duty Velcro on the other side....
-
I have 5 Grand Daughters........ 4 of the 5 think it to be very cool also (#5 is only 6 month old....) It all started w/ Hot Pink rear seat belts.... LOL
-
Zedman - MUCH Thanks !!! Sorry for the long delay in responding. I finally got them ordered last week and they should be in today so says my email!!! I have been working to get the engine compartment work done and front suspension rebuilt. Working on getting things put back together so that I can gen the new engine and rebuilt transmission back in....


-
Hey Bill - I rebuilt the control valve (new seals) and I have new lines that will be going in here in a few days as I finish up the Driver's side of the Engine Compartment.
-
Bill - Any details on your electric fan?? Also what color is your Avanti?
-
Zedman - any part numbers for these engine mounts?
-
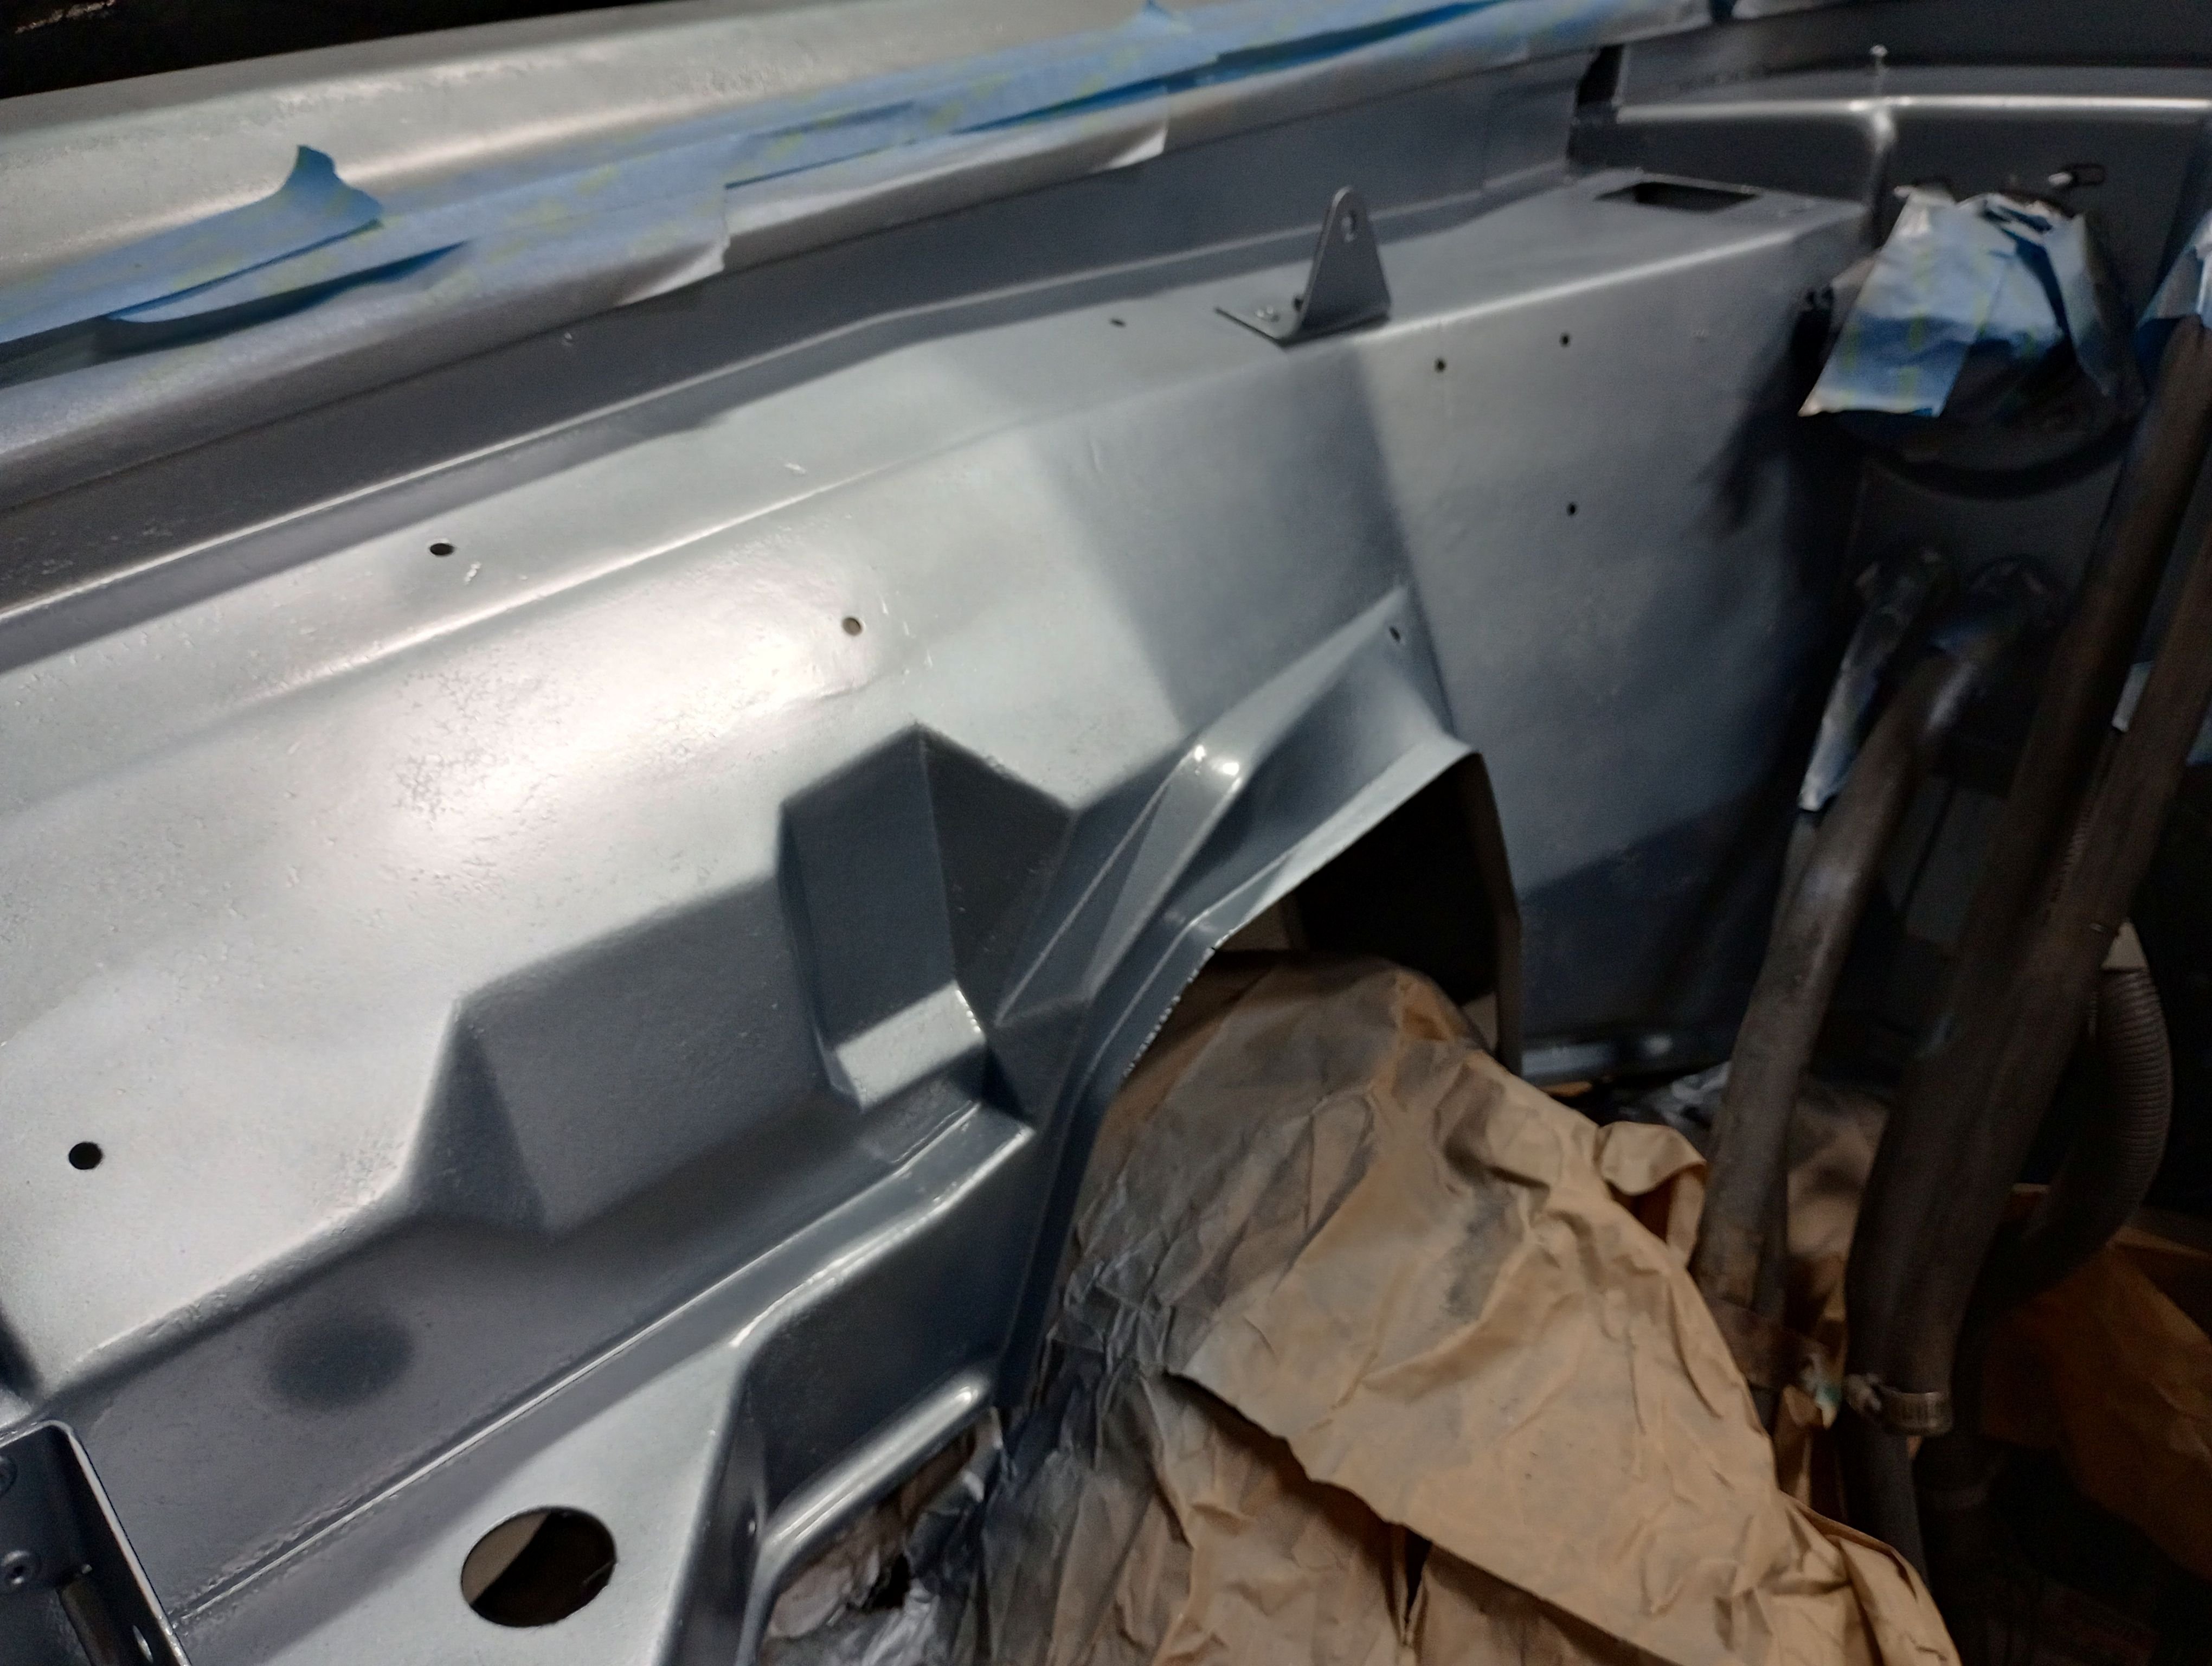
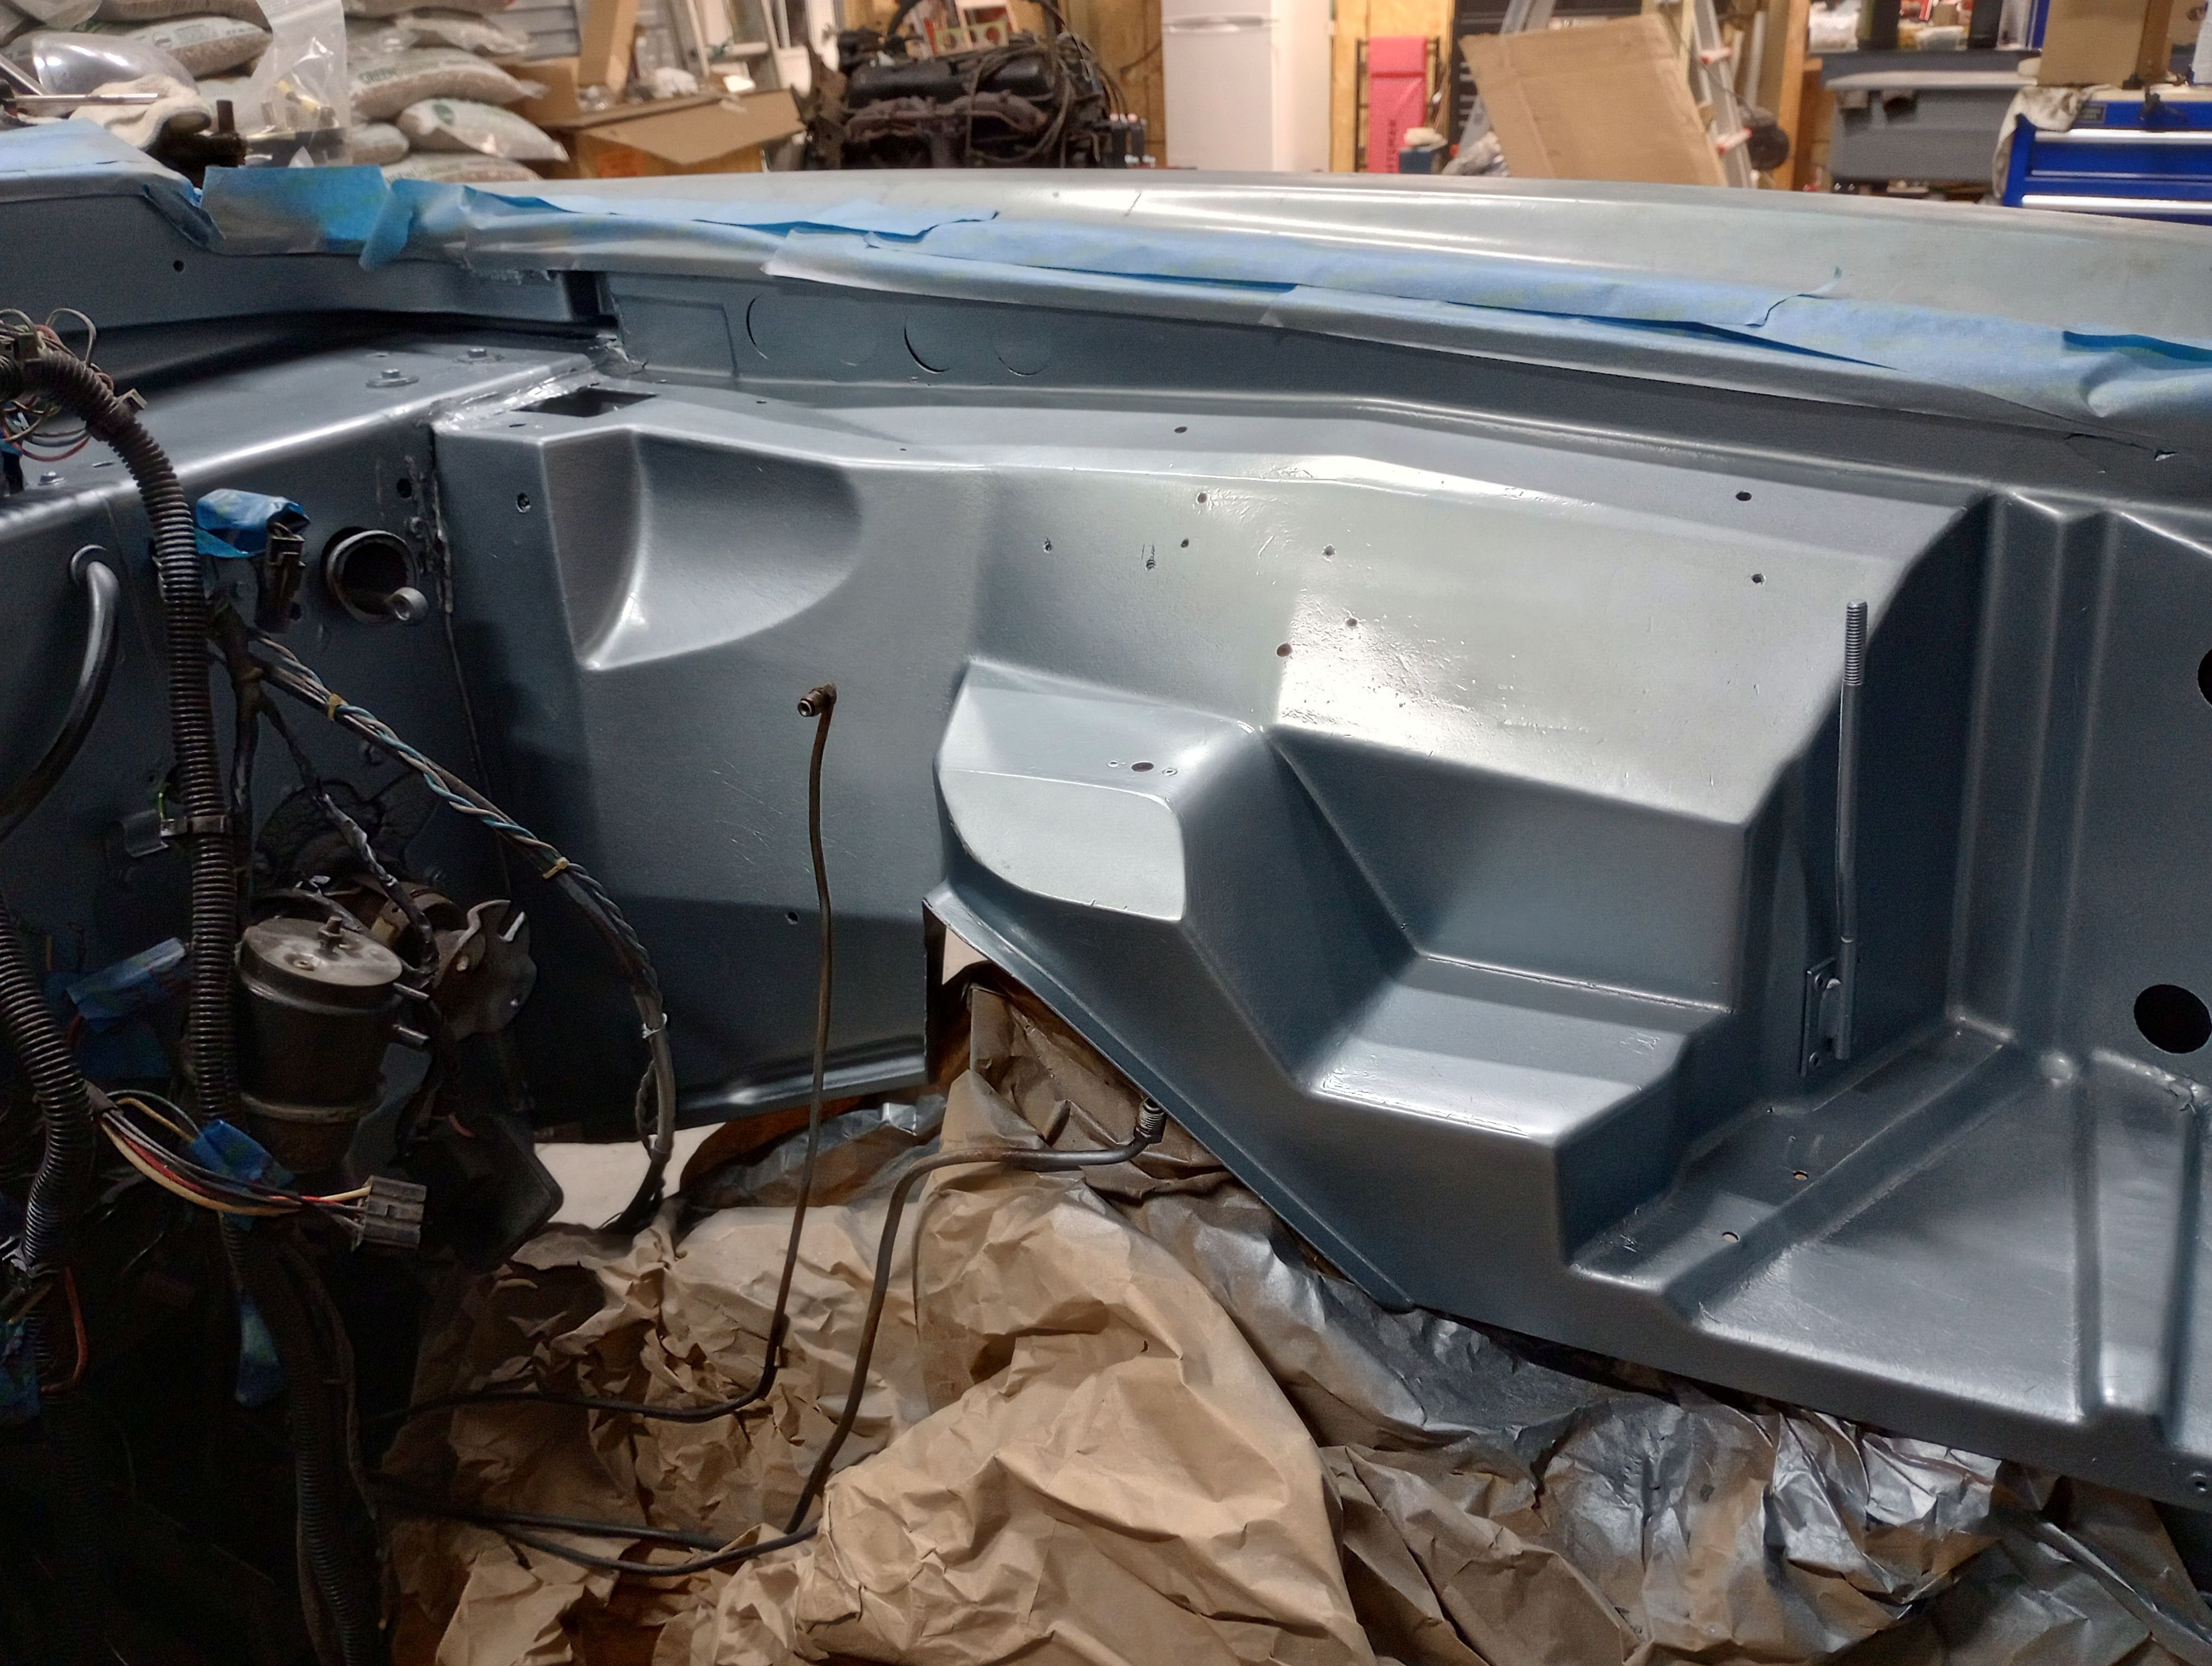
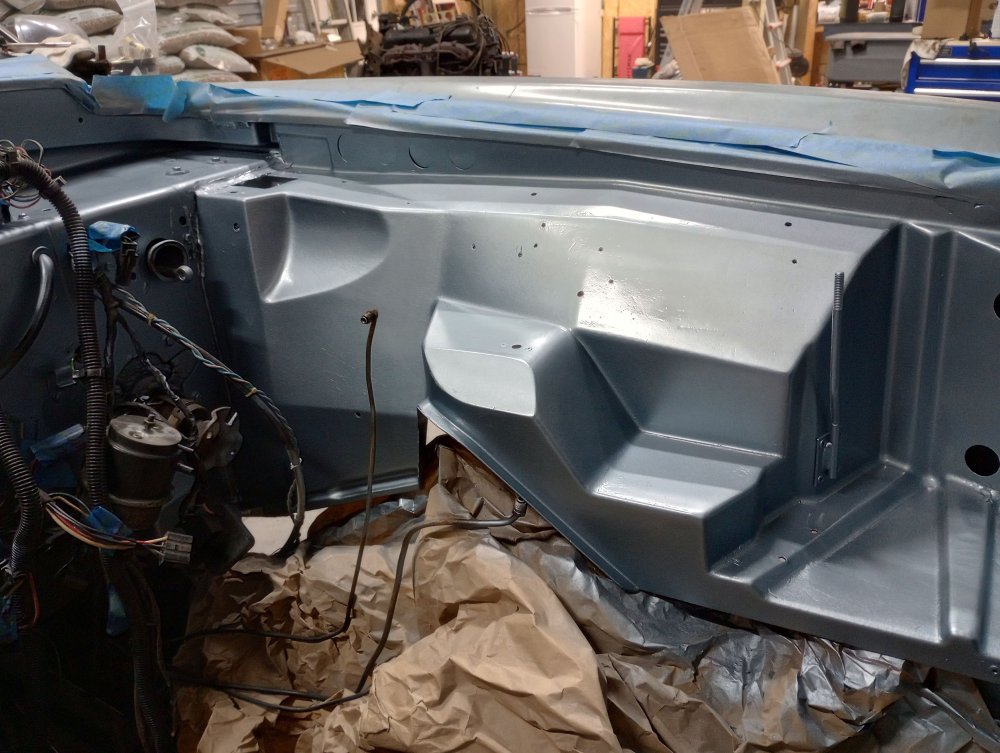
Good Morning Y'all.... It has been a little while since I have checked in. Much is going on w/ RQB 3616. I decided to rework my front suspension and rework the engine compartment before I put the engine & transmission back in. I degreased, scrubbed, and pressure washed the engine compartment. and frame. Removed the steering gear, scrubbed, painted, and it is awaiting reinstallation to include a new rag joint. I pulled and rebuilt the power steering solenoid and it is awaiting reinstallation. Received my order of Eastwood rust converter, encapsulaor, & internal frame coating. I have removed the driver side control arms and kingpin. The kingpin got new bearings, a solid, scrubbing, and a paintjob. The control arms and associated parts have also been scrubbed, painted, and are awaiting me to press in the new bushings. I have also started the rust converter / encapsulator effort on the driver side of the frame in the engine compartment..... I have tons of pictures and will them get posted later. I did fail to get the lockup kit installed on the transmission when I got it rebuilt but have picked up a Edelbrock Painless Performance 60109 Torque Converter Lock-Up Kit and will be installing sometime in the near future.... I also picked up the HD sway bar kit and will be replacing the front during all of this. With Fall being here I am pushing to get the suspension and engine compartment work done to include paint before the temps drop to much..... Any recommendation on exhaust manifolds... I was thinking a set of engine hugging ram horns but am open for ideas.... Blessings Y'all
-
Release The Hounds.... The Blueprint 350 / 341HP is on order (about 30 days out now). Old 305 has been pulled and set aside for later play... Transmission TR700R4 has been pulled and will be delivered to the transmission shop this Friday for rework and upgrade to support the HP of the new engine. The current game plan is to forgo the ECU. Currently going to clean and possibly repaint the engine compartment, rework the PS to include new hoses, replace control arm bushings, clean/scrub/degrease frame as much as possible to apply rust blocker and paint.....
-
This last weekend I took RQB3616 out on the road to my Iron Chariots Car Show after being in storage for several months while I built a garage to house her and provide a weather proof location to be able to work on her year round. Everything went well until a knock from deep within the engine appeared.... I was able to limp home via the back roads while purposely not getting much above 35/40mph. I need to empty the oil for sure as the dipstick shows a overfull oil pan (no water beads or fuel smell), pop the valve covers to see what I find, check compression, etc.. My true Gear Head friends have forewarned me that I will need a new engine. While I haven't reworked an engine in MANY years, I am not afraid to take it on but my gut also tells me that it may be a lost cause.... RQB3616 has a 305. The question is what do I need to consider in swapping out the original 305 for a 350? Will the 1983 engine electronics work on the new motor 305 or 350? Are the motor mounts the same? Etc.... Seeking any insight.