


Ntenna
-
Posts
58 -
Joined
-
Last visited
Content Type
Profiles
Forums
Events
Posts posted by Ntenna
-
-
Pretty much yes. Since it mounts on fiberglass you may want a dual contact socket for hot and ground separate from the shell, event though you can make a single contact housing and bulb work by grounding the shell to the ground wire. On the dual pin housing, pin orientation is important, bayonets to the two contacts.
-
In search of set of door panels, and rear arm rests/quarters early Avanti Stude and Avanti II. Just need solid foundations. This can even be a pay it forward, or back. I just want to build these sections for a faster swap to keep it on the road. Thanks!
-
Have seen this before as a quick by-pass to the ballast resistor to work-around original wiring issues, so the coil gets full 12V on start only. Following Brad's thoughts, if it starts easily - just remove. And yes, they were rarely fused and were prone to burn up. At least they only had power when the starter was engaged.
-
Sounds good, Brad. Planning on the same.
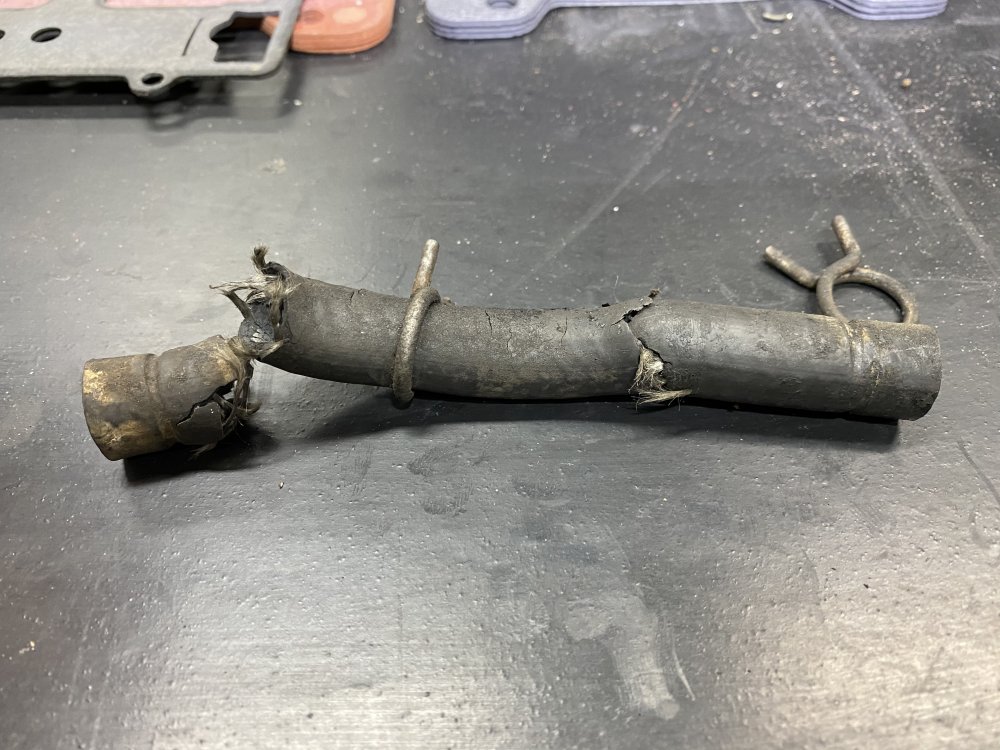
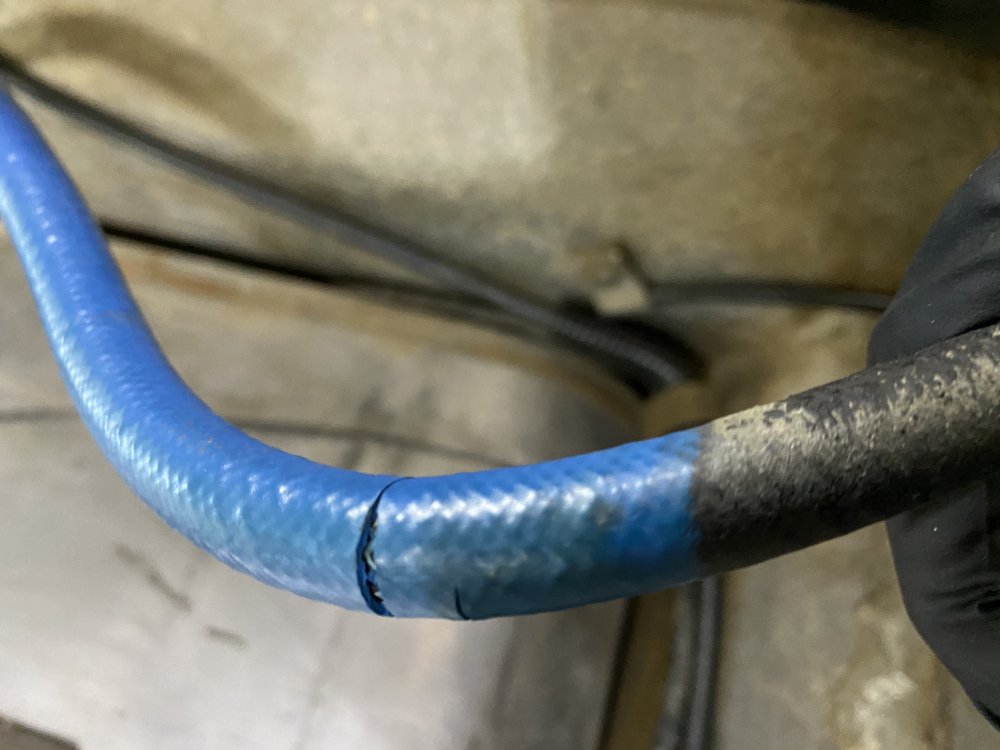
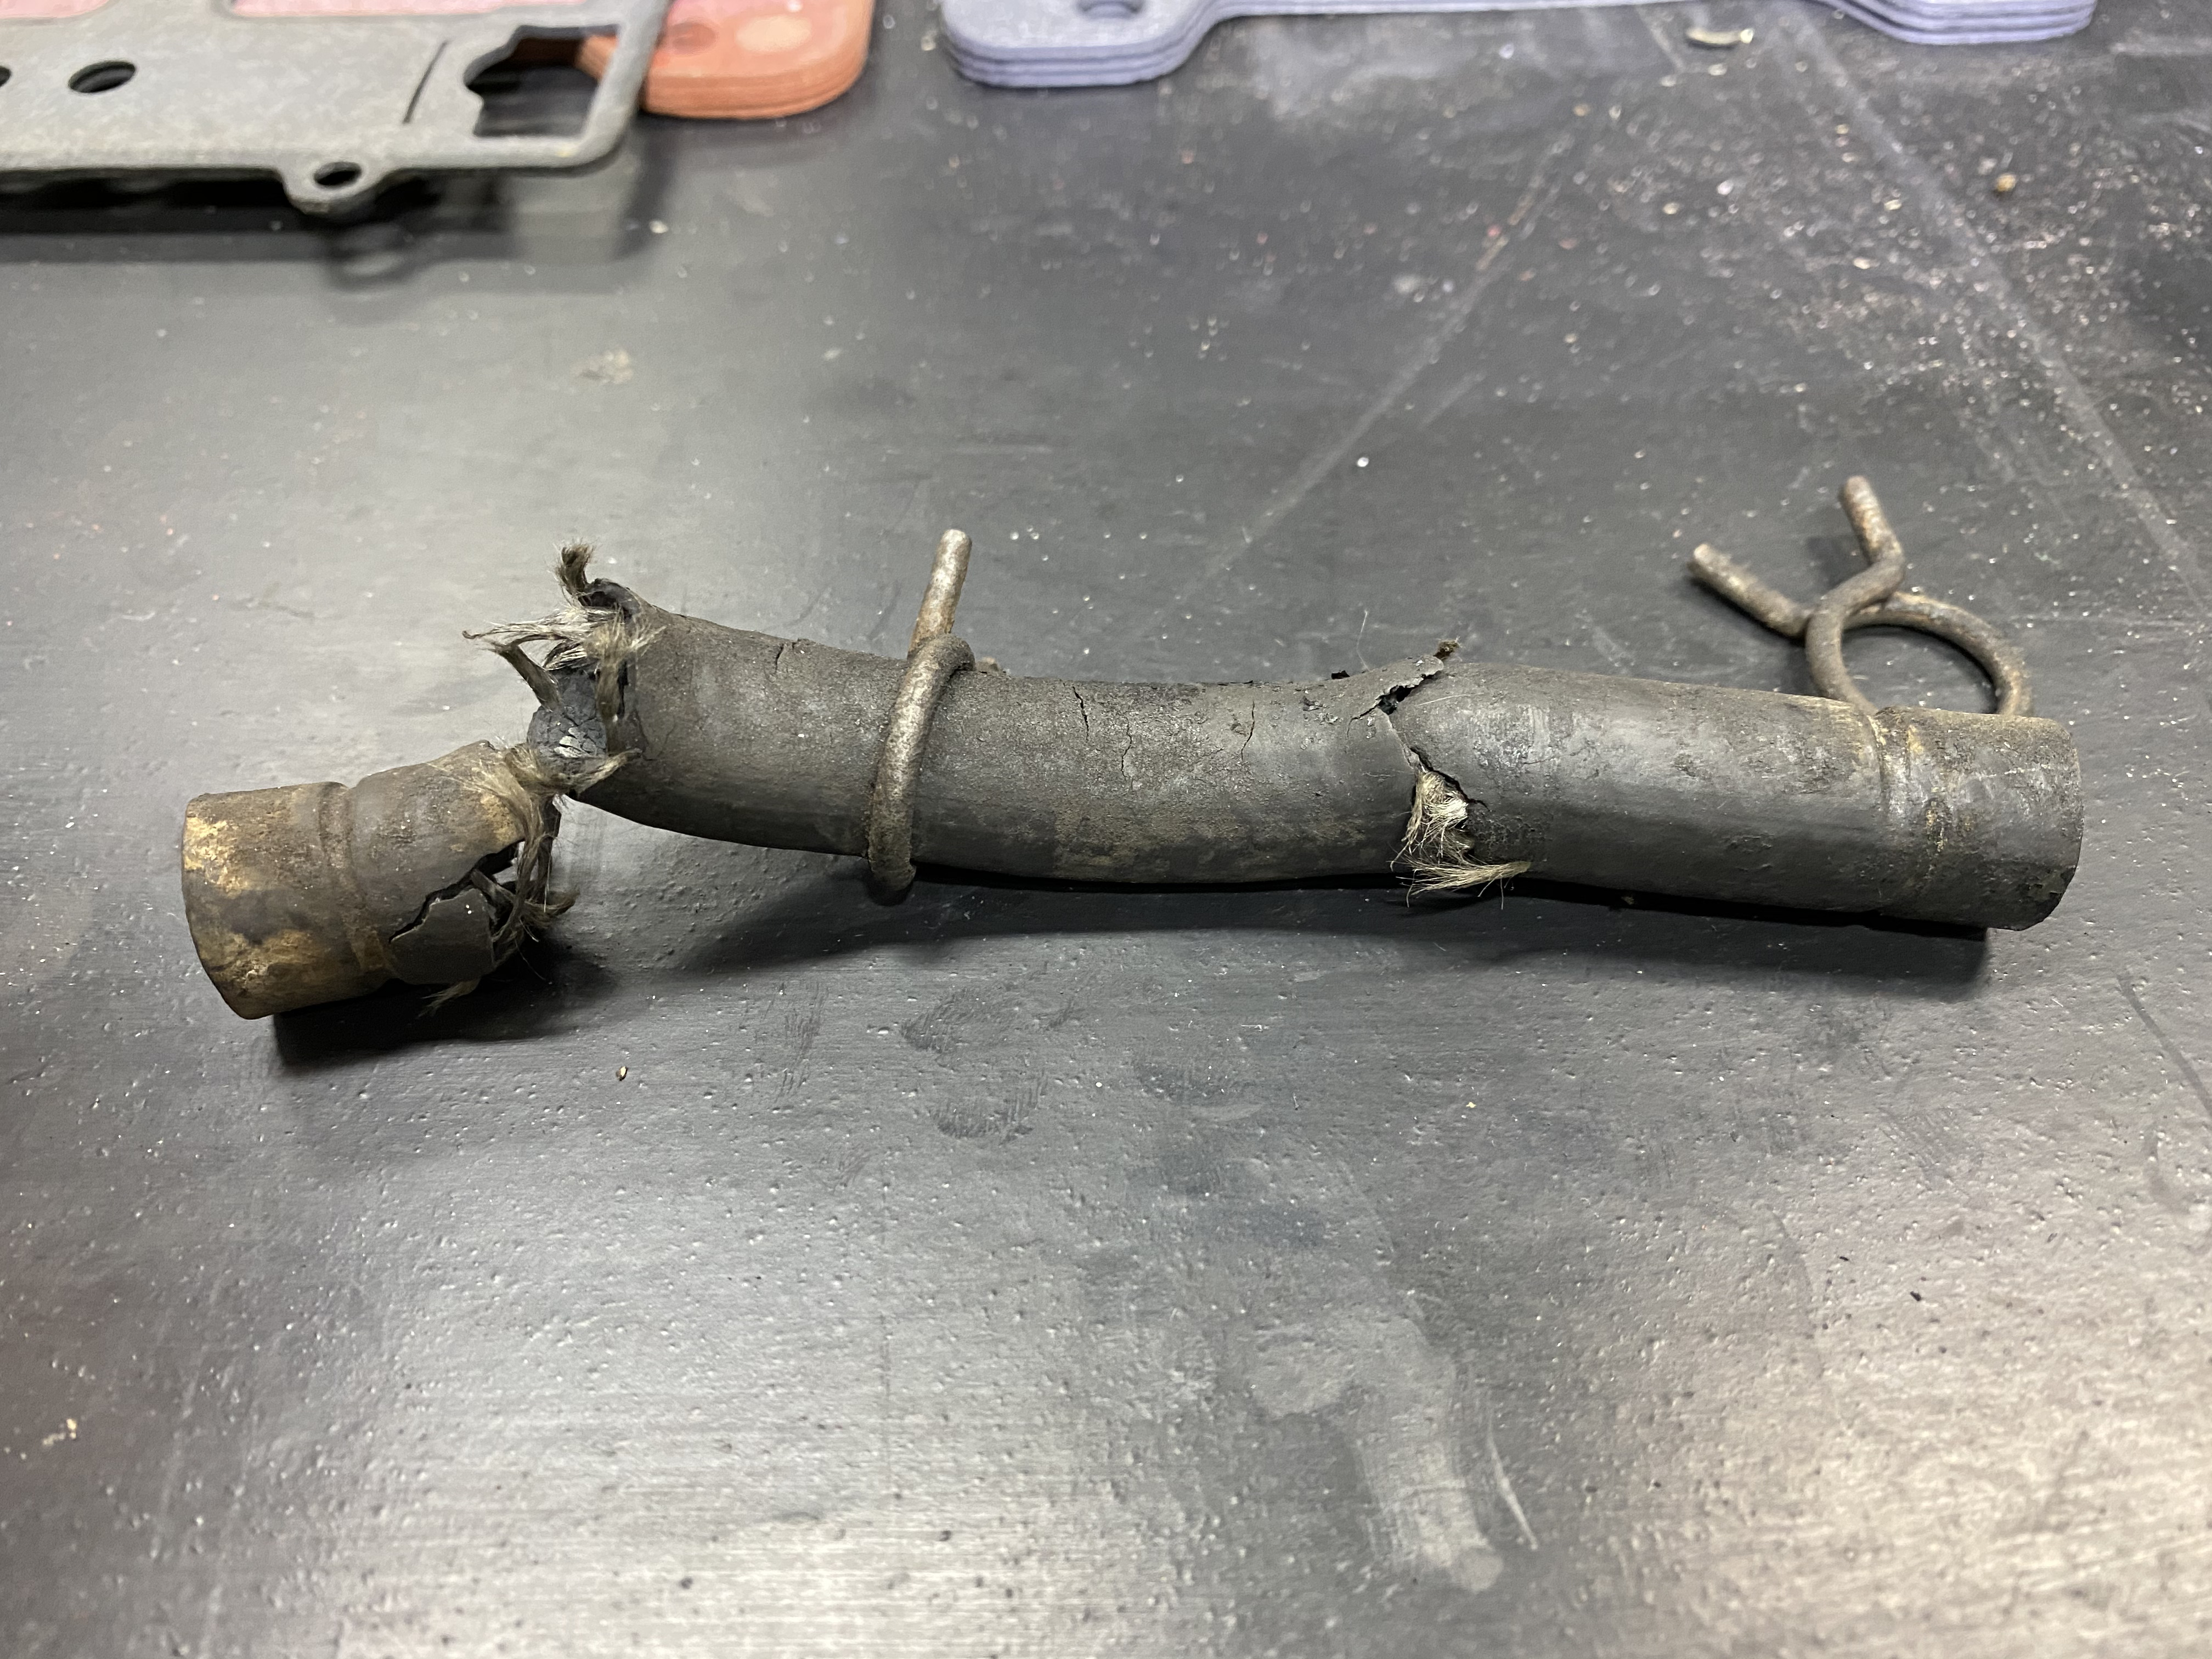
When I cut the vertical run and pulled the horizontal vent line out, I found the copper pipe was cut too long at the factory, and the flex line going up into the 1/4 panel was crimped shut against the copper pipe. Been folded over since new. Plus now cracked at the top of the U and tank coupler.
If anyone has issues with the tank spitting back while fueling, there's the problem. This one did, and it will hopefully now do it less or not at all. Pictures coming.
-
Avanti production began almost 60 years ago. Since then cars have received total restoration, been totaled and everything in-between.
If you haven't checked your fuel lines recently, look at these photos. This is not only the main tank feed over the axle, but the return and vent hoses behind the rear seat. They pretty much tell the story. Getting that vent line upper U-turn out and replaced is really fun. And this is a good running, show-level R-2. A failed pump diaphragm started me replacing everything.

-
There must be two out there somewhere! 😉
-
Hi, Rob - if you would be willing to part with one, please pm me off forum at ntenna@me.com. I will still have a fairly good one which can be used for repro or plated. Thank you, John H.
-
Thanks Jim. Very good to know.
J
-
Thanks Ed. That's what I used 17 years ago on our '57 Hawk building an R2 Avanti clone engine (actually a '63 Lark Daytona block, late model Paxton 6-7 pounds, AFB, cast headers). It has been dry all these years and 25,000-some miles. Looking at the gaps from the side, I'm very sure they used the thin head gaskets on this Avanti. Not my rebuild; we've all been there. Like you, I hate to pull it down, but I'm not too keen on coolant block sealer, either. The drip from the coolant leak is about once every 30 seconds cold, about every 10 seconds hot. This block was hot-tanked in 2017; I have the previous owner's invoices. If you were thinking external epoxy, that might work if it survived the exhaust manifold heat. Be interesting to know of any experiences with Barrs-leak and the like, but......
The top-side oil leak between the cylinder head and block at the rear right cylinder hits the bottom of the bell-housing after a 30-minute run. That's possibly the feed gallery to the lifters?
With good records and good numbers and no noises, I suspect it was a good shop with limited knowledge on the finer points of building Stude blown 289's.
Sigh
J
-
Consider an induction heater as an option to torch heat. They are available from multiple tool sources. Combined with ATF/acetone mix, you have the best chance at success.
-
R-2 - Dealing with slow oil leak between block and right cylinder head at rear about 4" from rear of head just above valley cover. Leaking at head gasket.
Same but slow coolant leak on left side at head gasket just below last exhaust outlet, very slow drip on starter.
Head bolt torque checked and good.. Engine rebuilt 2017, runs strong, cylinders within 7 pounds and no signs of water in oil or exhaust in coolant.
So I am thinking head gasket external seal issues. I see no cracks.
What do you all think, before I pull the heads and replace the gaskets.
Thanks, J
-
Looking to get TwinTraction rear axle tags completed. Have the two smaller tags, but missing the vertical positraction tag which bolts between to two center right side cover bolts.
Also need a horn bar in either good or plate-able condition, steering wheel horn contact ring, springs, screws and insulators.
Anyone? PM welcome.
Thanks, John H.
-
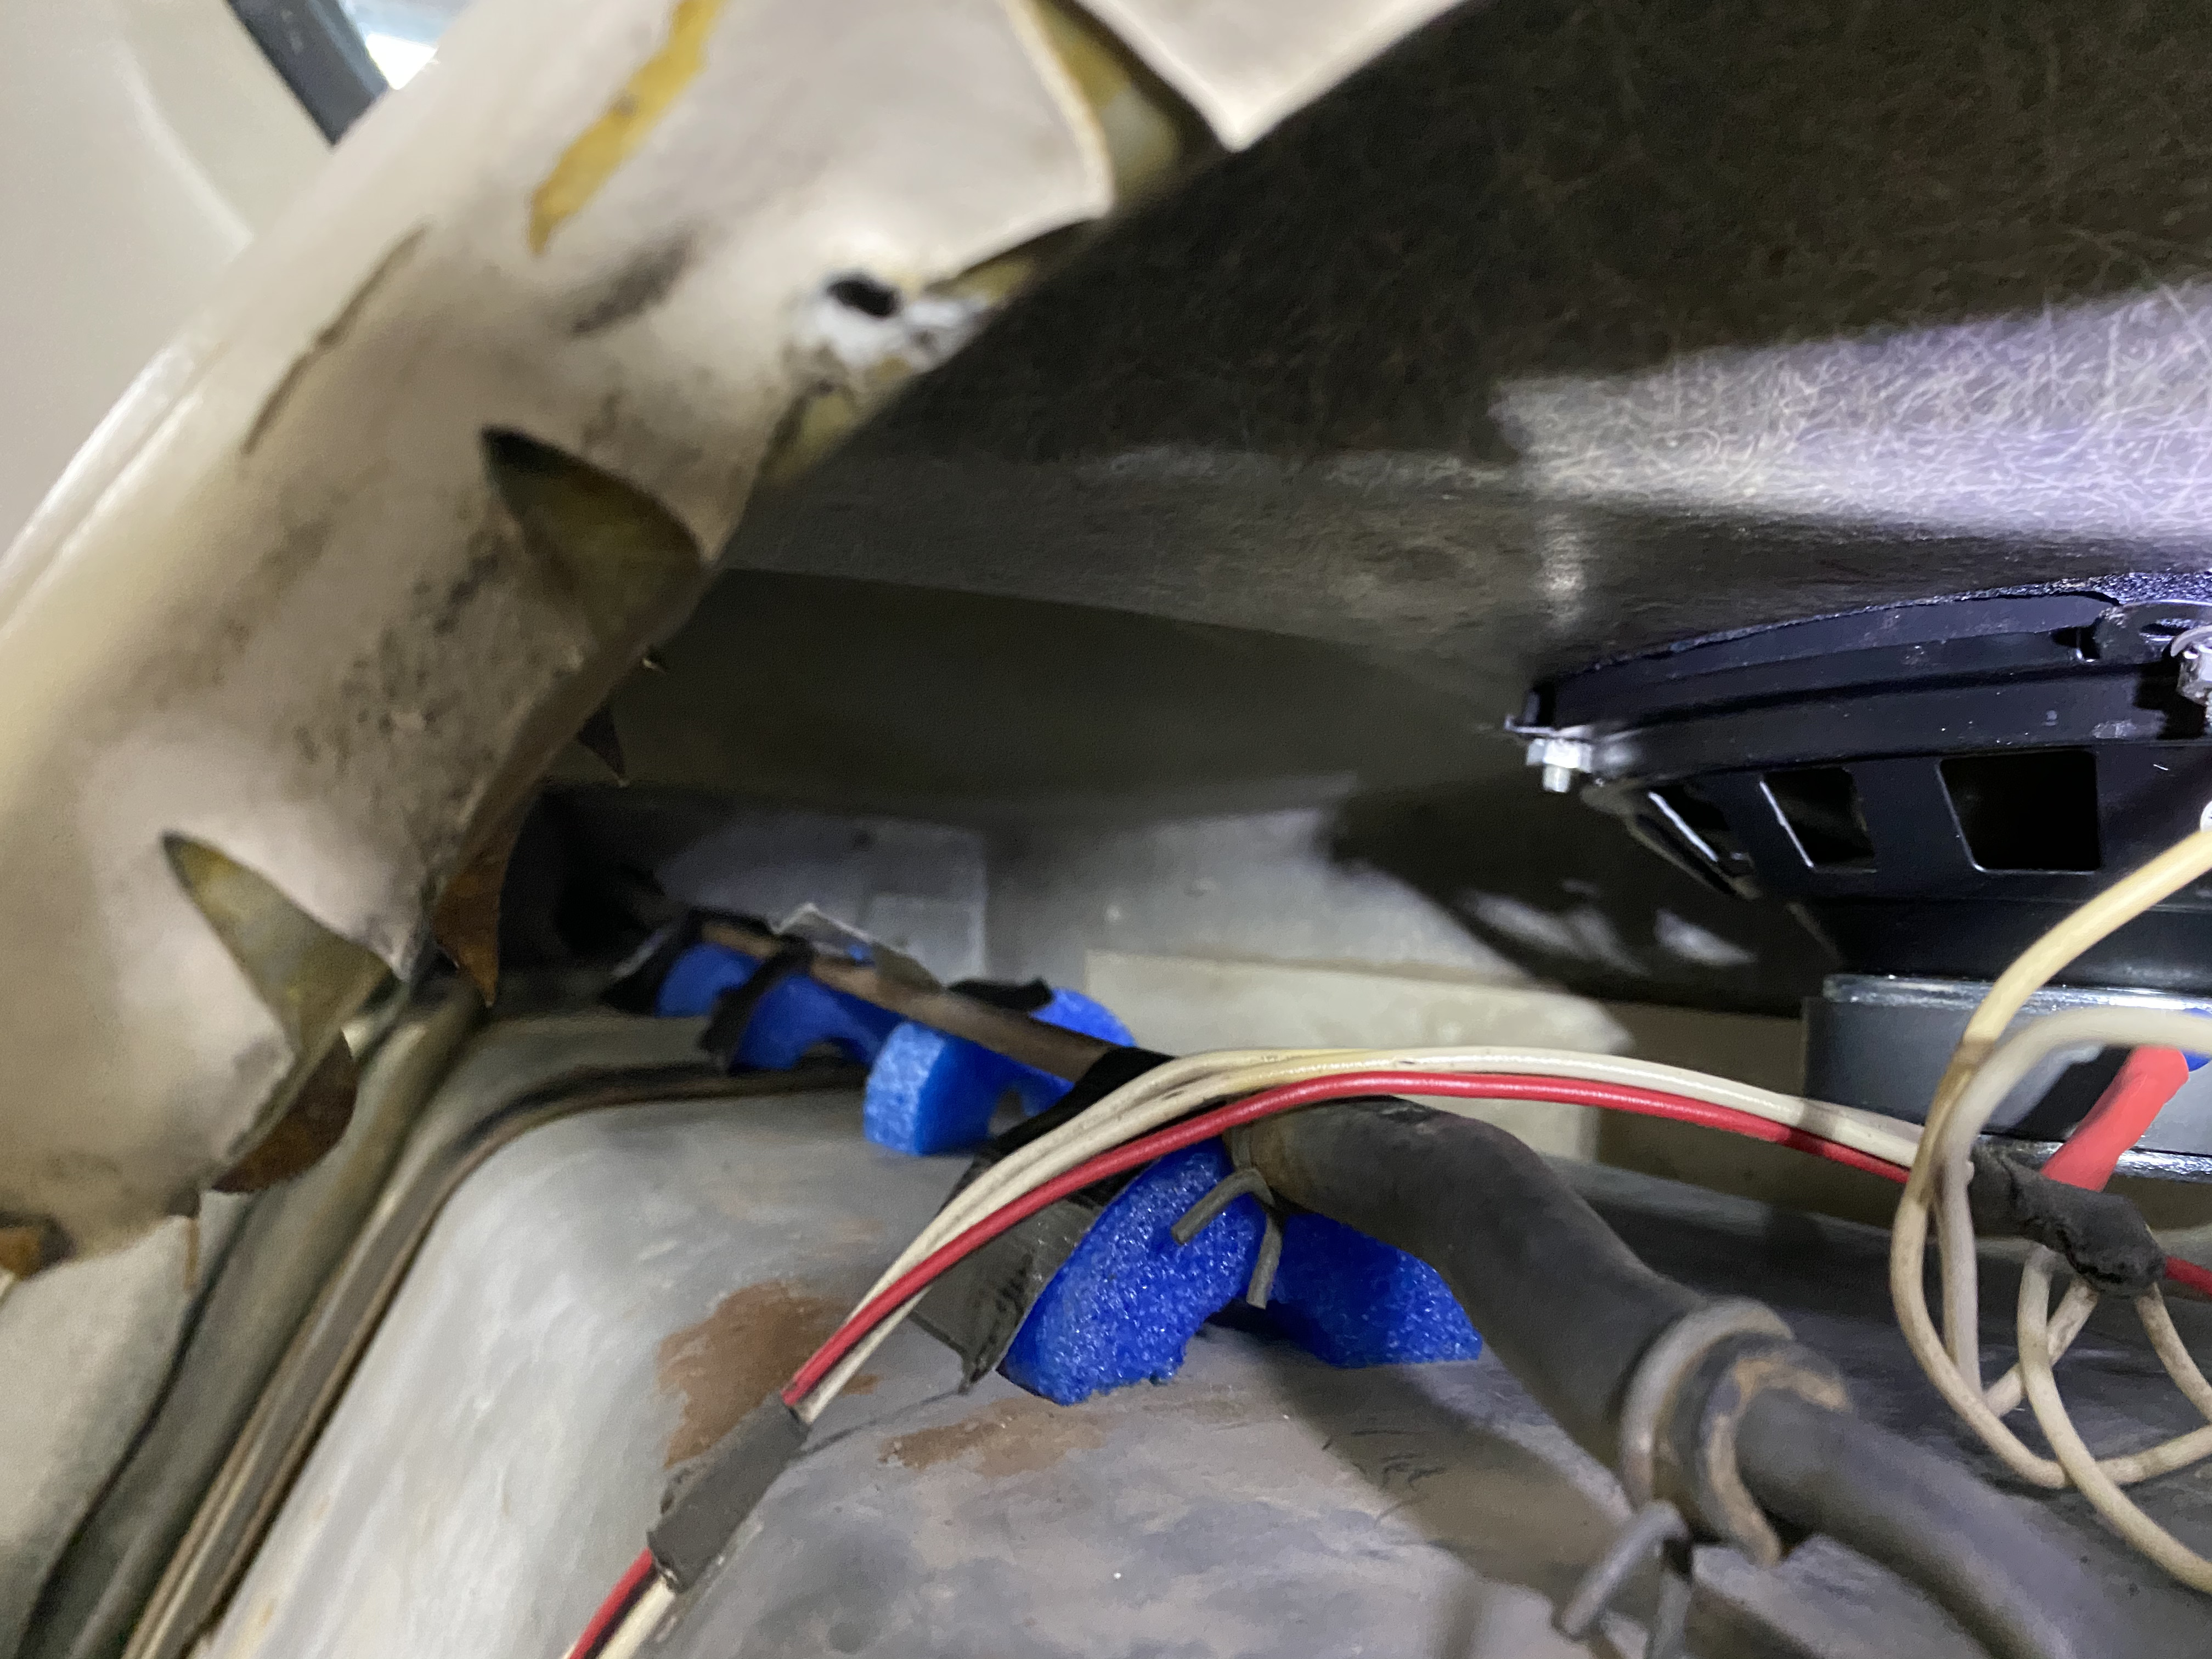
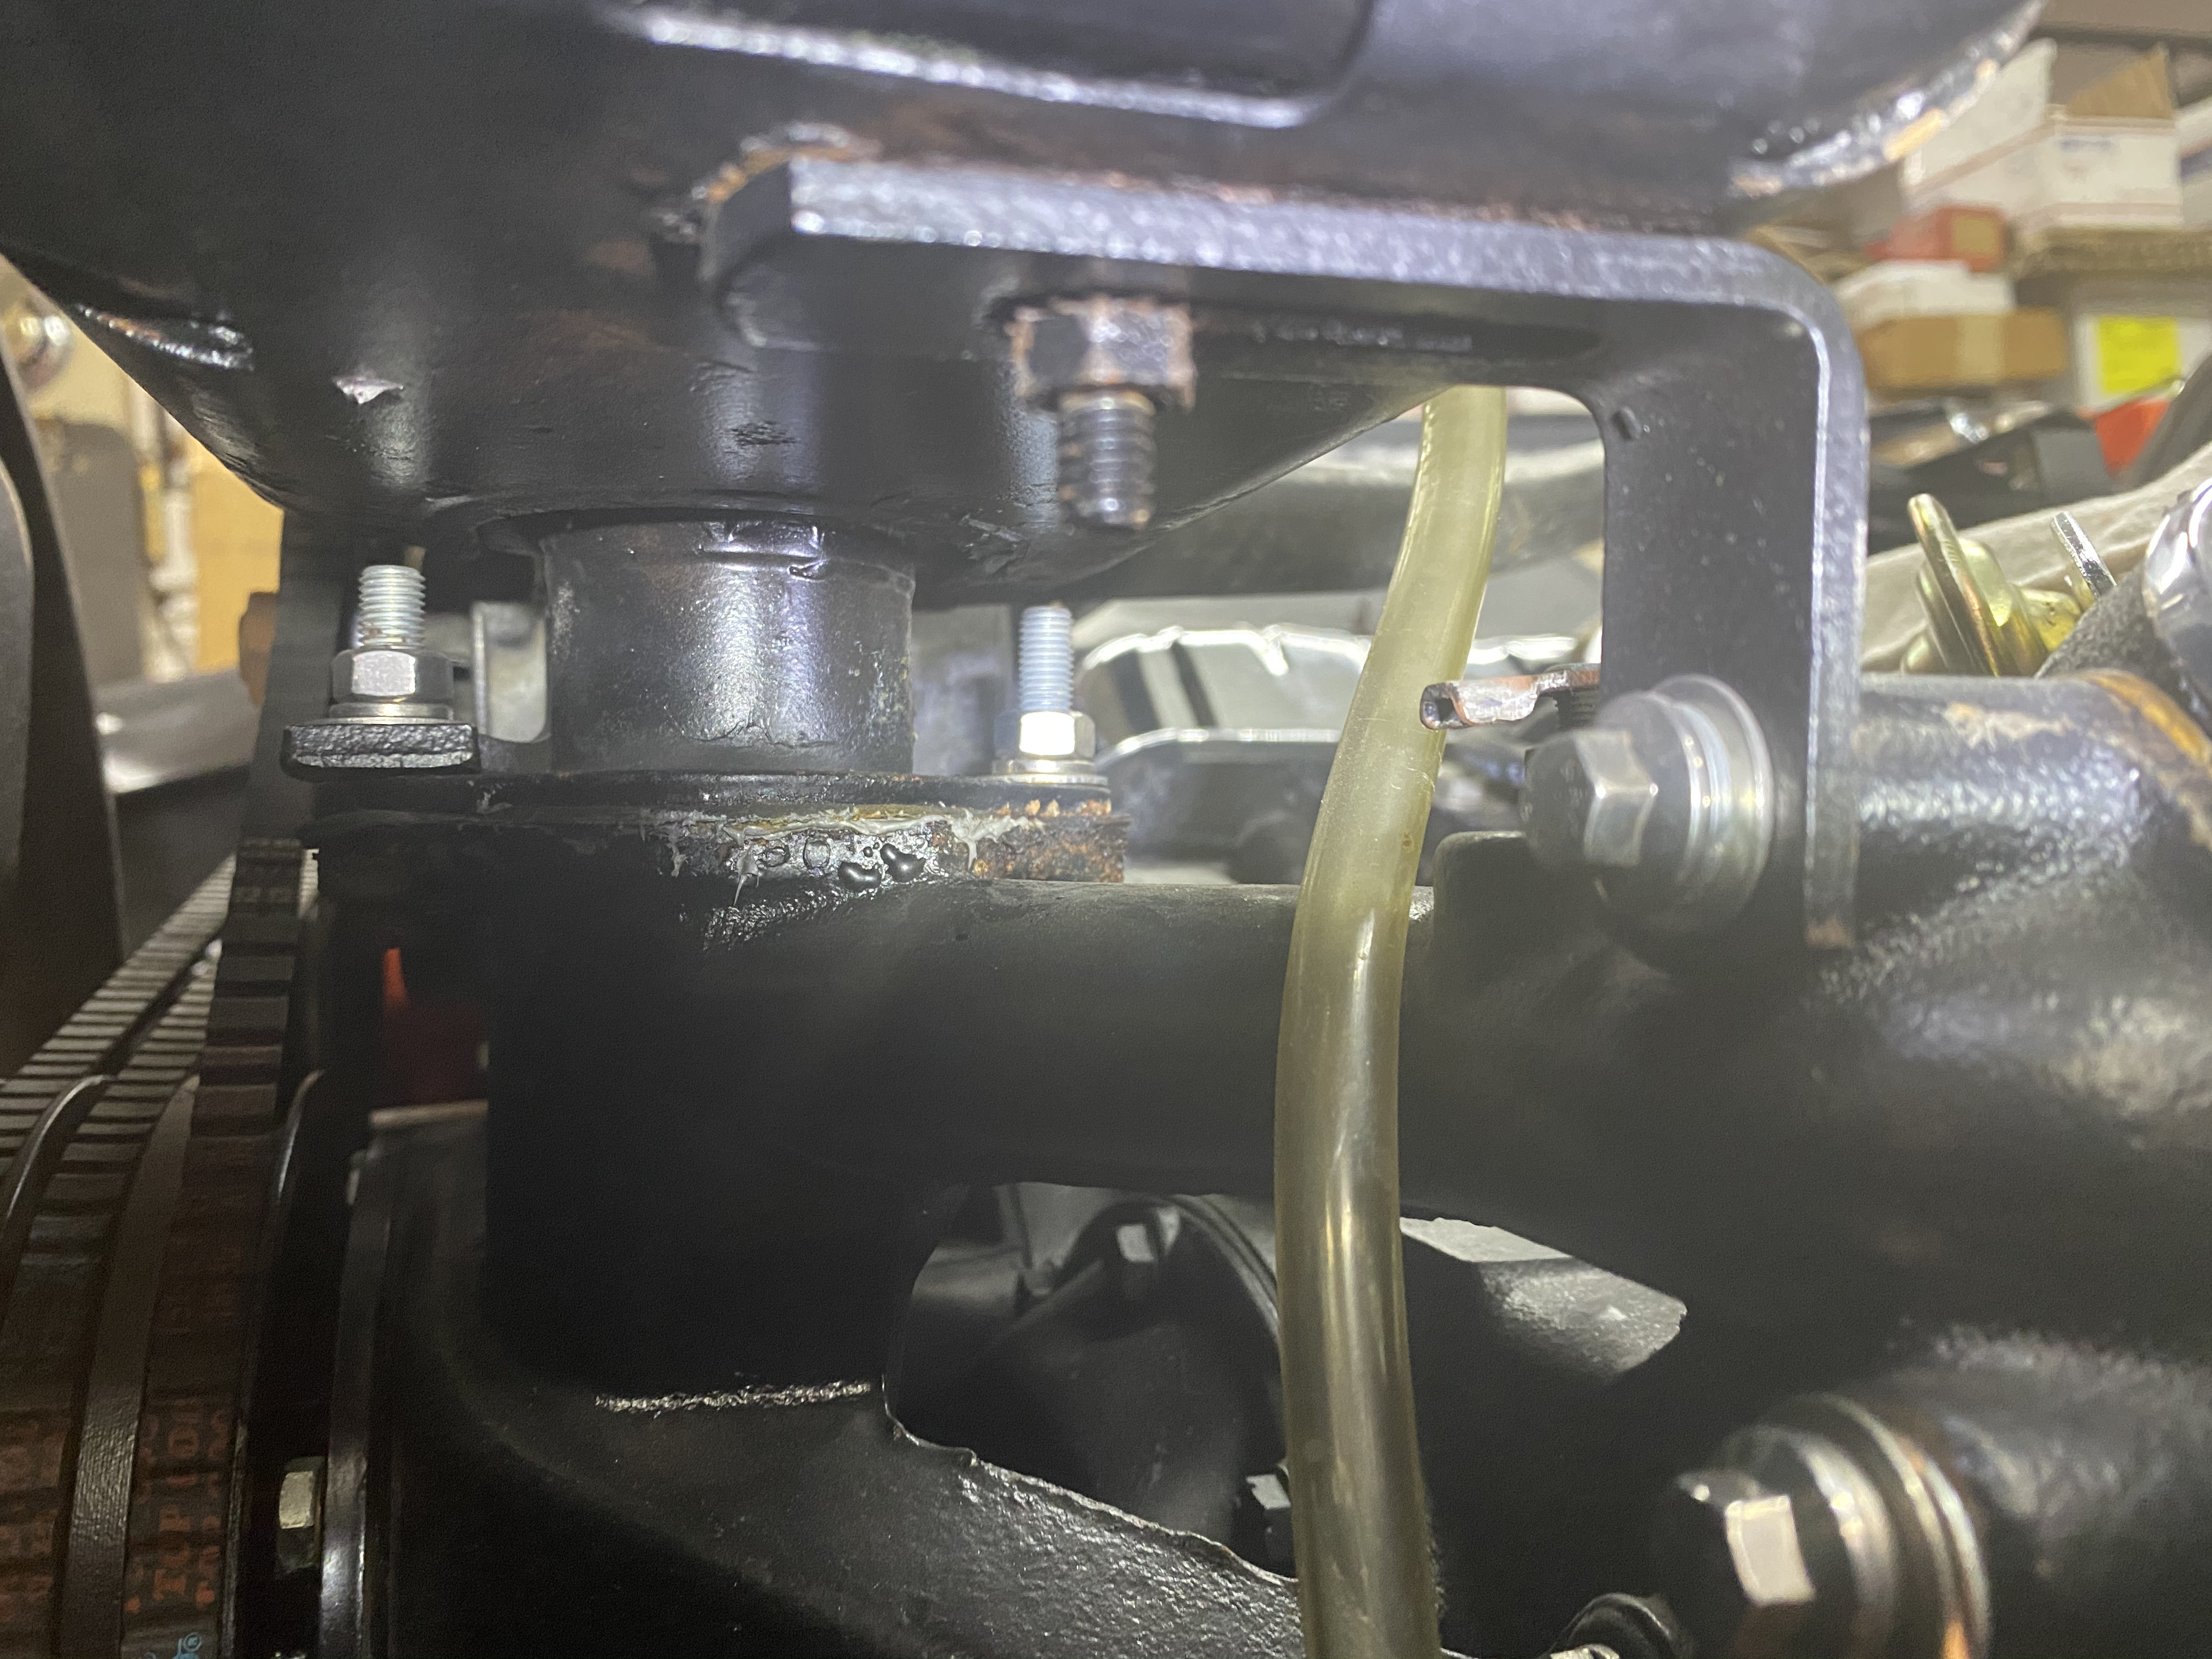
Here's what keeps that tank steady in our R-2. Not saying this is "original" but it is an almost daily driver, and has no shakes.

-
Contacted Mr. Williams, who still has the car, and the original package with doc is headed his way. Passed it forward 👍
-
On 1/9/2021 at 8:02 PM, brad said:
If you live below 3000ft. altitude, I have had great luck with this jet combination. (as a starting point....your results may vary)
Out of the Edelbrock 600cfm zip kit......098 primary jets. 74-47 metering rods. Orange 4 in" Hg step up springs. Use .095 secondary jets.
Brad - “ your results may vary”- LOL! Appreciate this starting point very much, though! J
-
On 1/9/2021 at 12:10 PM, PackardV8 said:
If one is going to all that work, suggest adding a direct reading O2 meter to confirm the jetting is optimum for your use, altitude and temperature.
Of course, on an R2, it can never be optimum. The jetting which would give the best MPG at cruise would be terminally lean at WOT under boost. The jetting which will give max power and be safe under boost will be too rich at cruise. Knowing where it is now is the first step to getting it right.
Also, confirm the correct intake manifold gaskets are being used. The R2 gaskets restrict the exhaust heat crossover. Personally, I block the passage completely with thin stainless steel plates.
jack vines
Thanks Jack. Some good thoughts - and I will check those intake gaskets! J
-
If anybody is interested, the rest of the story is that all of the jets and metering rods have been changed in our R-2, in addition to being installed with the jets in opposite locations. Jon Myer is sending the stock parts and I will spend some time checking performance.
Probably not the first Carter put together backwards.
J
-
Got what I need on steps leaner or richer from Bob's site. Good resource. AFB, AFB, AFB.....
-
Sorry - yes Carter, WCFB sticks in my mind when I look at one of these 😉 Thanks for the info!
-
Only question that comes to mind is clearances. It’s the tightest spot on any Avanti (with manual transmission); manifold, covers, bell crank, throttle, cables..... Otherwise, it’s just a gear box and a Pittman arm.....and a big ol frame to drill if you have to. What could go wrong? 😉
-
The service manual clearly states that primary jets are larger than secondary jets in the 3507S WCFB on supercharged 289s. Jets can of course be swapped, resized, drilled as a means of modifying performance. Avanti jets were number-stamped with size, such as 120 and 104, and can also be size-checked with calibration sets.
I’m hoping to get a quick confirmation of the original size numbers for the 63 Avanti R-2 primary and secondary jets, and any recent updates to jet sizing in relation to today’s (less than stellar) typical fuel. Hope I’m not opening a can of worms gone through many times before, but while rebuilding my carb I find the larger jets are in the secondaries, opposite from the service manual.
Thanks for anything you can add.
John H.
-
Well, duh! My attention span is slipping, especially after that Sunday afternoon whiske...er, nap.
Thanks!
-
And saves us TIME all these years later! Time? I was gonna have this front end done last month......😉
-
Toe-in and centering can be set from one location?

TRUNK LIGHT SET UP 63 AVANTI
in 1963-64 Avanti
Posted
An LED dual-contact bulb inside the original housing/socket is a compromise, if that's what you are looking for. Looks original, lights up the trunk much better than the original incandescent. Did that on ours and can see the whole trunk now.