


Pete Rutledge
-
Posts
56 -
Joined
-
Last visited
Content Type
Profiles
Forums
Events
Posts posted by Pete Rutledge
-
-
Thank you for the reply and the info. In the meantime, I cleaned the map light switch; now I can turn the map light on and off with the switch when the doors are closed. So I guess it is all good now. We're making progress getting everything working again.
-
The owner's manual says the dome lights come on when the doors are opened and the map light over the console area can be manually switched on. In my car (R5083), the map light comes on when the doors are opened and the dome lights do not. The dome lights can be individually switched on and off with their respective manual slider switches. When the doors are closed, the map light will not manually switch on (I do suspect this is wrong and will be checking that switch). So how should the interior lights operate and did this change at any point in the production run?
Thanks,
Pete
-
Thanks to 64studeavanti for the answer to where the plate piece goes. So it doesn't attach to anything--it just lies there loose under the battery and on top of the battery box floor? It would be odd that it has holes, cuts, and bends but doesn't attach to anything. Or does it attach to something?
-
I finished installation of the strap-like battery support today. I shortened the longer leg of the support by 3/4" (cut it and welded it back together). Then I found that it obstructed two holes in the battery box--one for the non-fixed battery J-bolt and one for a 1/4" bolt holding a clip for the wiring harness that goes to the left headlight and parking/signal light. So I had to notch the support in two places to clear those holes. I also repaired the crack in the battery box with fiberglass and hopefully, with the aid of the new support, it won't crack again. At this point, I don't plan to use the other, plate-like support I got from SI unless someone chimes in with a good reason to use it and some clues on where to put it.

-
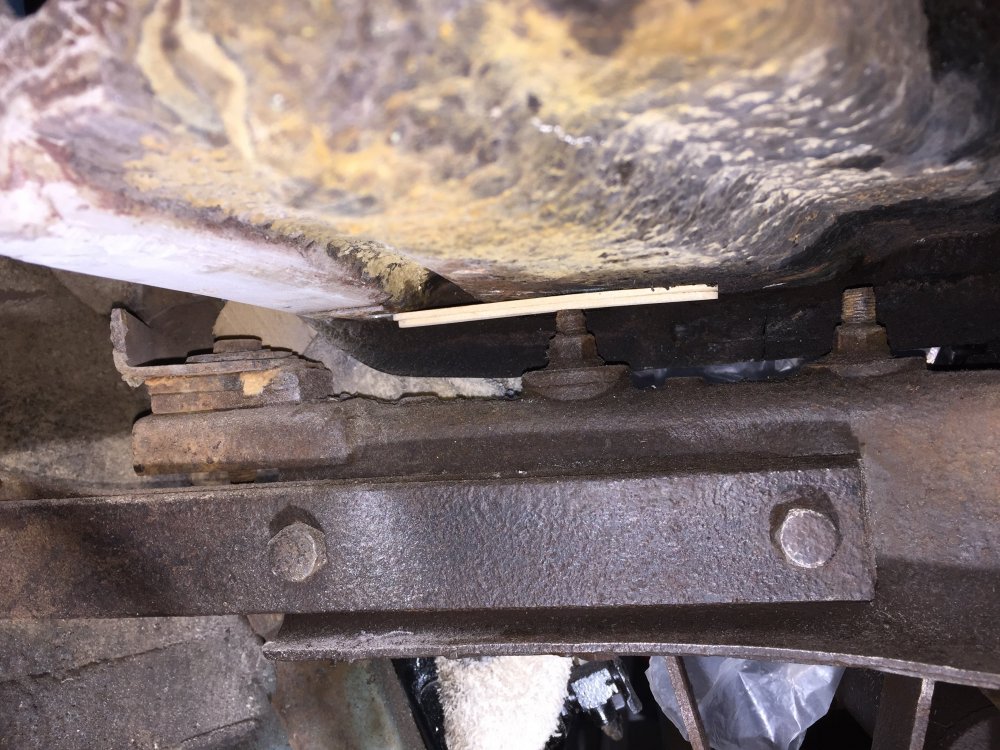
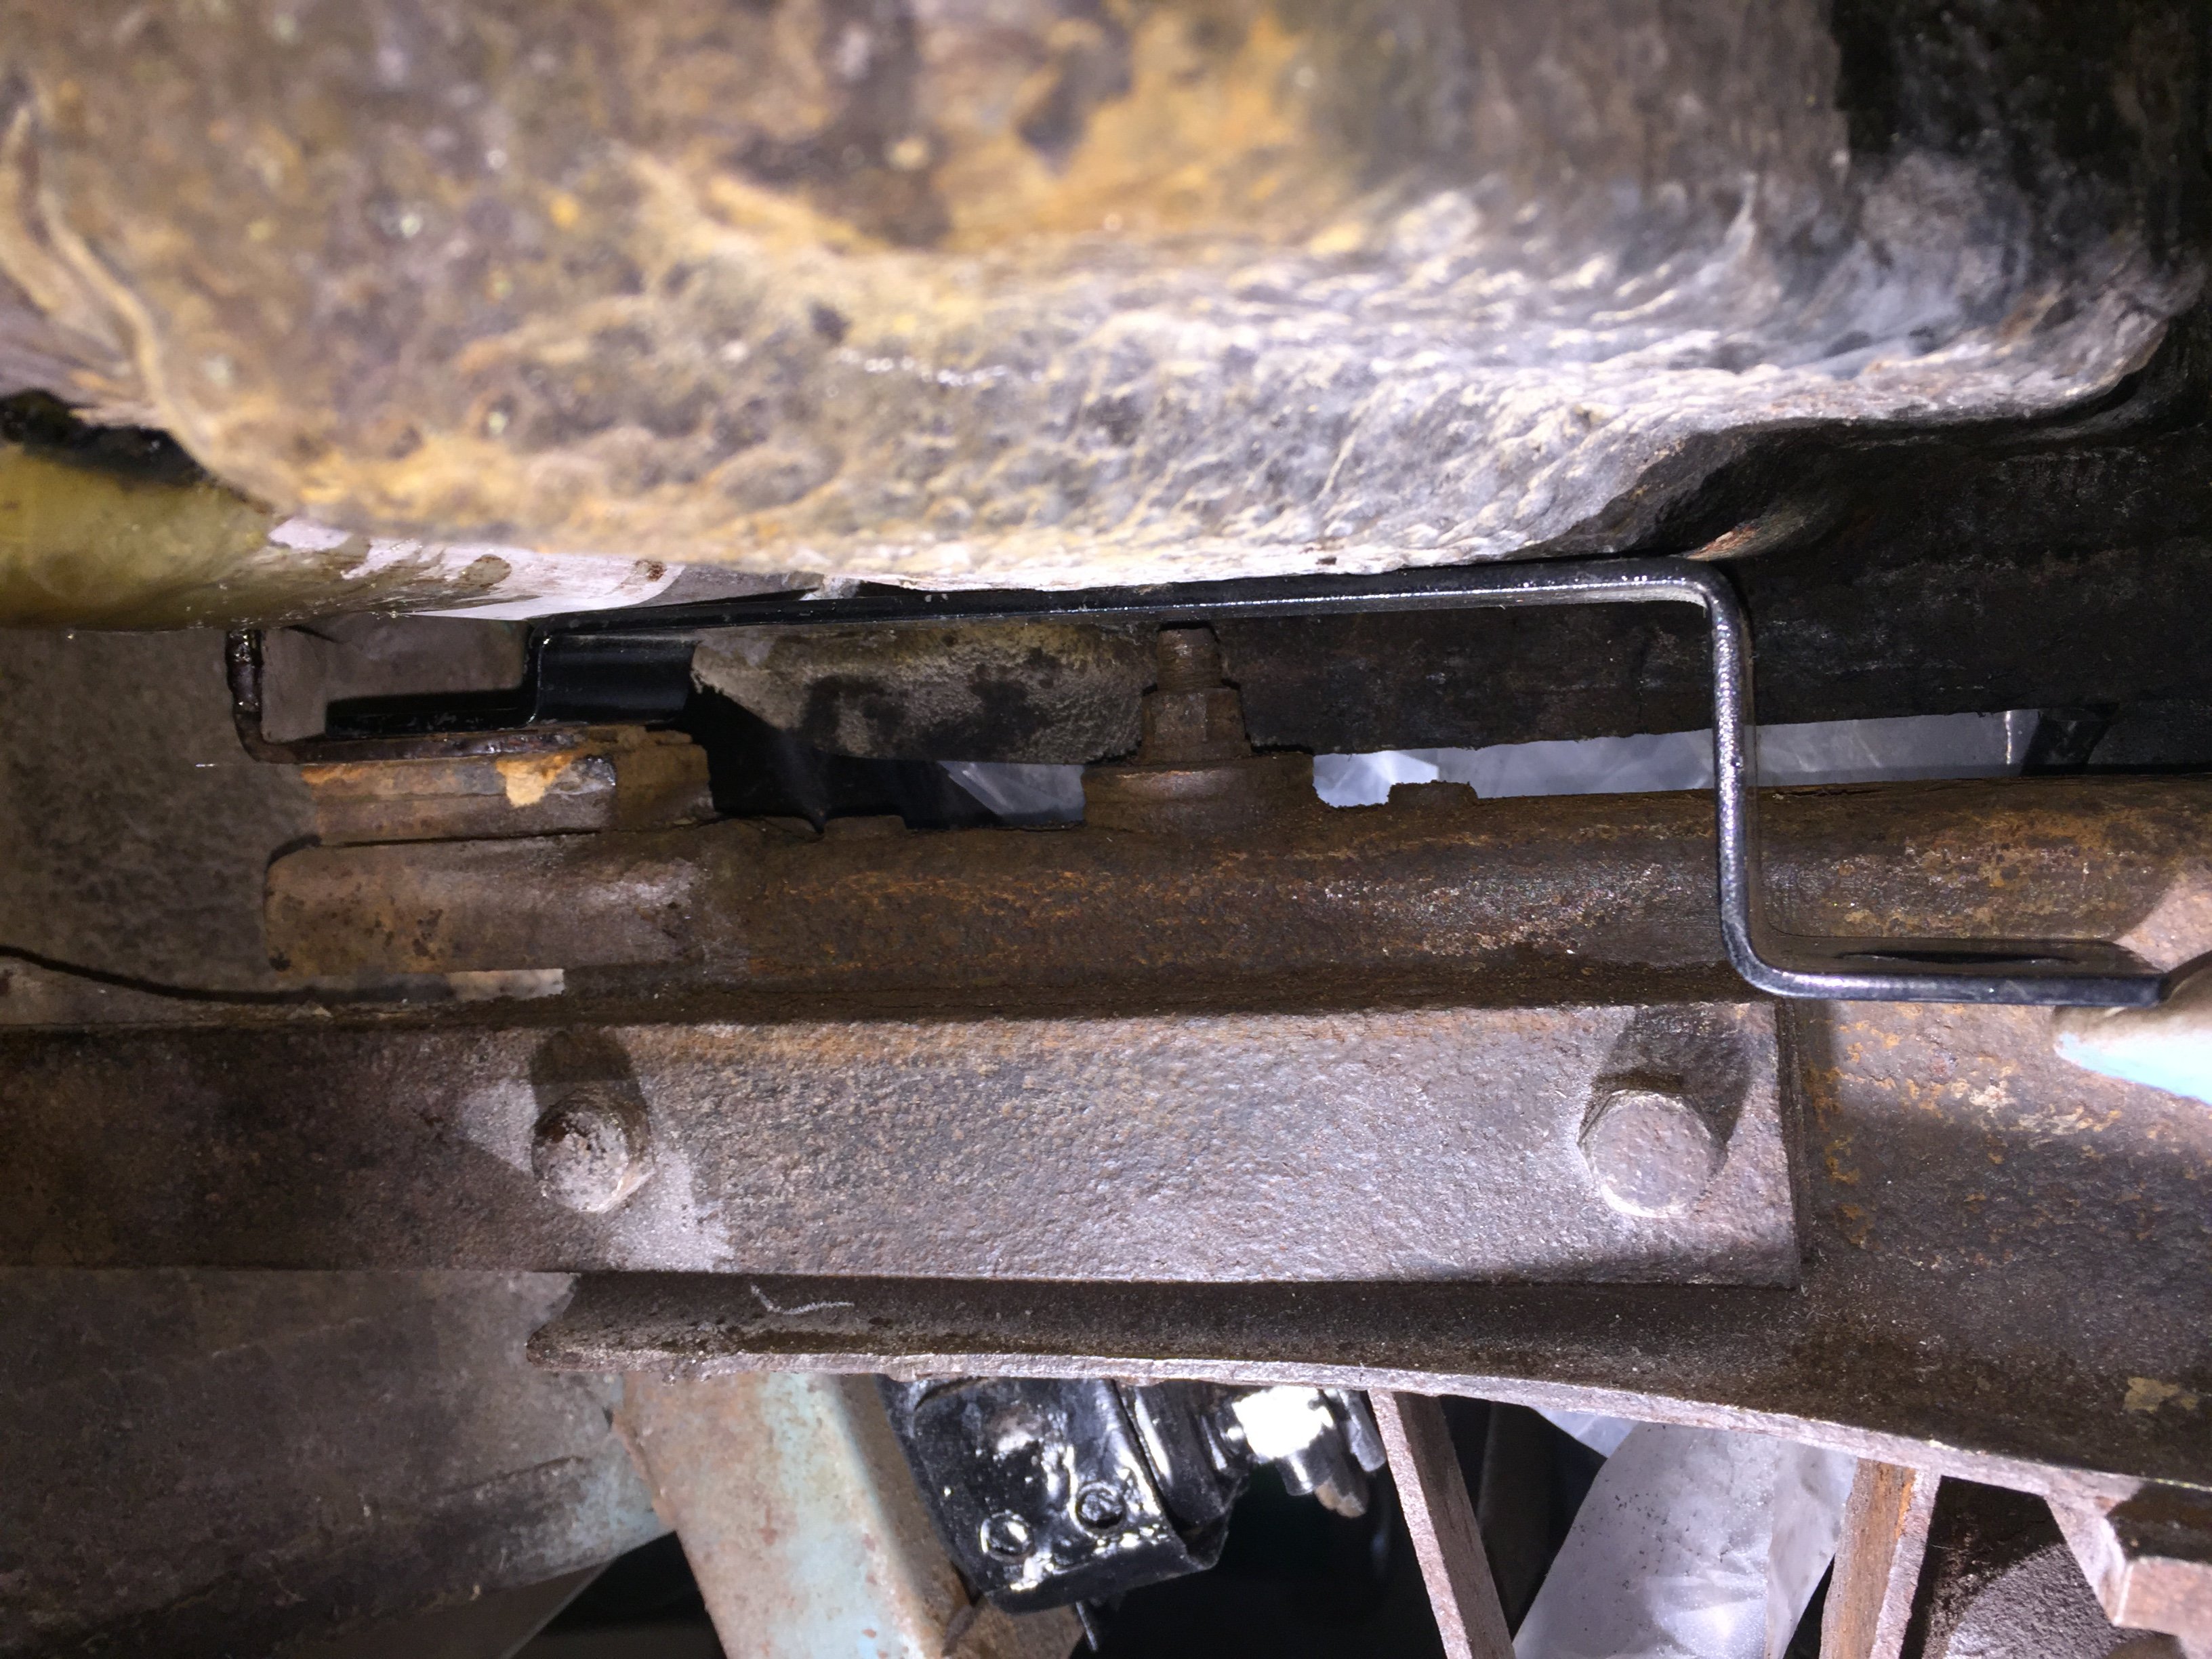
Well, I managed to remove the two rusty bolts that will hold the strap-like battery brace in place. Then I found out that the longer leg of the brace is about 3/4" too long (see picture) for a Studebaker Avanti, due to its lower fenders compared to the Avanti II. So I will have to cut the longer leg and weld it back together to make it 3/4" shorter. Then it will work just fine.
Still don't know where to put the plate-like support. Maybe an Avanti II owner can shed some light on it.
-
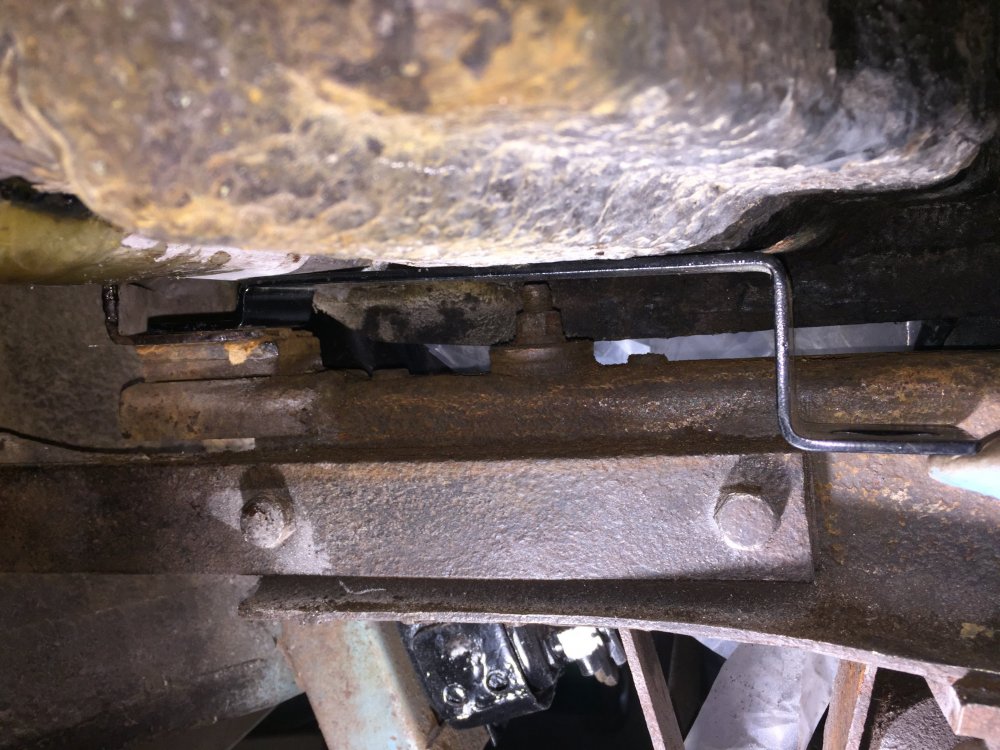
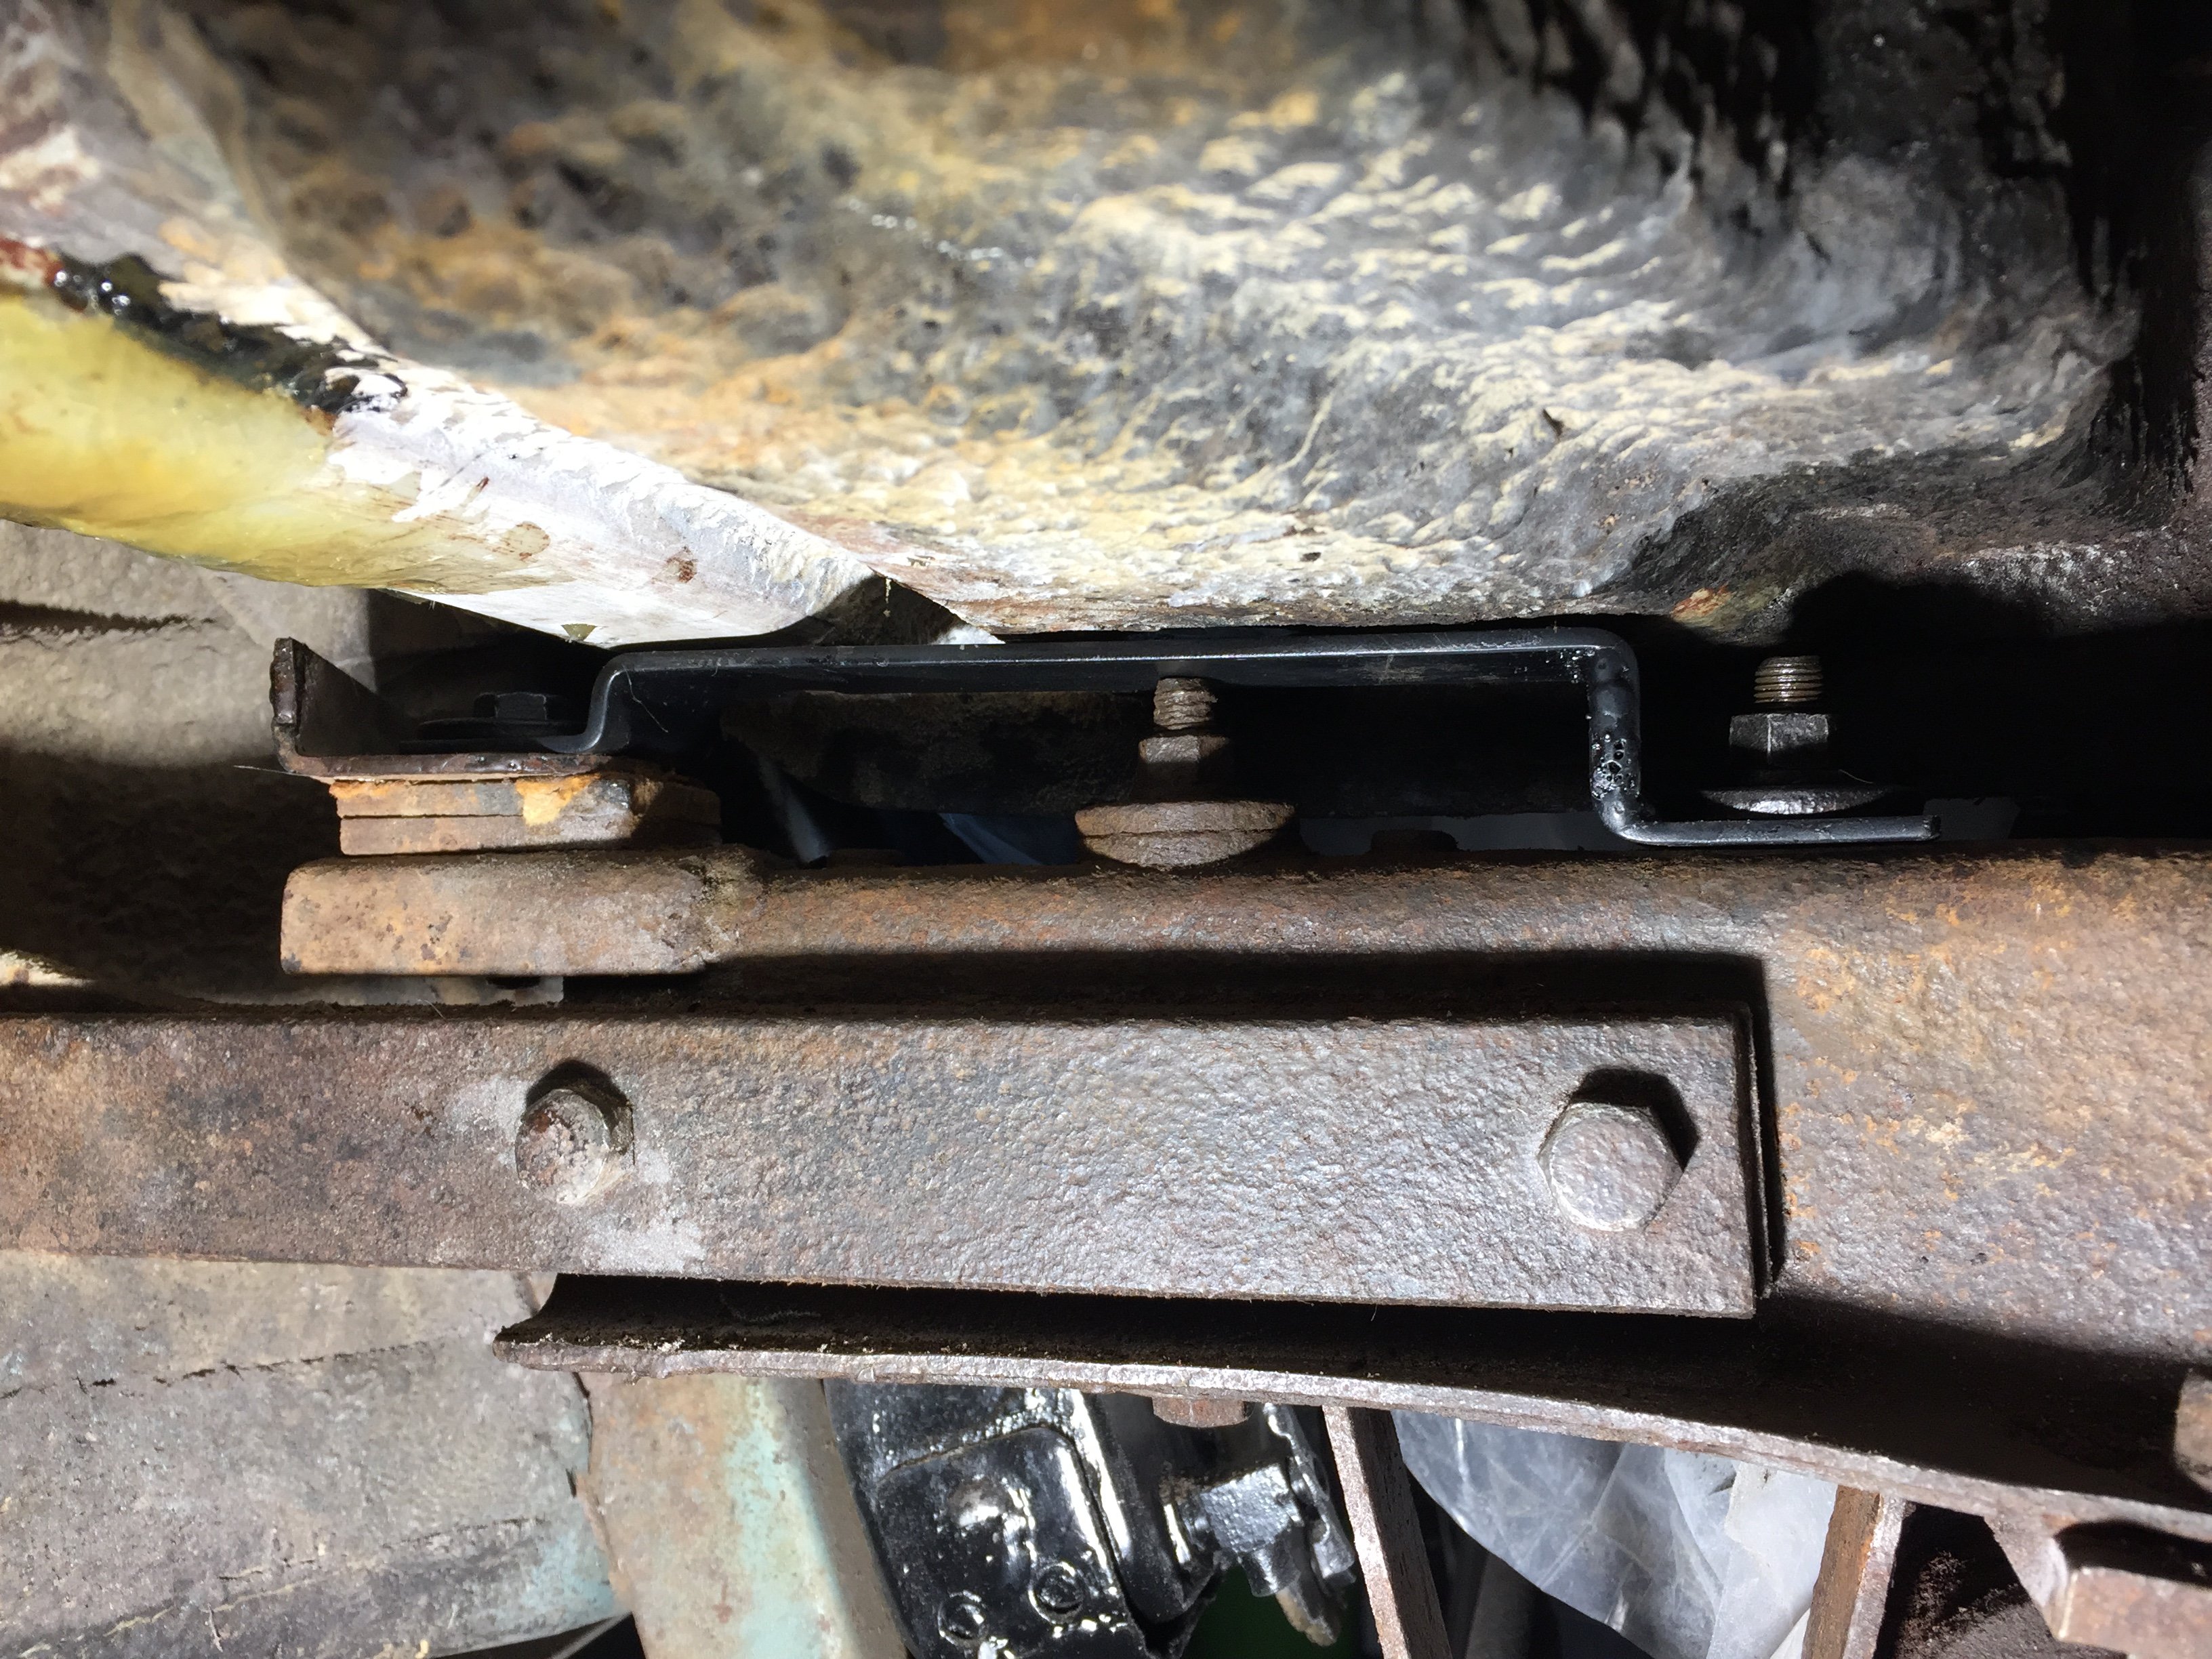
I was working on the Avanti battery box this afternoon (preparing for fiberglass repair) and have answered literally half of my initial question. The strap-like piece goes on top of the frame rail and under the inner edge of the battery box. Its front end attaches to the front bolt on top of the frame rail in the attached picture (a view from the front left wheel well--disregard the popsicle sticks I'm using as shims to raise the battery box for fiberglass repair) . That front bolt fastens the left radiator support bracket to the top of the left frame rail. The rear end of the strap connects to the rear bolt on top of the frame rail in the picture. That bolt goes through the frame rail and through the rear hole in the stabilizer bar left bracket. The two ends of the strap are at different levels because the two bolts it attaches to are at different heights above the frame rail as you can see in the picture. The long portion of the strap lies under and supports the inner edge of the battery box, which is where the battery box needs the most help. As for the other part, I can see a number of ways it might fit in the battery box from above and not sure which is the right way. Also not sure of the purpose of the various holes in this piece. Also not really sure about its purpose. So I still need some help, but only half as much as before.
-
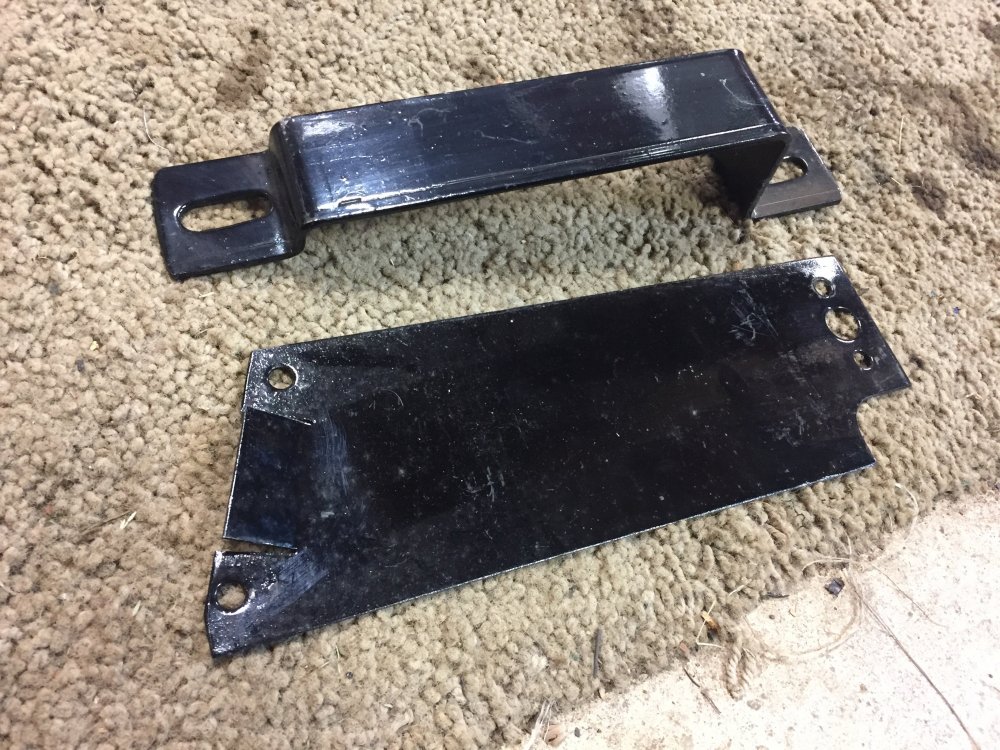
I purchased Stude Int'l part number 800076, battery tray reinforcement, for $60 about a year ago. It consists of two pieces (see picture) and came with no instructions. From looking at the two pieces, it is not obvious to me how to install it. The only clue is in the catalog description, which reads "Metal panel fits under battery. Bracket bolts to radiator support & front sway bar bolt. Standard on later models. Good addition on earlier models." My battery tray cracked many years ago (long before I owned it) and was "fixed" by using 9 screws to fasten an L-shaped piece of sheet metal across the crack. I have removed the rusty screws (had to grind the heads off) and the old sheet metal and will now repair the cracked fiberglass. While I don't normally like to make non-original modifications, I do plan to add the new bracket as I can see that the battery tray structure is pretty marginal for supporting a heavy battery. All that said, does anyone know how this bracket attaches? Photos of one that has been installed would be worth a thousand words. Thanks.
-
Larry,
You'll find more info and pictures of this car on Bob's Studebaker Resource Website at http://www.studebaker-info.org/avantix4.html#r4300. Look for its VIN.
I don't see an engine number in the material on Bob's site. The engine is painted red; it should be black (it's black in the 3rd entry on Bob's site). You could certainly call the seller and ask for a picture of the stamp pad on the engine, but I don't see any documents with the engine number on them. The 2nd entry on Bob's website does refer to the seller's dad rebuilding "the 289 that's in it now," which implies it might not be the original engine.
Pete
-
See the PM I sent you.
-
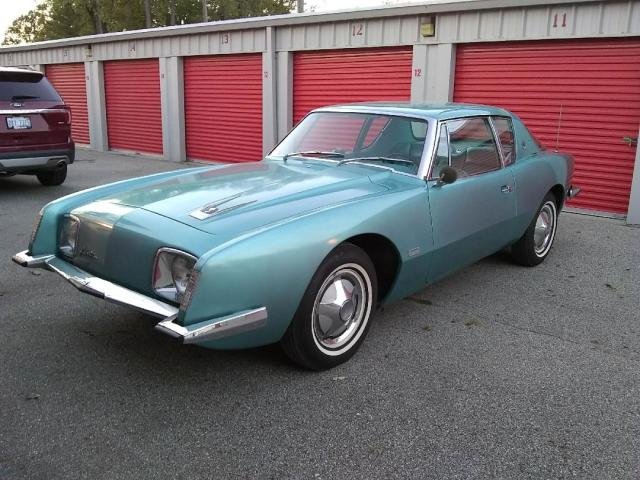
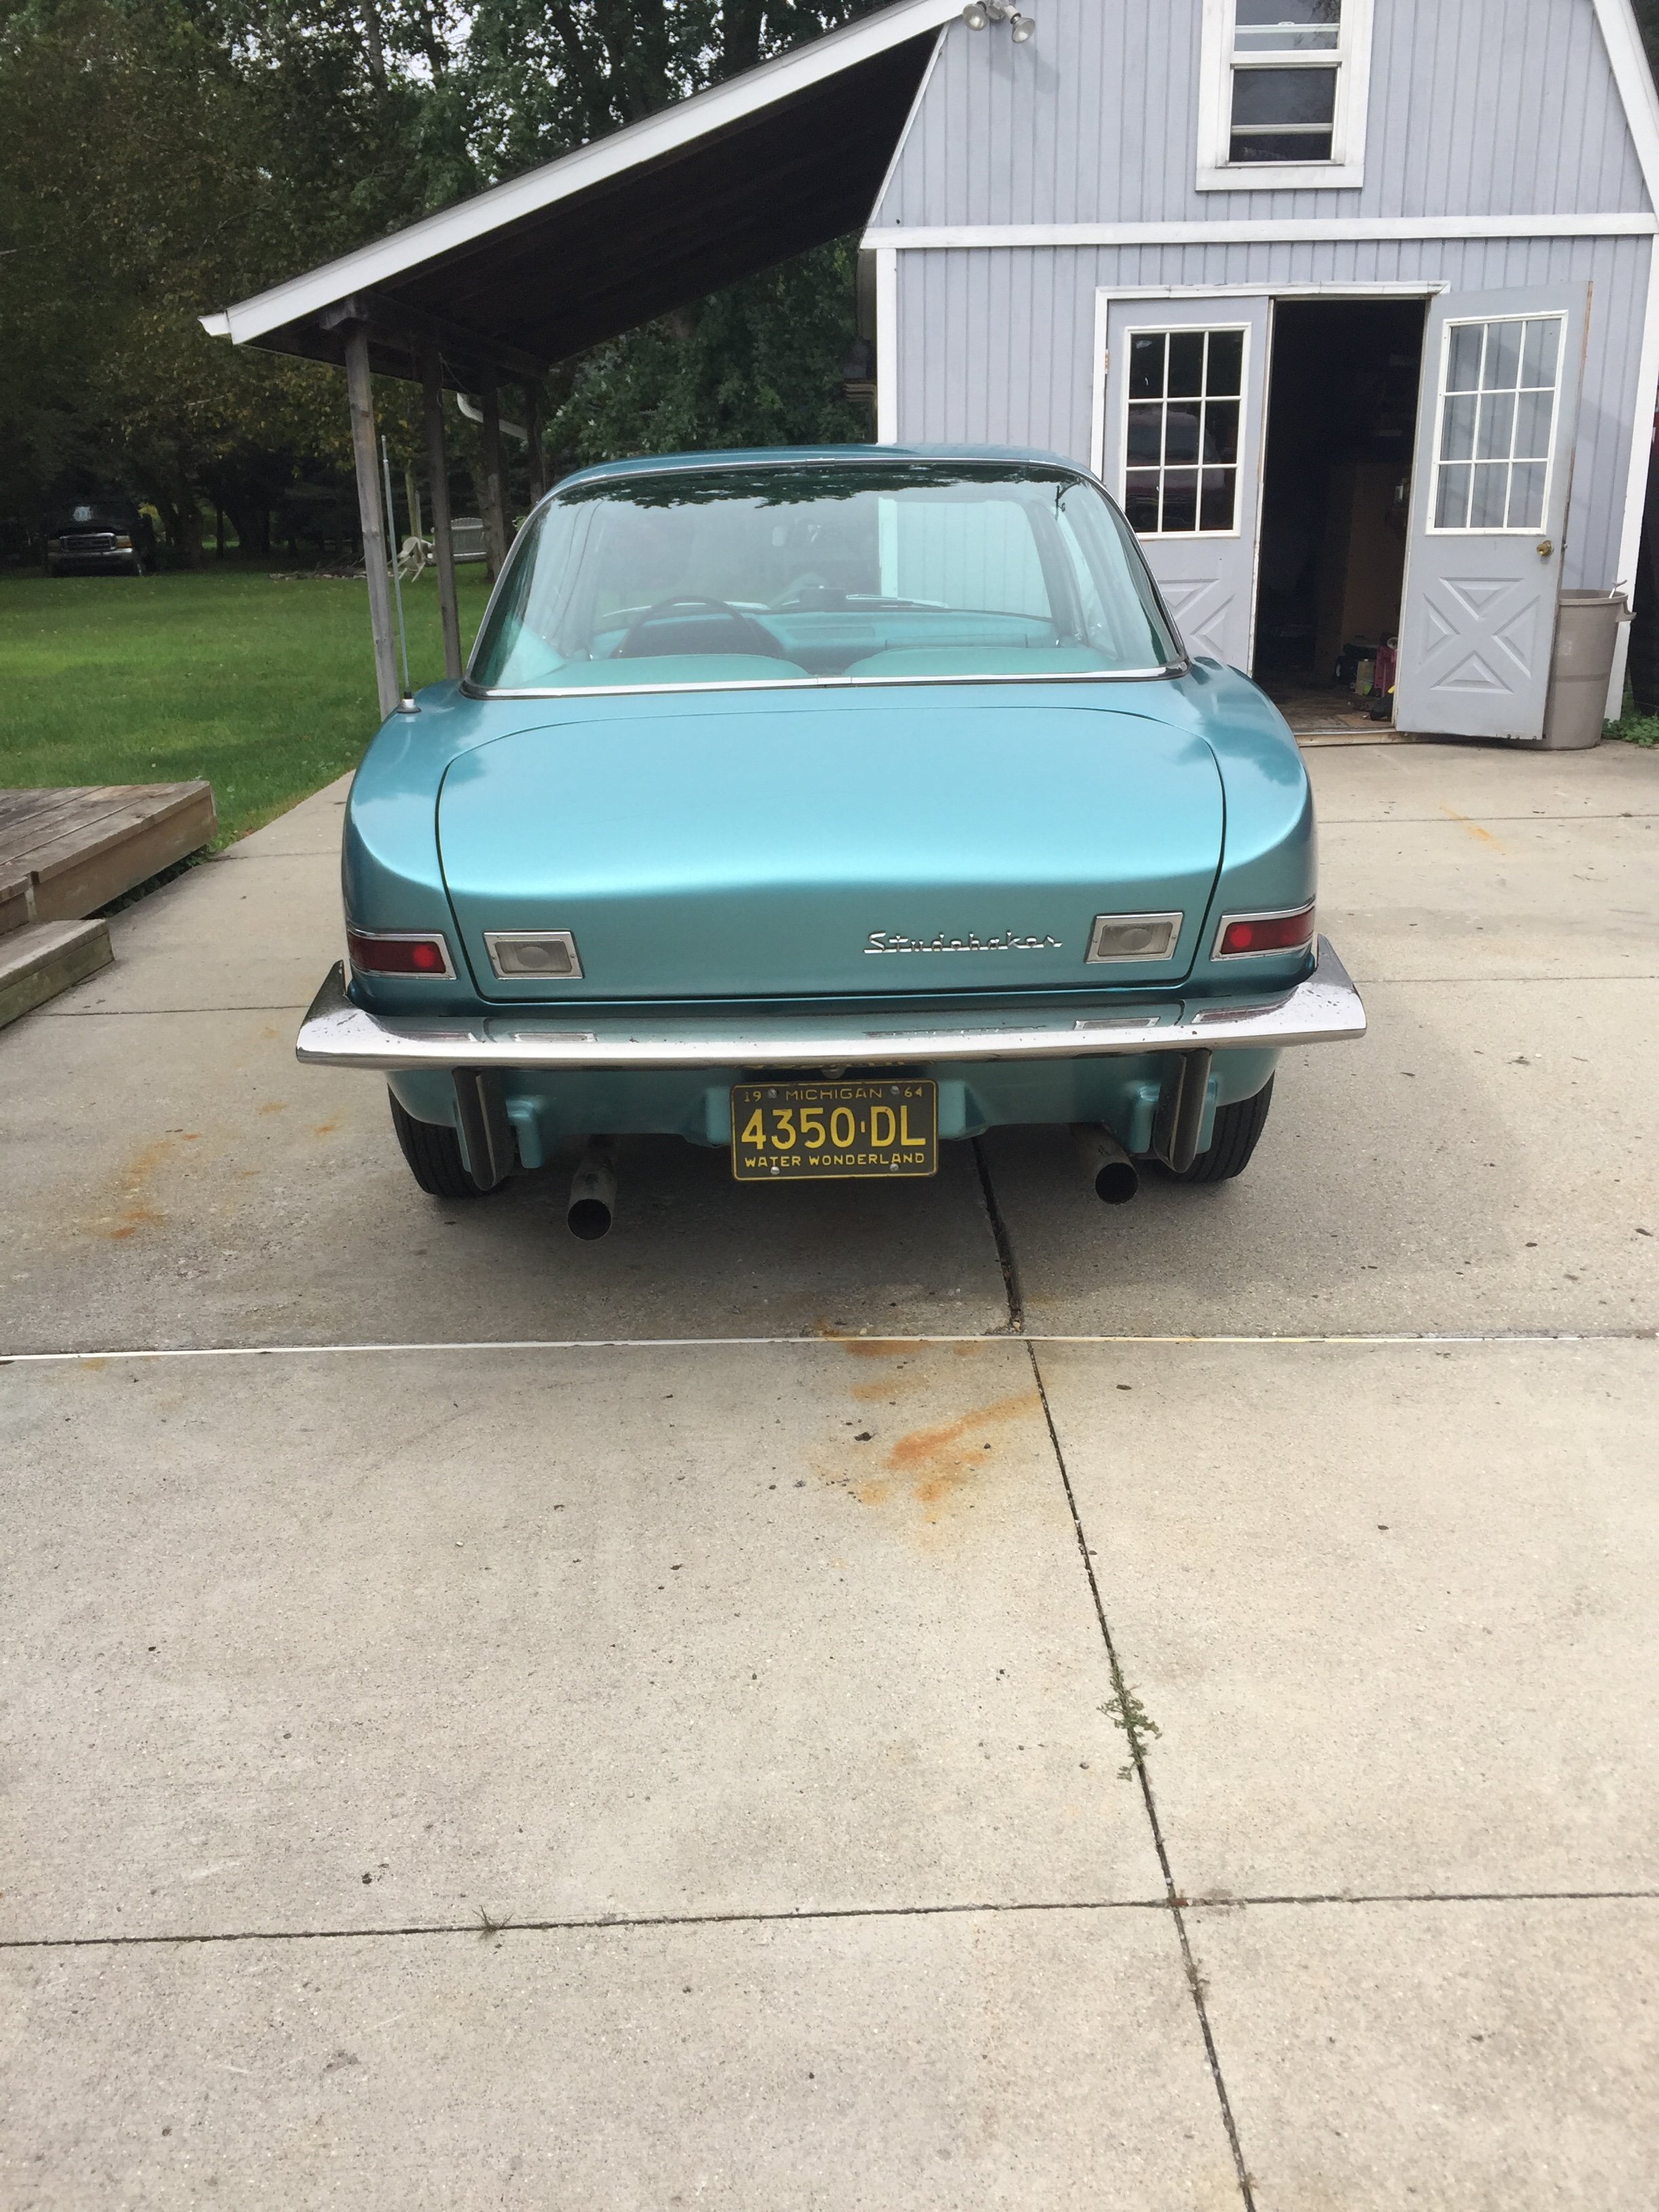
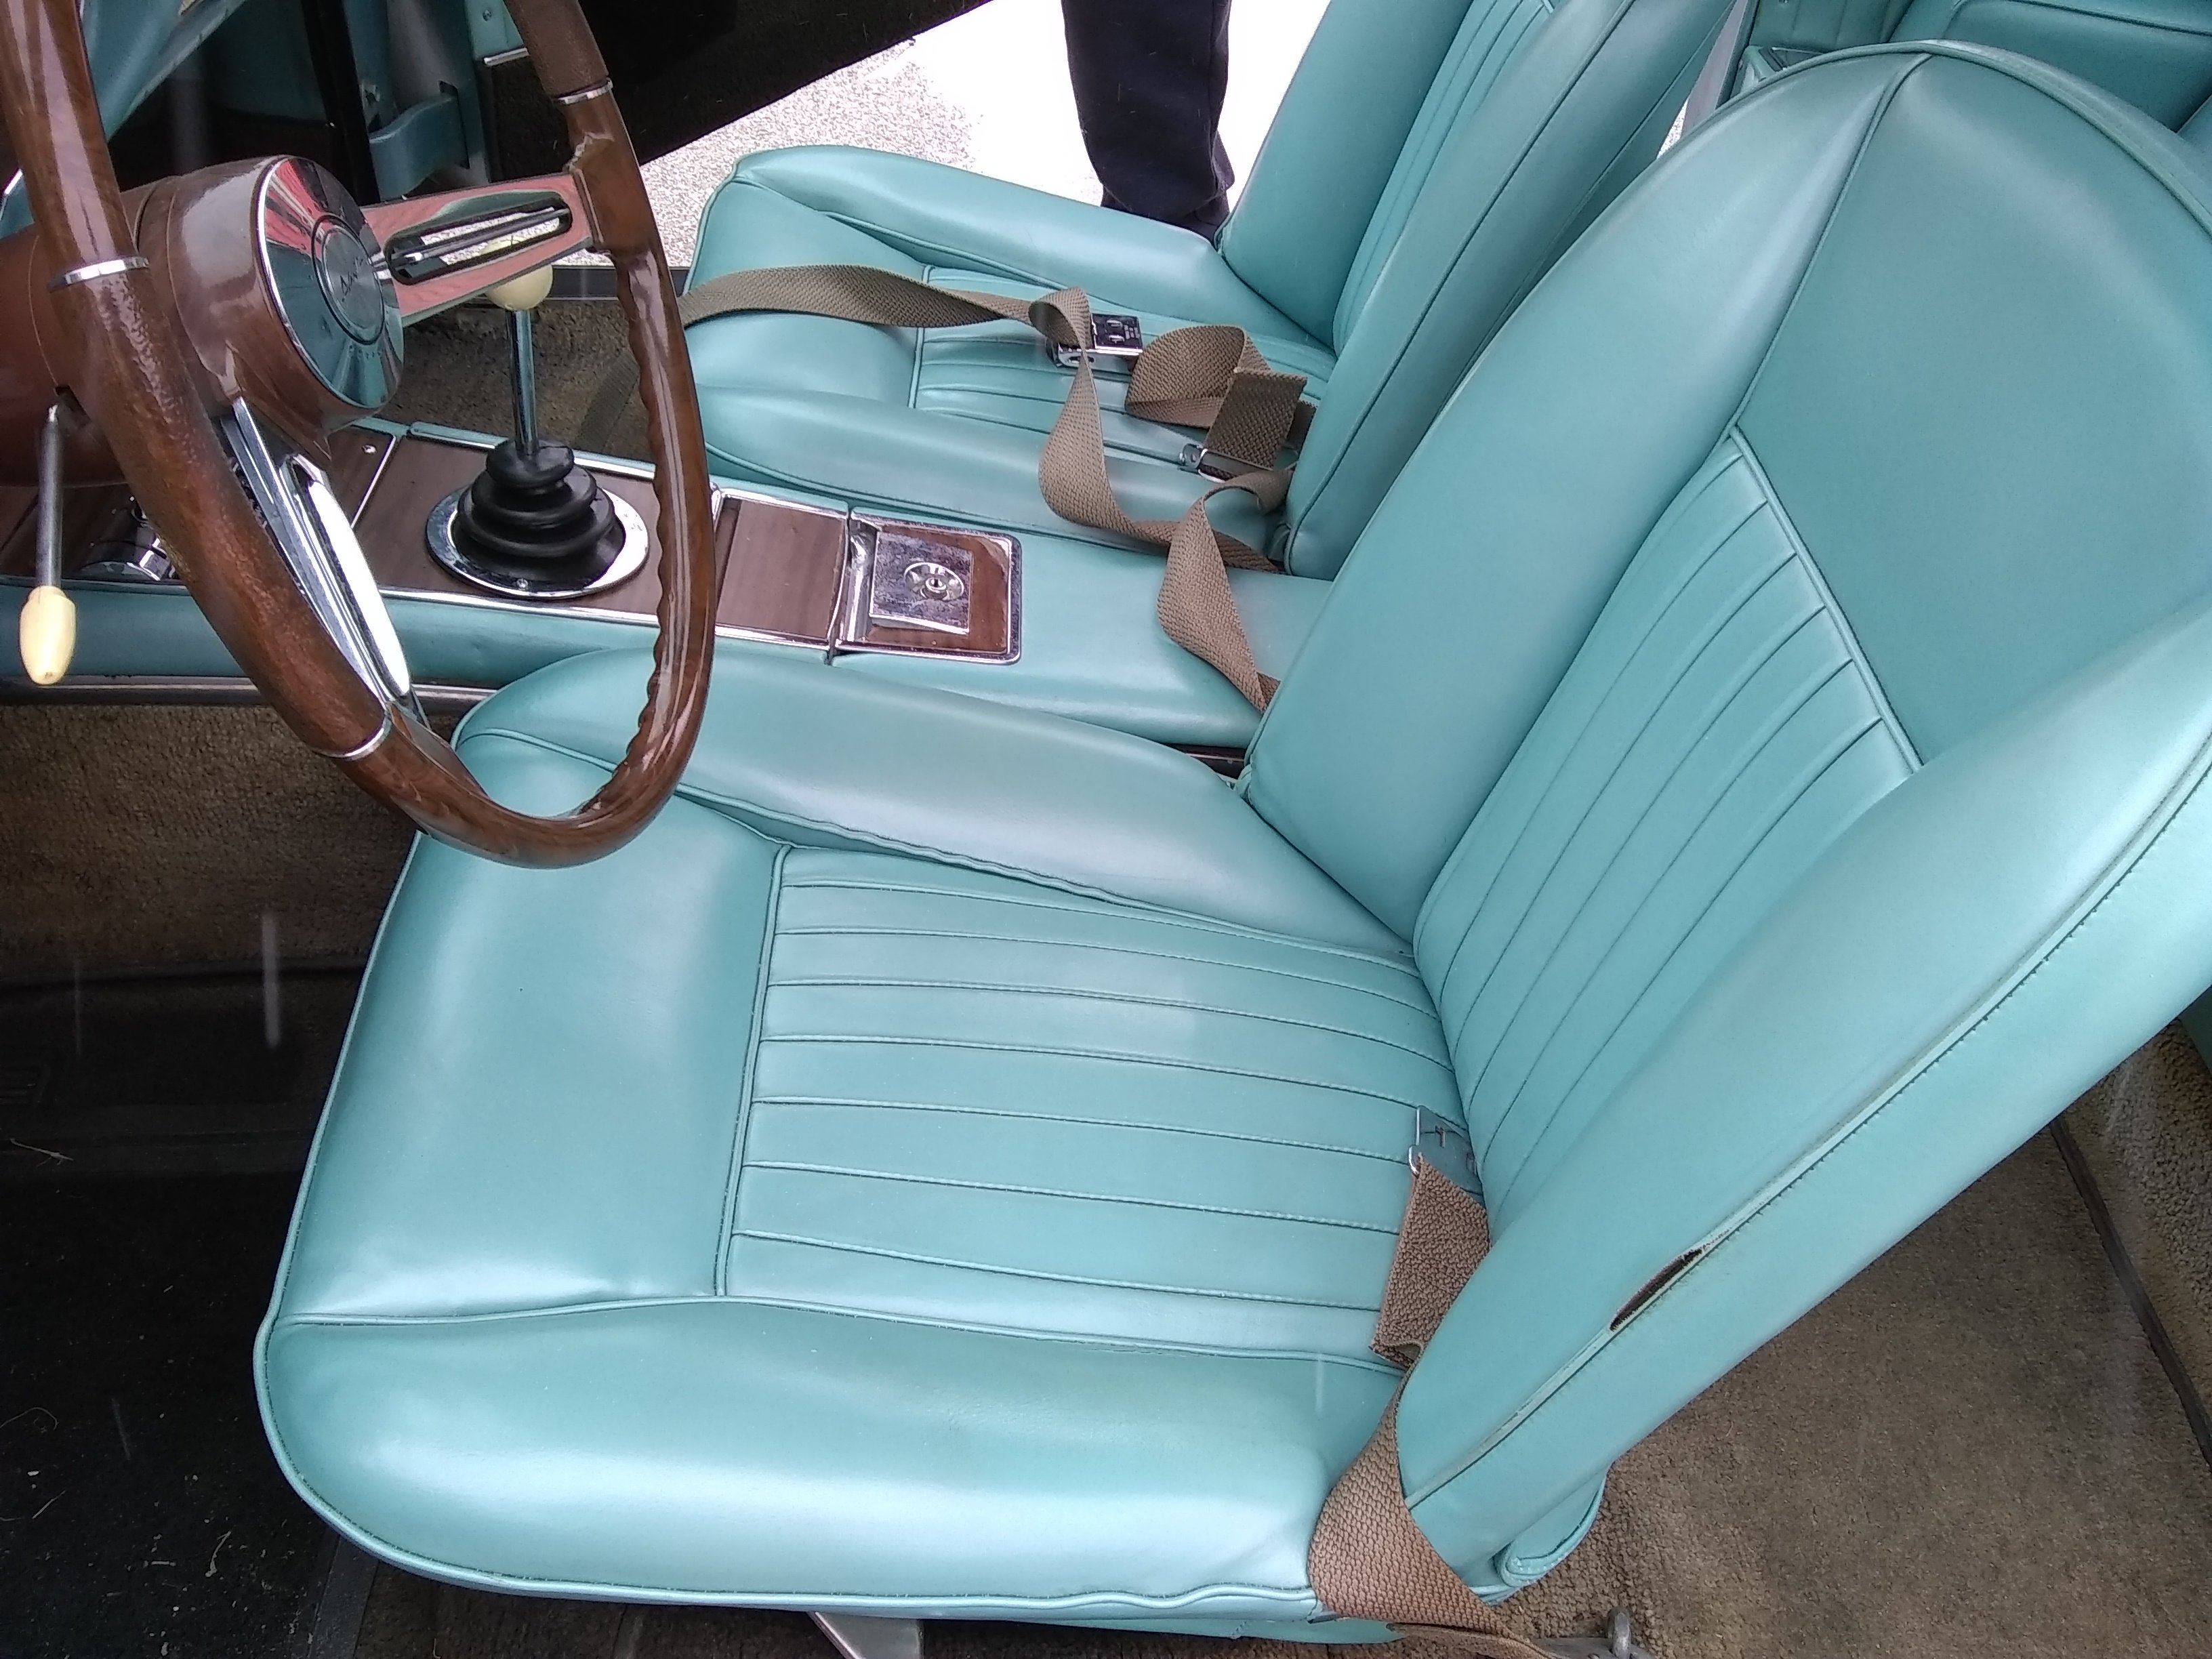
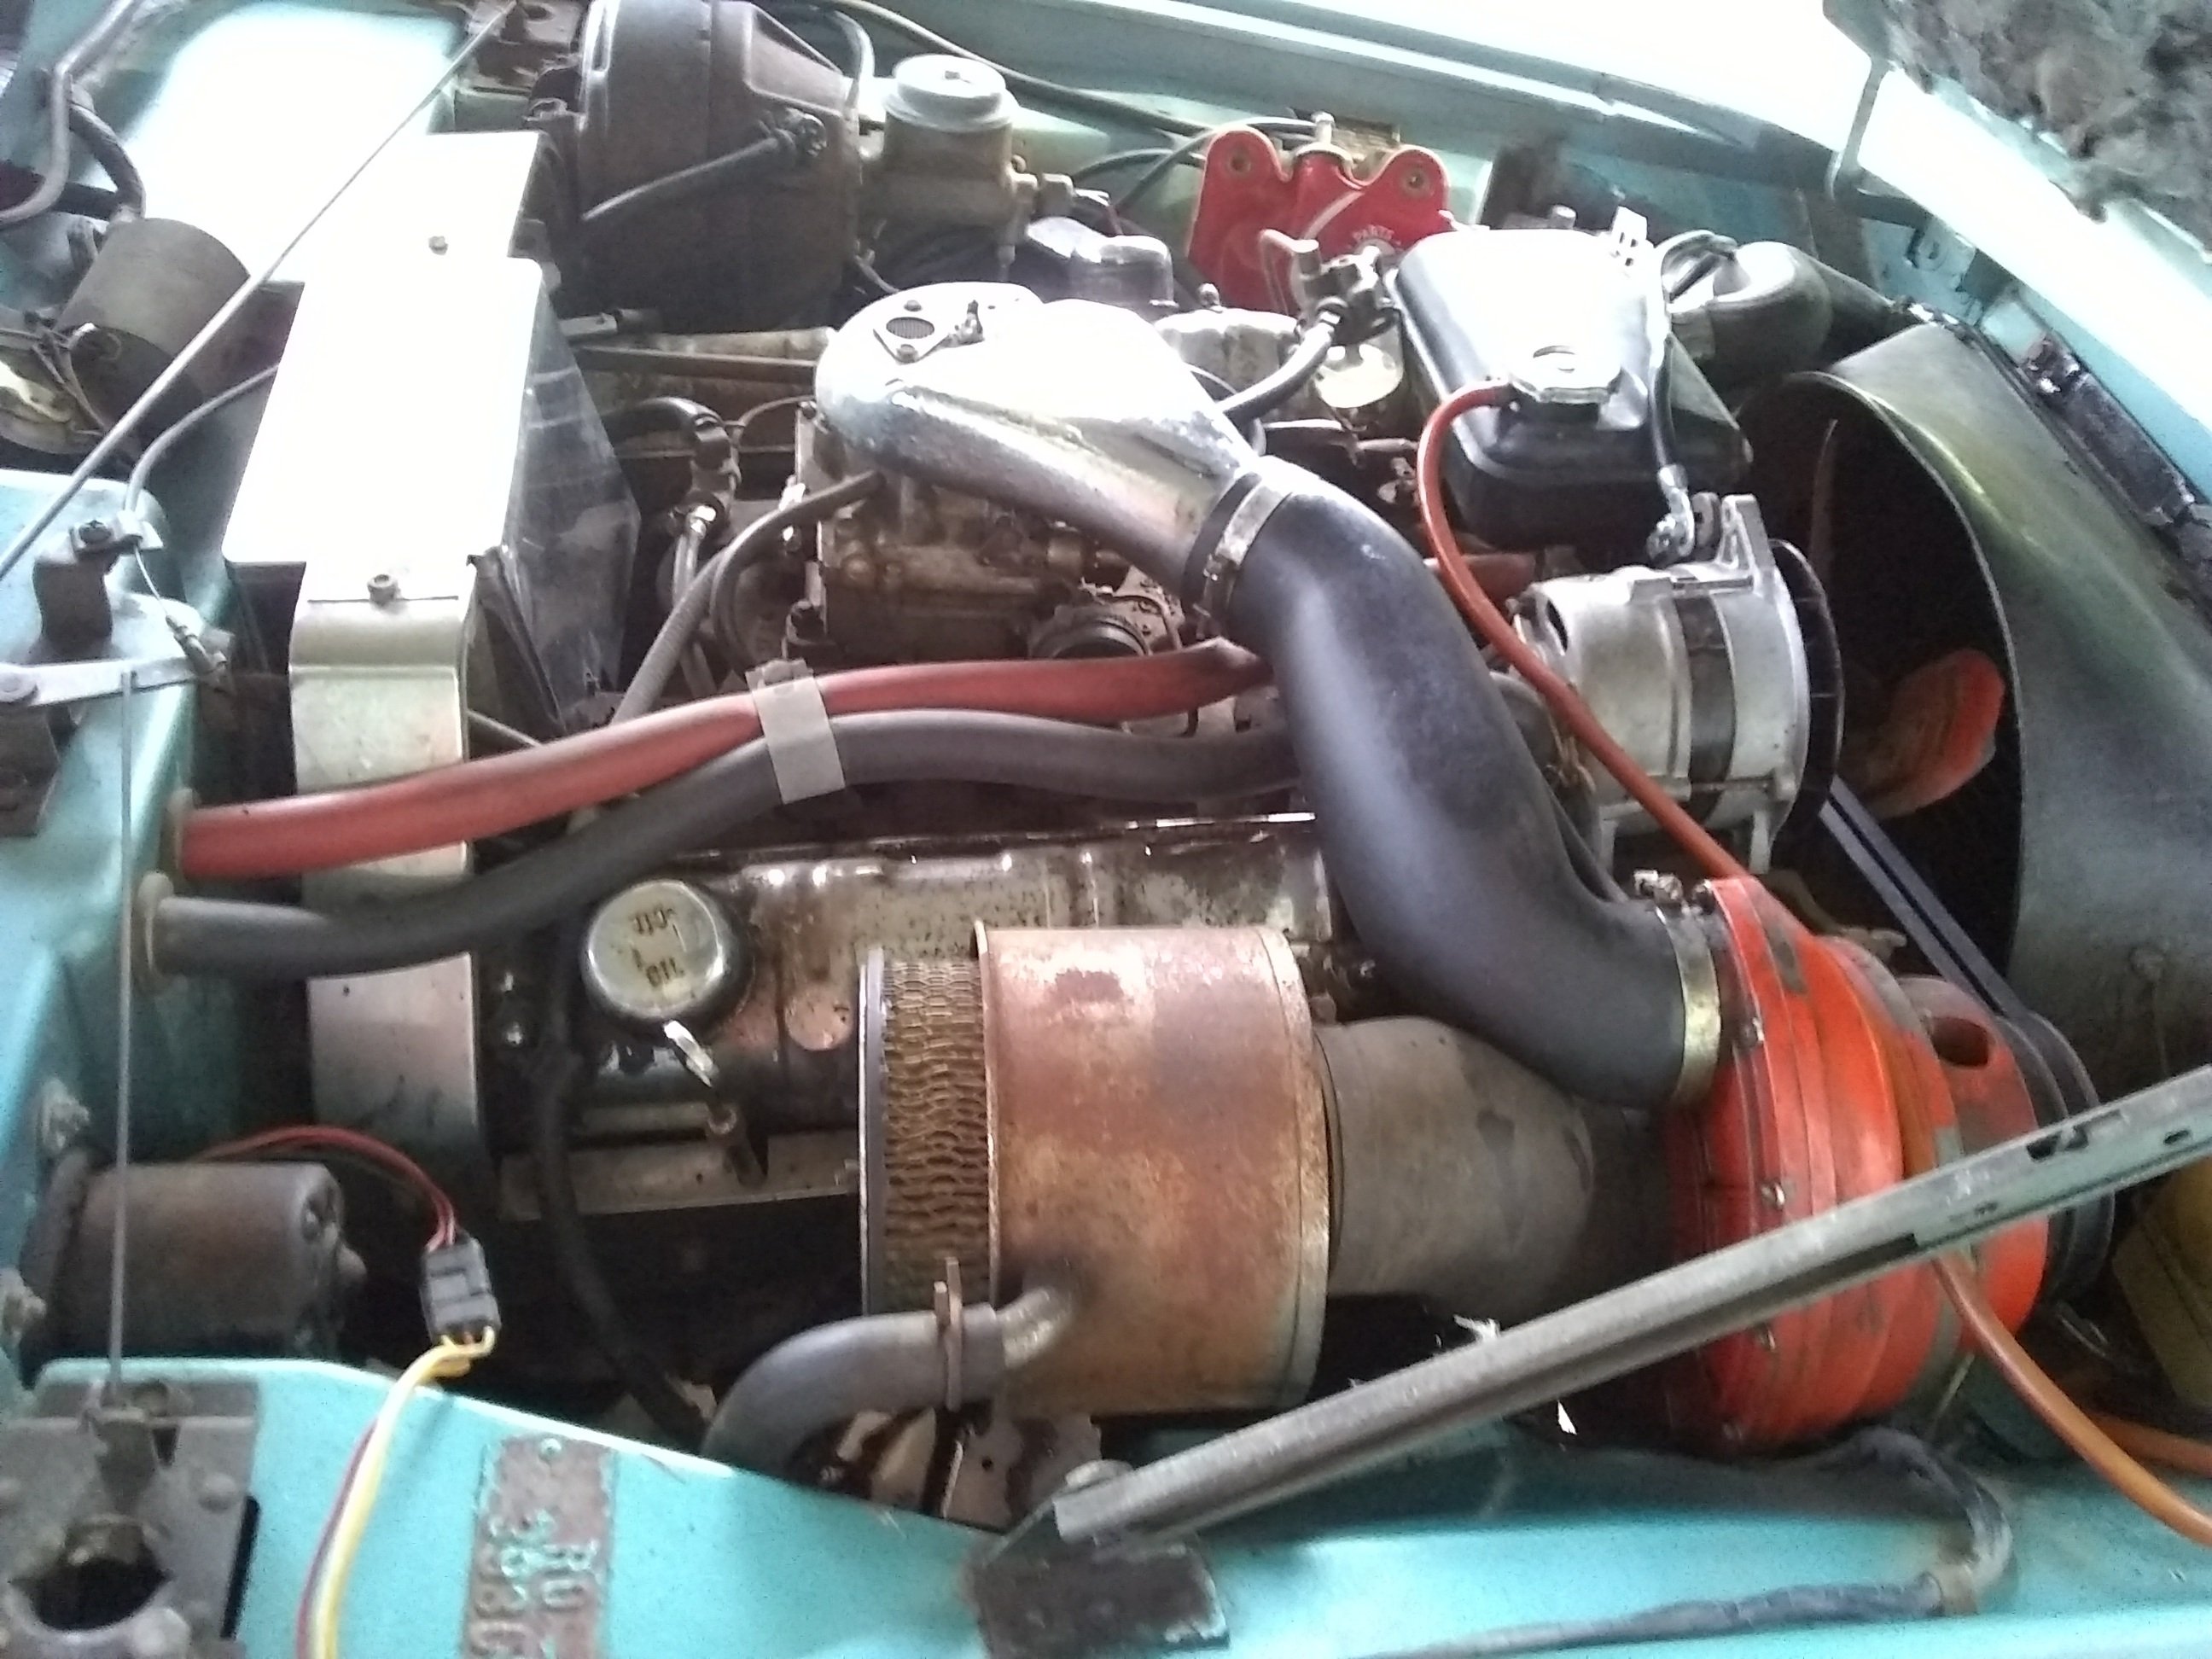
To close out this thread, or maybe to restart it, I'll add that I bought the car in question on Sept. 8, 2018. The car was listed on Cars.com since around Nov. 2017. The seller received many calls about the car, but I'm the only person who went to see it. My wife and I drove 600 miles from Virginia to north of Detroit to see (and buy) the car. While it's not a "barn find," I would call it a "storage unit find." It was in a storage unit since the early to mid-1980s. It came out of storage around May 2017 after the seller inherited it from her cousin. The car was cleaned up and put in driving condition in 2017. It's a low-mileage (43K) turquoise/turquoise 1964 R2 with 4-speed. In addition it has heavy duty springs and 4.09:1 Twin Traction (only 7 '64 R2 4-speed cars had this non-standard rear). It originally had no windshield washer, but an aftermarket washer was added at some point in the past with the washer fluid bag hung on the wrong side (I will be removing it). The turquoise interior is in amazing condition, including the driver seat (except for a small worn spot on the welting, but a roll of original turquoise vinyl came with the car and I do upholstery). Carpets are totally intact but faded and a new carpet set came with the car. Painted and plated surfaces in the engine compartment suffered during its long period of unheated storage, but it's very complete and original (and NOS valve covers came with the car). Exterior paint is original and is 95% pretty nice (a partial quart of Avanti Turquoise lacquer came with the car). The seller was honest on the phone about underside rust issues, which is probably why no one else came to see the car. It will need hog troughs (especially driver side) and rear cross-member (a new cross-member came with the car), as well as some replacement of frame rail bottom plate. I have previously done the latter two repairs (on my '54 Starlight coupe and an earlier Avanti II) and intend to do the hog trough repair myself using the Classic Enterprises hog troughs that don't require fiberglass surgery. I'm excited to get started. From time to time you can count on me asking questions and/or providing updates and more pictures.


-
A month or so ago I was in Border's book store looking at the car books (as usual). I spotted "Keith Martin's Guide to Car Collecting." I picked it up and found a Price Guide in it, so I looked for Studebaker. There were only three Studebakers listed: Avanti R1, Avanti R2, and Avanti II. So far, so good, but no 1953 Starliner, and no other Studebakers at all. But the bad news is that the Avantis, all of them, were given a Grade of "C" and an Appreciation Rating of "**"!! I wondered what these ratings meant so I looked for the key. To my horror, here's what a Grade "C" is:
"Grade C. Cars that have some inherent interest but had few special or desirable characteristics. Examples: Porche 914, Saab Sonnett II, Triumph TR4."
Doesn't sound much like an Avanti to me! And what does an Appreciation Rating of "**" mean? The books says:
"** Somewhat overpriced today, or a car that is slightly out of favor. May represent a good buying opportunity if you think the market’s opinion of the car will change."
Somewhat overpriced??!!! Needless to say, I left the store without buying the book, as it no longer had any credibility with me. But the idea that the Avanti was Grade "C" and Rated "**" just wouldn't stop bugging me. So when in Borders a few days ago, I looked for the book again and found it (nobody else had bought it, either). I noticed in the front of the book an announcement that invited comments and provided an address. So I copied down all the information I would need to write them a letter. Well, I've written the letter--four pages about why the Avanti is so special and why it is far from overpriced in today's classic car market. I also recommended they add the Starliner/Starlight coupe. I asked them to consider the information I'm providing if and when they revise the book for its second edition.
Maybe you'd be interested in what the book says about a Grade "A" car. Here is the definition:
"Grade A. Cars that will always have a following and will always bring strong money when they are offered for sale. They embody the attributes of style, performance, historical significance, rarity, and competition history that often typify first-rank collectibles. Examples: Ferrari SWB, Mercedes Benz 300Sc roadster, Alpha Romeo SC2300 Monza."
Now that's more like it. That's an Avanti!
If you would like to write the author with your opinion (or a "piece of your mind"), their address is:
Keith Martin’s Guide to Car Collecting
P.O. Box 16130
Portland, OR 97292
I also read Keith Martin's biographical sketch in the book and I'm really surprised that a car guy with an impressive background like his would let this happen.
-
I'm not familiar with this clip (yet), but assume that some part of it goes through the floor pan. Have you looked from underneath the car to see what is protruding through the floor pan? Perhaps there is a nut or some springy extensions that need to be squeezed together to release the clip. You might need to remove some undercoating or grease and grime to get a good look at it.
By the way, I noticed your signature block includes "RQ2350." That appears to be the body number found on top of the right inner fender. The real serial number of your car is found on a stainless plate located on the top of the right frame rail. You can see it by opening the hood and looking straight down in front of the heater blower. It may be covered by grease, grime, or even paint. Of course this number should also be on your title or registration. It's the number that Avanti enthusiasts look for, rather than the body number. You might want to change your signature block to include this number.
When you figure out the clip, let us know. Good luck.
-
The "History" section of the new Avanti web site says Avantis were made in Canada! Does their web site writer suffer from the common misconception that Avantis were made in Canada after Studebaker shut down in South Bend, or do they know something we don't know?
-
Thanks, guys. That makes it easy. All I have to do is install them.
Pete
-
Can anyone tell me the proper finish on the front arm rest metal insert plates? These plates are Studebaker part number 1347729 and they are each retained by two screws in the bottom of the hand-hold on the top of the arm rest. I just received NOS plates and they are silver colored. I have a black interior. Should they be left silver, painted black, covered with black vinyl? Should the retaining screws be chrome or black?
Going to the York, PA, swap meet tomorrow and really looking forward to it.
Thanks,
Pete
-
Thanks, James, that is good info. I have a wandering '74 and have wondered about the steering box adjustment for some time. Where is that access hole? In the wheel well? And how do you know when you've tightened the adjusting screw enough, before loosening it 90 degrees?
-
As far as whether you need to do the interior or the weatherstripping first, I think you can take your choice. The weatherstripping is cemented to painted surfaces on the door jambs and doesn't interfere or overlap with upholstery or carpeting in any way, as best I can remember.
Yes, I wondered about another way to replace the outer door to window seal, too. I could not see another way to do it. So I pulled the window out, following the shop manual directions. It really wasn't too bad a job and gave me the opportunity to do a little clean up and lubrication on the window related parts that you would not otherwise have much access to.
Sounds like you're really on the home stretch, with the hard parts behind you. Best of luck.
Pete
-
Earlier in the month I got a '64 Avanti R2 with 4-speed. The shifter had long ago been replaced with Hurst. Right now I'm planning to restore it back to the original appearance by reinstalling the Studebaker boot, boot ring, lever, and shifter ball, while retaining the Hurst linkage and shifter mechanism underneath. I've been able to buy from Studebaker suppliers all the parts except the shift lever. If I can't find one, I hope to make one and have it chrome plated. Here's where I need help. Can anyone give me some dimensions for the original Studebaker Avanti shift lever? First of all, is the stick tapered? In pictures from the period it doesn't look tapered. What is the diameter? (If tapered, what is the diameter at the top, just under the ball, and what is the diameter as low as you can push the boot down without removing it?) What is the length--a measurement from the surface of the console plate to the underside of the ball, with the stick in neutral, would work fine.
On the other hand, if anyone wants to trade a complete Hurst Competition Plus shifter assembly for a complete Stude shifter assembly, I'd be happy to do that, too. The Hurst shift mechanism is stiff right now should be sent to Hurst for their rebuild service, after which it should feel like new (and you know how nice Hurst Competition Plus feels when new).
Thanks for any help.
-
The rectangular opening in the radio faceplate bezel through which the dial and pushbuttons protrude on my '74 Avanti II is 3-5/8" x 1-1/2". This size opening accomodates the Blaupunkt radio which was the original equipment in my Avanti.
-
Here is a picture from my Camaro Z28 seat install:

The measurement I get from the top of the windshields weather stripping BOTTOM
edge to the bottom of the windshields weather stripping TOP edge (glass area) at
the location of the mirror is : 18 1/8"
The mirror bottom of the circular base to the top of the bottom weather stripping is : 2 9/16"
The mirror top of the circular base to the bottom of the top weather stripping is : 14 3/8"
These are all approx OUTSIDE dimensions.
Tom
Great! Thank you, Tom. That will do it. Just have to get some of the special windshield mirror glue.
Pete
-
I'll measure the distance on my car this weekend. The glass and mirror are original.
Okay, thanks, I would really appreciate that.
-
My '64 Avanti came missing the inside rear view mirror. I now have all the parts to reinstall one, but need a measurement to locate it correctly. Can someone with a '63 or early '64 Avanti that has the small mirror in the original location down near the bottom of the windshield, give me the measurement on the outside of the windshield from the top edge of the windshield weatherstripping to the bottom edge of the mirror mount? I realize the mirror won't really doesn't provide a good view out the back from this location, but I want it to be right. Thanks in advance for any help.
-
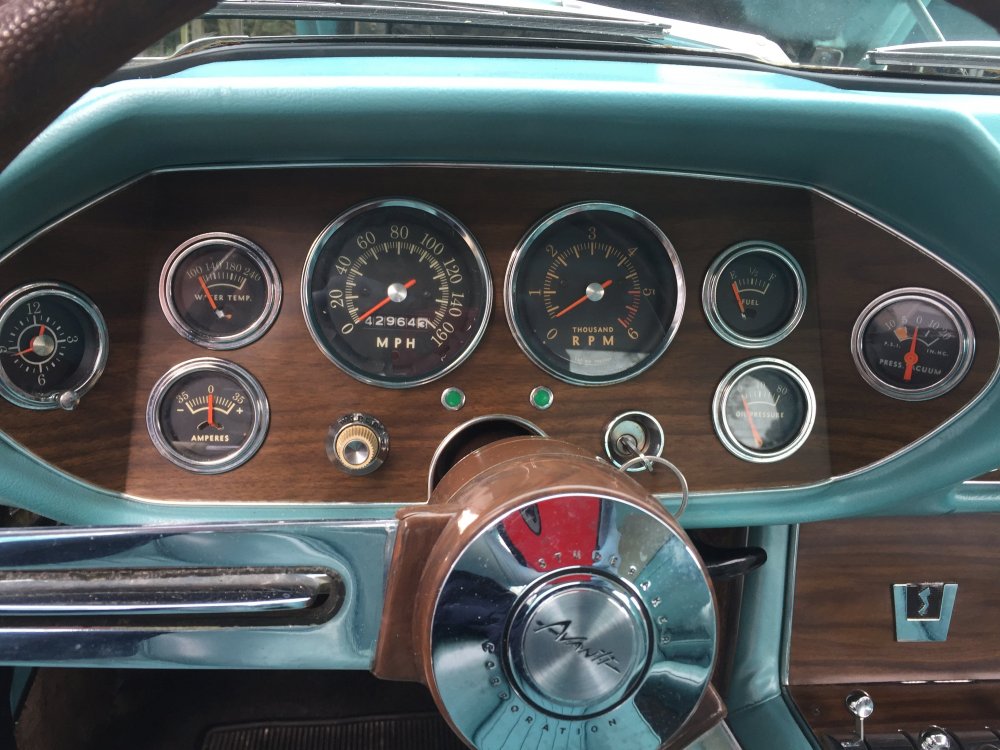
Picked up a copy of the February 2007 issue of Hemmings Motor News yesterday and much to my surprise found an article about the Avanti. It's on page 66 and is presented as an article on dashboard design. It's a very complimentary one-page article with two pictures. One is a front-side view of a square headlight '64 R2 and the other is a picture of an Avanti dashboard and steering wheel (possibly from the same car). The dash has the Tenite walnut grain covering, the steering wheel is walnut grain, there is no A/C, and the transmission is automatic. It's a nice article and good to see it in a publication as well circulated and respected as Hemmings Motor News.
-
The video that people refer to in this thread might be the "Avanti Video" available in DVD from the Studebaker National Museum for $13.95 plus S&H ($4.00 cheaper in VHS). Might also be "Five Weeks in the Desert: The Birth of the Avanti Video," for $24.95 plus S&H ($5.00 cheaper in VHS). I can't be sure because I don't have these...yet.


WANTED: Part for R2 carburetor
in Avanti Parts
Posted
Yesterday I removed my carb to rebuild it and found that it was cracked (significantly) at two of the four corner mounting pads (see pictures). So I need to replace the main body (the lower 2/3 of the carb that includes the fuel bowls) of a 3588S Carter AFB for an Avanti R2. I don't need the upper part of the carb that has the plate with the text about it being an Avanti carb. I am more than willing to pay a fair price.
Thanks,
Pete