


Pete Rutledge
-
Posts
56 -
Joined
-
Last visited
Content Type
Profiles
Forums
Events
Posts posted by Pete Rutledge
-
-
Okay, that would be fine. Let me know when you would be able to come. I will send you my address and contact info by PM.
-
Hi Bobcat,
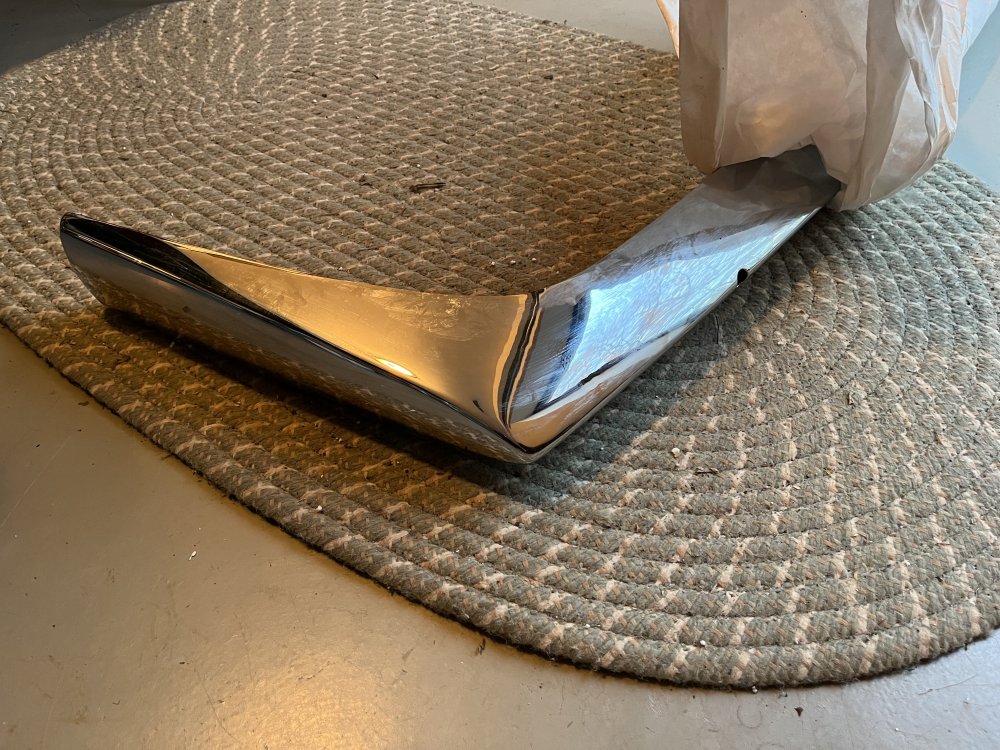
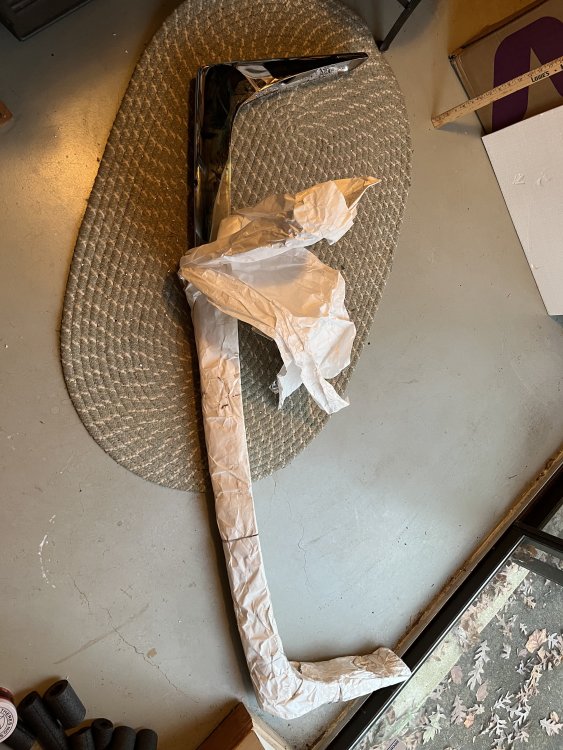
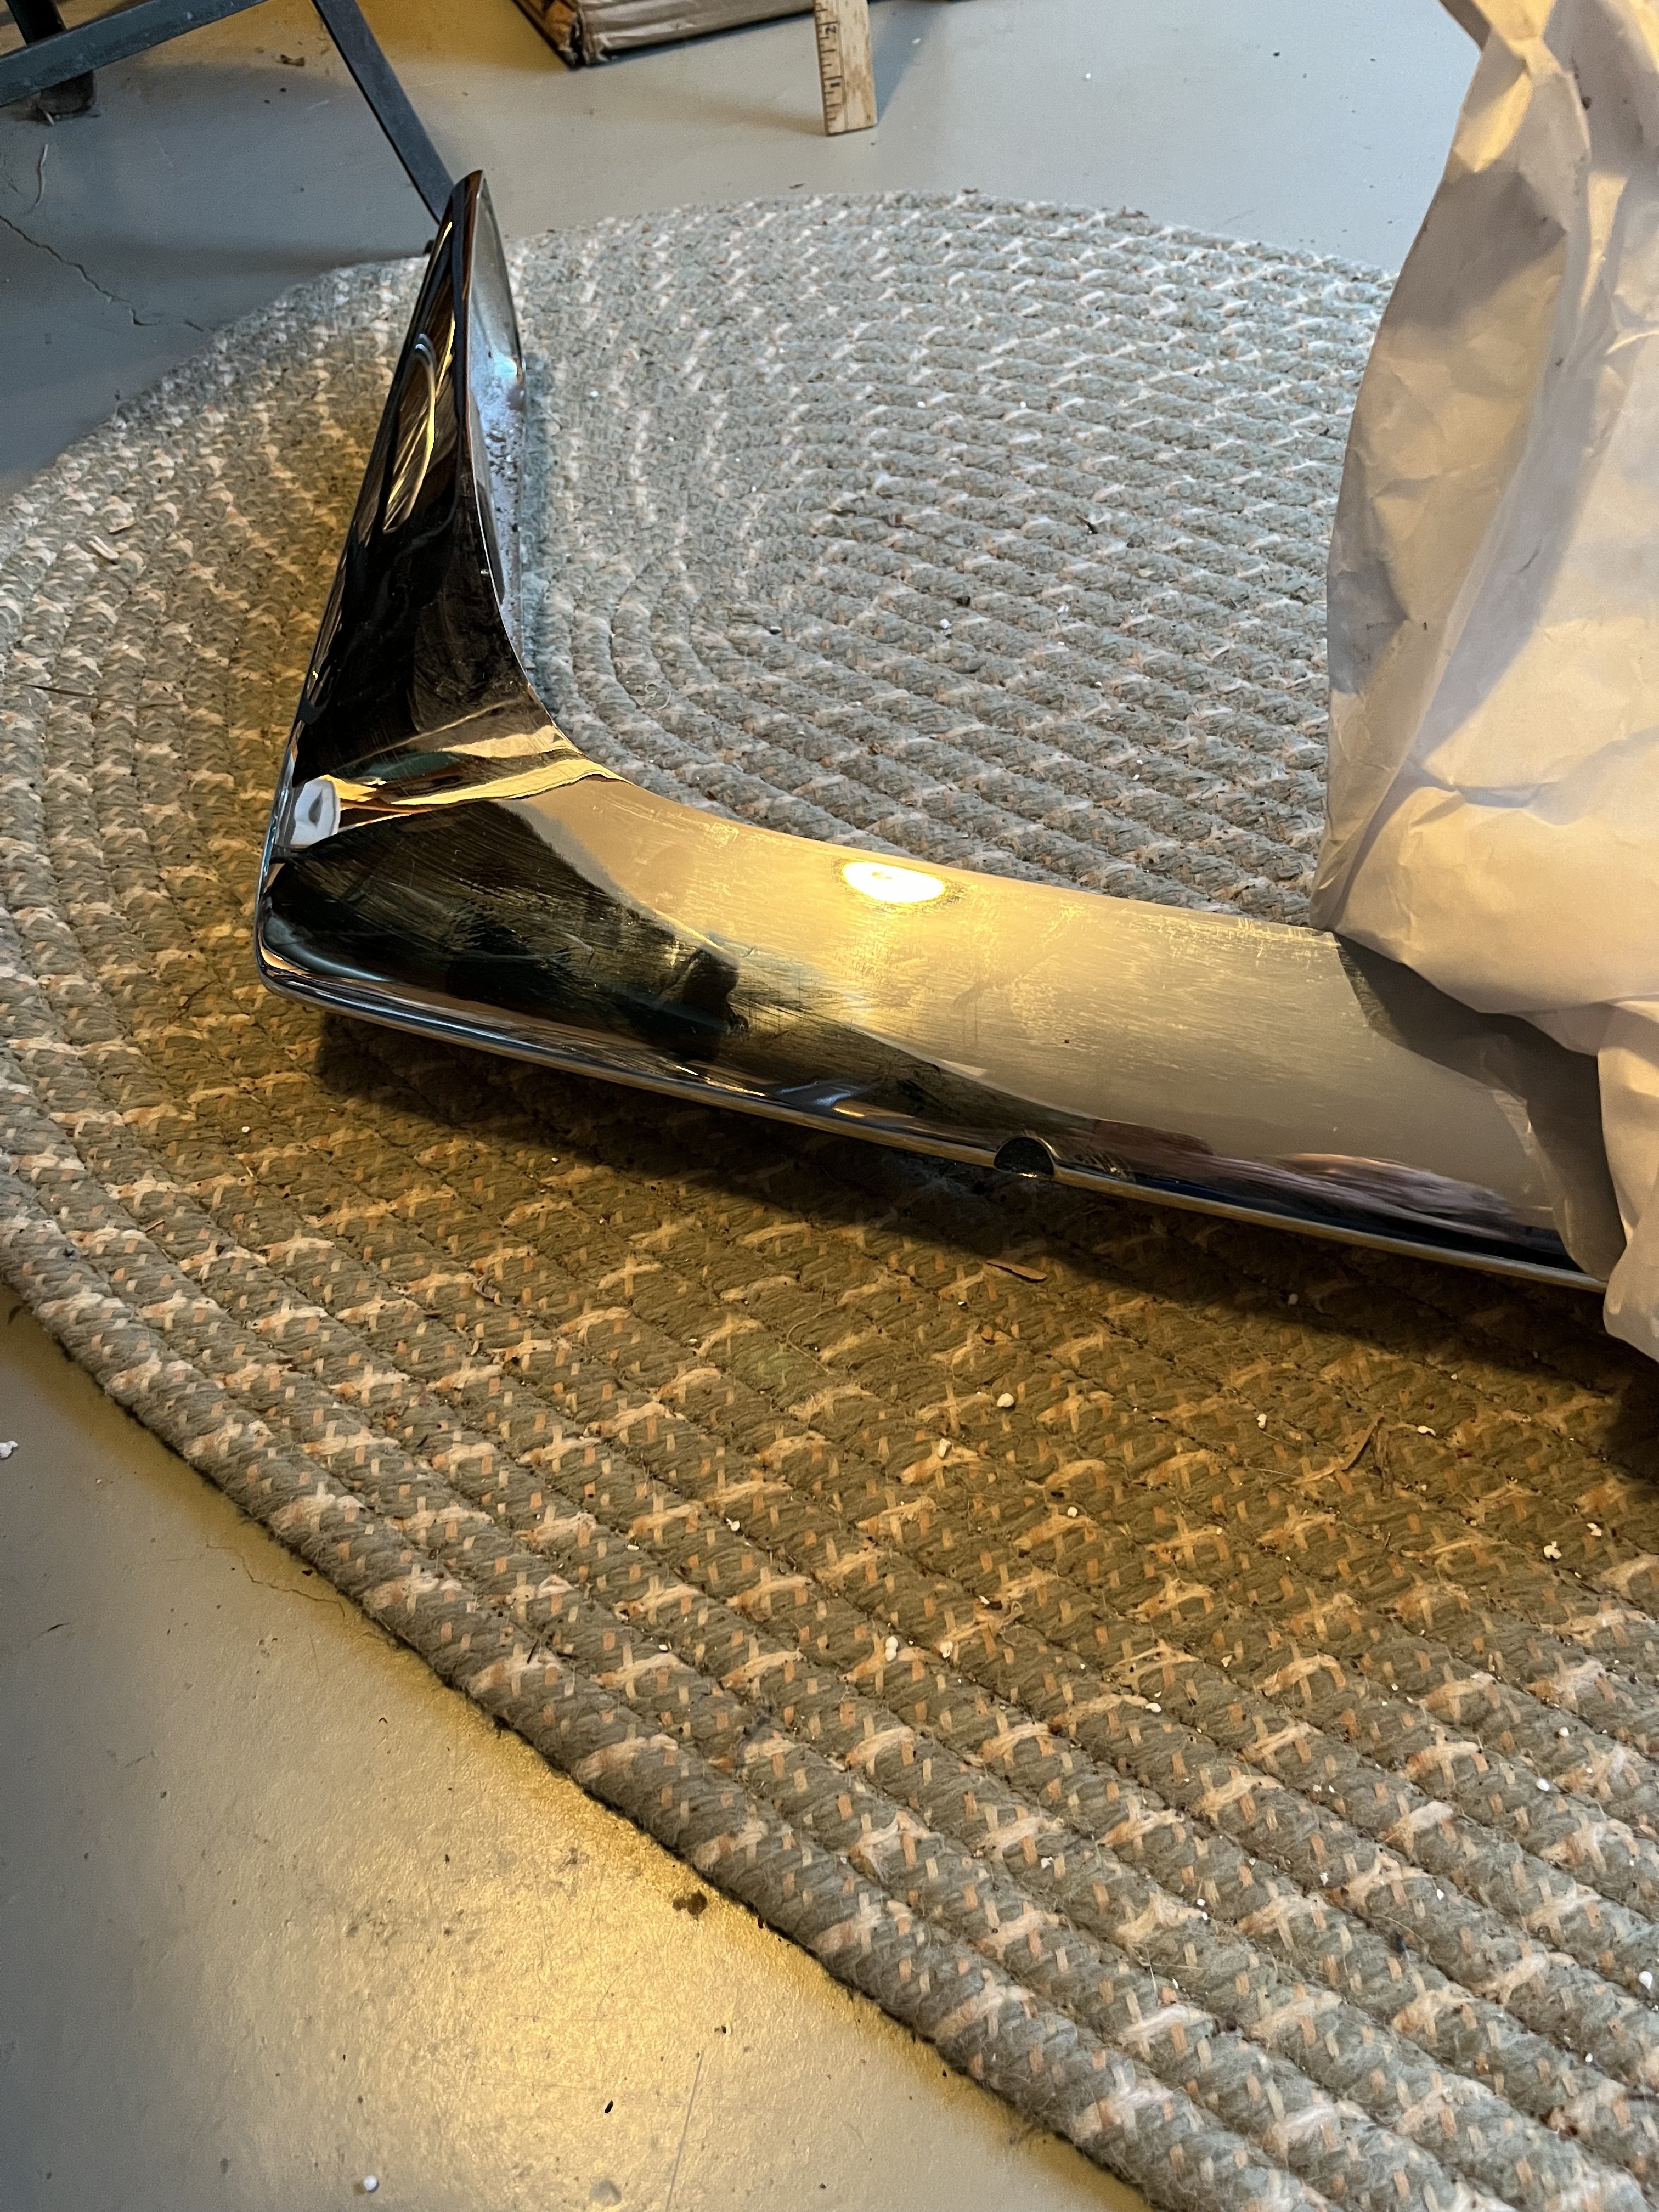
Here are some pix. If you need more or better pix, let me know. The surface doesn't look shiny in places because I applied a coat of Butcher's wax to the bumper to protect it while in storage in my basement.
Thanks,
Pete


-
The bumper is still available.
-
Price is now lowered to $400.
-
Price is now lowered to $450.
-
Bumper is still available. I'm sorry for not seeing your replies until now.
-
I bought this re-chromed bumper about 4 years ago at Reedsville, PA. It was intended for my '64 Avanti. Because of the paper covering most of the bumper, I didn't realize it had the holes for the rubber bumperettes used on the '72-83 Avanti II (I'm not sure the vendor was honest in selling it to me, either -- I told him what it was for). It's been stored in my house since that time. I coated the bumper with Butcher's Wax to protect the chrome (that's why it doesn't look perfectly shiny in the pix). The chrome plating is excellent. But I can't use it. I paid $600. Asking $500. My loss can be your gain. I don't really want to ship it; if you're not too far away, I might be able to meet you part way. If interested, please message me.

-
If any of you have been looking high and low for the reproduction Halibrand wheels of the type that were a dealer installed option on Studebakers in the 1963-64 timeframe, which were previously available from Real Rodders Wheels in CA, they are available again, at long last, after having been sold out and unavailable for at least 4 years. My set of four wheels and spinners is arriving next week; I was on their waiting list for 3 years and 4 months.
If you wish to order, the wheels are $369 each ($1476 for a set of 4); a set of 4 matching reproduction Halibrand spinners is $275. To order, call Pat O’Brien at Real Rodders Wheels, at 805-402-2212.
I am only providing this heads up as a courtesy to AOAI Forum members. I have nothing to gain by promoting these wheels.
-
No, it does not. It has nothing on body numbers.
-
I do. Do you want me to check something for you?
-
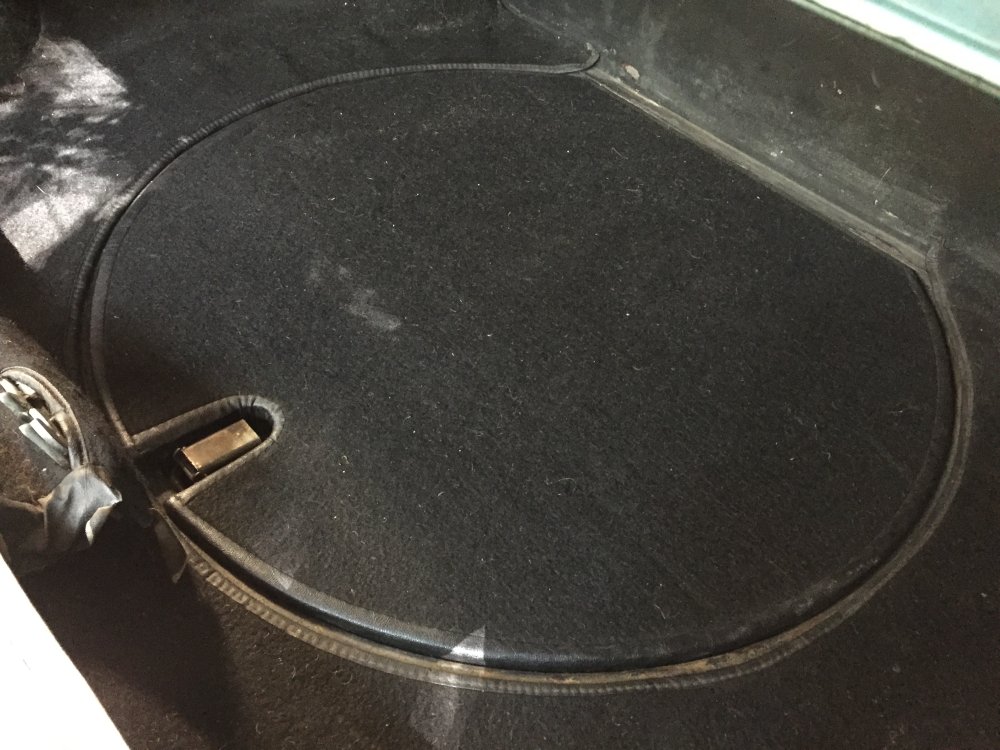
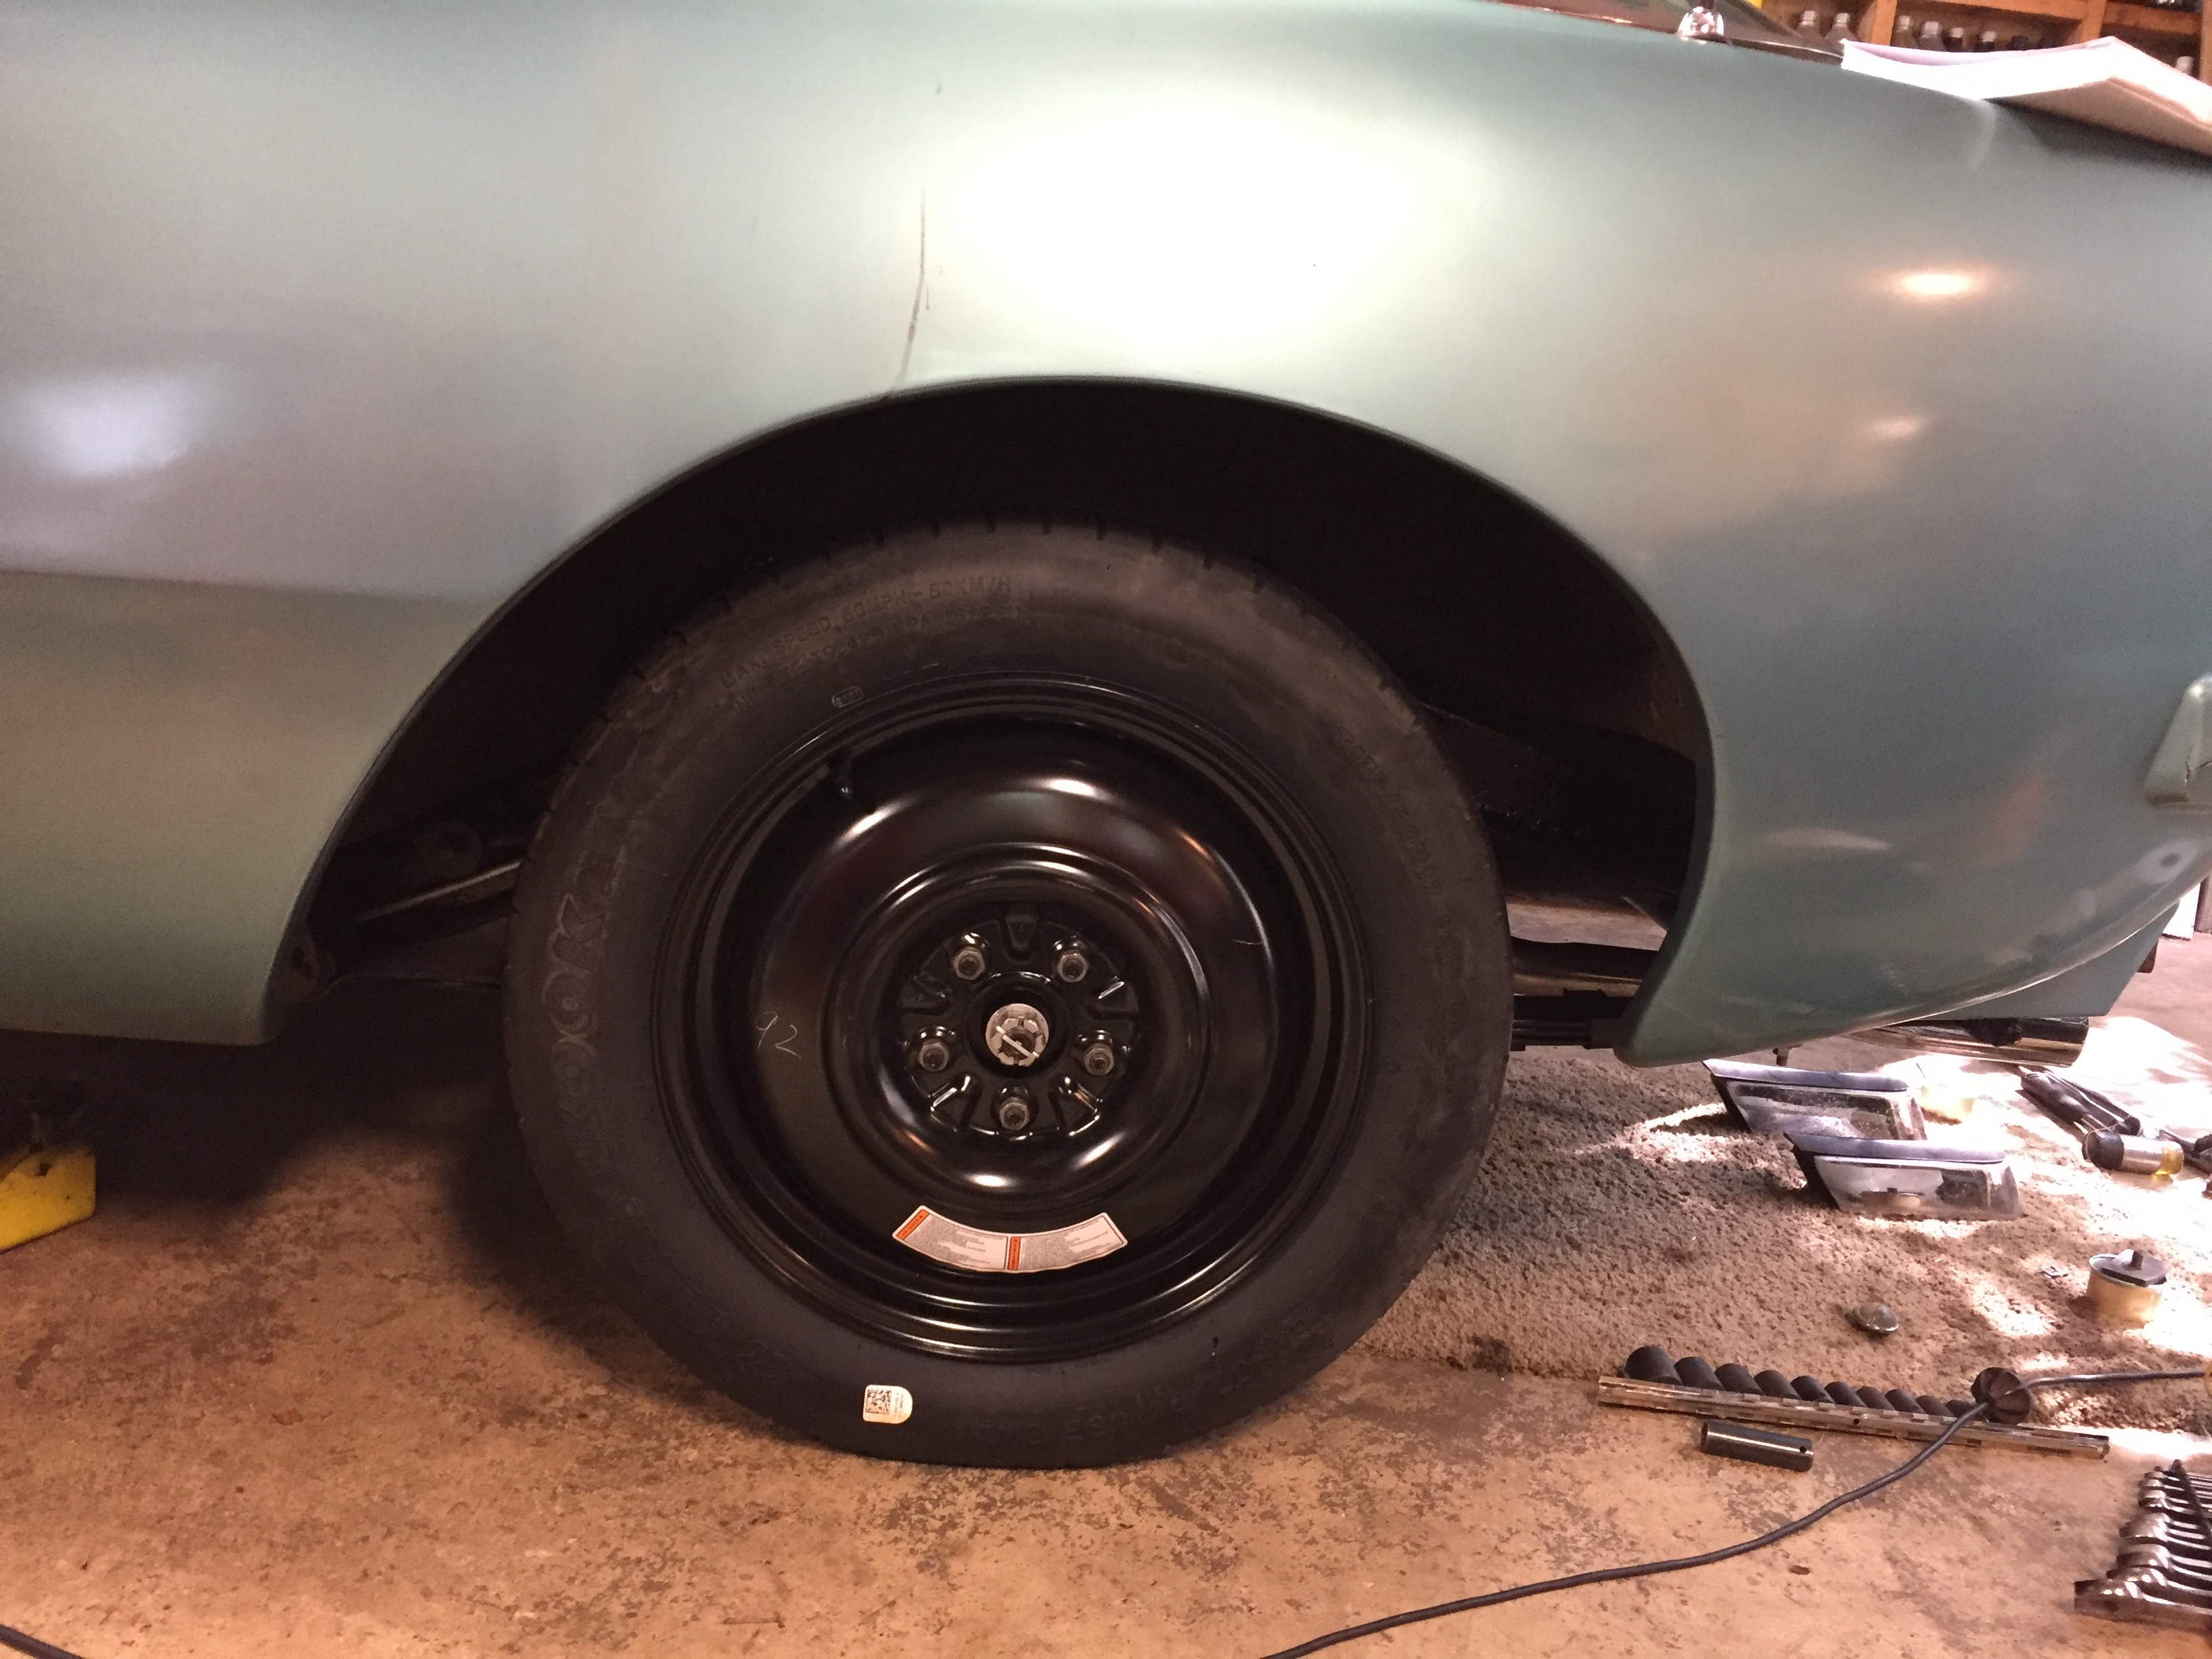
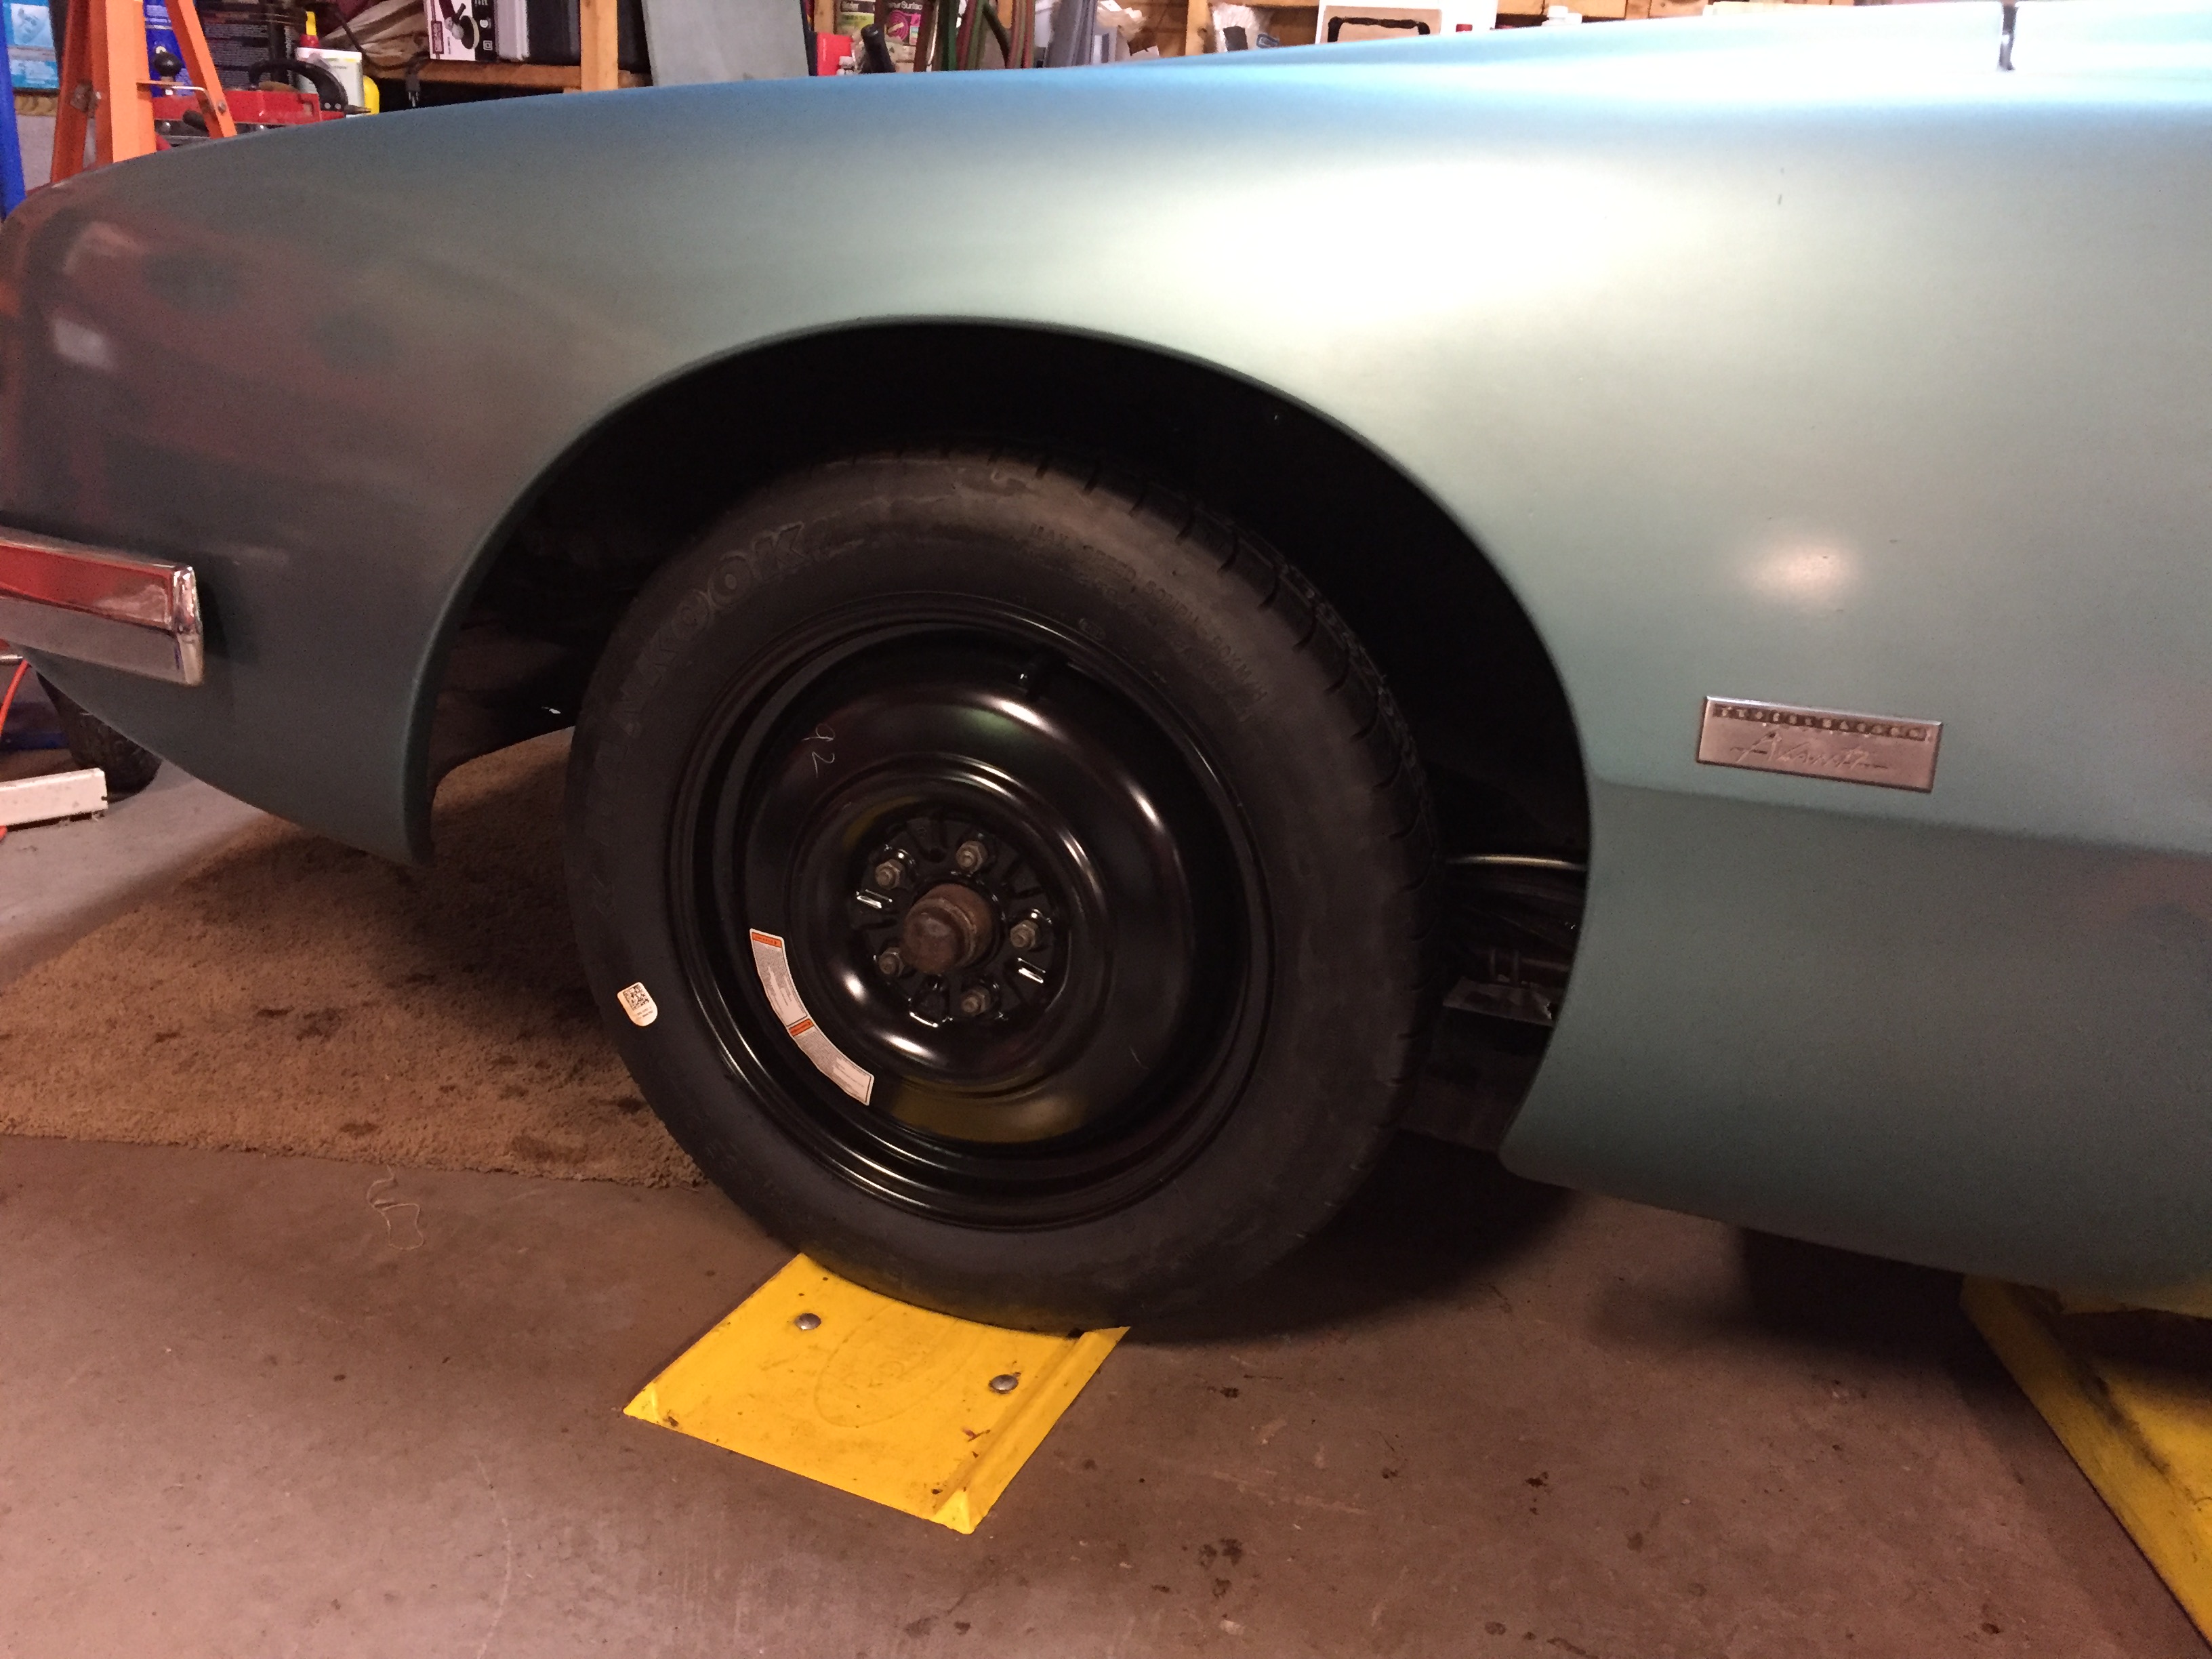
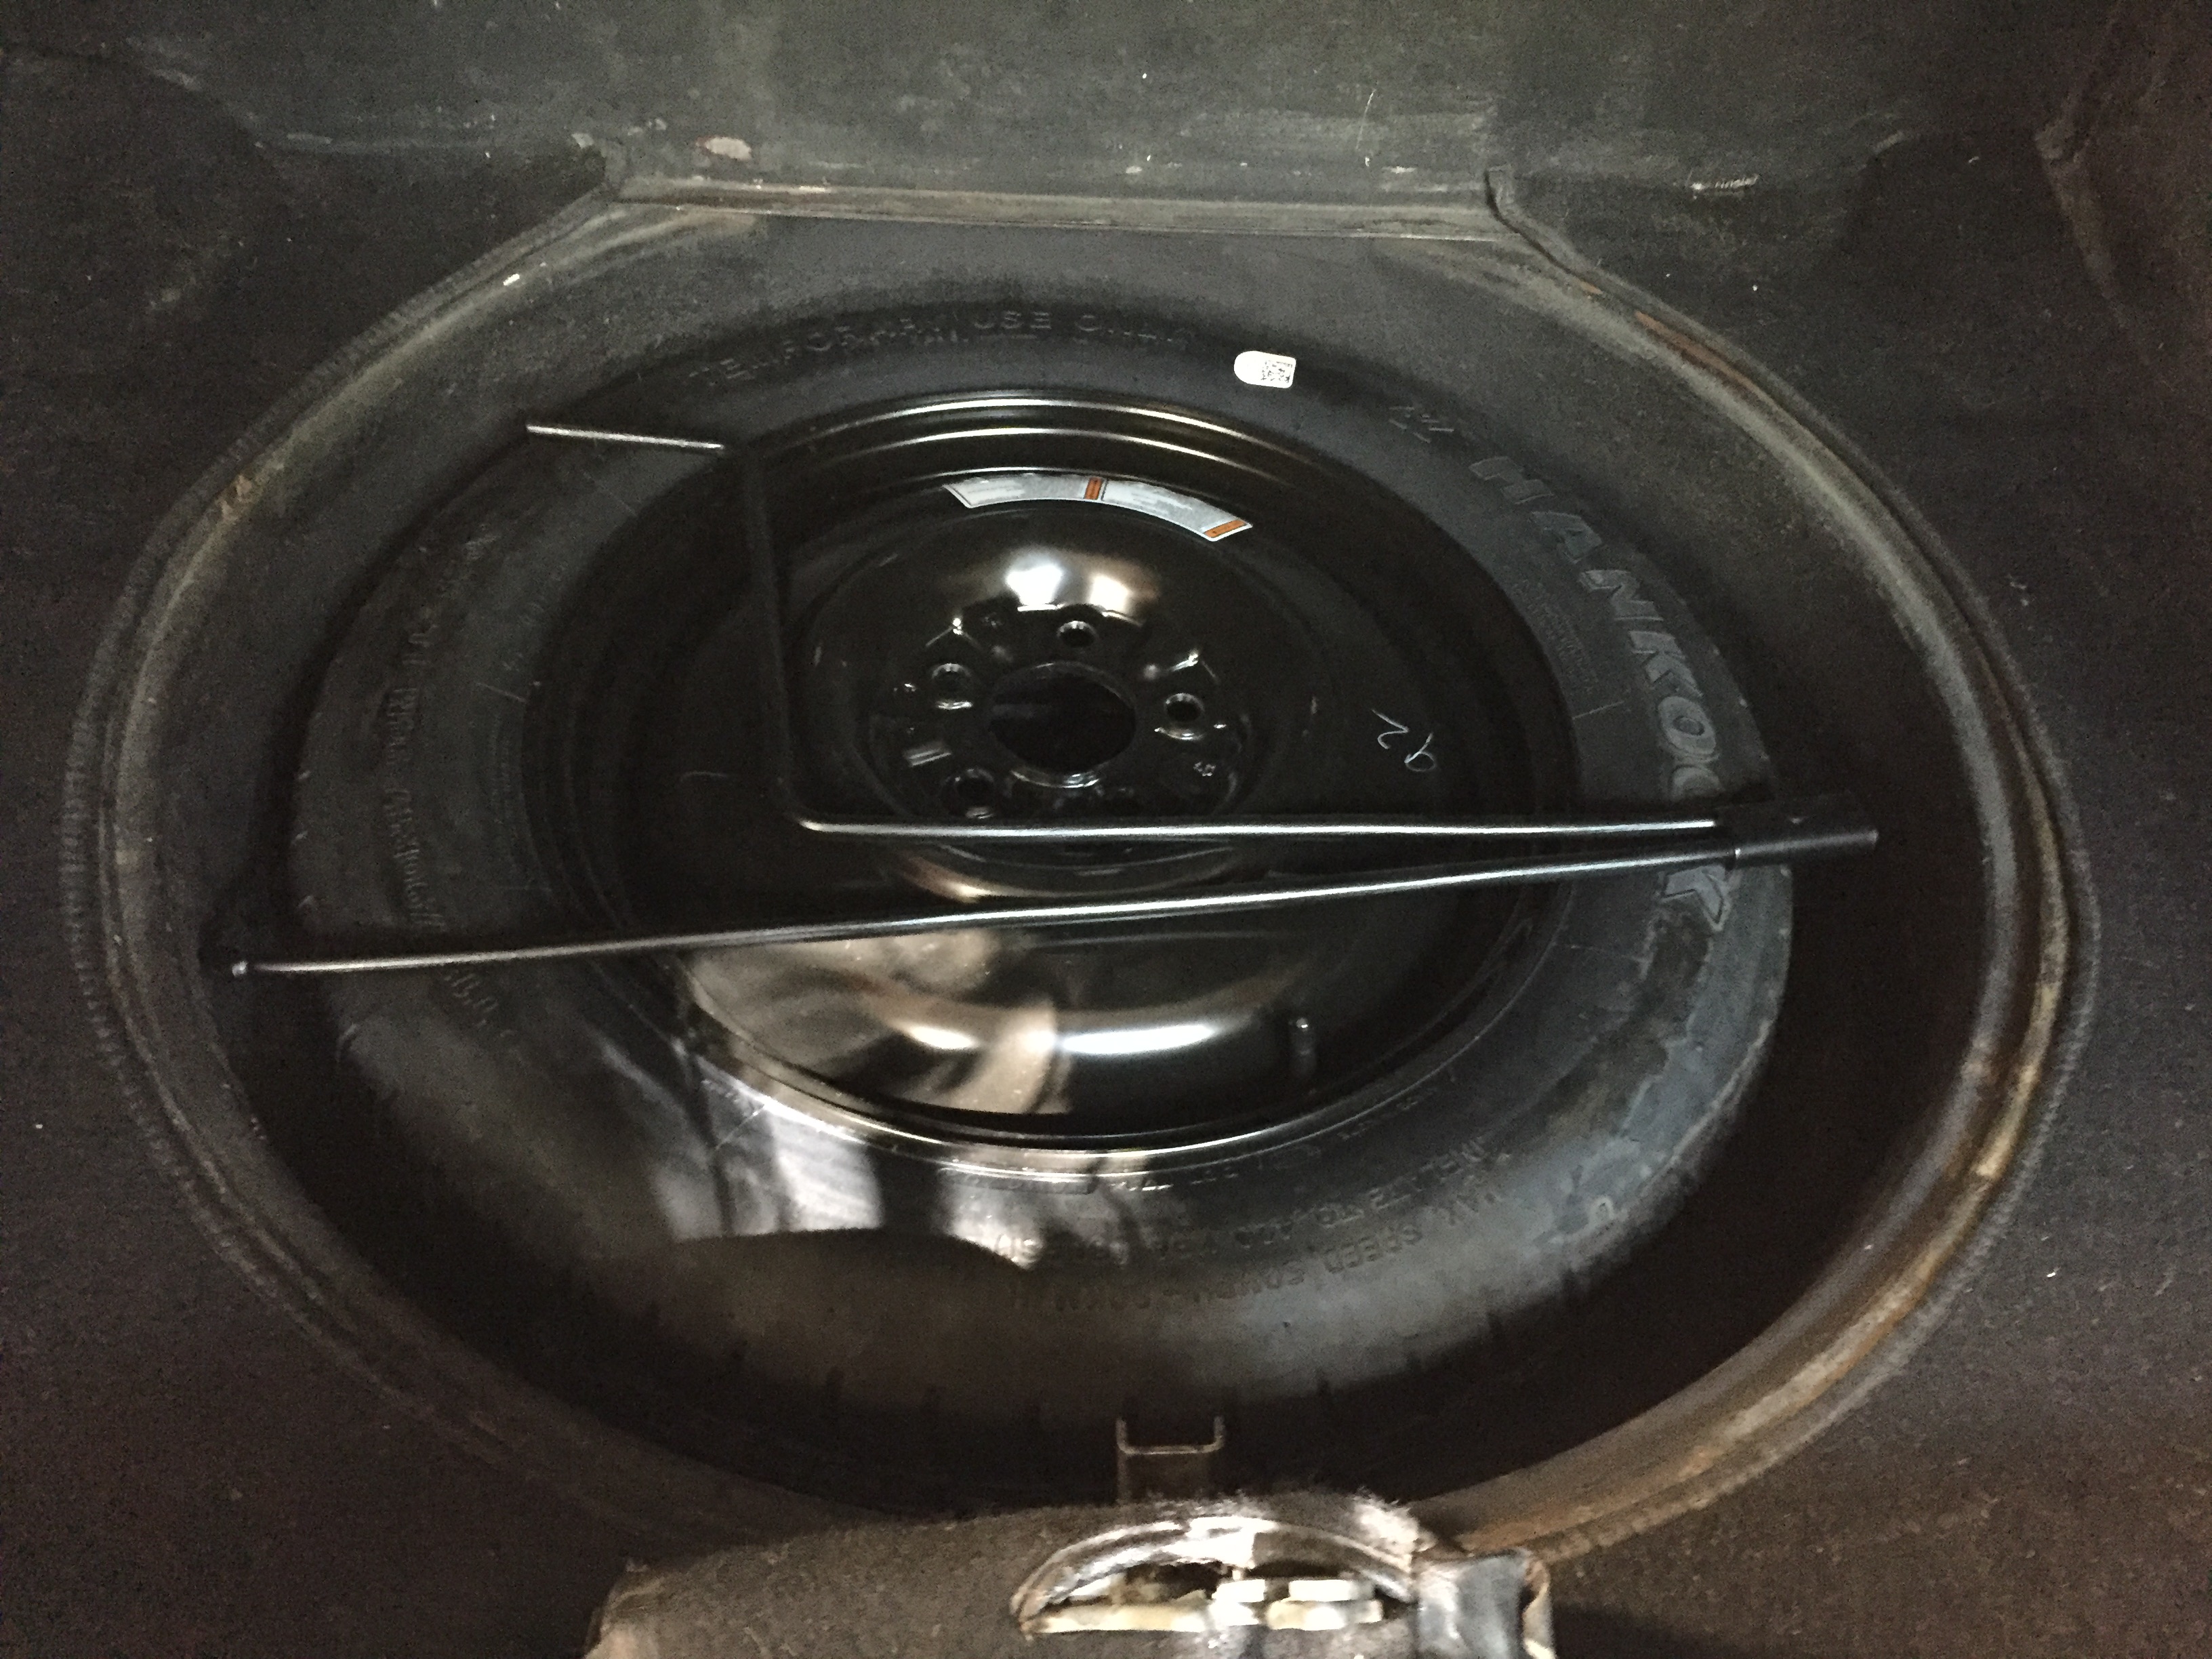
A couple of years ago I read the post on this forum that said the temporary spare tire (doughnut) from the '02-'12 Ford Escape had the same bolt pattern as the Avanti. The fellow who posted was going to use one for his Avanti II. Well, that was news to me because up to that point I wasn't aware of any such spare tires newer than '99 that would fit the Studebaker bolt pattern, let alone something as new as 2012. So I took a chance. I found a nice spare on eBay that was listed for '01-'04 Escape (so there is some discrepancy about which years are right, but '02-'04 were common to both the Avanti forum post and the eBay listing) and it was only $55 delivered to my door from a salvage yard in Wisconsin. It arrived quickly. It still had factory stenciled letters and numbers on the tread so I'm sure it had never been on the road. It was like brand new. I washed it and dried it and then tried it on the front and on the rear of the Avanti. It fit perfectly with plenty of clearance and no interference with anything. Its size is T135/90R17. It's even the same outside diameter (26.5") as the tires currently on the car. Then I removed my existing spare (which will only allow the spare tire lid to close if you let the air out of the tire (yeah, that's what we need--a spare with no air). With the jack and lug wrench on the floor of the well where they belong, I put the new spare in the well. It was a perfect fit. Then I put the jack handle on top of the spare with a towel to protect the wheel and the lid from the handle. The spare tire cover fit beautifully in its recess, allowing the lid latch to work like it's supposed to.


-
Don't use the web site. Just call them and if you need engine rebuilding parts, ask to talk to Jon. He knows what he's doing.
-
Jon Meyer has everything you will need, including hypereutectic pistons made in the USA. I finished rebuilding my R2 289 this past year after getting all my engine parts from Jon.
-
A few years ago, in anticipation of more wheels becoming available from Real Rodders, I purchased a set of spinners from Jon Meyer. I assume these will fit the wheels Tom is producing. Please correct me if I am wrong.
And thanks for the update. I'm ready to order when you are ready to take orders.
-
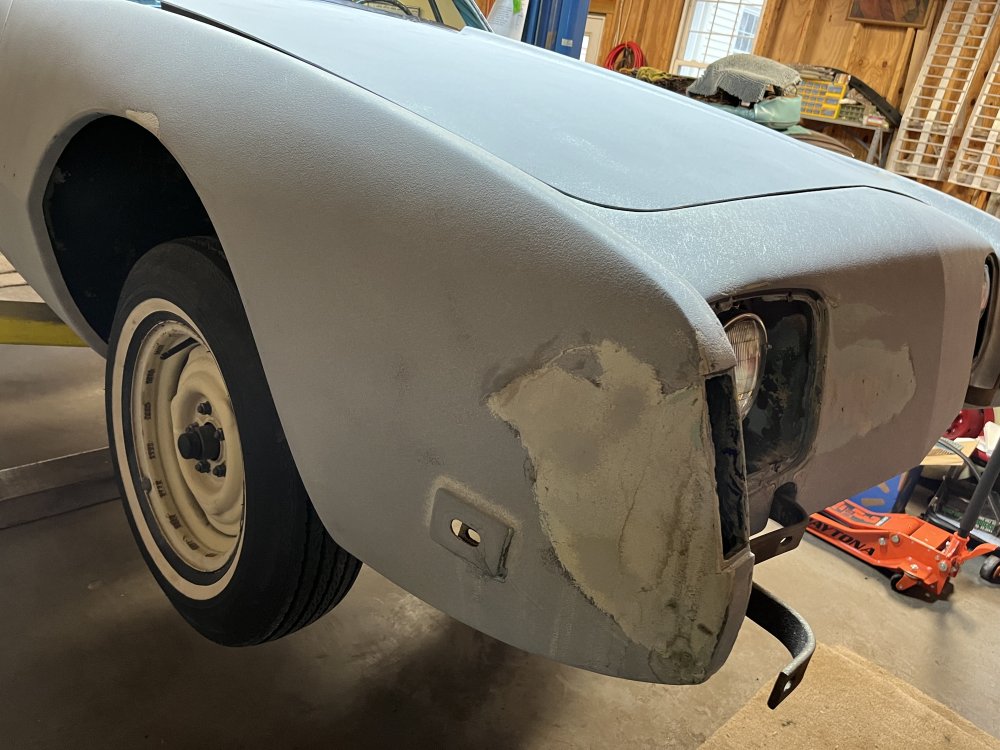
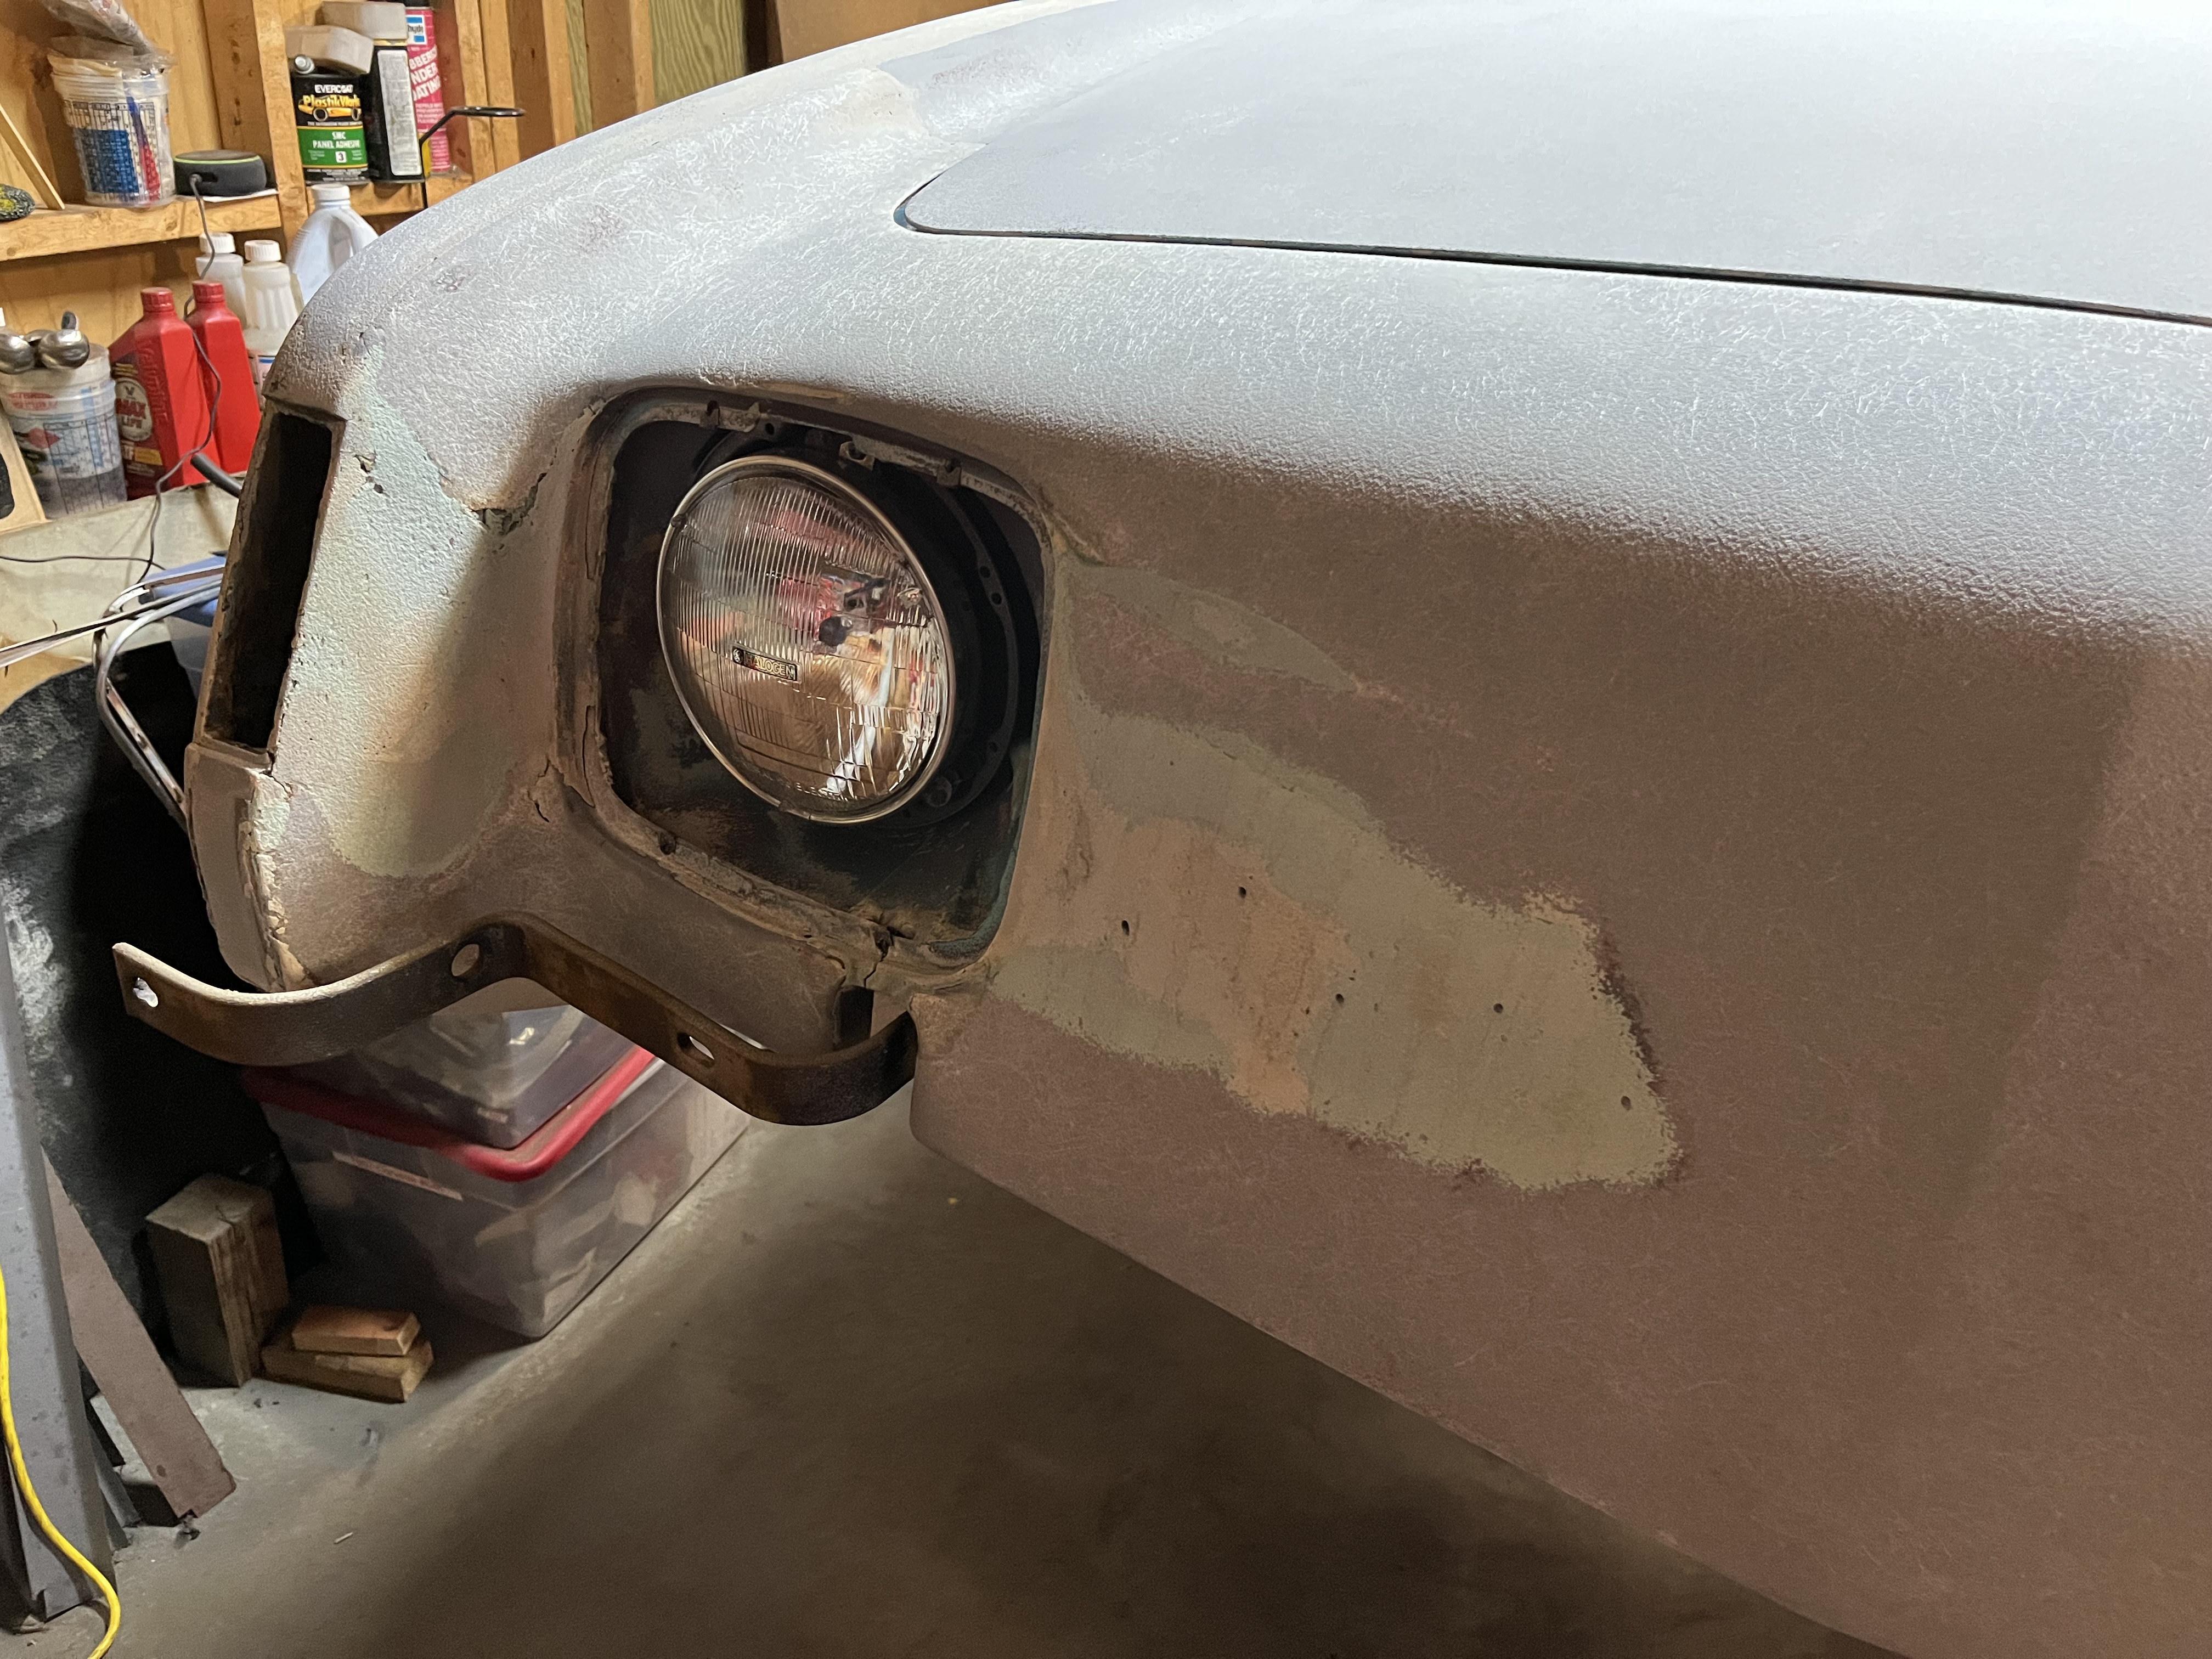
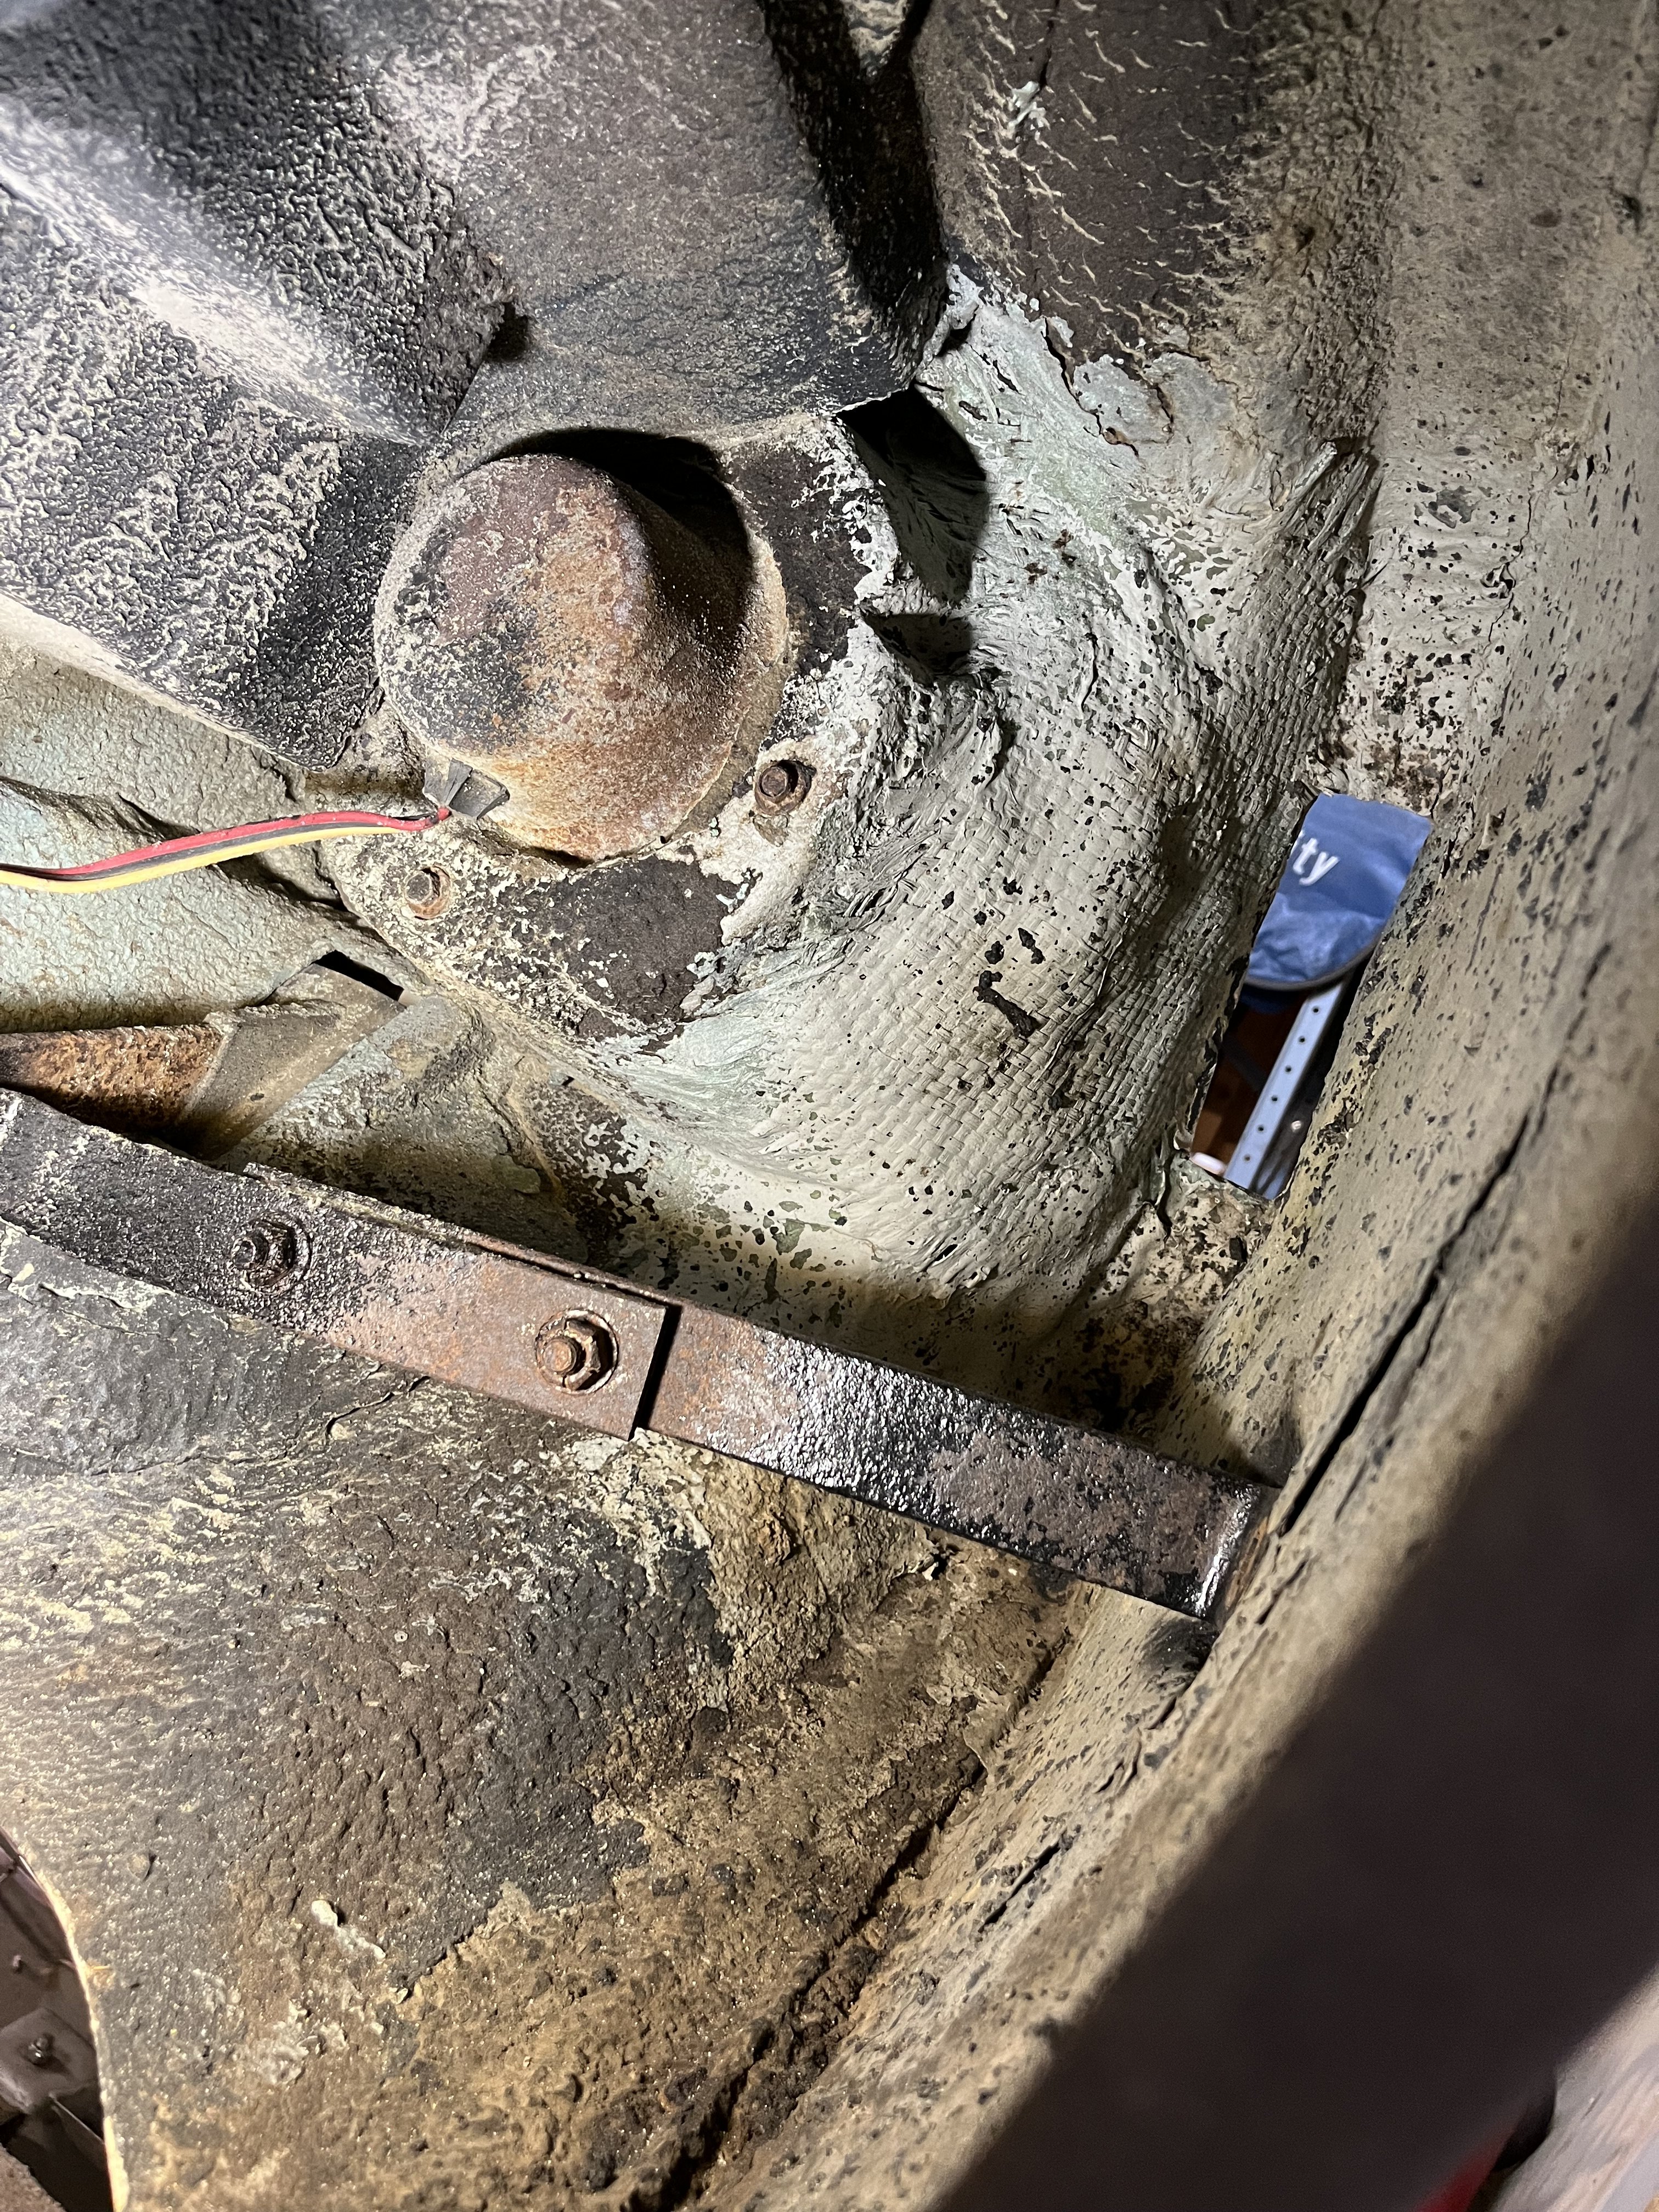
For anyone out there seeing this topic for the first time, with the panel I'm getting from Bob (see above), which covers a lot of the damage, I'm still in need of: 1) the front foot or two of the right front fender (to be exact, 12" from the tip of the fender would include the damaged area with an inch margin) and 2) the right headlight bucket.
-
Thanks for the reply, Bob, and for the generous offer. Yes, I will pick it up from you. It will replace a good deal of the damage to my front end. I'll contact you by private message to get your contact info and to set up a day and time to come see you near Pittsburgh.
Regards,
Pete
-
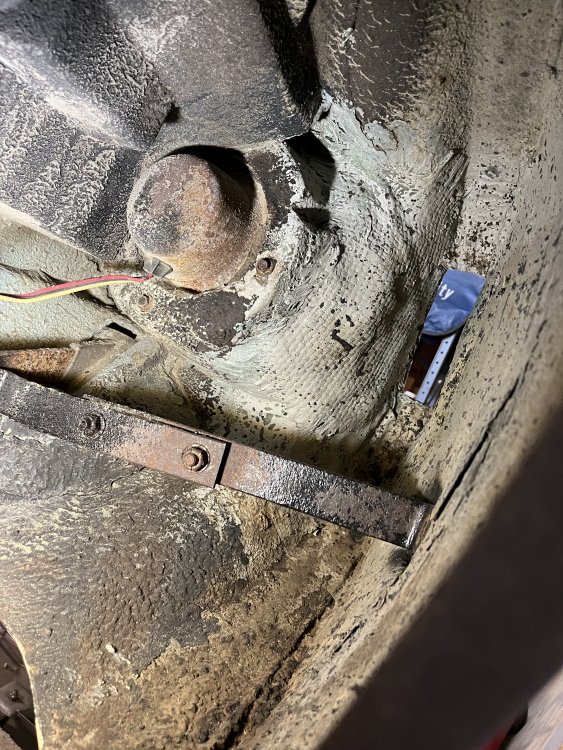
I am looking for replacement fiberglass panels to replace 40 year old repairs on the front right corner of my '64 Avanti. I would be interested in 1) the right headlight bucket; 2) the fiberglass between the right headlight and the right parking light; and 3) the front 2 feet or so of the right front fender. I already have an NOS panel that goes between the headlights. I would like NOS replacement panels or damage-free fiberglass cut from a donor car. See pictures of the damaged area below.
Thanks.

-
Thanks, Brad. That's what I needed to know. In that case, I will leave the emblems on the car for now and worry about removing the paint under them later. Soda blasting is Monday and I want to keep the car as watertight as possible for that, so don't want to mess up the integrity of the vent window frame seal.
-
I'm preparing my car for soda blasting to remove the paint. The only external trim I haven't removed are the belt buckle emblems on the sail panels because the retaining nuts are under the interior rear side panels. I have removed all the screws from these panels, but they remain firmly attached around the rear vent windows. Does anyone have any tips on how to remove these panels?
Thanks.
-
I would be interested in a set of four.
-
I have the timing cover off of R5083 (it's an R2 289). It had some very minor traces of black paint on it but was 95% bare aluminum. The Authenticity Manual does not shed any light on the original finish on the timing cover, at least not that I can find. The shop manual shows a number of engine pictures that show the timing cover with a natural aluminum finish, but Studebaker may have done that for shop manual photos simply for better contrast. A black finish would make sense because the engine was likely painted black with the timing cover in place and I doubt that the factory would take the time to mask off the cover. But it sure looks nice in natural aluminum. Does anyone know what it was originally and/or what would be considered correct by Avanti show judges?
-
Great! Thank you. That's the same diameter I get on my car with old (in need of replacement) F78-15 tires on it. So I think your solution will work for me, too.
-
Like you, I've been considering a doughnut spare for my '64, so that the spare tire lid will properly seat on the spare tire well. It's good to hear that there are temporary spares as new as '12 that have the right bolt pattern. I wonder how the OD compares to the 15" higher profile tires more commonly found on Avantis, especially the Studebaker variety. Can you tell us the OD of the temporary spare you got? Thanks.
-
Since I posted this AM, thanks to a Studebaker neighbor, I have located an R2 "parts carb."


Re-chromed rear bumper for '72-83 Avanti II
in Avanti Parts
Posted
Bumper has been SOLD.