


Cowboy91
-
Posts
33 -
Joined
-
Last visited
Content Type
Profiles
Forums
Events
Posts posted by Cowboy91
-
-
Wayne. Thanks. The CD parts/maintenance manual I have is totally not clear on this one. Today I happened to find a junk yard Lark with the power steering system (everything) in place, which was great to solve the problem, and some spare parts. Thanks for the come back.
-
Somewhere in the workshop is a sheet of paper showing which ram hose connection is for the right and left turn hose hookup. Somewhere. I believe the upper connection is for the right turn hose from the valve and leaves the lower one for the left turn hose. Right? Wrong? Just did the rebuild on the ram and valve and have hopes of getting it together this weekend.
-
Brad. Thanks for the response. I was reading a Ford bog where the description of reversing hoses also fits the issue at hand. Just ordered a ram and control valve rebuild kits. I'm going to do the control valve again just to be sure I didn't mess up on the first rebuild. Going to check the ram hoses in the morning as I pull the ram off. Hopefully there is no rod damage to deal with. Have a great week.
-
Need some help and ideas. Started '70 Avanti this morning to time it. The steering wheel went hard right and started to rapidly oscillate. Before I could hit the kill switch, the steering ram seal blew (what mess on the floor). I've rebuilt the control valve, all hoses are new, and have a new pump prior to start up. I check all the hose for correct location on the control valve and they are okay. Before I pull the ram and control valve out does anyone have an idea of what may have caused the failure. The ony connections that I may have reversed is at the ram. Reading what I have it dosen't really say whick control valve output goes to the upper or lower input connections. It is okay to tell me I may have screwed up.
-
I took the radiator from the '70 to the local shop and had it tested for leaks and flow. During the discussion of rebuilding of the factory one with a new core and changing the top outlet so cut out the inline fill/pressure cap was about $350. Three years ago I had one done for $150. Difference, the copper of the core. If you go to aluminum, be sure to ground strap the radiator to prevent electrolysis. Seen several that after two years of use are leaking due to corrosion.
-
Working with the "old guy", we determined the converstion kit was a steeltech. Seems he put them on several Studebakers. The give away was the re-drilled rotors, something that didn't turn the light blub on for me. Here is the hardware we used (all Napa).
The calipers were from a 1970 Chevy Chevelle. Left was PN SE4591, the right was PN SE4590.
Brake hoses were PN 38160.
Pads were PN SS728A
Caliper hose bolt was PN 82698.
The only hickup was that I had to take a bit of metal off the steering knuckle arms for the, about a 1/16", to give better clearance for the hose and bolt at the caliper. I also rounded the front of the hose block facing the steering knuckle arm for extra clearance.
Hope this help someone from getting gray hair.
On to the heat shield/roll bar issue.
-
Thanks Gunslinger. I hear you on the brakes and the hog troughs. Will check the roll bar attachment. Don't believe the individual I purchased the car from put the heat shield in. From what I've run into his mechanical ability is near zero. Making a trip to the "old guy's garage" with the brake stuff and see if he has any ideas. Have a great 4th.
-
I'm a bit puzzled about the front disk brake conversion on the 1970 I have. It doesn't seem to fit the parts list for the Turner or SteelTec systems. The calipers were cross referenced to a 1981 C10 Chevy pickup, along with the pads. The backing plate is not one that was cut out of plate in someone workshop, to clean of a job and no PN on it. The brake hose seem to match those of a CJ5/CJ7 from the 78-81 era. No clue on the rotors. Any ideas if this is a kit or a full custom setup.
Also I have a heat shield under the passenage side but done on the drivers side. I've been looking through blogs, books and so on, but I've not run across any comments on a heat shield being installed. There are no hog troughs, they appear to have been replaced by welded cross bracing. So the heat shield I've noted is not a cut up hog trough, the sheet metal is way to neat. As always, thanks for you time.
-
The attempt was good the results were bad. I've got to say the engineers that work the hoses and pipes out had their act together. I built a return line hose to try my idea out. It wasn't an issue to have a mostly straight pipe going into the control valve. The issue is when you shorten the hose length (about 6") the hose is okay for a right turn and straight ahead postion but left turn is no go. The overall hose and pipe bends are critical to the lateral movement of the control value. So I'll get a full set together and install them. Not going to give up, I just want to get in on the road. I have to agree with Bill. I'm not rebuilding for the judging events. I have two other that are 90+ point car and are a real pain to keep them that way. I'm doing a budget rebuild job so cost factors come in to play. The frame width looks close to the of a Ford Mustang so a front clip might work. However I think a full frame is the way to go. A full frame would I believe take care of many issues and give you a wide choice of front and rear supsensions, axles and gearing.
-
warren55. I'll take a look at how much movement comes into play. At this point I'm not sure if you keep the hose the same length but shorten the piping (English term for metal tubing) it should have any affect on movement. The return line to the pump was straight into the control valve, not the factory one with bends. DIdn't seem to affect opearting ability. A job for next week. Will post the outcome, with pics of course.
-
With my engineering hat on I've got a question on power steering hoses (all) at the control valve have the piping with too many bends in them in my mind. After taking the bunch off to replace them I'm not sure that straigth in piping wouldn't work just as well. Open to comments and understanding.
-
Yup. My bad for not searching all the forums. Thanks Bob.
-
Based on the cost to have the radiator recored I'm looking at using an aluminum radiator as a replace. I believe I saw a comment by someone who did so, but a search of the forum didn't pull up any info. As anyone did this type of swap? Thanks.
-
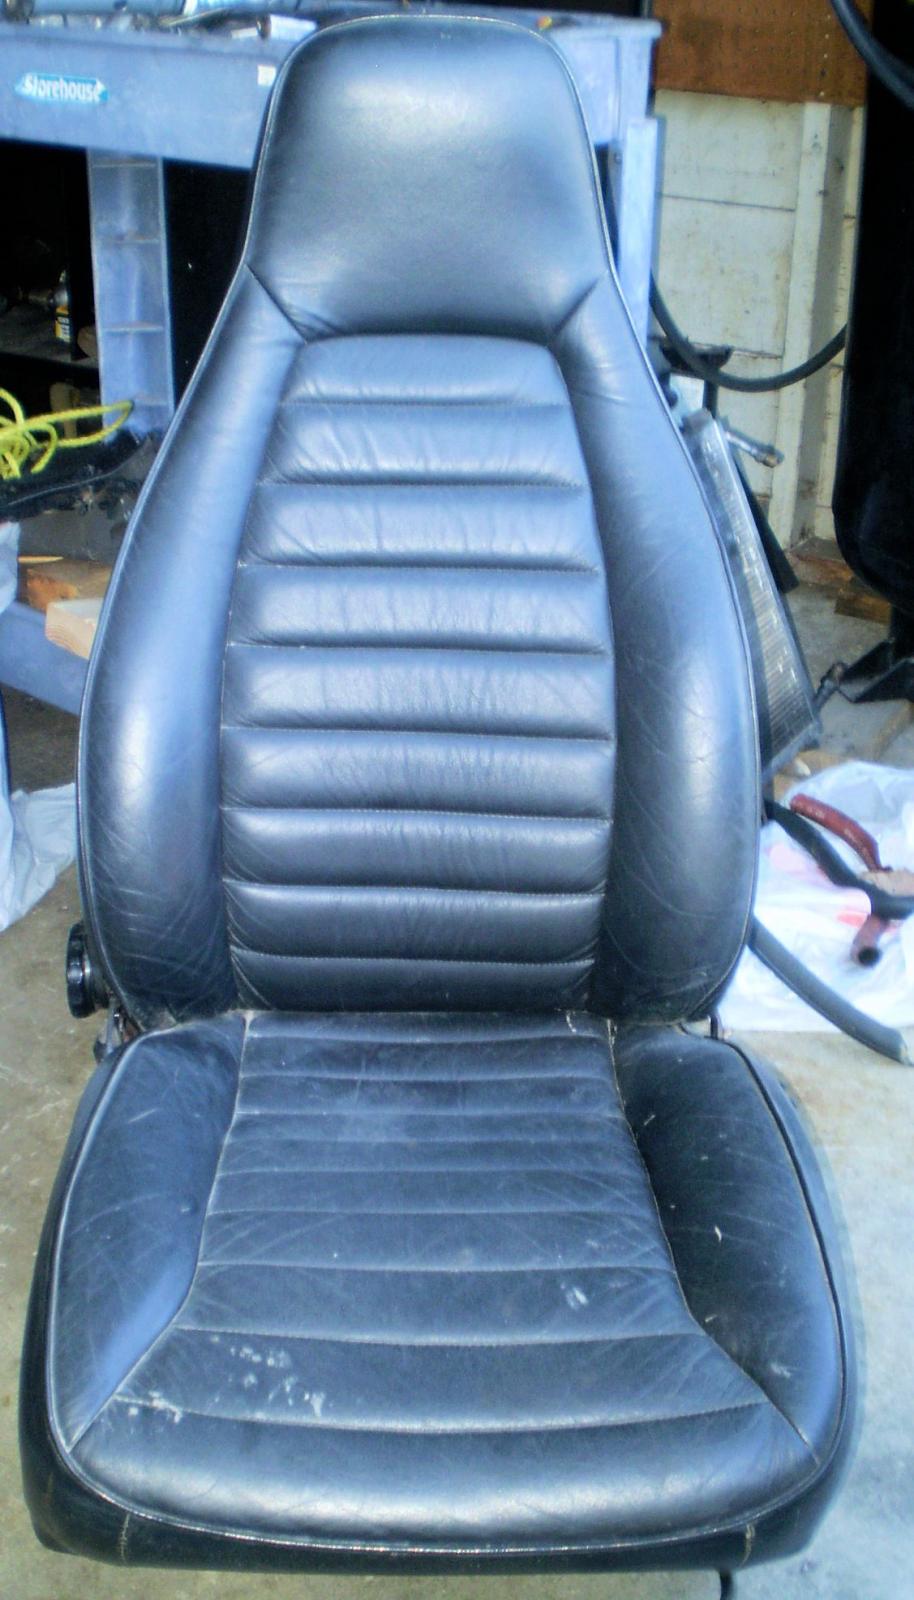
Avanti7, Gunslinger, plwindish. Thanks for the input. These seat do have a back support adjustment. I found them comfortable when I drove the vehicle home. The mounting frame is well done, all tig welded and matched the factory mounting points. So for now I'll take them to the shop that done work for me in the past to have the leather repaired on the one seat and see if they can figure out the latch system. I've seen Jeep products with similar high back seat so maybe that is where they came from.
-
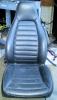
I'm not sure if the seat in my 1970 Avanti are stock in nature or an after market. I've attached a pic of the passenger seat. The passenger seat in good shape while the driver seat need a bit of repair. Both seat need to have the seat tilt lactch replaced. Can anyone tell me it these are Avanti production seats? There are not numbers or tags on the seat or the the base/slider. They are leather. Thanks.
-
Warren55. Not sure how it is going to work out but the son marked the AC braket up and is going to cut if off and re-weld it to the right side. I've not gotten it back yet but it appears it should work. If it doesn't I've found a couple of serpentine pulley kits at Summit over the weekend that would do the job. One with and one without AC. Bigger issue is to figure out what aftermarket cam and it's specs they have in the motor. Appears it may be top end tear down time. The Chevy nuts coming over this weekend to provide advice.
-
The serpentine setup is a no go. When I pulled the tall valve covers off to replace them I found a set of Erson rockers. Stock covers don't work with these. I did put the AC/PS bracket in place with the valve cover removed but the hood hits. So with two hits I'm back to V belts for now. I've got an alt and PS bracket but no AC bracket. Look through a lot of stuff on line. I can solve my crank pully size with either a 6.6" or 7.25" from several vendors. Any suggestions on a pax side low mount or driver side side mount systems for the AC. Has anyone use any of the vintage air brackets?
-
Thanks for the info. I barrowed a new set of engine mounts to check the ones on the car out. They were both the same dimensions. My dry fit of the system went well until I couldn't get the AC/PS bracket to mount in place. Issue is there are "tall" valve covers on the engine that will not allow the bracket to fit flush. So either mod the bracket or find a set of stock valve covers. The crank pully is long in depth and just clears the bellcrank connection. I'll going to see if I can find a smaller dia one. Current one is 7 3/4 ID so a 7 ID would be good. The Chevy nut said to check Buick, Olds and Chevy cars. So I'm off to Pick N Pull this morning. Once I get the bracket in place the hood clearance test comes next. Fingers cross of course.
-
Avanti83. The AC is of concern. The one I took off was the R4 type, big and round. This setup has the new small one, someone siad it was a type 1 but I'm not sure that is correct. Early Camaro are hard to find at Pick & Put and when you do, they have been butchered. The fan on the vehicle is a 6 blade, about 18" wide and 3" tall with the fan clutch. The one in the box of stuff is a 5 blade, 20" wide and about 4 1/2" tall with the fan clutch. Be close for sure. I changed over to an electric on one of the Rolls Royce's and is super in keeping the big block cool in 90 degree weather. When you did the electric did you install a automatic switch? Did you keep the fan shroud on or mod it? I believe if I went electric I would also change the radiator out. I can see the radiator I took out been worked on in a couple of places so most likely I'll take it local shop and have it pressured checked. Thoughts.
-
Thanks to all for your input. My vote goes along with Gunslinger. The motor mounts are new, but they seem slim. Going to check it out. I do have a long pump. Frankly I didn't think of this aspect. I visited with my local Chevy nuts this morning. For a six pack he gave me a complete serpentine unit he pulled out of a 99 truck but never used. Everything including a reverse flow WP but a belt. I'll dry fit it this coming week. The crank pully looks to large but it might clear since it deeper in depth. If not I did note that Summit as small dia ones so this is a fall back. If nothing else works, I'll vist my buddies in the machine shop and have them make one for me. Sweep meets are good they they are generally over in this area until next spring. I did pick up an air cleaner assembly two months ago. Will keep you all posted. Might be a couple of weeks, it is fall fishing time.
PS. The guy that worked on this car prior to me should be band from any auto stuff.
-
I'm sure someone out there has had the same or simliar issue I discovered this afternoon. The crank pully , 7.80" dia, rubs against the power cylinder connection at the bellcrank. You can't change any of the belts belt unless you remove the crank pully, this is not good. Open to suggestions. Yes I could conver to a serpentine system, but my goal of a "budget" build/fix would go out the door. Engine is an L31 5.7L Chevy crate that the prior person stuffed in using parts from other Chevy's.
-
Rear brake issue resolved with a bit of help. After disassembly, cleaning and checking, the Dana 44 gears were dated in November 1964 with a paint pen mark on the twin traction add of February 1969. While I'm still not clear on what vehicle it came from, we got it back together, set to specs. With some help from a local "Packard nut" we figure out the backing plates were in fact Studebaker. Dry fitting the shoes on the backing plates showed the brake hubs were a fit. Only when we added the upper link bar did we have issues with brake hubs fitting. The link bar was to long, keeping the upper part of the brake from closing to specs. One set of link bars later I'm good to go. As soon as the new bushings arrive, axle goes back in place. Thank to all for their advice.
-
drat. I found KYB model KG5570 to be an excellent fit on my '70. They are from 1989-1996 Corvette. The lower mount is an E3 measurement, which is what the lower "holes" are on mine. Rock Auto has them for about $32 each. Hope this helps.
-
Bigdaddy. My bad on that one. Assuming the ring and pinion are the first ones, it might narrow the field down a bit. While I do that, I'll count the teeth and figure the ratio. It may not me the 3.07 that is on the tag. I'm also awaiting a response from Spicer/Dana. Thanks for the input. Added 7 Sep 14. Spicer/Dana confirmed the BOM as 2468-1 as a Dana 44 with 3.07 gears, but didn't provide a date of mfg or vehicle make. Added 10 Sep 14. Spicer/Dana provided a build date for the rear end of 2 Dec 60 with several factory changes through 1961 and 1963. They rebuilt the unit in February 1969 and added twin/posi traction. They had no info on whose vehicle it was for.
Bigdaddy-No dates on any of the gears, just paint pen mark on the bolts. Since there were modern sealants used, my guess is someone in the 90's worked on it.
Power Steering Ram Connections
in 1965-83 Avanti
Posted
Steve/Joe. Thanks for your input. I was able to clean up the ram and rebuild it, in fact I rebuilt both the Avanti and Lark (junk yard dog), installed and we are good to go. Have a small leak in the control valve but when I get the seal kit, a rebuild should do it. Now that the streeing is in I can tune the engine a bit and get an exhaust system on it. Once done it is on to the nightmarish sun roof, figure out a headline, put a new dash and radio in. Body work, window/door gaskets are at the bottom the list for now.