


adamsavanti
-
Posts
22 -
Joined
-
Last visited
Content Type
Profiles
Forums
Events
Posts posted by adamsavanti
-
-
mfg had good advice. Took off the upper console plate, removed radio knobs, unscrewed thin nuts holding it in, pushed it BACK out of the way, went to work with a 6 1/2" long nut driver (after trying ratchet with extension), 3/8". (Note I have average size hands and it was hard to get them in there.) Put your hand in facing up, take driver and unscrew the nuts, and be sure to remove both brackets too. Work it out, place on cloth, work screwdriver around and around the bezel till gauge comes out. NOW I have to follow internet advice on how to fix it. More on that later. Thanks for your help everyone!
-
Thank you both for your good advice. I took the hose off the gauge, hooked it up to an vacuum gauge I've had for years (engine tuning type gauge) and it works, meaning the dash one obviously doesn't. Now for the BIG QUESTION. How do you get the gauge out? It's in such an inaccessible place and I can't see that the whole instrument panel comes out easily according to the shop manual.
-
Ditto Wapanzica. Go to O'Reilly's or similar and for about $6 you can get a big mirror with a suction cup. As he says, comes right off when at a show. But I hate backing up without two larger mirrors.
-
I'm writing this in case anyone else in the future has an interference problem between the engine and hood etc. Today I got out "What the Shop Manual Won't Tell You" by Stan Gundry, an interesting book from 1999! He talks about this very issue of Avanti motor mounts, modifying them, or using the thinner R-3 mounts, and the possible interference with the bellcrank and how to solve this problem. If anyone ever needs this I'll scan the two pages and send them or post them.
Dennis
-
Thank you Rob and mfg. I figured out with a flashlight, ruler and the internet that I have "standard" size mounts. Ordered the shorter ones yesterday. Got to crawl under the car and see what I put under the left rear mount some time ago.
The tip about clearance between crankshaft pulleys and bellcrank is appreciated, as I do have power steering.
Dennis
-
Again soliciting your collective expertise. Years ago pulled engine & stripped engine compartment for painting. Am sure I bought new correct Avanti motor mounts. When reassembled the car, fan “lightly” hit the shroud. Couldn’t figure out why so shimmed up the shroud by adding 1/2” center nut/washer under shroud and less to R & L sides to raise it till fan didn’t hit. Worked fine with no pad hood on, BUT I just installed a hood pad. NOW pad pushes on shroud, causing it to thwack the fan again. ALSO see the imprint of the radiator cap and air cleaner hose clamp. All of which leads me to believe the engine is sitting too high off the frame.
Ideas? Anyone have a measurement of the compressed motor mounts? I thought about putting the original motor mounts on but long ago threw one away because it was broken.
What have I missed or done wrong? -
Thank you! I'm off to the Oregon Coast for a couple of days, will get on it with your suggestions when I get back.
Dennis
-
Can anyone recommend somebody who can rebuild the vacuum gauge in my "64 Avanti, the later version of the '63-64 of vacuum gauges. Or does someone have an extra lying around you'd like to sell?
-
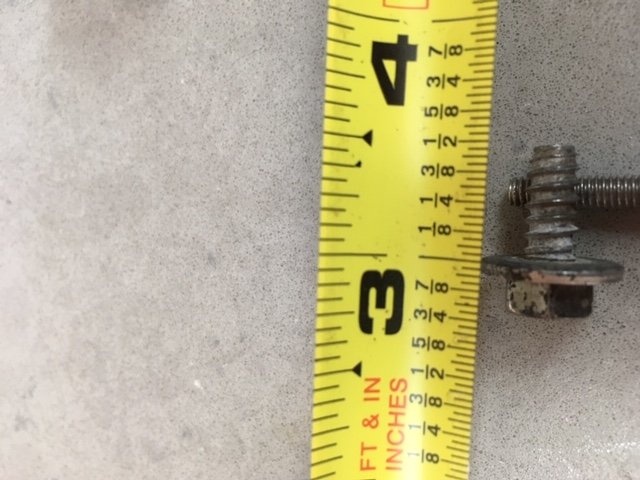
Thank you Avanti83. That was a very good website! I thought, WTH, was this bolt used before, so after quite a while of wasted thinking, went over to my horrible mishmash of unsorted '51 parts and found one, only about 1/2" longer. Did not find it described in the back of either of the workshop manuals, but who cares. SO got that longer one to work and one of the originals by a bit of pushing. I doubt if many folks are reading about this, but if you BREAK OFF YOUR '63/early '64 hood support, email me and I'll send you a tracing of the diagram and advice on how to repair the whole thing using an 1/8" aluminum sheet, reattaching everything so it won't "pop out" to Authenticity Inspectors.
-
Long story SHORT, fell (actually knocked) backwards off ladder onto open hood of my '64 Avanti. Amazingly, damaged nothing EXCEPT breaking off the hood support bracket from the wall behind the headlight. After several attempts at figuring up how to shore up the panel, decided to fashion a 1/8" aluminum plate to cover that entire panel. Done. Everything working well EXCEPT the bolts (2) that attach to the headlight bucket. Can't even find them in the PARTS CATALOG. Of course, they are short 1/8"! Hardware stores, including one with the most extensive stock in the city, have never seen a bolt like this. Strange threads. Where else where they used? Need one 5/8" or longer. Other applications? If I can't find any, will make larger hole in plate so they sit in original position and make other holes and screw in other bolts. HELP!
-
Very good Ed, along those lines I see Studebaker International sells the "plate", which incorporates the emblem, but without the walnut/other treatments. See at https://www.parts123.com/parts123/dyndetail.pta?catalog=0001003a&uKeY=AANWI
Do you have any idea of the size of the pirate buckle compares to the rear seat buckle???
-
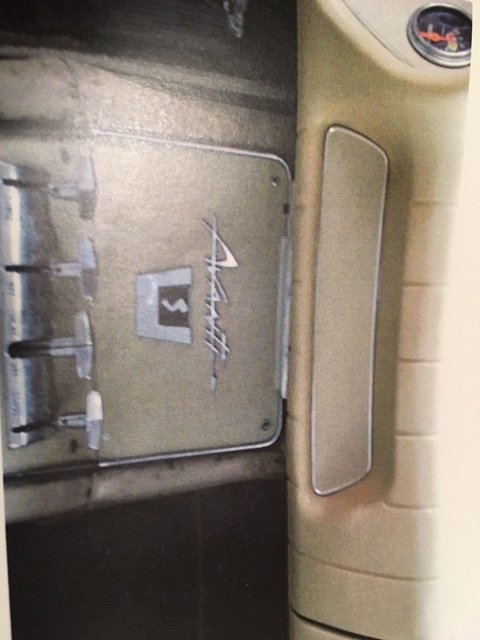
Do you have any idea if the S and Avanti pieces can be removed so I could mount them on my walnut panel? How much would you like for the panel?
I assume your panel is in the color show in attached (lousy) photo?
Thanks for the reply!
Dennis
-
Trying to finish the restoration of my ’64 Avanti. I need:
Console panel between radio and console (someone cut a hole in it, recovered in somewhat matching walnut). OR the Studebaker “buckle” with or without Avanti script to mount on the existing panel. (Authenticity manual pg. F-213)
Radio Bezel: 1562450 or will take any bezel, but prefer the later one with the chrome edge surrounding it. (Authenticity manual pp. F-203,213)
Original gas cap.
Original door light switch (a rectangle with curved sides – Authenticity manual, pp. F-195)
Original voltage regulator.
Appreciate any help in finding these parts! Thanks -
Bought car long time ago with different radio, so bought ’63 radio online some time ago, now having installation problems. Can’t find wiring diagram. Under dash have GREEN wire with black connector on end coming from left. HAS power.
There are also two wires taped together (looks factory), also coming in from left, one a lighter green, one white.
SDC friend gave me correct 3 prong plug for back of radio, Ground-Speaker-12V markings on paper glued to radio. On the plug the ground & speaker wire is molded together, green with black stripe for ground, white with green stripe for speaker.
HOW do I wire up the radio?
Problem #2: I can’t get radio all the way in – the bottom of the speaker bumps the top of the radio so it can’t slide in by about a quarter inch. I’m actually not thinking of using the center speaker as there were two auxiliary speakers installed in the doors. How do I remove the speaker? See protrusions at edges but they’re not threaded.
I don’t have any bracket called for in Parts Manual that goes on the R side of radio, so how does the bracket mount? To the top (where)? Easily fabricated?
The wood-grained bezel doesn’t fit. The opening is tall enough but not wide enough. The one I have is 3 5/8” wide but the radio opening is about 4 3/8” wide. Where can I get one or how can I modify mine (dremel)?
Lastly, there is a large grounding strap, wrapped in yellow, attached to Z bar (I think). Where does the other end go??? It’s just hanging down.
I know this is a lot of questions. Any one suggestion for any of the above issues is greatly appreciated.
-
Another member messaged me - it turns out I am not so swift. Installed WW motor, then mounted wipers. Guess what? Ya gotta run the mechanism to Home before placing the wipers. What I was experiencing was motor working against wiper position. Took wipers off, properly attached long arm under dash, all went well. THEN you put the actual wipers on their shafts. I confess to being an amateur at age 71.
-
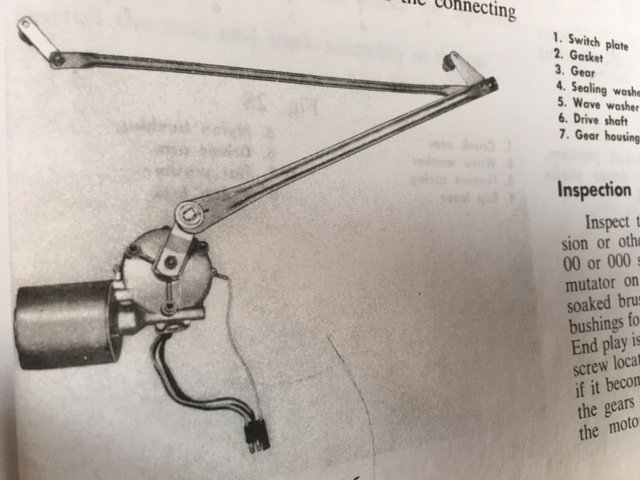
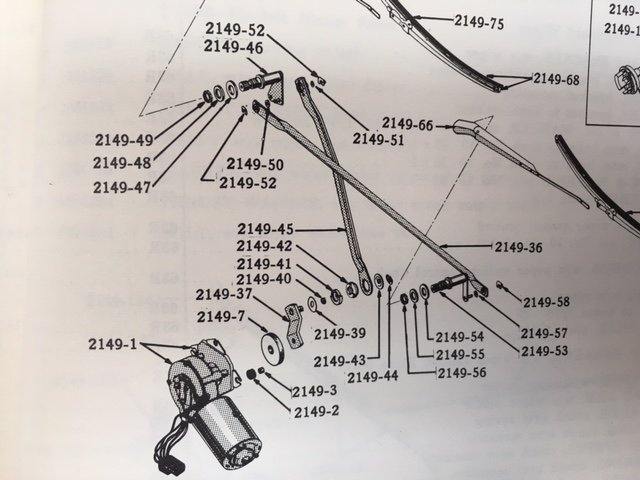
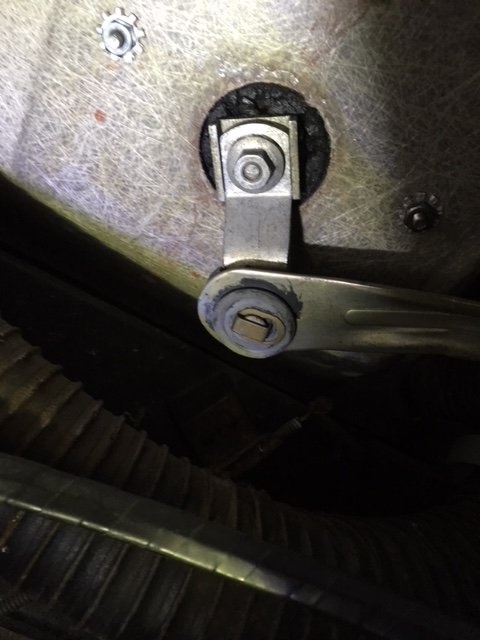
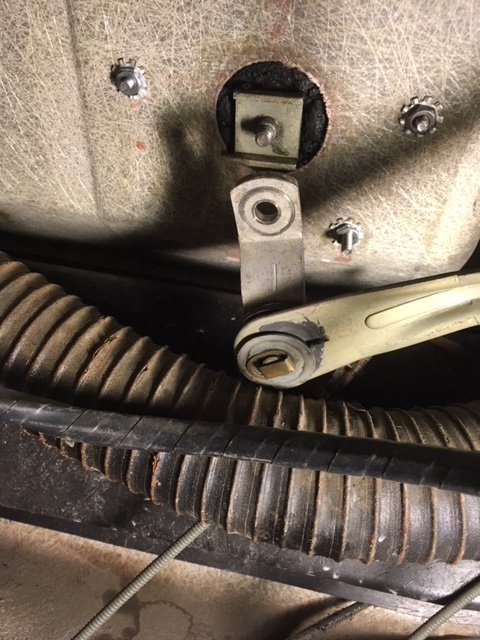
I posted this before but maybe the title of wiper problems led people to believe it was the wipers themselves I couldn't fix. Its the actuator arms under the dash. I took my Avanti apart years ago to be painted, before I had a digital camera! All I have are scrawled drawings, and none of the windshield wiper motor. Installed the motor from the engine side, secured it with washers and nuts. Following the Manual, ran the motor, turned it off and it returned to Home. So when I went to attach the long arm and, as you’ll see in photo 1, the motor attachment piece has horizontal grooves in the home position. But the long connecting arm doesn't exactly match the horizontal position of the motor with the wipers themselves in the down position. It's too far to the left. I tried connecting the long connection arm in several positions (photo 5), even resorting to turning the motor click by click to change the position and also moving the wipers themselves to different positions to be able to connect the arm. The closest I got to having them work was once when, wipers starting halfway up the windshield, they returned home, stopped, a click and quit. What have I don’t wrong – what am I missing?

-
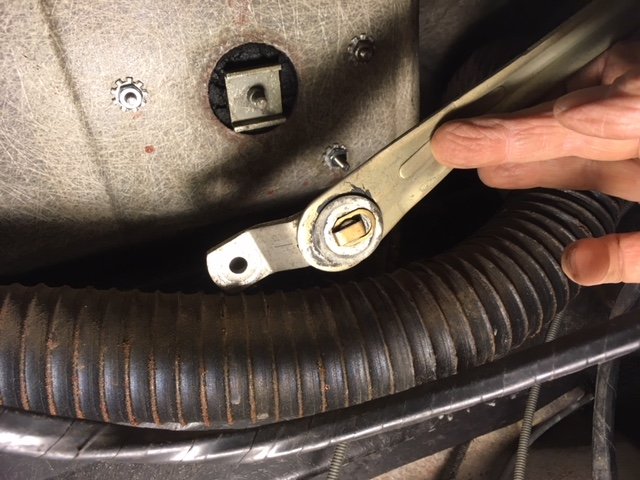
I can't see a way to edit the original post, but anyway, it occurred to me to mount the long drive arm on in various positions. So I had the short piece that bolts directly to the motor on the left, then the right, already tried it "straight ahead". All require moving the wipers somewhat off their off position. None worked. In one version they would continue all the way up, then down, stop, make a funny sort of "click" noise. BTW the motor runs just fine with nothing hooked to it, both on high and low, and goes to Home position when turned off.
There has to be somebody out there that can explain this!
-
I like your clear directions, especially about wiring it. I bought an auxiliary light some time ago, and when I get around to installing it think I'll use the hydraulic pressure activated brake light switch, find red wire with a white tracer on it under the dash and do it that way.
-
I took my Avanti apart years ago to be painted, before I had a digital camera! All I have are scrawled drawings, and none of the windshield wiper motor. Installed the motor from the engine side, secured it with washers and nuts. Following the Manual, ran the motor, turned it off and it returned to Home. So when I went to attach the long arm and, as you’ll se in photo 1, the motor attachment piece has horizontal grooves in the home position, while the connecting arm is too long and in a vertical position. If you push the wipers and attach the arm it doesn’t work, of course. By clicking the key, got the motor to stop so the grooves were vertical and, as expected, that didn’t work either. If you look at the parts diagram, I don’t know what 2149-7, a round washer-like thing is. What have I don’t wrong – what am I missing?


-
Yes, Al and Lou did an outstanding job. The "doughnut rescue" breakfast on the first day typifies their can do approach. The first reply above from Kennie, well I'd like to thank him for driving me to the family car museum. An outstanding Avanti, he knows his stuff. And he's a nice guy too! Drove all the way from Pasadena - that's confidence in your ride!
-
OK, I tried this on the Studebaker Forum and so far have gotten nothing, so I'll try here. (Maybe should have done this in the first place!)
In my '64 Avanti I've put the engine in with the (new) motor mounts offset toward the passenger side. There is only about 5/16" clearance between the rocker cover nut and the brake booster. I can't slide the lower left ignition shield into place as it hits on the steering coupler. Everything seems way to tight on the right side. I called another Avanti friend and he says he has very little clearance between his rocker cover nut and the brake booster. Was I supposed to install the ignition shield before the engine?
Dennis
Vacuum Gauge Rebuiler?
in Avanti Pub
Posted
Finale: one good directed spray with PB Blaster, then one with Gumout and it seemed to be working freely. After watching a You Tube video, learned you can make more of a vacuum like when sucking through a straw vs. inhaling. Stood in front of a mirror and found I could pull the dial all the way over! Put small amount of Sewing Machine oil on the movable points. Back in bezel and the dashboard tomorrow. Thanks for all your ideas!