

Luma
-
Posts
75 -
Joined
-
Last visited
Content Type
Profiles
Forums
Events
Posts posted by Luma
-
-
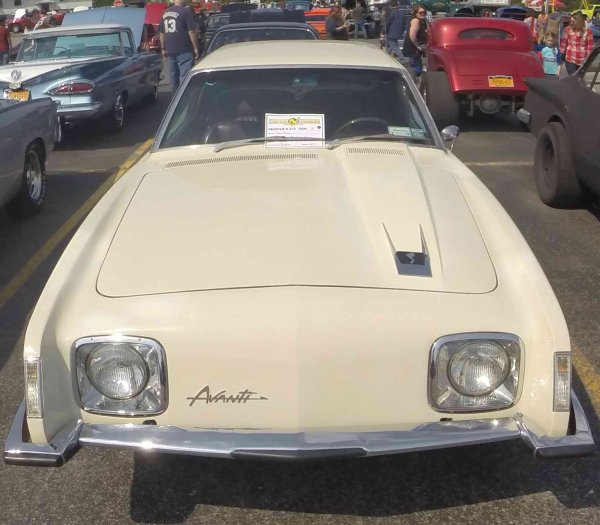
3 1963 Avantis bundled as one auction item at listing below.
-
3 1963 Avantis bundled as one auction item at listing below.
-
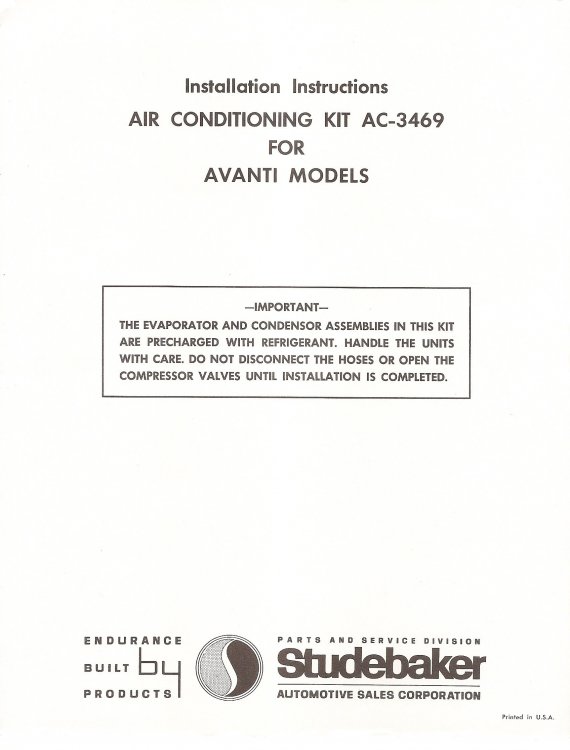
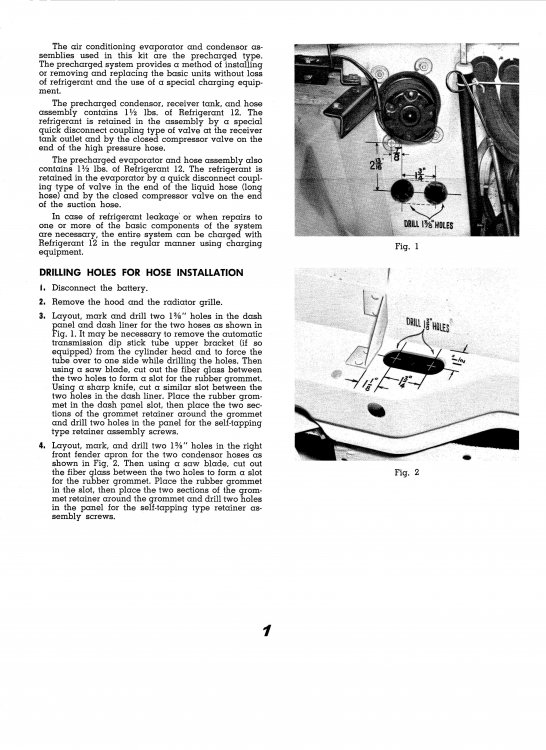
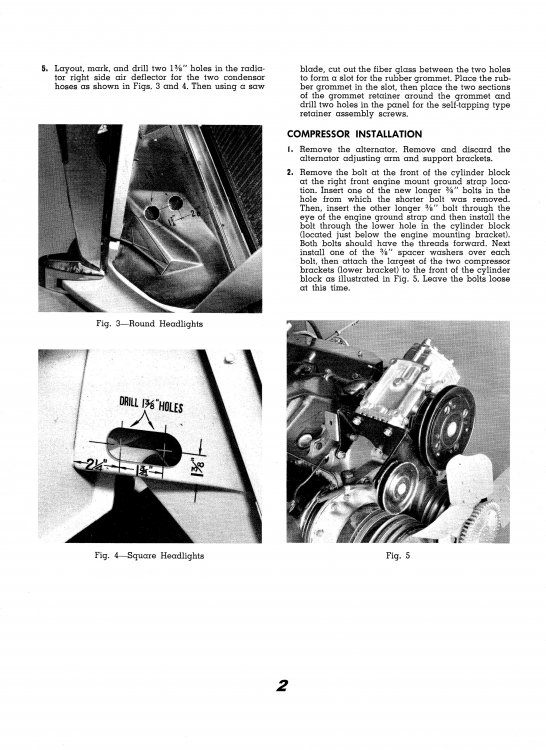
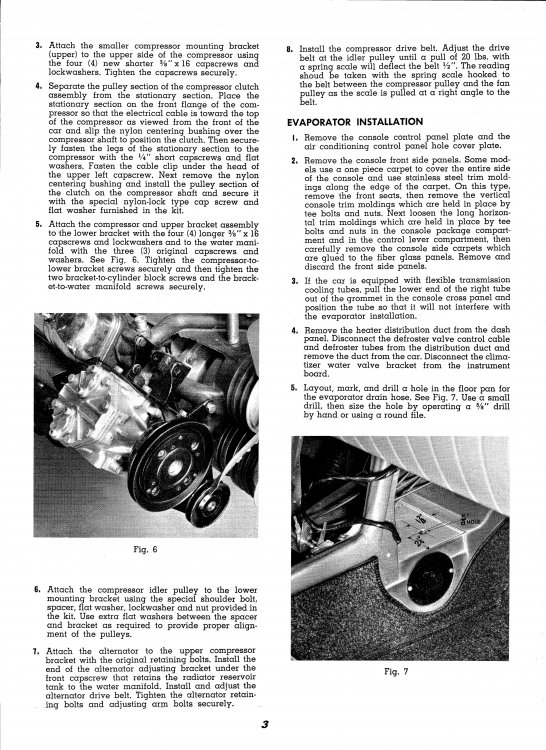
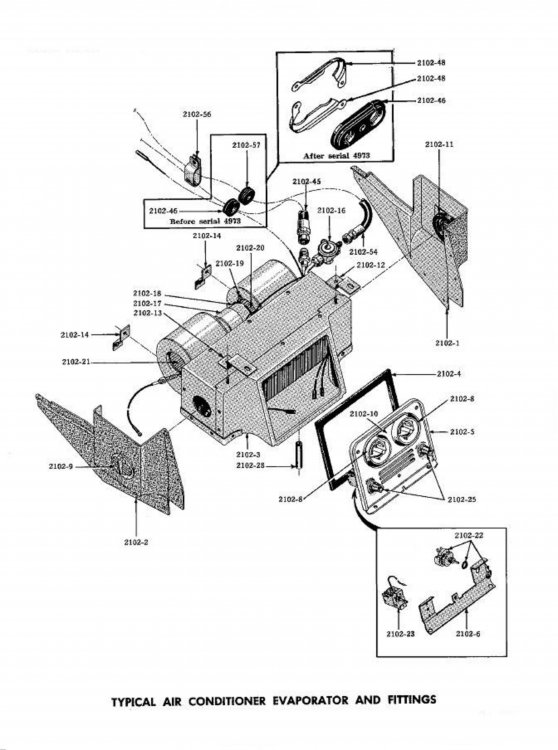
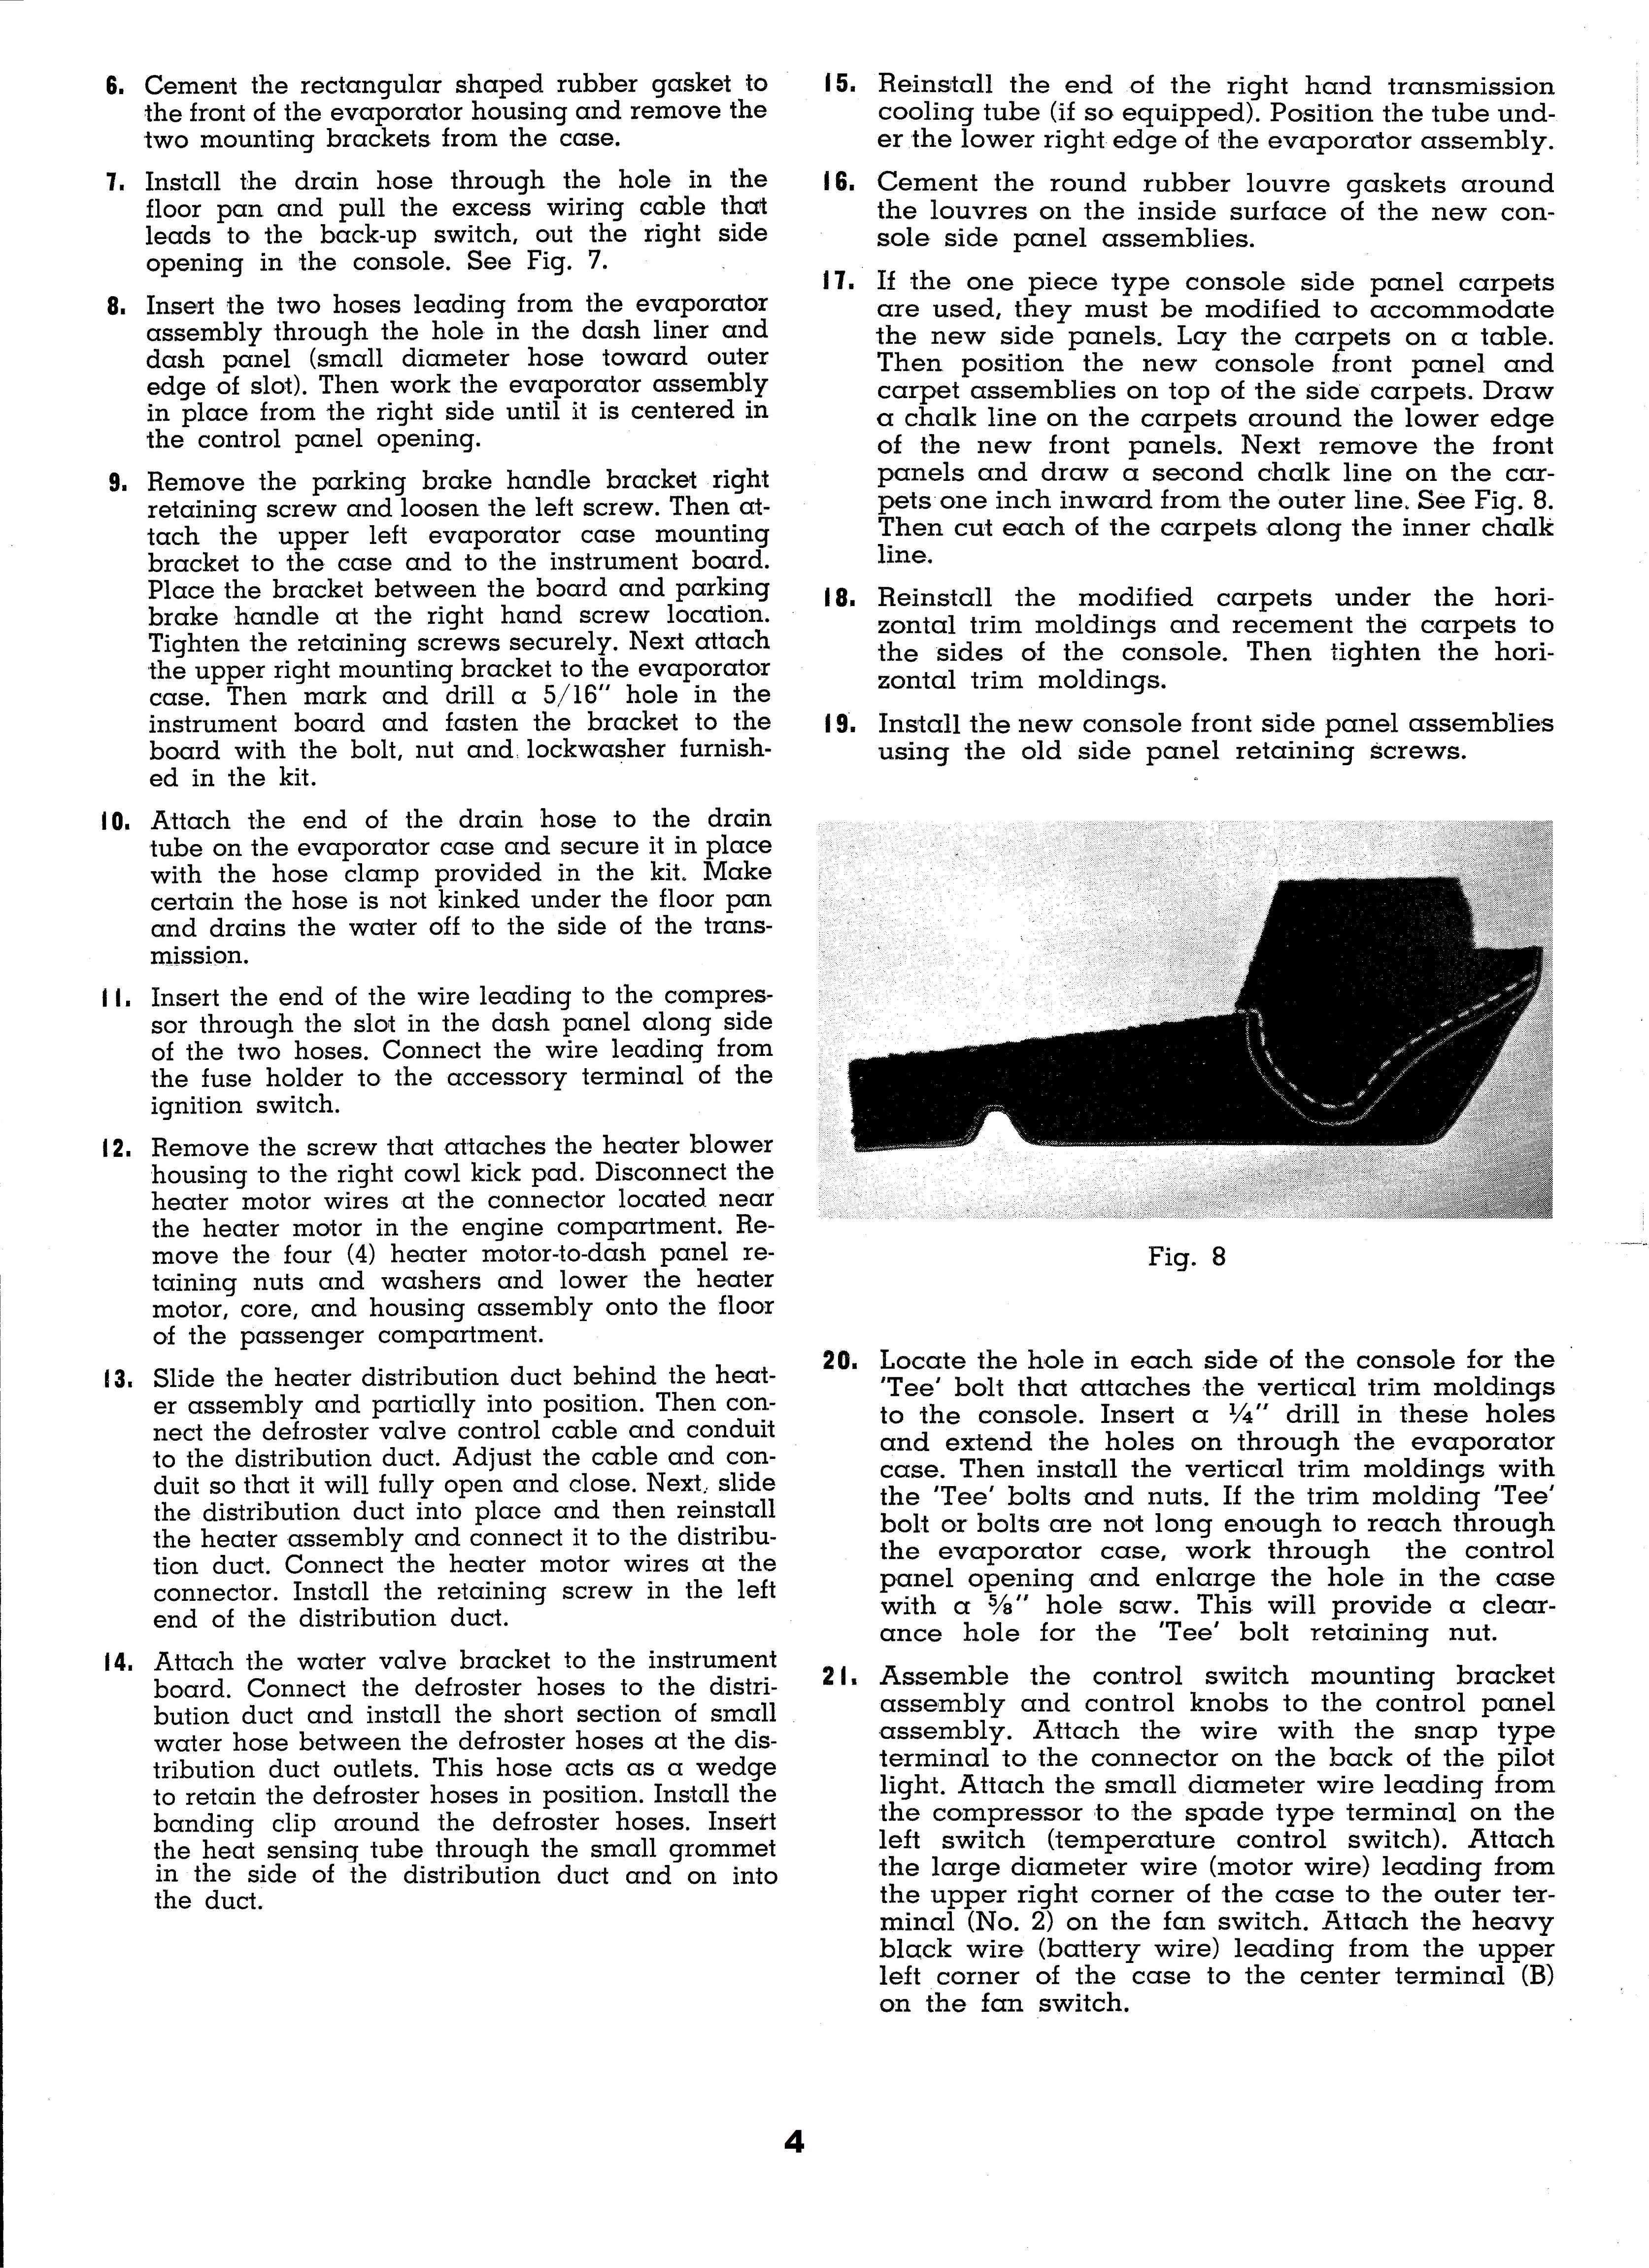
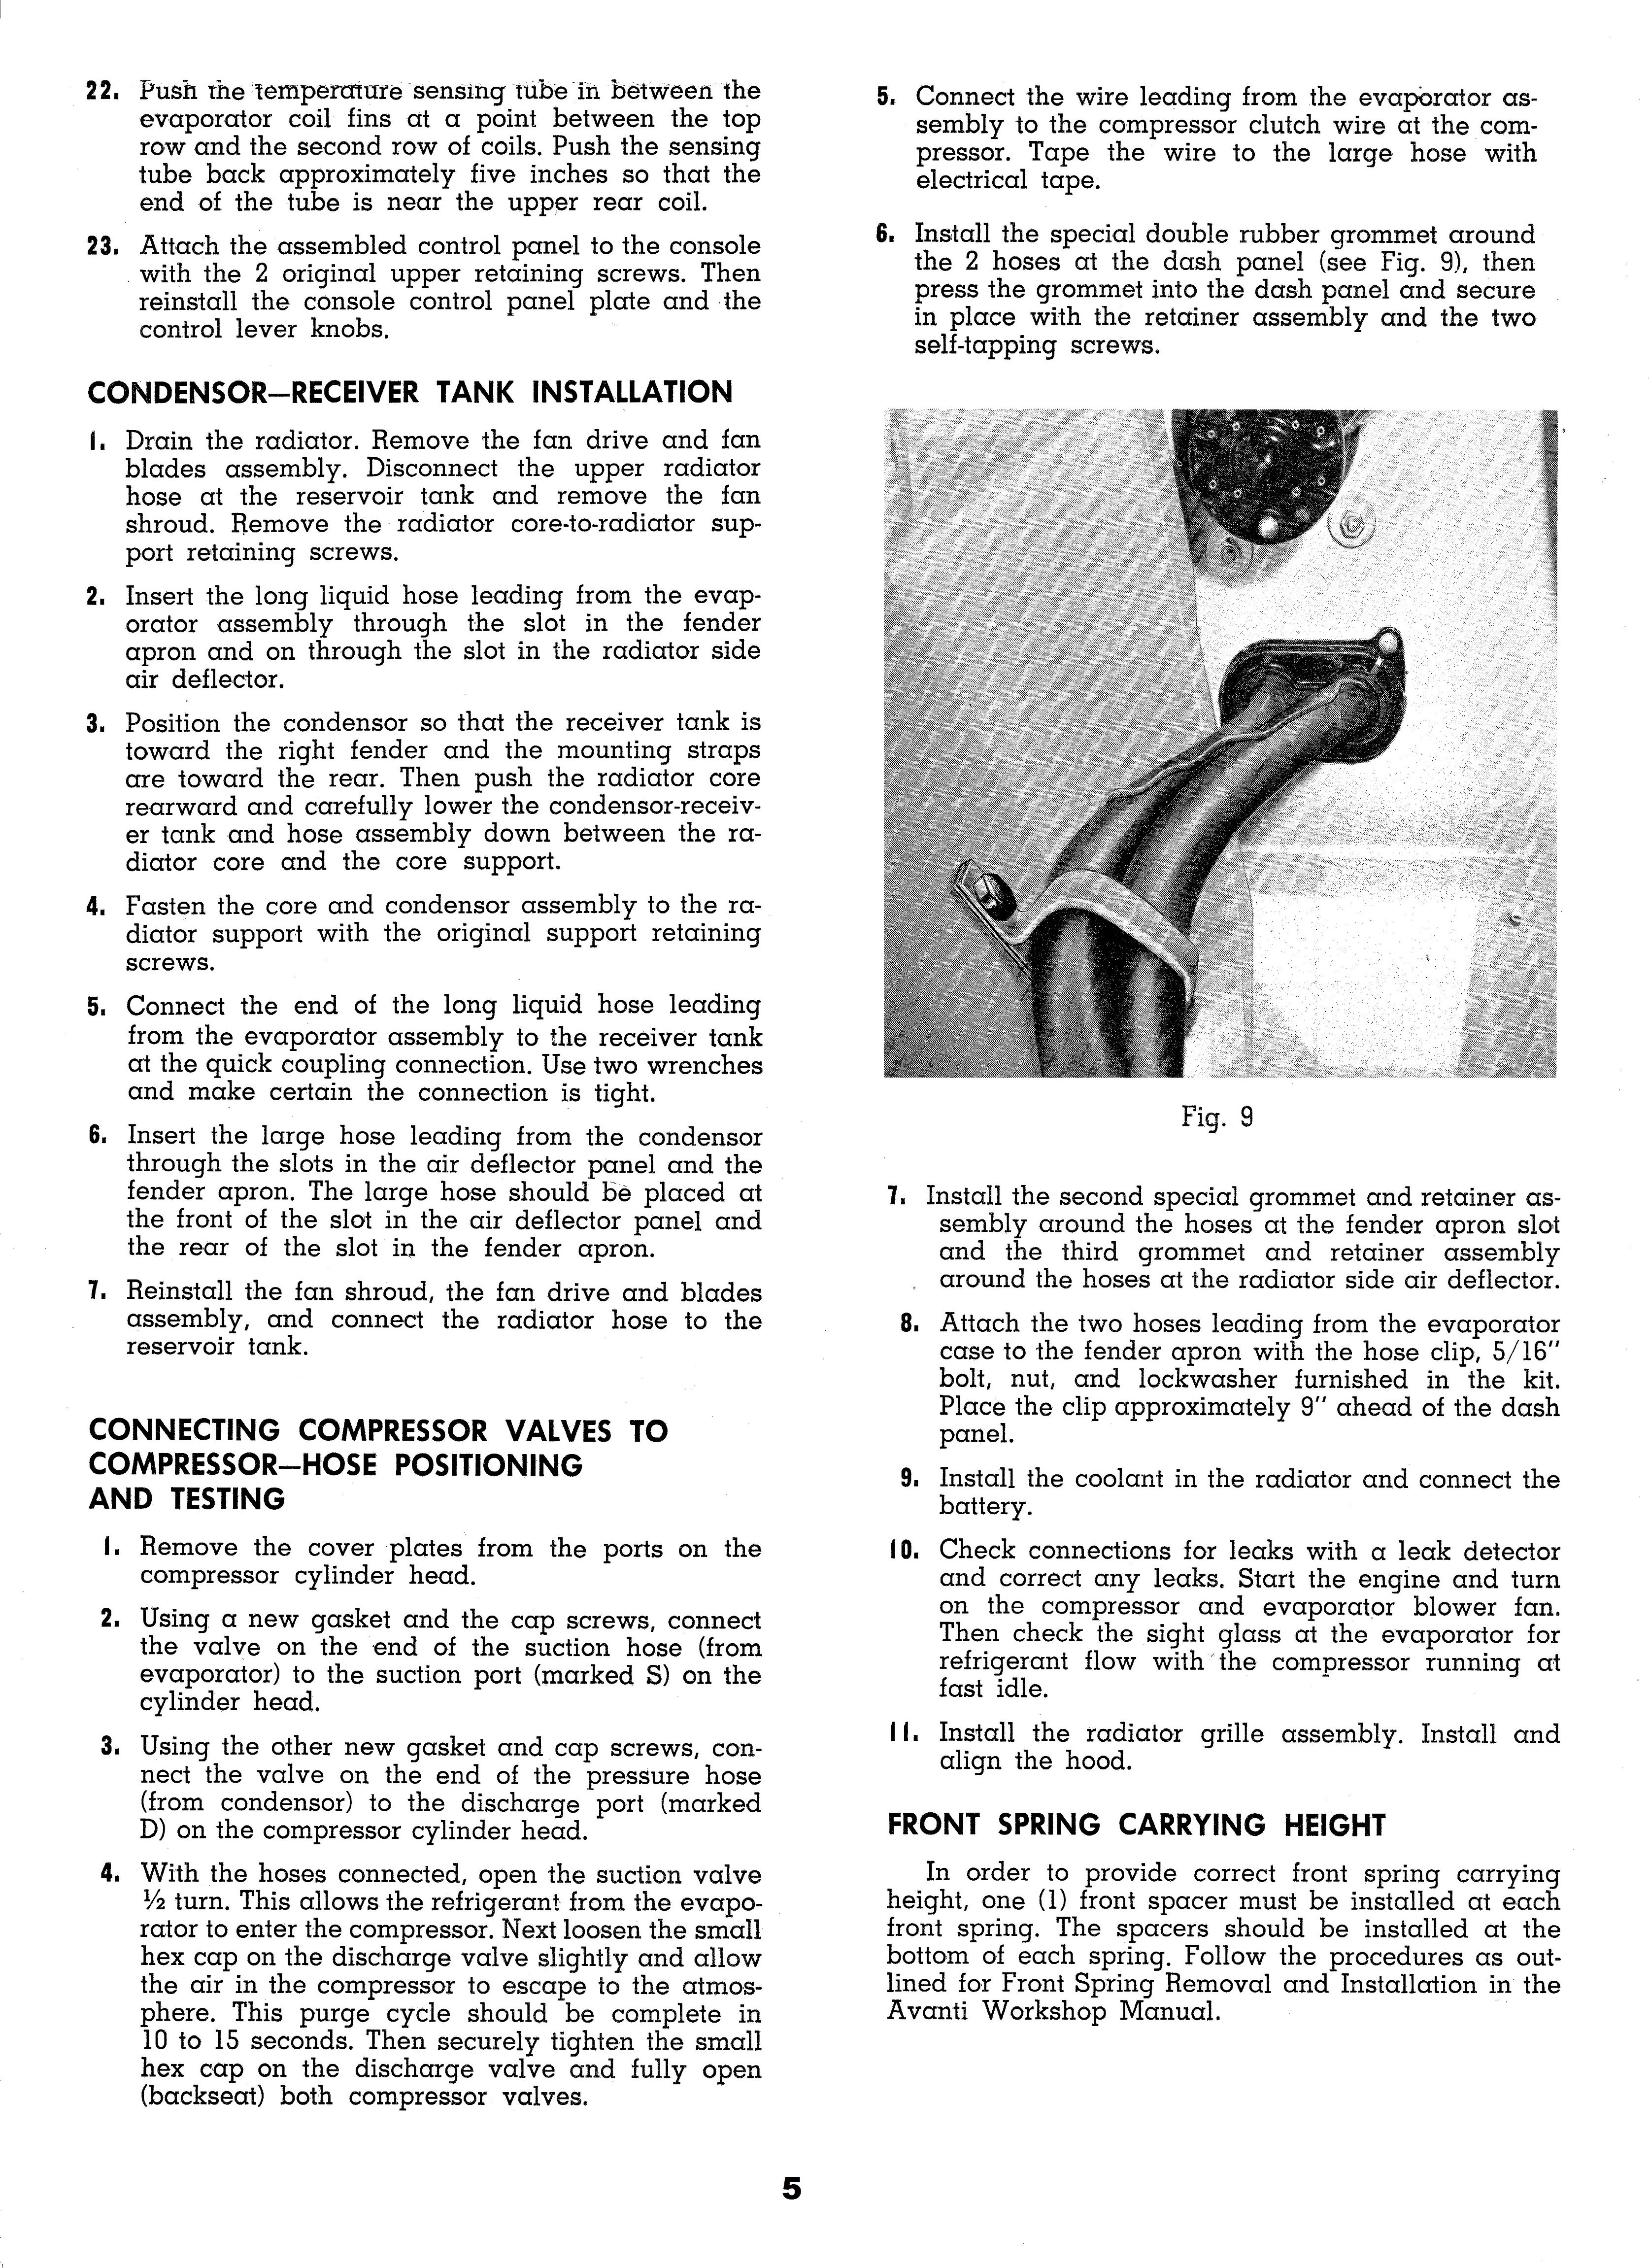
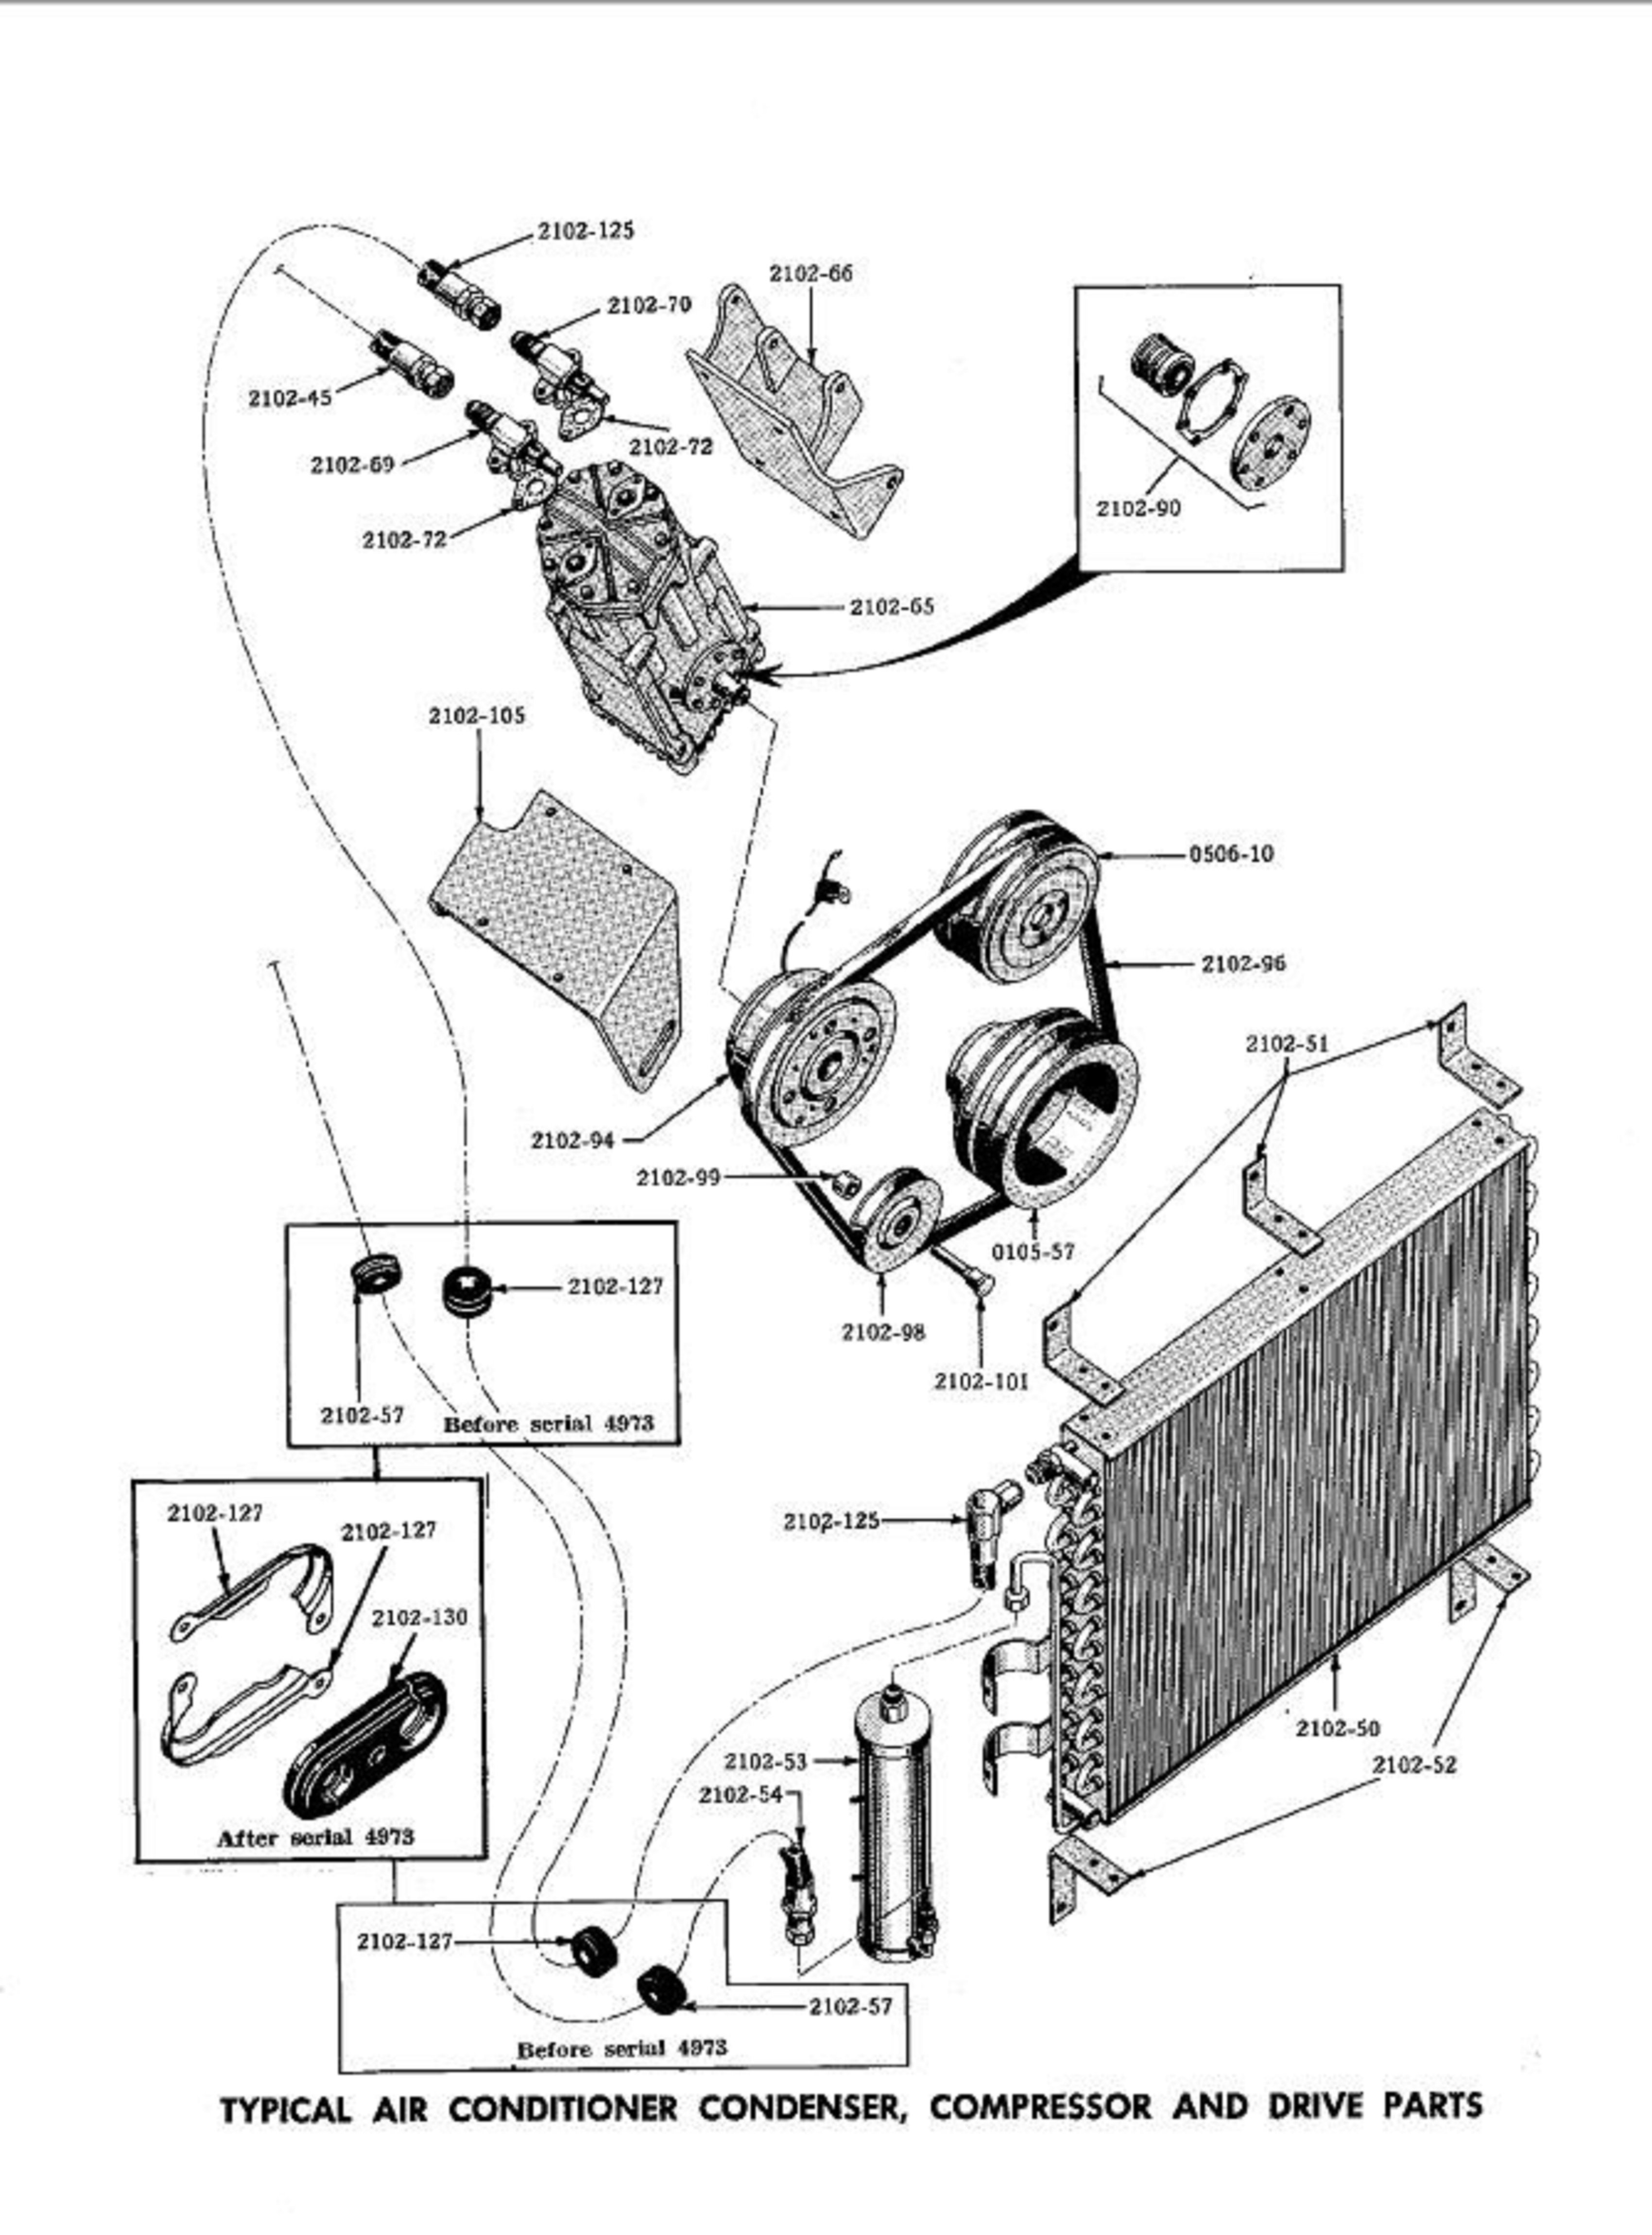
I always wondered why the Avanti Shop Manual never had any details on the Air Conditioning systems for Studebaker Avanti's. Found on ebay a 16 x 17 single sheet that I was able to fit on to a 8 1/2 x 11 format. I had to reduce their size to post here. Hope you find it useful and add them to you official shop manual. The final two pages are from the parts manual.


-
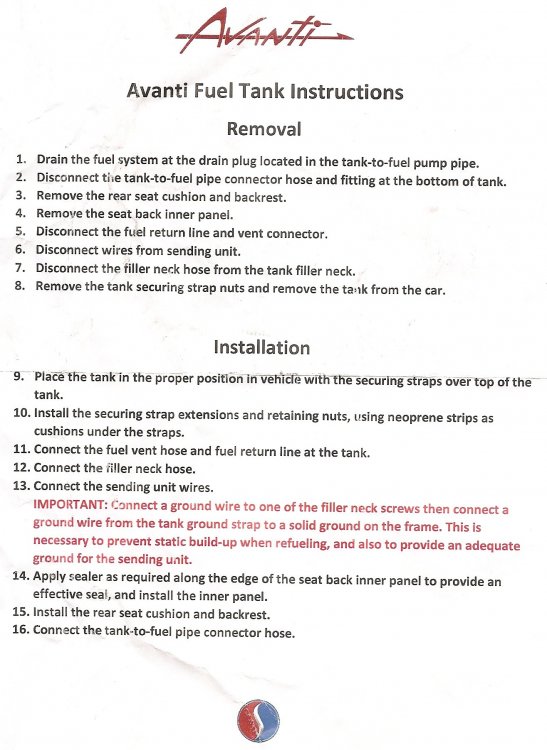
I also got a couple of new gas tanks from SI and attached are the instructions that were sent with them. Hope this is helpful.
-
Brad, Where is your shop located?
-
Shrock Brothers do a fantastic repair on an Avanti (and other Studes) steering wheels. I've been using one for 4 years with no problems.
http://www.shrockbrothers.com/steering_wheels.html
-
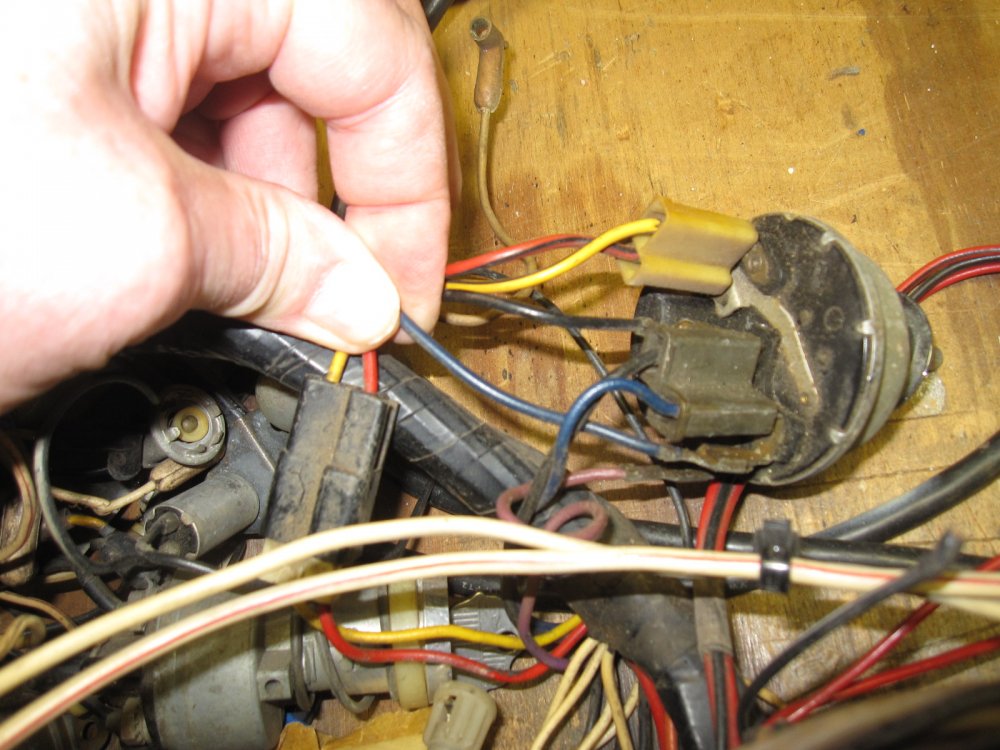
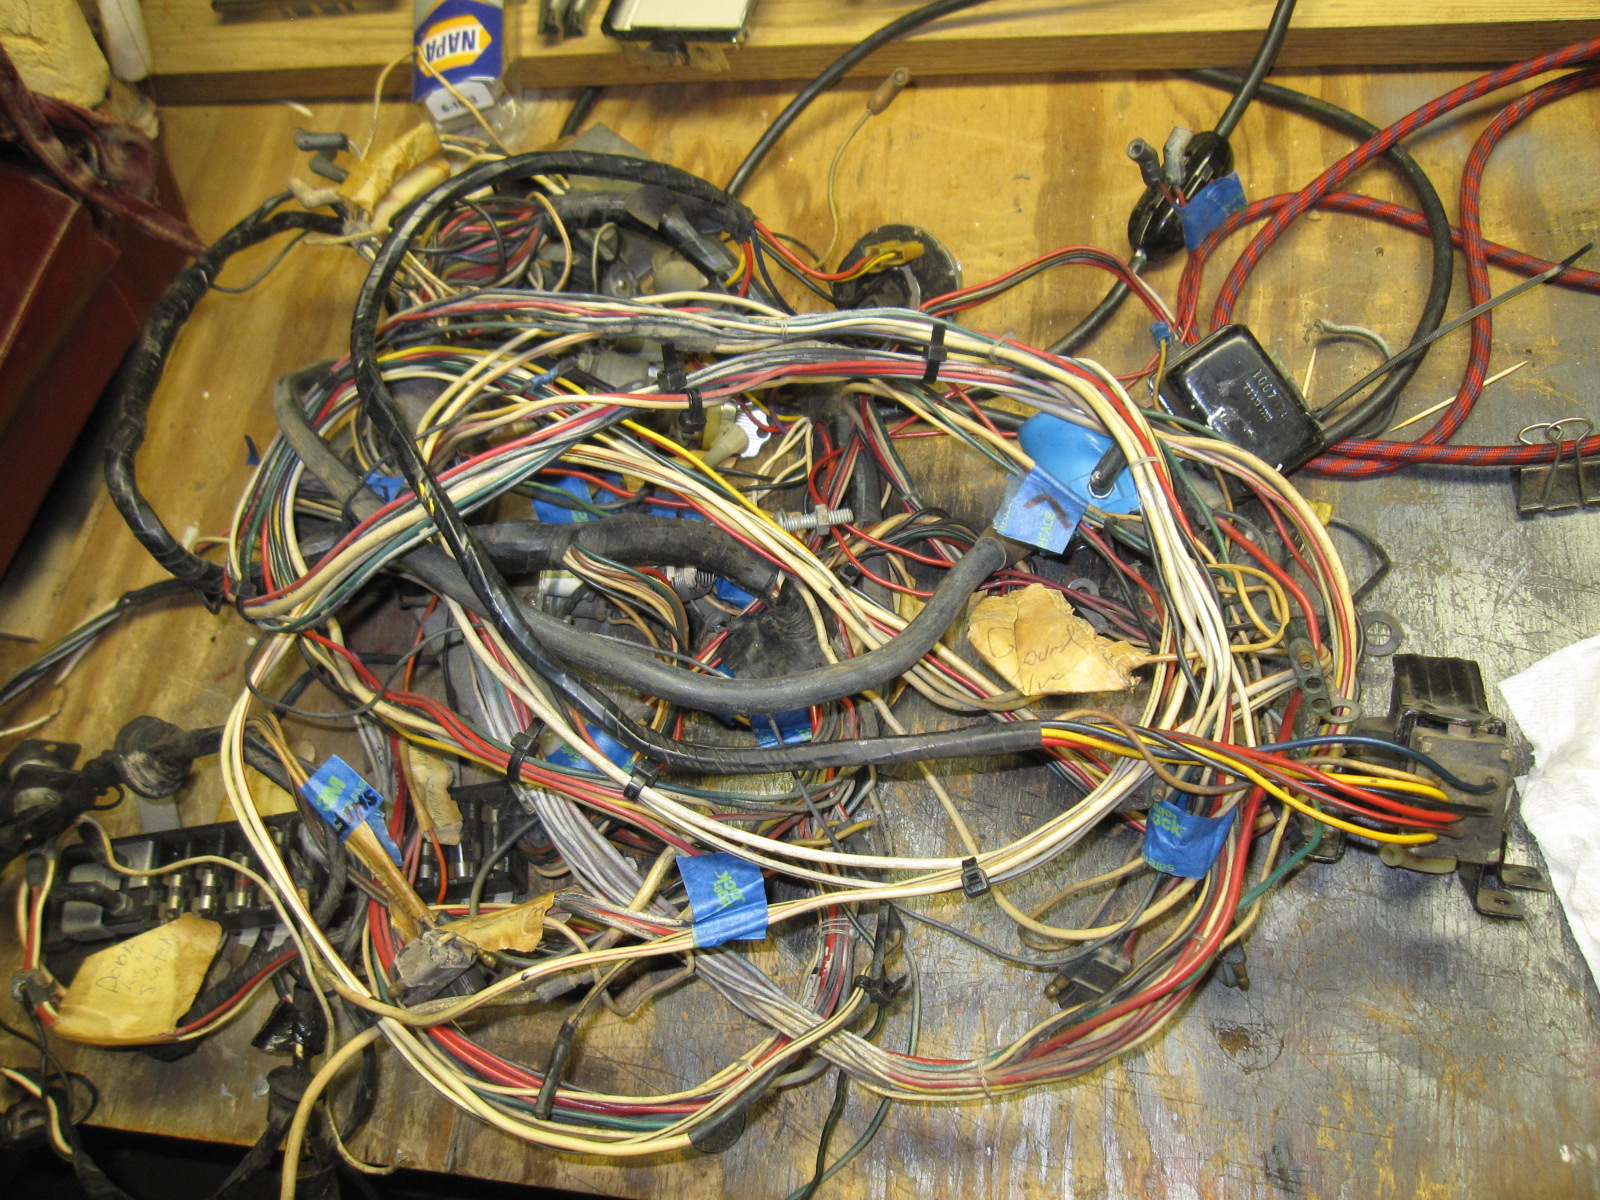
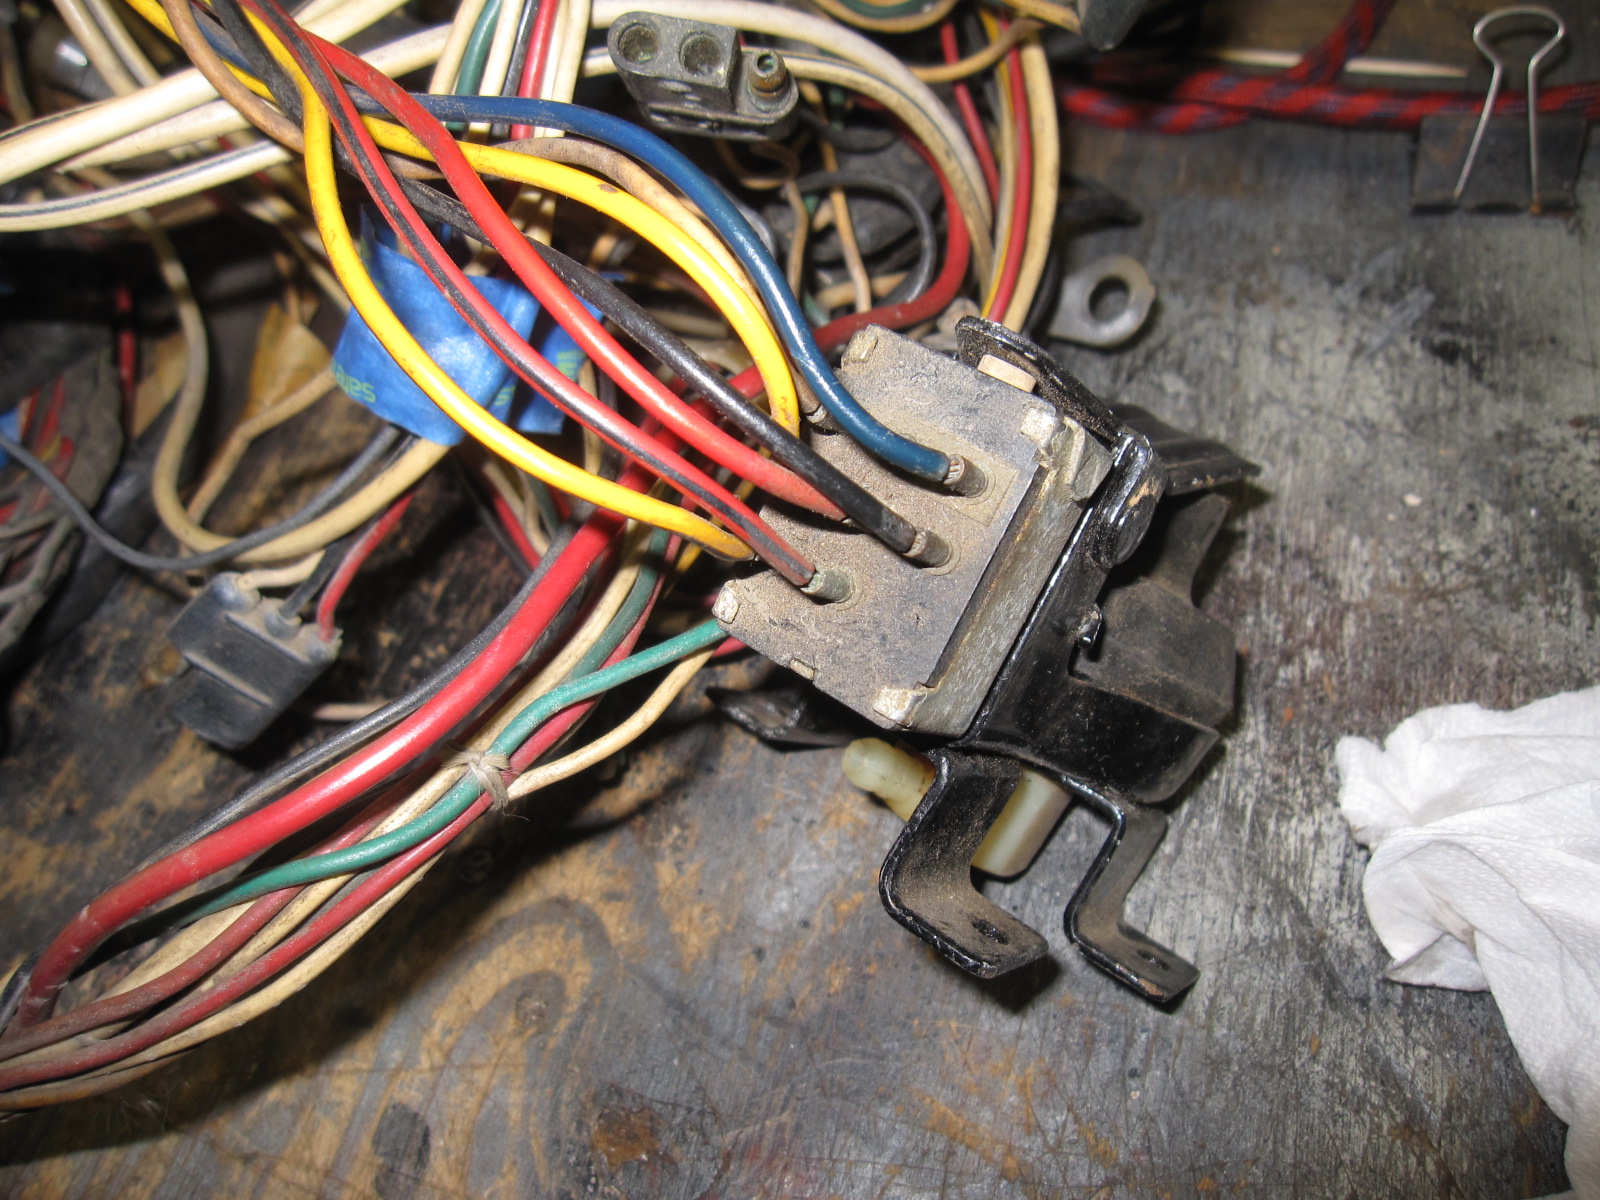
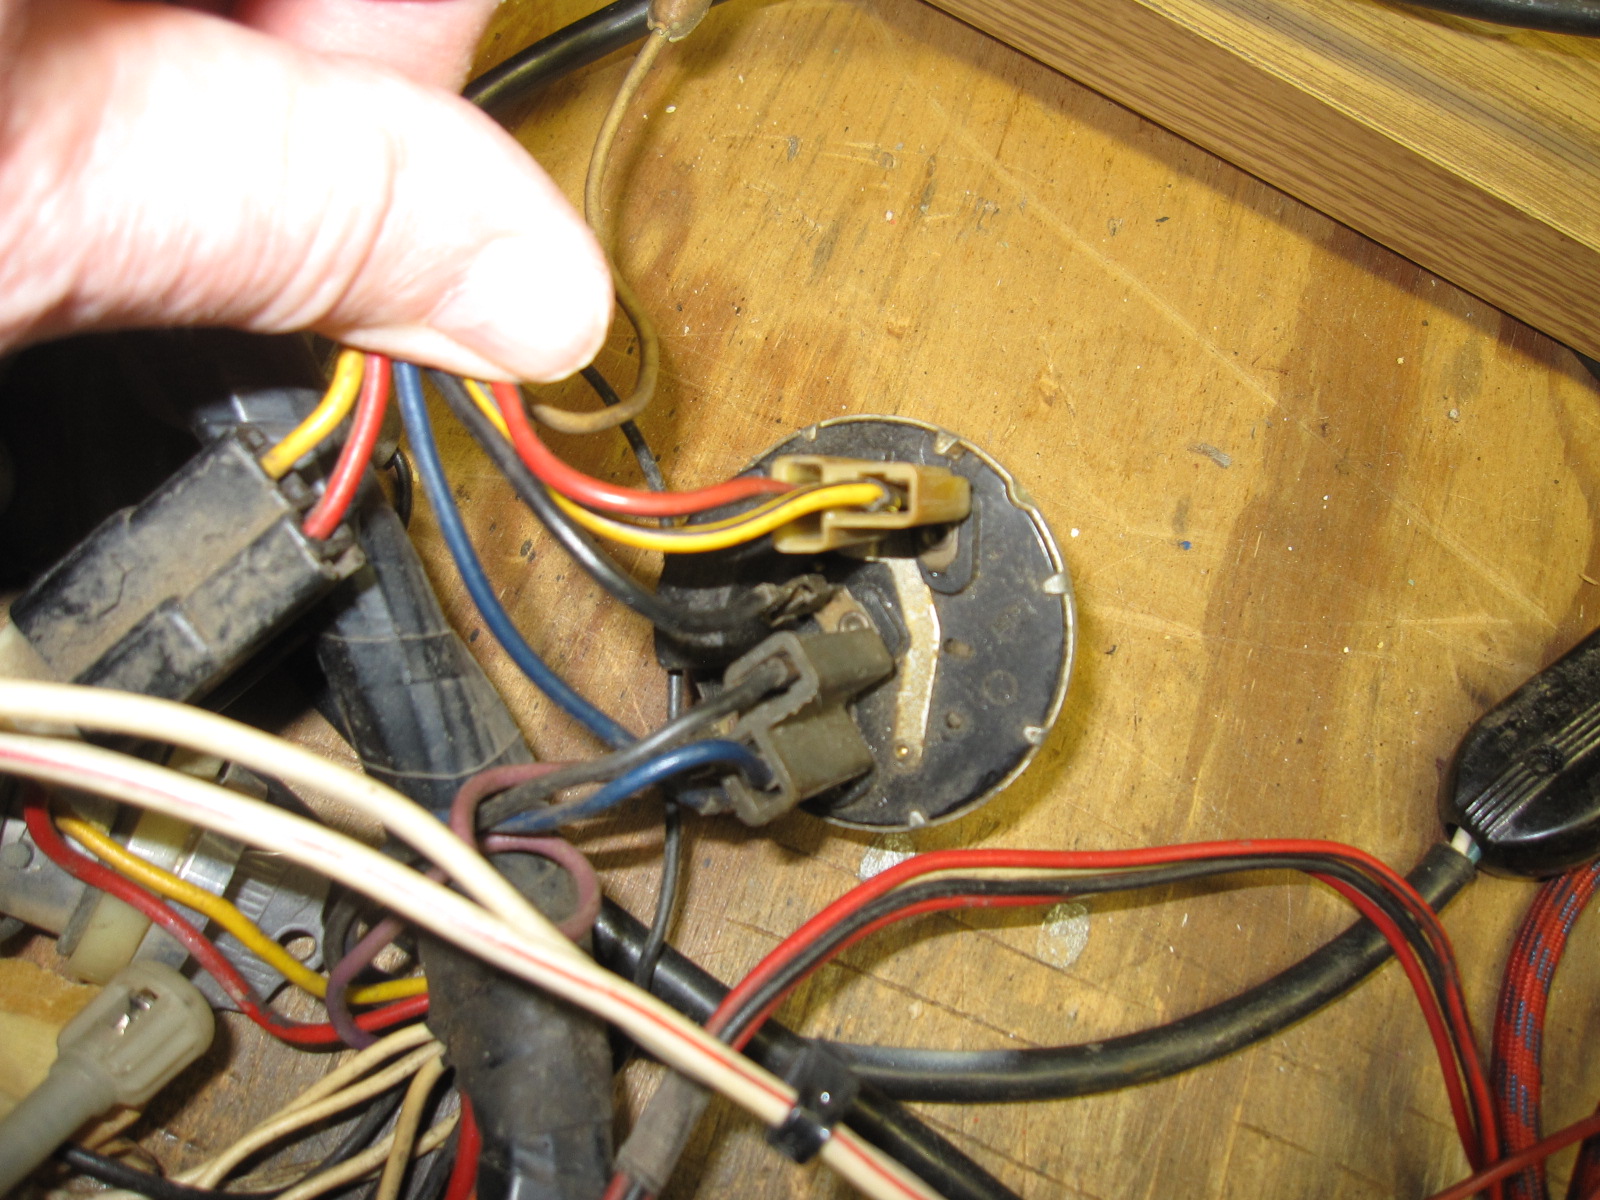
I hope this can help you out. I found this on Ebay years ago and could not purchase it fast enough. Just a heads up this is a 63 - 64 Harness. Notice the blue going into the wiper switch and a second blue going out to the harness. The blue wire I am pinching is from the foot pedal switch. I hope this helps. That harness has saved me many times and it included the power window option.


-
NO MYSTERY WORTH 100X the price. If you want to know how many 64 Avanti's (or 63's) with Gold exterior Claret interior Tilt wheel PW 4 Speeds were ever made, you can read thru the charts and see the exact number of probably every factory options and selections that were available. Even R3 and R4 ! (Sorry no R4's were sold.) The work the went into this was monumental. All Production Orders.
-
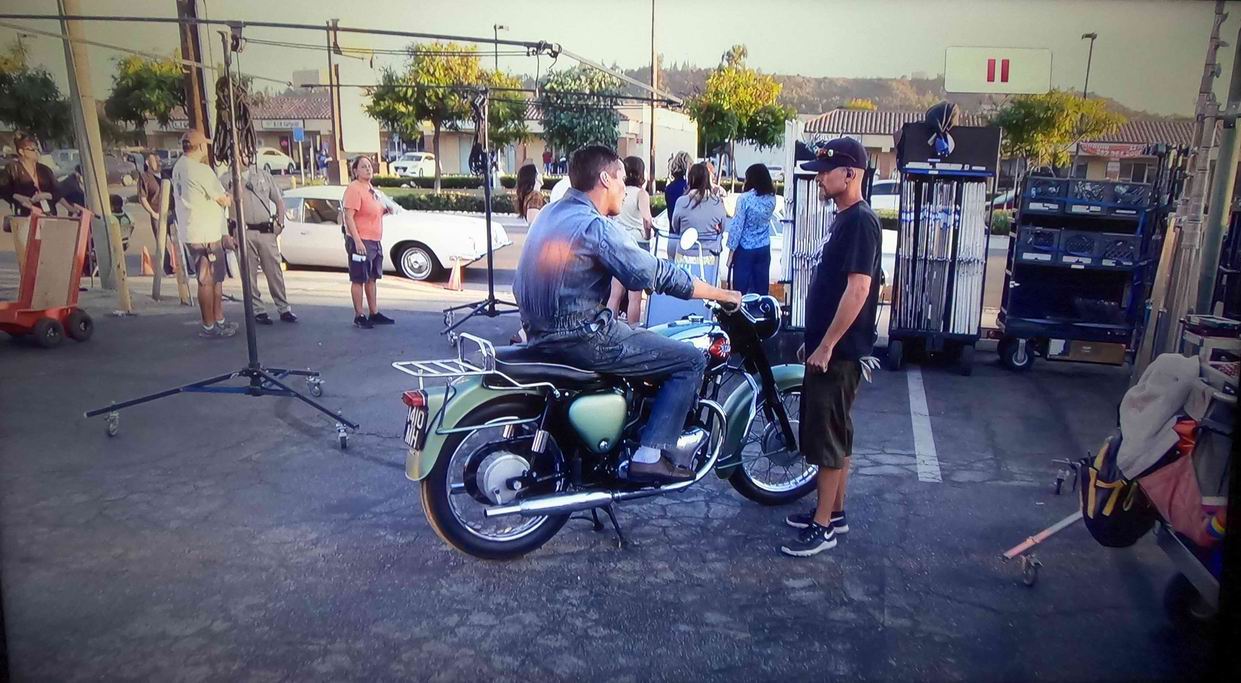
If you have seen the movie Ford vs Ferrari, you probably noticed a number of Studebakers in the film. While watching the extras on the Blue Ray version I happened to see this in one of the scenes that never made it to the movie. Well, at least they were thinking about us!

-
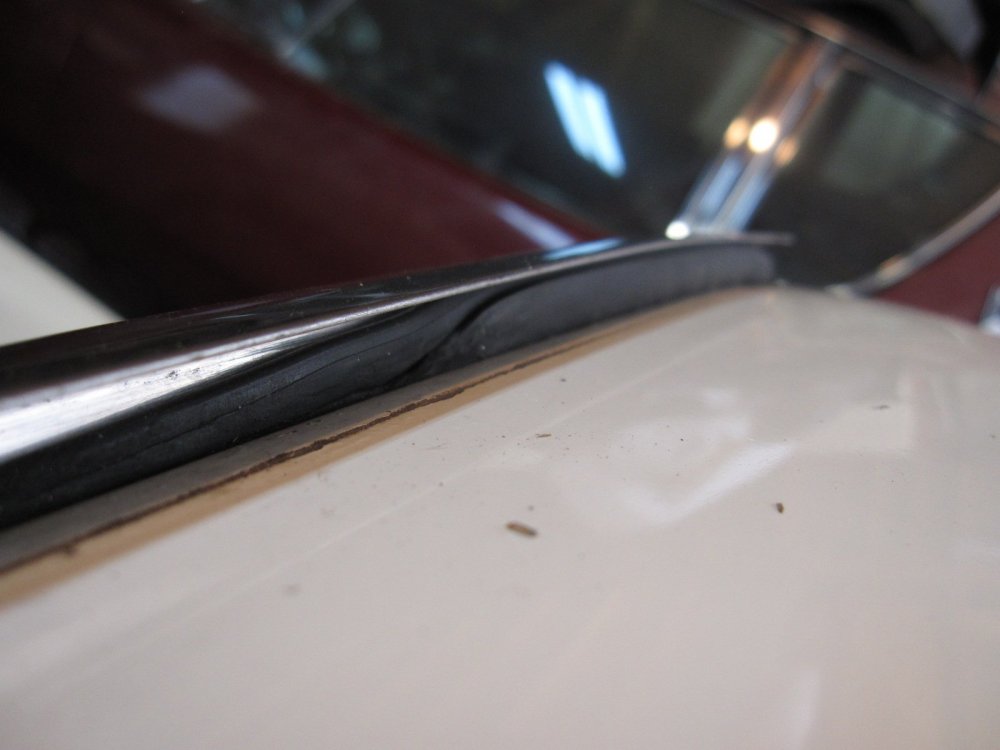
Great Picture Avanti83. But naturally I have another question. The clear tape on the top and bottom trim, does it go all the way to the interior side? The picture blows up real good but I can't tell if the tape stops just shy of the trim on the top and bottom stainless. I used string to hold everything together before I got your tape tip.
Thanks again, great tip.
Dan
-
Good Tip, I will try it out.
In your picture is the stainless already in place and then taped to the rubber and glass? Also do you have the rope in the picture all around the window and then crossed at the bottom?
Thanks, Dan
-
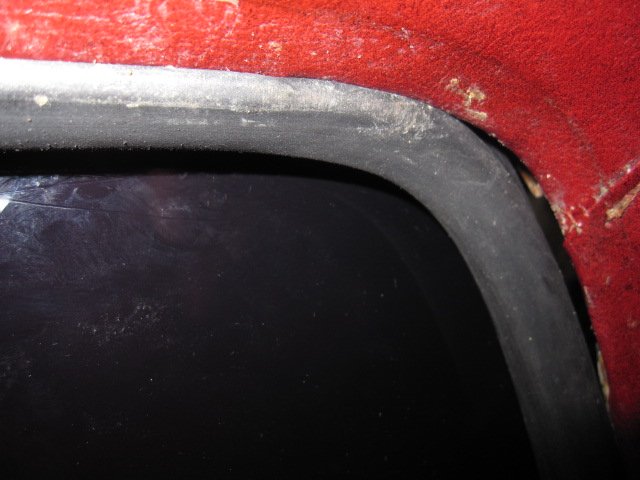
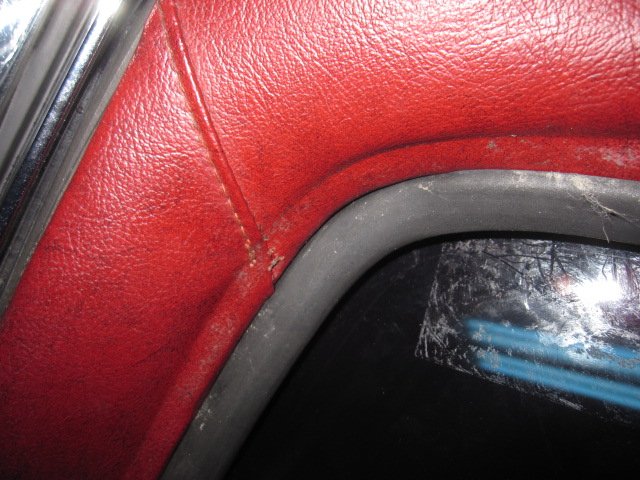
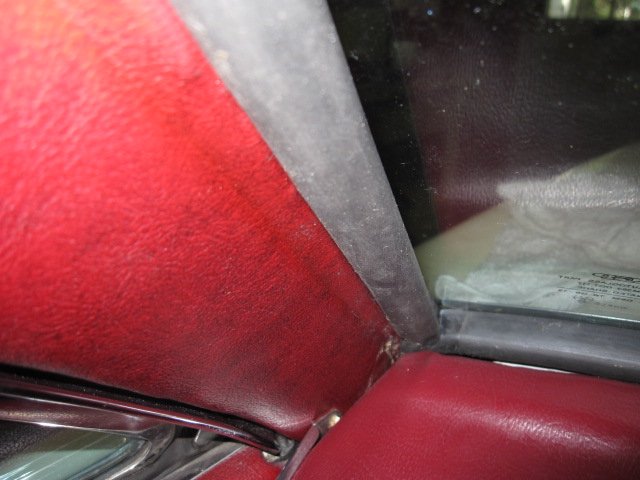
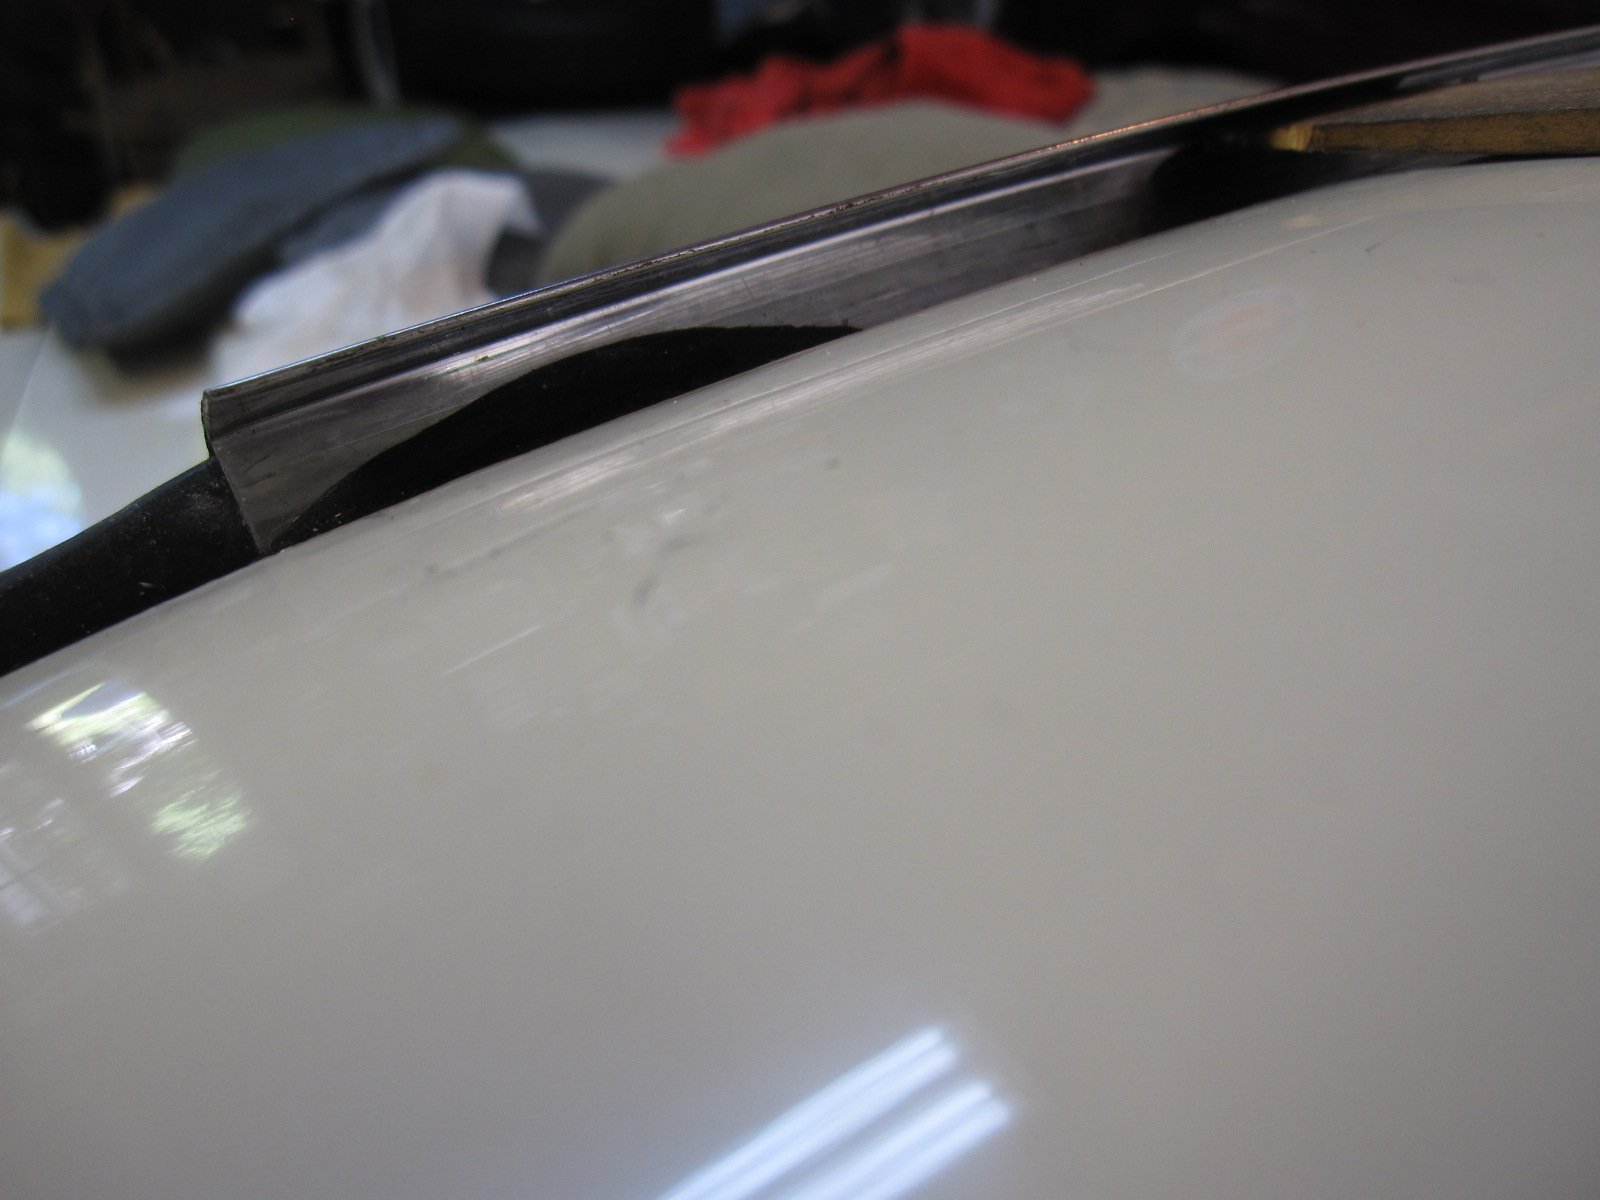
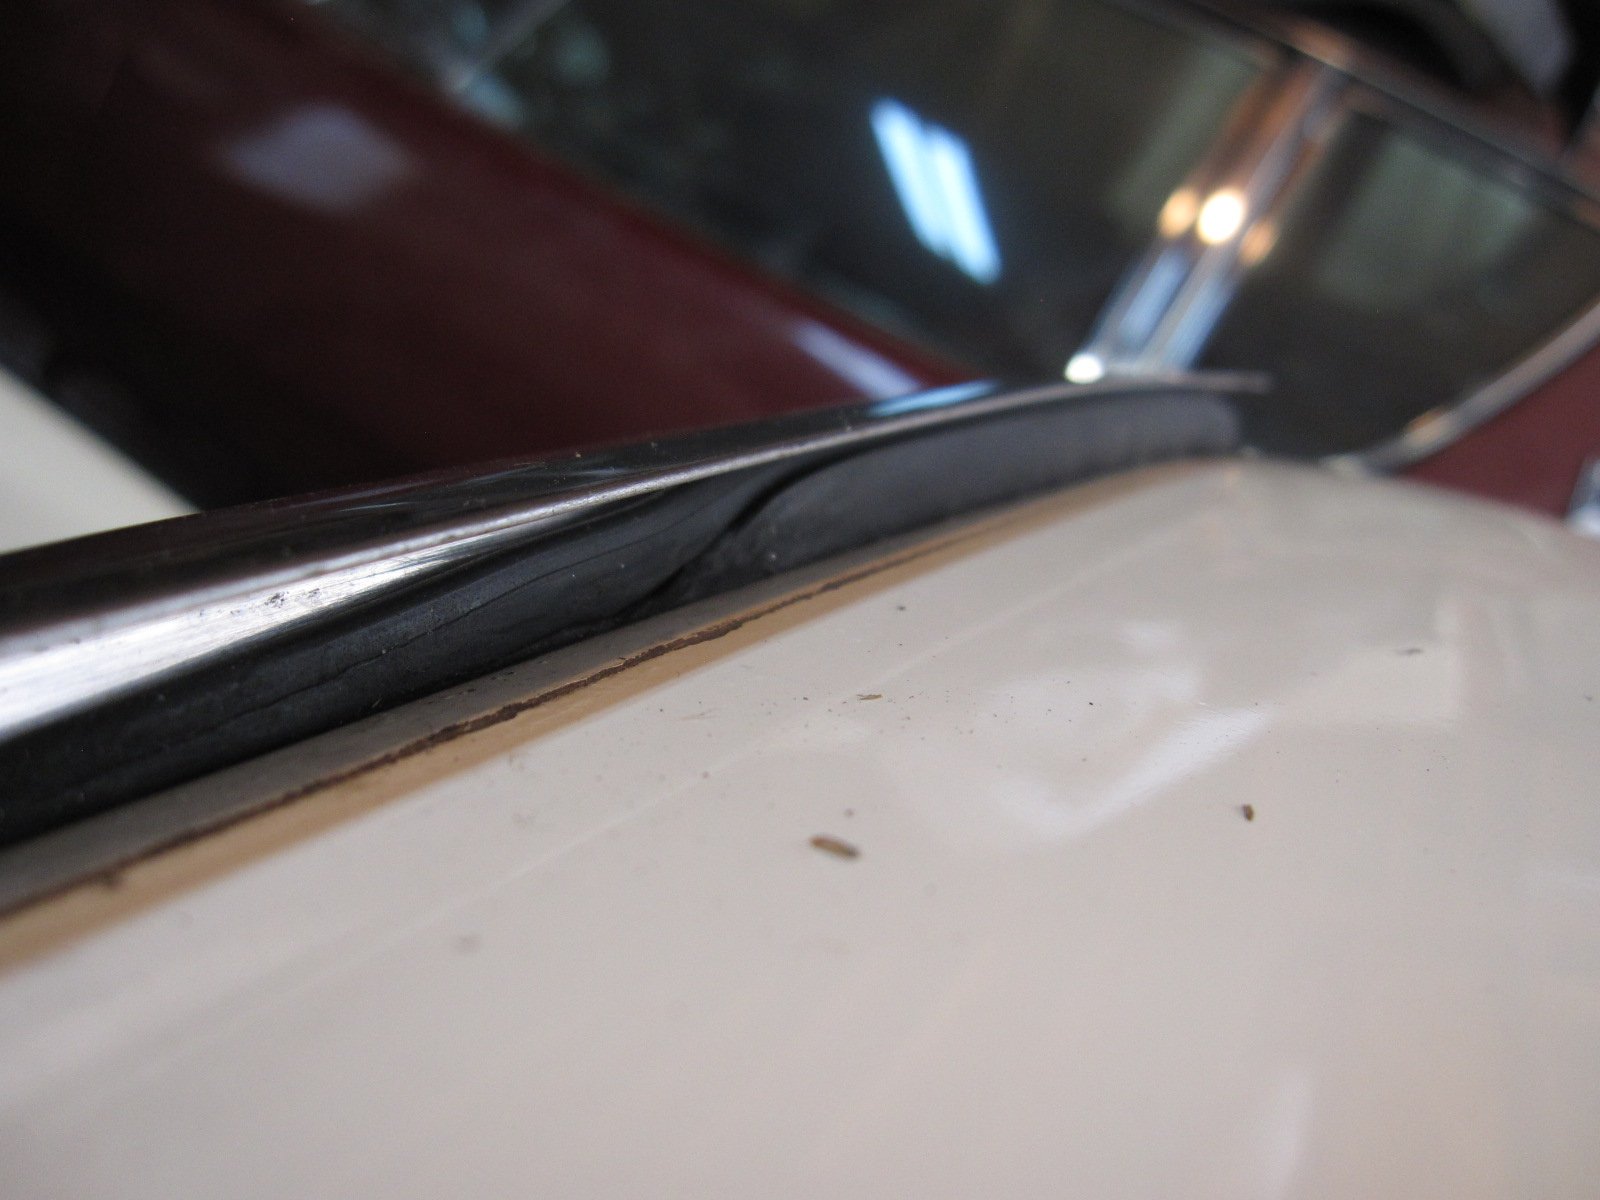
After about 20 hours of pushing and tugging I'm at this point. Left side small amount of weather seal that will not budge (1st Pic) Right side same right where the trim ends. Just a little perspective in the second picture all the black is stuffed into the roof area now and what is visible on both sides is about 2 inches of the material closest to the trim. 3rd pix. I have been pushing on the windshield and got the center part of the roof trim down to about 1/4 inch. The interior pictures are of the right corner and left corner. Gasket is totally inside the interior. And finally, the NEW windshield has some information on it, which I will display here.(Last Pic).
Brad! I may have a good deal for you on 4 Avanti's !
Thanks for any,
Dan
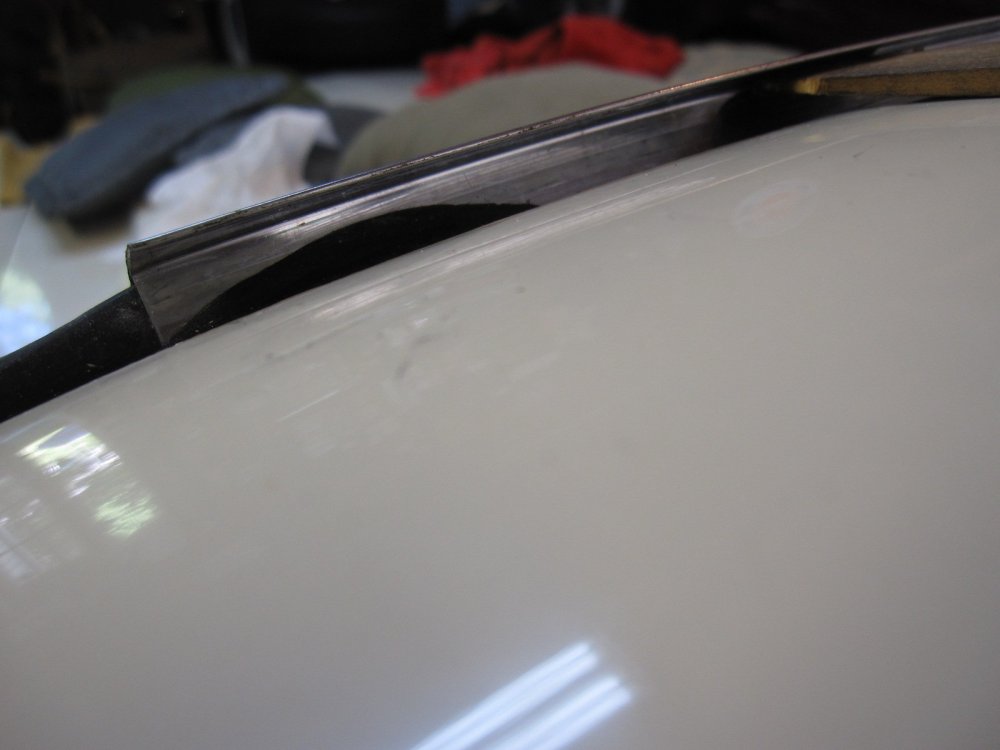
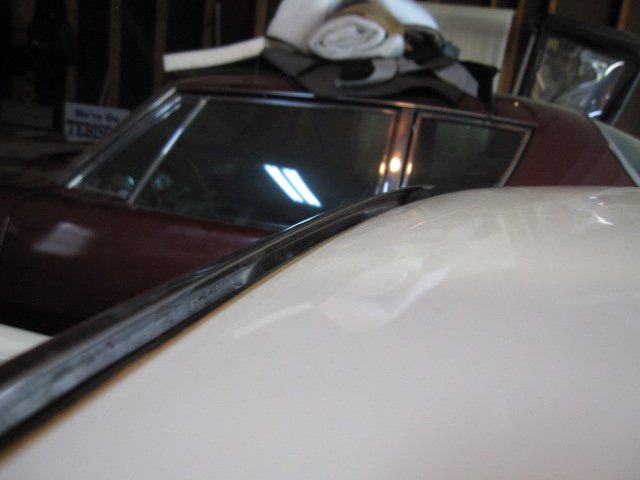
![IMG_1544[1].JPG](https://aoai.org/forums/uploads/monthly_2020_09/1954005912_IMG_15441.JPG.0acb52a6f341f4a9e8bec1885a421fb0.JPG)
-
Brad, that's the crazy part, the interior side of the gasket is 99% in place!
-
Stand by folks, pictures to follow. This is crazy. I've done this before a couple of times and never had this kind of trouble!
-
Any helpful tips for a new windshield install will be greatly appreciated. I have it about 98 % in except for about 1/2 inch at the roof stainless trim. Can't seem to push it down. I have even sat on the windshield (240 LBS+) and no luck. Any slippery solutions to ease the gasket in? The gasket is seated all around and is fully in at the interior side. Thanks, Dan
-
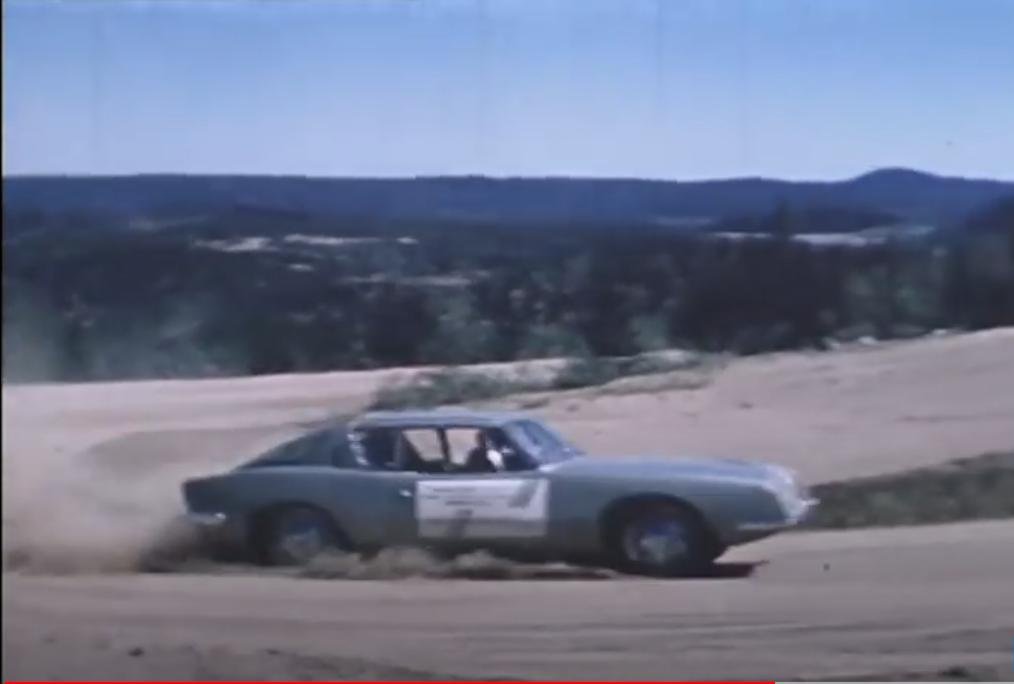
Does any one have a quality (original film) of Floyd Clymer Avanti at Pikes Peak ? I see a 1 minute version on YouTube with very good resolution and I have a a full version of the same film on VHS that is about 17 minutes long that is very poor and broken up. The attached picture is from the YouTube version and is pretty nice. I would like to make available the nice version full length and maybe put in some sound affects too. If have a 17 minute version of the quality of the picture, please let me know, any format acceptable.
Thanks, Luma

-
From Bobs Resource & Information Page are these fine lists of R3 & R4 data.
https://www.studebaker-info.org/XLS/R3cars02b.htm
https://www.studebaker-info.org/XLS/R34pub41.htm
Also reference back to the "3810" pictures, here is a 1964 R1 3589 underside picture.

-
Thanks, they are great!
-
Rags63, No difference on the superchargers, but high output pulleys were available as an option. Some Bonneville cars had external coolers also.
One more favor if you can carefully take photos of 3810 underside of the base, I would greatly appreciate it. Also where are you located?
-
Rags63. THANKS A TON for the 3810 shots. They are awesome. If you ever want to sell it, let me know.
-
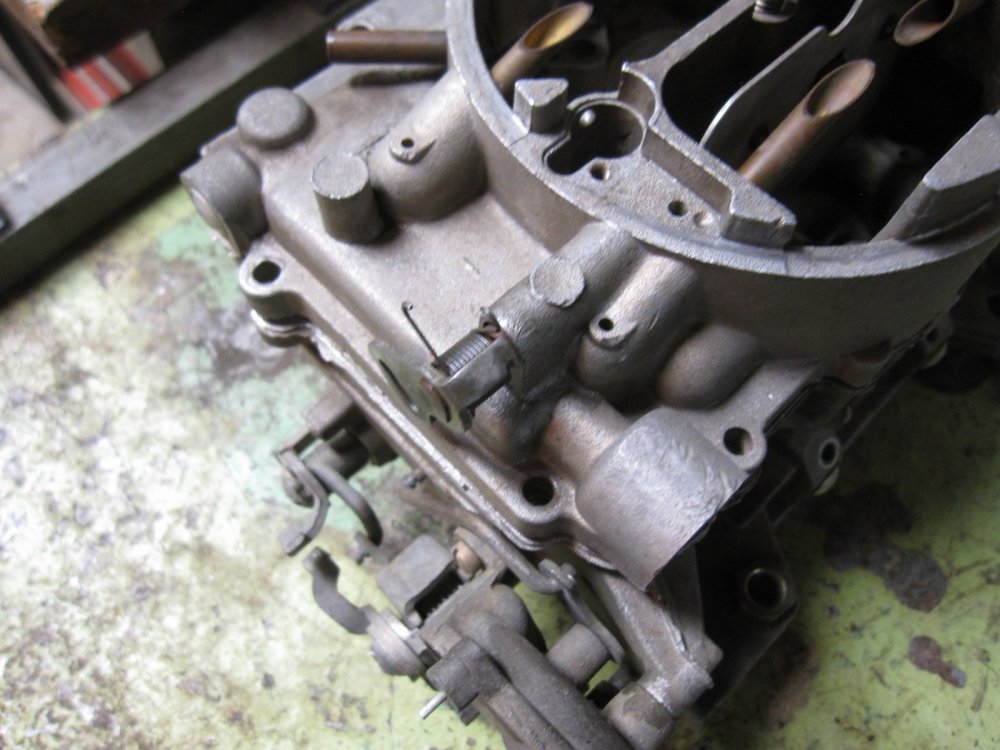
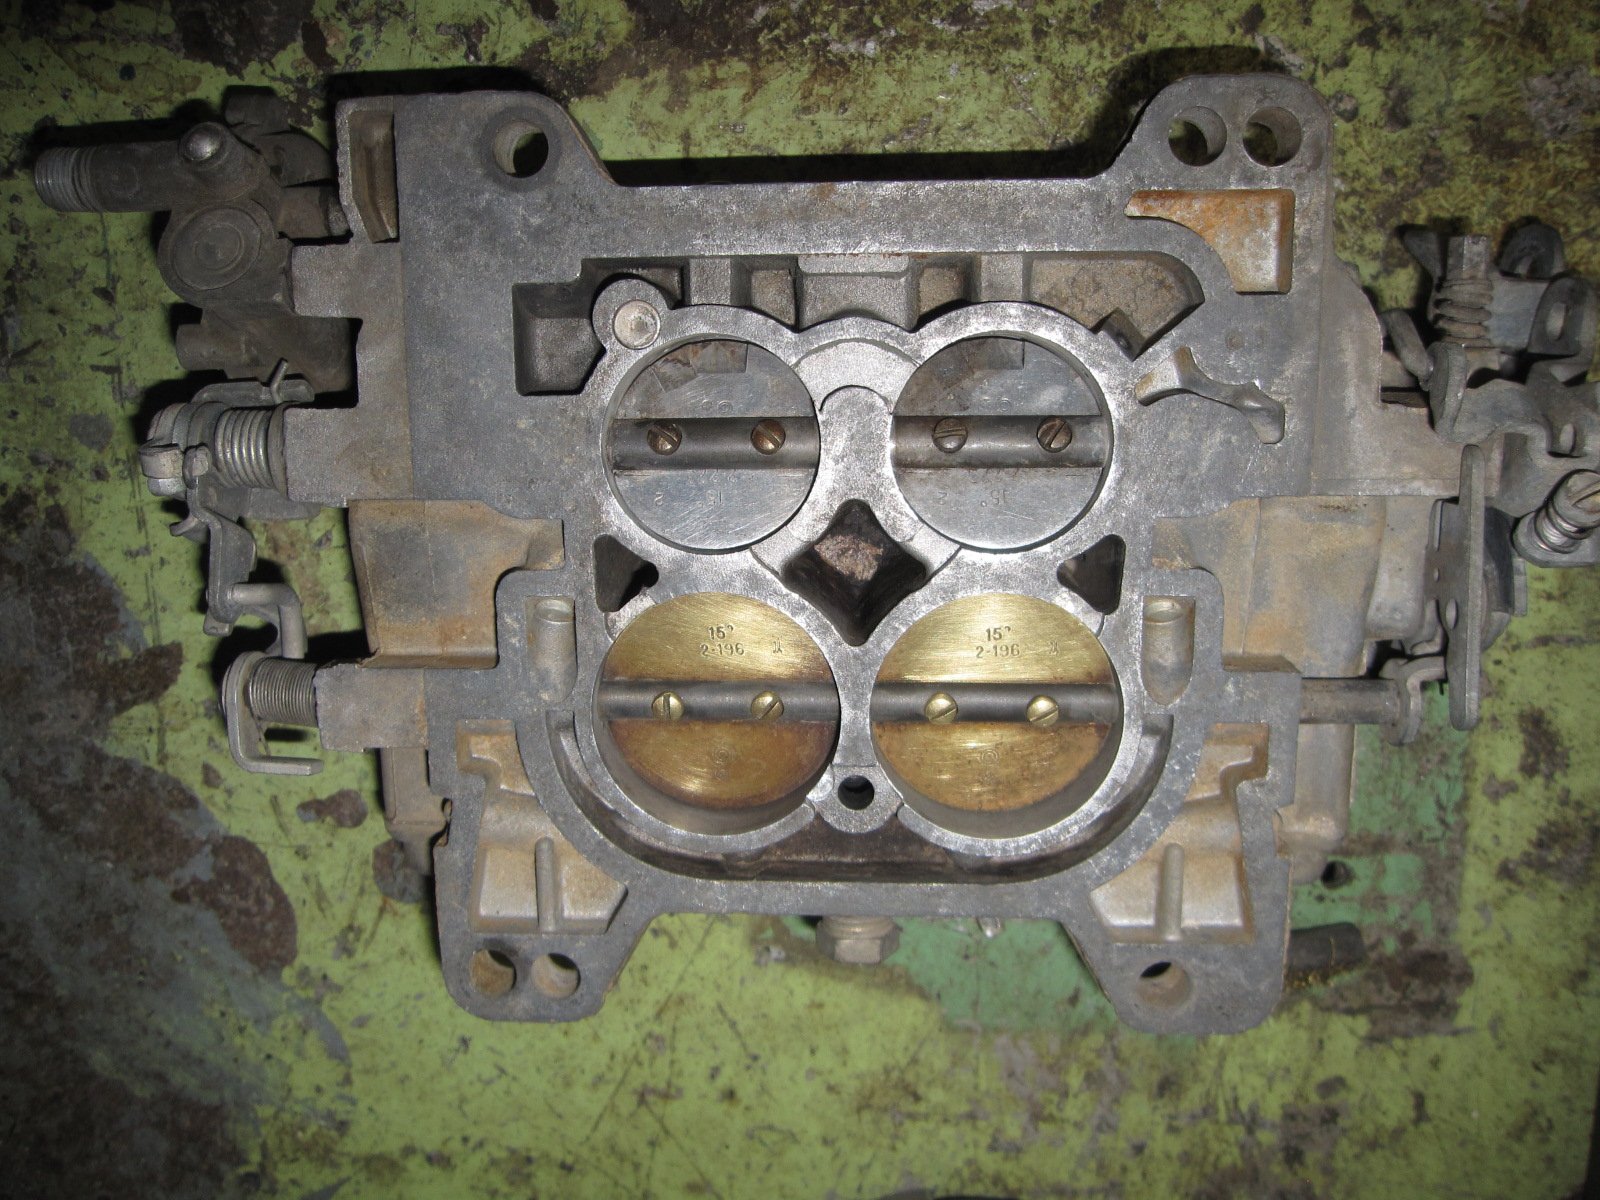
Years ago I spoke to Chris Banks from STU-V and if he was involved with your engine build it should be exactly as the paper work indicates. Is there any casting number on the intake manifold? Are the heads on the motor? Can you put the manifold on the engine and see if it looks like it is lining up with the head? As for the carbs, 3810 (no choke?) goes in the front and you could put one of the other carbs in the back spot. It might be a bit rich in the fuel department, but it should run. Can you post some pix of 3810 Carb? Also on the 3725 Carb, is there a spring located on the choke valve top, passenger side? See attached picture.
-
Over the years I have seen a number of true round headlight 64 (after serial number 4892) Avanti's and have a question for the experts. Did any of these cars have the extra air intake cowl on the left side near the windshield, hood top support on the right side of car and the standard battery size that was used on the square headlight cars? I always thought they built a 64 after August (63) but I think the had leftover 63 bodies that would get all the interior updates and other mechanical features of a true 64 rather then use a round headlight fiberglass nose on a 64 build. Even the Avanti emblem was in the higher position on the nose. A perfect example of what I mean is in this YouTube video. I'm also pretty sure this car has the 64 Style parking lights.
-
If I understand your question correctly, the easiest answer is to move the steering wheel off the center notch probably by 1 click on the column. Test it before you tighten the steering wheel back in place.
The correct way would be to center all the connections on the steering column from the box, to the rag joint, to the flange and then the column. Make sure your wheels are pointing straight ahead also.
-
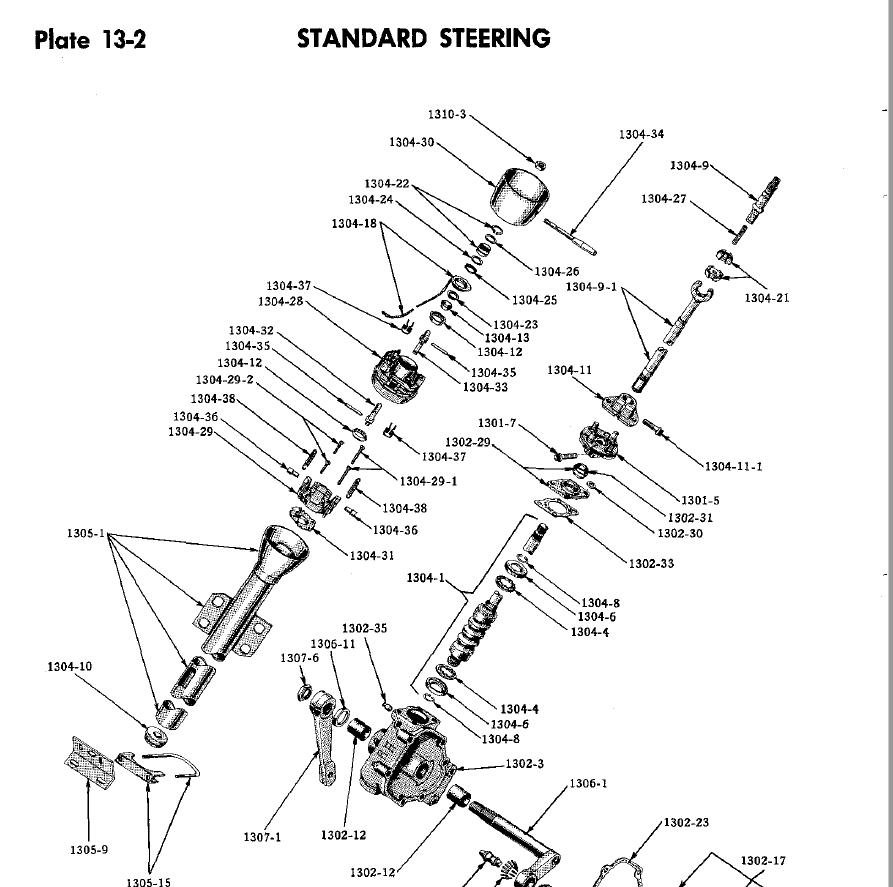
I just happen to have a Stude tilt column on my workbench so I measured it to post here. Its exactly 35 1/4 inches in length. I think that was longer then a Riviera column. I never looked at a Cadillac version. There is some adjustment at the steering box end, maybe an inch. On a side story, I once purchased a nice 64 Steering wheel and when I got it I thought the seller had sawed the wheel of the column. Wrong, it was off a tilt wheel stude and the 40 spline special tilt part unique to the Stude was left in place in the wheel unharmed! I still have that part. It is 1304-9 from the attached picture. Will trade for an 8 grand tach.


63 Window Mechanism?
in 1963-64 Avanti
Posted
How's this? Front and back pic and 1 page from shop manual.