

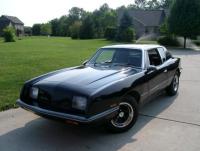
IndyJimW
-
Posts
584 -
Joined
-
Last visited
Content Type
Profiles
Forums
Events
Posts posted by IndyJimW
-
-
Wow .. that totally sucks. What were the events leading up to this? Just one day
you went out to start it, OR it was running and died and nothing?
Tom
Its my daily driver and I've had electrical problems that come and go, never long enough or serious enough to dig into. Was driving around town for a couple of hours and stopped for lunch, came back out and car was completely dead.
 Had a test light and a volt meter with me, so I started looking. Power into and out of firewall plug, but no juice anywhere else. Ignition switch dead, fuse block dead etc.
  Problem will be easy to fix just need a wiring diagram to help me,(Come on Ernest, THANK YOU!! THANK YOU!! THANK YOU!!
  ) I don't want to cut open the entire harness to trace that power supply wire, but it wouldn't be the first time.
Jim
-
Well the electric gremlins finally won today, my '87 is completely dead.
 I've been waiting for this to happen so I wouldn't have to chase all the little mystery problems. Before I dive into the wiring and start to cut open the factory harness does anyone know WHERE the sole power wire that comes off the starter solenoid and into the firewall electrical plug-in goes? The '87 Monte Carlo SS wiring diagram shows three 10 gauge wires supplying electrical power, I can't believe Avanti used ONE 10 gauge wire to supply power to the whole car! That explains the three jumpers on the fuse block necessary to power all the fuses. After I get this figure out and repaired I’ll post info on how to upgrade ’87 wiring.
Jim
-
Will your frame fit all Avantis or just 63-64?
-
Hi Guys,
I have a 1971 Avanti II w/4speed that I think has a bad ignition switch. I started it just over a month ago fine and yesterday I went to start it again and could not turn the ignition key into the on position. It would rotate back to turn on the accessories but not forward to fire the engine. I'm guessing that I have an AMC ignition as I have an AMC key for the car, and it is a tilt column. Any ideas? Also how do you remove the ignition switch from the column?
Thanks,
John
I'll check my old repair manuals tomorrow, but if the design is new enough and the problem is in the switch and not the lock, the switch is located on the column tube about half way down. It will be held to the column by two screws. The lock moves a rod that slides in a groove in the switch. You can disconnect the switch and use a screwdriver to move the slide to test the switch. I have seen them come loose and move with the rod, in that case just adjust the switch and tighten the screws.
Jim
-
I've been testing the electric fan for the last week with great results. My engine uses a 195F thermostat and I haven't noticed much difference in engine temperature. There is some more movement in the gauge from the fan turning off and on, but it doesn't get any hotter. I still need to get the A/C running so that I can test with the A/C running. I have noticed a bit more power in first and I'm wondering how this may affect my fuel mileage.
I can't tell when the electric fan is on and I really enjoy driving the car more now without the engine fan noise. I would highly recommend this fan kit. 
Jim
-
System works fine so far. The only thing I don't care for is the way the controller works, on at 200F, off at 185F. I'm looking at a controller from http://www.dccontrol.com/ you set it at the temperature you want and the controller adjusts the current to the fan to keep that temperature.
Jim
-
Does anyone have a drawing of the wiring to the defroster switch for a '87 Avanti?
Thanks, Jim
-
Thats a lot more work then I want to do just to make spark plugs easier. I have found the
"sweet spot" to get my arm in there, the only drawback is being able to read the exhaust
manifold casting number off my forearm!

Tom
You need a set of the new Snap-On swivel arms!
Jim
-
Cool! Looks factory. Good work. I have read that those mech fans can rob quite a
lot of HP. Now .. the REAL question ... how does it cool??

Tom
I just started driving it, so far so good. I will keep you informed.
Jim
-
Jim, I think I should have worded that differently - rather than being a blanket indictment, I just meant that it can be hard for the non-mechanical owner to know when they are being well served. There are shops I trust and use when I am pressed for time.
Your wording was fine and I would agree with you. Just as there are many types of shops, I have found there are many types of customers. On a Chevy site I visit a shop was called dishonest because they charged $50.00 a hour flat rate, alot of people jumped in on that shop. I charge $70.00 per hour and work mostly on fleets. Most fleets understand business and what it costs, they wouldn't use me if I was overcharging them.
Like I said, its a topic that can get real ugly, real fast.
Jim
-
Here is a picture of the A/C condensor installed.

Jim
-
Just finished installing the fan kit.
This shows the radiator before installing.

This is the radiator installed.

This is the controller installed.

After I test the system I'll clean up the wiring, so far the sytem has worked find. The first thing that I noticed is how quiet it made the car. The fan is no louder then the heater blower fan on low speed. Seem to have more power off the line too. Now I'll have to fix that damn wind noise now.
Jim
-
Which brings up one of the sad facts of classic car ownership for the non mechanical owner: it is hard to find a shop that gives you your money's worth.
Being a shop owner I can tell you this is a topic that can get ugly real fast on both sides.
Only because I find such things interesting, I am wondering if there is any sort of break down on the actual numbers of: R2, 4 speed, etc. I looked all over the internet and didn't find any data like that. All I know is that my engine is RS2087, which should make it the 1,087th R2 installation for the '63 model year.The automotive and truck industry has been using the VIN for over a decade now to track options on vehicles to make parts ordering easiler and its still hit and miss. I can't imagine trying to get information on cars with records before computers AND with the myths and legends that come with a model like an Avanti. I know that build sheets are available but from what I have seen it just shows how many different combinations there were available.
Jim
-
Welcome! A 63' Round headlight, R2 with a 4-speed. Ahhh................I think I hate you already.
Jim Wood
-
Where do you suggest best place to find new radiator hoses for 85 Avanti?
THANKS GUYS
For my '87 I tried different upper hoses but none seem to fit right. I ended up with a Mr Gasket bendable hose, fit great.
http://www.jegs.com/webapp/wcs/stores/serv...10603&langId=-1
I used a lower hose for a '87 Chevy Monte Carlo 5.0L.
Jim Wood
-
John, I e-mailed you twice. Did you get my reply? Would be glad to help.
For the power window, pull up on the center console and switch the plug from the drivers switch to the passenger switch and then try the window. If it works the switch is bad. If not you will have to pull the door panel to get access to the wiring and motor. Mine just needed the wire plugin and ground cleaned. If needed the motors are available from any good parts store, I'll have to find the part#.
Is the wiper motor turning? If so it could just be that the wiper transmission has become loose or disconnected from the motor.
The heater/AC controls are a nightmare. The head is a Crysler unit. The slide has a cable that connects to a heater control valve located in one of the heater hoses. The rest is vacuum controlled so check your vacuum lines to the engine first.
Some sites to get info;
http://patriot.net/~jonroq/rjavII.html
http://autos.groups.yahoo.com/group/avanti/
Look under files for PDF on Kelly ac controls.
Good luck
Jim
-
What did the serpentine belt kit cost, and where did you get it?
Charlie
RQB-3921
You can get the kit from your locate dealership, Summit Racing or on the Net
http://store.summitracing.com/partdetail.a...15&autoview=sku
http://www.superchevyperformance.com/12497698.asp
http://www.gmpartsdirect.com/results.cfm?s...number=12497698
Jim
-
Got the radiator back from the shop, we removed the two radiator support rods and used the kit brackets to mount the shroud. The shroud should give plenty of support to the radiator as it is a very well made piece. I should have the installation finished in the next few days. Will post results with pictures.
Jim
-
I'm in the middle of some improvements that may be of interest to most Avanti owners.
I needed a A/C condensor so we modified one from a Ford Taurus, my radiator shop replaced the Ford condensor hose ends with the orginals. The condensor is larger but bolted in easily and worked great last summer.
I'll be finishing the installation of a Flex-a-lite electric cooling fan this week, I'll let you know how that turns out.
I just received a serpentine belt kit from GM. This kit fits all Small Block Chevy's and included all the brackets, nuts and bolts, A/C compressor, alternator and P/S pump. This should clean up the engine compartment and places the A/C compressor on the passenger side of the engine.
Jim
-
Ditto!
-
Not that confusing, I'm not planning to change the engine for awhile and the serpentine setup cures three problems I'm having now. A/C compressor bad, alternator not quite right and I HATE belts (20 years working on fleet trucks). Still not sure if I'll install a 350 or the LT1 yet, been watching the Chevy sites and learning the problems involved.
Jim
-
Being a professional mechanic I hate working on my own vehicles, so once I get started I usually "FIX" alot of things (that are bothering me). I decided to take the radiator down to the radiator shop I use to get them to build me some good fan shroud mounts, the ones in the kit were OK but.... Anyway I'm looking at the engine compartment and all the clutter in it

and decide to clean it up a little, one thing leads to another and now I'm;
1.) Moving the horns to behind the front turn signals on the bumper bracket, this gets them out of the engine compartment and out of sight. This also lets me to move the wiring harness for the horns and front lights from the engine compartment to behind the nose.
2.) Ordered a serpentine belt drive kit from GM. This will get rid of the old fan belt system, includes new water pump, alternator, P/S pump and A/C compressor. It will also move the A/C compressor from the drivers side to the passenger side of the engine, allowing me to get rid of about 10 feet of a/c hoses.
http://www.gmpartsdirect.com/results.cfm?s...number=12497698
3.) With all the room I now have with the radiator, shroud and all drive accessories removed I 'm going to install a ground kit that I've had laying around waiting for the right moment.
4.) Install new poly engine mounts.
5.) God only knows what I may see next, did I mention that I'm a professional mechanic and HATE working on my own stuff!
So now my Avanti's sitting in the middle of one of my bays, blocking my mechanics and ticking off my service writer. Did I mention that I hate....
Jim
-
Pic of the SSBC caliper and 16" rim, will get a picture with the wheel off later.

Jim
-
I've started installation of the Flex-a-lite Fan kit and wanted to share some photos.
These are the parts you get with the kit.

This is the back side of the fan shroud.

This shows the seal and quikserts.

I pulled the radiator to make it easier to install the fan shroud, this shows how well the kit fits the Avanti radiator. The fan shroud sits between the tanks perfect, with about 3/4" of core height not covered. I will have to modify the brackets they include with the kit or find some others.

I will post more photos of the installation later.
Jim
Air dam
in Avanti Pub
Posted
Heard that a Saturn air dam would fit the Avanti but couldn't find the info, so I visited my friendly Saturn dealer and picked this up.
Deflector PN#21031161 $20.25 w/tax
This is the large deflector for the S models, the smaller deflector is less than $7.00.
Here's before.
Here's after.
The guys in the shop say it makes the car look too happy. I haven't riveted it in yet, I'm going to put it on the lift and take pictures of the install.
Jim