

Leo B
-
Posts
382 -
Joined
-
Last visited
Content Type
Profiles
Forums
Events
Everything posted by Leo B
-

1. Trunk carpet Fasteners? 2. Wrench, jack and jack handle?
Leo B replied to Leo B's topic in 1963-64 Avanti
John and Regnalbob I see here and from Regnalbob's pictures how trunk carpet is installed and how its around trunk latch receiver. Thank you for your help. https://bringatrailer.com/listing/1963-studebaker-avanti-44/ -
1. Trunk carpet Fasteners? 2. Wrench, jack and jack handle?
Leo B replied to Leo B's topic in 1963-64 Avanti
Yes. I have R2 1963 R4543 June. The Avanti interior is original. Only the roof has disintegrated and it had fallen down. What confuses me is that the interior carpet is red and black and old and broken in the driver's footarea. Definitely original. Running Changes shows that there should be black after R-4275. It first seemed to me that my Avanti only had trunk carpet on the bottom. The authenticity manual indicates that the version was completed late. I think my Avant should have the same version as yours. The first owner had removed all the carpets from the trunk. Maybe he had spilled something there and it was ruined. Do you have picture how trunk carpet is done near trunk latch receiver? Like to know wire area. I have a good condition piece of fabric which is around receiver. -
1. Trunk carpet Fasteners? 2. Wrench, jack and jack handle?
Leo B replied to Leo B's topic in 1963-64 Avanti
Thank You Regnalbob for the good explanation and the good pictures.👍 -
1. Trunk carpet Fasteners? 2. Wrench, jack and jack handle?
Leo B replied to Leo B's topic in 1963-64 Avanti
There has never been any glue in this trunk. I cleaned it up and painted the worn areas with matte black. I also cleaned and painted the antenna ground. Also new felt pieces. Since the wheel wrench is under the carpet, it cannot be under the glue. The drilled holes show no signs of anything being in them. The fabric is probably held in place with the spare tire cover. I will use some holes to install carpet fasteners and I cover the rest of the holes. This Avanti had carpet only on bottom area. BTW. I found original trunk tools.
-
I have R4543 (June 1963) and it looks like the carpet was only on the bottom. All areas of the trunk are painted semi-matte black and there are no adhesive areas. Looks very original. The carpet was removed by the previous owner (before 1976) and I would like to restore this. The authenticity manual shows that later production did not have carpet on the sides of the trunk. Black paint was used instead. I have carpet around the trunk latch receiver so I can see what the carpet should be. The pictures show that screw holes have been drilled in the bottom and they are possibly original because a template was clearly used in the drilling. Questions 1. Are tho holes for carpet fasterners? 2. Where to find correct wrench and jack and jack handle?
-
I saw the answer from https://bezautoalchemy.com/blog/ 👍
-
Hi, My radiator reservoir tank had cover installed the wrong way round. Before I install it correctly, I need to be sure how inner layer has been installed. Do you have pictures about inside? Or information on which way the inner part is?
-
Thank you Nelson. I just read this from https://www.curbsideclassic.com/automotive-histories/engine-history-the-studebaker-v8/ Is this related? There was a tendency of the oiling system to send too much oil to the rocker arm shafts as they wore, which could lead to oil starvation on the bottom end and low oil pressure problems. This rocker arm shaft wear was often the result of extended higher RPM usage, like high speed highway driving. The engine would pump too much oil to the top end of the motor and it couldn’t drain back to the pan fast enough. In mid-1961 Studebaker made some modifications to attempt to correct this problem. They used a smaller oil passage in the rocker arm shafts to restrict the oil to the top end and a large drain hole in the cylinder heads to get it back to the pan more quickly.
-
Thanks for the good answer. 👍
-
I couldn't find if this issue has been discussed before. I noticed that the R3 valve cover has two breathers in both. Is there a particular reason for that? Heat? More breathering flow? Were the dual breather covers only on the R3?
-
I use Permatex® Ultra Black® RTV Silicone Gasket Maker instead of paper gaskets. When I installed new dust seal plate 1002-24, I moistened the felt in oil. Otherwise it was very difficult to install Brake Drum thru it. The cone part of the axle and the brake drum must be dry when you install the brake drum. Otherwise, the drum will not bite hard into the axel end.
-
I think the simple reason is that when you use right side like its done in factory and written in manual, you know where the shims are. No need to open both sides to make changes or to check.
-
My opinion is that the side does not affect the result. Even if you use both sides. When you want to remove the axle bearings, remove all the plates and tap the other axle lightly (with a lead hammer, etc.), and the bearing on the opposite side will pop out. The shafts move together about + - 1/2" without bearings. If anyone has a different view, I'd love to read.
-
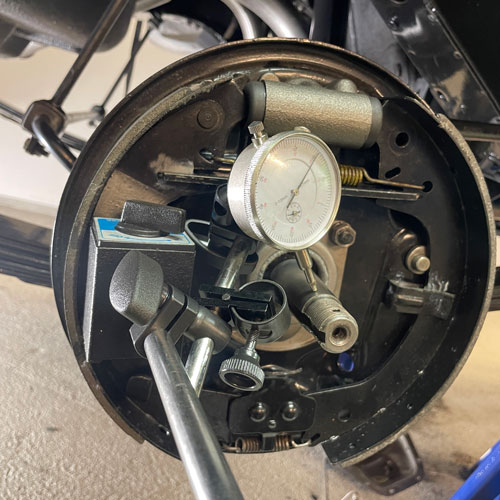
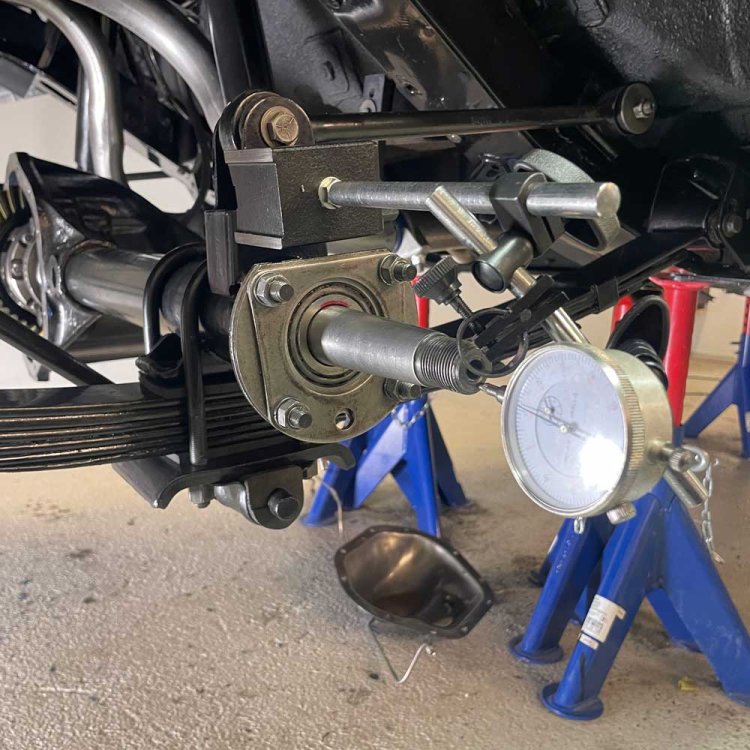
Yes. Thats an other thing to check. This the way to measure how straight the axel end is and is there any movement. Of course turning the drive shaft or differential gear.
-
Thanks for the clarification👍
-
If you want to measure the end clearance, hit the right axle lightly, e.g. with a lead hammer, to the left and measure. After that, hit the left axle to the right and you'll see how much the right axle moved. With the shims, you adjust the amount of change. You can see the target value in the manual.
-
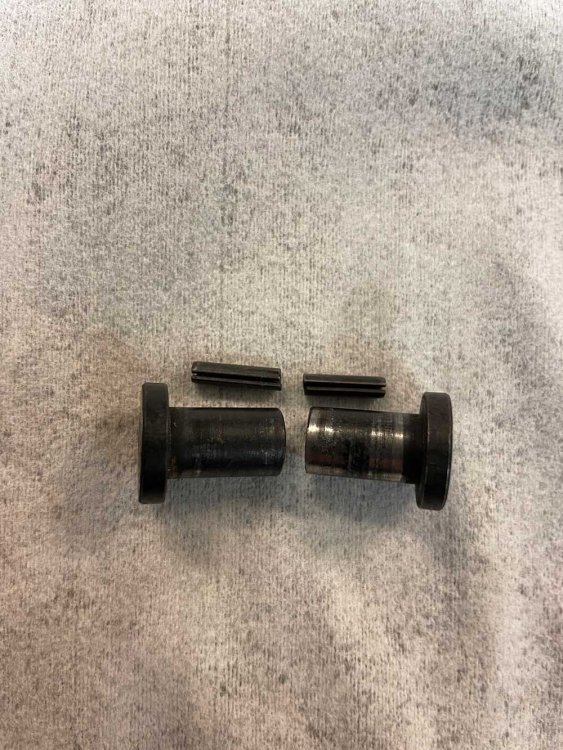
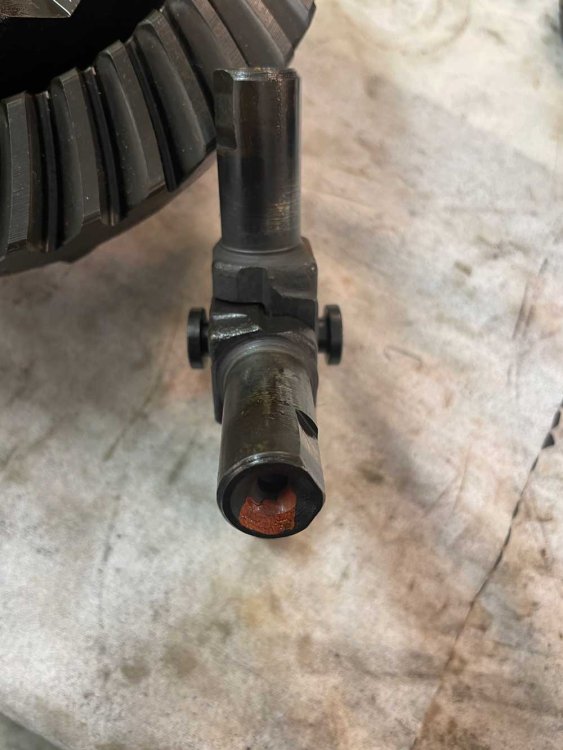
I'll try to explain this as best I can 🙂 In the center of the differential there is a grid with two pins. The pins move horizontally. For example, when you push the left axel, the right axel also moves. It is enough to adjust the clearance at the end of the right axle, and the pins are always placed in the middle of axels. If you remove the shaft, you must take care not to remove the pin. The pins are attached to each other with a pipe pin that can be broken like in photo. (If the pipe pin is broken the system still works but possible to drop those apart when you remove axel). If somebody likes to write/explain this better, please do it 😊

-
If you mean Hood Insulator / Hood Liner ... I used 3M #80 Adhesive Spray. I bought earlier the original styling material and lightly sewed the edges by hand so they don't come loose and hang. I also sprayed hole insulator with black spray. I also bought a neat insulator for the future. They have ready one for Stude Avanti. https://hoodliners.net/collections
-
Lower Control Arms - I Feel Like I'm Taking Crazy Pills
Leo B replied to Parklife's topic in 1963-64 Avanti
How about upper one? Same problem? Should be same thread. 1.134 - 1.136 -
Lower Control Arms - I Feel Like I'm Taking Crazy Pills
Leo B replied to Parklife's topic in 1963-64 Avanti
My 1963. Upper and lower are different but same outher thread size Lower Threads circa 1.134" Upper Threads circa 1.134". Inside thread is different.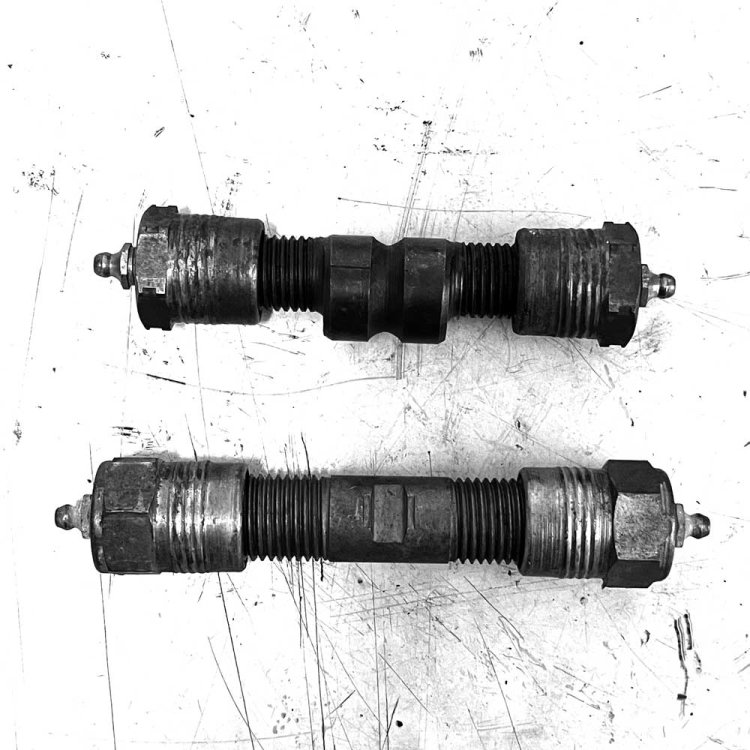
-
I remember it goes like in the picture - float moving in the right side. Main thing is that it does not touch the tank.
-
Hi, I dont have Glove Box / Center Console Box Key. In my Avanti Production Record. The Trunk Key no. is 1496. Does it help to make new one? SI has a key to make a new one. Product #1343378 Edit... Maybe a new key can be made to match the lock. If I remove the lock and take it to a locksmith.
-
Hi, Im trying to find Rear Lowering Kit (1") for Avanti -63 Dana 44. All I find are 3" wide for newer ones which are too wide. Correct Should be circa 2.5". Where to get correct?


