


Jred
-
Posts
174 -
Joined
-
Last visited
Content Type
Profiles
Forums
Events
Posts posted by Jred
-
-
Very cool. Where did you find the pocket? I’ve recently been thinking about building a space for a popup hidden stereo/screen in that area. I really want to update the og am radio but I love the aesthetics of it so hiding a modern radio is my next route… after more important items on my list
-
In this thread you can see some picts and other info of leds that I used. They work really well.
https://aoai.org/forums/topic/43270-fuel-gauge-wires/ -
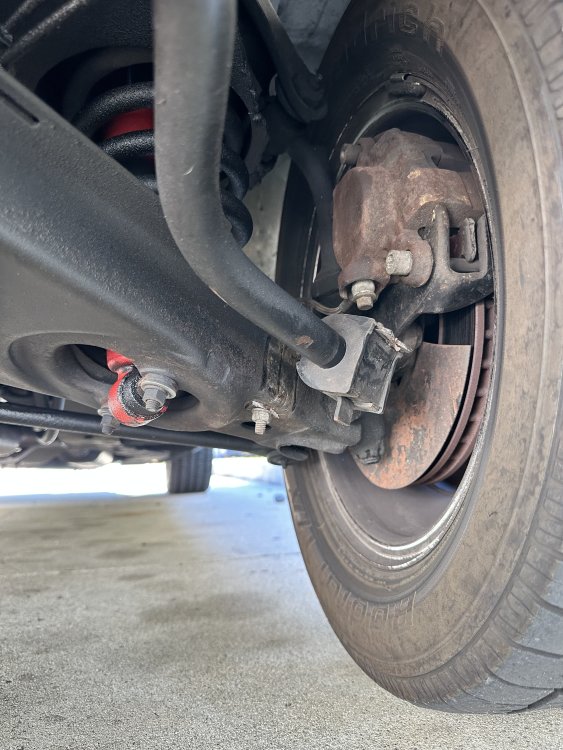
Felt a clunky clunk last night and this am. Jacked up the car to see this broken bracket. With google search I came across this fresh post on another forum. Going to give it a go with over the counter parts.
https://studebaker-info.org/Tech/SOB/sdc45279.html
-
Excuse my naïveté but does anyone know the torque spec on the front wheel bearings? I’m just plane missing it in the fsm
-
4 hours ago, ronmanfredi said:
I did mine a couple of months ago. I bought the bushing/shim kit and after tearing both sides down, I found 1 bad king pin due to a lack of lubrication. It turned out that the ball in the grease zerk was seized and that bearing/pin hadn't been lubed in years. So, I had to purchase rebuilt pins and then could reassemble the pins. During the process, I also bought new upper and lower rubber grease seals for the upper and lower arm pins as well, disassembling both, cleaning, lubing and reassembling. This is also a good time to set your caster and camber at max with the adjustable upper pin (through the rear upper grease fitting, 1/4" hex wrench) This will help your alignment shop get the alignment as good as possible. You want the Kin Pin up and down play when fully assembled around .003 using the shims in the bushing kit. I tried using the service manual to do this when assembling everything and both sides ended up being off, so I had to disassemble them to add more shims to tighten it up.
Thanks for the info. I’m sure when I read through the manual and get a visual on things it’ll make sense. I also ordered some fresh A arm bushings, while I’m there sorta thing
-
So after bearings, bell crank and tie rods…it had been a couple months, I took the car in for alignment. The shop wouldn’t align the car as the play in the wheels top to bottom. The play wasn’t there before so now I’m guessing the king pins are worn. Going to double check the bearing torque again.
Anyway, was just going to buy the entire king pin replacement and swap them out with direction of the fsm. Is there anything I should know about that the fsm or what the fsm won’t tell you manual doesn’t mention?
thanks!
-
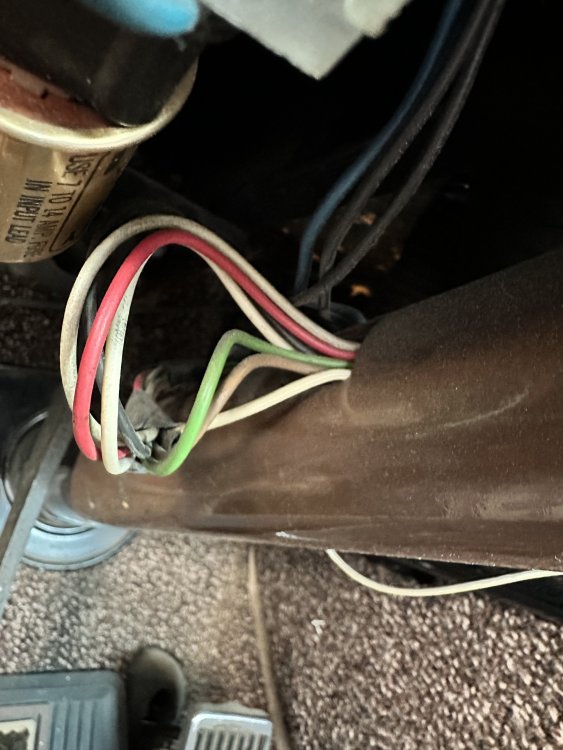
Went for it. If anyone in the future runs into this situation, yes the solid red wire is the correct wire. Brake lights work again.
-
I’m putting in a mechanical switch for the brakes. Reading the “what the shop manual won’t tell you” says “splice another wire into the red with white tracer coming out of steering column and take the other end to mechanical switch”
I have no red with white tracer there. Only red. Safe to assume that the red is what should tap into?
-
I remember reading some post I came across that mentioned studebaker had side visors, similar to the normal windshield visor but, well, mounted on the side. Fwiw
-
Okay deleted some picts in my past threads. See if that works…
-
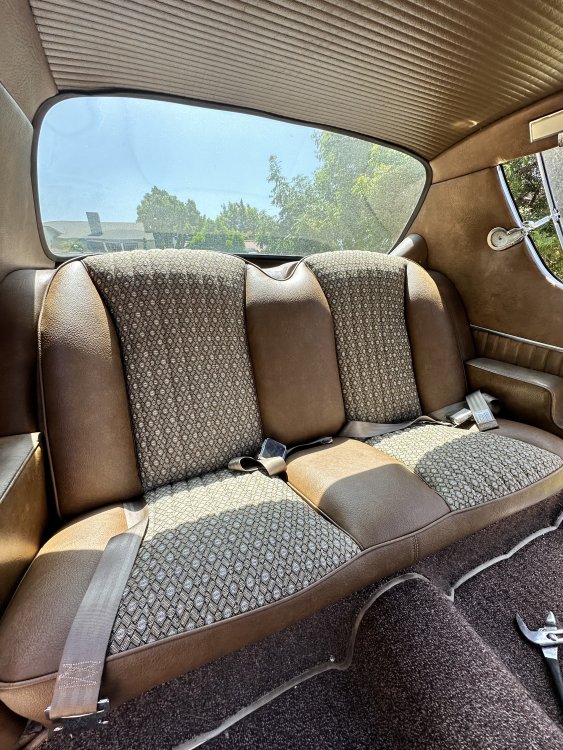
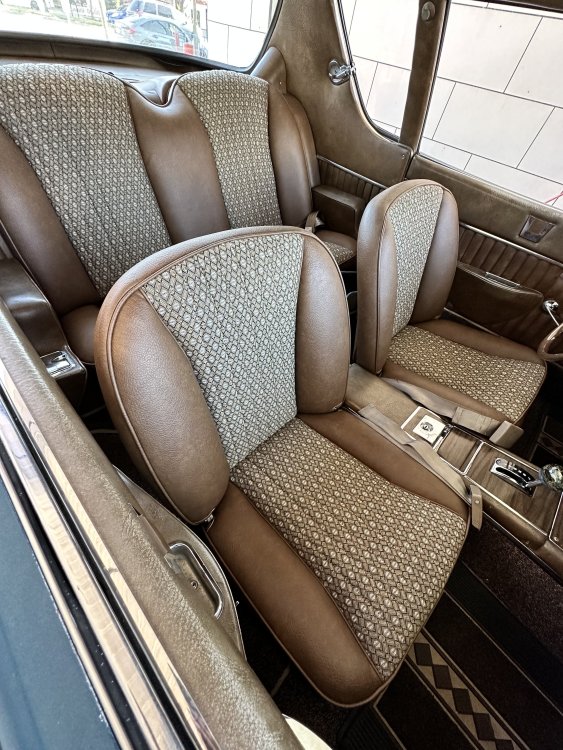
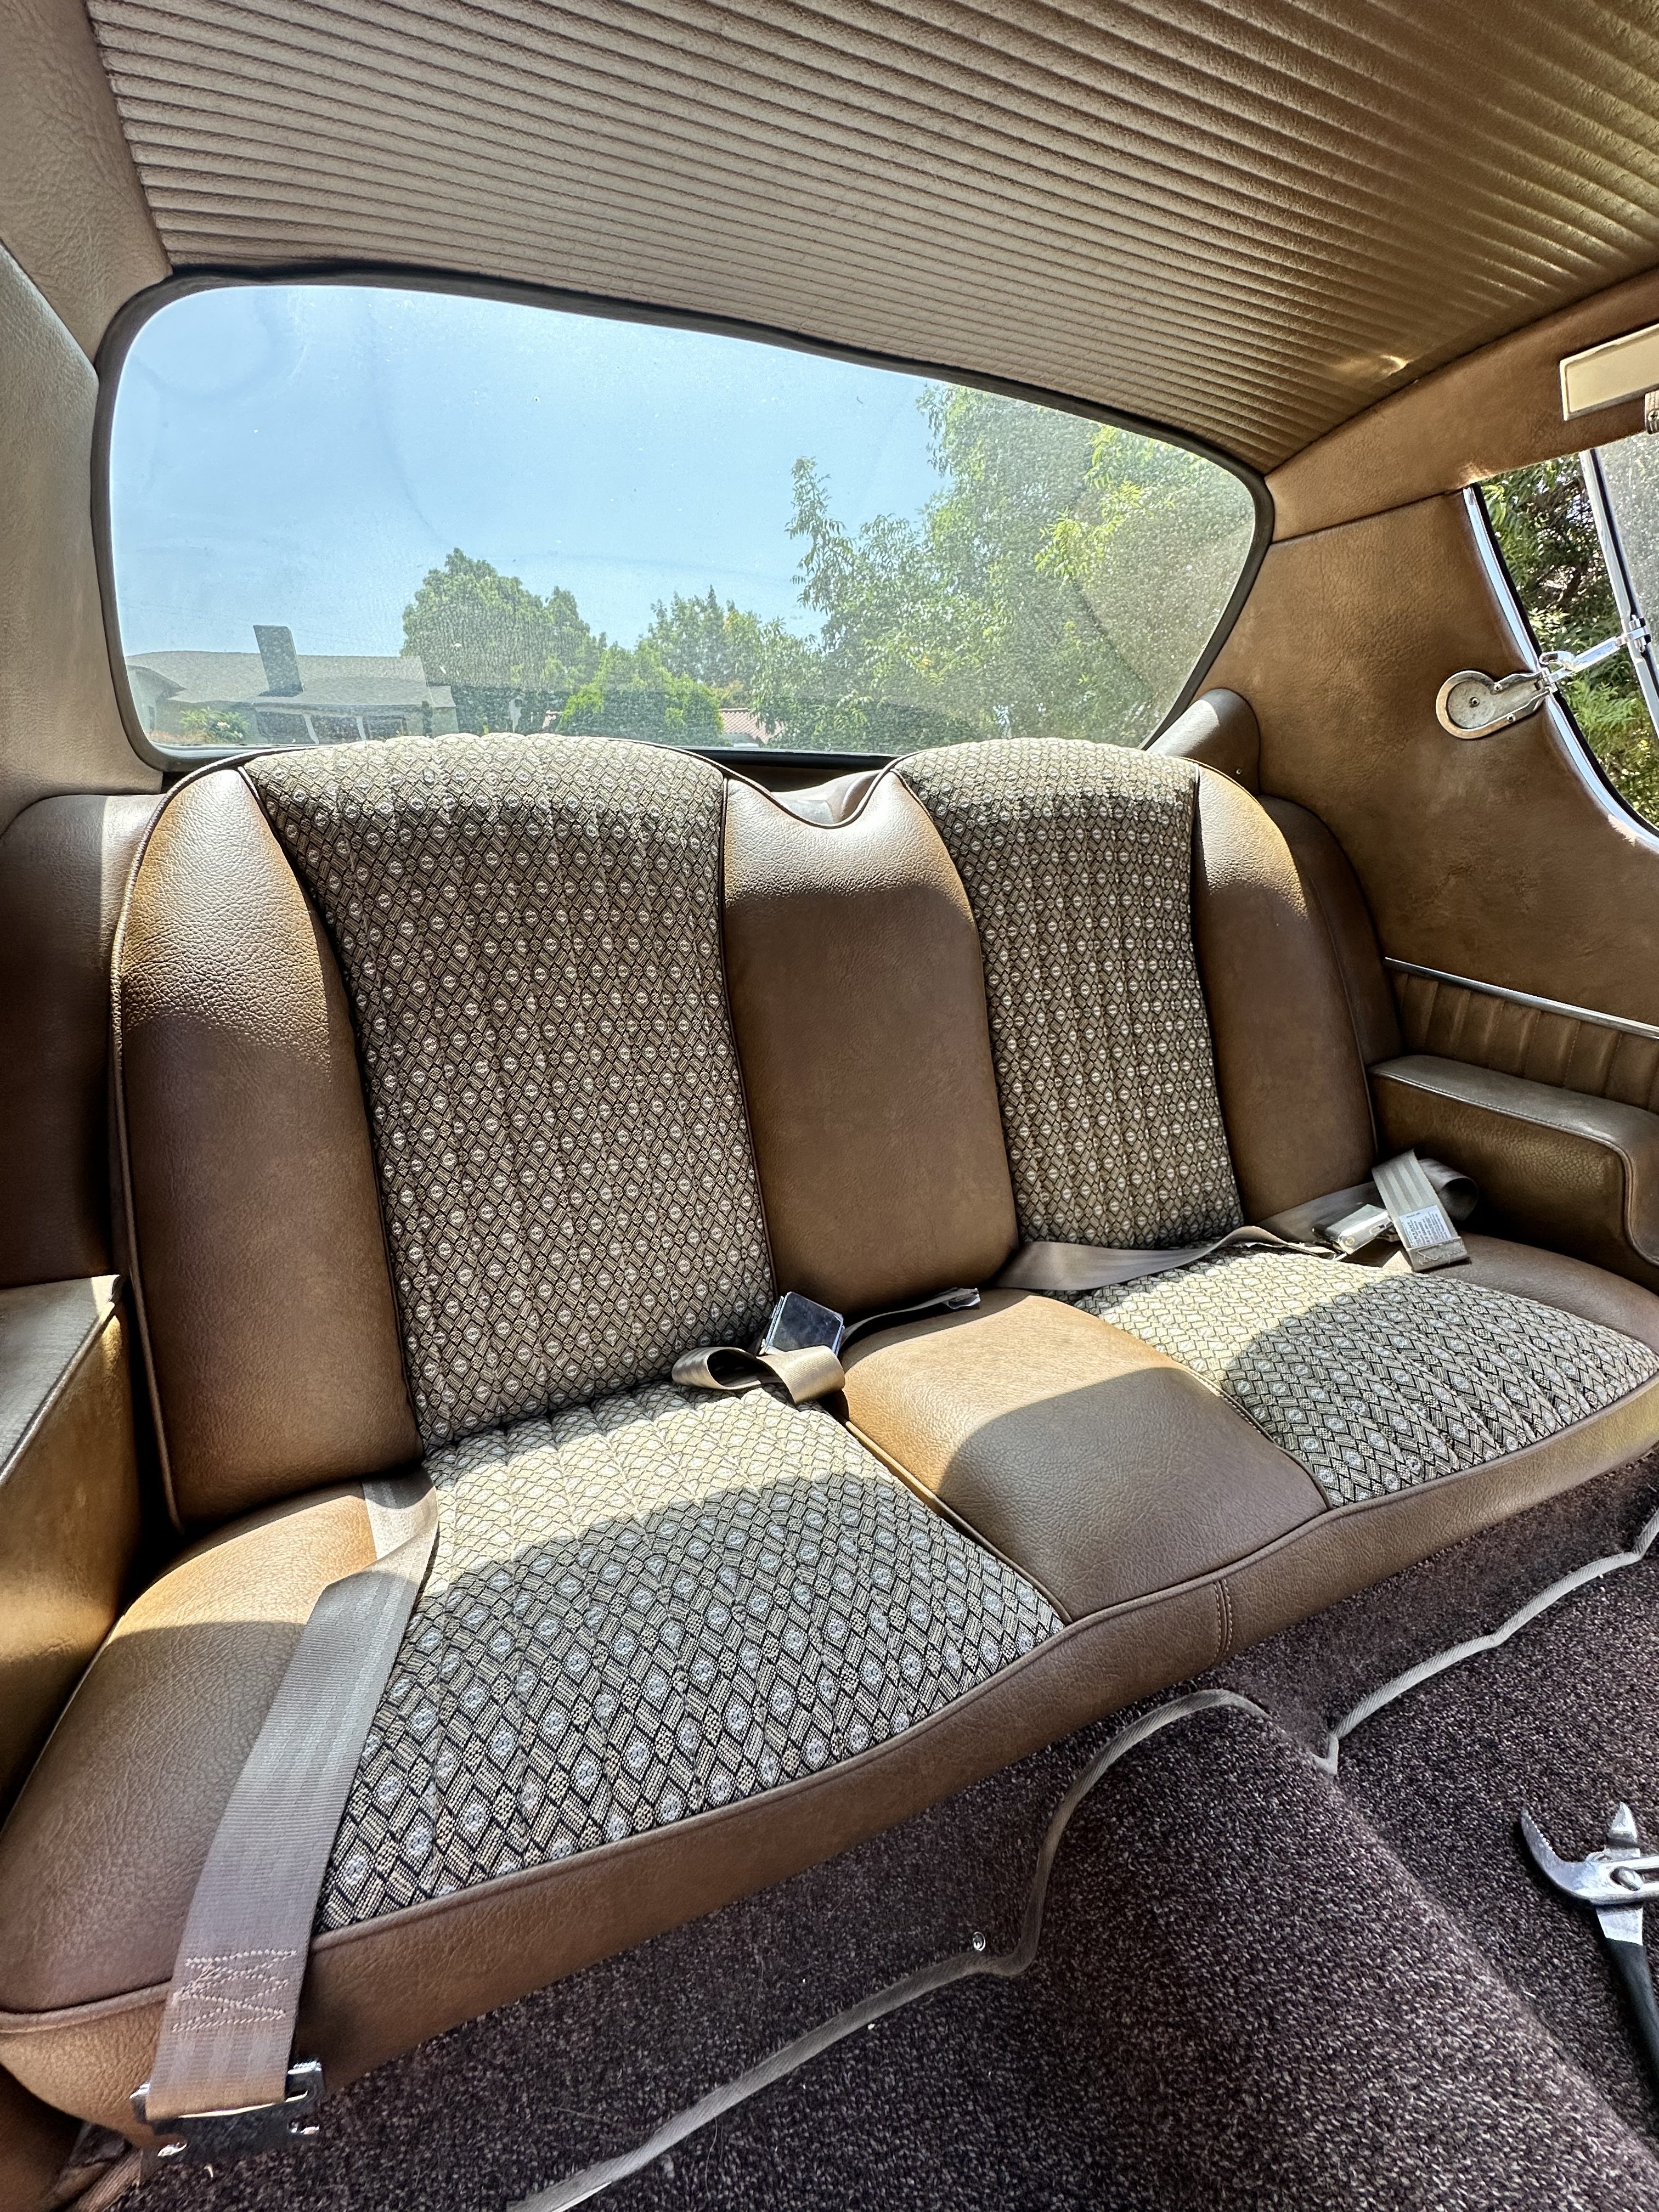
My seats were the original seats and vinyl. The dye from the seats was migrating off the seats with every drive in the summer heat. The outside corners of the seat were splayed open, dry and aged. Originally I found some leather and textiles from Relicate leather that were intended to replace the og upholstery. The summer sun was heating up the vinyl to intolerable temps for the wife and kid so I decided to go cloth centers. The upholsterer I found suggested using some dead stock from 1965 and some vinyl he could source to match closely. Both options ended up saving me quite a bit of cash. I’m pretty pleased with how they turned out and his work is really nice. I’d love to post some picts but with a limit of 5kb that seems near impossible.
-
A couple days ago I noticed the passenger side window has a hard time rolling. It will bind. This is a manual window by the way. Looking down into the door cavern while attempting to roll the window up I can see the arm that attaches to the rear of the track seems to pop inward after a turn of the handle.
I’ve taken the door apart in the past but was hoping I could find a diagram before I start removing things. Maybe have a part or two on hand and ready, being this is my current daily driver.
Thanks in advance. -
2 hours ago, Skip Lackie said:
If it's the original, it's 12 volts, only a few amps. The fuse amperage will tell you the max allowed.
Thanks for confirming. I gave the watch repair guy all that info.
-
I have a 1970 Avanti ii and currently the clock is at the watch repair shop to get working again. The fella seems to have the mechanical side sorted but was curious if I knew the specific amperage and voltage would be. Said he doesn’t want to over do it on the clock. Any one her know specifics? I didn’t see anything in the shop manual beyond the fuse number
-
Got the steering squared away. @silverstude offered some great info via dm. It was suggested that the bellcrank was the issue, as @mfg mentioned as well.
after some investigating it looked like that maybe someone had installed the wrong size lock washer on the pinch bolt. The washer was splayed open. I’m guessing over time the bellcrank shaft had worn enough to allow excessive movement in the geometry. That and neglect to lube any of the fittings along the geometry in the steering.thanks for the help and suggestions
Replaced the hardware, bell crank and tie-rods… car feels amazing now.
A-arm bushings are up next but that’ll be another weekend. -
With the car jacked up using Jack stands under the a-arms the only play I saw was an up & down from the bellcrank. Could this be one of my issues? The A-am bushings look pretty cracked as well.
-
Small update. Checked the steering box fluid and it was empty. Filled with “00” grease.
Seems to be turning a bit better but the wandering and lack of return to center isn’t any better.
apologies for the ignorance but does anyone have recommendations on a starting to checking components before I start replacing and rebuilding the front suspension/steering? Currently running fresh tires and shocks. -
Should I have the car lifted up from the crossmember with suspension hanging, when checking components? Or better to have the weight of the car on the wheels?
-
This last week my steering wheel has been a bit sloppy and not returning to center. Suggestions on where to start?
-
Interior lights at “high” and “low” seemed the same before and after. There was never a difference in my car that I could notice.
the metal bezel on my gauges are pressed on and crimped on the rear. I was able to remove mine on the clock carefully using a dremel tool. It was the only way I could get to the inside guts of the clock for a clock repair shop to asses. The task didn’t seem worth the time to clean lenses.
-
I noticed today that the trunk area is fairly wet. Wondering if water is coming in through the rear windshield, down into trunk and making its way under and in front of the rear seats. It doesn’t look or deal like it’s making it’s way in from the back edge of the door but that might be a possibility.
-
@brad thanks for the headsup
-
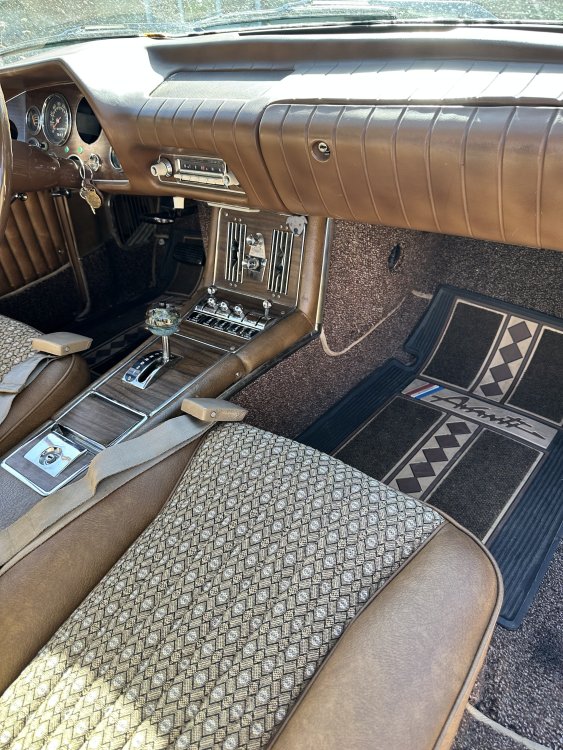
Been considering a repaint on my 1970 Avanti II. With our recent rains in SoCal I came out to the car, when sitting at a decline, with a good 1” of water in driver and passenger areas. I pulled the carpet, cleaned and dried it. Looks good. I recently noticed the rear windshield is leaking as well.
So with the cars old seals and visions of a repaint I’m wondering if anyone has first hand experience installing a complete weather strip kit.
https://www.studebakerparts.com/studebakerparts/store/s/agora.cgi?page=63-83avantirub.htmlI see it comes with things like the gas filler tube, door handle seals and tail light seals so I may not do the entire kit. We’ll see how it breaks down financially and what makes sense.
I believe I saw that one of the manuals has the “how to” but what’s the real world time people have experienced with installing whole kits or even just front and rear glass seals?thanks,
jason
-
6 hours ago, 64studeavanti said:
What does it cost to change the internals to a quartz movement? The p.o. did that to my 64 and it works great.
Looks like a basic conversion is starting at $130.
I did just come across a YouTube of a guy restoring a 1967 clock. He explained that most the time it’s the pints that burn up when the battery gets low. He showed how he restored the points and used a 1-2amp fuse in-line to the battery Incase the battery ever runs low. I may try to open up my clock to assess the situation if I get time. No pun intended


Door weatherstrip
in 1965-83 Avanti
Posted
Hey there. Anyone have pictures of the steelrubber trim installed? Would be great to get a visual of what was trimmed off.
thanks