

Jim78
-
Posts
273 -
Joined
-
Last visited
Content Type
Profiles
Forums
Events
Posts posted by Jim78
-
-
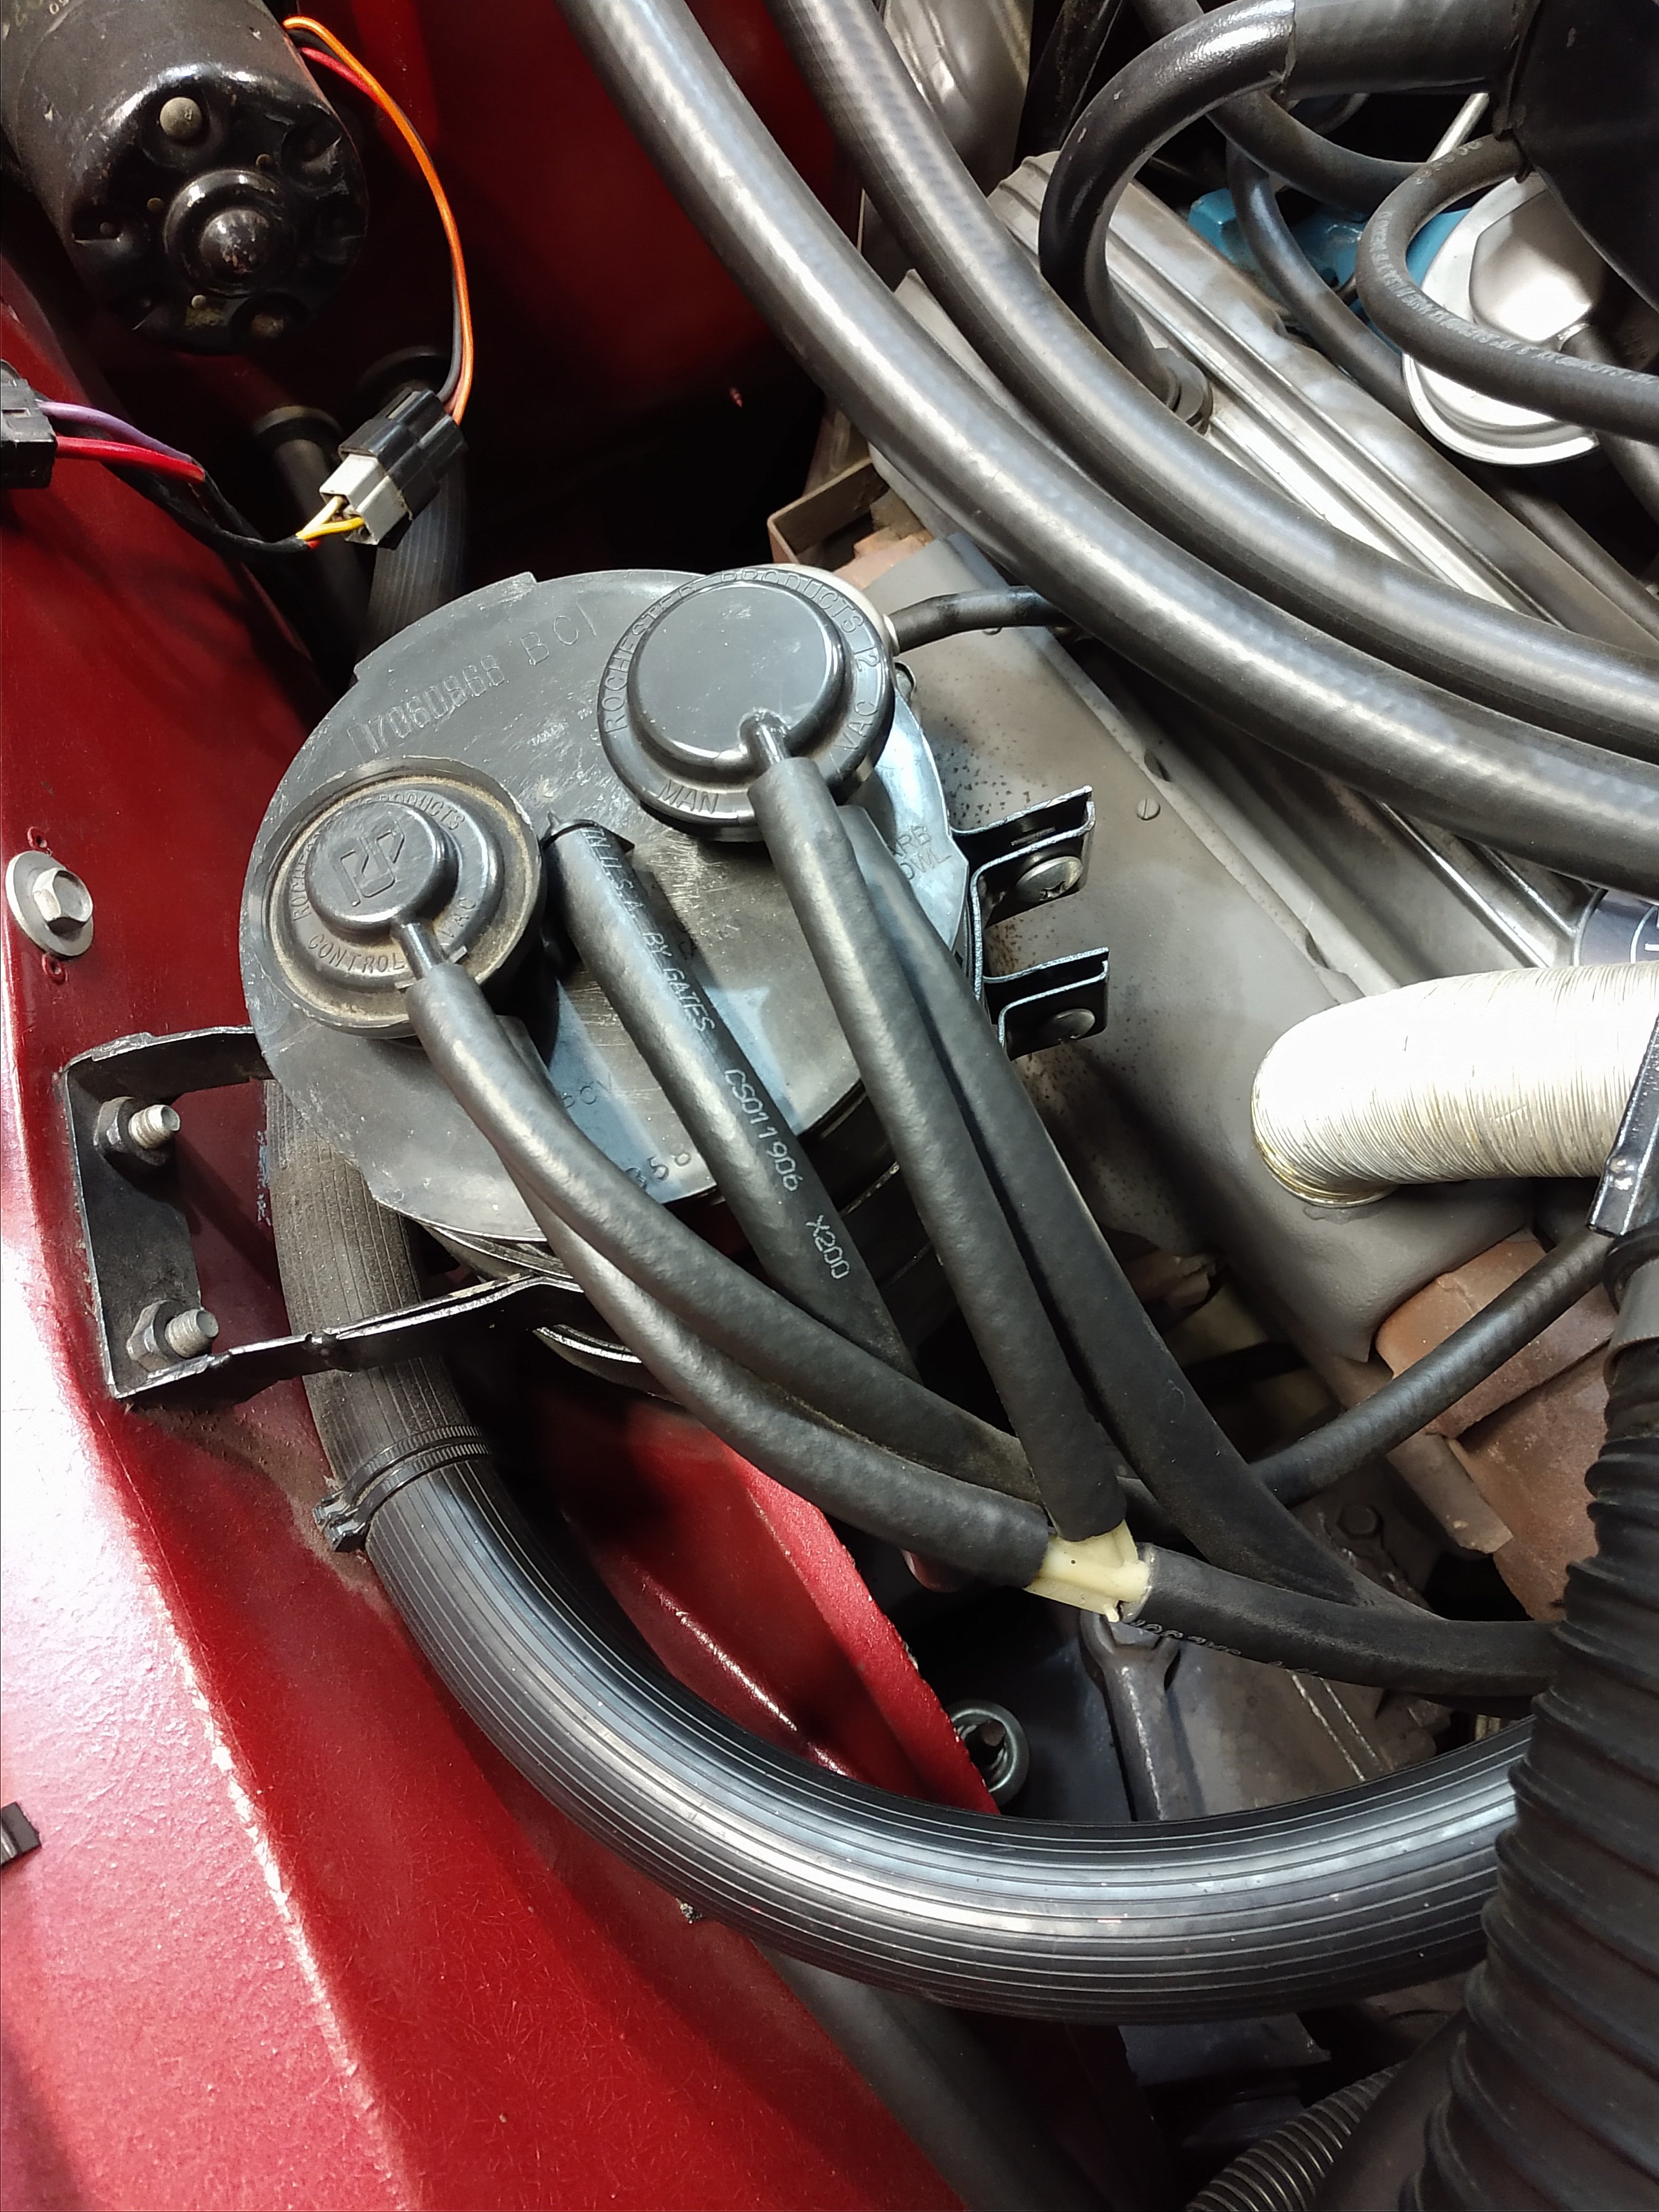
On my '78, the hose is connected to the fitting on the center of the top of the charcoal canister.
-
You might find the tint shops less afraid of the rear window if you were to remove the rear shelf (not a big deal). The additional access through the trunk would make the installation a lot easier.
-
My '78 doesn't have cruise control, so I'm guessing here. Typically, the cruise control is cancelled by application of the brake, via a second switch on the brake pedal. It almost sounds like your CC is somehow wired to the stoplight switch, and there is feedback when the turn signal is on. Does your pedal have a second switch, or a switch with two sets of contacts? Could it be possible that someone has the wires mixed up? FWIW, there is a sketch of the circuit on Bob Johnstone's page.
https://studebaker-info.org/Tech/Diagrams/AEC/aec.html
-
20 hours ago, pantera928 said:
Was that enough of a drop to make the car comfortable on a hot day?
Yep.
-
23 hours ago, pantera928 said:
Expansion valve appears to be working and with the old A6 compressor all worked well.
Do you know the temperature coming out of the vents?
The temperature out of the evaporator will vary with the ambient temperature. During the charging process, we were seeing a temperature drop of about 30-35 degrees.
-
I am running an S6 from Old Air Products with R-134a in my '78. Otherwise, the rest of the system is still factory stock, which was originally R12. That said, the system cools very well. I am no expert in A/C, but I am told that unlike the R12, the R134a is very sensitive to having the correct charge. Too little or too much is bad. Unfortunately, since it is a conversion, there is no sticker under the hood that would tell us the "proper" charge. The shop that charged mine has the latest equipment and a very competent tech. He took his time and charged the system in small increments letting it stabilize, checking the pressures and the temperature of the evaporator along the way. The whole process took about an hour, but the results were very good.
Might it be possible that there may be a problem with your expansion valve? Again, I'm no expert, but wouldn't a restricted expansion valve cause the high pressure differential and poor cooling that you describe?
-
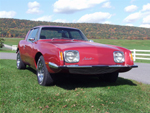
Yep, that's a factory butcher job. My '78 is the same way. I suppose if one were looking for true "authenticity", he should hack his frame. 🙄 Others might see this as a good opportunity to lose the cat entirely and use straight dual pipes. The more environmentally conscious owner might consider two in-line aftermarket converters.
-
As a quick and dirty alternative, I purchased a bluetooth adapter that simply plugs into the lighter socket. It converts the bluetooth signal to a chosen FM frequency on your existing radio. For less than $20 and no labor I can listen to my tunes from my phone.
https://www.amazon.com/gp/product/B07V27CYPT/ref=ppx_yo_dt_b_search_asin_title?ie=UTF8&psc=1
-
10 hours ago, plwindish said:
My '76 had the electric washer pump mounted right above the bladder bag on the passenger side fender well, just forward of the right hood latch. Dan Booth has the plastic cowl mounted ones you can replace the bladder bags with, but the mounting bolts go through the cowl on the driver's side and are a pain to tighten up. My car had enough tubing that I could run from the pump to the drivers side the new container without getting more tubing.
To avoid the issue with tightening mounting nuts under the dash, use "well-nuts" like those that hold the mirrors to the door skins.
-
I suppose that another option is to remove the stacks of spacers between the body and frame that were used eliminate the rake in the first place.
-
I would guess that the DEC 1989 might be a date when the compressor was rebuilt. I would run the system with the dye until it leaks down again. Then park the car in a very dark garage (or at night), with the engine off. Use a good ultraviolet light to check all over the system, including the condenser behind the grille. You should see a fluorescent residue where the freon is leaking.
-
Kodjo,
Recharge the system adding some compatible A/C fluorescent dye. Then leak check with a UV "black" light in a dark garage. Odds are that it is the compressor that's leaking, but better to be sure before you start spending for parts. Which model compressor is on your system?
-
16 hours ago, Kevin Preston said:
Do both these and the Summit that R2W55 recommended have fittings that match the stock Avanti fittings? I would rather that than fool around with a bunch of adapters....every joint has another potential leaking point!!!!
The dryer that I used (Amazon link above) has the correct flare fittings for the Avanti, no adapters required. Yes, any adapter is a future leak.
-
That would be the location for the drier. These are available from several sources. I found mine on Amazon.
https://www.amazon.com/gp/product/B003R3VKI8/ref=ox_sc_act_title_1?smid=ATVPDKIKX0DER&psc=1
If your system uses a binary pressure switch in the compressor clutch circuit, the switch would be ordered separately. My '78 did not have one, but I added it to protect the compressor.
-
11 hours ago, pantera928 said:
Thanks. I have a local shop that does my custom work. I will talk to them
Don Simmons at Silvertone Exhaust Systems has been doing Studebaker and Avanti stainless exhaust systems for many years. I used his system on my '78 to replace the factory cat system with plain old duals. The quality is excellent, and he does offer 2-1/2" if you are so inclined. Personally, I feel that the 2" is more than adequate for an L48. While his ads don't list '75-'83 because they have the cat system, he was able to provide the proper exhaust pipes (essentially a '65-'74 system) once we identified which manifolds were on my engine. I would suggest that you give him a call.
-
3.0714285 😄 is 43(ring teeth) divided by 14 (pinion teeth).
-
Note the stack of spacer washers on the body mount in the right of the picture. This "factory" solution to raising the body looks like something from a back alley garage.
-
On 1/2/2022 at 10:30 AM, JavierB said:
Hi folks.
Upcoming project is refitting the AC of the 81 to 134a. Before I start randomly tearing things apart, does anyone know of an existing guide or spec sheet or anything on the 79-81 Avanti AC components or what suitable replacement upgrades may be? Anyone on here post a thread on doing 134a conversions on the RQB's ? Obviously the compressor I can swap out easily. there are a number of aluminum new ones that just bolt on perfectly. I'm thinking this one or similar:
21-2201SH | Compressor | Pro6TEN | Super Heat Style | Single Groove
But the other things, the expansion valve and evaporator and whatever else... what does anyone suggest and where is it all for access and removal? Is everything in the console?
Finally, how does one access the condenser up front? does the radiator have to come out? or is there a better easier way? Thanks all.
When my old A6 compressor bit the dust, I changed over to the Pro6TEN. Bolts right up,works great, and is about 20 pounds lighter.
-
1 hour ago, pantera928 said:
Certainly. It is under the dash to the left(drivers) side of the light over the console
Seems to be the logical place for it.
-
Just a guess here... Possibly someone replaced the dimming resistor for the dash lights with a rheostat. This would affect the brightness when the overhead switch is in the first position.
-
If you go to Bob Johnstone's site you can see the wiring diagram 5b for your interior lights. Simply add a switch in parallel with the door switches going from the red/wht wire to ground. Very simply, you are creating another "door switch". However, this will also serve to activate your ignition key warning buzzer if the key is in the ignition. Find the annoying buzzer and pull it from its socket. Nobody likes that noise anyhow!
https://studebaker-info.org/Tech/Diagrams/AEC/aec.html
-
22 hours ago, Jred said:
Looks like my problem was the knob wasn’t able to depress for one reason or another and wouldn’t fully turn into the off position.
It began to function properly after I removed it. Wondering if adjusting the nut that holds the piece in had anything to do with it.
@Jim78 what did you you use to clean the corrosion up?I used an electrical contact cleaner (aerosol can) and a fine wire brass brush. If you disassemble the switch, know that the wiper is spring loaded, so open it carefully and note the order that the parts (wiper, washer, spring) go in.
-
7 hours ago, Jred said:
Read this too late. Unscrewed the the cover when I got home and touched it right away. Hotter than hot. No wonder warm air was constantly blowing out of this area.
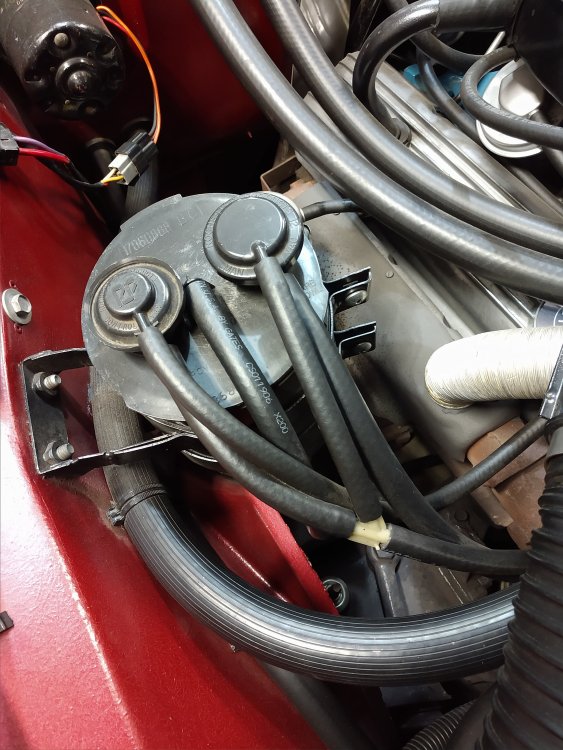
By design, these controls reduce voltage to the motor to control the fan speed. The quick and dirty way to do this is by adding variable resistance to the circuit. The down side to this method is that the variable resistor turns the excess power into heat. That is why these controls are typically located in the air stream. Mine had the additional problem of corrosion that caused poor contact between the wiper and the resistance coil that caused erratic speed control and even more heat. Replacement switches are available, but a bit expensive. I was able to carefully disassemble mine and clean and adjust it. Works as good as new.
-
The rotary fan control has an "OFF" position when it is fully counterclockwise. It is possible that the switch is broken. Another possibility is that the PO mixed up the wiring at the back of the fan and temperature controls. That's easy enough to check by removing the four screws that hold the vertical panel and tipping it forward. You may need to loosen the screws on the horizontal panel a little to get the bottom tab of the vertical panel loose. A picture of the correct wiring is attached.
But, before you get into removing the panel... This may be a dumb question, but are you sure that it is the A/C fan that you are hearing? There is another blower motor in the heater that is controlled by the 2-speed switch in the overhead console. You might want to check that first.

Serial / Vin # Location
in 1965-83 Avanti
Posted
It sounds like you are not absolutely positive at this point that it is an Avanti II. If the car is in reality happens to be a Studebaker Avanti, the serial number would be found on a plate attached to the top of the right side frame rail, just in front of the firewall, below the heater blower motor.